
Related Manuals for Leica CM1900


Summary of Contents for Leica CM1900
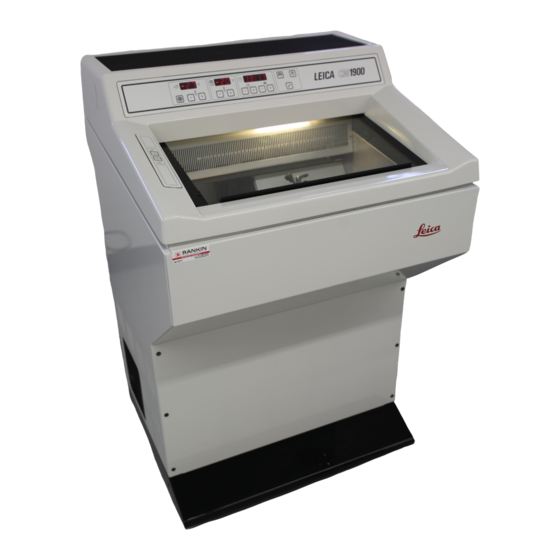
- Page 1 Leica CM1900 Cryostat Instruction Manual Leica CM1900 – V5.3 English - 10/2006 Always keep this manual near the instrument! Read carefully prior to operating the instrument!
- Page 3 These are determined only by the contract provisions agreed between our- selves and our customers. Leica reserves the right to change technical specifi- cations as well as manufacturing processes without prior notice. Only in this way is it possible to continu- ously improve the technology and manufacturing tech- niques used in our products.
-
Page 4: Table Of Contents
Inserting the knife holder ..............................21 Connection to the mains ..............................21 Turning on the instrument ..............................21 Leica CM1900 – Overview ..............................22 Programming the desired values ............................24 Daily operation ..................................30 Selection of the adecuate chamber temperature ......................30 Specimen freezing ................................ -
Page 5: Safety Instructions For Handling The Instrument
Notes i.e. important user information appears in a gray box and is marked by an information symbol. Figures in brackets refer to item numbers in (Fig.5) drawings or to the drawings themselves. Leica CM1900 – Cryostat... - Page 6 Safety instructions for handling the instrument Cleaning and disinfection - Turning the Removal/Reinstallation of the microtome instrument back on • Prior to removing the microtome, turn the instru- ment off with the mains switch and pull the mains It is not necessary to remove the microtome plug! for disinfecting the cryochamber, however, removal is possible, if required!
- Page 7 • Only use lamps of the same specification! For the required type refer to chapter 4 'Technical Data'! Leica CM1900 – Cryostat...
-
Page 8: Technical Data
1800 J/s 1800 J/s 1800 J/s 1800 J/s 1800 J/s Refrigeration CM1900, 50 Hz CM1900, 60 Hz Cryochamber Temperature range 0 - -35 °C ± 3 K, at an ambient 0 - -35 °C ± 3 K, at an ambient temperature of 22 °C... - Page 9 8 °C to 40 °C be replaced by authorized service personnel! Operating temperature range: 0°C to -35 °C Temperature range during storage: + 5°C to +55°C Relative humidity: max. 60%, non-condensing Humidity during storage: < 60% Leica CM1900 – Cryostat...
-
Page 10: General Description
1 Bottle of cryostat oil, type 407, 50 ml ..............0336 06089 1 Storage mat ....................... 0452 27913 1 Pair of safety gloves for cryosectioning, size S ..........0340 40859 1 Instruction manual Leica CM1900 - G/E/F/S ............0708 37105 Instruction manual V 5.3 – 10/2006... -
Page 11: Unpacking The Instrument
4. Take out the cardboard box (8) containing the ac- cessories and the instruction manual at the front of the instrument. 5. Remove the dust cover (9) by pulling it upward. 6. Remove the foam part (10) at the rear. Leica CM1900 – Cryostat... -
Page 12: Mounting The Ramp
Unpacking the instrument Mounting the ramp 1. Upon removal of the foam part (10) 2 screws (12) become visible on the base platform. 2. Fold down the hinges (2) at the rear and front. 3. Place the lid against the transport platform (11) from behind. -
Page 13: Transport To The Installation Site
2. Move the instrument to the installation site on its wheels. 3. The adjustable feet (15) can support the weight of the instrument when tipped at a slight angle (max. 30°). Tilt Lengthwise movement Leica CM1900 – Cryostat... -
Page 14: Installation
Installation Site requirements To ensure an adequate cooling capacity, the instrument must be set up maintaining a mini- mum distance from walls and furniture (see 'Technical data')! The place of installation must meet the following re- quirements: • No direct sunlight. •... -
Page 15: Transport To The Desired Site - Relocation
(max. 30°). Unscrew the adjustable feet with the open-end wrench no. 16 (when subsequently transporting the instrument any further on wheels, do not forget to screw the adjustable feet down completely). Leica CM1900 – Cryostat... - Page 16 Screw the handles into the threads (5) of the bot- is max. 540 mm. tom plate at both sides of the cabinet. • The handles can be ordered from your Leica Sales Unit. Distance for insertion a = max. 540 mm...
-
Page 17: Assembly Of The Handwheel
Push the locking pin (5) into the recess at the handwheel. The locking position is marked by a black dot (6). If necessary, move the handwheel slightly forth and back until the locking mechanism engages. Leica CM1900 – Cryostat... -
Page 18: Inserting The Accessories
Installation Inserting the accessories • Insert the storing shelf (1). • Insert the rimmed section waste tray (2). Instruction manual V 5.3 – 10/2006... -
Page 19: Inserting The Optional Accessories
Installation Inserting the optional accessories • Insert the waste container (3). • Insert the right storage shelf (4). • Insert the left storage shelf (5). • Insert the section waste tray (6). Leica CM1900 – Cryostat... -
Page 20: Operation
Operation Precooling the knife Installing the knife holder base • To precool the knife put the open knife rest includ- • To unlock relocate the lever to the front (1). ing the knife on the storage shelf inside the cryochamber. •... -
Page 21: Inserting The Knife Holder
Failure to comply with the above will cause severe damage to the instrument! • Check mains voltage and mains frequency to com- ply with the specification on the type plate. Plug the instrument only to power sockets with ground! Leica CM1900 – Cryostat... -
Page 22: Leica Cm1900 - Overview
Operation Leica CM1900 – Overview Display of Actual Temperature and Set Display of Actual Temperature and Set Display of Real Time, Defrost Time and Temperature of the specimen head - Temperature of the cryochamber - Error Messages. display flashes during specimen head... - Page 23 (upper button). Luminous indication (LED) - lights up when the specimen head has reached its front limit position Mounting the knife holder onto the knife holder base Quick freezing shelf, with heat extractor and low- temperature stabilizer Leica CM1900 – Cryostat...
-
Page 24: Programming The Desired Values
Operation Programming the desired values Turning the lamp on and off • Turn the lamp on or off. Setting the time • Set the time. • The actual time is set with the +/- buttons in the control panel marked with the clock symbol. When pushing the + or - button for more than 1 s, the time value increases or decreases continu- ously (Autorepeat-function). - Page 25 (-50 °C). • Push the snowflake button again for stopping the 'Max-Cool'-function. The temperature adjusts to the value programmed prior to activating the 'Max-Cool'-function. • Alternate flashing of 'LL' and actual temperature indicates activation of the 'Max-Cool'-function. Leica CM1900 – Cryostat...
- Page 26 Operation Programming the defrost cycle • Set the beginning of the automatic defrost cycle. The automatic defrost cycle is activated once in 24 hours. It is set with the + /- buttons on the right of the panel with the clock symbol. The buttons are marked by a melting snowflake.
- Page 27 This is confirmed by the flashing of the decimal points on the panel for the specimen cooling. • Ten seconds after the manual defrost cycle has been completed, the specimen cooling turns back Leica CM1900 – Cryostat...
- Page 28 Operation Before defrosting the specimen head remove all samples! Manual defrosting of the specimen cooling • Push the manual defrost button (with the melting snowflake) on the left over the key button to acti- vate the defrost cycle of the specimen head. •...
- Page 29 The instrument is not made for storing frozen specimen! Unfixed samples used in cryostats must al- ways be considered as possibly contami- nated! Ensure that the appropriate disinfec- tion methods are applied (see 'Cleaning and Disinfection')! Leica CM1900 – Cryostat...
-
Page 30: Daily Operation
Daily operation Selection of the adecuate chamber • After freezing the specimen insert the heat extrac- tor back in the fixing device and place it in its origi- temperature nal position on the low-temperature stabilizer (2). • For choosing the adecuate chamber temperature, •... -
Page 31: Activating / Deactivating The Specimen Cooling
• Deactivation of the chamber cooling is done in the same way. • Insert the specimen disc in the specimen head. • Loosen the screw (1) on the specimen head turning it counterclockwise, insert the specimen disc and retighten the screw. Leica CM1900 – Cryostat... -
Page 32: Inserting The Knife In The Knife Holder
Daily operation Inserting the knife in the knife holder • Insert and clamp the precooled knife/blade in the knife holder. For further details please refer to the separate in- struction manual for your knife holder. Take care when handling microtome knives and disposable blades. -
Page 33: Moving The Specimen Towards Or Away From The Knife Via Coarse Feed
Always observe the specimen during the for- ward movement, thus avoiding that specimen and knife collide by mistake! A collision can cause severe damage both to the knife and to the specimen and the speci- men disc! Leica CM1900 – Cryostat... -
Page 34: Adjustment Of The Anti-Roll Guide
Daily operation Adjustment of the anti-roll guide 9.10 Sectioning • Adjust the anti-roll guide to the knife holder before • When sectioning, make sure that the section sectioning. smoothly slides down between the anti-roll plate and the knife or the pressure plate of the knife •... -
Page 35: Cleaning And Disinfection
The microtome is encapsulated splash-proof cryochamber. Thus, it is not necessary to remove in the cryochamber. Thus, spray disinfection it for disinfection. with Leica Cryofect is possible. • Spray disinfection is possible. When disinfecting, please take appropriate protective measures (gloves, mask, protective •... -
Page 36: Removal Of The Microtome
11. Removal of the microtome 11.1 How to remove the microtome: 2. Loosen the specimen head turning the Allen key no. 5. counterclockwise. It is not necessary to remove the microtome for disinfecting the cryochamber. Prior to removing the microtome, turn the in- strument off with the mains switch and pull the mains plug! Remove the sliding window before removing... - Page 37 5. Take out the semicircular slit cover. 7. Pull the microtome forward until the cable becomes reachable. Disconnect the cable and pull the microtome out of the guidance and remove it from the cryochamber. Keep in mind that the microtome is heavy! Leica CM1900 – Cryostat...
-
Page 38: Reinstallation Of The Microtome
Reinstallation of the microtome 12.1 How to return the microtome to the 2. While pressing the microtome against the left guid- ance tighten the central screw with the Allen key cryochamber no. 5. The microtome must be entirely dry before re- installation. - Page 39 4. Mount both parts together on the specimen cylin- 6. Tighten the specimen head with the Allen key no. 5 der of the microtome. by turning it clockwise. 5. Mount the specimen head on the specimen cylin- 7. Insert the section waste tray. der. Leica CM1900 – Cryostat...
-
Page 40: Maintenance
• Enter into a service contract at the end of the war- ranty period. For further information, please con- tact your local Leica service center. • Clean the instrument daily. • From time to time:... -
Page 41: Replacement Of The Lamp
• Hold the lamp in the correct mounting position as shown and push it to the right until it engages in the holder. • Replace the sliding window. • Reconnect the instrument to the mains power and turn it on. Leica CM1900 – Cryostat... -
Page 42: Troubleshooting
14. Troubleshooting Problem Causes Remedies Frost on chamber walls and microtome Cryostat is exposed to air currents Change place of installation for the (open windows and doors, air cryostat. conditioning). Frost built-up by breathing into the Wear mouth protection. cryochamber. Sections smear Specimen not cold enough. - Page 43 Dirt on knife back. Clean. Inconsistent or insufficient specimen Microtome was not entirely dry when Remove microtome and dry feed switching refrigeration, which thoroughly. produced ice built up in the micrometer feed system. Microtome defective. Call technical service. Leica CM1900 – Cryostat...
- Page 44 14. Troubleshooting Problem Causes Remedies Cryostat inoperational Mains plug not properly connected. Check if properly connected. Defective fuses, or automatic fuse has Replace fuses, or switch automatic triggered. fuse back on. If not possible, call technical service. Specimen disc cannot be removed Moisture on the underside cause the Apply concentrated alcohol to the specimen to freeze to the freezing...
-
Page 45: Temperature Selection Chart
Spleen or bloody tissue ❉ ❉ Testicular ❉ Thyroid ❉ Tongue ❉ Uterus curettings The temperature values given above are based on long-term experience, however, these are only ap proximate values, as any tissue may require particular adjustments. Leica CM1900 – Cryostat... -
Page 46: Optional Accessories
16. Optional accessories 16.1 Orienting specimen head Mounting the orienting specimen head: 1. Loosen the specimen head (1) turning the Allen key no. 5 counterclockwise. 2. Pull out the specimen head (1) carefully and place it on the base. 3. Loosen 4 screws on the insulating ring (2) with an Allen key no. -
Page 47: Thermal Block
(4). Do not overtighten the screw! • Once the specimen is removed, take the thermal block out of the cold cryochamber. Keep the thermal block outside the cryochamber at room temperature. Place it in the cryochamber only for specimen removal. Leica CM1900 – Cryostat... -
Page 48: Ordering Information
17. Ordering information Knife holder base ............................0419 26140 Knife holder CN .............................. 0419 33993 Knife support ..............................0419 19426 Knife support ..............................0419 19427 Anti-roll plate, assy. 50mm ..........................0419 33981 Anti-roll plate, glass ............................0419 33816 Knife holder CE low prof..........................0419 33990 Knife holder CE high prof. - Page 49 Easy Dip Stain. rack grey ..........................0712 40161 Safety gloves size M ............................0340 29011 OCT-Compound 125 ml ..........................0201 08926 Cryostat oil, type 407 ............................0336 06100 Leica Cryofect 4 x 250 ml..........................0387 36193 Leica CM1900 – Cryostat...
-
Page 50: Warranty And Service
Warranty Leica Microsystems Nussloch GmbH guarantees that the contractual product delivered has been subjected to a comprehensive quality control procedure based on the Leica in-house testing standards, and that the product is faultless and complies with all tech- nical specifications and/or agreed characteristics warranted.
Need help?
Do you have a question about the CM1900 and is the answer not in the manual?
Questions and answers