Leica CM3050 S Instruction Manual
Hide thumbs
Also See for CM3050 S:
- Instruction manual (66 pages) ,
- Instructions for use manual (86 pages) ,
- Service manual (287 pages)

Related Manuals for Leica CM3050 S


Summary of Contents for Leica CM3050 S
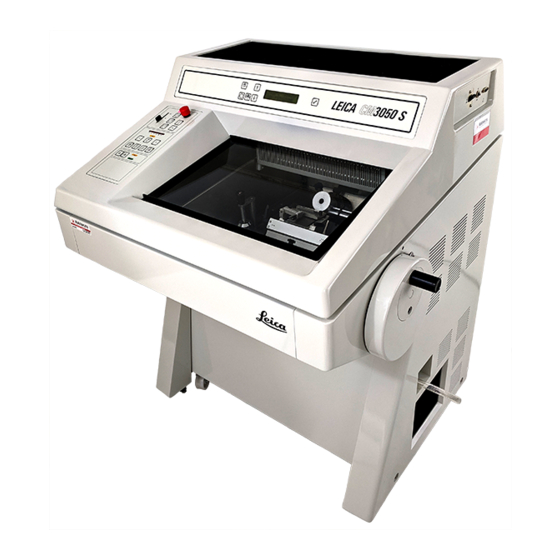
- Page 1 Leica CM3050 S Cryostat Instruction Manual Leica CM3050 S – Cryostat English V1.2– 11/2006 Always keep this manual near the instrument. Read carefully prior to operating the instrument.
- Page 3 Year of Manufacture: ..........the current state of knowledge. Leica will not assume liability for errors that might Country of Origin: Federal Republic of Germany be contained in this manual, nor for accidental damage or damage arising from the delivery, performance or use of this manual.
-
Page 4: Table Of Contents
Table of Contents Important information ........................ 7 Symbols used in this manual and ....................7 Designated use ........................... 8 Qualification of personnel ......................8 Sicherheit ............................ 9 General information on instrument design and safe handling ............ 9 Integrated safety devices ......................... 9 2.2.1 Locking the handwheel ........................ - Page 5 5.6.1 Daily routine steps ..........................44 5.6.2 Switching off the instrument for a ....................44 Defrosting ............................45 5.7.1 Automatic chamber defrost cycle ....................45 5.7.2 Manual chamber defrost cycle ...................... 46 5.7.3 Defrosting the specimen head ....................46 Leica CM3050 S – Cryostat...
- Page 6 Reference chart for temperature settings (in minus °C) ............ 52 Disinfection, cleaning and maintenance ................53 Safety instructions ........................... 53 Spray disinfection with Leica Cryofect ..................53 Disinfection with conventional ....................... 54 Cleaning ............................. 54 Removing / reinstalling the microtome ..................55 7.5.1 Removing the microtome ........................
-
Page 7: Important Information
Important information The chapters of the Leica CM3050 S cryostat 1.1 Symbols used in this manual and their meaning instruction manual: Chapter 1 Structure of the manual: Warnings appear in a grey box and are marked • Table of contents by a warning triangle •... -
Page 8: Designated Use
Read this instruction manual carefully before 1.3 Qualification of personnel attempting to use or operate the instrument. The Leica CM3050 S may only be operated by trained laboratory personnel. Please pay particular attention to All laboratory personnel designated to operate the... -
Page 9: Sicherheit
• DIN ISO 9001 In order to maintain this condition and to ensure safe operation, the operator must observe the instructions and warnings contained in this in- struction manual. Leica CM3050 S – Cryostat... -
Page 10: Locking The Handwheel
Safety Instruments with sectioning motor: 2.2.1 Locking the handwheel The sectioning motor is now blocked. Always cover the cutting edge with the knife guard and lock the hand- All instruments: wheel: • Prior to doing any work on The message ‘LOCKED’ in the display of control knife and/or specimen. -
Page 11: Emergency Stop Function (Instruments With Sectioningmotor Only)
• To deactivate, rotate emergency stop button in direction of arrow. If the emergency stop function has been activated by the footswitch, unlocking is not necessary (func-tion is unlocked as soon as the footswitch is released). Leica CM3050 S – Cryostat... -
Page 12: Safety Instructions: Handling And Operation Of The Instrument
Safety 2.3 Safety instructions: handling and operation of the instrument 2.3.3 Electrical connections 2.3.1 Transport • To avoid severe damage to the instrument by • Do not use extension cords for connecting the instrument to mains. running it while the compressor oil is dis- -->... -
Page 13: Handling Microtome Knives/Blades
- it only operates at ‘0’ speed. If the sliding potentiometer is accidental- ly moved, the instrument will resume sec- tioning immediately (risk of injury)! • During motorized sectioning, always center the handwheel grip! Leica CM3050 S – Cryostat... -
Page 14: Infectious/Radioactive Material
Safety 2.3.9 Infectious/radioactive material 2.3.10 Disinfection and cleaning • Prior to disinfection, switch the instrument • Danger! Use caution when working with potentially off and unplug it from mains. infectious specimens: • For removal of the microtome from the cryo- -->Risk of infection! chamber see chapter 2.3.11 ‘... -
Page 15: Removing/Reinstalling The Microtome
• Only technical service engineers authorized --> Risk of frost bite! by Leica may access the internal compo- • On instruments with specimen cooling: nents of the instrument for service and re- do not distort the refrigerating tube! pair. -
Page 16: Installation
We recommend to keep the original shipping • Even floor surface. crate and the unpacking instructions for the • Practically vibration-free floor. Leica CM3050 S. • Handwheel easily accessible. For repacking, proceed as per unpacking in- • Room temperature constantly below +22 °C. -
Page 17: Standard Delivery
1 Bottle of cryostat oil, type 407, 50 ml ............0336 06098 1 Pair of cut resistant gloves, size S ............0340 40859 1 Instruction manual Leica CM3050 S - G/E/F/S ........0708 37109 In addition to the above: Instruments with specimen cooling:... - Page 18 • Check all delivered parts against the packing list and against your order to verify whether the delivery is complete! If there is any difference, contact your local Leica office immediately. Instruction Manual V1.2 - 11/2006...
-
Page 19: Installing/Inserting Accessories
• Close the sliding window. removed. For a complete overview of all • To remove the handwheel, proceed as de- individual parts: scribed above but in reverse order. --> see Chapter 4.1 ‘Overview’. Leica CM 3050 S – Cryostat... -
Page 20: The Footswitch
Installation 3.4.3 The footswitch Connecting the footswitch • Insert footswitch into port (1) and secure. Function The footswitch performs the same task as the 3.5 Prior to switching on the instrument RUN/STOP and RUN/ENABLE keys (activating/ deactivating motorized sectioning / trimming). After transport, observe a waiting In addition, the footswitch can be used to acti- period of at least 4 hours before... -
Page 21: Instrument Properties
16 Specimen head with specimen cooling (Option) 17 90° Prism (instruments with specimen cooling only) 18 Knife holder base 19 Knife holder CE 20 Knife holder CN 21 Knife holder CS 22 Footswitch with protective guard Leica CM3050 S – Cryostat... - Page 22 Instrument Properties Instruction Manual V1.2 - 11/2006...
-
Page 23: Technical Data
185 g ±5g refrigerant R 404A * 185 g ±5g refrigerant R 404A * Compressor oil 0.4 l alpha 22, Kyodo * 0.4 l alpha 22, Kyodo * or RENISO E22, Fuchs * or RENISO E22, Fuchs * Leica CM3050 S – Cryostat... - Page 24 Instrument properties *) Refrigerant and compressor oil to be replaced only by trained and authorized service personnel! CM3050S-3 CM3050S-6 CM3050S-7 Microtome c-UL Rotary microtome 120 V AC ±10% 208 V AC ±10% 230 V AC ±10% Section thickness setting 0.5 - 300 μm 60 Hz 60 Hz 60 Hz...
-
Page 25: Operation
6.2. These chapters list the most common types of problems which many times have simple causes that can be eliminated by the actual user. If you find ‘Call Technical Service’ in the ‘Remedy’ column, please do so. Never try to solve these problems yourself! Leica CM3050 S – Cryostat... -
Page 26: Switching On/Fuses
Operation Automatic cutout for sectioning motor: 5.2 Switching on/fuses The instrument is equipped with an automatic cutout (2) for the sectioning motor. If the sectioning motor is overloaded (e.g. when sectioning extremely hard specimens etc.) the automatic cutout (2) will be triggered. To make the instrument functional again after the automatic cutout (2) has been triggered: (Automatic cutout... -
Page 27: Control Panel 1
See chapter 5.3.5 ‘Status indication’ and chap- - Activates / deactivates a number of ter 5.3.6 ‘Displaying state of refrigeration, sec- functions. tion thickness and counters’. Leica CM 3050 S – Cryostat... -
Page 28: Display Indications When Switching On
Operation 5.3.3 Display indications when switching on Operator activity: Meaning of indication: Initialization phase 1 8 8 8 8 8 8 8 8 8 8 8 8 8 8 8 8 8 8 8 8 8 8 8 8 8 8 8 8 8 8 8 8 Initialization phase 2 C M 3 0 5 0 S V s . -
Page 29: Menu Functions: Setting Parameters Of Refrigeration, Time And Preset Counter
(cryochamber defrosting) As soon as a value is displayed, it is at the same (6 to 12 minutes duration) time automatically stored. Menu items 5 and 6 displayed on 24 hour clock. Leica CM 3050 S – Cryostat... - Page 30 Operation 2. Cryochamber temperature: Now there are two options: 1. Increase or decrease the actual reference Press key until menu item ‘Set chamber value by pressing temperature’ is displayed: --> Continue as described for 2. Press simultaneously in order to specimen temperature.
- Page 31 The selected defrost cycle duration is cycle) valid both automatic • Use arrow keys ( ) to select the de- manual chamber defrost cycle. sired defrost start time. *) with 90° prism - see also chapter 5.5.2. Leica CM3050 S – Cryostat...
-
Page 32: Status Display
5. Operation 5.3.5 Status display Each individual parameter is displayed in a certain area of the display screen. Upper line: In the menu (see chapter 5.3.4): indication of selected menu item. Standard indication: Chamber temperature (instruments with specimen cooling: chamber and specimen temperature) Standard indication upper line: Instruments with chamber and specimen cooling Instruments with chamber cooling only... -
Page 33: Indication Of Refrigeration State, Section Thickness Setting And Counters
‘999’ Upon pressing both arrow keys, the instrument at which point the counter automatically continues sectioning without interruption, start- switches back to ‘0’. ing to count down from the old reference value. Leica CM 3050 S – Cryostat... -
Page 34: Control Panel 2
Operation 5.4 Control panel 2 Instruments without sectioning motor Instruments with sectioning motor In instruments without sec- In instruments with section- tioning motor, control panel ing motor, the control panel 2 only consists of functional is equipped with three func- area B (see below) tional areas: A, B and C (see large diagram). -
Page 35: Selecting A Sectioning Mode
LED in the corresponding key will be il- luminated. While sectioning is in motion, LED ‘RUN’ is illu- minated. While the sectioning motor is deactivated, LED ‘STOP’ is illuminated. Both LEDs are located in functional area C. Leica CM 3050 S – Cryostat... -
Page 36: Setting The Sectioning Window
5. Operation Functional areas A and C - Instruments with sectioning motor only The value has been stored when the LED in the 5.4.2 Setting the sectioning window sectioning window key lights up briefly. The term ‘Sectioning window’ stands for a dif- If the LED flashes, the value has not yet been ferent (slower) speed setting in that part of the stored, because the user has tried to set a win-... -
Page 37: Selecting Sectioning Speed
While Vmax is active, the sectioning window is motion. inactive. See also chapter 2.2.3 ‘Safety - Emergency stop When the Vmax key is released, the sectioning function’ for further information on the emer- window becomes active again. gency stop. Leica CM 3050 S – Cryostat... -
Page 38: Coarse Feed Keys
Operation Functional area B - all models 5.4.5 Coarse feed keys Coarse feed ‘fast forward’ - Travelling speed 1,000 μm/s The four coarse feed keys in functional area B function as follows: • To activate the function, press and hold. The specimen head travels forward (= to- Coarse feed ‘fast backward’... -
Page 39: Trimming And Sectioning Functions
C) simultaneously or by depressing the footswitch. • To stop trimming press RUN/STOP or RUN/ ENABLE or depress the footswitch again. Trimming thickness can be changed while trim- ming is in motion by pressing Leica CM 3050 S – Cryostat... -
Page 40: Daily Operation Of The Instrument
Operation 5.5 Daily operation of the instrument 5.5.1 Freezing specimens onto specimen discs with quick-freeze shelf and • Select chamber temperature and, in instru- ments with specimen cooling, specimen stationary heat extractor temperature according to the type of speci- men to be sectioned (see also chapter 6.3 •... -
Page 41: Freezing Specimens Onto Specimen
• Store heat extractor in chamber to precool. • Place onto specimen in quick-freeze shelf. Freezing’ and activate function by pressing • Remove as soon as specimen is frozen. (see chapter 5.3.4 ‘Menu functions’ item 4). Leica CM 3050 S – Cryostat... -
Page 42: Inserting Specimen Discs Into The
Operation 5.5.4 Inserting specimen discs into the Thermoblock specimen head The thermoblock makes it easy to remove fro- zen specimens from the specimen discs. • Lock handwheel in upper position. If a knife has already been inserted Do not store the thermoblock inside into the knife holder, cover knife the cryochamber - store at room edge with knife guard! -
Page 43: Trimming / Sectioning
• Adjust knife / knife holder relative to speci- chapter 6.3 ‘Reference chart for temperature men (see ‘Knife holder’ instruction manual). settings’. • Unlock handwheel. • Center handwheel grip (See chapter 2.2.2). Leica CM 3050 S – Cryostat... -
Page 44: Finishing Work
Operation 5.6 Finishing work 5.6.2 Switching off the instrument for a longer period of time 5.6.1 Daily routine steps If you do not plan to use the instrument for an Remove all specimens from the cry- extended period of time, it can be switched off. ochamber and store safely! However, since this involves a lot of work (see also corresponding safety instruc-... -
Page 45: Defrosting
5.7 Defrosting The specimen head refrigeration is automatical- ly switched back on when: The Leica CM3050 S has 3 (instruments without • at least 4 hours have passed since the de- specimen cooling: 2) different defrosting options. frost cycle was completed;... -
Page 46: Manual Chamber Defrost Cycle
Operation 5.7.2 Manual chamber defrost cycle 5.7.3 Defrosting the specimen head (instruments with specimen cooling In addition to the automatic defrost cycle, a only) manual chamber defrost cycle can be activat- ed when necessary. To activate specimen head defrosting: • Press until menu item ‘Set specimen •... -
Page 47: Troubleshooting, Applications Tips
Troubleshooting, applications tips 6.1 Displayed error messages 4. Service The autodiagnosis function of the CM3050 S C T - 3 0 ° C O T - 3 5 ° C displays error messages in case of certain mal- S E R V I C E functions. -
Page 48: Potential Problems - Causes And Remedies
Troubleshooting, applications tips 6.2 Potential problems - causes and remedies Problem Causes Remedies Frost on chamber walls and - Cryostat is exposed to draft - Eliminate draft sources or microtome (open windows, doors, air- change place of installation of conditioning). the cryostat. - Page 49 Condensation forms on anti-roll - Brush, forceps, cloth or other - Accessories and cleaning plate and knife during cleaning. cleaning item too warm. material to be used pre-cooled only. - Store on storage shelves inside the cryochamber. Leica CM3050 S – Cryostat...
- Page 50 Troubleshooting, applications tips Causes Remedies Problem - Anti-roll plate protrudes too far - Replace anti-roll plate; in Anti-roll plate damaged after beyond the knife edge. Adjust- future, lift away from the knife adjustment. ment was done in the direction when aligning. of the knife.
- Page 51 No or insufficient refrigerating - Stopper not placed properly - Close drain with stopper. performance. into drain in bottom of cryo- chamber. - Compressor defective. - Call Technical Service. - Leak in cooling system. - Call Technical Service. Leica CM3050 S – Cryostat...
-
Page 52: Reference Chart For Temperature Settings (In Minus °C)
Troubleshooting, applications tips 6.3 Reference chart for temperature settings (in minus °C) Tissue 10 - 15 15 - 25 25 - 50 Adrenal ❄ Bone marrow Brain Bladder Breast - fatty Breast - little fat Cartilage Cervical Fatty Heart and vascular Intestinal Kidney Laryngeal... -
Page 53: Disinfection, Cleaning And Maintenance
7.1 Safety instructions on disinfection and cleaning For practical spray disinfection, we recommend Leica Cryofect which is fully effective at tem- When disinfecting the instrument, peratures in the negative range down to -20 °C. make sure to observe the following safety instructions: •... -
Page 54: Disinfection With Conventional
Disinfection, cleaning and maintenance 7.3 Disinfection with conventional • Allow cryochamber to dry thoroughly. • Reinstall microtome (see chapter 7.5.3). disinfectants • Only when they are completely dry, reinsert • Switch the instrument off. the disinfected accessories / tools into the •... -
Page 55: Removing / Reinstalling The Microtome
• Insert hook (4) with refrigerating tube (3) into the opening above mark (▼). • Prior to removing the microtome, carry out preparation steps as per chapter 7.3 (switch instrument off, remove accessories etc.) Leica CM 3050 S – Cryostat... -
Page 56: Reinstalling The Microtome
Disinfection, cleaning and maintenance • Remove plug of temperature sensor (7). 7.5.3 Reinstalling the microtome • Remove plug of coarse feed motor: Pull bushing backward (arrow 1) and hold. Place your thumb between plug (6) and When reinstalling the microtome socket at the microtome (arrow 2). -
Page 57: Exchanging The Fluorescent Light Lamp
• Push the lamp slightly upwards until it locks into the clip. • Put the sliding window back in place. • Reconnect the instrument to mains and switch it back on. Leica CM 3050 S – Cryostat... -
Page 58: Warranty And Service
Leica Microsystems Nussloch GmbH guarantees that the contractual prod- uct delivered has been subjected to a comprehensive quality control procedure based on the Leica in-house testing standards, and that the prod- uct is faultless and complies with all technical specifications and/or agreed characteristics warranted. -
Page 59: Appendix
It has been designed for use with the Leica cry- the actual mains voltage in your ostat series CM3050 S only and may under no lab! - Page 60 • In order to be able to move the instrument, use a fork wrench and unscrew the rollers on which the Leica CM3050 S moves by about 2 cm. • Roll the cryostat onto the U-frame as far as it will go.
- Page 61 880 mm ( without control unit 1030 mm ( • Once every year have the height adjustment with control unit Depth: 555 mm device checked by an authorized Leica ser- Weigth: approx. 30 kg vice engineer. Leica CM 3050 S – Cryostat...
-
Page 62: Ordering Information - Accessories
Appendix 2. Ordering information - accessories 2.1 Knife holders Knife-holder CN for reusable microtome knives´w/anti-roll guide, adjustable knife guard and knife support bars for slim and wide knives ..........0419 18649 Knife support bar for knife holder CN, for slim knives ................0419 19426 Knife support bar for knife holder CN, for wide knives ................ -
Page 63: Ec Declaration Of Conformity
10. EC Declaration of Conformity EC Declaration of Conformity We herewith declare, in exclusive responsibility, that the Leica CM3050 S – Cryostat was developed, designed and manufactured to conform with the • Council Directive 73/23/EEC (Low Voltage), • Council Directive 89/336/EEC, Appendix I (Electromagnetic Compatibility) and •... -
Page 64: Decontamination Certificate (Master)
(master) Dear Customer, any product which is be returned to Leica Microsystems or serviced on site, must be cleaned and decontaminated in the appropriate manner. This certificate, duly completed, must be placed in the unit prior to packaging or handed over to the service engineer. Packages will not be opend nor servicing commenced until the Company or service engineer have received a satisfactory certificate. - Page 65 Important - to avoid refusal of shipment: Place one copy in the unit prior to packaging or hand it over to the service engineer. Customer as- sumes all responsibility for the immediate return shipment of articles sent to Leica without proper decontamination documentation.
- Page 66 Instruction Manual V1.2 - 11/2006...
Need help?
Do you have a question about the CM3050 S and is the answer not in the manual?
Questions and answers