
Subscribe to Our Youtube Channel
Related Manuals for Leica RM2235


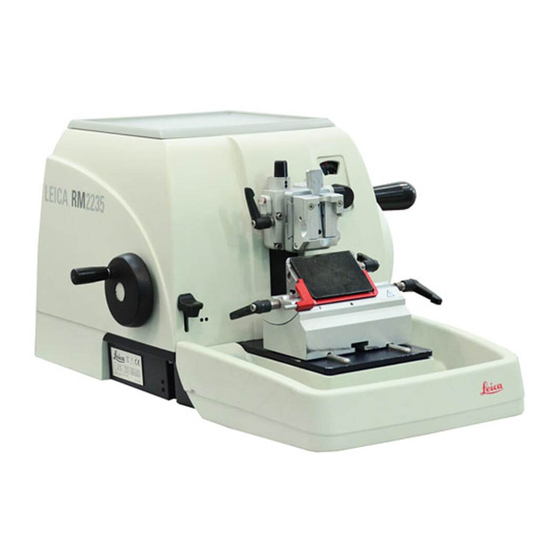
Summary of Contents for Leica RM2235
- Page 1 Leica RM2235 Rotary Microtome Instruction Manual Leica RM 2235 V1.1 English - 02/2005 Always keep this manual with the instrument. Read carefully before working with the instrument.
- Page 3 Leica reserves the right to change technical stand it following thorough investigation in this specifications as well as manufacturing pro- field.
-
Page 4: Table Of Contents
Table of contents 1. Important notes ..........................6 2. Safety ..............................7 Safety notes ............................7 Warnings .............................. 7 Integrated safety devices ........................ 10 3. Instrument components and specifications ................12 Overview - instrument components ....................12 Instrument specifications ........................ 13 Technical data ........................... - Page 5 7. Trouble shooting ..........................44 7.1 Possible faults ............................44 7.2 Instrument malfunctions ........................44 8. Cleaning and maintenance ......................45 Cleaning the instrument ........................45 Maintenance instructions ....................... 47 Lubricating the instrument ......................48 9. Warranty and service ........................49 Leica RM2235...
-
Page 6: Important Notes
1. Important notes Symbols in the text and their meanings Intended use of instrument The Leica RM 2235 is a manually operated rota- Dangers, warnings and cautions ap- tion microtome for creating thin sections of pear in a gray box and are marked... -
Page 7: Safety
The protective devices on both instrument and accessories may neither be removed nor modified. Only service personnel qualified by Leica may repair the instrument and access the instrument’s internal components. 2.2 Warnings The safety devices installed in this instrument by the manufacturer only constitute the basis for accident prevention. - Page 8 2. Safety Warnings - Safety instructions / warning labels attached to the instrument • Safety instruction labels on the instrument marked with a warning triangle indicate that the correct operating instructions (as described in this manual) must be followed when operating or replacing the instrument component bearing the label.
- Page 9 • Do not use any solvents containing acetone or xylene for cleaning! • Ensure that no liquids enter the interior of the instrument when cleaning! • When using detergents please comply with the safety precautions of the manufacturer and with the applicable laboratory regulations. Leica RM2235...
-
Page 10: Integrated Safety Devices
2. Safety 2.3 Integrated safety devices Locking the handwheel There are two ways of locking the handwheel (12): Using the lever (3) on the right side of the micro- tome base plate, the handwheel can be braked in almost any position. •... - Page 11 Knife holder E-TC malfunctions of the knife holder can occur. Clamping lever for the blade (10) at the right, clamping lever for the lat- eral displacement (11) at the left. Fig. 4 Leica RM2235...
-
Page 12: Instrument Components And Specifications
Instrument components and specifications 3.1 Overview - instrument components Tray Universal Handwheel cassette clamp locking mechanism Knife holder base, Smooth-turning without lateral handwheel movement feature Lever for activating the Removable section handwheel brake waste tray Clamping lever of the knife holder base Window for Directional... -
Page 13: Instrument Specifications
Basic Instrument with mechanical trimming, with lateral coarse feed (clockwise (CW) or counter clockwise (CCW)) without specimen orien- tation The Leica RM2235 rotary microtome features low-maintenance and back- lash-free precision micrometer feed system with horizontal feed and verti- cal stroke mechanism based on self-lubricating cross roller bearings. -
Page 14: Technical Data
Instrument components and specifications 3.3 Technical data General Approvals: The instrument-specific marks are located on the rear panel of the instrument next to the name plate Operating temperature range: +10 °C to +35 °C Storage temperature range: +5 °C to +55 °C Relative humidity: max. -
Page 15: Startup
4. Startup 4.1 Standard delivery The Leica RM 2235 standard delivery includes: 1 Leica RM2235 basic instrument 1 Handwheel, complete 0500 38181 1 Section waste tray 0502 37931 1 Tool set consisting of: 0500 38600 1 Allen key with handle, size 5... -
Page 16: Assembling The Handwheel
Startup Setting up the instrument Do not transport the instrument by holding it on the handwheel shaft, the object head or the housing! • By holding the instrument (5) at the front by the baseplate, and at the rear by the re- cessed grip (Fig. -
Page 17: Inserting The Universal Cassette Clamp
(61) clockwise as far as it will go. Fig. 8 Since all stage clamps available as accessories are equipped with the same kind of guide on the back, they are inserted in the same way described here using the example of the cassette clamp. Leica RM2235... -
Page 18: Inserting The Knife Holder
4. Startup 4.5 Inserting the knife holder Setting up the knife holder base • Release the clamping lever (50) by rotating it counterclockwise. • Insert the knife holder base (51) using the notch (52) on the bottom into the T-piece (55) of the microtome base plate (53). -
Page 19: Operation
The coarse driving wheel also turns during sectioning. Therefore it must not block whilst the handwheel is being turned during sectioning; oth- erwise, no feed motion can take place and thus also no sectioning. Fig. 12 Leica RM2235... -
Page 20: Mechanical Trimming Function
5. Operation 5.1.3 Specimen retraction Magnet for The specimen retraction serves for protecting the holding the knife and the specimen. When the retraction is wrench size 4 switched on, the object is drawn back 200 µm into the upper end position after the sectioning stroke during the return movement. -
Page 21: Specimen Holder With Precision Orientation
For ease of estimation, there is a white The usable angle is only about 4° in marking on the handle and a notch point that this case. is noticeable during turning. • To lock the current orientation, turn the ec- centric lever (29) backwards. Leica RM2235... -
Page 22: Adjusting The Clearance Angle
5. Operation 5.2 Adjusting the clearance angle • The index marks (0°, 5° and 10°) for adjust- ment of the clearance angle (59.1) are locat- ed on the right side of the knife holder (57). • There is also an index mark (51) on the right side of the knife holder basis (59.2) which serves as a reference point when adjusting the clearance angle. -
Page 23: Fine Adjustment Of The Mass Balance
• If the specimen head has moved upward, ro- tate the screw counterclockwise through approx. ½ turn and check whether the spec- imen head remains stable. • Continue turning the screw until the speci- Fig. 18 men head remains exactly in position. Leica RM2235... -
Page 24: Clamping The Specimen
Operation 5.4 Clamping the specimen Always clamp the specimen block BEFORE clamping the knife. Lock the handwheel and cover the knife edge with the knife guard prior to any manipulation of knife or specimen, prior to changing the specimen block and during all work breaks! •... -
Page 25: Sectioning
Take care not to block the coarse driving wheel when turning the handwheel! Otherwise there will be no feed motion of the section thickness and thus no sectioning will occur. • Pick up the sections and mount them on microscope slides. Leica RM2235... -
Page 26: Changing The Specimen Or Interrupting Sectioning
Operation 5.7 Changing the specimen or interrupting sectioning Lock the handwheel and cover the knife edge with the knife guard prior to any manipulation of knife or object head, as well as prior to changing the specimen block and during all work breaks! •... -
Page 27: Optional Accessories
(5). Tighten pressure device (5) completely with a • Finally, place dove tail guide (2) onto fixture and screwdriver. tighten 4 screws (1) with a 3 mm Allen key. • Retighten adjusting screws (3+4) completely. Leica RM2235... -
Page 28: Fixture For Specimen Clamps With Precision Orientation
Optional accessories 6.1.3 Fixture for specimen clamps with precision orientation • Prior to installing the fixture with precision orientation, loosen 4 screws (10) (3 mm Allen key) and carefully detach the fixture for specimen clamps from base plate (9). • Fasten the base plate to specimen head (12) with a 3 mm Allen key and 4 screws (11) (de- livered together with fixture with precision orientation). -
Page 29: Quick-Clamping System
• Use a 2.5 mm Allen key to insert and tighten 4 screws (13) in bore A. Fig. 22 Leica RM2235... -
Page 30: Specimen Clamps And Holders
6. Optional accessories 6.2 Specimen clamps and holders All object clamps available as accessories can be integrated into either the directional or non-directional specimen holder fixture. 6.2.1 Standard specimen clamp The standard object clamps are available in two sizes: 40 x 40 mm and 50 x 55 mm. It is designed for direct clamping of rectangular blocks. -
Page 31: Foil Clamp Type 1
(74) by turning the set screw (77) against the fixed jaw (73). • Insert the foil clamp in the standard speci- men clamp as shown. • Turn the knurled screw (66) clockwise to clamp the foil clamp in the standard speci- men clamp. Fig. 26 Leica RM2235... -
Page 32: Foil Clamp Type 2
6. Optional accessories 6.2.4 Foil clamp type 2 This foil clamp is appropriate for large foil ribbons. It is mounted in the standard specimen clamp. • To open the jaws (78) and (79) lightly loosen the 3 screws (81) with an Allen key size 4 •... -
Page 33: Super Mega Cassette Cla Mp
„0“ and the cover of the back- lighting must be removed (otherwise, the different parts will collide). Never use the SuperMega cassettes together with the back- lighting system! Leica RM2235... -
Page 34: Holder For Round Specimens
Optional accessories 6.2.7 Holder for round specimens The holder for round specimens is designed to accommodate cylindrical samples. Inserts for specimens of 6, 15 and 25 mm diameter are available. • To mount the required insert (89.1-3) turn the clamping ring (90) counterclockwise and 89.1 remove. -
Page 35: Knife Holder Base And Knife Holder
• Reposition the knife holder together with the knife holder base forward or backward as appropriate. • Secure the clamping mechanism by rotating the lever (50) clockwise. Fig. 32 Leica RM2235... -
Page 36: Knife Holder E/E-Tc
6.3.2 Knife holder E/E-TC Prior to inserting the blade, both The knife holder E-TC is designed knife holder and knife holder base for the Leica TC-65 tungsten carbide must have been installed on the in- blades. strument! Inserting the blades, knife holder E and E-TC Knife holder E-TC •... - Page 37 For cases of malfunction or damage occurring after the warranty has expired, Leica Microsystems offers new clamping tops at a special price. In this way, perfect function of the device can be ensured over the course of many years.
-
Page 38: Knife Holder N/Nz
Optional accessories 6.3.3 Knife holder N/NZ The knife holders N and NZ are appropriate for standard steel and tungsten carbide knives, profile c and d, up to 16 cm long. The integrated height adjustment feature allows you to also use knives that have been resharpened numerous times. Mounting the knife support bar •... - Page 39 • Push the knife (47) to the left or right as required. • To clamp the knife (47), always tighten the clamping screw (49) first which is located on the side to which the knife has been repositioned by turning it clockwise. Leica RM2235...
-
Page 40: Section Waste Tray
Optional accessories 6.4 Section waste tray • Push the section waste tray (18) from the front to the microtome base plate (53) until it is held in place by the two magnets (39) (on the front of the microtome base plate). To remove the section waste tray, lift it slightly and pull it off towards the back. -
Page 41: Freezer Pack
(but for at least six hours) at ap- prox. -23 °C. • Reassemble the freezer plate and insulation jacket and place them on the bench or the Fig. 40 instrument. Leica RM2235... -
Page 42: Ordering Information
Optional accessories 6.8 Ordering information Fixture for specimen clamps, non-orienting, silver-colored ..........050238160 Fixture for specimen clamps, orienting, silver-colored ............050238949 Fixturfor specimen clamps, orienting, silver-colored, with 2 zero reference point indicators .................. 050237717 Quick clamping system, assy....................050237718 Knife holder base non-orienting, silver-colored .............. - Page 43 Hand rest for waste tray ......................050238770 Freezer pack (freezer plate / insulation jacket), complete ..........050238325 Section waste tray ........................050237931 Section waste tray RM2265..................... 050339060 Demo Box RM22xx series ......................050238930 Storage tray ..........................050237932 ‘Leica’ brush w/magnet ......................018340426 Leica RM2235...
-
Page 44: Trouble Shooting
Trouble shooting In the following table there is a list of the most common problems which can arise while working with the instrument, along with possible causes and troubleshooting proce- dures. Problem Possible cause Corrective action 7.1 Possible faults 1. Thick/thin sections •... -
Page 45: Cleaning And Maintenance
The instrument must be completely dry before it can be used again. Cleaning the knife When cleaning the knife, always wipe from the knife back towards the cutting edge, NEVER the other way round. Risk of injury! For cleaning, use alcohol-based detergents or acetone. Leica RM2235... - Page 46 Cleaning and maintenance Knife holder E Take the knife holder apart for cleaning. To do so, proceed as follows: • Fold knife guard (9) downward. • Rotate the clamping lever (11) of the lateral displacement forwards and pull it out side- ways.
-
Page 47: Maintenance Instructions
2. Enter into a service contract at the latest at the end of the warranty period. For more in- The intervals depend on how heavily the in- formation, please contact your local Leica strument is used. technical service center. We recommend the following inspection intervals depending on the general workload of the instru-... -
Page 48: Lubricating The Instrument
Cleaning and maintenance 8.3 Lubricating the instrument Once a month, lubricate the following parts with the included drive parts oil No. 405 (1- 2 drops are enough). Instrument and specimen holder : • The clamping key (95) of the quick clamping system. -
Page 49: Warranty And Service
Leica Microsystems Nussloch GmbH guarantees that the contractual product delivered has been subjected to a comprehensive quality control procedure based on the Leica in-house testing standards, and that the product is faultless and complies with all technical specifications and/or agreed characteristics warranted. - Page 50 Notes Instruction manual V 1.1 – 02/2005...
Need help?
Do you have a question about the RM2235 and is the answer not in the manual?
Questions and answers