Table of Contents

Related Manuals for Burmester 077


Summary of Contents for Burmester 077
- Page 1 OWNER´S MANUAL REFERENCE LINE PREAMP HIGH END MADE IN GERMANY BURMESTER AUDIOSYSTEME GMBH • KOLONNENSTR. 30G • 10829 BERLIN • GERMANY TEL +49/(0)30/78 79 68 – 0 • FAX +49/(0)30/78 79 68 – 68 • E-MAIL: mail@burmester.de • www.burmester.de...
- Page 2 VERSION: 1.4 FROM 5/7/2009...
- Page 3 Dear Audiophile, Thank you for choosing this Burmester audio component. We sincerely appreciate your trust in our products. You have purchased a unit, which excels in musical fidelity and combines uncompromising manufacturing quality with technical innovation and the highest degree of operating flexibility.
-
Page 4: Table Of Contents
T A B L E O F C O N T E N T S LIST OF FUNCTIONS UNPACKING AND SETTING UP FUNCTIONAL OVERVIEW OF THE PREAMP FRONT PANEL REAR PANEL WITH INTERNAL POWER SUPPLY REAR PANEL WITH EXTERNAL POWER SUPPLY FUNCTIONAL OVERVIEW OF EXTERNAL POWER SUPPLY UNIT FRONT PANEL REAR PANEL... -
Page 5: List Of Functions
LIST OF FUNCTIONS Through factory settings a lot of functions are disabled to operate the 077 as a simple preamp. With the menus you are comfortably able to activate the numerous options the 077 offers. In daily use these functions are hidden. If wanted, factory settings can be reestablished. -
Page 6: Unpacking And Setting Up
CAUTION: The preamp 077 is shipped inside a plastic protective cover. Make sure that children do not play with it to avoid the danger of suffocation. -
Page 7: Functional Overview Of The Preamp
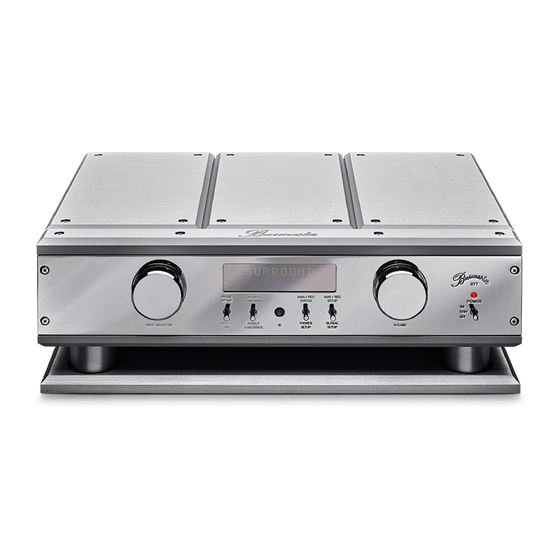
FUNCTIONAL OVERVIEW OF THE PREAMP FRONT PANEL (1) Input selector (8) POWER switch to switch the unit on & off (2) PHASE LED lights up when phase is180˚ (9) Base plate between active input and output (10) Foot – constructed as spike (3) AUDIO LED shows up sampling of 192kHz, if (11) PHASE/DISPLAY switch key switches the phase a D/A converter module is equipped... -
Page 8: Rear Panel With Internal Power Supply
REAR PANEL WITH INTERNAL POWER SUPPLY (17) BURLINK interface RS-232 with check LEDs (24) High level inputs INPUT 1 to INPUT 5, (18) BURLINK interface USB with check LEDs balanced (19) Phones jack PHONES 1 (25) Module input as ordered (20) Phones jack PHONES 2 (26) GROUND screw for ground cable of record (21) MAIN output balanced preamp output... -
Page 9: Rear Panel With External Power Supply
REAR PANEL WITH EXTERNAL POWER SUPPLY (16) POWER SUPPLY terminal (23) SURROUND or high level input (17) BURLINK interface RS-232 with check LEDs INPUT 6, balanced (18) BURLINK interface USB with check LEDs (24) High level inputs INPUT 1 to INPUT 5, (19) Phones jack PHONES 1 balanced (20) Phones jack PHONES 2... -
Page 10: Functional Overview Of External Power Supply Unit
FUNCTIONAL OVERVIEW OF EXTERNAL POWER SUPPLY UNIT FRONT PANEL (29) Base plate (31) POWER LED lights up red when the unit is on (30) Foot – constructed as spike REAR PANEL (32) AC mains terminal (34) POWER SUPPLY terminal (33) AC mains switch... -
Page 11: First Startup
Connect your preferred in- and outputs of the preamp with your HiFi system. Please refer to the chapter CONNECTIONS. • Make sure, that the AC mains switch (33) on the rear panel of the 077 or on the external power supply unit is set to OFF position. •... -
Page 12: Connections
Through factory settings a lot of functions are disabled to operate the 077 as a simple preamp. With the menus you are comfortably able to activate the numerous options the 077 offers. In daily use these functions are hidden. If wanted, factory settings can be reestablished. - Page 13 NOTICE: Subsequent installation of other modules must only be done by your authorized dealer or by Burmester Audiosysteme GmbH. • • • • PHONO MC module With a PHONO MC module the module input is a balanced PHONO MC input to connect a record player with moving coil pickup (no high output MC).
- Page 14 MENUS / GLOBAL SETUP) NOTICE: Subsequent installation of other modules must only be done by your authorized dealer or by Burmester Audiosysteme GmbH. GROUNDING screw When using the PHONO input as an unbalanced input for a record player it is necessary to connect the GND wire of your record player to the GND screw (26).
- Page 15 REMOTE Connecting DC OUT (27) to the corresponding DC IN-jack of another BURMESTER-unit offers the function to switch on or off this other unit simultaneous by the 077. In this case, the 077 has the master function. Connecting DC IN (28) to the corresponding DC OUT-jack of another BURMESTER-unit offers the function to switch on or off the 077 simultaneous by the other unit.
-
Page 16: Operating Controls
The AC mains switch (33) which completely disconnects the AC power to the unit is located on the rear panel of the 077 or on the rear panel of the external power supply unit above the AC mains terminal. By switching to the ON position the standby transformer is powered up. -
Page 17: Phase Reversal
Phase reversal In factory settings the preamp 077 passes incoming signals without phase reversal to the MAIN and RECORD outputs. If the pin polarity of a reproducer differs from the pin polarity of power amps or active speakers connected to the output terminals (see also owner `s... -
Page 18: Special Functions
Therefore, it is possible to decrease every input of the preamp 077 up to -6 dB (factor 2) or to increase it up to 12 dB (factor 4) in order to adjust the different volumes of your sources. -
Page 19: Monitor Lock
The volume shift is realized by reducing one of the two stereo channels. It is possible to reduce one channel of the preamp 077 up to 9 dB (factor 2.8) in steps of 1 dB, and for specific situations to switch off completely. -
Page 20: Serial Number
You will find the activation options in the GLOBAL SETUP in submenu SNR. For specific instructions please refer to THE SETUP MENUS/ GLOBAL SETUP. Switching off control In order to prevent undesired control of the preamp 077, it is possible to lock all controlling elements of device elements on the front panel (except the POWER switch). -
Page 21: The Setup Menus
NOTICE: While the SETUP menu is active, the volume selector (6) on the front panel of the 077 serves to change the settings of the various menu items. During this procedure the volume level can only be changed by the volume buttons on your remote control. -
Page 22: The Global Setup
THE GLOBAL SETUP The GLOBAL SETUP offers the adjustment of global functions like INPUT LEVEL, INPUT NAMES, displaying the SERIAL NUMBER, 4 CHANNEL MODE, SWITCHING OFF CONTROL ELEMENTS on the front panel, RC INPUT and resetting to FACTORY SETTINGS. The following chart provides an overview of all menu items, which can be adjusted in the GLOBAL SETUP. The factory settings (defaults) are listed in brackets. - Page 23 Input names Through factory settings all inputs of the preamp 077 are assigned with specific names (INPUT1 = CD etc.). You may, however label every input with another name of your choice. We provide a range of names. It is of course possible to select an individual name, e.g. the type of your device.
- Page 24 4 Channel Mode This option allows you to use both, the MAIN and RECORD level, as one preamp. The RECORD level will be deactivated and the power amp connected to the RECORD output will reproduce the signals of the MAIN level input. When activated both, the MAIN and RECORD level, will reproduce the signal from the selected input.
- Page 25 Deactivating control In order to prevent accidental use of the control elements on the front panel, it is possible to panel deactivate all controlling elements on your device (except the POWER-switch). All functions can then only be operated via remote control. This provides a child proof lock option. Select menu item FRONT-P with the left rotary switch or the navigation buttons ¡...
-
Page 26: The Main Setup
The volume shift is realized by reducing one of the two stereo channels. It is possible to alleviate one channel of the preamp 077 up to 9 dB (factor 2.8) in steps of 1 dB, and for specific situations to switch it off completely. - Page 27 With the right rotary switch or the navigation buttons ¡ on your remote control you may select one of the following: Volume indicated in BURMESTER steps (00 to 60) Volume indicated in dB steps (-99dB to +5dB or +21dB at high amplification)
- Page 28 To operate BURMESTER power amps we recommend the setting LOW. Configuration of Through factory settings the INPUT 6/SURR (23) of the preamp 077 is preset as a surround INPUT 6 input for the MAIN level, i.e. the signal is transported directly to the MAIN output, avoiding volume control and all amps.
-
Page 29: The Record Setup
The volume shift is realized by reducing one of the two stereo channels. It is possible to alleviate one channel of the preamp 077 up to 9 dB (factor 2.8) in steps of 1 dB, and for specific situations to switch it off completely. - Page 30 NOTICE: The setting is only valid if menu item REC is set to VARIABLE. This menu item preselects whether the volume of the RECORD level is indicated in BURMESTER steps or dB steps. Select menu item R-SCALE with the left rotary switch or the navigation buttons ¡...
-
Page 31: The Phones Setup
THE PHONES SETUP The PHONES SETUP gives you the option whether the phones output shall playback music from the MAIN or RECORD level. The following chart provides an overview of all menu items, which can be adjusted in the PHONES SETUP. The factory settings (defaults) are listed in brackets. -
Page 32: The Phono Setup
The PHONO SETUP offers the adjustment of functions like SUBSONIC FILTER and AUTOMATIC LEVEL ADJUST. NOTICE: This menu is only available if your preamp 077 is equipped with a PHONO MC or PHONO MM module and the according input is selected. - Page 33 If both channel levels are equal, the display will show LEFT = RIGHT, and adjustment is not necessary. If the channel levels are different the display will show ADJUST…, and the 077 adjusts the channel difference. After correctly finishing the adjust-process the display will show ADJ- COMPLETE.
-
Page 34: The Mc Setup
THE MC SETUP The MC SETUP offers the adjustment of functions like AMPLIFICATION and INPUT RESISTANCE. NOTICE: This menu is only available if your preamp 077 is equipped with a PHONO MC module and the input PH- MC is selected The following chart provides an overview of all menu items, which may be adjusted in the MC SETUP. -
Page 35: The Mm Setup
THE MM SETUP The MM SETUP offers the adjustment of functions like AMPLIFICATION and INPUT CAPACITANCE. NOTICE: This menu is only available if your preamp 077 is equipped with a PHONO MM module and the input PH- MM is selected The following chart provides an overview of all menu items, which may be adjusted in the MM SETUP. -
Page 36: Remote Control
REMOTE CONTROL Equipped as standard is the 005 remote control Switching on/off The POWER button switches the preamp on or off, provided the Mains switch of the external power supply unit or on the rear panel of the preamp is set to ON and the power switch on the front panel of the preamp is set to STBY. - Page 37 MAIN/REC change Shortly pressing the MODE button will allow you to switch between MAIN and RECORD level. Phase reversal Longer Pressing the DIM button (approx. 2 seconds) will reverse the phase of the presently activated input channel by 180° . When the phase rev ersal is active, the PHASE LED (2) will light up.
-
Page 38: Burlink
A USB device driver needs to be installed when using the USB connector. System requirements for using the USB software are either WINDOWS 2000 or WINDOWS XP operating system. COMMANDS Listed below are the possible commands to control the preamp 077. All commands needs to be sent in capital letters finished with a “carriage return“ \r . POWON\r... - Page 39 PHASE\r switches the active input between 0˚ and 180˚ phase PHASEON\r switches the active input to 180˚ phase PHASEOFF\r switches the active input to 0˚ phase AUDIO\r switches the D/A converter module between a sample rate of 96kHz and 192kHz, if equipped AUDIO96\r switches the D/A converter module to a sample rate of 96kHz, if equipped...
-
Page 40: General Instructions
For the cleanest power supply we recommend our triple-shielded power cord BURMESTER- POWER. IR receiver The IR receiver receives signals from the BURMESTER remote control and must not be covered up by any objects. Heat development Be careful when touching the housing – it may get quite warm during operation. - Page 41 Lightening strikes During the summer months, malfunctions often occur due to voltage spikes in the power lines after lightning strikes. Completely unplugging the power cord offers the only effective protection. Merely switching the unit off does not suffice since voltage spikes are able to arc over separated contacts.
-
Page 42: Technical Specifications
TECHNICAL SPECIFICATIONS Dimensions Preamp incl. base plate (W x H x D) 450 x 160 x 340 mm (17.7 x 6.3 x 13.4 inches) Power supply unit incl. base plate (B x H x T) 450 x 160 x 340 mm (17.7 x 6.3 x 13.4 inches) Weight Preamp incl.
Need help?
Do you have a question about the 077 and is the answer not in the manual?
Questions and answers