
Related Manuals for Burmester 159


Summary of Contents for Burmester 159
-
Page 1: Table Of Contents
Meanings of Warning Symbols and Words Important Safety Instructions UNPACKING AND SETTING UP THE DEVICE Unpacking the Power Amplifier Setting Up the Power Amplifier OVERVIEW OF THE 159 Connecting the Power Amplifier Classic Connection Bi-amping Connecting the Power Cable OPERATING THE POWER AMPLIFIER... - Page 2 2|46...
-
Page 3: Introduction
Introduction... - Page 4 O P E R A T I O N M A N U A L 4 | 4 6...
- Page 5 M O N O P O W E R A M P L I F I E R Congratulations on your purchase and thank you for choosing Burmester. Dear music lover, Congratulations on your purchase and thank you for choosing Burmester.
-
Page 6: About This Device
– because exceptional sound is in our DNA. With a design inspired by the renowned amplifiers in our portfolio, we’ve updated the look of the 159 mono power amplifier to match the most modern design concepts and to highlight the technological advances contained within. -
Page 7: Intended Use
A M P L I F I E R Intended Use This device is intended for use in home music systems. PERMISSIBLE OPERATING CONDITIONS Please take care to only ever use your Burmester device under the following conditions: Maximum altitude 2000 m Humidity <... - Page 8 8|46...
-
Page 9: Instructions
Instructions 9|46... -
Page 10: Instructions For Skilled Persons
O P E R A T I O N M A N U A L Instructions for Skilled Persons Certain steps in this operation manual may only be performed by skilled persons. The work steps in question are presented in this manual with a blue background and marked with the following notice: ARRANGE FOR A SKILLED PERSON TO CARRY ... -
Page 11: Meanings Of Warning Symbols And Words
1 5 9 M O N O P O W E R A M P L I F I E R Meaning of Warning Symbols and Words The following warnings, symbols and warning words are used in this document: The general hazard symbol, in conjunction with the warning words CAUTION, WARNING or DANGER warns of the risk of serious injury. -
Page 12: Important Safety Instructions
KEEP THIS OPERATION MANUAL IN A SAFE PLACE. WARNING: SUFFOCATION HAZARD DURING UNPACKING Your Burmester device is shipped in plastic bags to protect the surfaces. Keep these bags out of reach of children in order to prevent suffocation. ATTENTION: RISK OF INJURY TO CHILDREN If used improperly, this device poses various injury risks to children. - Page 13 Do not attempt to operate the device if it is obviously damaged or if liquid has gotten in it. CAUTION: HEAT GENERATION During operation, the housing of the 159 can heat up to 70° C at the places marked. Be careful when touching the device.
- Page 14 14|46...
-
Page 15: Unpacking And Setting Up The Device
Unpacking and Setting Up the Device 15|46... -
Page 16: Unpacking The Power Amplifier
Please check the delivery for completeness and damage. SCOPE OF DELIVERY The following is included with delivery: Flight case with the 159 power amplifier Power cable, 2 m Remote cable, 2 m Set of warranty documents Care kit PLEASE CHECK THE DELIVERY FOR COMPLETENESS AND DAMAGE. -
Page 17: Setting Up The Power Amplifier
ARRANGE FOR A SKILLED PERSON TO CARRY OUT THIS STEP! WARNING: HIGH POWER AMPLIFIER WEIGHT The 159 is very heavy and can cause serious injury if it falls. The power amplifier should only be unpacked and set up by skilled persons who are experienced in handling heavy loads. - Page 18 O P E R A T I O N M A N U A L 1 8 | 4 6...
-
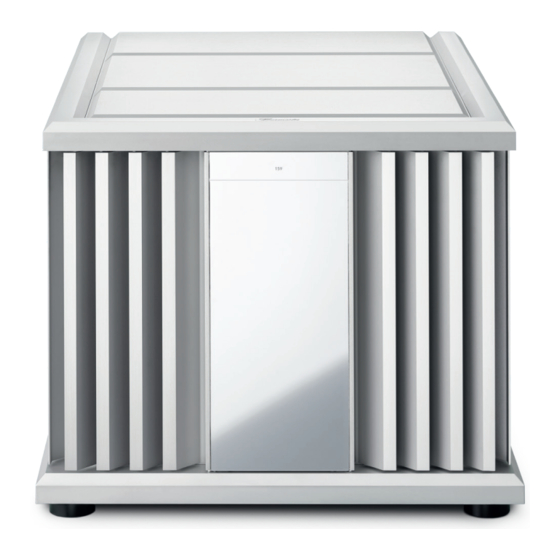
Page 19: Overview Of The 159
1 5 9 M O N O P O W E R A M P L I F I E R Overview of the 159... - Page 20 O P E R A T I O N M A N U A L FRONT SIDE LED (operation/standby) and infrared receiver (LED off) The power amplifier is switched off. Initiating start-up (LED steady orange) The power amplifier is starting up. (LED flashing green) The power amplifier is in operation.
- Page 21 1 5 9 M O N O P O W E R A M P L I F I E R REAR SIDE Balanced output Damping factor adjustment knob Balanced input Remote control output BurSync output Loudspeaker output, positive Power socket Mains switch Loudspeaker output, negative BurSync input...
- Page 22 O P E R A T I O N M A N U A L CONTROL PANEL Damping factor display BurSync display Toggle the damping factor Status display On/off switch Auto power down indicator Auto power down button 2 2 | 4 6...
- Page 23 1 5 9 M O N O P O W E R A M P L I F I E R THE BURMESTER REMOTE CONTROL (OPTIONAL) Switch the device on or to standby mode. Toggle the damping factor between FIXED / VARIABLE...
-
Page 24: Connecting The Power Amplifier
ARRANGE FOR A SKILLED PERSON TO CARRY OUT THIS STEP! The connections are located on the rear of the 159. Before connecting the device, please also read the operation manuals for the signal source. Switch off all devices in your hi-fi system before installation. - Page 25 NOTE: If you are operating multiple 159 devices connected via BurSync, you need only connect one of the power amplifiers (via the remote control input (13)) to another Burmester device that you want to start together with the power amplifiers.
- Page 26 A large cross-section ensures that you can maintain the power amplifier’s damping factor for optimal control of the loudspeakers. The best results are achieved by using original Burmester speaker cables, which have the same electrical and tonal characteristics as the internal wiring of Burmester loudspeakers and amplifiers.
- Page 27 1 5 9 M O N O P O W E R A M P L I F I E R SHORT-CIRCUITING THE SPEAKER OUTPUTS Connecting the positive and negative terminals of the speaker’s binding posts while the amplifier is on will cause a short circuit. In this event, the speaker outputs will automatically switch off to prevent damage to the device.
- Page 28 O P E R A T I O N M A N U A L STEP 3 Rotate anticlockwise STEP 4 Remove binding post cover STEP 5 Place spade lug Then replace on binding post binding post cover STEP 6 Rotate clockwise 2 8 | 4 6...
-
Page 29: Classic Connection
1 5 9 M O N O P O W E R A M P L I F I E R Classic Connection ARRANGE FOR A SKILLED PERSON TO CARRY OUT THIS STEP! This is the most common connection method. With this method, each channel on the power amplifier is connected to a loudspeaker via a 2-pole cable. - Page 30 O P E R A T I O N M A N U A L 3 0 | 4 6...
-
Page 31: Connecting The Power Cable
1 5 9 M O N O P O W E R 159 MONO POWER AMPLIFIER A M P L I F I E R Connecting the Power Cable Before connecting the loudspeakers, please also read the operation manuals for the components you plan to connect. - Page 32 32|46...
-
Page 33: Operating The Power Amplifier
Operating the Power Amplifier... - Page 34 O P E R A T I O N M A N U A L Push the cover backwards to change the settings 3 4 | 4 6...
-
Page 35: Accessing The Control Panel
159 MONO POWER AMPLIFIER Accessing the Control Panel WARNING: BRUISING CAUSED BY THE COVER. The cover can cause hand injuries when closing. Make sure that your hands or other limbs are not in the opening when closing the cover. The control panel is hidden under the movable cover. Slide the cover back to adjust settings or to turn the device on or off. -
Page 36: Switching The Device On And Off
O P E R A T I O N M A N U A L Switching the Device On and Off THE DEVICE HAS TWO CONTROLS FOR SWITCHING IT ON AND OFF: — The mains switch (10) is located on the rear of the device. Toggling the mains switch connects or disconnects the standby power supply to/from the mains. -
Page 37: Configuring Auto Power Down
If your power amplifiers are connected via BurSync, all connected power amplifiers follow the settings of the BurSync master, which is the first 159 in the network. CONFIGURING AUTO POWER DOWN Press the auto power down button (20). -
Page 38: Adjusting The Damping Factor
The variable damping factor enables you to adjust the sound of the 159 to your preferences. Changing the damping factor affects the bass response of the 159 in particular. The higher the damping, the more precisely your speakers will be controlled by the amplifier. - Page 39 BurSync. If you want to control your 159 device with the remote control but do not want to connect it with BurSync, first set the same values for the auto power down function and the damping factor status directly on all 159 devices.
-
Page 40: Troubleshooting
If an error occurs, this is indicated by the LED (1) on the front of the 159. It flashes orange in the event of an error. MORE DETAILS ABOUT THE ERROR WILL BE FOUND ON THE CONTROL PANEL. - Page 41 1 5 9 M O N O P O W E R A M P L I F I E R TEMPERATURE – WARNING Sequence Status Description: The power amplifier has reached a critical temperature. Troubleshooting: 1. Reduce the volume until the LED switches off. 2.
- Page 42 Contact your dealer for further steps. Sequence Status Sequence Status Sequence Status Sequence Status Sequence Status DESCRIPTION: An error has occurred that requires Burmester service. 4 2 | 4 6...
-
Page 43: Maintenance, Repair, Care
1 5 9 M O N O P O W E R A M P L I F I E R MAINTENANCE, REPAIR AND CARE ATTENTION: DAMAGE TO THE SURFACE Liquids and chemical agents can damage the surface of the housing. Use the enclosed care kit to clean the Ensure that no liquids get into the device. - Page 44 O P E R A T I O N M A N U A L 4 4 | 4 6...
-
Page 45: Specifications
Power consumption when OFF 0 W Power consumption in standby < 0.5 W Continuous current 6.6 A Voltage range (Model 159-120) 100 – 120 V ~, 50/60 Hz Voltage range (Model 159-240) 220 – 240 V ~, 50/60 Hz Damping factor 102 – 3,895 in 23 steps Unweighted signal-to-noise ratio for 1 kHz... - Page 46 O P E R A T I O N M A N U A L VERSION: BA_159_EN_1-1_2109 BURMESTER HOME AUDIO GMBH Wilhelm-Kabus-Straße 47 10829 Berlin Germany www.burmester.de 4 6 | 4 6...
Need help?
Do you have a question about the 159 and is the answer not in the manual?
Questions and answers