dji MATRICE 600 User Manual
Hide thumbs
Also See for MATRICE 600:
- User manual (40 pages) ,
- Disclaimer and safety manuallines (23 pages) ,
- Manual (4 pages)
Table of Contents
Advertisement
Advertisement
Table of Contents

Related Manuals for dji MATRICE 600


Summary of Contents for dji MATRICE 600
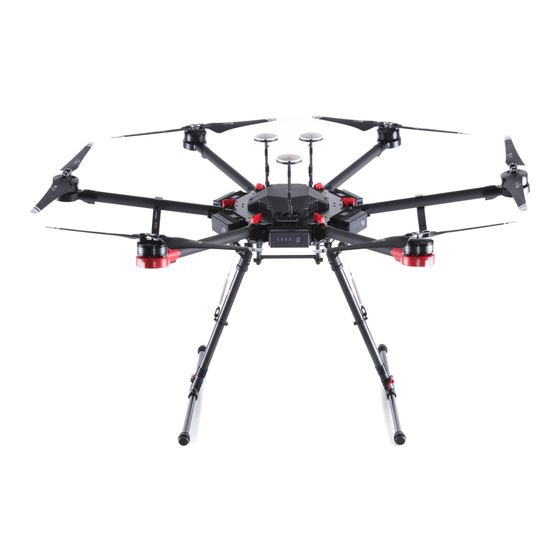
- Page 1 MATRICE 600 User Manual V1.0 2016.04...
- Page 2 Searching for Keywords Search for keywords such as “battery” and “install” to find a topic. If you are using Adobe Acrobat Reader to read this document, press Ctrl+F on Windows or Command+F on Mac to begin a search. Navigating to a Topic View a complete list of topics in the table of contents.
-
Page 3: Using This Manual
Please watch the tutorial video below to learn how to install the Matrice 600 correctly: http://www.dji.com/product/matrice600/info#video Download DJI Assistant 2 When using your Matrice 600 for the first time, you will need to activate it in the DJI Assistant 2 software. http://www.dji.com/product/matrice600/info#downloads DJI Assistant 2 supports Windows 7 or above. -
Page 4: Warning
5. Unless specified, screws with blue or red glue on their threads can be used without threadlocker for the first time. After that, apply a suitable amount of threadlocker to the thread. 6. The Matrice 600 should be lifted off the ground when testing the landing gear or recalibrating servo travel. -
Page 5: Table Of Contents
Intelligent Flight Battery Functions Using the Batteries Remote Controller Profile Preparing Remote Controller Remote Controller Overview Remote Controller Operations Dual Remote Controllers Mode Remote Controller LEDs Linking the Remote Controller Return-to-Home (RTH) Profile Smart RTH © 2016 DJI All Rights Reserved. - Page 6 Retractable Landing Gear Reserved Mounting Position Dimensions A3 Flight Controller Overview Lightbridge 2 Air System Overview Mounting the Gimbal (Optional) Mounting the Expansion Bays (Optional) Modular Redundancy System (Optional) DJI Zenmuse X3 Gimbal with Camera © 2016 DJI All Rights Reserved.
-
Page 7: Product Profile
The A3 Pro’s three GPS modules and IMUs add triple modular redundancy to greatly reduce the risk of system failure. The Matrice 600 is compatible with the DJI Zenmuse X3, X5 series, XT gimbal with camera, Zenmuse Z15 series HD gimbal, and Ronin-MX gimbal for professional aerial photography and industrial applications. -
Page 8: Installation
Mount the arms with red motor bases to the M1 and M2 positions (on both sides of battery compartment No. 1) to indicate the nose direction of the Matrice 600. When viewed from above with battery compartment No. 1 facing forward, the M1 position is on the right side of battery compartment No. - Page 9 MATRICE 600 User Manual 2. Remove the lower cover of the center frame for installation and connection. 3. Insert the frame arm into the arm connector on the center frame with the propeller away from the center frame. Rotate the frame arm to align the screw holes on the frame arm and connector. Then insert and tighten four M3×6.5 screws.
-
Page 10: Mounting The Retractable Modules
MATRICE 600 User Manual 7. Connect the power cables to the center frame. Each cable must be screwed into a positive (+) or negative (-) gold bracket. Red cables are positive and black cables are negative. Each bracket will have two cables of the same color screwed into it. Then tighten each M3×5.5 screw (square head) using the square socket wrench. - Page 11 MATRICE 600 User Manual Servo Mounting Holes Control Board (Left module only) Servo Cable Connecting Arm Power Cable (Left module only) 1. Mount the retractable module bracket to the mounting position on the lower plate of the center frame as shown below. Apply medium strength threadlocker to two M3×8.5 screws.
- Page 12 MATRICE 600 User Manual 3. Align the cable fixing ring and the screw hole on the bottom of the retractable module. Insert and tighten the M3×5.5 screw. 4. Align the screw holes of the connector on the center frame and the screw holes on the middle of the retractable module.
-
Page 13: Mounting The Landing Gear
MATRICE 600 User Manual Mounting the Landing Gear The antennas are attached to the landing gear legs upon delivery. DO NOT move the antennas. Pull out the antenna cables from the landing gear legs before mounting. Antenna Cable Antenna 1. Insert one landing gear leg into each landing skid tube and ensure that the antenna is pointing in the same direction as the screw hole on the landing skid tube. -
Page 14: Mounting Gps Module
MATRICE 600 User Manual 6. Connect both springs to the legs and the center frame. Watch your fingers when mounting the springs to the landing gear. DO NOT move the spring mount on the landing gear leg to avoid affecting flight performance. -
Page 15: Mounting The Upper And Lower Covers Of The Center Frame
MATRICE 600 User Manual 4. Plug the GPS cable into the CAN1 port on the flight controller. 5. Attach the CAN HUB of the GPS module onto the upper plate of the center frame. Then insert the GPS cable into the slot on the upper plate of the center frame. -
Page 16: Mounting The Gimbal (Optional)
3. Connect the power cable of the retractable module to the XT30 power cable at the bottom of the center frame. Mounting the Gimbal (Optional) The built-in flight control system of the Matrice 600 is compatible with the following DJI gimbals and cameras. Ronin-MX... -
Page 17: Intelligent Flight Battery
Intelligent Flight Battery Profile The Matrice 600 has six battery compartments and six Intelligent Flight Batteries to extend the flight time. The standard Intelligent Flight Battery has a capacity of 4500mAh, voltage of 22.2V, and built-in smart charge-discharge function. It can only be charged with an appropriate DJI approved charger or charging hub. -
Page 18: Using The Batteries
Using the Batteries Installing the Batteries There are six battery compartments on the Matrice 600. You must load all six battery compartments with batteries of the same model before each flight. Make sure all the batteries are fully charged before each flight. - Page 19 MATRICE 600 User Manual If the power supply is not OK when powering on the batteries, the DJI GO app will either prompt you to adjust the battery positions or tell you there is a large voltage difference. To adjust the battery positions: 1.
- Page 20 For more information about the battery, launch the DJI GO app and go to the Battery tab. Charging the Intelligent Flight Battery The Matrice 600 is shipped with two Charging Hubs. Each Charging Hub can charge up to four Intelligent Flight Batteries. Refer to Using the Charging Hub (p. 56) for more details.
- Page 21 MATRICE 600 User Manual 1. Connect the battery charger to a suitable power supply (100-240V 50/60Hz). 2. Open the protection cap and connect the Intelligent Flight Battery to the battery charger. If the battery level is above 95%, turn on the battery before charging.
- Page 22 5% battery level, or until it can no longer be turned on. Check the battery level in the DJI GO app. Fast: Fly the Matrice 600 outdoors until there is less than 5% battery level, or until the battery can no longer be turned on.
-
Page 23: Remote Controller
It is powered by a 2S rechargeable battery. Stick Mode: Control can be set to Mode 1, Mode 2 (by default), or a custom mode in the DJI GO app. - Page 24 [12] Shutter Button Connect to mobile device to access all of Press to take a photo. If in burst mode, the the DJI GO app controls and features. [20] GPS Module Used to pinpoint the location of the remote [20] controller.
-
Page 25: Remote Controller Operations
Powering On and Off the Remote Controller The Matrice 600 remote controller is powered by a 2S rechargeable battery with a capacity of 6000mAh. The battery level is indicated by the Battery Level LEDs on the front panel. Follow the steps below to power on your remote controller: 1. - Page 26 MATRICE 600 User Manual Controlling the Camera Shoot videos or images and adjust camera settings via the Shutter Button, Camera Settings Dial, Playback Button and Video Recording Button on the remote controller when using a Zenmuse X3, X5 series or XT gimbal with camera.
- Page 27 MATRICE 600 User Manual Remote Controller Aircraft ( indicates nose direction) Function Moving the Left Stick up/down changes the aircraft’s elevation. Push it up to ascend and down to descend. Use this stick to take off when the motors are spinning at idle speed.
- Page 28 Intelligent Flight Modes (p. 53) section in the Appendix and SDK in DJI Assistant 2 (p. 40) for more information. The flight mode is locked in P-mode by default. To enable other flight modes, go to the DJI GO app > Camera View >...
- Page 29 Ensure that the switch is in the lower position when enabling this feature. The feature will be disabled after raising and lowering the landing gear once. Enable it in the DJI GO app if you want to raise or lower the landing gear again.
-
Page 30: Dual Remote Controllers Mode
More than one remote controller can be connected to the same aircraft in the Dual Remote Controllers mode. When using a DJI gimbal in the Dual Remote Controllers mode, the Master remote controller controls the movement of the aircraft, while the Slave remote controller controls the movement of the gimbal. - Page 31 Master Remote Controller through the DJI GO app. Follow the steps below for setup: Master Remote Controller: 1. Connect the remote controller to your mobile device and launch the DJI GO app. 2. Go to the Camera View, and tap to enter the remote controller settings window.
-
Page 32: Remote Controller Leds
The remote controller cannot link to the aircraft or control aircraft movement if it is set to Slave. Set the remote controller as Master in the DJI GO app if you want to link the remote controller to the aircraft. -
Page 33: Linking The Remote Controller
Follow these steps to link a new remote controller: 1. Power on the remote controller and connect it to your mobile device. Then power on the aircraft. 2. Go to the DJI GO app > Camera View > > Remote Controller Settings > Linking Remote Controller. - Page 34 The remote controller cannot link to the aircraft or control aircraft movement if it is set to Slave. Set the remote controller as Master in the DJI GO app if you want to link the remote controller to the aircraft.
-
Page 35: Return-To-Home (Rth)
Use the RTH button on the remote controller (see RTH Button on p. 27 for more details) or the RTH button in the DJI GO app when GPS is available to enable Smart RTH. With Smart RTH, you may control the aircraft’s orientation to avoid collision when it is returning to the Home Point. Press and hold the Smart RTH button to start the RTH procedure, then press the Smart RTH button again to exit Smart RTH and regain control of the aircraft. -
Page 36: Failsafe Rth
MATRICE 600 User Manual Aircraft Status Flight Battery Level Description DJI GO App Indicator Instructions Tap Go-Home to make the Fly the aircraft aircraft return to Home Point back and land Aircraft Status and land automatically, or Low Battery The battery level is... -
Page 37: Rth Safety Notices
Home Point. Follow the instructions below to update the Home Point: 1. Connect your mobile device to the remote controller and go to the DJI GO app > Camera View > 2. Tap to set the remote controller’s current coordinates as the Home Point;... -
Page 38: Dji Go App
DJI GO App Use the DJI GO app to configure your aircraft. If using a gimbal or camera, you can also control the gimbal or camera in the app. The Library, Explore, and Me sections in the app allow you to share your content with friends. - Page 39 MATRICE 600 User Manual [1] System Status : Indicates the current aircraft system status and GPS signal strength. [2] Battery Level Indicator : Describes the battery level of the aircraft according to its immediate status. The colored zones represent the various stages of battery level. When the battery level drops to a certain stage, the system will prompt the user to take the appropriate action.
- Page 40 : Initiate RTH home procedure. Tap to have the aircraft return to the latest Home Point. [14] Gimbal Operation Mode This icon will be displayed when using a DJI gimbal (or camera). Tap to select a mode or re-align the gimbal.
-
Page 41: Editor
Find out about our latest events, featured products and trending Skypixel uploads in the Explore page. If you already have a DJI account, you will be able to participate in forum discussions, earn Credits in the DJI Store, and share your artwork with the community. -
Page 42: Dji Assistant 2
DJI GO app for information. 3. Connect the Micro USB port (at the bottom of the Aircraft Status Indicator) of the Matrice 600 to the computer with a Micro USB cable. Do not disconnect the cable until configuration is finished. - Page 43 MATRICE 600 User Manual Enable API Control If you are using the DJI SDK, select Enable API Control to allow the flight control system to communicate with external devices such as an on-board computer. The external device will be able to control the aircraft only if the Flight Mode Switch on the remote controller is toggled to F-mode.
-
Page 44: Flight
Users can change the maximum height and radius limits in the DJI GO app. Once complete, your Matrice 600 will fly in a restricted cylinder that is determined by these settings. The tables below show the details of these limits. - Page 45 GPS icon) when powered on. If you fly out of bounds, you can still control the Matrice 600, but cannot fly it further. If the Matrice 600 loses GPS signal and flies out of the max radius but regains GPS signal afterwards, it will fly back within range automatically.
- Page 46 MATRICE 600 User Manual 2. R1 miles around the airport (depending on its shape and size) encompasses the no fly zone, inside of which takeoff and flight are prohibited. 3. From R1 to R1+1 miles around the airport, the flight altitude is limited at a 15 degree incline, starting at 66 feet (20 meters) from the edge of airport and radiating outwards.
-
Page 47: Pre-Flight Checklist
MATRICE 600 User Manual Safe to Fly (GPS) Blinking Green Slowly Aircraft Status Zone Restrictions DJI GO App Warning Indicator Warning: You are in a no fly zone. Motors will not start. Takeoff prohibited. If the aircraft loses GPS No Fly... -
Page 48: Flight Status Indicators
Front/Rear LEDs There is a Front/Rear LED on each frame arm of the Matrice 600 to show the orientation of the aircraft after motors started. The Front LEDs are red and located on frame arms M1 and M2. The Rear LEDs are green and located on frame arms M3 to M6. -
Page 49: Calibrating The Compass
Be sure to calibrate the compass before your first flight, or else the aircraft cannot work properly. After that, calibrate the compass when the DJI GO app or the Aircraft Status Indicator prompts you to do so. DO NOT calibrate your compass where there is a chance of strong magnetic interference, such as magnetite quarries, parking structures, and underground steel reinforcements. -
Page 50: Auto Takeoff And Auto Landing
2. Flying in a new location, or a location that is different from your last flight. 3. The mechanical structure of the Matrice 600 is changed, i.e. the mounting position of the GPS module is changed. 4. Severe drifting occurs in flight, i.e. the Matrice 600 has difficulty flying in a straight line. -
Page 51: Stopping The Motors Mid-Flight
Stopping the Motors There are two methods to stop the motors. Method 1: When the Matrice 600 has landed, push the throttle stick down, then perform the CSC command to stop the motors. Release both sticks once the motors have stopped. -
Page 52: Appendix
Standard Operating Temperature 14° to 104° F (-10° to 40° C) * The hovering time is based on flying at 10m above sea level in a no-wind environment and landing with 10% battery level. © 2016 DJI All Rights Reserved. - Page 53 MATRICE 600 User Manual Remote Controller 920.6 MHz to 928 MHz (Japan) Operating Frequency 5.725 GHz to 5.825 GHz 2.400 GHz to 2.483 GHz Max Transmitting Distance FCC: 5 km (unobstructed, free of interference) CE: 3.5 km 10 dBm @ 900 M EIRP 13 dBm @ 5.8 G...
- Page 54 MATRICE 600 User Manual Battery (Optional) Model TB48S Capacity 5700 mAh Voltage 22.8 V Type LiPo 6S Energy 129.96 Wh Net Weight 680 g Operating Temperature 14° to 104° F (-10° to 40° C) Less than 3 months: -4° to 113° F (-20° to 45° C) Storage Temperature More than 3 months: 72°...
-
Page 55: Intelligent Flight Modes
Go to the DJI GO app > Camera View > > Multiple Flight Modes. On the remote controller, toggle the Flight Mode Switch to F-mode. Tap in the DJI GO app to use Intelligent Flight Modes by following the steps in the app. ©... -
Page 56: Upgrading The Firmware
Firmware to download and upgrade the firmware. 2. A progress bar in the DJI GO app will indicate the upgrade status. The Status LED on the remote controller will be solid blue while the upgrade is in progress and it will turn solid green when the upgrade is successful. -
Page 57: Charging Hub For Intelligent Flight Batteries
Warning 1. The Charging Hub is only compatible with the Matrice 600 Battery Charger. Do not attempt to use the Charging Hub with any other battery charger. 2. The Charging Hub is only compatible with TB47S and TB48S Intelligent Flight Batteries. Do not attempt to use the Charging Hub with other battery models. - Page 58 —— Solid Yellow Upgrading the Firmware The firmware update program has an “exe” extension. Visit the Matrice 600 page on the official DJI website to check if there is a firmware upgrade. 1. Download the latest firmware upgrade from the official DJI website.
-
Page 59: Retractable Landing Gear
4. The Charging Hub will automatically restart when the update has been successfully completed. 5. Repeat this process if the firmware upgrade fails for any reason. Specifications Compatible Battery Charger Matrice 600 Standard Charger (A14-100P1A) TB47S Intelligent Flight Battery Compatible Battery Models TB48S Intelligent Flight Battery Operating Temperature 14 °F to 104 °F (5 °C to 40 °C) - Page 60 (if the remaining batteries do not automatically power on, connect your mobile device to the remote controller and follow the on-screen tips in the DJI GO app). The LED will blink yellow quickly. Press the SET button again. Auto calibration will begin and the LED will blink yellow slowly.
-
Page 61: Reserved Mounting Position Dimensions
MATRICE 600 User Manual Reserved Mounting Position Dimensions A mounting position for your own devices is reserved at the bottom of the center frame. 1. Remove the twelve M3×6.5 screws at the bottom of the center frame first, and then remove the expansion mounting kit. -
Page 62: A3 Flight Controller Overview
[4] Status Indicator Indicates the status of the flight controller and triple modular redundancy system. [5] RF Port Communicates with the DJI Lightbridge 2 Air System. Connected to the Lightbridge 2 Air System upon delivery. [6] iESC Port Communicates with the DJI Smart ESC. Connected to the DJI Smart ESC upon delivery. -
Page 63: Lightbridge 2 Air System Overview
[2] AV IN Receives AV input from the camera. [3] Gimbal Port Connects to a DJI gimbal or camera. [4] DBUS Port Sends the remote controller signal to the flight controller. Connected to the RF port on the flight controller upon delivery. -
Page 64: Mounting The Gimbal (Optional)
Different accessories are used to mount different gimbals or cameras. Purchase corresponding accessories according to your needs. The following section provides brief instructions for installation and connection. Refer to the video tutorial on the Matrice 600 page of the official DJI website for details. - Page 65 XT30 power cable at the bottom of the center frame. The X series gimbal cables are only for using an X series gimbal with the Matrice 600. DO NOT mix up the X series gimbal cables with other cables.
- Page 66 SRW-60G Transmitter When using the Ronin-MX, set the App Output Mode in the DJI GO app to display the image on your mobile device from the camera used with the Ronin-MX. Launch the DJI GO app > Camera View >...
- Page 67 When using the Zenmuse X3, X5 Series, XT or Z15 series HD gimbal, set the App Output Mode in the DJI GO app to display the image on your mobile device from the camera used with your gimbal. Launch the DJI GO app > Camera View >...
-
Page 68: Mounting The Expansion Bays (Optional)
MATRICE 600 User Manual Mounting the Expansion Bays (Optional) Extend the center frame of the Matrice 600 with the expansion bays to mount your own devices. Mounting the Upper Expansion Bay 1. Remove the four sets of triangularly arranged M3x5.5 screws (twelve screws in total). -
Page 69: Modular Redundancy System (Optional)
Modular Redundancy System (Optional) The A3 flight control system built into the Matrice 600 can be upgraded to the A3 Pro by installing two upgrade kits. Refer to the A3/A3 Pro User Manual for installation and usage. After installation, be sure to connect the Matrice 600 to the DJI Assistant 2 to configure the modular redundancy system. - Page 70 MATRICE 600 User Manual Camera Operation Use the Shutter and Record button on the remote controller to shoot images or the videos through the DJI GO app. For more information on how to use these buttons, refer to Controlling the Camera (p. 24).
- Page 71 MENU Gimbal Operation Modes Switch between the three operation modes in Camera View in the DJI GO app. Note that your mobile device must be connected to the remote controller for changes to take effect. Refer to the table below...
- Page 72 MATRICE 600 User Manual The gimbal’s orientation is aligned with the aircraft’s nose. One user alone can control the pitch motion of the gimbal, but a second Follow Mode operator is required to control the yaw motion using a second remote controller.
- Page 73 MATRICE 600 User Manual CMOS Sony EXMOR 1/2.3” 20 mm (35 mm format equivalent), f/2.8, focus at ∞ Lens 9 elements in 9 groups Anti-distortion Single shot Burst mode: 3/5/7 frames Still Photography Modes Auto Exposure Bracketing (AEB): 3/5 frames at ±0.7EV...
- Page 74 This content is subject to change. Download the latest version from http://www.dji.com/product/matrice600 If you have any questions about this document, please contact DJI by sending a message to DocSupport@dji.com. © MATRICE is a trademark of DJI. Copyright 2016 DJI All Rights Reserved.
Need help?
Do you have a question about the MATRICE 600 and is the answer not in the manual?
Questions and answers