dji MATRICE M210 RTK V2 User Manual
Hide thumbs
Also See for MATRICE M210 RTK V2:
- User manual (140 pages) ,
- Quick start manual (99 pages) ,
- Quick start manual (87 pages)
Table of Contents
Advertisement
Advertisement
Table of Contents

Related Manuals for dji MATRICE M210 RTK V2


Summary of Contents for dji MATRICE M210 RTK V2
- Page 1 MATRICE 200 SERIES V2 M210 V2 / M210 RTK V2 User Manual V1.0 2019.02...
-
Page 2: Using This Manual
Download the DJI Pilot app The DJI Pilot app is required if using a mobile device connected to the remote controller. Search for Scan the QR code or visit https://m.dji.net/djipilot_enterprise to download the app. DJI Pilot supports Android 5.0 or later. -
Page 3: Table Of Contents
Contents Using This Manual Legends Before Flight Download the DJI Pilot app Download the DJI Assistant 2 for Matrice Product Profile Introduction Feature Highlights Assemble the Aircraft Preparing the Remote Controller Aircraft Diagram Remote Controller Diagram Aircraft Profile Flight Mode... - Page 4 Calibrating the Compass Starting/Stopping the Motors Stop the Motor Mid-flight Flight Test Appendix Specifications Firmware Update Using the Zenmuse XT Gimbal and Camera Dual Downward Gimbals Using the Upward Gimbal and GPS Kit Carrying Box Descriptions © 2019 DJI All Rights Reserved.
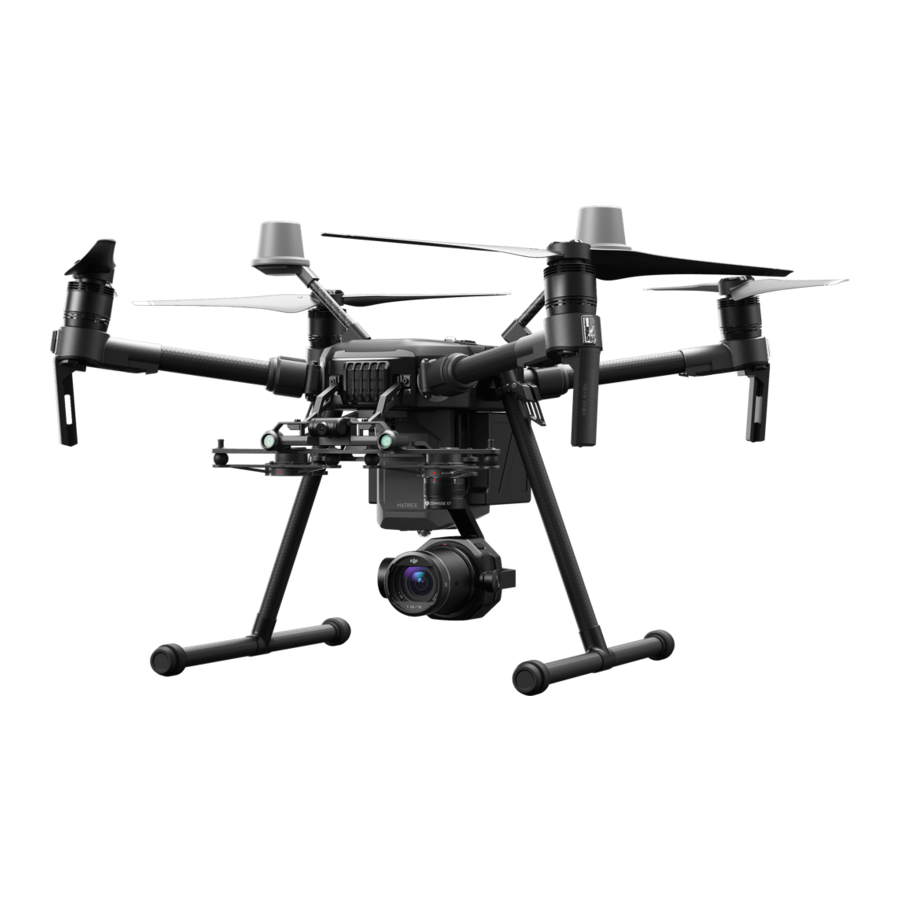
- Page 5 Product Profile This chapter describes the features of the Matrice 210 V2/Matrice 210 RTK V2, shows how to assemble the aircraft, and contains diagrams of the aircraft and remote controller with component explanations. © 2019 DJI All Rights Reserved.
-
Page 6: Product Profile
** When using an upward gimbal with the M210 V2, an external GPS Kit connected through the expansion port is required. *** When using the M210 RTK V2, more accurate positioning data can be achieved when using a DJI D-RTK 2 High Precision GNSS Mobile Station for Matrice Series. If the data transmission signal between the aircraft and the mobile station is weak, it is recommended to use post-processed kinematic (PPK) technology. -
Page 7: Assemble The Aircraft
Check that the propellers are secure before each flight. © 2019 DJI All Rights Reserved. - Page 8 Make sure to use the included TB55 batteries. DO NOT use any other type of batteries. Removing the Intelligent Flight Battery Make sure to press the battery removal button when removing the battery. © 2019 DJI All Rights Reserved.
-
Page 9: Preparing The Remote Controller
Mounting the Monitor to the Remote Controller Ensure that Part B is Lock the Mounting Use a coin or the unlocked. Connect Bracket. screwdriver included to Part B to Part A. adjust the tightness of the tilt axis. © 2019 DJI All Rights Reserved. -
Page 10: Aircraft Diagram
1. FPV Camera 19. USB Mode Switch 2. Forward Vision System 20. USB Port 3. DJI Gimbal Connector v2.0 (DGC2.0) I 21. Linking Button and Indicator 4. DJI Gimbal Connector v2.0 (DGC2.0) II 22. Expansion Ports 5. Gimbal Detachment Button 23. -
Page 11: Remote Controller Diagram
Press and rotate the Camera Setting Dial to 15. Monitor Mounting Bracket set the shutter speed. Used to mount the DJI CrystalSky monitor. 24. Aperture Setting Button 16. USB Port (Reserved Port) Press and rotate the Camera Setting Dial to 17. - Page 12 40. Micro USB Port degrade the flight distance. Additionally, disable the Connect to the DJI Assistant 2 for Matrice to video output in the Image Transmission Settings in the update firmware. app when the display device is disconnected.
- Page 13 Aircraft This section describes the features of the Flight Controller, Vision System, and the Intelligent Flight Battery.
-
Page 14: Aircraft
Be vigilant and maintain adequate maneuvering space during flight. Use the Flight Mode switch on the remote controller to select aircraft flight modes. © 2019 DJI All Rights Reserved. -
Page 15: Flight Status Indicator
DJI Pilot app. The Aircraft Status Indicators communicate the system status of the flight controller. Refer to the table below for more information about the Aircraft Status Indicators. The Front LEDs, Rear LEDs, and Aircraft Status Indicators can be turned off in the DJI Pilot app for unobtrusive drone operations. -
Page 16: Vision System And Infrared Sensing System
The Infrared Sensing System consists [4] of two infrared modules on top of the aircraft. These scan for obstacles on top side of the aircraft and is active in certain flight modes. © 2019 DJI All Rights Reserved. - Page 17 The aircraft cannot detect objects in low-light conditions. Please fly with caution. Ultrasonic sensor detection range is depicted below. Infrared Sensing System detection range is depicted below. © 2019 DJI All Rights Reserved.
- Page 18 The Forward and Downward Vision System cameras are calibrated prior to delivery. However, these cameras are vulnerable to impact and will require occasional calibration via DJI Assistant 2. 1. Power on the Intelligent Flight Battery and slide the USB Mode Switch right.
- Page 19 Using Infrared Sensing System The Infrared Sensing System can only be used to avoid large, diffuse, and reflective obstacles (reflectivity >10%). Please be mindful of blind spots (Grey) of the Infrared Sensing System. © 2019 DJI All Rights Reserved.
-
Page 20: Return-To-Home (Rth)
The GPS signal strength is Home Point indicated by the GPS icon . Less than 4 bars is considered a weak GPS signal. The aircraft status indicator will blink rapidly when the home point is recorded. © 2019 DJI All Rights Reserved. - Page 21 Smart RTH Use the RTH button on the remote controller or tap the RTH button in the DJI Pilot app and follow the on-screen instructions when GPS is available to initiate Smart RTH. The aircraft will then automatically return to the last recorded Home Point. Use the remote controller to control the aircraft’s speed or altitude to avoid a collision during the Smart RTH process.
- Page 22 RED slowly. go home and land after 10 and replace the seconds. Remote controller battery. will sound an alarm. The DJI Pilot app display will Allow the aircraft Critical Low The aircraft Aircraft status flash red and the aircraft will...
- Page 23 The aircraft cannot avoid obstacles during Failsafe RTH when the 20 m Forward Vision System is disabled. Therefore, it is important to set a suitable Failsafe altitude before each flight. Launch the DJI Pilot app, enter Camera and tap to set the Failsafe Altitude.
-
Page 24: Spotlight Pro
Users retain control of aircraft flight orientation. 3. If Landing Protection is inactive, the DJI Pilot app will display a landing prompt when the aircraft descends below 0.7 meters. Tap to confirm or pull down the control stick for 2 seconds to land when the environment is appropriate for landing. -
Page 25: Flight Recorder
10.0 m/s 2: 12: 45 113.95357, 22.54268 You can drag on a subject in DJI Pilot or move the gimbal control sticks to change the subject's position in the shot. Spotlight Pro can be used in S-mode, A-mode. Flight Recorder Flight data is automatically recorded to the internal storage of the aircraft. - Page 26 8. Short Circuit Protection: Automatically cuts the power supply when a short circuit is detected. 9. Battery Cell Damage Protection: DJI Pilot displays a warning message when a damaged battery cell is detected. 10. Sleep Mode: Sleep mode is entered to save power when the aircraft is not flying.
- Page 27 Description” section for more information about Status LED blinking patterns. The buzzer will begin beeping when charging is complete. Refer to the “Buzzer Beeping Description” for more information about buzzer beeping patterns. Battery Level Button LED4 LED3 LED2 LED1 © 2019 DJI All Rights Reserved.
- Page 28 After any of the above mentioned protection issues are resolved, press the button to turn off the Battery Level Indicator. Unplug the Intelligent Flight Battery from the charger and plug it back in to © 2019 DJI All Rights Reserved.
- Page 29 1 hour Updating the Firmware DJI will release firmware updates when available. Refer to the official DJI website and follow the instructions below to update the firmware. 1. Download the latest firmware update program from the official DJI website.
- Page 30 4.35 V before each flight. 2. End the flight as soon as DJI Pilot displays the “Low Battery Level Warning” in low temperature environments. You will still be able to control the aircraft’s movement when this warning is triggered.
-
Page 31: D-Rtk (For M210 Rtk V2)
More accurate positioning data can be achieved when using a DJI D-RTK 2 High Precision GNSS Mobile Station for Matrice Series. If the RTK signal is weak and differential data cannot be transmitted during flight, users can read the raw satellite observations* recorded in the aircraft after the flight, and then use PPK technology to achieve centimeter-level positioning. -
Page 32: Dji Airsense
ADS-B outs. 2. If there is an obstacle or steel structure between civil and DJI aircraft, the system won’t be able to receive ADS-B messages sent by manned aircraft or send out warnings. Keenly observe your surroundings and fly with caution. -
Page 33: Components At The Rear Of The Aircraft
MATRICE 200 SERIES V2 User Manual Components at the Rear of the Aircraft M210 V2/M210 RTK V2 provides several I/O ports, which can be customized in the DJI Pilot app. The aircraft also has components such as Extended Power Port, USB Mode Switch, Linking Button, and USB Port. - Page 34 MATRICE 200 SERIES V2 User Manual Pins Descriptions PWM power level is 3.3V and all pins can be configured in DJI Pilot app. Number Name I/O port I/O port OSDK port Especially for an external GPS Kit* PPS_OUT Pins (from up...
- Page 35 Remote Controller This section describes the features of the remote controller that includes aircraft and remote controller operations.
-
Page 36: Remote Controller
5 mi (8 km).* Equipped with a DJI CrystalSky 7.85 inch ultra-bright monitor, it displays a HD live view directly via the built-in DJI Pilot app, providing a precise and responsive flying experience. Dual frequency* support makes the HD video downlink more stable. In Dual Remote Controller Mode, two remote controllers control the aircraft and camera separately, even when they are up to 656 feet (200 m) apart.*... - Page 37 (100-240V, 50/60Hz). USB power supply port can be used to charge the mobile device of 5V/2A. Refer to the WCH2 Charging Hub User Guide for more details. © 2019 DJI All Rights Reserved.
-
Page 38: Mounting The Monitor To The Remote Controller
Users can use the preconfigured buttons to control the aircraft and the camera and can also assign functions to the customizable buttons through the DJI Pilot app. There are three types of button: 1. Preconfigured buttons for aircraft control, e.g. the Pause Button, RTH Button, etc. - Page 39 2. Next, press and hold the Power button to power on the remote controller. 3. Repeat step 2 to power off the remote controller after you finish using it. © 2019 DJI All Rights Reserved.
- Page 40 Left Right Turn Left Turn Right The Stick Mode is set to Mode 2 by default. Stick Neutral/Mid-Point: Control sticks are centered. Moving the Control Stick: Control sticks are pushed away from the center. © 2019 DJI All Rights Reserved.
- Page 41 Toggle the switch to select the desired flight mode. Choose between; P-mode, S-mode, and A- mode. Position Figure Flight Mode Position 1 Position 1 P-mode Position 2 Position 2 S-mode Position 3 Position 3 A-mode © 2019 DJI All Rights Reserved.
- Page 42 The Flight Mode Switch is locked to P-mode, regardless of the Flight Mode Switch's position. To change flight modes, go to the Camera View in DJI Pilot and enable Multiple Flight Modes in Main Controller Settings. After enabling multiple flight modes, toggle the switch to P for Position mode and S for Sport Mode.
- Page 43 4. ISO Setting Press ISO Setting Button and rotate the Camera Setting Dial at the same time to set the ISO value. 5. Focus Adjustment Rotate Focus Adjustment Knob to set the focal length. © 2019 DJI All Rights Reserved.
-
Page 44: Linking The Remote Controller
3. Enter the Camera View > , and tap the Linking Remote Controller button. 4. The DJI Pilot app will display a countdown box, the remote controller will be ready to link, with its display showing Connecting and a beeping sound being emitted. -
Page 45: Mounting The Control Stick Covers
The two Control Stick Covers are not the same, and neither are the two rings around the sticks. The left and right Control Stick Covers and rings can be distinguished using the figures below. Be sure to install each Control Stick Cover on the correct side. © 2019 DJI All Rights Reserved. - Page 46 Gimbal and Camera This section focuses on the technical specifications of the camera and explains how to use the gimbal.
-
Page 47: Gimbal And Camera
Use the Shutter and Record buttons on the remote controller to shoot photos or videos. For more information on how to use these buttons, please refer to Controlling the Camera. DJI Pilot Use DJI Pilot to shoot photos or videos. For more information, refer to the camera and gimbal User Manual. ©... -
Page 48: Gimbal
+ 320° Using the DJI Pilot App to Control Gimbal Follow the steps below to use the DJI Pilot app to control gimbal orientation: 1. Launch DJI Pilot and enter the Camera View. 2. Tap and press on the screen until a blue circle is shown. - Page 49 MATRICE 200 SERIES V2 User Manual Gimbal Operation Modes Three gimbal operation modes are available. Switch between the different operation modes in DJI Pilot's Camera View. Note that your mobile device must be connected to the remote controller for changes to take effect. Refer to the table below for details:...
- Page 50 DJI Pilot App This section introduces the main functions of the DJI Pilot app.
-
Page 51: Dji Pilot App
DJI Pilot App The DJI Pilot app is specifically developed for enterprise users. Manual flight integrates a variety of professional features that make flying simple and intuitive. Mission flight supports flight planning, and allows you to control the drone automatically, making your workflow much simpler and more efficient. - Page 52 : This icon shows the strength of the remote controller signal. The icon will blink when an interference is recognized during flight. When there are no additional warnings in DJI Pilot, it means that the interference will not affect operation and overall flight experience.
- Page 53 Only available in MF mode. Focus can be adjusted manually. 22. Playback : Tap to enter Playback and preview photos and videos as soon as they are captured. 23. Parameter Settings : Tap to set ISO, shutter, exposure values and other parameters. © 2019 DJI All Rights Reserved.
- Page 54 : Tap to switch between Follow mode and Free mode, or to reset the gimbal. 31. Spotlight Pro : Tap to select Quick mode or to disable Spotlight Pro. 32. Back : Tap this icon to return to the main menu. © 2019 DJI All Rights Reserved.
-
Page 55: Mission Flight
: Tap to switch between Standard and Satellite mode. Clear Screen : Tap to clear the flight path currently shown on the map. Parameter List Edit the mission name and configure Route and Waypoints settings in the list. © 2019 DJI All Rights Reserved. - Page 56 Tap the “Start to Fly” button to perform the mission. 13. Edit : If the path is not in edit mode, tap the icon to enter edit mode to edit the mission. 14. Save : Tap to save current settings. © 2019 DJI All Rights Reserved.
-
Page 57: Album
DJI account used has a FlightHub license. DJI FlightHub is a web-based drone management platform that provides users with real-time monitoring, flight logs and data, team management and more. For more information, please visit www.dji.com/flighthub... - Page 58 Flight This section describes safe flight practices and flight restrictions.
-
Page 59: Flight
DJI Pilot app. The locations designated by GEO are called GEO Zones. GEO Zones are specific flight areas that are categorized by flight regulations and restrictions. GEO Zones that prohibit flight are implemented around locations such as airports, power plants, and prisons. -
Page 60: Flight Restrictions
Restricted Zone, please go to https://www.dji.com/flysafe or contact flysafe@dji.com to unlock the zone. DJI GEO Zones aim to ensure the user’s flight safety, but it cannot be guaranteed to be in full compliance with local laws and regulations. Users should check local laws, regulations, and regulatory requirements before each flight and are responsible for the flight safety. - Page 61 GPS signal is strong. For safety reasons, do not fly near airports, highways, railway stations, railway lines, city centers, or other sensitive areas. Only fly aircraft in areas that are within your direct line of sight. © 2019 DJI All Rights Reserved.
- Page 62 Altitude Zone. If it is higher than the altitude limit, the aircraft decelerates and hovers in place. When the GPS signal changes from weak to strong, DJI Pilot app starts a 20-second countdown. Once the countdown is over, the aircraft will descend and hover below the altitude limit.
-
Page 63: Geo Unlocking
7. Ensure that the sensors for the Obstacle Sensing System are clean. Calibrating the Compass Only calibrate the compass when the DJI Pilot app or the status indicator prompts you to do so. Observe the following rules when calibrating your compass: DO NOT calibrate your compass where there is a chance of strong magnetic interference, such as near magnets, parking structures, or steel reinforcements underground. - Page 64 DO NOT calibrate the compass near metal objects such as a metal bridge, cars, scaffolding. If the aircraft status indicators are blinking red and yellow alternately after placing the aircraft on the ground, the compass has detected magnetic interference. Please change your location. © 2019 DJI All Rights Reserved.
-
Page 65: Starting/Stopping The Motors
To stop the motors mid-flight, press the RTH button while simultaneously pulling the left stick to the bottom inner corner. Stop motors mid-flight will cause the aircraft to crash. The motor can only be stopped mid-flight when the flight controller detects critical error. © 2019 DJI All Rights Reserved. -
Page 66: Flight Test
Video Suggestions and Tips 1. Go through the full pre-flight checklist before each flight. 2. Select the desired gimbal operation mode in the DJI Pilot app. 3. Only shoot video when flying in P-mode. 4. Always fly in good weather and avoid flying in rain or heavy wind. - Page 67 The weatherproofing top shell plug is not firmly attached to the top shell. The microSD card slot cover is not firmly attached. The aircraft is broken due to various reasons, such as broken aircraft shell, failure of the waterproof adhesive, etc. © 2019 DJI All Rights Reserved.
- Page 68 Appendix...
-
Page 69: Appendix
M210 RTK V2: 33 min (no payload), 24 min (takeoff weight: 6.14 kg) Motor Model DJI 3515 Propeller Model 1760S Supported DJI Gimbals Zenmuse X4S/X5S/X7/XT/XT2/Z30 Single Downward Gimbal (connected to Gimbal Connector I), Dual Supported Gimbal Configurations Downward Gimbals, Single Upward Gimbal Ingress Protection Rating IP43 © 2019 DJI All Rights Reserved. - Page 70 Video Output Ports USB, HDMI, SDI Power Supply Extended Intelligent Battery (Model: WB37-4920mAh-7.6V) Charging DJI charger or DJI charging hub Output Power (max) 13 W (Without supplying power to monitor) USB Power Supply 5.2 V (max) DJI CrystalSky 7.85inch, Resolution: 2048×1536;...
-
Page 71: Firmware Update
6.9 A Firmware Update Use the DJI Pilot app or the DJI Assistant 2 for Matrice to update the remote controller, aircraft and other connected DJI devices. For the Zenmuse X5S, X4S and X7, the aircraft and gimbal firmware will be updated simultaneously via DJI Assistant 2 for Matrice or the DJI Pilot app. -
Page 72: Using The Zenmuse Xt Gimbal And Camera
The battery level should be above 30% for the firmware update process. When using DJI Pilot to update, you may disconnect the aircraft and the mobile device once the update is more than 30% completed. No Internet connection is required. -
Page 73: Dual Downward Gimbals
Connector I and Gimbal Connector II cannot be mounted with two of the same Zenmuse gimbals. Gimbal Connector I's camera view will show on the main interface in the DJI Pilot app, while Gimbal Connector II's camera view will show on the assistant interface. You can switch between them. -
Page 74: Carrying Box Descriptions
DJI incorporates HDM I technology. The terms HDMI and HDMI High-Definition Multimedia Interface, and the HDMI Logo are trademarks or registered trademarks of HDMI Licensing LLC in the United States and other countries . © 2019 DJI All Rights Reserved. - Page 75 DJI Support https://www.dji.com/support This content is subject to change. Download the latest version from http://www.dji.com/matrice-200-series-v2 If you have any questions about this document, please contact DJI by sending a message to DocSupport@dji.com. Copyright © 2019 DJI All Rights Reserved.
Need help?
Do you have a question about the MATRICE M210 RTK V2 and is the answer not in the manual?
Questions and answers