Table of Contents
Advertisement
Quick Links
Download this manual
See also:
Quick Reference Manual
Advertisement
Table of Contents
Troubleshooting

Subscribe to Our Youtube Channel
Related Manuals for Oki Teriostar LP-1030


Summary of Contents for Oki Teriostar LP-1030
- Page 1 Chapter W i d e Fo r mat Pr i nte r Te r i o s t a r LP-10 3 0 Se r i e s Multifunction Model LP-1030-MF Chapter Printer Model LP-1030 Chapter User's Manual for Basic Printer Operation Chapter U00123003004 Chapter...
- Page 2 U00123003003 April, 2015 U00123003004 December, 2015 Copyright© 2015 OKI Data Infotech Corporation. All rights reserved. The contents of this manual may be changed without prior notice. This product displays fonts created by TypeBank Co., Ltd. and ARPHIC TECHNOLOGY. This equipment has been tested and found to comply with the limits for a Class A digital device, pursuant to Part 15 of the FCC Rules.
- Page 3 Preface Your Printer is a Teriostar LP-1030 Series Wide Format Printer (Referred to as the Printer in this manual), and this manual describes the general handling methods for the Printer, the Printer functions, and the operating methods. They are written on the assumption that the Printer has already been installed.
-
Page 4: Safety Precautions
Safety Precautions In this manual, the following symbols are used to alert the user to information that will prevent damage to the Printer, and ensure its safe and correct use. These symbols are explained below. Make sure that you thoroughly understand the information. - Page 5 Warning Be very careful not to touch the fuser unit labeled HIGH TEMPERATURE inside the Printer. Burn injuries may result. Do not disassemble or modify the Printer. An accident or malfunction may result. Do not heat a toner cartridge or a waste toner bottle containing waste toner, nor place it into a flame.
- Page 6 Be sure to remove the dust on the power plug and the socket. Do not use a dusty plug as a current leak due to humidity on its surface may heat the plug and result in fire. Do not fix, twist, bind, modify, stretch, or bend excessively the power cord. Do not put heavy object on it.
- Page 7 If you use a power strip, change it for a new one at least once a year. Do not use an extension cable or an adapter plug. Once a month, turn the power switch off and inspect the followings. Contact your service representative if you detect any problem.
-
Page 8: Warning Labels
Warning Labels Warning labels are affixed to the Printer in the locations shown in the figure below. Make sure you understand the information on the warning labels before handling the Printer. (1) HIGH TEMPERATURE caution label (1) HIGH TEMPERATURE (2) Instruction label to remove jams caution label (1) HIGH TEMPERATURE caution label... - Page 9 (1) HIGH TEMPERATURE caution label, affixed inside, seen when the fuser unit door is opened. This label warns against touching heated parts. The fuser unit becomes very hot. Be careful not to touch this area inside the Printer, while the cover is opened, e.g., to remove a paper jam. 取扱説明書を参照...
-
Page 10: Reading The Manual
Reading the Manual ‹ Manual Structure This manual is comprised of 4 chapters and an appendix. Chapter 1 describes information such as the printer features and part names. These should be known before starting operations. First, read Chapter 1 to understand the basic information about the Printer. -
Page 11: Notations
‹ Notations „ Indicators Warning Describes information equivalent to a Warning in a safety precaution. ‹ Caution Describes information equivalent to a Caution in a safety precaution. ‹ Note Describes the information to be noted on handling the Printer. ‹ The Tip indicator. -
Page 12: Supplied Items At Printer Installation
Supplied Items at Printer Installation The Printer components and options are shown in the tables below. If any parts are missing or damaged, contact the store of purchase or your nearest service representative. Printer Components Quantity Notes Printer Toner cartridge For installation check Waste toner bottle Installed in the Printer... -
Page 13: Consumables
Consumables Product Name Part No. Quantity Notes Toner Cartridge LP-761 Waste Toner Bottle LP-850 Process Cartridge LP-852 Charger Unit LP-860 Paper Flange LP-871 „ Options Printer Components Part No. Quantity Notes Carrier Sheet Set LP-819 For protecting original documents Color Scan Upgrade LP-857 For color scan Bucket (W) - Page 14 LP-819 Carrier Sheet Set LP-857 Color Scan Upgrade LP-874 TerioStation PDF Print LP-853 Output Tray LP-862 STACKER STD LP-859 Bucket (W) LP-863 Catch Basket LP-1030/LP-1030-MF User's Manual for Basic Printer Operation...
-
Page 15: Table Of Contents
Table of Contents Preface Safety Precautions ..................4 Warning Labels ....................8 Reading the Manual ..................10 Manual Structure ......................... 10 Notations ...........................11 D-SCAN format........................11 Supplied Items at Printer Installation .............12 Consumables ....................13 Chapter Before Use Features ......................22 Operation Requirements ................24 Environment Requirements ..................24 Ensure Good Ventilation ....................25 Installation/Maintenance Space .................26 Supported paper .........................27... - Page 16 Chapter Basic Operations Turning the Power On/Off ................ 40 Powering On........................... 41 Powering Off .......................... 43 Replacing the Roll Paper ................44 Replacement Precautions ....................45 Removing the Roll Paper ....................46 Installing the Roll Paper ....................47 Replacing the Toner Cartridge..............50 Handling Precautions ......................
- Page 17 Chapter Menu Functions Menu Mode Screen ..................82 Confirming Printer Restart .....................83 Paper Menu ....................84 Rolls 1 and 2 Paper Types ....................84 Rolls 1 and 2 Standards ....................84 Printer Engine Menu ...................86 Power Save Time ........................86 Top Cut Timer (Roll 1-2) ....................86 Top Cut at Door Open ......................87 Print Density ...........................88 Humidity for Tracing Paper ....................88...
- Page 18 Submission Destination Setting Menu ..........143 Function Menu ...................147 Print System Settings .......................147 Print Print Settings......................147 Print Copy Settings ...................147 Print Submission Settings ................147 Print All Settings ........................ 148 Print for Fax Transmission..................... 148 Date and Time Setting ....................148 Print Error Log ........................148 Print Engine Information ....................
- Page 19 Chapter Authentication Function Authentication Function Overview ............154 Printer Administration ................156 User Administrators and Standard Users .............156 Registering a Supervisor....................159 Registering User Administrators ................160 Enabling Printer Administration................162 Administrator Login ......................164 User Authentication ..................165 Operation Guide for User Authentication ............165 Printer Setting Procedure to Enable User Authentication Operation 168 Procedure for User Authentication Operation..........
- Page 20 Chapter Troubleshooting Initial Checks ..................... 186 When the Error Screen Appears .............187 Paper Jam ..........................187 Door is Open ........................196 Error Log Reference ..................197 Procedure to Check the Error Log ................197 Error Log List .........................197 Ethernet Troubleshooting ..............208 Image Quality Defects ................210 Unusual Sound ...................211 When you have set the wrong language ..........212 Appendix...
-
Page 21: Chapter Before Use
Chapter Chapter Chapter Before Use Chapter Chapter 1 describes the information required for using the Printer. Be sure to understand the basic information described in this chapter before moving to the next chapters. Chapter Chapter Contents Features ....................22 Operation Requirements ..............24 Part Names and Functions ..............30 Chapter Mode Screen ....................37... -
Page 22: Features
Features Chapter This manual explains the operation for LP-1030-MF/LP-1030 Wide Format Printer, that is: - A monochrome raster printer with electro photographic technology, to receive and Print the graphic data created on a workstation or personal computer Chapter (referred to as computer in this manual). - A multi function device, that combines the monochrome raster Printer with a contact image scanner. -
Page 23: T Features
Features Chapter The Printer is equipped with a 2-stage roll feed mechanism 2-stage 2-roll feed mechanism, in which two types of roll paper are supported: compatible with - A0 (or 36 inches) Chapter long pages - A1 (or 24 inches) - A2 (or 18 inches) - A3 (or 12 inches) By selecting the roll paper from A0 to A4 depending on... -
Page 24: Operation Requirements
Operation Requirements Chapter This section describes the operation requirements for the Printer. ‹ Environment Requirements Chapter Operate the Printer within the temperature and humidity range shown in the figure below. Chapter ‘ To obtain good image quality, operate the Printer within a temperature range of 20 to 30˚C (68 to 86˚F) and a humidity range of 45 to 60% RH. -
Page 25: Ensure Good Ventilation
Operation Requirements Chapter Do not install in the following locations. ‘ A location exposed to direct sunlight or a bright location, such as next to a window ‘ A location exposed to vibration Chapter ‘ A location exposed to a large amount of dust ‘... -
Page 26: Installation/Maintenance Space
Operation Requirements Chapter ‹ Installation/Maintenance Space Installation and maintenance space shown in the figure below is required for: Chapter - Consumables replacement - Printout handling - Ventilation - Repair operation including parts replacement „ Installation/Maintenance Space Chapter Installation Space Maintenance Space 1200 (47.24) (23.62) (11.81) -
Page 27: Supported Paper
Use the OKI Data Infotech-specified roll paper listed below. Chapter Note If the installed paper is not OKI Data Infotech-specified, the image quality is ‹ not guaranteed and the Printer malfunction may occur. Store the paper carefully, following the instructions below. -
Page 28: Chapter
Operation Requirements Chapter In addition, roll paper with the following widths can be used with this Printer. „ ARCH Series Roll Width Standard Longer Side Shorter Side Chapter 1219.2 mm 914.4 mm E standard size (48 inches) (36 inches) 36 inches (914.4 mm) 914.4 mm 609.6 mm... -
Page 29: Chapter
Operation Requirements Chapter „ 30×42 Series Roll Width Standard Longer Side Shorter Side 30 inches 30×42 size 1066.8 mm 762.0 mm Chapter (762.0 mm) Standard size (42 inches) (30 inches) 15 inches 15×21 size 533.4 mm 381.0 mm (762.0 mm) Standard size (21 inches) (15 inches) -
Page 30: Part Names And Functions
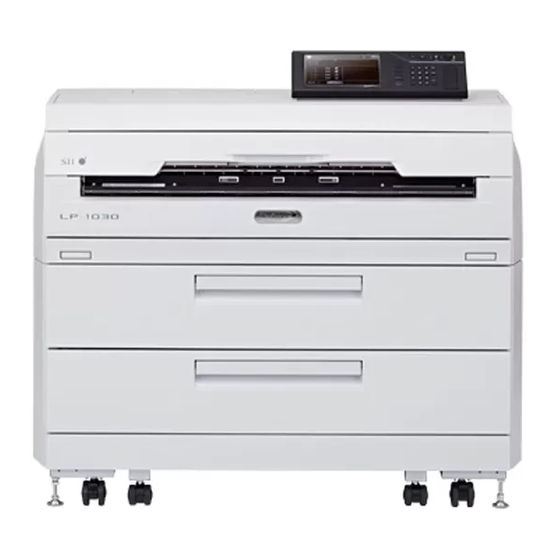
Part Names and Functions Chapter This section describes the Printer's part names, operation information, and functions. ‹ Front Side Chapter Multifunction Model Printer Model (11) Chapter (10) (10) Chapter Chapter (1) Operation panel (6) Waste toner door Contains the following Open when replacing a waste toner bottle. -
Page 31: Left Side And Rear Side
Part Names and Functions Chapter ‹ Left Side and Rear Side Multifunction Model Printer Model Chapter Chapter Chapter Chapter (1) Toner door Open to replace the toner cartridge. ( & page 52) (2) Heater switch ( & page 40) The switch for the heater. (3) Main power switch Turn on or off to supply the power to the Printer. -
Page 32: Inside
Part Names and Functions Chapter ‹ Inside Roll number Chapter Roll 1 Chapter U001XXXXXXXX U001XXXXXXXX Roll 2 Chapter (1) Paper flange ( & page 46) Installs the roll paper. (2) Paper feed knob Feeds the end of the roll paper into the paper Chapter ( &... -
Page 33: Operation Panel
Part Names and Functions Chapter ‹ Operation Panel The layout for the keys, lamps, and touchpanel screen on the operation panel is Chapter shown in the following figures. „ Multifunction Model Chapter Chapter ( & page 37) „ Printer Model Chapter ( &... -
Page 34: Chapter
Part Names and Functions Chapter Changes the mode. COPY button Changes to copy mode, and the green lamp next to the button Chapter lights up. For more details, see the separate User's Manual for Multifunction Printer Operation. SUBMIT button Changes to submission mode, and the green lamp next to the button lights up. -
Page 35: Chapter
Part Names and Functions Chapter Resets the settings, stops a printing in progress, and changes to power save mode. STOP button Chapter Press this button to stop printing in progress. RESET button In copy mode or submission mode, press this button to reset the settings and return to the initial mode. -
Page 36: Chapter
Chapter Starts scanning the original or stops scanning in progress. STOP FEED button Stops the scanning of the original. Chapter START button Starts the scanning of the original. Chapter Chapter Chapter LP-1030/LP-1030-MF User's Manual for Basic Printer Operation... -
Page 37: Mode Screen
Mode Screen Chapter Print Mode Screen Copy Mode Screen Displays the size, type and the Performs copy operations. Chapter current level of paper. For more details, see the separate User's Manual for Multifunction Printer Operation. Chapter Submission Mode Screen Chapter Submits image data scanned with the Printer to a shared folder of a computer connected to the... - Page 38 PDL Setting Port 1_HP-GL Paper Parameters Paper Supply Mode Centering Output tray Chapter (& page 111) Sets the printing Page Size Paper Type Print from End parameters and Print Copies Excess Size Tolerance Port 10_HP-GL similar items. Size of Automatically Supplied Paper (&...
- Page 39 Chapter Chapter Chapter Basic Operations Chapter Chapter 2 describes the basic operations for the Printer. These include turning the power on and off, replacing the paper, and replacing the toner cartridge. Chapter Contents Chapter Turning the Power On/Off ..............40 Replacing the Roll Paper ..............44 Replacing the Toner Cartridge .............50 Replacing the Waste Toner Bottle ............56 Chapter...
-
Page 40: Turning The Power On/Off
Turning the Power On/Off Chapter The Printer has two power switches. The main power switch is on the bottom right when viewed from behind the Printer, and the POWER button is on the operation panel. Normally, keep the main power switch on, and turn the Printer's power on or off by Chapter pressing POWER on the operation panel. -
Page 41: Powering On
Turning the Power On/Off Chapter ‹ Powering On Turn on the main power switch on the Main power switch bottom right when viewed from behind the Printer. Chapter Press the main power switch to the | side (upper side). Chapter Set the heater switch to On if the Heater switch Chapter... - Page 42 Turning the Power On/Off Chapter The first time the power is turned on after purchasing the Printer, the following settings must be configured. - Panel language Chapter - Printer initialization - Date and time settings - IP address setting of the Printer Chapter If these items have already been set, the following display appears.
-
Page 43: Powering Off
Turning the Power On/Off Chapter ‹ Powering Off Before turning off the power, make sure that the Printer is ready to receive data Chapter (standby screen is displayed). Hold down POWER on the Printer's panel for about 1 second. When Shutting Down is displayed, Chapter release the button. -
Page 44: Replacing The Roll Paper
Replacing the Roll Paper Chapter This section describes the removal and installation procedures at the roll paper replacement. When the roll paper is running out, the roll paper icon on the screen changes as Chapter follows. Chapter Chapter Once the icon has changed, the Printer can issue approximately 50 m (1968.50 inches) of printout. -
Page 45: Replacement Precautions
Replacing the Roll Paper Chapter ‘ When the prompt message to supply paper appears, press Alternative Printing to print with: - a paper size bigger than the requested paper; or - a paper type different from the requested paper. However, Alternative Print is not effective when: Chapter - On the print mode, Paper Supply Mode is set to Roll 1, Roll 2, Roll 3, or Roll4;... -
Page 46: Removing The Roll Paper
Replacing the Roll Paper Chapter Note Use the OKI Data Infotech-specified roll paper. If your paper is not OKI Data ‹ Infotech-specified, the image quality is not guaranteed. Store paper in a cool, dark, and dry place ‹ Chapter ‘ The drawer for roll 2 is also open when you open the drawer for roll 1. -
Page 47: Installing The Roll Paper
Replacing the Roll Paper Chapter Release the paper flanges, and remove the roll paper. Loosen the paper flange knobs by turning them in the OPEN direction. Remove the paper flanges Chapter on both sides. Knob Note To prevent the paper flange ends from being misaligned, do not turn the aper ‹... - Page 48 Replacing the Roll Paper Chapter Set the roll paper into the Printer. Hold the roll paper so that the paper end hangs down from the bottom toward the Printer. Slowly insert the paper flange while aligning it with the Chapter groove on the flange guide.
- Page 49 Replacing the Roll Paper Chapter Caution Be careful not to injure yourself on the cutter. ‹ Note Chapter After closing a roll paper drawer, do not open it again until the Warming ‹ up… (Warming-up counter) message disappears. ‘ When you set a roll paper of a different type or series, press Paper on the supply paper error screen.
-
Page 50: Replacing The Toner Cartridge
Replacing the Toner Cartridge Chapter When the toner level is low, the icon below is displayed on the screen. Chapter Chapter After the icon above appeared, about 100 m (3937.01 inches) of printing is possible. However, prepare a new toner cartridge in advance to replace the toner. Chapter When the toner runs out, the screen below is displayed. -
Page 51: Handling Precautions
Replacing the Toner Cartridge Chapter ‹ Handling Precautions Warning Chapter Do not put a used toner cartridge into a flame. It may cause a fire or ‹ burns. Put the used toner cartridge into the bag provided in the box of the ‹... -
Page 52: Toner Replacement Procedure
Replacing the Toner Cartridge Chapter ‹ Toner Replacement Procedure Note Before replacing the toner cartridge, make sure that the power is on and Chapter ‹ Ready is displayed. When the power is off, the toner amount is not detected. As such, even if the toner cartridge is replaced correctly, the error is not canceled. - Page 53 Replacing the Toner Cartridge Chapter Warning Never refill an empty toner cartridge with toner. A malfunction may result. ‹ Chapter Remove the new toner cartridge from its box. Chapter Shake the new toner cartridge to mix the toner inside. Chapter Shake up and down, and left to right, 10 times in each direction.
- Page 54 Replacing the Toner Cartridge Chapter Push in the toner cartridge. Push in the cartridge to the right of the Printer as far as it goes. Chapter Pull off the green tape. Pull off the green tape to the left side while Chapter holding the toner cartridge with your other hand.
- Page 55 Replacing the Toner Cartridge Chapter With your both hands, Close the toner door. The toner mixing takes about 1 minute. Chapter Chapter Chapter ‘ Dispose of the used toner cartridge according to the local regulations. Chapter LP-1030/LP-1030-MF User's Manual for Basic Printer Operation...
-
Page 56: Replacing The Waste Toner Bottle
Replacing the Waste Toner Bottle Chapter When the waste toner bottle is nearly full with waste toner, the icon below is displayed on the screen. Chapter Chapter Chapter After the icon above appeared, about 200 m (7874.02 inches) of printing is possible. However, prepare a new waste toner bottle in advance to replace the bottle. -
Page 57: Replacement Precautions
Replacing the Waste Toner Bottle Chapter ‹ Replacement Precautions Warning Chapter Do not place a waste toner bottle into a flame. An accident or fire ‹ may result. Caution Chapter Do not drop or hit a waste toner bottle that contains waste toner. ‹... - Page 58 Replacing the Waste Toner Bottle Chapter Open the waste toner door. The waste toner door is on the right side of the Printer. Chapter Chapter Chapter Lightly tap the duct to remove any waste toner accumulating inside. Chapter Remove the waste toner bottle from the Printer.
- Page 59 Replacing the Waste Toner Bottle Chapter Remove the cap from the new waste toner bottle and screw it on the waste toner bottle that contains the waste toner. Chapter Note Screw the cap securely. If not, when the ‹ toner bottle is fallen down accidentally, the cap may come away and the toner Chapter may spill.
-
Page 60: Replacing The Charger Unit
Replacing the Charger Unit Chapter The following explains the procedure for replacing the charger unit. ‹ Charger Unit Replacement Procedure Chapter By pressing the POWER button on the operation panel, turn the Printer off. Chapter Put the document table in the vertical position. - Page 61 Replacing the Charger Unit Chapter ‘ Note that the knobs are classified into two: inner-side ones and outerside ones. At the step 3, rotate the outer-side knobs. Inner-side knob Chapter U00120305200 Outer-side knob Pull out the process cartridge to your Chapter side by holding its green-indicated parts.
- Page 62 Replacing the Charger Unit Chapter Pull the green handles to remove the charger unit. Chapter Chapter ‘ Dispose of the used charger unit according to the local regulations. Remove a new charger unit from its Chapter box. Chapter Install the new charger unit by aligning its | mark with the process cartridge’s | mark.
- Page 63 Replacing the Charger Unit Chapter ‘ The charger unit can be installed in either direction. If lines or other defects appear on the printout, inverting the charger unit right and left sides may solve the problem. Chapter Close the process cartridge drawer. Chapter Chapter By rotating the outer-side knobs, fix...
-
Page 64: Replacing The Process Cartridge
Replacing the Process Cartridge Chapter The following explains the procedure for replacing the process cartridge. ‹ Replacement Precautions Chapter Warning Do not place a process cartridge into a flame. An accident or fire ‹ Chapter may result. Note Keep the process cartridge stored in its cardboard box. Unpack the package ‹... -
Page 65: Process Cartridge Replacement Procedure
Replacing the Process Cartridge Chapter ‹ Process Cartridge Replacement Procedure By pressing the POWER button on the operation panel, turn the Printer off. Chapter Put the document table in the vertical position. Chapter Open the fuser unit drawer. Chapter Chapter By rotating the right and left outer-side knobs counterclockwise, release the process cartridge drawer's lock. - Page 66 Replacing the Process Cartridge Chapter Pull out the process cartridge toward you by holding its green-indicated parts. Chapter Chapter Chapter Chapter Remove the process cartridge. Hold the handles on the process cartridge when pulling it out. ‘ To the used process cartridge, attach the protective case removed from a new process cartridge at the step 9.
- Page 67 Replacing the Process Cartridge Chapter Remove a new process cartridge from its box. Remove a new process cartridge from its box with the protective case still attached. Chapter Check that two types of replacement filters are included in the process cartridge box. Large lter Small lter Chapter...
- Page 68 Replacing the Process Cartridge Chapter Rotate the knob at the center to remove it, and then dispose of it. Chapter Chapter Close the process cartridge drawer. Chapter By rotating the outer-side knobs, fix the Chapter process cartridge. LP-1030/LP-1030-MF User's Manual for Basic Printer Operation...
- Page 69 Replacing the Process Cartridge Chapter Replace the small filters installed at both ends of the fuser unit drawer. (1) Turn the knob and remove the cover. (2) Replace the filter inside. Chapter (3) Reinstall the cover. (4) Replace the small filter on the other side following the same procedure.
- Page 70 Replacing the Process Cartridge Chapter Replace the large filter. Pull out the large filter toward you, and remove it. Then install the large filter contained in the process cartridge box. Chapter (1) On the right side of the Printer, pull out the filter cover towards you, and remove it.
-
Page 71: Job Operation
Job Operation Chapter The Printer identifies each received data and scanned data as a job, which means they are the equivalent of the files used for data transmission. On the Printer's job operation, a job is equal to a file. However, a drawing is not always equal to a job, as sometimes one job is comprised Chapter of two drawings or more. -
Page 72: Printing Pause And Cancellation
Job Operation Chapter ‹ Printing Pause and Cancellation During continuous printing of multiple jobs, press MENU to temporary pause the Chapter job printing. However, the printing may continue for up to 5 jobs after the menu screen is displayed. Press either of PRINT, COPY, SUBMIT, or SCAN to exit the menu mode and continue printing. -
Page 73: Web Functions
Web Functions Chapter With a Web browser, the following Printer functions are remotely operated from a host computer. To operate these functions, the IP address of the Printer must be set in advance. Also, Cookies and JavaScript must be enabled in the Web browser. For the setting Chapter method, see Help in the host computer's browser (or operating system). -
Page 74: Starting The Web Functions
Web Functions Chapter (8) Image browsing, acquisition, and deletion in the PDtF box Enables the browsing, acquisition and deletion of image data stored in the PDtF box of the Printer. Chapter ‹ Starting the Web Functions Perform the following Printer preparations. Chapter (1) Start up the Printer by turning on the power. -
Page 75: Cleaning The Exterior
Cleaning the Exterior Chapter If the Printer exterior becomes dirty, soak a soft cloth in water or a neutral detergent diluted with water. Wring the cloth thoroughly, and then wipe the Printer. Chapter Warning Never use volatile solvents such as thinner, benzene, or alcohol. ‹... -
Page 76: Using Paper From A New Size Standard
Using Paper from a New Size Standard Chapter This Printer supports the paper of the following size standards. A series ARCH series ANSI series Chapter 30×42 series MAP series DIN series User Defined series Chapter The Printer's factory default setting is A series. Check the size standard currently specified on your Printer in Available Size Standards ( &... - Page 77 Chapter (3) Set the roll Set the ANSI series roll into the roll paper drawer. For the roll paper installation page method, see (4) Set the paper menu Chapter Set Size Standard to ANSI series for the roll paper drawer in which you set the ANSI series roll ( &...
-
Page 78: Using Paper From A User Defined Series
Using Paper from a User Defined Series Chapter The Printer supports the following user defined series rolls. Standard-size printing cannot be performed with user defined series. All printing is actual length printing. Chapter 279.4 mm (11 inches)to Default values: User Defined 0 = 914 mm (35.98 inches) 914.4 mm (36 inches) User Defined 1 = 620 mm (24.41 inches) User Defined 2 = 450 mm (17.72 inches) - Page 79 Chapter (4) Set the roll Set the user defined series roll into the roll paper drawer. For the roll paper setting page method, see (5) Set the paper menu Chapter Set Size Standard to User Defined series for the roll paper drawer in which you set the roll ( &...
-
Page 80: Restricting The Available Rolls
Restricting the Available Rolls Chapter To simplify the Printer operation, you are recommended to restrict the roll paper sizes required for operation. The following explains the procedure when you intend to operate only with the A0 and A1 rolls. Chapter (1) Set the paper size standards Set the roll that you intend to use to On in Paper Size Standards ( &... - Page 81 Chapter Chapter Chapter Menu Functions Chapter This chapter explains the menu functions of the Printer. Chapter Contents Chapter Menu Mode Screen ................82 Paper Menu ....................84 Printer Engine Menu ................86 System Menu ...................89 Chapter Ports Settings Menu ................104 Setup Items in PDL Settings Menu ........... 108 Submission Destination Setting Menu ..........143 Function Menu ..................147 Adjustment Menu .................151...
-
Page 82: Menu Mode Screen
Menu Mode Screen Chapter Press MENU to display the menu screen. (15) Chapter (10) (11) (12) (13) (14) Chapter (1) Printer Information Menu (2) Paper Menu The Printer serial number, firmware ( & page 84) version, and other information are displayed. -
Page 83: Confirming Printer Restart
Chapter ‹ Confirming Printer Restart When setting changes require the printer to restart, the following printer restart confirmation screen appears after the Standby button is pressed and the menu Chapter top screen is exited. Chapter Chapter To continue configuration, press No. When configuration is complete, press Yes to restart printer. -
Page 84: Paper Menu
Paper Menu Chapter In the Paper menu, set the roll paper type and size standard. Note The screen displays the paper size standards to be selected only when they ‹ Chapter are activated in Available Size Standards in the system parameters. ‹... - Page 85 Chapter ARCH series 36 in. (914 mm), 24 in. (609.6 mm), 18 in. (457.2 mm), 12 in. (304.8 mm) ANSI series Chapter 34 in. (863.6 mm), 22 in. (558.8 mm), 17 in. (431.8 mm), 11 in. (279.4 mm) 30x42 series 30 in.
-
Page 86: Printer Engine Menu
Printer Engine Menu Chapter The Printer Engine menu specifies the operation conditions for the Printer engine. ‹ Power Save Time Chapter The parameter specifies the maximum idle time before entering the power save mode. <Parameter by selecting options> : Default value Chapter 15 minutes Enters power save mode if the Printer is not operated for... -
Page 87: Top Cut At Door Open
Printer Engine Menu Chapter <Parameter by selecting options> : Default value Does not cut. 30 minutes Cuts the paper if the printer is not operated for 30 minutes. Chapter 1 hour Cuts the paper if the printer is not operated for 1 hour. 2 hours Cuts the paper if the printer is not operated for 2 hours. -
Page 88: Print Density
Printer Engine Menu Chapter ‹ Print Density Adjusts the print density. Chapter <Parameter by selecting options> : Default value Slightly Low Normal Chapter Slightly High High ‹ Humidity for Tracing Paper Chapter The parameter specifies the print mode for tracing paper. <Parameter by selecting options>... -
Page 89: Communication Parameters
System Menu Chapter After settings are changed in this menu, the Printer restarts ( & page 83) exiting Menu Mode. If there are waiting jobs, only browsing is available. Chapter ‹ Communication Parameters The Printer is equipped with an Ethernet interface that enables the following functions. -
Page 90: T System Menu
System Menu Chapter Subnet Mask Sets the subnet mask of the printer's network. <Parameter by entering numbers> 000.000.000.000 to 255.255.255.255 Default value: Chapter 0.0.0.0 (not set) DNS Server 1 (IPv4/IPv6) DNS Server 2 (IPv4/IPv6) Chapter Sets the DNS server addresses (IPv4/IPv6). The DNS Server 1 is prioritized over the DNS Server 2. - Page 91 System Menu Chapter Connection Type Sets the communication method. <Parameter by selecting options> : Default value Auto Chapter Full Half HTTP Port Address Sets the HTTP port for the Web function. Chapter <Parameter by entering numbers> 0 to 65535 Default value: 80 SNMP Sets the SNMP operation.
- Page 92 System Menu Chapter IPv6 Connection Sets whether to use IPv6 connection. <Parameter by selecting options> : Default value IPv6 is not used. Set this parameter to Off when using Chapter only IPv4 connection. IPv6 is used. IPv6 Address Manual Setting Sets whether to set manually the IPv6 address on the Printer.
- Page 93 System Menu Chapter DHCPv6 Set the options when the Printer is installed in an environment with automatic IPv6 address distribution from the DHCP server. <Parameter by selecting options> : Default value Chapter The IPv6 address is obtained automatically using RA (router advertisement).
- Page 94 System Menu Chapter Subnet Mask 01 to 10 Sets the subnet mask of the routing destination network. <Parameter by entering numbers> 000.000.000.000 to 255.255.255.255 Default value: Chapter 000.000.000.000 (not set) This parameter is not applicable when default routing is set. This parameter is applicable when the destination network is set in the network addresses of the routing table.
- Page 95 System Menu Chapter <Parameter by entering numbers> 000.000.000.000 to 255.255.255.255 Default value: 000.000.000.000 The default value indicates that no IP address is registered, which is the same Chapter as the trap Off. Error Specifies a trap to be sent at an error related to the engine. However, the error does not include the technical call errors.
- Page 96 System Menu Chapter Port Enabled when On by Port is selected in operation TRAP ** job. The setting can also be enabled. After printing is completed, a trap is sent to the TRAP Agent Computer for all jobs sent to the Printer port that is specified here. Chapter <Parameter by selecting options>...
- Page 97 System Menu Chapter TWAIN Connection Timeout Sets the timeout period if the response from the driver stops during TWAIN driver connection. When the set time elapses, the TWAIN mode is exited. <Parameter by selecting options> : Default value Chapter 30 minutes Performs timeout after 30 minutes.
-
Page 98: Available Size Standards
System Menu Chapter ‹ Available Size Standards Specifies the paper size standard for the Printer. Chapter „ Various Paper Series Specifies the paper size standard from the following. A series, ARCH series, ANSI series, 30×42 series, MAP series, DIN series, User Defined series Chapter A series Rolls... -
Page 99: Paper Size Standards
System Menu Chapter ‹ Paper Size Standards Sets the roll sizes for each size standard used in the Printer. Chapter „ Various Paper Sizes for the Paper Series Specifies the paper sizes and the paper size standards below to be used. A series, ARCH series, ANSI series, 30×42 series, MAP series, DIN series, User Defined series Chapter... -
Page 100: User Defined Size
System Menu Chapter ‹ User Defined Size Sets the roll sizes for the paper series used in the Printer. Chapter User Defined 1 User Defined 2 User Defined 3 User Defined 4 Chapter <Parameter by selecting numbers> 279.4 mm (11 inches) to Default value: User Defined 1 = 914 mm (35.98 inches) 914.4 mm (36 inches) -
Page 101: Printer Settings
System Menu Chapter ‹ Printer Settings Sets the roll sizes for the paper series used in the Printer. Chapter Common Setting Mode Transition Time Sets the time until standby mode is entered if no buttons are operated. <Parameter by selecting options> : Default value Chapter 30 seconds... - Page 102 System Menu Chapter Save/Delete Complete Job The parameter specifies if completed jobs should be saved or deleted. Select Save when you intend to reprint the completed job with the Web functions. <Parameter by selecting options> : Default value Chapter Delete Delete completed jobs.
- Page 103 System Menu Chapter Job box retention period Specifies the number of days jobs are stored in the submission box. Jobs are automatically deleted when the specified period expires. <Parameter by selecting numbers> Chapter 3 to 10 Default value: 3 days Unit: day Time to Start Scanning Specifies the time from feeding original document to starting scanning.
-
Page 104: Ports Settings Menu
Ports Settings Menu Chapter In the ports setting menu, set the communication protocol and the PDL used for each port. The Printer is equipped as standard with an Ethernet interface connector through which 10 logical ports can be used. Chapter The settings for the protocol of each port are set in this menu. -
Page 105: Port 1 To 10
Ports Settings Menu Chapter <Parameter by selecting options> : Default value Connection Timeout is not enabled. 5 minutes Sets 5 minutes. 10 minutes Sets 10 minutes. Chapter 15 minutes Sets 15 minutes. 30 minutes Sets 30 minutes. Chapter ‹ Port 1 to 10 Protocol selection Select used Internet ports and protocols. - Page 106 Ports Settings Menu Chapter TIFF <Parameter by selecting options> : Default value The port does not accept TIFF format command. The port accepts TIFF format command. Chapter CALS <Parameter by selecting options> : Default value The port does not accept CALS format command. Chapter The port accepts CALS format command.
- Page 107 Ports Settings Menu Chapter FTP password Sets the FTP Password (text). <Parameter by entering characters> 3 to 15 characters Default value: FTPxx xx: Port number Chapter The available characters are A to Z, 0 to 9, - (hyphen), and _ (underscore). Case is not distinguished.
-
Page 108: Setup Items In Pdl Settings Menu
Chapter The data formats shown in the following table can be used with this Printer. Panel Display Data Formats This is OKI Data Infotech's original D-SCAN format. D-SCAN raster D-SCAN Chapter data is also supported. This data format is compatible with HP-GL, HP-GL/2, and HP RTL HP-GL from HP. -
Page 109: Setting Parameter Table In Pdl Setting Menu
Setup Items in PDL Settings Menu Chapter - Format Parameters (only with HP-GL and D-SCAN) - Pen Parameters (only with HP-GL and D-SCAN) - Raster Parameters The PDL Setting menu is browsed or changed even during printing. However, any Chapter changed parameters are valid only from the job received after the change. -
Page 110: Pdl Parameter Priority Mode
Setup Items in PDL Settings Menu Chapter ‹ PDL Parameter Priority Mode In the HP-GL PDL and D-SCAN PDL, by setting a priority mode for the setup parameters with Data Setting/Panel Setting, the following is activated: Chapter - The setup parameters selected with the data; or - The setup parameters selected on the Printer Note that some parameters selected on the Printer is activated even at the data setting priority mode, when the parameters are not selected with the data. -
Page 111: Paper Parameters
Setup Items in PDL Settings Menu Chapter ‹ Paper Parameters Size of Automatically Supplied Paper (only with HP-GL, TIFF, and CALS) Sets the size standard of the supplied paper when the Paper Supply Mode is set to Chapter Continuous or Optimal. <Parameter by selecting options>... -
Page 112: Page Size
Setup Items in PDL Settings Menu Chapter Page Size The standard sizes supported by the Printer are shown below. A Series Longer Side Shorter Side A0 size 1189.0 mm (46.81 inches) 841.0 mm (33.11 inches) Chapter A1 size 841.0 mm (33.11 inches) 594.5 mm (23.41 inches) A2 size 594.5 mm (23.41 inches) - Page 113 Setup Items in PDL Settings Menu Chapter <Parameter by selecting options> : Default value Same as Original Size The Printer prints at the original size. Standard Size The Printer prints at the standard size. Print as A Series This parameter is valid only with A series paper. The Printer Chapter prints on: - A1 to A4 size paper;...
- Page 114 Setup Items in PDL Settings Menu Chapter Centering O Centering On Chapter printed image printed image Chapter Paper feed direction Cut position Paper feed direction Cut position a: Varies depending on the printed image size. b: Varies depending on the printed image size. Regardless of the printed image size, the image is positioned in the center of the paper.
- Page 115 Setup Items in PDL Settings Menu Chapter Output Tray The parameter specifies the size of the printout to be output on the optional tray. <Parameter by selecting options> : Default value The Printer outputs all paper to the lower output slot. Chapter Output Tray The Printer outputs the A3 or smaller printout to the tray.
-
Page 116: Drawing Parameters
Setup Items in PDL Settings Menu Chapter ‹ Drawing Parameters Drawing parameters specify the print conditions. Chapter Parameter Mode (only with D-SCAN) When a parameter is selected with both data and touchpanel, the parameter mode specifies the parameter priority. <Parameter by selecting options> : Default value Chapter Data Setting... - Page 117 Setup Items in PDL Settings Menu Chapter Same Drawing Size with Same Drawing Size with Top and Bottom Blank = 0 mm Top and Bottom Blank ≠ 0 mm Chapter printed image printed image Chapter Paper feed direction Cut position Paper feed direction Cut position a: Speci ed value...
- Page 118 Setup Items in PDL Settings Menu Chapter Mirror With the parameter, the Printer prints the image reversed, that is, symmetrical around the drawing's center line parallel to the x axis. <Parameter by selecting options> : Default value Chapter Does not perform mirror printing. Performs mirror printing.
-
Page 119: Scale Parameters
Setup Items in PDL Settings Menu Chapter Chapter printed image Error memo Chapter Paper feed direction Cut position Chapter ‹ Scale Parameters Scale parameters specify the scale conditions. Chapter Scale Settings Scale Mode The parameter selects the image scale mode: Manual Scale or Auto Scale. When Manual Scale is selected, the image is scaled according to the x scale, y scale, and standard-size scale settings. - Page 120 Setup Items in PDL Settings Menu Chapter Auto Scale Image Chapter Image Chapter Paper feed direction X Scale (%) Y Scale (%) Chapter The parameters specify the scale values in x and y directions when the Scale Mode is set to Manual Scale. <Parameter by entering numbers>...
- Page 121 Setup Items in PDL Settings Menu Chapter Scale in A Scale in ARCH Scale in ANSI The parameter specifies the auto scaling mode from one standard size image to Chapter another standard size image when the Scale Mode is set to Manual Scale. Note that the setting is disabled at actual size printing and enlarged standard-size printing.
- Page 122 Setup Items in PDL Settings Menu Chapter Scale for A Series Roll Width Scale for ARCH Series Roll Width Scale for ANSI Series Roll Width Scale for User Defined Roll Width Chapter This parameter specifies the auto scaling mode from one roll width to another roll width with actual size printing when the Scale Mode is set to Manual Scale.
- Page 123 Setup Items in PDL Settings Menu Chapter A2 Width The Printer prints the image reduced to A2 roll width size. A3 Width The Printer prints the image reduced to A3 roll width size. Scale for ARCH Series Roll Width Chapter E Width B Width The Printer prints the image enlarged to E roll width size.
- Page 124 Setup Items in PDL Settings Menu Chapter B Width The Printer prints the image with the original size. E Width C Width The Printer prints the image enlarged to E roll width size. D Width The Printer prints the image enlarged to D roll width size. Chapter C Width The Printer prints the image with the original size.
- Page 125 Setup Items in PDL Settings Menu Chapter User Defined 3 User Defined 1 Width The Printer prints the image enlarged to user Width defined 1 roll width size. User Defined 2 Width The Printer prints the image enlarged to user defined 2 roll width size.
-
Page 126: Format Parameters (Only With Hp-Gl And D-Scan)
Setup Items in PDL Settings Menu Chapter ‹ Format Parameters (only with HP-GL and D-SCAN) Format parameters specify the analysis conditions in the HP-GL format and D-SCAN format. Chapter Select this setting to: - Use the LP-1030's printer driver; - Operate without the touchpanel setting; and - Print on a user defined series roll. - Page 127 Setup Items in PDL Settings Menu Chapter User Defined When the Printer operates with the printer driver for LP-1030 installed, select User Defined to print on the user-defined series roll and to prioritize the driver settings over the PDL settings with the operation panel. With this setting, the data output from the driver Chapter automatically selects the user-defined series roll, and is...
- Page 128 Setup Items in PDL Settings Menu Chapter Items affected by the driver settings Yes: The driver setting is disabled and the printer setting is enabled. No: In effect even when the driver is disabled. Setup Items Consequence Chapter Paper tab Print orientation Paper size No *...
- Page 129 Setup Items in PDL Settings Menu Chapter Language (only with HP-GL) With this parameter, the received data is handled as HP-GL or HPGL/2. When Auto is selected, the data is automatically identified. The selection of HP-GL or HP-GL/2 affects the coordinate origin definition. Chapter <Parameter by selecting options>...
- Page 130 Setup Items in PDL Settings Menu Chapter Drawing Size Command (only with HP-GL) The parameter specifies PS, IP, or IW to be applied to the drawing size. If the drawing size of the data is not specified correctly, set this parameter to Off. <Parameter by selecting options>...
- Page 131 Setup Items in PDL Settings Menu Chapter When the paper number is identified as the Paper Position, the paper is supplied as follows. Paper Number Paper Supply Disables the paper number and supplies paper according to the touchpanel's Paper Supply Mode setting. Chapter Supplies paper with identifying the Paper Supply Mode as Roll 1.
-
Page 132: Pen Parameters (Only With Hp-Gl And D-Scan)
Setup Items in PDL Settings Menu Chapter ‹ Pen Parameters (only with HP-GL and D-SCAN) Pen parameters specify the Printer's drawing pen conditions, e.g., thickness (line width), and density. Chapter HP-GL: 00 to 15 D-SCAN: 01 to 32 Pen Settings Pen Parameter Mode Chapter The parameter selects the data setting or touchpanel setting tospecify the pen... - Page 133 Setup Items in PDL Settings Menu Chapter In some cases micro-vectors may be printed clearly only with the parameters below: Line End to Round; and Line Join to Round When the Micro-Vector Rounding is set to On, the micro-vector is processed with the settings below: Chapter Line End to Round;...
- Page 134 Setup Items in PDL Settings Menu Chapter If the density of a thin line is reduced, it may be printed as a dotted line. In the D-SCAN format, 16 gradations are available for printing. Specified Values (%) Gradation Specified Values (%) Gradation 0 to 5 50 to 56...
- Page 135 Setup Items in PDL Settings Menu Chapter Round Mitered Chapter Miter Length The printing may take time when the parameter settings are NOT as follows. Line End to Round; and Line Join to Round The Line Join parameter is not valid for the non-traversable broken lines. Chapter The Line Join parameter is not valid when a line attribute below is changed: - Line color...
-
Page 136: Raster Parameters
Setup Items in PDL Settings Menu Chapter ‹ Raster Parameters Raster parameters specify the condition to draw raster data. Chapter Binary Image Scale Sets the scaling mode when scaling binary image data. <Parameter by selecting options> : Default value Photo Mode Maintains the density when scaling binary image data. -
Page 137: Pdtf (Plotdatatofile) Parameters
Setup Items in PDL Settings Menu Chapter ‹ PDtF (PlotDataToFile) Parameters The PlotDataToFile function converts plot images into TIFF or PDF files when the images are printed with the Printer, and then saves them in the Printer's PDtF box Chapter or a shared folder on a computer. - Page 138 Setup Items in PDL Settings Menu Chapter Example With the following naming rules setting, File naming rule 1: Host name File naming rule 2: User name File naming rule 3: File name Chapter File naming rule 4: Date and time created if print data is created under the file name sample.tif on December 23, 2010, at 12:34:56 p.m.
- Page 139 Setup Items in PDL Settings Menu Chapter File Format Select the file format of images created by PDtF. <Parameter by selecting options> : Default value TIFF Creates a TIFF file. Chapter Creates a PDF file. Format of date and time created This parameter specifies the format of the creation date and time when Date and Chapter Time Created is selected as a naming rule.
-
Page 140: Stamp Setting
Setup Items in PDL Settings Menu Chapter ‹ Stamp setting This function prints information such as the date and user name in any corner of a printout. Chapter Top Left Top Right Drawing Chapter Bottom Left Bottom Right Chapter Stamp Position This parameter specifies the position to print the stamp. - Page 141 Setup Items in PDL Settings Menu Chapter Distance from Paper Edges This parameter specifies distance of the stamp from the paper edges. <Parameter by entering numbers> 1 to 10 Default value = 5, Unit in mm Chapter Characters Height This parameter specifies the height of the stamp characters. <Parameter by entering numbers>...
- Page 142 Setup Items in PDL Settings Menu Chapter Reception Date and Time Format This parameter specifies the format of the reception date and time when Reception Date and Time is selected as a stamped item. In the case the data was received on December 23, 2010, at 12:34:56 p.m., the Chapter reception date and time are displayed as follows.
-
Page 143: Submission Destination Setting Menu
Submission Destination Setting Menu Chapter In the Submission Destination Settings menu, configure the settings so that image files created by PDtF or image submission ( ) are transferred directly to: - a shared folder of a computer; or - a FTP server connected to the network Chapter without being stored in the hard disk drive of the Printer. - Page 144 Submission Destination Setting Menu Chapter Protocol Select the protocol. <Parameter by selecting options> : Default value Submits to a shared folder of a computer. Chapter Submits to a FTP server. Shared server name selection (Server Selection) Configure the connection server name. Chapter <Parameter by selecting options>...
- Page 145 Submission Destination Setting Menu Chapter Submission destination name (Preset Name) Specify the submission destination name. <Parameter by entering characters> 1 to 15 characters Chapter ‘ With Web functions, submission destination names can be registered in multiple languages. Workgroup Chapter Enter the workgroup name. <Parameter by entering characters>...
- Page 146 Submission Destination Setting Menu Chapter FTP Connection Mode Select the connection mode for when FTP connection is selected. <Parameter by selecting options> : Default value Active Chapter Passive FTP Port Configure the FTP port. Generally, the default setting of 21 is acceptable. Chapter <Parameter by selecting numbers>...
-
Page 147: Function Menu
Function Menu Chapter Functions below are executed from the Function menu. Chapter Chapter ‹ Print System Settings Chapter Prints the system settings. ‹ Print Print Settings Chapter Prints the Print settings. ‹ Print Copy Settings Prints the copy function settings. ‹... -
Page 148: Print All Settings
Prints the accounting information based on the customer's maintenance contract Chapter so that the customer can send it to OKI Data Infotech by fax. ‹ Date and Time Setting Sets the date (year, month, and day) and time (hour, minute, and second) for the Chapter Printer. -
Page 149: Print Scanner Information Mf
Function Menu Chapter ‹ Print Scanner Information Prints the scanner information. Chapter ‹ Initialize Port Accounting Information Initializes the accounting information (number of pages printed at each channel/ Chapter port) stored in the printer's nonvolatile memory. ‹ Print Port Accounting Information Chapter Prints the accounting information (number of pages printed at each channel/port) stored in the printer's nonvolatile memory. -
Page 150: Initialize Printer For Use In Us 2
Function Menu Chapter ‹ Initialize Printer for Use in US 2 The Printer is initialized for the operation mainly with ANSI series (34 in., 22 in., 17 in., and 11 in.), suited for a use in the US. Chapter ‹ Initialize Printer for Use in US 3 Chapter The Printer is initialized for the operation mainly with 36 in., 30 in., 24 in. -
Page 151: T Adjustment Menu
Adjustment Menu Chapter Adjusts the touchpanel calibration value and brightness. Touchpanel Calibration When the touchpanel coordinates are misaligned with the LCD's coordinates, the Chapter Printer may not detect the pressed position correctly. In such a case, calibrate the touchpanel coordinates by operating the calibration screen following the instruction on the screen. - Page 152 Chapter Chapter Chapter Chapter Chapter LP-1030/LP-1030-MF User's Manual for Basic Printer Operation...
-
Page 153: Authentication Function
Chapter Chapter Chapter Authentication Function Chapter Chapter 4 describe the authentication function for the Printer. Chapter Contents Chapter Authentication Function Overview ..........154 Printer Administration .................156 User Authentication ................165 Chapter LP-1030/LP-1030-MF User's Manual for Basic Printer Operation... -
Page 154: Authentication Function Overview
Authentication Function Overview Chapter The authentication function of the Printer allows administrators to manage the Printer and its users. „ Printer administration ( & page 156) Chapter The authentication function allows the administrators to administrate the Printer operations such as: - To change the Printer settings;... - Page 155 Overview of the authentication function Chapter Chapter PIN code authentication Enter a PIN code Password authentication Enter a login name and password Chapter „ One-time password authentication ( & page 182) Chapter This is an authentication method for print mode only. Set the one-time password with the printer driver when the Printer prints highly confidential drawings without user authentication.
-
Page 156: Printer Administration
Printer Administration Chapter To manage the Printer, first register an administrator and then enable printer administration. Administrator registration allows the following printer administration operations. - Prevent changes to the Printer settings by unspecified users. Chapter - Prevent access to the Printer logs by unspecified users. - Prevent access or initialization of accounting information by unspecified users. - Page 157 Printer administration Chapter For the printer administration, the supervisor's activities are different from the user administrator's. Besides, user administrators have additional activities depending on the privileges they received. The burden of individual administrators can be lessened by registering multiple supervisors and user administrators. Dividing privileges among multiple user Chapter administrators will also prevent improper operations by individual user administrators.
- Page 158 Printer administration Chapter Operation privileges on the Web Supervisor authentication cannot be performed on the Web. Consequently, supervisors have the same privileges as standard users on the Web. Yes: Can be performed without restrictions, No: Not possible Partially: Access only. Settings cannot be changed. Chapter Printer administration...
-
Page 159: Registering A Supervisor
Printer administration Chapter In the initial condition with printer administration enabled, only user administrators with printer administration privileges can edit: - Submission destinations in submission mode; and - Registration memory in copy/submission mode. However, by changing settings, standard users can also perform editing. Chapter ( &... -
Page 160: Registering User Administrators
Printer administration Chapter Enter the login name and password of the supervisor to be registered, and then press OK. Chapter Chapter Note Do not forget the login name and password of the supervisor. ‹ Chapter Do not share the login names and PIN codes for user authentication ‹... - Page 161 Printer administration Chapter Enter a supervisor login name and password and then press Login. After login, the menu top screen is displayed again. Press Administrator Settings. Chapter Press Register User Administrator. Chapter Enter the login name and password of the user administrator to be registered, set the administrator privileges, and then press OK.
-
Page 162: Enabling Printer Administration
Printer administration Chapter ‹ Enabling Printer Administration „ Supervisor or user administrator (with printer administration privileges) Chapter Press MENU. Press Administrator Settings. Chapter Press Printer Administration Settings. Chapter Chapter Press On for Printer Administration. Before changing Printer Administration to On, specify the supervisor and printer administrators correctly . - Page 163 Printer administration Chapter However, by changing settings, standard users can also perform editing. Chapter Changing settings requires supervisor privileges or user administrator printer Chapter administration privileges. „ Enabling remote maintenance When requested to do so by our maintenance staff, set the remote maintenance function setting to On.
-
Page 164: Administrator Login
Printer administration Chapter ‹ Administrator Login Press MENU. Chapter Press Administrator Login. The screen on the left is shown when Printer Administration is set to Yes. Chapter Enter a supervisor or user administrator login name and password and then press Login. If the Printer display returns to the standby screen Chapter after logging in, the user is logged out. -
Page 165: User Authentication
User Authentication Chapter ‹ Operation Guide for User Authentication Chapter User authentication enables the following operations. „ Only authorized users can use the printer. Individual users of the Printer are issued a unique authentication code (a PIN code or login name and password). When the user operates the Printer, the Chapter authentication code is required to identificate the user. - Page 166 User authentication Chapter „ Set usage restrictions for each user The use of copy, submission, scan, and print modes can be set for each user. For example, design department users are allowed to all modes while restricting accounting department users to copy and print modes. Chapter „...
- Page 167 User authentication Chapter „ During print authentication, authenticate using a computer name or host login user name In the print mode with user authentication, generally, the Printer is operated with your allotted authentication code specified with the printer driver. For print mode authentication, besides authenticated by the printer driver, a user is Chapter authenticated with a computer name or host login user name.
-
Page 168: Printer Setting Procedure To Enable User Authentication Operation
User authentication Chapter ‹ Printer Setting Procedure to Enable User Authentication Operation Register a user ( & page 171) Chapter Register in the Printer a user that can use the Printer. The following three methods are used to register users. Operation panel Convenient when registering a small number of users. - Page 169 User authentication Chapter Enter your assigned authentication code on the operation panel. The screen of the desired mode appears. Perform copy, submission, or scanning operations. Chapter Press Log out. The standby screen appears. „ For print mode ( & page 179) Chapter When printing from the printer driver, set your authentication code to the printer driver sheet.
- Page 170 User authentication Chapter Enter your assigned authentication code on the operation panel. The authenticated printing screen appears. On the authenticated printing screen, select the print data to be Chapter printed and press Print. The selected print data is printed. Chapter Chapter Press Log Out.
-
Page 171: Registering A User
User authentication Chapter ‹ Registering a User The following three methods are used to register users. - Registration from the operation panel Chapter - Registration from a Web browser - Registration from dedicated software The following describes user registration from the operation panel. When operating with the Web function, register users on the Maintenance function User Registration screen with the same method as the operation panel method. - Page 172 User authentication Chapter Press Register and then enter user registration information on the following screens. Press OK. Chapter Chapter User Name 1 to 63 characters (required) PIN Code 4 to 63 alphanumeric characters (required) Chapter Login Name 4 to 63 alphanumeric characters (required) Password 0 to 31 alphanumeric characters...
- Page 173 User authentication Chapter ‘ When a user is involved in multiple projects, to perform accounting for each project, you are recommended to register the project names. Note Chapter When registering users from the operation panel, only alphanumeric ‹ characters can be entered. To enter the other characters, register users from a Web browser or dedicated software.
-
Page 174: User Authentication Setting Procedure
User authentication Chapter ‹ User Authentication Setting Procedure Press MENU. Chapter Press User Authentication Settings. Chapter Press Authentication Administrator Settings. Chapter Set Authentication mode to: PIN Code Authentication; or Password Authentication Chapter Activate user authentication function at each of copy, submission, scan, and print modes with On. - Page 175 User authentication Chapter ‘ When Login Name in Job Log is set to Yes, the login name or PIN code specified in TerioStation or the printer driver is registered in the job log. Job logs can be output as excel files using the WEB tool. ‘...
-
Page 176: Computers)
User authentication Chapter ‹ No Authentication Print Job Setting (Authentication from Specified Computers) When authenticated in print mode, with this setting the Printer prints the print jobs sent from specified host computers without user authentication. Chapter Press MENU. Press User Authentication Settings. Chapter Chapter Press No Auth. -
Page 177: No Authentication Print Job Setting (Authentication By Port)
User authentication Chapter ‹ No Authentication Print Job Setting (Authentication by Port) When authenticated in print mode, with this setting the Printer prints the print jobs sent to specified ports without user authentication. Chapter Press MENU. Press User Authentication Settings. Chapter Chapter Press No Auth. -
Page 178: User Authentication Procedure (Login) And Logout
User authentication Chapter ‹ User Authentication Procedure (Login) and Logout „ Authentication in copy, submission, and scan modes Chapter Press COPY, SUBMIT, or SCAN. Chapter Enter a PIN code or login name and password and then press Log In. Chapter Chapter If a project name is registered in the user information, select a project. - Page 179 User authentication Chapter „ Authentication in print mode When using the printer driver, set the authentication code to the authentication sheet of the printer driver and print. Chapter For details, see the Help section of the printer driver. Even after submission, printing is not performed. Chapter Chapter Press PRINT.
- Page 180 User authentication Chapter Enter a PIN code or login name and password and then press Log In. The sent print job list is displayed in the Confidential documents print screen. Chapter With the box for Print all confidential documents checked, the printer starts printing all documents waiting for the user's authentication as soon as he/she Chapter...
- Page 181 User authentication Chapter „ Authenticating from a Web Browser When you are performing printer administration or user authentication, to access the Printer from a Web browser press Login at the top of the Web browser window before using a function. Chapter Chapter The authentication screen appears.
-
Page 182: One-Time Password Authentication
User authentication Chapter ‹ One-time Password Authentication One-time password authentication is a print mode authentication function. When print function authentication is off, this function allows the Printer to print specified Chapter drawings only with authentication. Print data with one-time password Password entry Print Chapter... - Page 183 User authentication Chapter Note One-time password jobs are automatically deleted when the specified Print ‹ job authentication time ( & page 174) elapses. The file names of one-time password jobs are not displayed on the print job ‹ screen. Furthermore, they are not saved in completed jobs in the Printer and Chapter cannot be reprinted.
- Page 184 User authentication Chapter „ Operation procedure with the Printer. Press PRINT. Chapter Chapter Press Authenticated Printing. Chapter Enter the one-time password. With the box for Print all confidential documents checked, the printer starts printing all documents waiting for the Chapter user's authentication as soon as he/she logs in.
-
Page 185: Troubleshooting
Chapter Chapter Chapter Troubleshooting Chapter This chapter describes the action to take should a Printer problem occur. If the problem persists after taking the appropriate action, contact your dealer or nearest service representative. Chapter Chapter Contents Initial Checks ..................186 When the Error Screen Appears ............187 Chapter Error Log Reference ................197... -
Page 186: Initial Checks
Paper jams occur Paper type Check that the set paper matches frequently. the paper type setting. Use the OKI Data Infotech-specified paper. & page 27 Paper setting condition Set correctly. & page 44 Obstructions in the paper path Remove the obstructions. -
Page 187: When The Error Screen Appears
When the Error Screen Appears Chapter When an error lamp lights up, press the mode button with its green LED lighted, and check the error message displayed on the screen. ( & page 187 to 169) Paper is jammed. Chapter ( &... - Page 188 When the Error Screen Appears Chapter „ Removing a Paper Jam from the Fuser Unit Chapter Chapter Put the document table in the vertical position. Chapter Note Chapter Manipulate the document table with care. Rough manipulations may cause ‹ a malfunction. Lift the latch lever, and open the fuser unit drawer.
- Page 189 When the Error Screen Appears Chapter Warning The inside parts of the fuser unit become very hot. Be careful not to touch ‹ these parts as it may cause burn injuries. Note Chapter If you can see jammed paper to the rear of the fuser unit, be sure to pull ‹...
- Page 190 When the Error Screen Appears Chapter Return the document table to its original position. Chapter „ Removing a Paper Jam from Inside the Printer (rear door) Chapter Chapter Chapter Turn the knob to open the rear door. LP-1030/LP-1030-MF User's Manual for Basic Printer Operation...
- Page 191 When the Error Screen Appears Chapter Remove the jammed paper, and then close the rear door. When the rear door is closed, the Printer restarts the print from the page at which the paper jam Chapter occurred. Close the rear door and turn the knobs. Chapter Chapter Chapter...
- Page 192 When the Error Screen Appears Chapter Put the document table in the vertical position. Chapter Note Manipulate the document table with care. Rough manipulations may cause ‹ Chapter a malfunction. Lift the latch lever, and open the fuser unit drawer. Chapter Chapter Turn the knob to open the rear door.
- Page 193 When the Error Screen Appears Chapter Open the roll paper drawer. Chapter Cut the paper. Chapter ロール紙の交換 Replacing Roll Paper 用紙カッ ト位置 Paper Cut Position Chapter Remove the roll paper. Chapter Close the rear door and turn the knobs. LP-1030/LP-1030-MF User's Manual for Basic Printer Operation...
- Page 194 When the Error Screen Appears Chapter Close the fuser unit drawer. Chapter Return the document table to its Chapter original position. Chapter „ Original Jam When an original jam occurs, the following messages appear on the screen. Chapter Open the scanner cover. LP-1030/LP-1030-MF User's Manual for Basic Printer Operation...
- Page 195 When the Error Screen Appears Chapter Support the scanner cover with the Stopper stopper. Slide the stopper to the right. Chapter Remove the jammed original. Chapter Chapter Release the stopper. Slide the stopper to the left. Chapter Close the scanner cover. Be closing the scanner cover, then the Printer becomes ready.
-
Page 196: Door Is Open
When the Error Screen Appears Chapter ‹ Door is Open The following messages are displayed on the screen when a door or drawer is open. Chapter Following the message, close the indicated door or drawer. Chapter Chapter Chapter LP-1030/LP-1030-MF User's Manual for Basic Printer Operation... -
Page 197: Error Log Reference
Error Log Reference Chapter On the problems below, solve the problems by checking the Printer's error log. - Error memo is printed. - The Printer cannot communicate with the computer. - Otherwise, the Printer operation is not stable. Chapter ‹ Procedure to Check the Error Log You can check the error logs with the procedure below. - Page 198 Error Log Reference Chapter (1) (2) Message Meaning Action 2C00 Battery run out warning Replace the battery. Contact your nearest service representative. 8401 NBT name registration denied Restart the Printer. 8402 NBT name registration failed 8403 NBT session connection failed Chapter 8404 SMB negotiation failed...
- Page 199 Error Log Reference Chapter (1) (2) Message Meaning Action 1034 Initialize PM Module start error (PM task) Restart the Printer. 1035 Initialize JOB Module start error (job task) 1036 Initialize NETD Module start error (network task) 1037 Initialize SPL Module start error (spool task) 1038 Initialize OUTMAIN Module start error (output main task)
- Page 200 Error Log Reference Chapter (1) (2) Message Meaning Action 4200 Receive select error for MYKselect returned an error when receiving a Restart the Printer. jobCreate message jobcreate 4201 Receive select error for MYKselect returned an error when receiving a jobGetInfo message jobgetinfo 4202 Receive select error for...
- Page 201 Error Log Reference Chapter (1) (2) Message Meaning Action LN 8000 PPP parameter xx Invalid protocol data sent from the host Check the status of the data PPP: Protocol name (FTP/LPD/XPT) transmission host and the xx: Internal code applications. LN 8001 XPT same port number XPT port number duplication Correct the Printer's XPT settings.
- Page 202 Error Log Reference Chapter (1) (2) Message Meaning Action LN 8130 PPP connection timeout xx Communication timeout (TCP level) Check the status of the data (Communication with the host broke during transmission host and the data transmission) connection cables. PPP: Protocol name (FTP/LPD/XPT) xx: Internal code LN 8140 PPP accept(nnnn) xx...
- Page 203 Error Log Reference Chapter (1) (2) Message Meaning Action LN 8270 PPP listen(nnnn) xx Communication connection related: listen error Check the status of the data PPP: Protocol name (FTP/LPD/XPT) transmission host and the nnnn: Supported character string connection cables. xx: Internal code LN 8280 PPP connect(nnnn) xx Communication connection related: connect...
- Page 204 Error Log Reference Chapter (1) (2) Message Meaning Action ML 8738 server protocol Check DATA SMTP server protocol error (DATA permission and Check the settings of the SMTP data sending process) server, and the status, settings, & data connection of the SMTP server. ML 8739 server protocol Check data SMTP server protocol error (end of data sending...
- Page 205 Error Log Reference Chapter (1) (2) Message Meaning Action OM 4750 Receive message error from MYKrcvInterface returned an error when Restart the Printer. receiving a message from a TWAIN task TWAIN OM 4800 Send message error MYKsndInterface returned an error when sending a message OP EF00 Job ID mismatch...
- Page 206 Error Log Reference Chapter (1) (2) Message Meaning Action PD A600 RASTER_DECODE_ERR An error exists in the format of the compression Check on the computer side raster data. for an error in the format of the compression raster data. PD A601 RASTER_FORMAT_ERR No raster data of the size specified in the data.
- Page 207 Error Log Reference Chapter (1) (2) Message Meaning Action A100 Cannot Determine Data Format automatic identification failed Check the print data. Fomat A110 No PDL Choice(Port %d) Not even 1 valid PDL at port %d Change the Printer's port settings, and restart the Printer.
-
Page 208: Ethernet Troubleshooting
Ethernet Troubleshooting Chapter „ When communication is not possible Cause Check Action The power is not on. Is the power switch turned on? Turn on the power switch. Chapter Is the power cord connected Connect the power cord correctly. correctly? The LAN cable is not Is the cable connected correctly to the Connect fully and correctly. - Page 209 Ethernet Troubleshooting Chapter Cause Check Action The protocol (XPT, FTP, Are the settings on the device side Enable the settings of the used and LPR) is not set. of the used protocols (XPT, FTP, LPR) protocols. enabled? The lpr printer name is Do the printer names on the host side Set the correct printer name.
-
Page 210: Image Quality Defects
Cut off the top of the roll paper installed in the Printer. & page 44 & page 40 Set the heater to On. The installed paper is not OKI Data Install the OKI Data Infotech-specified Infotech-specified. paper. & page 27... -
Page 211: Unusual Sound
Unusual Sound Chapter If the Printer issues an unusual sound, contact your dealer or nearest service representative. Chapter Chapter Chapter Chapter LP-1030/LP-1030-MF User's Manual for Basic Printer Operation... -
Page 212: When You Have Set The Wrong Language
When you have set the wrong language Chapter If you have specified the wrong language setting and you cannot operate the Printer, perform the following solution. Restart the Printer. Chapter The Printer starts normally and the standby screen appears. Press the following buttons consecutively. -
Page 213: Appendix
Chapter Appendix Chapter Chapter The Appendix contains information such as the Printer's basic specifications, components, menu structure, and command lists. Chapter Chapter Contents Basic Specifications ................214 Menu Structure ..................216 Chapter Command Lists ..................231 LP-1030/LP-1030-MF User's Manual for Basic Printer Operation... -
Page 214: Basic Specifications
Basic Specifications Chapter ‹ Printer Specifications (1/2) Chapter Specification/Function Item LP-1030 LP-1030-MF Printing system Electrophotographic technology (LED exposure) Developing system Single-component type dry developing Photoconductor type Chapter Fuser system Heat rollers Resolution 600 dpi A0 (portrait): 3.7 pages/minute A1 (portrait): 5.1 pages/minute Chapter A1 (landscape): 6.8 pages/minute... - Page 215 Basic Specifications Chapter (2/2) Specification/Function Item LP-1030 LP-1030-MF During operation (continuous sound): 61 dB (A) or less Chapter Noise During operation (discontinuous sound): 66 dB (A) or less During standby: 53 dB (A) or less Calorific value 5220 kJ or less 120V AC±10% (U.S.A version) Power voltage 230V AC±10% (European version)
-
Page 216: Menu Structure
Menu Structure Chapter ‘ The menu structure in this section was created based on the Printer's factory default settings. Chapter Chapter Chapter & page 218 & page 217 Chapter & page 223 & page 224 LP-1030/LP-1030-MF User's Manual for Basic Printer Operation... -
Page 217: Printer Engine Menu
Menu Structure Chapter ‹ Printer Engine Menu Printer Engine Power Save Time 15 minutes 30 minutes Chapter 60 minutes 90 minutes 235 minutes Chapter Top Cut Timer (Roll 1-2) 30 minutes 1 hour 2 hours 4 hours Chapter 1 minute 5 minutes 10 minutes Chapter... -
Page 218: System Menu
Menu Structure Chapter ‹ System Menu System : Default value Chapter 000.000.000.000 to Communication Network Settings Common Settings IP Address 255.255.255.255 Parameters 000.000.000.000 to Subnet Mask 255.255.255.255 DNS Server 1 (IPv4/IPv6) 0 to 63 characters DNS Server 2 (IPv4/IPv6) 0 to 63 characters NetBIOS 0 to 15 characters Chapter... - Page 219 Menu Structure Chapter : Default value 000.000.000.000 to Routing Table Gateway Address 01 to 10 255.255.255.255 000.000.000.000 to Network Address 01 to 10 255.255.255.255 000.000.000.000 to Subnet Mask 01 to 10 255.255.255.255 Chapter IPv6 Network 0 to 63 characters Address 01 to 02 Prefix Length 01 to 02 0 to 128 IPv6 Gateway...
- Page 220 Menu Structure Chapter : Default value Paper Size A Series A0 Roll Standard A1 Roll Chapter A2 Roll A3 Roll Chapter ARCH Series 36 in. Roll 24 in. Roll 18 in. Roll Chapter 12 in. Roll ANSI Series 34 in. Roll Chapter 22 in.
- Page 221 Menu Structure Chapter : Default value DIN Series B1 DIN Roll B2 DIN Roll Chapter User Defined A1 User Defined Roll User Defined A2 Roll Chapter User Defined A3 Roll User Defined A4 Roll 279.4 mm (11 inches) to User Defined User Defined 1 914.4 mm (36 inches) Chapter...
- Page 222 Menu Structure Chapter Unit of Length Inch Save/Delete Delete Complete Job Chapter Save Optional Folder Not Enabled Enabled PDtF box retention 1 to 199 (hours) period Chapter Job Display Order Chronological Reverse Chronological Multifunction Settings Start Scanning Original Setting Press START Job box retention period 3 to 10 (days) Chapter...
-
Page 223: Ports Setting Menu
Menu Structure Chapter ‹ Ports Setting Menu Ports Setting Common Settings Connection Timeout 5 minutes Chapter 10 minutes 15 minutes 30 minutes Port 1 to 10 Protocol selection Chapter HP-GL Chapter D-SCAN TIFF Chapter CALS XPT Port 0 to 65535 Printer Name 3 to 15 characters User Name... -
Page 224: Pdl Setting Menu
Menu Structure Chapter ‹ PDL Setting Menu PDL Setting Paper Size of Automatically Port n_HP-GL A Series Chapter Parameters Supplied Paper Port n_D-SCAN ARCH Series Port n_TIFF ANSI Series Port n_CALS 30x42 Series MAP Series Chapter DIN Series User Defined Paper Supply Mode Continuous Optimal... - Page 225 Menu Structure Chapter Drawing Parameter Mode Data Setting Parameters Panel Setting Same Drawing Size with Offset Mode Top and Bottom Blank Chapter Offset with Paper Size Change Offset without Paper Size Change Chapter Same Drawing Size with 0 to 100 (mm) Top and Bottom Blank X Offset -9999.99 to 9999.99 (mm)
- Page 226 Menu Structure Chapter Scale in A A0, A1, A2, A3, A0, A1, A2, A3, A4 A0, A1, A2, A3, A4 Chapter A1, A2, A3, A4 A0, A1, A2, A3, A4 Scale in ARCH E, D, C, B, E, D, C, B, A E, D, C, B, A...
- Page 227 Menu Structure Chapter Scale User Def. Roll User Defined 4 Width User Defined 1 Width Width User Defined 2 Width User Defined 3 Width User Defined 4 Width Chapter User Defined 3 Width User Defined 1 Width User Defined 2 Width User Defined 3 Width User Defined 4 Width Chapter...
- Page 228 Menu Structure Chapter Terminator SP0; Terminator ESC.); Chapter Terminator AF; Terminator AH; Chapter Terminator FR; Drawing Size Command On (PS) On (IP) Chapter On (IW) Drawing Identify by Paper Number Paper Position Chapter Paper Type Pen Parameters Pen Settings Pen Parameter Mode Data Setting Panel Setting Fine Pen-Width...
- Page 229 Menu Structure Chapter Raster Parameters Binary Image Scale Photo Mode Line Art Mode Screening Line Art Mode Graphic Mode Chapter Photo Mode Uniformity effects Standard Better uniformity High uniformity Chapter PlotDataToFile PlotDataToFile Print + image conversion Image conversion File naming rules 1 Not Specified Date and Time Created Chapter...
- Page 230 Menu Structure Chapter Image submission 1 to 100 destination number File naming rules 4 TIFF Chapter Reception date and YYMMDDhhmmss time format YYYYMMDD YYMMDD hhmmss Chapter Stamp setting Stamp position Bottom Right Bottom Left Top Right Top Left Stamp direction Left to right Chapter Right to left...
-
Page 231: Command Lists
Command Lists Chapter ‹ List of HP-GL and HP-GL/2 Printer Engine Control Commands The meaning of the symbols in the table is as follows. Chapter Yes : Indicates commands supported by the Printer. Partially : Indicates commands whose functions are partially supported by the Printer. No : Indicates commands not supported by the Printer. -
Page 232: List Of Hp-Gl And Hp-Gl/2 Printer Engine Printing Commands
Command Lists Chapter ‹ List of HP-GL and HP-GL/2 Printer Engine Printing Commands The meaning of the symbols in the table is as follows. Yes : Indicates commands supported by the Printer. Chapter Partially : Indicates commands whose functions are partially supported by the Printer. No : Indicates commands not supported by the Printer. - Page 233 Command Lists Chapter (2/3) Category Command Function Supported Painting style setting command Hatch interval setting command Coating pattern reference point setting command Coating pattern definition command Coating Chapter Attributes Partially ( Color overlap control command Transparent mode selection command Hatch Painting pattern definition command Vector Painting style setting command Absolute coordinates rectangle Painting command Coating...
- Page 234 Command Lists Chapter (3/3) Category Command Function Supported Not ready command 1 page paper feed command Partially Partially ( Half page paper feed command 1 frame paper feed command Partially ( Printing end command Chapter Message display command Error mask command Enlargement Cutter control command Commands...
-
Page 235: List Of Hp Rtl Printing Commands
Command Lists Chapter ‹ List of HP RTL Printing Commands The meaning of the symbols in the table is as follows. Yes: Indicates commands supported by the Printer. Chapter Partially: Indicates commands whose functions are partially supported by the Printer. No: Indicates commands not supported by the Printer. - Page 236 Command Lists Chapter (2/2) Command Function Supported Name Code Simple Color ESC * r # u|U Sets the color mode. Current Pattern ESC * v # t|T Sets the pattern type for the raster. Download Pattern ESC * c # W [pattern data] Loads a user defined pattern.
-
Page 237: List Of D-Scan Format Commands
Command Lists Chapter ‹ List of D-SCAN Format Commands The meaning of the symbols in the table is as follows. Yes: Indicates commands supported by the Printer. Chapter No: Indicates commands not supported by the Printer (ignored by the Printer). (1/6) Command Category... - Page 238 Command Lists Chapter (2/6) Command Category Function Supported Name Hexadecimal Sets the drawing conditions for the file FILECONTROL BLOCK 0003 information block. Specifies the drawing control (whether to set the Chapter IEOD Partially * page unit as a file or a drawing). IFSZX, IFSZY Specifies the page size for the file.
- Page 239 Command Lists Chapter (3/6) Command Category Function Supported Name Hexadecimal DRAWING CONTROL Sets the drawing conditions for the drawing 0004 BLOCK information block. Specifies the drawing control (whether to set the IEOD Partially * page unit as a file or a drawing). Chapter IFSZX, IFSZY Specifies the page size for the file.
- Page 240 Command Lists Chapter (4/6) Command Category Function Supported Name Hexadecimal LINE WIDTH 1101 Sets the pen line width. LINE TYPE 1102 Sets the pen line type. Chapter LINE COLOR 1103 Sets the pen line color. LINE PATTERN 1104 Registers a line type pattern. COLOR 1105 Sets the color component.*...
- Page 241 Command Lists Chapter (5/6) Command Category Function Supported Name Hexadecimal WINDOW 1160 Sets the window. VIEWPORT 1161 Sets the viewport. Chapter FILL AREA STYLE 1162 Sets the internal style of polygons. FILL AREA BASE 1163 Sets the pattern and hatch reference point. POINT WRITE MODE 1164...
- Page 242 Command Lists Chapter (6/6) Command Category Function Supported Name Hexadecimal RASTER (MH) 1198 Sets the information for compression raster (MH). RASTER (MR) 1199 Sets the information for compression raster (MR). Chapter Sets the information for compression raster RASTER (MMR) 119A (MMR).
-
Page 243: Tiff Tags
Command Lists Chapter ‹ TIFF Tags The meaning of the symbols in the table is as follows. Yes: Indicates commands supported by the Printer. Chapter Partially: Indicates the corresponding functions are partially supported by the Printer. No: Indicates tags not supported by the Printer. ‘... -
Page 244: Cals Format Record
Command Lists Chapter ‹ CALS Format Record The meaning of the symbols in the table is as follows. Yes: Indicates records supported by the Printer. Chapter No: Indicates records not supported by the Printer. ‘ Only the TYPE I format type is supported by the Printer. When TYPE II data is received, the data is disregarded. - Page 245 Command Lists Chapter Command Function Default Notes ascii Sets the file transfer type to ASCII. — Sets the file transfer type to binary. Be sure to set this binary Image binary command when transferring files. Ends the execution of the ftp command. —...
-
Page 246: Commands Supported By Lpd
Command Lists Chapter ‹ Commands Supported by lpd Up to 10 users can be connected at the same time with lpr, lpq, and lprm. Chapter Command Function Copies a file from the computer to the Printer. Outputs the Printer's spool data status to the computer. lprm Deletes an unprocessed file already transferred to the Printer.
Need help?
Do you have a question about the Teriostar LP-1030 and is the answer not in the manual?
Questions and answers