Viessmann Vitodens 222-F B2TA Installation And Service Instructions Manual
Hide thumbs
Also See for Vitodens 222-F B2TA:
- Service instructions manual (108 pages) ,
- Operating instructions manual (40 pages) ,
- Installation instructions manual (28 pages)
Table of Contents
Advertisement
Quick Links
VIESMANN
Installation and service
instructions
for contractors
Vitodens 222-F
Type B2TA, 3.2 to 35 kW
Gas condensing storage combi boiler
g: Gas council no.
41-819-15; 41-819-16; 41-819-17
Natural gas and LPG version
For applicability, see the last page
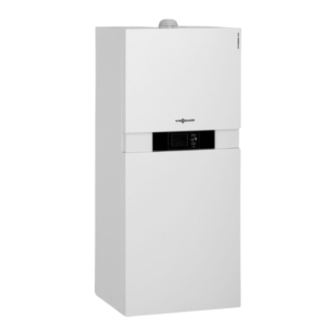
VITODENS 222-F
Please keep safe.
5773 216 GB
12/2012
Advertisement
Chapters
Table of Contents

Related Manuals for Viessmann Vitodens 222-F B2TA


Summary of Contents for Viessmann Vitodens 222-F B2TA
- Page 1 VIESMANN Installation and service instructions for contractors Vitodens 222-F Type B2TA, 3.2 to 35 kW Gas condensing storage combi boiler g: Gas council no. 41-819-15; 41-819-16; 41-819-17 Natural gas and LPG version For applicability, see the last page VITODENS 222-F Please keep safe.
- Page 2 Safety instructions Safety instructions Please follow these safety instructions closely to prevent accidents and mate- rial losses. Safety instructions explained ■ Codes of practice of the relevant trade associations Danger ■ All current safety regulations as This symbol warns against the defined by DIN, EN, DVGW, TRGI, risk of injury.
- Page 3 If the boiler is operated at Defective components must be the same time, this can lead to reverse replaced with genuine flow of the flue gas. Viessmann spare parts.
- Page 4 Installing non-author- ised components and making non-approved modifications or conversions can compromise safety and may invalidate our warranty. For replacements, use only orig- inal spare parts supplied or approved by Viessmann.
-
Page 5: Table Of Contents
Index Index Installation instructions Preparing for installation Intended use......................Product information....................Preparing for boiler installation................Installing the boiler Removing the front panels................... 12 Siting and levelling the boiler................13 Connections on the heating water and the DHW side.......... 14 Condensate connection..................15 Flue gas connection..................... - Page 6 Index Index (cont.) Troubleshooting Fault display......................120 Fault codes......................122 Repair........................137 Function description Constant temperature control unit................ 149 Weather-compensated control unit..............150 Internal extensions....................152 External extensions (accessories)................ 154 Control functions....................158 Allocating heating circuits to the remote control........... 166 Electronic combustion control unit................
-
Page 7: Preparing For Installation
Preparing for installation Intended use The appliance is only intended to be Any usage beyond this must be installed and operated in sealed unven- approved by the manufacturer for the ted heating systems that comply with individual case. EN 12828, with due attention paid to the associated installation, service and Incorrect usage or operation of the appli- operating instructions. -
Page 8: Preparing For Boiler Installation
Preparing for installation Preparing for boiler installation Use a connection set or connection kit, Please note available as an accessory, to make the Avoid device damage. connection on the gas and water sides. Connect all pipework free of load and torque stress. Fitting accessories Fit all accessories that are installed from The following diagram shows sample... - Page 9 Preparing for installation Preparing for boiler installation (cont.) H Side condensate drain K Wiring area Rated heating 3.2 to 5.2 to output range 26 kW 35 kW a (mm) b (mm) c (mm) 1172 d (mm) 1027 1227 e (mm) 1082 1302 f (mm)
- Page 10 Preparing for installation Preparing for boiler installation (cont.) 2. Prepare the connections on the DHW side. Install the safety assembly (accessory or on-site provision) in accordance with DIN 1988 and EN 806 in the cold water line (see page 11). Recommendation: Install the safety valve above the DHW cylinder to protect it against...
- Page 11 Preparing for installation Preparing for boiler installation (cont.) Safety assembly in accordance with DIN 1988 and EN 806 to the cold water connection A Safety assembly (accessory for the G Non-return valve connection sets on unfinished H Drain walls) K Cold water B Safety valve L Drinking water filter C Visible discharge pipe outlet point...
-
Page 12: Installing The Boiler
Installing the boiler Removing the front panels... -
Page 13: Siting And Levelling The Boiler
Installing the boiler Siting and levelling the boiler SW17... -
Page 14: Connections On The Heating Water And The Dhw Side
Installing the boiler Connections on the heating water and the DHW side Shown with connection sets for finished walls (accessories) A Heating flow R¾ D Cold water R½ B DHW R½ E Heating return R¾ C DHW circulation R½ (separate accessory) Connection on the domestic hot water side The DHW expansion vessel, available... -
Page 15: Condensate Connection
Installing the boiler Condensate connection 2. Route condensate hose M to the back (drain in wall G) or to side aper- ture H (see page 8). Note Pull the condensate hose far enough out of the boiler that no unnecessary bends are created inside the boiler. -
Page 16: Flue Gas Connection
"Skoberne GmbH flue system" tions enclosed with the technical documen- tation may only be used in conjunction with the Viessmann flue system made by Skoberne. ■ During installation and positioning of the flue system, observe Part L and BS 5440 building regulations... -
Page 17: Gas Connection
Installing the boiler Gas connection Information on operation with LPG 2. Carry out a tightness test. We recommend the installation of an external safety solenoid valve when Note installing the boiler in rooms below Only use suitable and approved leak ground level. - Page 18 Installing the boiler Gas connection (cont.) Please note 3. Vent the gas line. Excessive test pressure may damage the boiler and the gas Conversion to other gas types: valve. See page 44. Max. test pressure 150 mbar (15 kPa). Where higher pres- sure is required for tightness tests, disconnect the boiler and the gas valves from the...
-
Page 19: Opening The Control Unit Casing
Installing the boiler Opening the control unit casing... -
Page 20: Electrical Connections
Installing the boiler Electrical connections Please note Before beginning work, touch Electronic assemblies can be earthed objects, such as heating damaged by electrostatic dis- or water pipes, to discharge static charge. loads. 230V~ 230V~ 3 2 1 A Radio clock receiver B Jumper... -
Page 21: Outside Temperature Sensor
Installing the boiler Electrical connections (cont.) Connections at plug 230 V~ Information on connecting fÖ Power supply accessories lH ■ Power supply for accessories When connecting accessories ■ External demand/blocking observe the separate installation ■ Room temperature control unit instructions provided with them. (remove jumper B when making this connection): –... -
Page 22: External Demand Via Switching Contact
Installing the boiler Electrical connections (cont.) Fitting location for outside tempera- ■ Not immediately below balconies or ture sensor gutters ■ Never render over ■ North or north-western wall, 2 to 2.5 m above ground level; in multi Outside temperature sensor connec- storey buildings, in the upper half of tion the second floor... - Page 23 Installing the boiler Electrical connections (cont.) Plug lH Extension EA1 A Floating contact A Floating contact (when connecting, B Extension EA1 remove jumper across L and 1) Codes Codes ■ "4b:1" in group "General"/1. ■ Set "3A" (DE1), "3b" (DE2) or "3C" ■...
-
Page 24: External Blocking Via Switching Contact
Installing the boiler Electrical connections (cont.) 0 – 1 V ≙ No default set boiler water temperature ≙ Set value 10 °C ≙ Set value 100 °C [{{] fÖ 0-10V 10 V Ö L ? N 230 V~ 0-10 V External blocking via switching contact Connection options: Please note... - Page 25 Installing the boiler Electrical connections (cont.) Plug lH Extension EA1 A Floating contact A Floating contact (when connecting, B Extension EA1 remove jumper across L and 1) Codes Codes ■ "4b:2" in group "General"/1 ■ Set "3A" (DE1), "3b" (DE2) or "3C" ■...
- Page 26 Installing the boiler Electrical connections (cont.) Power supply to all accessories via heat source control unit Some accessories with direct power supply A Heat source control unit D Extensions AM1 or EA1 B Extension kit for heating circuit with E ON/OFF switch mixer M2 C Extension kit for heating circuit with mixer M3...
- Page 27 Installing the boiler Electrical connections (cont.) Power supply fÖ ■ Remove existing wires from plug fÖ. Danger Incorrect core allocation can ■ Install an isolator in the power cable result in serious injury and dam- which simultaneously separates all age to the appliance. non-earthed conductors from the Take care not to interchange mains with contact separation of at...
-
Page 28: Routing The Connecting Cables
Installing the boiler Electrical connections (cont.) Routing the connecting cables Please note When routing and securing Connecting cables will be dam- cables/leads on site, ensure that aged if they touch hot compo- the maximum permissible tem- nents. peratures for these cables/leads are not exceeded. -
Page 29: Closing The Control Unit Casing
Installing the boiler Closing the control unit casing... - Page 30 Installing the boiler Closing the control unit casing (cont.) Insert programming unit (packed sepa- rately) into the control unit support. Note The programming unit can also be inser- ted into a wall mounting base (accesso- ries) near the boiler. Wall mounting base installation instructions...
-
Page 31: Fitting The Front Panels
Installing the boiler Fitting the front panels... -
Page 32: Commissioning, Inspection, Maintenance
Commissioning, inspection, maintenance Steps - commissioning, inspection and maintenance For further information regarding the individual steps, see the page indicated Commissioning steps Inspection steps Maintenance steps Page • • 1. Removing the front panels..........35 • 2. Checking the power supply •... - Page 33 Commissioning, inspection, maintenance Steps - commissioning, inspection and maintenance Commissioning steps Inspection steps Maintenance steps Page • • 21. Checking the burner gasket and burner gauze assembly................. 51 • • 22. Checking and adjusting the ignition and ionisation electrodes................ 52 •...
- Page 34 Commissioning, inspection, maintenance Steps - commissioning, inspection and… (cont.) Commissioning steps Inspection steps Maintenance steps Page • 42. Connecting the control unit to the LON....... 73 • 43. Scanning and resetting the "Service" display..... 75 • • • 44. Fitting the cover panel and front panels...... 76 •...
-
Page 35: Further Details Regarding The Individual Steps
Commissioning, inspection, maintenance Further details regarding the individual steps Removing the front panels See page 12 Filling the heating system Fill water Please note Unsuitable fill water increases the level of deposits and corro- sion and may lead to boiler dam- age. - Page 36 Commissioning, inspection, maintenance Further details regarding the individual steps (cont.) Shown with connection set for finished walls (accessories) 1. Check the pre-charge pressure of the 5. If the control unit had already been diaphragm expansion vessel (see switched on before filling began: page 61).
-
Page 37: Filling The Dhw Cylinder On The Dhw Side
Commissioning, inspection, maintenance Further details regarding the individual steps (cont.) Activating the filling function Weather-compensated control unit Constant temperature control unit Service menu Service menu 1. Press OK and å simultaneously for 1. Press OK and å simultaneously for approx. 4 s. approx. -
Page 38: Setting The Time And Date - Only For Weather-Compensated Control Units
Commissioning, inspection, maintenance Further details regarding the individual steps (cont.) Sprache Deutsch ê ç Bulgarski ê Cesky ê Dansk ê Wählen mit Setting the time and date - only for weather-compensated control units The time and date need to be reset dur- 3. -
Page 39: Venting The Boiler
Commissioning, inspection, maintenance Further details regarding the individual steps (cont.) Venting the boiler 1. Close the shut-off valves on the heat- ing water side. 2. Remove cover panel A. 3. Push the drain hose onto air vent valve B and connect to a drain. 4. -
Page 40: Venting The Heating System
Commissioning, inspection, maintenance Further details regarding the individual steps (cont.) Venting the heating system 1. Close the gas shut-off valve and 4. Check the system pressure. switch the control unit ON. 5. Open the gas shut-off valve. 2. Check whether the air vent screw in quick-action air vent valve A in the heating circuit pump is open. - Page 41 Commissioning, inspection, maintenance Further details regarding the individual steps (cont.) Activating the venting function Weather-compensated control unit Constant temperature control unit Service menu Service menu 1. Press OK and å simultaneously for 1. Press OK and å simultaneously for approx. 4 s. approx.
-
Page 42: Filling The Siphon With Water
Commissioning, inspection, maintenance Further details regarding the individual steps (cont.) Filling the siphon with water 1. Pivot control unit forward. 6. Check that the condensate pipe is connected correctly to the siphon and 2. Remove retaining clip A. heat exchanger. 3. -
Page 43: Designating Heating Circuits - Only For Weather
Commissioning, inspection, maintenance Further details regarding the individual steps (cont.) Designating heating circuits - only for weather-compensated control units In the delivered condition, the heating Enter names for heating cir- circuits are designated "Heating circuit cuits: 1", "Heating circuit 2" and "Heating Operating instructions circuit 3"... -
Page 44: Gas Type Conversion (Only For Operation With Lpg)
Commissioning, inspection, maintenance Further details regarding the individual steps (cont.) Gas type conversion (only for operation with LPG) 1. Set adjusting screw A on the gas train to "2". 2. Switch ON/OFF switch 3. Select the gas type in coding address "82". - Page 45 Commissioning, inspection, maintenance Further details regarding the individual steps (cont.) 6. Check the supply (flow) pressure. Set value: ■ Natural gas: 20 mbar (2.0 kPa) ■ LPG: 50 mbar (5.0 kPa) Note Use a suitable measuring device with a resolution of at least 0.1 mbar (0.01 kPa) to check the supply pres- sure.
-
Page 46: Function Sequence And Possible Faults
Commissioning, inspection, maintenance Further details regarding the individual steps (cont.) Supply pressure (flow pressure) Action For natural gas For LPG Below 17.4 mbar Below 42.5 mbar Do not start the boiler. Notify your gas (1.74 kPa) (4.25 kPa) supply utility or LPG supplier. 17.4 to 25 mbar 42.5 to 57.5 mbar Start the boiler. - Page 47 Commissioning, inspection, maintenance Further details regarding the individual steps (cont.) Gas train opens Fault EE Check the gas train (control voltage 230 V) and gas supply pressure Ionisation current Fault EE Check the ionisa- builds tion electrode ad- Symbol A justment and the gas line for air- locks.
-
Page 48: Max. Heating Output Setting
Commissioning, inspection, maintenance Further details regarding the individual steps (cont.) Automatic calibra- Fault E3 Ensure adequate tion of the com- heat transfer. bustion controller Press reset button Fault Eb Check gap be- tween ionisation electrode and burner gauze as- sembly. Check allocation of gas type (coding address 82, gas... -
Page 49: Tightness Test, Balanced Flue System (Annular Gap Check)
Commissioning, inspection, maintenance Further details regarding the individual steps (cont.) Weather-compensated control unit Constant temperature control unit Service menu Service menu 1. Press OK and å simultaneously for 1. Press OK and å simultaneously for approx. 4 s. approx. 4 s. 2. -
Page 50: Burner Removal
Commissioning, inspection, maintenance Further details regarding the individual steps (cont.) Burner removal 4. Undo gas supply pipe fitting F. 1. Switch OFF the power supply and the ON/OFF switch at the control unit. 5. Undo four screws G and remove the 2. -
Page 51: Checking The Burner Gasket And Burner Gauze Assembly
Commissioning, inspection, maintenance Further details regarding the individual steps (cont.) Checking the burner gasket and burner gauze assembly Check burner gasket A and burner gauze assembly E for possible damage and replace if required. 1. Remove electrodes B. 3. Undo two Torx screws and remove burner gauze assembly E with gas- 2. -
Page 52: Checking And Adjusting The Ignition And Ionisation Electrodes
Commissioning, inspection, maintenance Further details regarding the individual steps (cont.) 5. Fit thermal insulation ring D. 6. Fit electrodes B. Torque: 4.5 Nm. Checking and adjusting the ignition and ionisation electrodes ±1 A Ignition electrodes B Ionisation electrode 1. Check the electrodes for wear and 3. -
Page 53: Checking The Condensate Drain And Cleaning The Siphon
Commissioning, inspection, maintenance Further details regarding the individual steps (cont.) 1. Use a vacuum cleaner to remove deposits from heating surfaces A of the heat exchanger. 2. If required, rinse heating surfaces A with water. 3. Check condensate drain and clean siphon. - Page 54 Commissioning, inspection, maintenance Further details regarding the individual steps (cont.) 1. Check at the siphon that the conden- 7. Fill siphon with water and reassemble sate can drain freely. with retaining clip A. 2. Remove retaining clip A. 8. Check that the condensate pipe is connected correctly to the siphon and 3.
-
Page 55: Installing The Burner
Commissioning, inspection, maintenance Further details regarding the individual steps (cont.) Installing the burner 1. Install the burner and tighten screws 3. Check the gas connections for tight- G diagonally with 8.5 Nm. ness. 2. Fit gas supply pipe F with a new gasket. -
Page 56: Checking The Anode Connection
Commissioning, inspection, maintenance Further details regarding the individual steps (cont.) 4. Connect cables from fan motor A, Danger Escaping gas leads to a risk of gas train B, ionisation electrode explosion. C, ignition unit D and earth tab Check all fittings for gas tight- ness. - Page 57 Commissioning, inspection, maintenance Further details regarding the individual steps (cont.) 1. Remove cover A. 3. Connect tester (up to 5 mA ) in series between tab C and earth cable B. 2. Remove earth cable B from tab ■ If the current measures > 0.3 mA, the anode is OK.
-
Page 58: Draining The Boiler On The Dhw Side
Commissioning, inspection, maintenance Further details regarding the individual steps (cont.) Draining the boiler on the DHW side 2. Turn drain valve from lever position A (operational) to lever position B or C as required. ■ Lever position B: Drain drinking water circuit in appliance exclud- ing DHW cylinder via the cold water connection. -
Page 59: Cleaning The Primary Store
Commissioning, inspection, maintenance Further details regarding the individual steps (cont.) Cleaning the primary store Note According to EN 806, a visual inspection and (if necessary) cleaning must be car- ried out no later than two years after commissioning and thereafter as required. -
Page 60: Checking And Replacing The Magnesium Anode (If Required)
Commissioning, inspection, maintenance Further details regarding the individual steps (cont.) Checking and replacing the magnesium anode (if required) Check the magnesium anode. If it is dis- covered that the anode has degraded to 10 to 15 mm Ø, we recommend replac- ing the magnesium anode. -
Page 61: Checking The Expansion Vessel And System Pressure
Commissioning, inspection, maintenance Further details regarding the individual steps (cont.) Checking the expansion vessel and system pressure Check whether the installed diaphragm expansion vessel is adequate for the system water pressure (only g). Note Carry out this test on a cold system. 1. -
Page 62: Checking The Pre-Charge Pressure And The Dhw
Commissioning, inspection, maintenance Further details regarding the individual steps (cont.) Checking the pre-charge pressure and the DHW expansion ves- sel (if installed) 1. Check the static pressure of the DHW line downstream of the pressure reducer and adjust if required. Set value: max. -
Page 63: Checking The Combustion Quality
Commissioning, inspection, maintenance Further details regarding the individual steps (cont.) Checking the combustion quality The electronic combustion controller Note automatically ensures optimum combus- During commissioning, the combustion tion quality. During commissioning/ controller carries out an automatic cali- maintenance, only the combustion val- bration. -
Page 64: Matching The Control Unit To The Heating System
Commissioning, inspection, maintenance Further details regarding the individual steps (cont.) 7. Check the CO content. Should the 8. After testing, press OK. actual value deviate from the afore- 9. Enter actual values into the report. mentioned ranges by more than 1 %, implement steps from page 63. - Page 65 Commissioning, inspection, maintenance Further details regarding the individual steps (cont.) System version 1 One heating circuit without mixer A1 1 Vitodens 222-F 3 Vitotrol 100 (only for constant tem- perature control units) 2 Outside temperature sensor (only 4 Heating circuit without mixer A1 for weather-compensated control units) (heating circuit 1)
- Page 66 Commissioning, inspection, maintenance Further details regarding the individual steps (cont.) System version 2 One heating circuit with mixer M2 and a low loss header 1 Vitodens 222-F 5 Flow temperature sensor M2 2 Outside temperature sensor 6 Heating circuit pump M2 3 Heating circuit with mixer M2 (heat- 7 Extension kit for one heating circuit ing circuit 2)
- Page 67 Commissioning, inspection, maintenance Further details regarding the individual steps (cont.) System version 3 One heating circuit without mixer A1 and one heating circuit with mixer M2 1 Vitodens 222-F 6 Flow temperature sensor M2 2 Outside temperature sensor 7 Heating circuit pump M2 3 Heating circuit without mixer A1 8 Extension kit for one heating circuit (heating circuit 1)
- Page 68 Commissioning, inspection, maintenance Further details regarding the individual steps (cont.) Function/system components Code Adjust Group Operation with LPG 82:1 "General" System only with one heating circuit with mixer with 00:4 "General" extension kit for mixer (without unregulated heating circuit) with DHW heating System with DHW circulation pump: DHW circulation pump connection at internal exten- —...
- Page 69 Commissioning, inspection, maintenance Further details regarding the individual steps (cont.) 9 Heat exchanger for system separa- qP Assembly kit with mixer (accesso- tion ries) Function/system components Code Adjust Group Operation with LPG 82:1 "General" System only with one heating circuit with mixer with 00:4 "General"...
-
Page 70: Adjusting The Heating Curves (Only For Weather- Compensated Control Units)
Commissioning, inspection, maintenance Further details regarding the individual steps (cont.) 5 Heating circuit with mixer M2 (heat- qQ Flow temperature sensor M3 ing circuit 2) qW Heating circuit pump M3 6 Flow temperature sensor M2 qE Extension kit for one heating circuit 7 Heating circuit pump M2 with mixer M3 8 Extension kit for one heating circuit... - Page 71 Commissioning, inspection, maintenance Further details regarding the individual steps (cont.) Note The differential temperature is adjusta- If the heating system includes heating ble via coding address "9F" in the "Gen- circuits with mixers, then the flow tem- eral" group. perature of the heating circuit without mixer is higher by a selected differential (8 K in the delivered condition) than the flow temperature of the heating circuits...
- Page 72 Commissioning, inspection, maintenance Further details regarding the individual steps (cont.) Standard set room temperature Reduced set room temperature Example 1: Adjustment of the standard Example 2: Adjustment of the reduced set room temperature from 20 to 26 °C set room temperature from 5 °C to 14 °C A Boiler water temperature or flow temperature in °C...
-
Page 73: Connecting The Control Unit To The Lon
Commissioning, inspection, maintenance Further details regarding the individual steps (cont.) Extended menu: 1. å 2. "Heating" 3. Select heating circuit. 4. "Heating curve" 5. "Slope" or "Level" 6. Select heating curve according to the system requirements. Outside temperature in °C A Changing the slope B Changing the level (vertical parallel offset of the heating curve) - Page 74 Control unit receives — outside temperature, outside tempera- outside tempera- Set code "97:2". ture, ture, Set code "97:1". Set code "97:1". Viessmann system Viessmann system Viessmann system — number, number, number, Code "98:1". Code "98:1". Code "98:1". LON subscriber fault...
-
Page 75: Scanning And Resetting The "Service" Display
Commissioning, inspection, maintenance Further details regarding the individual steps (cont.) ■ Successfully tested subscribers are Note designated with "OK". During the subscriber check, the display ■ Unsuccessfully tested subscribers are for the relevant subscriber shows the designated with "Not OK". subscriber no. -
Page 76: Fitting The Cover Panel And Front Panels
Commissioning, inspection, maintenance Further details regarding the individual steps (cont.) Weather-compensated control unit Constant temperature control unit After the service has been carried out: Reset the codes Service menu: Reset code "24:1" in group 2 to "24:0". 1. Press OK and å simultaneously for approx. -
Page 77: Calling Up Coding Level 1
Code 1 Calling up coding level 1 ■ On weather-compensated control The heating circuit without mixer is units, codes are displayed as plain designated "Heating circuit 1" and text. the heating circuits with mixer as ■ Codes that have not been assigned "Heating circuit 2"... -
Page 78: General"/Group 1
Code 1 "General"/group 1 Select "General" for weather-compen- Select "1" for constant temperature con- sated control units (see page 77). trol units (see page 77). Coding Coding in the delivered condition Possible change System design 00:2 One heating circuit with- 00:4 For system schemes, see out mixer A1 (heating cir-... - Page 79 Code 1 "General"/group 1 (cont.) Coding in the delivered condition Possible change Internal circulation pump function 51:0 Internal circulation pump 51:1 System with low loss head- always starts when there is a heat demand When there is a heat de- mand, the internal circula- tion pump is only started if the burner is operational.
-
Page 80: Boiler"/Group 2
Code 1 "General"/group 1 (cont.) Coding in the delivered condition Possible change Lock out controls 8F:0 Operation in the standard 8F:1 Operation in standard menu and extended menu and extended menu menu enabled blocked. Emissions test mode can Note be enabled The respective code is 8F:2 Operation enabled in the... -
Page 81: Dhw"/Group 3
Code 1 "Boiler"/group 2 (cont.) Coding in the delivered condition Possible change Service interval in months 23:0 No interval for burner 23:1 Interval adjustable from 1 service to 24 months 23:24 Service status 24:0 "Service" not shown on 24:1 "Service" is shown on dis- display play (the address is auto- matically set and must be... - Page 82 Code 1 "Heating circuit ..."/group 5 (cont.) Coding Coding in the delivered condition Possible change Economy function outside temperature A5:5 With heating circuit pump A5:0 Without heating circuit logic function (economy pump logic function control): heating circuit A5:1 With heating circuit pump pump "OFF"...
- Page 83 Code 1 "Heating circuit ..."/group 5 (cont.) Coding in the delivered condition Possible change Extended economy function adjusted outside temperature A6:36 Extended economy con- A6:5 Extended economy control trol disabled (only for enabled, i.e. the burner and weather-compensated A6:35 heating circuit pump will control units) stop and the mixer will be closed at a variable value,...
- Page 84 Code 1 "Heating circuit ..."/group 5 (cont.) Coding in the delivered condition Possible change Weather-compensated/room temperature hook-up b0:0 Only for heating circuit b0:1 Heating mode: weather- with mixer and remote compensated. control: Reduced mode: With room Heating mode/reduced temperature hook-up mode: Weather-compen- b0:2 Heating mode: With room...
- Page 85 Code 1 "Heating circuit ..."/group 5 (cont.) Coding in the delivered condition Possible change Min. flow temperature heating circuit C5:20 Electronic minimum flow C5:1 Minimum limit adjustable temperature limit 20 °C from 1 to 127 °C (limited by (only in operation with C5:127 boiler-specific parameters) standard room tempera-...
- Page 86 Code 1 "Heating circuit ..."/group 5 (cont.) Coding in the delivered condition Possible change Max. pump speed in standard mode E6:... Only for heating systems E6:0 Maximum speed adjusta- without a heating circuit ble from 0 to 100 % with mixer: E6:100 Maximum speed of the in- ternal variable speed...
- Page 87 Code 1 "Heating circuit ..."/group 5 (cont.) Coding in the delivered condition Possible change Party mode time limit F2:8 Time limit for party mode F2:0 No time limit. or external heating pro- F2:1 Time limit adjustable from 1 gram changeover via to 12 h pushbutton: 8 h (only for F2:12...
- Page 88 Code 1 "Heating circuit ..."/group 5 (cont.) Coding in the delivered condition Possible change Start temperature raising F8:–5 Temperature limit for ter- F8:+10 Temperature limit adjusta- minating reduced mode ble from –5 °C, see example on F8:–60 +10 to –60 °C page 163.
-
Page 89: Calling Up Coding Level 2
Code 2 Calling up coding level 2 ■ All codes are accessible in coding If the heating circuits were given indi- level 2. vidual designations, the selected des- ■ Codes that have not been assigned ignation and "HC1", "HC2" or "HC3" due to the heating system equipment appear instead. -
Page 90: General"/Group 1
Code 2 Calling up coding level 2 (cont.) Weather-compensated control unit Constant temperature control unit Resetting all codes to their delivered condition Select "Standard setting". Select "7" with Ú and confirm with OK. When " " flashes, confirm with OK. Note This also resets codes at coding level 1. - Page 91 Code 2 "General"/group 1 (cont.) Coding in the delivered condition Possible change 11:≠9 No access to the coding 11:9 Access open to the coding addresses for the com- addresses for the combus- bustion controller param- tion controller parameters eters 25:0 Without outside tempera- 25:1 With outside temperature...
- Page 92 Code 2 "General"/group 1 (cont.) Coding in the delivered condition Possible change 3A:4 External blocking with fault message input. Internal circulation pump function: Coding address "3E" in this group. 3A:5 Fault message input 3A:6 Brief operation, DHW cir- culation pump (pushbutton function).
- Page 93 Code 2 "General"/group 1 (cont.) Coding in the delivered condition Possible change 3C:0 Function input DE3 at ex- 3C:1 Heating program - change- tension EA1: over No function 3C:2 External demand with set flow temperature. Set value setting: Coding address "9b" in this group. Internal circulation pump function: Coding address "3F"...
- Page 94 Code 2 "General"/group 1 (cont.) Coding in the delivered condition Possible change 51:0 Internal circulation pump 51:1 System with low loss head- always starts when there is a heat demand When there is a heat de- mand, the internal circula- tion pump is only started if the burner is operational.
- Page 95 Code 2 "General"/group 1 (cont.) Coding in the delivered condition Possible change 10 - 97 = Vitotronic 200-H 98 = Vitogate 99 = Vitocom 79:1 With LON communication 79:0 Control unit is not fault module: manager Control unit is fault man- ager (only for weather- compensated control units)
- Page 96 Vitotronic 200-H ed internally (only for weather-compensated control units) 98:1 With LON communication 98:1 System number adjustable module: from 1 to 5 Viessmann system num- 98:5 ber (in conjunction with monitoring several sys- tems via Vitocom 300)
-
Page 97: Boiler"/Group 2
Code 2 "General"/group 1 (cont.) Coding in the delivered condition Possible change 99:0 Do not adjust 9A:0 Do not adjust 9b:70 Set flow temperature for 9b:0 Set value adjustable from 0 external demand 70 °C to 127 °C (limited by boiler- 9b:127 specific parameters) 9C:20... - Page 98 Code 2 "Boiler"/group 2 (cont.) Coding in the delivered condition Possible change Pause time set permanent- ly (specified by boiler cod- ing card) 06:... Maximum limit of the boil- 06:20 Maximum limit adjustable er water temperature, de- within the ranges specified faulted in °C by the boiler 06:127 by the boiler...
-
Page 99: Dhw"/Group 3
Code 2 "Boiler"/group 2 (cont.) Coding in the delivered condition Possible change 31:... Set speed in % of the in- 31:0 Set speed adjustable from ternal circulation pump 0 to 100 % when operated as boiler 31:100 circuit pump, specified by the boiler coding card 38:0 Status burner control unit:... - Page 100 Code 2 "DHW"/group 3 (cont.) Coding in the delivered condition Possible change 60:20 During DHW heating, the 60:5 The difference between the boiler water temperature boiler water temperature is max. 20 K higher than 60:25 and the set DHW tempera- the set DHW tempera- ture is adjustable from 5 to ture...
-
Page 101: Heating Circuit
Code 2 "DHW"/group 3 (cont.) Coding in the delivered condition Possible change 73:6 "ON" 6 times per hour for 5 min 73:7 Constantly "ON" "Heating circuit ..."/group 5 Select "Heating circuit ..." for weather- Select "5" for constant temperature con- compensated control units (see trol units (see page 89). - Page 102 Code 2 "Heating circuit ..."/group 5 (cont.) Parameter Heating circ pump Address A3:... "ON" "OFF" –6 –7 °C –5 °C –5 –6 °C –4 °C –4 –5 °C –3 °C –3 –4 °C –2 °C –2 –3 °C –1 °C –1 –2 °C 0 °C...
- Page 103 Code 2 "Heating circuit ..."/group 5 (cont.) Parameter address With heating circuit pump logic function: Heating cir- A5:... cuit pump "OFF" AT > RT + 3 K AT > RT + 2 K AT > RT + 1 K AT > RT AT >...
- Page 104 Code 2 "Heating circuit ..."/group 5 (cont.) Coding in the delivered condition Possible change A8:1 Heating circuit with mixer A8:0 Heating circuit with mixer creates a demand for the creates no demand for the internal circulation pump internal circulation pump (only for weather-com- pensated control units) A9:7...
- Page 105 Code 2 "Heating circuit ..."/group 5 (cont.) Coding in the delivered condition Possible change No room temperature-de- pendent heating circuit pump logic function (only for weather-compensa- ted control units) Parameter ad- With heating circuit pump logic function: dress b5:... Heating circuit pump "OFF" Heating circuit pump "ON"...
- Page 106 Code 2 "Heating circuit ..."/group 5 (cont.) Coding in the delivered condition Possible change d5:0 With external heating pro- d5:1 The heating program gram changeover (ob- changes to "Constant op- serve setting for coding eration with standard room addresses "3A", "3b" and temperature".
- Page 107 Code 2 "Heating circuit ..."/group 5 (cont.) Coding in the delivered condition Possible change d8:3 Heating program change- over via input DE3. E1:1 Do not adjust E2:50 With remote control: E2:0 Display correction –5 K No display correction for the actual room tempera- E2:49 Display correction –0.1 K ture (only for weather-...
- Page 108 Code 2 "Heating circuit ..."/group 5 (cont.) Coding in the delivered condition Possible change Minimum speed of the in- ternal variable speed heating circuit pump in operation with reduced room temperature sub- ject to the setting in cod- ing address "E9" (only for weather-compensated control units) E9:45...
- Page 109 Code 2 "Heating circuit ..."/group 5 (cont.) Coding in the delivered condition Possible change Note F2:12 Observe settings of cod- ing addresses "3A", "3b" and "3C" in group "Gen- eral", as well as "d5" and "d8" in group "Heating circuit...". F5:12 Run-on time of the inter- F5:0...
- Page 110 Code 2 "Heating circuit ..."/group 5 (cont.) Coding in the delivered condition Possible change F9:–14 Temperature limit for rais- F9:+10 Temperature limit for rais- ing the reduced set room ing the set room tempera- temperature –14 °C; see F9:–60 ture to the value selected example on page 163 for standard mode adjusta- (only for weather-com-...
-
Page 111: Diagnosis And Service Scans
Diagnosis and service scans Service menu Weather-compensated control unit Constant temperature control unit Calling up the service menu 1. Press OK and å simultaneously for 1. Press OK and å simultaneously for approx. 4 s. approx. 4 s. 2. Select required menu. See following "Ü"... -
Page 112: Diagnosis
Diagnosis and service scans Service menu (cont.) Note This menu point changes the control unit Do not adjust menu point "Multi-boiler to a constant temperature control unit in system". a multi-boiler system. Diagnosis Operating data Weather-compensated control unit Constant temperature control unit Calling up operating data ■... -
Page 113: Brief Scan
Diagnosis and service scans Diagnosis (cont.) Weather-compensated control unit Constant temperature control unit Resetting operating data Saved operating data (e.g. hours run) can Saved operating data (e.g. hours run) can be reset to "0". be reset to "0". The value "Adjusted outside temp" is re- set to the actual value. - Page 114 Diagnosis and service scans Diagnosis (cont.) For an explanation of the relevant values in the individual lines and fields, see the following table: Line (brief Field scan) System schemes 01 Software version Software version to 10 Control unit Programming unit Appliance version Device identification ZE-ID...
- Page 115 Diagnosis and service scans Diagnosis (cont.) Line (brief Field scan) Heating circuit A1 Heating circuit M2 Heating circuit M3 (without mixer) (with mixer) (with mixer) Remote Software Remote Software Remote Software control version, control version, control version, re- 0: With- remote 0: With- remote...
- Page 116 Diagnosis and service scans Diagnosis (cont.) Constant temperature control unit Service menu: "Ü" flashes on the display. 1. Press OK and å simultaneously for 2. Confirm with OK. approx. 4 s. 3. Select the required scan with V/v. For example, "A" for "Max. output" (see following table): 4.
- Page 117 Diagnosis and service scans Diagnosis (cont.) Brief scan Display Variable Software speed version pump Variable 1 Wilo speed pump 2 Grundfos 0: no varia- ble speed pump Software version Burner control unit Setting of Internal details for calibration coding ad- dress "53"...
-
Page 118: Checking Outputs (Actuator Test)
Diagnosis and service scans Checking outputs (actuator test) Weather-compensated control unit 1. Press OK and å simultaneously for approx. 4 s. 2. "Actuator test" The following relay outputs can be controlled subject to system design: Display Explanation All actuators All actuators are off Base load Burner operates at minimum output;... - Page 119 Diagnosis and service scans Checking outputs (actuator test) (cont.) Constant temperature control unit 1. Press OK and å simultaneously for "Ü" flashes on the display. approx. 4 s. 2. Select " " with Ú and confirm with 3. Select required actuator (output) with V/v (see following table): 4.
-
Page 120: Troubleshooting
Troubleshooting Fault display Weather-compensated control unit In the event of a fault, red fault indicator Calling up acknowledged faults A flashes. " " flashes on the display Select "Fault" in the standard menu. and "Fault" is shown. The current faults will be displayed in a list. - Page 121 Troubleshooting Fault display (cont.) Constant temperature control unit In the event of a fault, red fault indicator A fault message facility, if connected, will A flashes. The two-digit fault code and be switched OFF. (subject to the type of fault) " " or " " If an acknowledged fault is not remedied, flash on the programming unit display.
-
Page 122: Fault Codes
Troubleshooting Fault codes Dis- Const. Weath.- System char- Cause Measures played comp. acteristics fault code Control mode Service Service required "0F" is only displayed in Note the fault histo- After servicing, se- lect code "24:0". Controls as if Short circuit, Check outside tem- the outside outside tem-... - Page 123 Troubleshooting Fault codes (cont.) Dis- Const. Weath.- System char- Cause Measures played comp. acteristics fault code Regulates with- Lead break, Check low loss out flow tem- system flow header sensor (see perature sen- temperature page 140) sor (low loss sensor If no low loss head- header) er sensor is con-...
- Page 124 Troubleshooting Fault codes (cont.) Dis- Const. Weath.- System char- Cause Measures played comp. acteristics fault code No DHW heat- Short circuit, Check the cylinder cylinder tem- temperature sen- perature sen- sor (see page 140) No DHW heat- Short circuit, Check the outlet outlet temper- temperature sen- ature sensor...
- Page 125 Troubleshooting Fault codes (cont.) Dis- Const. Weath.- System char- Cause Measures played comp. acteristics fault code Burner blocked Short circuit, Check the flue gas flue gas tem- temperature sen- perature sen- sor (see page 144) Control mode Communica- Check connections as per deliv- tion error, and replace pro-...
- Page 126 Troubleshooting Fault codes (cont.) Dis- Const. Weath.- System char- Cause Measures played comp. acteristics fault code Control mode Communica- Check connec- without remote tion error, re- tions, cable, coding control mote control address "A0" in Vitotrol heat- group "Heating ing circuit 1 circuit..."5/ and re- (without mix- mote control con-...
- Page 127 Troubleshooting Fault codes (cont.) Dis- Const. Weath.- System char- Cause Measures played comp. acteristics fault code Control mode Communica- Check connec- without remote tion error, re- tions, cable, coding control mote control address "A0" in Vitotrol heat- group "Heating ing circuit 3 circuit..."/5 and re- (with mixer) mote control con-...
- Page 128 Troubleshooting Fault codes (cont.) Dis- Const. Weath.- System char- Cause Measures played comp. acteristics fault code Control mode Communica- Check connections tion error, and Vitocom 100 Vitocom 100 (see separate in- stallation and serv- ice instructions). Without Vitocom 100: Set code "95:0"...
- Page 129 Troubleshooting Fault codes (cont.) Dis- Const. Weath.- System char- Cause Measures played comp. acteristics fault code Control mode Short circuit, Check room tem- without room room temper- perature sensor, influence ature sensor, heating circuit 2 heating circuit 2 (with mixer) Control mode Short circuit, Check room tem-...
- Page 130 Troubleshooting Fault codes (cont.) Dis- Const. Weath.- System char- Cause Measures played comp. acteristics fault code Burner in a fault Ionisation Check gap be- state current too tween ionisation high during electrode and calibration burner gauze as- sembly (see page 52). In open flue opera- tion, prevent high incidence of dust in...
- Page 131 Troubleshooting Fault codes (cont.) Dis- Const. Weath.- System char- Cause Measures played comp. acteristics fault code Burner in a fault Ionisation Check ionisation state current too electrode: low during ■ Distance to burn- calibration er gauze assem- bly (see page 52) ■...
- Page 132 Troubleshooting Fault codes (cont.) Dis- Const. Weath.- System char- Cause Measures played comp. acteristics fault code Burner in a fault Ionisation Check flue system; state current out- remedy flue gas re- side permissi- circulation if re- ble range dur- quired. ing calibration In open flue opera- (deviation...
- Page 133 Troubleshooting Fault codes (cont.) Dis- Const. Weath.- System char- Cause Measures played comp. acteristics fault code Burner in a fault Flame signal Check gas supply state is not present (gas pressure and or too weak at gas flow switch). burner start Check gas train.
- Page 134 Troubleshooting Fault codes (cont.) Dis- Const. Weath.- System char- Cause Measures played comp. acteristics fault code Burner in a fault Flame is lost Check gas supply state immediately (gas pressure and after it has gas flow switch). formed (dur- Check balanced ing the safety flue system for flue time)
- Page 135 Troubleshooting Fault codes (cont.) Dis- Const. Weath.- System char- Cause Measures played comp. acteristics fault code Burner in a fault Flame signal Check ionisation state is already electrode and con- present at necting cable. burner start Press reset button Burner in a fault Fuel valve Check gas train.
- Page 136 Troubleshooting Fault codes (cont.) Dis- Const. Weath.- System char- Cause Measures played comp. acteristics fault code Burner in a fault Fault, burner Check ignition state control unit electrodes and connecting cables. Check whether a strong interference (EMC) field exists near the appliance. Press reset button Replace control unit if fault persists...
-
Page 137: Repair
Troubleshooting Repair Putting control unit in maintenance position If required for commissioning and serv- icing, the control unit can be put in a dif- ferent position. - Page 138 Troubleshooting Repair (cont.) Drain boiler on the heating water side 1. Close the shut-off valves on the heat- 3. Open drain valve A and drain the ing water side. boiler as much as required. 2. Route hose at drain valve A into a suitable container or drain outlet.
- Page 139 Troubleshooting Repair (cont.) Checking the outside temperature sensor 2. Test the resistance of the outside temperature sensor across terminals "X3.1" and "X3.2" on the disconnec- ted plug and compare it with the curve. 3. Where actual values deviate severely from the curve values, disconnect the wires at the sensor and repeat the test on the sensor itself.
- Page 140 Troubleshooting Repair (cont.) Checking the boiler temperature sensor, cylinder temperature sensor or low loss header flow temperature sensor...
- Page 141 Troubleshooting Repair (cont.) 2. Check the sensor resistance and compare it with the curve. 3. Replace the sensor in the case of severe deviation. Danger The boiler water temperature sensor is immersed in the heating water (risk of scald- ing). 10 30 50 70 90 110 Drain the boiler on the heating Temperature in °C...
- Page 142 Troubleshooting Repair (cont.) Checking the outlet temperature sensor 1. Pull leads from outlet temperature sensor A. 2. Check the sensor resistance and compare it with the curve. 3. Replace the sensor in the case of severe deviation. Danger The outlet temperature sen- sor is immersed in the DHW (risk of scalding).
- Page 143 Troubleshooting Repair (cont.) Checking the plate heat exchanger Note During disassembly and once removed, Drain the boiler on its heating water and small amounts of water may escape from DHW side. the plate heat exchanger. 1. Shut off and drain the boiler on the 4.
- Page 144 Troubleshooting Repair (cont.) 6. Check the connections on the heat- 7. Install in reverse order using new ing water and DHW side for contam- gaskets. ination and scaling; if required, replace the plate heat exchanger. Checking the flue gas temperature sensor The flue gas temperature sensor locks out the boiler when the permissible flue gas temperature is exceeded.
- Page 145 Troubleshooting Repair (cont.) 2. If necessary, correct the position of 3. Press reset button R and repeat com- the flue gas temperature sensor or missioning. replace faulty flue gas temperature The check is repeated until it is com- sensor. pleted successfully. Checking the temperature limiter If the burner control unit cannot be reset 1.
- Page 146 Troubleshooting Repair (cont.) Checking the fuse 1. Switch off the power. 3. Remove cover A. 2. Release the side closures and pivot 4. Check fuse F1 (see connection and the control unit down. wiring diagram). Extension kit for heating circuit with mixer Checking the setting of rotary selec- Heating circuit Rotary se-...
- Page 147 Troubleshooting Repair (cont.) Checking the rotational direction of Note the rotational direction of the mixer the mixer motor motor during its self-test. Then set the mixer manually to "Open" After being switched on, the boiler imple- again. ments a self-test. During this, the mixer is opened and closed again.
- Page 148 Troubleshooting Repair (cont.) Checking flow temperature sensor Pressure drop curve 10 30 50 70 90 110 Temperature in °C Sensor type: NTC 10 kΩ 1. Remove plug ? (flow temperature 2. Check the sensor resistance and sensor). compare it with the curve. Replace the sensor in the case of severe deviation.
-
Page 149: Function Description
Function description Constant temperature control unit °C Heating mode The selected set boiler water tempera- The electronic temperature limiter inside ture will be maintained when a demand the burner control unit limits the boiler is being raised by the room thermostat water temperature. -
Page 150: Weather-Compensated Control Unit
Function description Weather-compensated control unit 21°C 14°C Boiler temperature 48 °C Heating mode The control unit determines a set boiler The electronic temperature limiter inside water temperature subject to outside the burner control unit limits the boiler temperature or room temperature (if a water temperature. - Page 151 Function description Weather-compensated control unit (cont.) Reheating when DHW is drawn off When DHW is drawn off, cold water DHW is regulated to the set temperature enters at the bottom of the primary via the outlet temperature sensor. store. The primary store continues to be heated The heating circuit pump is switched ON up after the draw off process has termi- and the 3-way diverter valve is changed...
-
Page 152: Internal Extensions
Function description Internal extensions Internal extension H1 The internal extension is integrated into ■ Heating circuit pump for heating circuit the control unit casing. The following without mixer (code "53:2") alternative functions can be connected ■ Circulation pump for cylinder heating to relay output sK. -
Page 153: Internal Extension H2
Function description Internal extensions (cont.) Internal extension H2 The internal extension is integrated into ■ Heating circuit pump for heating circuit the control unit casing. The following without mixer (code "53:2") alternative functions can be connected ■ Circulation pump for cylinder heating to relay output sK. -
Page 154: External Extensions (Accessories)
Function description External extensions (accessories) Extension AM1 Circulation pump fÖ A Power supply for additional Circulation pump accessories fÖ Power supply aVG KM BUS... - Page 155 Function description External extensions (accessories) (cont.) Functions Select the output functions by means of the codes on the boiler control unit. One of the following circulation pumps can be connected to each of the connec- tions A1 and A2: ■ Heating circuit pump for the heating circuit without mixer ■...
-
Page 156: Extension Ea1
Function description External extensions (accessories) (cont.) Extension EA1 fÖ A Power supply for additional Fuse/MCB accessories Digital input 1 Central fault message/feed Digital input 2 pump/DHW circulation pump Digital input 3 (potential-free) 0 – 10 V 0 – 10 V input KM BUS fÖ... - Page 157 Function description External extensions (accessories) (cont.) Digital data inputs DE1 to DE3 The effect of the operating program changeover is selected via coding The following functions can be connec- address d5 in the "Heating circuit" ted alternatively: group. ■ External operating program change- The duration of the changeover is set via over for each heating circuit coding address F2 in the "Heating cir-...
-
Page 158: Control Functions
Function description External extensions (accessories) (cont.) Output aBJ Analogue input 0 – 10 V The 0 – 10 V hook-up provides an addi- The following functions can be connec- tional set boiler water temperature: ted to output aBJ: 0 – 1 V is taken as "no default for set ■... - Page 159 Function description Control functions (cont.) You can select which direction the heat- ing program changeover takes in coding address "d5" in the "Heating circuit" group: Heating program - changeover Code Changeover towards "Permanently reduced" or "Permanent d5:0 standby" mode (subject to the selected set value) Changeover towards "Constant heating mode"...
- Page 160 Function description Control functions (cont.) External blocking and fault message input Code Input DE1 3A:4 Input DE2 3b:4 Input DE3 3C:4 The effect on the internal circulation The effect on the relevant heating circuit pump is selected in coding address pump is selected in coding address "3E"...
- Page 161 Function description Control functions (cont.) Fill program In the delivered condition, the diverter Filling with the control unit switched valve is set to its central position, ena- bling the system to be filled completely. After the control unit has been switched If the system is to be filled with the control on, the diverter valve no longer goes into unit switched on, the diverter valve is...
- Page 162 Function description Control functions (cont.) Temperature profile 2: (ZV parquet and flooring technology) code "F1:2" Days Temperature profile 3: Code "F1:3" Days Temperature profile 4: Code "F1:4" Days Temperature profile 5: Code "F1:5" Days...
- Page 163 Function description Control functions (cont.) Temperature profile 6: Code "F1:6" Days Temperature profile 7: Code "F1:15" Days Raising the reduced room temperature During operation with reduced room The outside temperature limits for the temperature, the reduced set room tem- start and end of temperature raising can perature can be automatically raised be set in coding addresses "F8"...
- Page 164 Function description Control functions (cont.) Example using the settings in the delivered condition -5 -10 -15 Outside temp. in °C A Heating curve for operation with B Heating curve for operation with standard room temperature reduced room temperature Reducing the heat-up time During the transition from operation with The value and duration of the additional reduced room temperature to operation...
- Page 165 Function description Control functions (cont.) Example using the settings in the delivered condition Time in h A Start of operation with standard D Duration of operation with raised set room temperature boiler water or flow temperature in B Set boiler water or flow temperature accordance with coding address in accordance with the selected "Fb":...
-
Page 166: Allocating Heating Circuits To The Remote Control
Function description Allocating heating circuits to the remote control The heating circuit allocation must be configured when commissioning the Vitotrol. Heating circuit Vitotrol configuration 200A/200 RF 300A/300 RF The remote control affects the heating circuit with- HC 1 out mixer A1 The remote control affects the heating circuit with HC 2 mixer M2... - Page 167 Function description Electronic combustion control unit (cont.) Air ratio λ– CO content Air ratio λ content content content content (%) for natu- (%) for natu- (%) for LPG P ral gas E ral gas LL 1.20 11.3 1.24 10.9 1.27 10.6 1.30 10.3...
-
Page 168: Designs
Designs Internal connection diagram Main PCB dÖ Stepper motor for diverter valve X... Electrical interfaces Temperature limiter § Boiler water temperature sensor Ignition unit Outlet temperature sensor a-Ö Fan motor Ionisation electrode a-ÖA Fan motor control Flue gas temperature sensor a:Ö... -
Page 169: External Connection Diagram
Designs External connection diagram Main PCB Burner control unit Power supply unit Programming unit Optolink Coding card... - Page 170 Designs External connection diagram (cont.) sÖ Connection adaptor Internal circulation pump LON communication module Cylinder primary pump (accessories) Gas solenoid valve Internal extension H1 or H2 fÖ Power supply (accessories) Power supply for accessories ON/OFF switch and Vitotrol 100 Reset button a-Ö...
-
Page 171: Parts Lists
Parts lists Ordering individual parts The following information is required: Standard parts are available from your ■ Serial no. (see type plate A) local dealer. ■ Assembly (from this parts list) ■ Position number of the individual part within the assembly (from this parts list) -
Page 172: Overview Of The Assemblies
Parts lists Overview of the assemblies A Type plate C Hydraulic assembly with hydraulic block B Casing assembly D Primary store assembly... -
Page 173: Casing
Parts lists Overview of the assemblies (cont.) E Heat cell assembly with MatriX cyl- F Control unit assembly inder burner G Miscellaneous assemblies Casing 0001 Front panel, top 0008 Side panel, right 0002 Logo 0009 Side panel, left 0003 Toggle fastener (set) 0010 Primary store mounting bracket 0004 Cover panel with profiled seal 0011 Top panel insert... - Page 174 Parts lists Casing (cont.) 0009 0011 0012 0003 0005 0005 0014 0014 0010 0001 0002 0014 0002 0004 0005 0007 0014 0008 0014 0013 0006 0014...
-
Page 175: Hydraulics
Parts lists Hydraulics 0001 Hydraulic block 0026 Round sealing ring 8 x 2 (5 pce) 0002 Set of plug-in connector retainers 0027 Connection line, DHW charging (2 pce) 0028 Shut-off valve, DHW, cylinder 0003 Diaphragm grommet (5 pce) 0029 Flow pipe 0004 Diaphragm grommet (5 pce) 0030 Expansion vessel 0005 Clip Ø... - Page 176 Parts lists Hydraulics (cont.) 0046 0030 0050 0047 0002 0012 0037 0029 0008 0002 0005 0003 0036 0008 0009 0009 0047 0033 0043 0043 0033 0046 0006 0047 0008 0020 0005 0047 0005 0005 0026 0046 0001 0035 0026 0012 0006 0047 0047...
-
Page 177: Hydraulic Block
Parts lists Hydraulics (cont.) Hydraulic block 0001 Return unit 0010 Overflow pipe 0002 Profiled gasket 0011 Flow unit 0003 Plug Ø 8/Ø 10 0012 Valve insert 0004 Clip Ø 8 (5 pce) 0013 Overflow valve 0005 Clip Ø 10 (5 pce) 0014 O-ring 17.86 x 2.62 (5 pce) 0006 Clip Ø... -
Page 178: Primary Store
Parts lists Hydraulics (cont.) 0008 0009 0012 0014 0016 0011 0004 0018 0002 0012 0017 0014 0002 0015 0006 0010 0014 0015 0013 0016 0014 0003 0005 0016 0015 0016 0001 0003 0015 0016 0016 0016 0016 0003 0005 0007 0005 Primary store 0001 Primary store... - Page 179 Parts lists Primary store (cont.) 0009 Flange insulation 0010 Cylinder temperature sensor NTC 10kΩ 0009 0005 0007 0004 0008 0004 0007 0006 0003 0002 0001 0010...
-
Page 180: Heat Cell
Parts lists Heat cell 0001 MatriX cylinder burner 0014 O-rings 35.4 x 3.59 (5 pce) 0002 Locking clip, condensate drain 0015 Gasket A 17 x 24 x 2 (5 pce) 0003 Profile hose, heating return 0016 Hose 19 x 600, corrugated 0004 Condensate collector 0017 Spring clip DN 25 (5 pce) 0005 Flue gasket... - Page 181 Parts lists Heat cell (cont.) 0021 0009 0010 0015 0020 0017 0020 0021 0025 0023 0005 0020 0025 0017 0011 0005 0025 0024 0025 0003 0017 0001 0025 0017 0024 0007 0015 0016 0022 0012 0022 0019 0008 0015 0017 0017 0017 0006...
- Page 182 Parts lists Heat cell (cont.) MatriX cylinder burner 0001 Burner gasket (wearing part) 0012 Ionisation electrode gasket 0002 Thermal insulation ring (5 pce) 0003 Cylinder burner gauze assembly 0013 Ignition electrode gasket (5 pce) 0004 Burner gauze assembly gasket 0014 Blade terminal (10 pce) 0005 Ignition electrode (wearing part) 0015 Mixture restrictor 0006 Ionisation electrode (wearing...
-
Page 183: Control Unit
Parts lists Heat cell (cont.) 0018 0004 0002 0001 0015 0004 0003 0018 0001 0004 0007 0012 0013 0010 0018 0013 0005 0013 0012 0006 0011 0012 0014 0007 0008 0007 0019 0009 0016 0017 0019 Control unit 0001 Control unit 0005 Fuse holder 0002 Control unit casing back panel 0006 Programming unit for constant... - Page 184 Parts lists Control unit (cont.) 0007 Programming unit for weather- 0015 Locking bolts, left and right compensated mode 0017 Wireless outside temperature 0008 LON module sensor 0009 PCB adaptor 0018 Outside temperature sensor 0010 Cable harness X8/X9/ionisation (hardwired) 0011 Cable harness 100/35/54/PE 0019 KM BUS cable 145 0012 Power cable, stepper motor 0020 Internal extension H1...
-
Page 185: Miscellaneous
Parts lists Control unit (cont.) 0013 0002 0009 0008 0005 0009 0015 0020 0001 0003 0015 0021 0014 0005 0006 0004 0017 0015 0007 0018 0010 0011 0012 0019 Miscellaneous 0001 Special grease 0004 Installation and service instruc- 0002 Spray paint, Vitowhite tions 0003 Touch-up paint stick, Vitowhite... - Page 186 Parts lists Miscellaneous (cont.) 0005 Operating instructions for con- stant temperature mode 0006 Operating instructions for weath- er-compensated mode 0002 0003 0004 0001 0005 0006...
-
Page 187: Commissioning/Service Reports
Commissioning/service reports Commissioning/service reports Settings and actual values Set value Commis- Mainte- sioning nance/ Service Date Signature Static pressure mbar ≤ 57.5 ≤ 5.75 Supply pressure (flow pres- sure) = for natural gas E mbar 17.4-25 1.74-2.5 = for natural gas LL mbar 17.4-25 1.74-2.5... -
Page 188: Specification
Specification Specification Rated voltage 230 V Electronic tempera- Rated frequency 50 Hz ture limiter setting 81 °C Rated current Temperature limiter Safety category setting 100 °C (fixed) IP rating IP X 4 D to Backup fuse (power EN 60529 supply) Max. - Page 189 Specification Specification (cont.) Note The connection values are only for doc- umentation purposes (e.g. in the gas contract application) or to estimate a supplementary volumetric settings check. Due to the factory settings, the gas pressure must not be altered from these values.
-
Page 190: Certificates
Certificates Declaration of conformity We, Viessmann Werke GmbH&Co KG, D-35107 Allendorf, declare as sole respon- sible body that the product Vitodens 222-F, type B2TA complies with the following standards: DIN 4753 EN 55 014 EN 483 EN 60 335-1 EN 625... -
Page 191: Manufacturer's Certificate According To The 1St Bimschv [Germany]
Certificates Manufacturer's certificate according to the 1st BImSchV [Germany] We, Viessmann Werke GmbH&Co KG, D-35107 Allendorf, confirm that the product Vitodens 222-F, type B2TA, complies with the NO limits specified by the 1st BImSchV Paragraph 6 [Germany]. Allendorf, 1 January 2013 Viessmann Werke GmbH&Co KG... -
Page 192: Keyword Index
Keyword index Keyword index Acknowledging a fault display..120 Electronic combustion controller..166 Actuator test........118 Extension Anode, checking........60 ■ AM1..........154 Anode, replacing........60 ■ EA1..........156 Assembly.........171 ■ Internal H1........152 ■ Internal H2........153 Extension kit for heating circuit with Boiler, draining on the DHW side..58 mixer ..........146 Boiler water temperature sensor..140 External blocking......159... - Page 193 Keyword index Keyword index (cont.) Remote control.........166 Ignition..........52 Removing a fault display....120 Ignition electrodes......52 Report..........187 Ionisation electrode......52 Rotational direction of mixer motor ■ Changing........147 ■ Checking........147 Language selection......37 LON............73 ■ Fault monitoring......74 Safety chain ........145 ■ Setting subscriber numbers....73 Screed drying........161 ■...
- Page 196 Applicability Serial No.: 7519081 7513044 7513045 7513046 Viessmann Werke GmbH&Co KG Viessmann Limited D-35107 Allendorf Hortonwood 30, Telford Telephone: +49 6452 70-0 Shropshire, TF1 7YP, GB Fax: +49 6452 70-2780 Telephone: +44 1952 675000 www.viessmann.com Fax: +44 1952 675040 E-mail: info-uk@viessmann.com...
Need help?
Do you have a question about the Vitodens 222-F B2TA and is the answer not in the manual?
Questions and answers