Sign In
Upload
Manuals
Brands
Symmetricom Manuals
Clock
TimeProvider 1000
Symmetricom TimeProvider 1000 Manuals
Manuals and User Guides for Symmetricom TimeProvider 1000. We have
5
Symmetricom TimeProvider 1000 manuals available for free PDF download: User Manual, Reference Manual, Release Notice
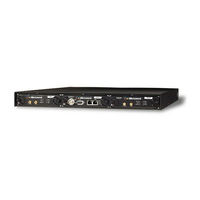
Symmetricom TimeProvider 1000 User Manual (298 pages)
DOCSIS Timing Interface Server
Brand:
Symmetricom
| Category:
Server
| Size: 2.42 MB
Table of Contents
Table of Contents
3
Figures
11
How to Use this Guide
15
Purpose of this Guide
16
Structure of this Guide
17
Conventions Used in this Guide
18
Warnings, Cautions, Recommendations, and Notes
19
Related Documents and Information
20
Chapter 1 Overview of the Timecreator
23
DTI Server Hierarchy and M-CMTS Elements
24
Overview
24
Timecreator 1000 Front View
25
Timecreator 1000 Rear View
25
Shelf
26
Timecreator 1000 Input Signal Source
27
Output Signals
28
Clock Design
29
Performance Monitoring
30
Functional Description
31
Timecreator 1000 Modules and DTI Links
31
IMC Module Block Diagram
32
Timecreator 1000 Block Diagram
32
IOC Module Block Diagram
33
Power Module
34
Management Ethernet Port
35
Alarms
36
Chapter 2 Engineering and Ordering Procedures
37
Common Configurations
38
Overview
38
AC Power Cord Options
39
Component Part Numbers
39
GPS Parts and Accessories
40
Two-Way GPS Antenna
40
Timecreator 1000 no Redundancy - NA AC Power - P/N 990-93101-01
41
Timecreator 1000 - DC Power - P/N 990-93106-01
42
Timecreator 1000 - NA AC Power - P/N 990-93107-01
42
Timecreator 1000 - DC Power - P/N 990-93108-01
43
Timecreator 1000 - NA AC Power - P/N 990-93109-01
43
GPS Antenna Kit - P/N 990-93500-01
44
NTP Option - P/N 990-93200-01
44
Timecreator 1000 - DC Power - P/N 990-93110-01
44
User-Supplied Tools and Materials
45
Chapter 3 Installing the Timecreator
47
Getting Started
48
Installation Tools and Equipment
49
Rack Mounting the Shelf
50
Installing the Timecreator 1000
51
Working with Modules
51
Inserting Modules
52
IMC Module
53
Making Signal Connections
53
Serial Port Connector Pins
54
Management and NTP Server Ethernet Connector Pin Assignments
54
Serial Port Connector Pin Assignments
54
GPS Connections
55
Rear Panel DTI Links
56
DTI and Root DTI Connector Pin Assignments
56
Making Ground and Power Connections
57
Timecreator 1000 AC Power Module
58
Installation Check List
59
Installation Completeness Checklist
59
Module LED Descriptions
59
Chapter 4 General Guidelines for Using the Symmetricom Timecreator
63
Timecreator 1000 DC Power Module
58
Clock Operations
64
TOD Source Modes
64
CLI Commands
65
Adding and Deleting Users
65
Logging in and out
65
Determining Status
66
Restoring Default Configuration
66
Saving the Present Configuration to Non-Volatile Memory
66
Configuring for Default Mode (Real Time Clock)
67
Configuring for GPS Mode
67
Configuring for User Mode
67
Enabling Outputs
67
Setting the Output to Test Mode
67
Configuring for NTP Mode
68
Configuring for Subtending Mode
68
Forcing Unit to Send New Time
68
Timecreator 1000 User's Guide 097-93100-01 Revision C – February
68
Configuring Dynamic IP
69
Configuring Static IP
69
Setting Auto Cable Advance
69
Setting Manual Cable Advance
69
Switching Active and Standby Cards
70
Dhcp
65
Chapter 5 Provisioning
71
Establishing a Connection to the Timecreator 1000
72
Communicating through the Ethernet Port
72
Communicating through the Serial Port
72
Managing the User Access List
74
Login
74
User Level and Access
74
Adding a User
75
Deleting a User
76
Displaying Current Users and User Access Levels
76
Displaying Logged in Users
76
Changing a User's Password and Access Level
77
Managing the IP Address Whitelist
78
Add an IP Address to the Whitelist
78
Delete an IP Address from the Whitelist
79
Set the Whitelist to Default
79
Provisioning Login Authentication
79
Provisioning the TC1000 for Login Authentication
79
Configuring the RADIUS Server
80
Security Levels Vs. RADIUS Server Class Attribute Settings
80
Configuring the TACACS+ Server
82
Security Levels Vs. RADIUS Server Class Attribute Settings
82
Provisioning Services
84
Provisioning the Ethernet Ports
84
Static IP Mode
84
DHCP Mode
85
Setting the System Date, Time and Time Offset
85
Setting the DTI Server Type
86
Timecreator 1000 Input Signal Source
86
Root DTI Server in Free-Run Mode
87
Root DTI Server in GPS Mode
88
Subtending DTI Server Mode
88
Provisioning the Input Reference
89
Setting the GPS Parameters
89
Setting the DTI Parameters
90
Force System Time to Reference (Jam Sync)
91
Setting the NTP Parameters
91
Provisioning the DTI Links
92
Enabling and Disabling the DTI Client/Server Links
92
Enabling and Disabling the DTI Server Links
92
DTI Link LED Indicators
93
Enabling DTI Test Mode
94
Provisioning Revertive and Non-Revertive Mode
94
Provisioning Root Server Recovery Mode
95
Benefit of Using Root Server Recovery
95
Root Server Recovery Vs. Root Recovery
95
Recovery Modes Based on TOD Source
96
State Diagram for Root Server Recovery - USER Mode
97
Large Scale Deployment with Root Server Recovery
98
Simple Deployment with Root Server Recovery
98
State Diagram for Root Recovery - GPS, NTP, and RTC Modes
99
Duration of Root Server Recovery Process
100
Requirements for Root Server Recovery
100
Displaying Configuration of Root Server Recovery
101
Displaying Status of Root Server Recovery
101
Enabling Root Server Recovery
101
Aborting Root Server Recovery
102
Provisioning SNMP
103
Provisioning an NTP Server
104
Provisioning Alarms
105
Provisioning Cable Advance
105
Provisioning the Alarm-States
106
Provisioning the Set and Clear Alarm Thresholds
106
Timecreator 1000 Alarm Codes
107
Displaying System Status
108
Retrieving Current Alarm Settings
108
Retrieving Current Alarms
108
Timecreator 1000 Alarm Codes
108
Displaying Alarms
109
Displaying Events
109
Routine Operation Commands
109
Backing up Provisioning Data
110
Restarting Timecreator 1000'S IMC Card
110
Saving and Restoring Provisioning Data
110
Restoring Provisioning Data
111
Timecreator 1000 User's Guide 097-93100-01 Revision C – February
114
Chapter 6 Maintenance and Troubleshooting
115
Preventive Maintenance
116
Safety Considerations
116
ESD Considerations
116
Diagnosing the IOC
117
Reading LED Conditions
117
Removing the IOC
117
LED Conditions for the IOC
117
Replacing the IOC
120
Diagnosing the IMC
121
Reading LED Conditions
121
LED Conditions for the IMC
121
Replacing the IMC
122
Repairing the Timecreator 1000
122
Obtaining Technical Assistance
123
Upgrading the Firmware
123
Upgrading the IOC
123
Upgrading the IMC
125
Returning the Timecreator 1000
126
Equipment Return Procedure
126
Repacking the Unit
126
User's Guide Updates
127
Appendix A Alarms, Events and SNMP Traps
129
Alarm Messages
130
Identification Parameters for Alarms, Events and Traps
130
System Notification Messages - Alarms
131
Event Messages
138
System Notification Messages - Events
138
SNMP Traps
148
MIB Var Bindings for Symmetricom- Specific Traps
148
SNMP MIB - Event Table Entries
149
SNMP MIB - Trap Object Parameters and Event Log Entries
149
SNMP Alarm Traps
150
SNMP MIB - Trap Object Binding Example
150
Timecreator 1000 Alarm Trap Details
150
Timecreator 1000 Alarm Traps - Additional Details
152
SNMP Event Traps
158
Standard SNMP Traps Supported by TC1000
158
Timecreator 1000 Event Trap Details
158
Timecreator Events Traps - Additional Details
162
Appendix B Command Descriptions and
176
CLI Overview
176
General Conventions
176
Timecreator 1000 CLI Command Set
176
Command User Levels
177
CLI Commands
178
Show Authentication
187
Show Clock
193
Time Zone Offsets
194
Set Configuration
195
Set Hostname
208
Show Hostname
208
Show Interface
211
Show Inventory
217
Show Log
226
Show Ntp
232
Set Service
250
Show Services
250
Show Snmp
252
Set Snmp
253
Show Statistics
258
Show Status
259
Set User
265
Show User
265
Simple Network Management Protocol
268
Management Information Base
269
SNMP Features
269
SNMP Users and Manager Addresses
269
Snmpv3 Security Features
269
Network Time Protocol
271
Client Mode
272
Server Mode
272
Secure File Transfer Protocol
272
Secure Shell Protocol
272
Appendix C Installing the Two-Way GPS Antenna
273
GPS Parts and Accessories
274
Parts
274
Tools
274
Locating the GPS Antenna
275
Making GPS Connections
275
Installing the GPS Antenna
275
Antenna-To-Device Cabling
277
Installing the Antenna Bracket on a Pipe
278
Installing the Antenna Bracket on a Post
278
Attaching the Antenna to the Bracket
279
Assembling the Lightning Suppressor
280
Appendix D Specifications and Factory Defaults
283
Specifications
284
Environmental
284
Mechanical
284
Timecreator 1000 Mechanical Specifications
284
Timecreator 1000 Environmental Specifications
284
Power
285
Serial Port
285
Timecreator 1000 Power Specifications
285
Serial Port Specifications
285
Input Signals
286
LAN Port
286
Output Signals
286
LAN Port Specifications
286
Input Signal Specifications
286
Output Signal Specifications
286
Roof Antenna
287
Factory Defaults
287
Antenna Specifications
287
GPS and DTI Port Parameters
287
IMC and Communication Parameters
288
Alarm Default Values
290
GPS and DTI Port Alarm Parameters
290
Timecreator 1000 User's Guide 097-93100-01 Revision C – February
292
Index
295
Advertisement
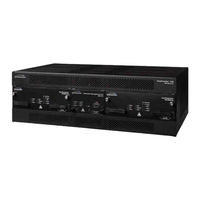
Symmetricom TimeProvider 1000 User Manual (224 pages)
Edge Clock
Brand:
Symmetricom
| Category:
Clock
| Size: 2.18 MB
Table of Contents
Table of Contents
3
How to Use this Guide
13
Purpose of this Guide
14
Who Should Read this Guide
14
Structure of this Guide
14
Conventions Used in this Guide
15
Warnings, Cautions, Recommendations, and Notes
16
Related Documents and Information
17
Where to Find Answers to Product and Document Questions
17
What's New in this Guide
17
Chapter 1 Overview of the Timeprovider
19
Overview
20
Shelves
20
Expansion Panel
21
Timeprovider 1000 ETSI-Style Shelf
21
Timeprovider 1100 Rear Access Shelf
21
Inputs
22
Outputs
22
Timeprovider 1100 Expansion Panel
22
Communication
23
Clocks
23
Operating Modes
23
Performance Monitoring
24
Phase Measurements
25
MTIE Calculations
25
TDEV Calculations
25
FFOFF Calculations
26
NTP Operation
26
SNMP - Simple Network Management Protocol
28
Physical Description
28
Front Panel of the Timeprovider 1000
29
Rear Panel of the Timeprovider 1100 - Old Version
29
Functional Description
30
Rear Panel of the Timeprovider 1100 - New Version
30
Block Diagram of the Timeprovider
31
System Power
33
The Timeprovider Interface Unit (TPIU)
33
Typical Power Consumption
33
Communication Ports
34
Ethernet
34
Local Craft Serial Port
34
Remote Serial Port
34
Reference Input Signals
34
Selecting the Input
35
Ssms and Quality Level
36
SSU-Based Reference Selection Scenarios
37
Subtending-Based Reference Selection Scenarios
37
GPS Inputs
38
The Integrated IMC/TPIU
38
Clock Performance
39
Output Signals
39
Retimer Modules
40
Alarms
41
Synchronization Status Messages (Ssms)
41
ANSI SSM Quality Level Definitions
41
ITU SSM Quality Level Definitions
42
Smartclock
43
Bestime
43
Normal Tracking
44
GPS Holdover
44
Revision G – April 2008 Timeprovider User's Guide
45
Chapter 2 Engineering and Ordering Procedures
45
Shelf
46
Model 1000 Front Access
46
Model 1100 Rear Access
46
Expansion Panel
46
Front Access
46
Rear Access
47
Input Modules
47
Output Modules
47
Input Modules Available for the Timeprovider
47
Output Modules and Accessories Available for the Timeprovider
47
IMC and IOC Modules
48
IOC and IMC Modules Available for the Timeprovider
48
GPS Antenna
49
GPS Parts and Accessories
49
Ordering and Parts List
51
Ordering the Cable Management Option
51
Ordering an NTP or SNMP License
51
Timeprovider Shelves
51
Chapter 3 Installing the Timeprovider
53
Getting Started
54
Pre-Installation Check
54
Performing a Site Survey
54
Gathering the Tools
55
Unpacking the Unit
56
Rack Mounting
56
Installing the Model 1000 Shelf, Expansion Panel, and Cable Management
57
Installing the Model 1100 Shelf, Cable Management Tray, and Expansion
58
Installing the Model 1000 Shelf and Expansion Panel - 23-Inch Rack
59
Making Connections
60
Making Ground Connections
60
Installing the Model 1100 Shelf and Expansion Panel - 23-Inch Rack
60
Making Power Connections
61
Power Connections
61
Verifying Power and Grounding Connections
62
Power Terminal Connectors
62
Assembling the ETSI (Front Access) Power Connector
62
Making Input Connections
63
BNC Input Module
63
Input Connector Modules Available for the IOC
63
Wire-Wrap Input Module
64
DB9 Input Module
64
Pinout for the DB9 Input Module
64
BT43 Input Module
65
Metric (Siemens) Input Module
65
Making Output Connections
66
Output Connector Modules
66
Pinout for the DB9 Output Module
66
BNC and Wire-Wrap Output Modules
67
DB9 Output Modules
67
BT43 and Metric (Siemens) Output Modules
68
B-422 Output Module
68
Making Retimer Connections
69
Front Panel of the T1 (Wire-Wrap) and E1 (BNC) Retimer Modules
69
Sample Installation Schematic for a Retimer
69
Making Alarm Connections
70
Alarm Connector Pinout
70
Making GPS Connections
71
DB-25 Alarm Connector (Front View)
71
Locating the GPS Antenna
71
Antenna-To-Shelf Cabling
73
Installing the Antenna Bracket on a Pipe
74
Installing the Antenna Bracket on a Post
74
Attaching the Antenna to the Bracket
75
Assembling the Lightning Suppressor
76
Mounting the TPIU and Expansion Panel on the same Rack Ears
78
Mounting the TPIU with a Model 1000 ETSI-Style Shelf
78
Making Communications Connections
79
Connector Pinouts for the Serial Ports
79
Changing Communications Settings
80
Installing Connections to the Ethernet Port
80
Ethernet Communications Port Signal Connections
81
Installation Check List
82
Powering up the Shelf
82
Working with Cards
82
Properly Handling Cards
82
Installation Completeness Checklist
82
Inserting Cards
83
Removing Cards
83
Firmware Features
84
Firmware Feature Matrix
84
Chapter 4 Provisioning the Timeprovider
85
TL1 Overview
86
TL1 Command Structure
86
TL1 Syntax Conventions
86
TL1 Response Format
87
Autonomous Messages
88
Starting the Timeprovider for the First Time
88
Logging in for the First Time
89
Setting Communications Parameters
91
Setting RS-232 Parameters
91
Setting Ethernet Parameters
93
Checking Communication Links
94
Defining the Security Parameters
94
Defining a User at the Security Access Level
95
Managing the User List
96
Logging in
96
Logging out
97
Adding a User
98
Changing the Current User's Password
99
Displaying a User's Access Level
99
Editing a User's Access Level
100
Deleting a User
101
Retrieving Current Users
101
Using Syncraft
102
Starting Syncraft
102
The Syncraft Main Window
102
Creating a Connection
103
The Create New Connection Window
103
Opening a Connection
104
Closing a Connection
104
Logical View of the Timeprovider
104
Provisioning the IOC
105
Setting the System Mode
105
Setting the IOC Parameters
107
Provisioning the Input Reference
108
Setting the Input State
108
Setting the GPS Parameters
109
Setting the Input Frequency
110
Setting the Input Frame Type
110
Controlling Automatic Reference Switching
111
Setting the Input Quality Level
112
Setting the Input Priority Level
113
Manually Selecting the Reference
114
Provisioning the SSM
115
Enabling CRC4
116
Using Performance Monitoring
116
Default Mask Parameters
117
Provisioning the Outputs
118
Enabling and Disabling the Outputs
119
Provisioning the Output Framing Type
119
Provisioning Retimer Parameters
120
Enabling and Disabling the Retimers
120
Provisioning the LBO
121
Provisioning Cut-Thru Mode
122
Provisioning NTP Parameters
122
Activating NTP
123
Editing NTP Peer Server Parameters
123
Enabling NTP Authentication
124
Setting the NTP Authentication Key
125
Provisioning Alarms
126
Provisioning the Alarm Levels
126
Alarm Conditions and Defaults
127
Provisioning System-Level Alarms
130
Retrieving Current Alarm Settings
131
Retrieving Current Alarms
132
Displaying Alarm Status
134
Clearing Alarms
135
Provisioning SNMP Parameters
136
Activating SNMP
136
Adding a User
137
Changing a User's Security Parameters
137
Displaying the Connected Users
137
Deleting a User
137
Setting up SNMP Traps, Informs, and Notifications
137
System Commands
138
Displaying Events
138
Displaying the Configuration of the Timeprovider
139
Restarting the Timeprovider
140
Saving Provisioning Data
141
Provisioning Record
141
Chapter 5 Testing the Timeprovider
145
Revision G – April 2008 Timeprovider User's Guide
145
LED Conditions for the IOC
146
Testing the Timeprovider
146
Test Overview
146
Test Equipment
146
Verifying Normal Operation
146
LED Conditions for the IMC and IMC/TPIU
147
LED Conditions for the IOC
147
Testing Alarm Conditions
148
Testing the IOC Operating Modes
148
Testing the Reference Switching
149
Testing the Non-Revertive Operating Mode
149
Testing the Revertive Operating Mode
150
Testing the Power Alarms
150
Detecting Input Errors
151
Testing the Communication Ports
151
Testing the Local Craft Serial Port
151
Testing the Remote Serial Port
152
Testing the Ethernet Port
152
Record of Test Results
153
Test Record
153
Testing the Outputs
153
Timeprovider User's Guide 097-58001-02 Revision G – April
154
Chapter 6 Maintaining and Troubleshooting the Timeprovider
155
Preventive Maintenance
156
Safety Considerations
156
ESD Considerations
156
Diagnosing the IOC
157
Reading LED Conditions
157
Interpreting Error Messages
158
Removing the IOC
158
Replacing the IOC
160
Diagnosing the IMC
162
Reading LED Conditions
162
LED Conditions for the IMC and IMC/TPIU
162
Interpreting Error Messages
163
Replacing the IMC or IMC/TPIU
163
Diagnosing the External TPIU
164
Diagnosing the Retimer Module
164
LED Conditions for the External TPIU
164
Replacing Output Modules
165
Replacing the Input Module
166
Troubleshooting the Timeprovider
167
Using Events to Troubleshoot
167
Event Codes
167
Set and Clear Conditions for Alarms
174
Using Alarm Codes to Troubleshoot
176
Alarm Codes
176
Conditions Causing an Event
184
Repairing the Timeprovider
187
Obtaining Technical Assistance
187
Upgrading the Firmware
187
Upgrading the IMC
189
Upgrading the IOC
189
Returning the Timeprovider
191
Repacking the Unit
191
Equipment Return Procedure
192
Manual Updates
192
Symmetricom TimeProvider 1000 User Manual (216 pages)
Edge Clock
Brand:
Symmetricom
| Category:
Clock
| Size: 6.23 MB
Table of Contents
Table of Contents
3
Purpose of this Guide
14
Who Should Read this Guide
14
Structure of this Guide
14
Conventions Used in this Guide
15
Warnings, Cautions, Recommendations, and Notes
15
Related Documents and Information
17
Where to Find Answers to Product and Document Questions
17
What's New in this Document
17
Chapter 1 Overview of the Timeprovider
19
Overview
20
New Capabilities
20
Shelves
21
Timeprovider 1000 ETSI-Style Shelf
21
Expansion Panel
22
Inputs
22
Timeprovider 1100 Rear Access Shelf
22
Timeprovider 1100 Expansion Panel
22
Outputs
23
Communication
23
Clocks
23
Operating Modes
24
Performance Monitoring
25
Phase Measurements
25
MTIE Calculations
25
TDEV Calculations
26
FFOFF Calculations
26
Physical Description
26
Timeprovider 1000 - Front Panel
27
Timeprovider 1100 - Rear Panel
27
Functional Description
28
Block Diagram of the Timeprovider
28
System Power
30
Typical Power Consumption
30
Communication Ports
31
Ethernet
31
Local Craft Serial Port
31
Remote Serial Port
31
Reference Input Signals
32
Selecting the Input
32
Ssms and Quality Level
33
SSU-Based Reference Selection Scenarios
34
GPS Inputs
35
The Timeprovider Interface Unit (TPIU)
35
Subtending-Based Reference Selection Scenarios
35
Clock Performance
36
Output Signals
36
Alarms
37
Synchronization Status Messages (Ssms)
37
ANSI SSM Quality Level Definitions
37
ITU SSM Quality Level Definitions
38
Smartclock
39
Bestime
39
Normal Tracking
40
GPS Holdover
40
Chapter 2 Engineering and Ordering Procedures
41
Shelf
42
Model 1000 Front Access
42
Model 1100 Rear Access
42
Expansion Panel
42
Front Access
42
Rear Access
43
Input Modules
43
Output Modules
43
BNC Input Module
43
Input Modules Available for the Timeprovider
43
Output Modules Available for the Timeprovider
43
IMC and IOC Modules
44
IOC and IMC Modules Available for the Timeprovider
44
GPS Antenna
45
GPS Parts and Accessories
45
Ordering and Parts List
46
Accessories, Tools, and Equipment
46
Timeprovider Shelves
46
Chapter 3 Installing the Timeprovider
47
Getting Started
48
Pre-Installation Check
48
Performing a Site Survey
48
Gathering the Tools
49
Unpacking the Unit
50
Rack Mounting the Shelf and Expansion Panel
51
Installing the Model 1000 Shelf and Expansion Panel - 19-Inch Rack
51
Installing the Model 1100 Shelf and Expansion Panel - 19-Inch Rack
52
Installing the Model 1000 Shelf and Expansion Panel - 23-Inch Rack
53
Installing the Model 1100 Shelf and Expansion Panel - 23-Inch Rack
53
Making Connections
54
Making Ground Connections
54
Making Power Connections
54
Power Terminal Connectors
55
Power Connections
55
Verifying Power and Grounding Connections
56
Assembling the ETSI Power Connector
56
Making Input Connections
57
Input Connector Modules Available for the IOC
57
Wire-Wrap Input Module
58
DB9 Input Module
58
Pinout for the DB9 Input Module
58
BT43 Input Module
59
Metric (Siemens) Input Module
59
Making Output Connections
60
Output Connector Modules
60
Pinout for the DB9 Output Module
60
BNC and Wire-Wrap Output Modules
61
DB9 and BT43 Output Modules
61
Making Retimer Connections
62
Metric (Siemens) Output Module and T1 Retimer Wirewrap Output Module
62
Making Alarm Connections
63
Making Retimer Connections
63
Alarm Connector Pinout
63
Making GPS Connections
64
Locating the GPS Antenna
65
Antenna-To-Shelf Cabling
66
Installing the Antenna Bracket on a Pipe
67
Installing the Antenna Bracket on a Post
67
Attaching the Antenna to the Bracket
68
Assembling the Lightning Suppressor
69
Mounting the TPIU and Expansion Panel on the same Rack Ears
71
Mounting the TPIU with a Model 1000 ETSI-Style Shelf
71
Making Communications Connections
72
Connector Pinouts for the Serial Ports
72
Changing Communications Settings
73
Installing Connections to the Ethernet Port
73
Ethernet Communications Port Signal Connections
74
Installation Check List
75
Powering up the Shelf
75
Working with Cards
75
Properly Handling Cards
75
Installation Completeness Checklist
75
Inserting Cards
76
Removing Cards
76
Firmware Features
77
Chapter 4 Provisioning the Timeprovider
79
TL1 Overview
80
TL1 Command Structure
80
TL1 Syntax Conventions
80
TL1 Response Format
81
Autonomous Messages
82
Starting the Timeprovider for the First Time
82
Defining a User at the Security Access Level
83
Setting the Source ID <Sid
84
Setting the Date and Time
85
Setting Communications Parameters
86
Setting RS-232 Parameters
86
Setting Ethernet Parameters
88
Checking Communication Links
89
Defining the Security Parameters
90
Managing the User List
90
Logging in
90
Logging out
91
Adding a User
92
Changing the Current User's Password
93
Displaying a User's Access Level
93
Editing a User's Access Level
94
Deleting a User
95
Retrieving Current Users
95
Provisioning the IOC
96
Setting the System Mode
96
Setting the IOC Parameters
98
Provisioning the Input Reference
99
Setting the Input State
99
Setting the GPS Parameters
100
Setting the Input Frequency
101
Setting the Input Frame Type
102
Controlling Automatic Reference Switching
102
Setting the Input Quality Level
104
Setting the Input Priority Level
105
Manually Selecting the Reference
105
Provisioning the SSM
106
Enabling CRC4
108
Using Performance Monitoring
108
Default Mask Parameters
109
Provisioning the Outputs
111
Enabling and Disabling the Outputs
111
Provisioning the Output Framing Type
111
Provisioning the Retimer Module
112
Provisioning Alarms
114
Provisioning the Alarm Levels
114
Provisioning System-Level Alarms
121
Retrieving Current Alarm Settings
122
Retrieving Current Alarms
123
Displaying Alarm Status
125
Clearing Alarms
127
System Commands
128
Displaying Events
128
Displaying the Configuration of the Timeprovider
129
Restarting the Timeprovider
130
Saving Provisioning Data
131
Provisioning Record
131
Chapter 5 Testing the Timeprovider
135
Testing the Timeprovider
136
Test Overview
136
Test Equipment
136
Verifying Normal Operation
136
LED Conditions for the IOC
136
LED Conditions for the IMC
137
LED Conditions for the IOC
137
Testing Alarm Conditions
138
Testing the IOC Operating Modes
138
Testing the Reference Switching
139
Testing the Non-Revertive Operating Mode
139
Testing the Revertive Operating Mode
140
Testing the Power Alarms
140
Detecting Input Errors
141
Testing the Communication Ports
141
Testing the Local Craft Serial Port
141
Testing the Remote Serial Port
142
Testing the Ethernet Port
142
Testing the Outputs
143
Test Record
143
Record of Test Results
143
Chapter 6 Maintaining and Troubleshooting the Timeprovider
145
Preventive Maintenance
146
Safety Considerations
146
ESD Considerations
146
Diagnosing the IOC
147
Reading LED Conditions
147
Interpreting Error Messages
147
Removing the IOC
148
Replacing the IOC
150
Diagnosing the IMC
152
Reading LED Conditions
152
LED Conditions for the IMC
152
Interpreting Error Messages
153
Replacing the IMC
153
Diagnosing the TPIU
154
Replacing Output Modules
154
LED Conditions for the TPIU
154
Replacing the Input Module
155
Troubleshooting the Timeprovider
156
Using Events to Troubleshoot
156
Event Codes
156
Set and Clear Conditions for Alarms
164
Using Alarm Codes to Troubleshoot
167
Event Code Conditional Descriptions
177
Repairing the Timeprovider
180
Obtaining Technical Assistance
181
Upgrading the Firmware
181
Upgrading the IMC
182
Upgrading the IOC
183
Returning the Timeprovider
185
Repacking the Unit
185
Equipment Return Procedure
185
User Guide Updates
186
Advertisement
Symmetricom TimeProvider 1000 Reference Manual (180 pages)
Edge Clock TL1 Reference Guide
Brand:
Symmetricom
| Category:
Clock
| Size: 0.96 MB
Table of Contents
Table of Contents
3
How to Use this Guide
7
Purpose of this Guide
8
Who Should Read this Guide
8
Structure of this Guide
8
Conventions Used in this Guide
9
Warnings, Cautions, Recommendations, and Notes
10
Related Documents and Information
11
Where to Find Answers to Product and Document Questions
11
What's New in this Guide
11
Chapter 1 TL1 Overview
13
Overview
14
TL1 Command Structure
14
Command Code Block
15
Staging Block
15
Payload Block
15
Responses
16
Normal Response
16
Error Response
17
Normal Response Fields
17
Error Response Fields
17
Error Codes Returned in Error Responses
18
In-Process Response
19
Autonomous Messages
19
In-Process Response Fields
19
Autonomous Message Fields
20
Command Security
21
Timeprovider TL1 Command Types and Access Levels
22
Chapter 2 TL1 Command Syntax and Description
25
TL1 Syntax Conventions
26
Command Descriptions
26
Activate Feature (ACT-FEATURE)
27
Activate Software Download Mode (ACT-SWDL)
28
The Firmware Download Process
29
Activate User (ACT-USER)
34
Cancel User (CANC-USER)
35
Copy Memory (CPY-MEM)
36
Delete Performance Monitoring Data (DLT-PM-DATA)
38
Delete Security (DLT-SECU)
39
Delete User Security (DLT-USER-SECU)
40
Edit Circuit Identifier (ED-CKTID)
41
ED-DAT - Keywords and Values for <Aid>=Sys
41
Edit Command Security (ED-CMD-SECU)
42
ED-CMD-SECU - Keyword and Values for <CID>=Text String
42
Edit Date (ED-DAT)
44
ED-DAT - Keywords and Values for <Aid>=Sys
44
Edit Equipment (ED-EQPT)
45
ED-EQPT - Keywords and Values
46
ED-EQPT for NTP Parameters
51
Edit Password (ED-PID)
54
Edit Sync (ED-SYNC)
55
ED-SYNC - Keywords and Values
56
Edit User Security (ED-USER-SECU)
62
ED-USER-SECU - Keyword and Values for <Uid>=Text String
62
Enter Password (ENT-PID)
63
Enter User Security (ENT-USER-SECU)
64
Initialize Event Log (INIT-LOG)
66
Initialize System (INIT-SYS)
67
INIT-SYS Keywords
67
Operate Alarm Cutoff (OPR-ACO-ALL)
69
Ping (PING)
70
Remove Equipment (RMV-EQPT)
71
Retrieve Alarm Condition (RTRV-ALM)
73
RTRV-ALM Output Fields
74
Retrieve Attribute (RTRV-ATTR)
76
RTRV-ATTR - Keywords and Values for All <Aids
77
RTRV-ATTR Output Fields
78
Retrieve Bestime Status (RTRV-BESTIME-STAT)
79
RTRV-BESTIME-STAT Output Fields
79
Retrieve Built-In Self Test (RTRV-BIST)
81
Retrieve Built-In Self Test Output Fields
82
Retrieve Circuit Identification (RTRV-CKTID)
84
Retrieve Command Security (RTRV-CMD-SECU)
85
RTRV-CMD-SECU Output Fields
85
Retrieve Condition (RTRV-COND)
87
RTRV-COND Output Fields
89
Retrieve Craft Data (RTRV-CRAFT)
92
RTRV-CRAFT Output Fields
93
Retrieve Date (RTRV-DAT)
99
RTRV-DAT Output Fields
99
Retrieve Equipment (RTRV-EQPT)
101
RTRV-EQPT Output Field
102
Retrieve GPS Status (RTRV-GPS-STAT)
103
RTRV-GPS-STAT Output Fields
103
Retrieve Header (RTRV-HDR)
104
Retrieve Inventory (RTRV-INV)
105
RTRV-INV Output Fields
105
Retrieve LED Status (RTRV-LED)
107
RTRV-LED Output Fields
107
Retrieve Log (RTRV-LOG)
109
RTRV-LOG - Keywords for All <Aids
110
RTRV-LOG Event Output Fields
110
RTRV-LOG Alarm Output Fields
111
Retrieve Network Equipment Type (RTRV-NETYPE)
113
Retrieve NTP Information (RTRV-NTP-PEER)
114
RTRV-NTP-PEER Output Fields
114
Retrieve PM (RTRV-PM)
116
RTRV-PM - Keywords for All <Aids
116
RTRV-PM Keyword Modifier Fields
116
RTRV-PM Output Fields
117
Retrieve Sync (RTRV-SYNC)
123
RTRV-SYNC Output Field
124
Retrieve System Mode (RTRV-SYS-MODE)
125
Retrieve Threshold (RTRV-TH)
126
RTRV-TH - Output Fields
127
Retrieve User (RTRV-USER)
128
Retrieve User Security (RTRV-USER-SECU)
129
RTRV-USER-SECU Output Fields
129
Set Attribute (SET-ATTR)
131
SET-ATTR - Keywords and Values for All <Aids
132
Set Source Identifier (SET-SID)
133
SET-SID - Keyword and Value
133
Set System Mode (SET-SYS-MODE)
134
SET-SYS-MODE - Keyword and Values
134
Set Threshold (SET-TH)
136
SET-TH - Keywords and Values for All <Aids
136
Mask Table
137
Security and Administrative Commands
139
System Commands
140
Performance Monitoring Commands
141
Symmetricom TimeProvider 1000 Release Notice (7 pages)
DOCSIS Timing Interface Server
Brand:
Symmetricom
| Category:
Server
| Size: 0.04 MB
Table of Contents
Resolved Issues
2
Known Issues
3
Updating the Firmware
4
Upgrading the IMC
4
Contacting Technical Support
7
Advertisement
Related Products
Symmetricom TimeProvider 100
Symmetricom TimeProvider 1100
Symmetricom TimeProvider 500 series
Symmetricom TimeProvider 500
Symmetricom TimeProvider 5000
Symmetricom TimeProvider 2700
Symmetricom TimeProvider 2300
Symmetricom EDGE CLOCK 1000
Symmetricom EDGE CLOCK 1100
Symmetricom ND-CLK
Symmetricom Categories
Test Equipment
Clock
Server
GPS
Amplifier
More Symmetricom Manuals
Login
Sign In
OR
Sign in with Facebook
Sign in with Google
Upload manual
Upload from disk
Upload from URL