Kodak Scan Station 700 Administrator's Manual
Scan station 700; scan station 700ex
Hide thumbs
Also See for Scan Station 700:
- Administrator's manual (178 pages) ,
- User setup manual (33 pages) ,
- Maintenance reference manual (2 pages)
Table of Contents
Advertisement
Advertisement
Chapters
Table of Contents

Related Manuals for Kodak Scan Station 700


Summary of Contents for Kodak Scan Station 700
-
Page 2: Environmental Information
Remove the power cord from the wall outlet before moving or relocating the Scan Station. • Follow the Kodak recommended cleaning procedures. Do not use air, liquid or gas spray cleaners. These cleaners displace dust, dirt and debris to other locations within the scanner, which may cause the Scan Station to malfunction. -
Page 3: Acoustic Emission
Acoustic emission Maschinenlärminformationsverordnung – 3, GSGV Der arbeitsplatzbezogene Emissionswert beträgt <70 db(A). [Machine Noise Information Ordinance — 3, GSGV The operator-position noise emission value is <70 dB(A).] phase est de 230 V. EMC statements United States: This equipment has been tested and found to comply with the limits for a Class B digital device pursuant to Part 15 of the FCC rules. -
Page 4: Table Of Contents
CONTENTS OVERVIEW PRE-INSTALLATION CHECKLIST INSTALLATION AND GETTING STARTED CONFIGURING DEVICE SETTINGS DEFINING SCAN SETTINGS CREATING DESTINATIONS ADDING AND MANAGING GROUPS CREATING JOBS MONITORING AND MANAGING YOUR SCAN STATIONS MAINTENANCE 10-1 TROUBLESHOOTING 11-1 GLOSSARY 12-1 APPENDICES Specifications Network Protocol Warranty... -
Page 5: What's In The Box
Setting up configurations ..............1-3 Scan Station components ............... 1-5 The Kodak Scan Station 700/720EX is designed as a walk-up device that requires no host PC or application software. It works with and uses an existing network and network shared services to communicate with other network devices or destinations. -
Page 6: Setting Up The Scan Station
Setting up the Scan Carefully unpack the Scan Station 700 and place it on a clean, dry and level surface. Refer to the Installation Guide or the “Rear view” Station illustration later in this chapter for port locations. 1. Select the appropriate AC power cord. Plug the power adapter into the power port on the Scan Station. -
Page 7: Setting Up Configurations
Setting up You must configure the Scan Station using the Kodak Scan Station 700/ 720EX - Scanner Administration application before you can use it. The configurations application allows you to configure and manage your Scan Stations. A Scan Station configuration consists of setting the following groups of options: Device Settings, Scan Settings, Destinations, Groups, and Jobs. - Page 8 It is suggested that scan settings, destinations and groups be defined before defining any jobs. Each Scan Setting, Destination and Group configuration will have an associated name that will be used when defining a job. The Scan Station can be configured to force a user to login. The login information is matched with the groups defined for each job.
-
Page 9: Scan Station Components
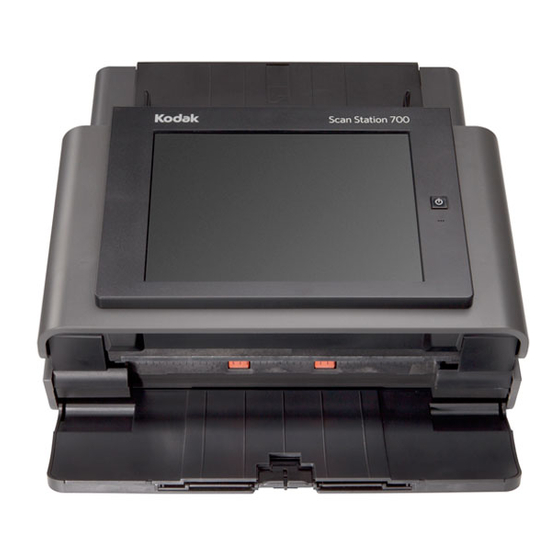
Scan Station Front view components Input tray extender — pull this extender out to accommodate document sizes over 8 1/2 x 11 inches (A4). Input tray — holds up to 75 sheets of 80 g/m (20 lb.) paper. Side guides — slide the guides back and forth to accommodate the width of the documents you want to scan. - Page 10 Inside view Separation module release lever/separation module — push the release lever down to remove the separation module for cleaning or replacement. The separation module provides smooth document feeding and separation of various sizes, thicknesses and textures of documents. Gap release lever — allows you to manually adjust the space between the feed module and separation module for documents that require special handling.
- Page 11 Rear view Modem port — the RJ-11 port connects the fax modem to a phone line. This is only for the Scan Station 720EX. Security lock port — connects a security lock to the Scan Station. You can purchase a standard security lock at an office supply store. Refer to the instructions provided with the security lock for installation procedures.
- Page 12 2 Pre-installation Checklist Contents Network configuration details............2-1 Best practices ................. 2-1 Pre-installation checklist ..............2-2 Network Because the Scan Station is a network device, a basic knowledge of networking principles and terminology is helpful. You should be familiar configuration details with the concept of creating user accounts (on domains), sharing folders, setting access privileges, the Universal Naming Convention (UNC), using IP addresses, fully qualified domain names (FQDNs) and...
-
Page 13: Best Practices
\\192.168.2.10\scanfolder. Pre-installation It is recommended that you review this checklist before configuring the Kodak Scan Station 700. This information is needed to create the initial checklist configuration file to complete the installation. Locate any information you are unsure of before creating the configuration file. - Page 14 Device Settings/Email (SMTP) Server The following settings are found using the Configuration tab and by selecting Edit>Device Settings. Parameter Name Your Setting Chapter Reference Email Server Address Username, Password, Domain Port See Chapter 4, “Configuring email settings”. Authentication Scheme Maximum Attachment Size Security Type Device Settings/Active Directory Server The following settings are found using the Configuration tab and by selecting Edit>Device Settings.
- Page 15 Printer Destination The following settings are found using the Configuration tab and by selecting Edit>Destinations. Parameter Name Your Setting Chapter Reference Complete directory path (the directory path to the printer server queue) Username, Password, Domain Chapter 6, “Setting up a printer Address (for direct connection destination”.
- Page 16 SFTP Destination The following settings are found using the Configuration tab and by selecting Edit>Destinations. Parameter Name Your Setting Chapter Reference Address Username, Password Protocol (SFTP) Port number Private Key File, Password Chapter 6, “Setting up a FTP site”. Proxy •...
- Page 17 Scan Station configuration. • Install the Kodak Scan Station 700/720EX - Scanner Administration application on a separate PC. See the section entitled, “Installing the Kodak Scan Station 700/720EX - Scanner Administration application”...
-
Page 18: Installing The Kodak Scan Station 700/720Ex - Scanner Administration Application
Kodak Scan Station 700/720EX - Scanner Administration application. 2. Click Next when the Kodak Scan Station 700 splash screen is displayed. 3. Click Next when the Welcome screen is displayed. 4. Click I Agree after you have read and agreed with the terms of the Software License Agreement, then click Next. -
Page 19: The Main Screen
See Chapter 9, Monitoring and Managing Your Scan Stations for more information. NOTE: In addition to the Scan Station 700/720EX, the Kodak Scan Station 500/520EX can be managed from the Scanner tab and the Scanner menu. - Page 20 A configuration is a collection of Device settings, Scan settings, Destinations, Groups, and Job settings. Configurations are stored on your PC in a configuration database and maintained by the Kodak Scan Station 700/720EX - Scanner Administration application. Detailed procedures for configuring these settings are described in Chapters 4-8.
-
Page 21: Menus
Kodak Scan Station 700/720EX - Scanner Administration application. Export — allows you to export a configuration file from the Kodak Scan Station 700/720EX - Scanner Administration application to any location. Exit — closes the Kodak Scan Station 700/720EX - Scanner Administration application. -
Page 22: Edit Menu
Edit menu Following is a description of the menu options on the Edit menu. Device Settings — allows you to configure the parameters that the Scan Station needs to send emails, communicate with an Active Directory Server for security purposes and set Scan Station defaults. For more information, see Chapter 4, Device Settings. - Page 23 Device Password — displays the Device Password dialog box which allows you to change the network connection password to the Scan Station. NOTE: This device password is used by the Kodak Scan Station 700/ 720EX - Scanner Administration to communicate with the Scan Station.
- Page 24 HTTPS — turning HTTPS on will encrypt data as it is communicated between the Kodak Scan Station 700/720EX - Scanner Administration application and the Scan Station. Device — provides the following options. Procedures on how to use these functions are described in Chapter 9, Monitoring and Managing Your Scan Stations.
-
Page 25: Help Menu
Help menu Following is a description of the menu options on the Help menu. Contents — provides the on-line help for the Kodak Scan Station 700/ 720EX - Scanner Administration. Index — provides an alphanumeric listing of keywords associated with the Kodak Scan Station 700/720EX - Scanner Administration. -
Page 26: Configuring Device Settings
4 Configuring Device Settings Contents Device Settings ................4-1 Configuring your device options..........4-3 Configuring email settings............4-8 Configuring Active Directory Server settings ......4-10 Configuring Fax settings ............4-12 Email address summary............4-15 Device Settings The Device Settings option allow you to configure the Scan Station for sending emails, communicate with the Active Directory Server for authentication purposes and set Scan Station defaults. - Page 27 2. Select Edit>Device Settings. Check all options that you want to configure and click Next. The software will step you through each option. • Device Options — allows you to set the following options: - Language - Device/Administrator Password - Network Destination Credentials - Remote Configuration Settings - Volume - Configuration Options...
- Page 28 Configuring your device This screen allows you to setup the following device options: options Language — click the down arrow to select the language that will be used on the Scan Station display. Device/Administrator Password — allows you to set a password that controls user access to the Scan Station., Force User Device Password...
- Page 29 Network Destination Credentials — when selected, define the Username, Password and Domain required to access network resources. 1. Enter the network user name assigned to the Scan Station. For more information see the section entitled, “Network configuration details” in Chapter 2. NOTE: If you want the Scan Station to have access to network printers or network shared folders, the credentials provided must have sufficient privileges to access these resources.
- Page 30 Volume — allows you to adjust the master volume of the Scan Station. This will typically affect the speaker sound from the FAX modem. NOTE: If you do not hear the fax dial tone after changing the volume, you may need to restart the Scan Station. Configuration Options —...
- Page 31 (e.g., time, date, etc.) when the Scan Station is restarted. NOTE: The Setup Wizard is run from the Scan Station (not the Kodak Scan Station 700/720EX - Scanner Administration application). A-61796 December 2013...
- Page 32 5. Select the hours, minutes, seconds of how you want the time format to be displayed: hh:mm:ss, h:mm:ss, hh:mm or h:mm. Power Saver (for Scan Station 700 only) — use the up and down arrows to set the amount of time the Scan Station needs to be inactive before it goes into power saver mode.
- Page 33 Configuring email For the Scan Station to send documents to email recipients, you must settings define how the Scan Station will access your email server. 1. Check Email Server and click Next. 2. Enter an IP address or a fully qualified domain name of your SMTP server in the Email Server Address field.
- Page 34 7. Enter the email address where you want a notification to be sent that an email could not be delivered by the Scan Station in the Return Email Address field. This email address will also be put in the email From field. 8.
- Page 35 Configuring Active If you selected to configure the Active Directory Server, proceed with Directory Server settings the following steps. If not, go to the section that describes the next device you want to configure. The Active Directory Server allows you to setup a central location for network administration and security.
- Page 36 6. Enter the Active Directory Server Fax Field Tag for the tag to use when searching the Active Directory Server for fax numbers. For more information, contact your network administrator for the exact string to use (e.g., facsimiletelephonenumber). 7. Select the maximum number of records to display when performing a search from the Search Results To Return field.
- Page 37 Configuring Fax settings If you selected to configure Fax, proceed with the following steps. NOTE: Dial-up fax settings are for the Scan Station 720EX only. Dial-up configuration settings will be ignored if they are sent to a Scan Station 700. Fax settings can be configured to allow the Scan Station to send and receive faxes.
- Page 38 4. Enter the number of times the Scan Station will attempt to send a fax in the Fax Failure Retries field. 5. Enter the number of minutes the Scan Station will wait between attempting to send a fax in the Delay Between Retries field. NOTE: If the fax service is not able to send a fax to the recipient, an email will be sent to the sender’s email address (if available).
- Page 39 10. When you have finished entering information on this screen, click Next. The following screen will be displayed. 11. If you do not want to allow the Scan Station to receive faxes, click No; otherwise click Yes and enter the required information in the Incoming Fax Configuration fields.
- Page 40 If desired, enter one or more of the following: • a fully qualified path name to the network folder where the incoming fax will be saved. • the email address of the person/group where the incoming fax will be delivered. •...
- Page 41 5 Defining Scan Settings Scan Settings.................. 5-3 Black and White Settings ..............5-5 Color Settings ................. 5-6 Advanced Settings ................5-8 PDF Settings................. 5-11 Filename Settings ................. 5-12 Scan Settings provide basic image processing settings, such as, color/ grayscale/black and white, output file format, compression, and some advanced options like Hole Fill, Streak Filter, etc.
- Page 42 2. Click the Add icon. The following screen will be displayed. 3. Make selections from any of the categories (e.g., Black and White Settings, Advanced Settings, etc.). NOTE: For a detailed description about the options, see the sections that follow. 4.
-
Page 43: Scan Settings
Scan Settings Scan Settings Scan As — select how you want documents to be scanned. Selections are: Color, Grayscale, Black and White. File Type — select one of the following options: • JPEG: this option is only available for Color or Grayscale. If your Scan As selection is Black and White and JPEG is selected, your Scan As selection will automatically change to Color. - Page 44 Input Type — select one of the following options: • Two Sided: the Scan Station will scan the front and back in a single pass. • One-Sided - Face Down: if you select this option, the documents must be put in the input tray face down (the side you want to scan facing the input tray).
-
Page 45: Black And White Settings
Black and White Settings The Black and White settings will be grayed out, if your Scan As selection is Color or Grayscale. Compression — you can select None or Group 4. Conversion Quality —allows you to select Best (iThresholding) or Normal (ATP). -
Page 46: Color Settings
Color Settings Compression — select JPEG or None. JPEG creates multiple files, one for the front and back of a page. If JPEG is selected, you can select a Quality option of: Draft, Good, Better, Best or Superior. Quality — allows you to select a Draft, Good, Better, Best or Superior quality option. - Page 47 Color Balance — select one of the following options: • None • Automatic: adjusts the white background of each document to pure white. This option compensates for the variations that occur between different weights and brands of paper. This is not recommended for use with photographs.
-
Page 48: Advanced Settings
Advanced Settings • Hole Fill: allows you to fill in the holes that are around the edges of your document. The types of holes that are filled include: round, rectangular, and irregularly shaped (e.g., double-punched or those having a slight tear that could have occurred when the document was removed from a binder). - Page 49 • Streak Filter: allows you to configure the Scan Station to filter vertical streaks from your images. Streaks are lines which may appear on an image and are not part of the original document. Streaks may be caused by contaminants on your documents (e.g., dirt, dust or frayed edges) or by not following the recommended cleaning procedures for your Scan Station.
- Page 50 Multifeed Ultrasonic Detection — multifeed detection aids in document processing by detecting documents that may go through the feeder overlapped. Multifeeds can happen due to stapled documents, adhesives on documents, or electrostatically charged documents. Check this option if you want to enable a Multifeed Response when a multifeed is detected.
-
Page 51: Pdf Settings
PDF Settings Quality — allows you to select a Good, Better or Best quality option. When saving a file as PDF, predefined resolution settings will be used when selecting Good (150 dpi), Better (200 dpi), and Best (300 dpi). The Scan Station dpi settings will not be used when scanning in PDF mode. -
Page 52: Filename Settings
Filename Settings File Name Settings allow you to define values that determine the locations (directories or subdirectories) and file name used when creating scanned documents. You can define a folder name where scanned documents will be placed when scanning to a network folder, FTP location or USB drive destination. -
Page 53: Creating Destinations
6 Creating Destinations Contents Accessing the Destinations screen ..........6-1 Destination layout and terminology..........6-3 Setting up an email destination............6-4 Importing an email address book..........6-6 Setting up a network destination............. 6-8 Setting up a printer destination ............. 6-10 Setting up a FTP site .............. - Page 54 The Setup Destinations screen will be displayed. 2. Click the Add icon to display the Destinations screen. The Destinations screen allows you to create destinations for: Email, Network, Printer, FTP, Fax, Email to Fax, SharePoint and Kofax Front Office Server. A-61796 December 2013...
-
Page 55: Destination Layout And Terminology
3. Select the destination type you want to create. When you select a destination type, a recommended name for the destination will be displayed in the Destination Name field. You can change this name by entering a name that is meaningful to you. This is the name that will be displayed on the Scan Station touchscreen. -
Page 56: Setting Up An Email Destination
Setting up a email 1. Select Edit>Destinations. The Setup Destinations screen will be displayed. destination 2. Click the Add icon to display the Destinations screen. 3. Select Email. 4. Click Next. 5. Enter a name in the Description field and an email address in the Enter a complete email address field where you want the scanned documents to be sent. - Page 57 6. Click Finish. The following screen will be displayed showing the email destinations and groups. 7. If you want to add more email destinations within the same email destination group, select the Add icon and repeat Steps 5 and 6. 8.
- Page 58 Importing an email CSV files are data files that represent database information. Each row address book contains data values that are separated by a comma. Each comma found on a line of text represents a column of data from the original database.
- Page 59 3. Many email client applications automatically export the column headings as the first row of data. If you do not want to import the column headings as the first row, check Skip first row of data. NOTE: Some email applications also export the data with additional quote characters surrounding the data.
-
Page 60: Setting Up A Network Destination
Setting up a network 1. Select Edit>Destinations. The Setup Destinations screen will be displayed. destination 2. Click the Add icon to display the Destinations screen. 3. Select Network. 4. Click Next. 5. Enter a network destination name that is meaningful to you in the Description field. - Page 61 The following screen will be displayed showing the network destination and group. 7. If you want to add more network destinations within the same network destination group, select the Add icon and repeat Steps 5 and 6. 8. To add another network destination group, select the network destination type and then click the Add icon, otherwise, click Finish.
-
Page 62: Setting Up A Printer Destination
Setting up a printer The Scan Station uses the Microsoft “Point and Print” technology for installing print drivers and connecting to network printers. Typically, destination network printers are attached to print servers which manage the scheduling of print jobs for one or more network printers. These print servers manage print queues for each connected printer and can also deliver and install print drivers to other network PCs or devices. - Page 63 5. Enter any text that describes the printer in the Description field. • If you want to connect to a print server on a network domain or to a printer that is shared by another computer on a network, continue with Step 6. •...
- Page 64 If you want to configure a printer that is directly connected to the network, follow Steps 11 - 18. The printer must first be “shared” from a computer on the network in order to download the print driver. The shared printer must also be configured to provide a Windows 7 driver for the printer.
- Page 65 Port value. NOTE: As shown below, this would be “IP_192.168.2.137”. 16. Return to the Kodak Scan Station 700/720EX - Scanner Administration application and enter the fully qualified address of the PC sharing the printer including the share name (e.g., \\workgrouppc\BrotherH) in the Address field.
-
Page 66: Setting Up A Ftp Site
Setting up a FTP site 1. Select Edit>Destinations. The Setup Destinations screen will be displayed. 2. Click the Add icon to display the Destinations screen. 3. Select FTP. 4. Click Next. 5. Make an entry in the Description, Enter a server name and directory path, Username and Password fields. - Page 67 Click the Proxy down arrow to configure the proxy settings. Select USER after login for the Proxy Type. Enter the Proxy Address in the form of a fully qualified domain name (e.g., FTP.acme.com) or as an IP address. Enter the Username and Password required to access the proxy server.
- Page 68 • If you select SFTP the following options are available: If the SFTP site communicates on a port other than Port 22, change the value using the up and down arrows. When you select SFTP, the port value will automatically change to the default value of Port 22.
- Page 69 7. Click Finish. 8. If you want to add more FTP destinations within the same FTP destination group, select the Add icon and repeat Steps 5 - 8. 9. To add another FTP destination group, select the FTP destination type and then click the Add icon, otherwise, click Finish. A-61796 December 2013 6-17...
- Page 70 Setting up a fax or You can setup a destination to a fax machine or email to fax. The steps are the same for either destination. email to fax destination 1. Select Edit>Destinations. The Setup Destinations screen will be displayed. 2.
-
Page 71: Adding A Sharepoint Group
Adding a SharePoint 1. Select Edit>Destinations. The Setup Destinations screen will be displayed. group 2. Click the Add icon to display the Destinations screen. 3. Select SharePoint. 4. Click Next. 5. Make an entry in the Description field that identifies the destination. 6. - Page 72 12. If the proxy server is configured to communicate on a port other than Port 80, change or enter the value using the up and down arrows. 13. In the Documents Path field, enter the path to the folder where the documents will be scanned.
-
Page 73: Adding A Kofax Front Office Server Group
Adding a Kofax Front 1. Select Edit>Destinations. The Setup Destinations screen will be displayed. Office Server group 2. Click the Add icon to display the Destinations screen. 3. Select Kofax Front Office Server. 4. Click Next. 5. Make an entry in the Description field that identifies the destination. 6. - Page 74 12. Click Index Fields. The Index Fields dialog box will be displayed. Index fields will vary based on each company’s implementation of the Kofax Front Office Server. 13. If the Kofax Front Office Server is secure, enter (or browse to) the name of the certificate file in the Certificate field.
-
Page 75: Adding And Managing Groups
7 Adding and Managing Groups This chapter provides procedures for adding and maintaining groups. Groups are a collection of network users whose names can be extracted from the Active Directory Server. You can create a group from the contents of an existing Active Directory Server group and you can add individual users from the Active Directory Server to your group. - Page 76 2. Click the Add icon to display the Group screen. 3. Enter the desired group name and click Next. Group names can be anything that is meaningful to you that defines a group of users. • If you do not want to add groups from your Active Directory Server, click No, then click Next and continue with Step 8.
- Page 77 • If you select Yes, the search fields will be displayed allowing you to find a group name from your Active Directory Server (LDAP). 4. In the Enter the Group to search field, enter the name of the group that you want to add and click Search. NOTES: •...
- Page 78 7. When finished, click Next. 8. To add users from the Active Directory Server, select Yes. 9. Enter the name of the user you want to add to the group and click Search. NOTES: • If too many addresses are found that match the search criteria, you may want to refine your search by adding more information, such as the first name of the person you are searching;...
- Page 79 A listing of the groups and users will be displayed. 12. Click Finish. A-61796 December 2013...
-
Page 80: Creating Jobs
8 Creating Jobs Because jobs are a collection of scan settings, destinations and groups of users, it is recommended that you create jobs after you have defined all of these settings. 1. Select Edit>Jobs. The Setup Jobs screen will be displayed. A-61796 December 2013... - Page 81 2. Click the Add icon. The Job screen will be displayed. 3. Enter a job name. As you enter the job name, it will be displayed in the Job Button Preview box. This is how the name will appear on the Scan Station touchscreen.
- Page 82 6. Select the Scan Settings you want to use for this job and click Next. The following screen will be displayed. NOTE: You can also create new scan settings from this screen by clicking the Add icon. 7. Select the destination(s) where want this job to be sent: •...
- Page 83 8. Select Next, then select the group where you want to send this job. 9. When finished, click Next. A summary of your job settings will be displayed. 10. Click Finish. A-61796 December 2013...
- Page 84 Once a job has been defined and the configuration has been uploaded to a Scan Station, the Jobs-only screen will be displayed on the Scan Station touchscreen instead of the normal user interface. A-61796 December 2013...
-
Page 85: Monitoring And Managing Your Scan Stations
9 Monitoring and Managing Your Scan Stations Contents Scanners tab................... 9-2 Toolbar ..................9-2 Grid view ..................9-4 Network configuration options............9-5 Adding a Scan Station..............9-5 Discovering devices ................ 9-7 Modifying a Scan Station ..............9-8 Deleting a Scan Station..............9-9 Changing a password ..............9-9 Configurations/configuration files..........9-10 Updating your Scan Station ............9-10... -
Page 86: Scanners Tab
Scanners tab The Scanners tab contains the specific data to identify and connect to Scan Stations on a network. When the Scanners tab is active, you will have access to the Scanner menu. The options on the Scanner and Help menus are described in the section entitled, “Menu options”... - Page 87 Refreshes the grid to display the current state of the Scan Station: • Idle • Scanning • Processing images • Sending email • Saving • Printing • Scan completed • Error • Cancelled • Preview • Sending Fax • Receiving Fax •...
-
Page 88: Grid View
Grid view Following is a description of the grid view columns Scanner Name — displays the name assigned to the Scan Station. IP Address — displays the IP address that is associated with the Scan Station. DHCP — if the Scan Station is configured to retrieve the IP address using DHCP, this field will be checked. -
Page 89: Network Configuration Options
Network Before you can start adding or discovering Scan Stations you must know the IP address or the device name; preferably both. configuration options To get the name of your Scan Station: 1. Be sure the Scan Station is on and operational. 2. - Page 90 Comment field. For example, you can enter the name of the department where the Scan Station is located. 7. Click Add. The Scan Station name and information will be displayed on the Kodak Scan Station 700/720EX - Scanner Administration main screen. NOTES: •...
-
Page 91: Discovering Devices
Discovering devices The Discover Devices option allows you to scan a range of IP addresses to find and automatically register any Scan Station that has an IP address that falls within the defined range of addresses. NOTE: The Discover Devices option only works on Scan Stations that have not had their password changed from the factory default. -
Page 92: Modifying A Scan Station
Modifying a Scan 1. Select Scanner>Modify Scanner. The Modify Scanner dialog box will be displayed. Station 2. Make any required changes. NOTE: If you select Static IP Address, the Static IP Address dialog box will be displayed allowing you to change IP address settings. -
Page 93: Deleting A Scan Station
Station 2. Click Yes. Changing a device 1. Select Scanner>Device Password. This device password is used by the Kodak Scan Station 700/720EX - Scanner Administration to password communicate with the Scan Station. The Device Password dialog box will be displayed. -
Page 94: Configurations/Configuration Files
Scan Settings, Destinations, Groups and Jobs. Configurations are configuration files stored in two places: on the PC running the Kodak Scan Station 700/ 720EX - Scanner Administration application and on the Scan Station(s) where the configuration file is uploaded. For more information on the difference between configurations and configuration files, see Chapter 13, Glossary. -
Page 95: Method 1
Method 1 The configuration file and optional update package is uploaded using the Kodak Scan Station 700/720EX - Scanner Administration application. The Scan Station will recognize the new configuration file or update package and perform an update automatically. Uploading configuration files 1. - Page 96 Uploading firmware 1. Select the Scan Station(s) where you want to send new firmware. NOTE: To select more than one Scan Station, use the Ctrl or Shift key and click the mouse button. The selected Scan Stations will be highlighted. 2.
-
Page 97: Method 2
The Scan Station can be configured to monitor a network folder where configurations and firmware updates are installed. NOTE: If you have a Scan Station 700, it is suggested that you do not use this method because it will go into Low Power mode. - Page 98 KSSUpdate.exe file is more current, the configuration settings and/or new firmware update in the file are applied to the Scan Station. NOTES: • You can obtain update packages from the Kodak website or from your Service Representative. Update packages will always be a KSSUpdate.exe file.
-
Page 99: Method 3
Method 3 This method requires a configuration file to be copied to a USB drive. When the USB drive is inserted into the Scan Station and recognized, you will be prompted to update the Scan Station configuration. NOTE: If a device password is set, you will be prompted to enter the device password. -
Page 100: Method 4
Method 4 This method allows you to interactively select any of the Scan Station settings that are available in Settings mode on the Scan Station touchscreen and modify their values. When the USB drive with the configuration file is inserted into the Scan Station and recognized, you will be prompted to update the Scan Station configuration. -
Page 101: Method 5
Method 5 This method requires an update package and a configuration file to be copied to a USB drive. When the USB drive is inserted into the Scan Station and recognized, if the update package is a different version than the currently installed version, you will be prompted to update the Scan Station firmware. -
Page 102: Scan Station Security
• The underlying operating system is not available to the administrator or user. Updates to the operating system and/or the Scan Station firmware will be made available on the Kodak Alaris website (http:// www.kodakalaris.com/go/disupport) as needed. • You can require a user to login before scanning. For more information, see the section entitled, “Configuring your device... -
Page 103: Password Protecting The Scan Station
Password protecting the You can require a user to log into the Scan Station before scanning. If Scan Station you want to assign a device password, see the section entitled, “Configuring your device options” in Chapter 4. This security feature is intended for use in companies or departments that have sensitive material that they want to prevent being scanned and control distribution. -
Page 104: Retrieving And Clearing Files
Station log file contains information about the Scan Station (e.g., document jams, etc.). Two methods are available for saving log files: • Method 1. Using the Kodak Scan Station 700/720EX - Scanner Administration application. • Method 2. Using a USB drive. - Page 105 2. Select Scanner>Device>Retrieve Logs. The log file for the selected Scan Station will be displayed. 3. Click Save. The Save As dialog box will be displayed. 4. Enter a file name for the log file and click Save. A-61796 December 2013 9-21...
-
Page 106: Clearing A Log File
Method 2 1. Create a configuration file (kss.xml) on a new USB drive. 2. Insert the USB drive into the Scan Station’s USB port to put the Scan Station into local administrative mode. The following message will be displayed. 3. Select No. The Scan Station will display the Settings icons. 4. -
Page 107: Retrieving The Scan Station Transaction Log File
Scan Station transactions (i.e., destinations, time of transaction, recipient, sender, status of the transaction, number of pages scanned). Two methods are available for saving log files: • Method 1. Using the Kodak Scan Station 700/720EX - Scanner Administration application. • Method 2. Using a USB drive. -
Page 108: Clearing A Transaction Log File
Method 2 1. Create a configuration file (kss.xml) on a new USB drive. 2. Insert the USB drive into the Scan Station’s USB port to put the Scan Station into local administrative mode. The following message will be displayed. 3. Select No. The Scan Station will display the Settings icons. 4. -
Page 109: Scan Station Details
Scan Station details To view the details of a selected Scan Station: • Select Scanner>Device>Details. The Details dialog box will be displayed with detailed information about the selected Scan Station (e.g., software version, IP address, etc.). Updating the Time/Date If your network has access to an NTP server, you can configure all of your Scan Stations to synch their internal clock with the NTP server by remotely using the Update Time/Date option. -
Page 110: Turning Off One Or More Scan Stations
Power button. If there are jobs in the background processing queue when you restart or turn off the Scan Station using the Kodak Scan Station 700/720EX - Scanner Administration application (Scanner>Power Options), a list of options will be displayed. -
Page 111: Moving One Or More Scan Stations
Moving one or more If you need to move a Scan Station(s) from one network to another. Scan Stations 1. Power off the Scan Station. 2. Unplug the power cord and network cable. 3. Move the Scan Station(s) to the desired location. 4. - Page 112 10 Maintenance Contents Opening the Scan Station cover ........... 10-1 Cleaning procedures..............10-2 Cleaning the rollers ..............10-2 Cleaning the separation module..........10-3 Cleaning the feed module ............10-4 Vacuuming the Scan Station ............ 10-5 Cleaning the imaging area ............10-6 Running a transport cleaning sheet..........
-
Page 113: Cleaning Procedures
Scan Station. IMPORTANT: Use only non-flammable cleaners such as those provided through Kodak Parts Services. Do not use household cleaners. Allow surfaces to cool to ambient temperature before use. Do not use cleaners on hot surfaces. -
Page 114: Cleaning The Separation Module
Cleaning the separation The separation module should be removed from the Scan Station for module best cleaning results. 1. Push the separation module up to snap out and lift it out of position. 2. Manually rotate and wipe the separation module tires with a roller cleaning pad. -
Page 115: Cleaning The Feed Module
4. Insert the separation module by aligning the tabs with the slots and snapping it into position. Cleaning the feed module NOTE: The paper present sensor is located to the left of the feed module. Be careful not to damage the paper present sensor when removing or cleaning around the feed module. -
Page 116: Vacuuming The Scan Station
3. Manually rotate and wipe the feed module tires with a roller cleaning pad. 4. Inspect the feed module. If the feed module tires show signs of wear or damage, replace the tires or the feed module. See the “Replacement procedures” for more information. -
Page 117: Cleaning The Imaging Area
Cleaning the imaging area 1. Wipe the upper and lower imaging area using a Staticide wipe. Be careful not to scratch the imaging area when cleaning. IMPORTANT: Staticide wipes contain isopropanol which can cause eye irritation and dry skin. Wash your hands with soap and water after performing maintenance procedures. -
Page 118: Replacement Procedures
Replacement Kodak Scan Stations use replaceable tires that can feed a wide range of document types, sizes and thicknesses. Tire life and performance procedures will vary based on the customer’s document set, the frequency of cleaning the paper path and tires, and following the recommended schedule for changing tires. - Page 119 2. Holding onto the separation module, rotate the release lever back so you can access the separation roller. CAUTION: Use caution as the release lever is spring-loaded and will snap back if you do not hold it in place. 3. Remove the separation roller from the separation module housing. 4.
-
Page 120: Replacing The Pre-Separation Pad
Replacing the pre- 1. Remove the separation module from the Scan Station by following separation pad the steps previously described in “Replacing the separation module and tires”. 2. Hold the separation module in both hands and locate the two tabs which protrude slightly from the back of the separation module. -
Page 121: Replacing The Feed Module And Tires
Replacing the feed module NOTE: The paper present sensor is located to the left of the feed and tires module. Be careful not to damage the paper present sensor when removing or cleaning around the feed module. 1. Pull against the raised edge of the feed module cover and lift it up and out of position. - Page 122 5. Install each new tire by gently pulling it over the core. IMPORTANT:Do not overstretch the tire; it may tear. 6. Replace the core assembly in the feed module. You may need to slide the shaft to the right or left so the core fits properly within the feed module housing.
-
Page 123: Adjusting The Pre-Separation Roller Tension
Adjusting the pre- If you are experiencing multi-feeds or document jams, it may be necessary to adjust the pre-separation roller tension. separation roller tension 1. Remove the separation module by following the steps described previously in “Replacing the separation module and tires”. 2. -
Page 124: Supplies And Consumables
Kodak Feed Rollers (quantity: 12) 148 4864 Kodak Separation Module 173 6115 Kodak Feed Module 826 9607 Kodak Digital Science Roller Cleaning Pads (quantity: 24) 853 5981 Kodak Digital Science Transport Cleaning Sheets 169 0783 (quantity: 50) Staticide Wipes (quantity: 6 boxes of 24) 896 5519 NOTE: Items and catalog numbers are subject to change. -
Page 125: Problem Solving
11 Troubleshooting Contents Problem solving ................11-1 Indicator lights................11-5 Saving error log files ..............11-6 Contacting Service................ 11-6 Problem solving Occasionally you may encounter a situation with your Scan Station where it may not function properly. Use the chart below as a guide to check possible solutions to help you resolve the situation before calling Technical Support. - Page 126 Problem Possible Solution Be sure the documents you are scanning are placed properly in the input No images are being displayed tray based on how your job is configured. For example, if your job is set up to scan documents one-sided - face down, be sure the side you want to scan is facing the input tray (not facing you).
- Page 127 • ask the administrator of the mail server for this information. Verifying an SMTP server address In the Kodak Scan Station 700/720EX - Scanner Administration application, use Test Connection. Send mail to the SMTP server using a mail client application from a PC attached to the same network as the Scan Station.
- Page 128 Network Authentication Issues Possible Solution FTP authentication Scanning to FTP sites may require the configuration of two sets of credentials: proxy credentials and FTP server credentials. If your network environment requires the use of a proxy server to access external FTP sites, you need to configure appropriate proxy credentials that include username, password and authentication method.
-
Page 129: Indicator Lights
Scan to Network Share Issues Possible Solution Using another Windows XP, Windows Vista, Windows 7 or Windows 8 Unable to scan to network folder machine on your network, ping the NETBIOS computer name of the Share destination. For example, if your destination is \\Servername\Sharename, ping Servername. -
Page 130: Saving Error Log Files
3. Select Save Logs and click Yes to save the log file to the USB drive. The analog.log and kss700.xml.log files will be saved to the USB drive. You can also use the Kodak Scan Station 700/720EX - Scanner Administration application to save log files. 1. Launch the Kodak Scan Station 700/720EX - Scanner Administration application. - Page 131 12 Glossary Authentication credentials — a username, password and optional network domain name that grants the Scan Station access to network resources. Challenge Response (CRAM-MD5) — an encryption algorithm used for authenticating access to an email server. Configuration — a collection of device settings, scan settings, destinations, groups and job settings.
- Page 132 Remote Configuration — the ability to configure network devices (Scan Station 700) from a remote location on the network. Router — a device that allows multiple computers and devices to connect to a local area network. A router can also be one of many routers that comprise a wide area network (WAN).
- Page 133 TCP/IP (Transmission Control Protocol / Internet Protocol) — a suite of protocols tailored to specific needs for advanced networking. Named after TCP and IP, the first of the many protocols in the suite. TCP/IP forms the basic standard for communication over the Internet. TCP Port —...
-
Page 134: Appendix A Specifications
Appendix A Specifications This appendix provides Scan Station specifications and system requirements. Connectivity 10/100/1000 Mb/sec Ethernet LAN, RJ-45 For Scan Station 720EX only: Internal 56 K fax modem, RJ-11 Output methods Scan to network share, scan to print, scan to email, scan to fax, scan to portable USB flash drive, scan to FTP (anonymous, authenticated, with proxy support), SharePoint and Kofax Front Office Server group Network protocols... -
Page 135: System Requirements
10 to 85% relative humidity Environmental Factors Energy Star qualified scanners System requirements The Kodak Scan Station 700/720EX - Scanner Administration application which is installed on a PC, requires one of the following operating systems: • Windows XP, Service Pack 3 •... - Page 136 FTP site. This information should be available from your network administrator. While the Scan Station 700 can be used in heterogeneous networks with SMTP and FTP, printing to network printers and scanning to network shared folders requires Microsoft printer drivers and SMB (Server Message Block) drive access respectively.
- Page 137 Kodak Alaris Inc. (“Alaris”) or through its authorized distribution channels. Kodak Alaris warrants that a Kodak Scan Station, from the time of sale through the applicable Limited Warranty period, will be free of defects in materials or workmanship and will conform to the applicable performance specifications. End users may determine the applicable Limited Warranty period for the Kodak Scan Station by reviewing the Limited Warranty Summary Card enclosed with the product.
- Page 138 1414 The Response Center is available Monday – Friday (excluding holidays) 8 a.m. to 5 p.m. EST. Before placing the call, the end user must have the Kodak Scan Station model number, part number, serial number and proof of purchase available, and also be prepared to provide a description of the problem. Response Center personnel will assist in resolving the problem over the phone.
- Page 139 Depot Service If the Kodak Scan Station is not eligible for AUR, the end user may use the Depot Repair Service. The end user will be instructed to ship the product to the nearest authorized Depot Repair Center. The product must be shipped with the provided shipping label and packaging or it will be at the end user’s risk and expense.