Table of Contents
Advertisement
Advertisement
Table of Contents

Summary of Contents for DigiTech GeNetX BNX3
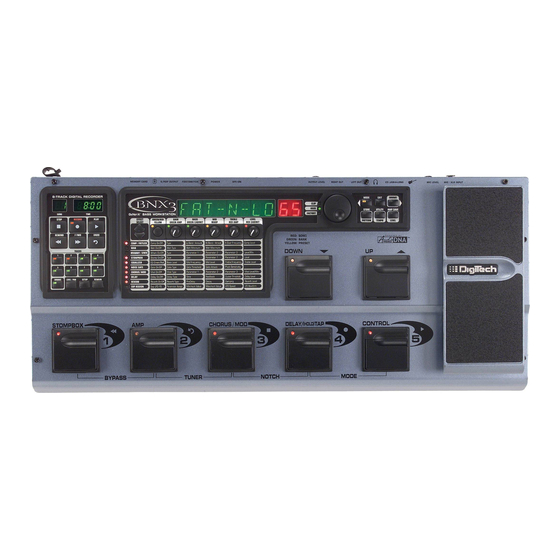
- Page 1 ’ UIDE ORKSTATION...
- Page 2 WARNING FOR YOUR PROTECTION PLEASE READ THE FOLLOWING: KEEP THESE INSTRUCTIONS HEED ALL WARNINGS FOLLOW ALL INSTRUCTIONS Do not use this apparatus near water CLEAN ONLY WITH A DRY CLOTH. These symbols are internationally accepted symbols that warn of potential hazards with electrical products.The lightning flash means that there are DO NOT BLOCK ANY OF THE VENTILATION OPENINGS.
- Page 3 7.The foregoing is in lieu of all other warranties, expressed or implied, and DigiTech neither assumes nor authorizes any person to assume any obligation or liability in connection with the sale of this product. In no event shall DigiTech or its dealers be liable for special or conse- quential damages or from any delay in the performance of this warranty due to causes beyond their control.
-
Page 4: Table Of Contents
......30 About the BNX3 ......10 Create a HyperModel™... - Page 5 Selecting Songs and Loops ....55 Deleting Songs and Loops ....55 Using the BNX3’s Footswitches for Recording ..56 Recording a Track .
-
Page 6: Introduction
However, if you find anything missing, please contact the factory at once. Please take a moment to fill out the warranty card. It is your safeguard in the unlikely event that the BNX3 develops a problem. -
Page 7: Quick Start
Note: See page 66 for Bi-Amp feature Apply Power 1.Turn the OUTPUT level knob, on the rear panel of the BNX3, all the way down (fully counter clockwise). 2. Connect the PSS3 power supply to the POWER jack on the BNX3. -
Page 8: A Guided Tour Of The Bnx3
Depending on the selected mode, these 5 footswitches select presets, change amp channels, turn individual effects on and off, and give you hands-free operation of the BNX3’s recorder. Bypass,Tuner, Notch Filter, and Mode functions are accessed by pressing the labeled pair of footswitches simultaneously. - Page 9 STORE - This button saves preset edits to the User presets, or selects the drum pattern while the drum machine is active. UTILITY - This button accesses the BNX3’s global functions, or selects the drum tempo while the drum machine is active.
- Page 10 Introduction 11. Expression Pedal The Expression Pedal controls effect parameters in real time. Most BNX3 parameters can be assigned to the Expression Pedal. Applying extra pressure to the toe of the Expression Pedal switches control between the assigned parameter(s) and the Wah.
-
Page 11: The Rear Panel
The Rear Panel 1. Mic/XLR Input This XLR jack connects a low impedance dynamic mic to the BNX3 that can be used for recording vocals or an acoustic instrument into the BNX3’s Recorder. A mic with a cardioid pattern is recommended. -
Page 12: Getting Started
Before connecting the BNX3, make sure both the BNX3 and the amplifier are OFF. Connect the PSS3 to the power jack, on the back of the BNX3, and the other end to an AC outlet. The following diagrams show some examples. -
Page 13: Stereo Operation
3.Turn on the BNX3. 4. If the BNX3 is used in Stereo configuration, set the pan controls of the mixer hard left and right, and select Stereo as the output configuration from the Utility menu. See page 66 for more informa- tion on selecting the Output configuration. -
Page 14: S/Pdif Digital Output
NOTE: Do not connect the S/PDIF output to analog auxiliary, CD, phono, or tape inputs on mixers or consumer electronic devices. It is not compatible with these inputs. Setting Output Level 1. Once the audio connections are made, turn the BNX3’s Output Level, on the rear panel, all the way down (counterclockwise). -
Page 15: About The Bnx3
The BNX3’s Modes When you first apply power to the BNX3, it powers up in one of three modes: Bank, Stompbox, or Recorder. Modes are selected in two different ways: 1. Press the MODE button (located to the right of the DATA WHEEL). -
Page 16: Stompbox Mode
The Matrix and Programming buttons are not available in Bypass. Tuner The Tuner in the BNX3 lets you quickly tune or check the tuning on your bass. Press Footswitches 2 and TUNER 3 simultaneously to access the Tuner. The display briefly flashes . -
Page 17: Notch Filter
4.To exit, press FOOTSWITCHES 3 and 4 simultaneously again. Jam-A-Long The Jam-A-Long feature lets you connect a Tape, CD, or MP3 player to the BNX3. The tape, CD, or MP3 player’s signal is output through the BNX3’s left, right, and headphone outputs. To use the Jam-A-Long feature, do the following: 1. -
Page 18: Tempo
Introduction ROCK 1 POP 2 DANCE 2 SWING 1 ROCK 2 POP 3 DANCE 3 SWING 2 ROCK 3 FUNK 1 DANCE 4 REGGAE ROCK 4 FUNK 2 URBAN 1 CHACHA HrdROCK1 FUNK 3 URBAN 2 BOSSA 1 HrdROCK2 BLUES CouNTRY1 BOSSA 2 HrdROCK3... -
Page 19: Editing/Creating A Preset
Introduction Editing/Creating a Preset The BNX3 was designed to make sound processing easy and intuitive. Because the BNX3 provides both Amp Modeling and Effects Processing, the editing functions are divided into two sections: the Amp/Cabinet Modeling section and the Effects section. The GeNetX™ technology contained in the BNX3 lets you go much further than mere Amp Modeling. -
Page 20: Editing Amp Models And Cabinet Types
Introduction Editing Amp Models and Cabinet Types Each BNX3 preset has a Green, Red, and Yellow (Warped) Amp Channel. The Green and Red Amp Channels include individually selectable Amp Models, Cabinet Types, Gain, EQ, and Level settings.The Speaker Cabinet’s resonant frequency can be selected. Once the Green and Red channel’s models are selected, you can toggle channels instantly using the Amp Channel Footswitch (only when Stompbox Mode is active). -
Page 21: Creating Hypermodels
See page 17 for information on storing changes to a Preset. Editing the Effects The BNX3 contains a comprehensive library of fully programmable, studio quality Effects. The Effects section is accessed with the Effect Select Up/Down buttons.The Matrix LEDs light one at a time to identify the selected row of effects . -
Page 22: Storing/Copying A Preset
Introduction Rotating the parameter knobs increases or decreases the value of the parameter and you hear the change in real time. When parameter values have changed, the Store LED lights indicating the preset has been modified and needs to be stored (see below for more on the storing procedure). Changing presets, or turning the power off before storing any changes will erase your changes and revert to the stored values. - Page 23 Introduction 7. Press the STORE button again to finish. To copy one preset to another preset location, begin by selecting the preset you want to copy, then follow the steps listed above. Press EXIT at any time during the procedure to aborts the process.
-
Page 24: Effects And Parameters
Effects and Parameters Effects and Parameters The BNX3 can be thought of as several different “virtual” amplifiers, and individual, hi-tech stomp boxes. With stomp boxes, the order in which they are connected can make a big difference in how good the overall sound is. -
Page 25: Wah
Effects and Parameters senstvty Sensitivity - The Parameter 4 knob adjusts the sensitivity ( )of the fretless effect. Higher values correspond to increased sensitivity to your playing. Range is 0 to 99. The Parameter 5 knob has no function when the fretless simulator is active. Wah is an effect controlled by the Expression Pedal. -
Page 26: Intelligent Pitch Shifting (Ips)
Effects and Parameters Parameter 2 (Whammy™ Pedal) - The Parameter 3 knob provides a manual control of the wham pdl ) Whammy™ pedal position. Ranges from 0-99. wham MIX Parameter 3 (Whammy™ Mix) - The Parameter 5 knob adjusts the Mix ( ) of all pitch altering effects in this module. -
Page 27: Octavider
Parameter 4 (Sweep) - The Parameter 5 knob controls the direction of filter sweep normal/inverse Envelope Filter The BNX3’s Envelope Filter provides classic autowah functionality with a sub-octave generator. Parameter 1 (Sensitivity) - The Parameter 2 knob controls the envelope filter’s sensitivity senstvty ). -
Page 28: Stomp Box Modeling
Level - Controls the output level of the Stompbox model. Range is 0-99 Equalization helps shape the tonal response of your bass signal. The EQ in the BNX3 is similar to the tone knobs on an amplifier with the exception that the BNX3 lets you choose the center frequency for the Mid Range and Treble adjustments. -
Page 29: Noise Gate
A Noise Gate is designed to eliminate hiss and ambient noise while you are not playing. A Noise Gate can also be used to create an automatic swell in volume. The BNX3 includes two different types of Noise Gates: Silencer™, and Pluck.The Silencer™ operates as a standard Noise Gate.The Pluck Noise Gate is designed to close after every note (depending on the Pluck Sensitivity).This allows automatic volume... -
Page 30: Flanger
Effects and Parameters mod levl Mod Level - The Parameter 5 knob controls the level ( ) of the Chorus. Ranges from 0 to Flanger A Flanger uses the same principle as a Chorus but has a shorter delay time and adds regeneration (or repeats) to the modulating delay. -
Page 31: Panner
Effects and Parameters Panner An Auto Panner modulates the sound from left to right at an even rate. Speed Parameter 1 - The Parameter 2 knob adjusts the rate ( ) at which the signal pans from side to side. Ranges from 1 to 99. Depth Parameter 2 - The Parameter 3 knob adjusts the intensity ( ) of the changing pan. -
Page 32: Yaya
(all dry) to 99 (all wet). YaYa™ The YaYa™ is an effect exclusive to DigiTech products. The YaYa™ is controlled by the Expression Pedal and combines the characteristics of a wah and a flanger together providing a unique talk box type of effect. -
Page 33: Delay
(that turns off the input to the Delay and lets you play over the top of a passage in the Delay loop). The Delay in the BNX3 also includes a Ducker Threshold that lets you set the signal strength required before the Delay records. - Page 34 Effects and Parameters STUDIO = Studio THEATER = Amphitheater ROOM = Wood Room CHURCH = Church CLUB = Club GARAGE = Parking Garage PLATE = Plate ARENA = Arena HALL = Hall SPRING = Spring PREDeLaY PreDelay - The Parameter 2 knob adjusts the amount of time ( ) it takes for the initial sound to reach the first reflective surface in the simulated environment.
-
Page 35: Tutorial
Preset 40. Use the Footswitches or the Data Wheel to select Preset 40. Create a HyperModel™ 1. Select Preset 40. The BNX3 is ready to select the Amp Models (indicated by the Status button’s yellow LED). -
Page 36: Adjust The Green Channel Parameters
Tutorial AshDown ash4x10 Adjust the Green Channel Parameters The Vintage bass amp that we selected for our Green Channel assignment uses the factory default settings for the Gain, EQ, and Level Parameters.Therefore, you may want to change the settings. To access the Green Channel Parameters, do the following: 1. -
Page 37: Tune The Cabinets
Tutorial Tune the Cabinets As an option, you may also want to adjust the resonance for the Vintage 8x10 and the Ash 4x10 Cabinets. To access the Cabinet tuning for both Red and Green Channels, do the following: CAB TUNe 1. -
Page 38: Select Models For The Preset's Channels
9 User HyperModel™ locations.The alpha-numeric display should read (Empty) and the red numeric display should read if this is the first HyperModel™ stored to your BNX3. AMP SaVD 5. Press the AMP SAVE button again to save to this Amp location.The display briefly reads (Amp Saved) and then returns to the name of the selected preset. -
Page 39: Turn The Wah Off
Mid and High frequency centers for greater tone shaping flexibility. To adjust the EQ, do the following: 1. Press the EFFECT SELECT DOWN button until the Equalizer LED lights. The BNX3 defaults to EQ green the Green Channel EQ adjustments. Therefore, the display briefly reads 2. -
Page 40: Adjust The Noise Gate
Tutorial Adjust the Noise Gate For your example, you want our Noise Gate to open quickly with a relatively weak signal. This type of gate uses the Silencer™ with a low threshold and short attack time. To create this type of Noise Gate, do the following: 1. -
Page 41: Turn The Delay Off
Store the Preset The last step, is to store your changes to a User Preset. If you changed presets or turned the BNX3 off without storing these settings, it would forget what you had done and revert back to the original preset. To store the preset, do the following: 1. - Page 42 Tutorial examplE preset 2. Rotate the DATA WHEEL until the flashing character in the display is an 3. Press the DRUMS button once and the second character begins to flash. 4. Rotate the DATA WHEEL again until the flashing character is an .
-
Page 43: Recorder
They include Stop, Record, Play, Rewind, Fast Forward, and Undo. 3. TRACKS – A Track is an individual memory location in a song that you record audio to. The BNX3 has eight individual tracks that can be recorded to. -
Page 44: Recorder Setup
This input is great for bassist/singers who like to sing as they play. This input can also be used for recording stereo signals into the BNX3’s recorder. By properly setting the Mic Level and using a 1/4” to XLR impedance (DI) box, you can run one side of the stereo signal into the Bass input and the other side through the XLR Mic input. -
Page 45: Stereo Record
– Select this input to route a dry, unprocessed bass signal direct from the input to the recorder while processed signal is heard at the BNX3’s outputs. This input is great for laying down a dry bass track that can be replayed through different amp models and presets using the Reamp input . You can still monitor the bass signal through all of the BNX3’s effects processing while recording. -
Page 46: Click Track
00 00 1. Begin with the recorder stopped. sterorec Of 2. Press the SETUP button until the BNX3’s main display reads 3. Use the DATA WHEEL to turn the Stereo Enable feature on and off. 4.When finished, press EXIT. This feature doesn’t affect track arming when using the recorder panel. You can arm two tracks using the track buttons. -
Page 47: Tempo
Pre-Roll can also be used as a cue, indicating when the very beginning of the song starts. The BNX3’s Pre-Roll has 3 settings, 4, 8, or 16 counts. To setup the Pre-Roll function, follow these steps:... -
Page 48: Song Repeat
1. Begin with the recorder stopped. pre-rollOf 2. Press the SETUP button until the BNX3’s main display reads 3. Use the DATA WHEEL to select the amount of Pre Roll or turn it off. You can select from 4, 8, or 16 counts before recording begins. -
Page 49: Quantize
Therefore, if you set a loop length just a little too long to sync with the recorder click track or the BNX3’s drum machine, the quantize function pulls in the actual loop length to make it sync up exactly with the tempo you have selected. -
Page 50: Card>Pc - Preparing A Card For The Computer
REMOVE followed by The card should be removed from the BNX3 and inserted into a card reader connected to a PC, and the BNX3’s recorder data is then accessible. WARNING: If any recorded material or Setup utilities are added, deleted, or modified on CARD>>PC... -
Page 51: Erase
Fresh memory cards that have never been used are typically formatted in a manner that the BNX3 can already use. If you have a card that has been used in other electronic devices, it may be necessary for the BNX3 to format the card prior to using it. To use memory cards effectively, we recommend format- ting/erasing any card you intend to use in the BNX3’s Memory Card slot. -
Page 52: Smartmedia™ Memory Cards
1. Place the card into the MEMORY CARD slot with the contacts facing down. When a memory card is inserted into a BNX3 for the first time, it needs to be formatted by the BNX3 in order to use it. To format the card, do the following: format? 1. -
Page 53: Transferring Audio Tracks From The Computer
BNX3 and inserting it into an external card reader. If this procedure is not per- formed, recorded data may be lost. Transferring Audio Tracks from the Computer When returning the card back to the BNX3 from the computer, the BNX3 reads the card before record- size busy ed data can be accessed. -
Page 54: Using The Bnx3'S Recorder Panel For Recording
The number of songs that can be in memory is dependent on the total amount of record time. For example, with an optional 128 Meg Smart Media® card, the BNX3 has a total of 96 EP Quality track minutes available. -
Page 55: Using The Undo Button To Erase A Track
Using the UNDO Button to Erase a Track Every track you record may not be a take you want to keep. The BNX3’s recorder features an UNDO button, that erases the contents of a track. You can Undo a track even while recording is in progress, thus eliminating having to stop and start all the recording procedures again. -
Page 56: Using Undo While Recording Is In Progress
To undo the track you are currently recording on, follow these steps: rerecord 1. Press the UNDO button once. The BNX3’s main display reads 2. Press the UNDO button again within 3 seconds to start re-recording. The display reads undodone and the recorder returns to the beginning of the song and resumes recording on the same track. -
Page 57: Setting Each Track's Pan
Recorder 4.To adjust the playback level of the tracks, press the LEVEL / PAN button once. It lights green. tkx levl 50 5. Press any track button that is playing back. It flashes green. The main display reads (X = track number). 6.Turn the DATA WHEEL to adjust this track’s playback level. -
Page 58: Punching In / Punching Out
Drums Track The BNX3’s built-in drum machine is not only a great practice tool but can actually be used for song creation as well. Using the Drums button located in the recorder panel, you can either sync the drum machine with your other recorded audio tracks, or record the drum machine patterns to any of the recorder’s tracks. -
Page 59: Recording Drum Machine Tracks
3.Turn the MIC LEVEL control on the rear panel clockwise for more gain and counter-clockwise for less gain until the CLIP LED next to the BNX3’s main display only flashes occasionally. If it is flashing often or solid red, turn down the gain. If the CLIP LED doesn’t flash, turn up the gain until it does flash occasionally. -
Page 60: Recorder Output Configuration
Working with Songs and Loops A Song and a Loop are a group of recorded tracks. The BNX3’s recorder has 99 songs available to record to as recording memory allows. With an optional 128 Meg Smart Media™ card, for example the BNX3 has a total of 48 EP quality track minutes available. -
Page 61: Using The Bnx3'S Footswitches For Recording
Using the UNDO Footswitch to Erase a Track You can undo tracks using the BNX3’s footswitches just as you can using the recorder panel. To undo tracks, follow these steps: Using Undo While the Recorder is Stopped del trkx 1. -
Page 62: Recording Multiple Tracks
To use the JamMan feature of the BNX3 you must first have the footswitches in Recorder mode. To do this, press the 4 and 5 footswitches simultaneously until the DOWN/UP footswitches are lit red. If you have... -
Page 63: Recording A Loop
Sometimes our timing may not be perfect when pressing the PLAY footswitch to set the length. The BNX3 provides a Quantize feature that corrects these timing problems to the nearest eighth note. Quantize looks at the point where you pressed the PLAY footswitch in relation to the... -
Page 64: Using The Gnxfc For Recorder Functions
4. Press the EXIT button. Using the GNXFC for Recorder Functions The BNX3 is equipped with a footswitch jack that allows you to connect an optional GNXFC for controlling the BNX3’s recorder. This 3-button footswitch features functions for STOP/UNDO (switch A), RECORD (switch B), and PLAY (switch C). -
Page 65: Using Undo While Recording Is In Progress
To undo the track you are currently recording on, follow these steps: rerecord 1. Press and hold the A-STOP/UNDO footswitch once. The BNX3’s main display reads 2. Press the A-STOP/UNDO footswitch again within 3 seconds to start re-recording. The display undodone... -
Page 66: Using The Gnxfc For Looping
To record a loop is no different than when you are doing multi-track recording. You must begin with a new song in order to create a loop. Press the BNX3’s UP footswitch (the BNX3’s footswitches must be in recorder mode first) or the F FWD button to select a new song that has not been recorded on. -
Page 67: Other Functions
Expression Pedal The Expression Pedal on the BNX3 can control up to 3 parameters in real time. Each parameter assigned to the Expression Pedal can have specific ranges of how much the parameter is controlled by using the minimum and maximum controls. -
Page 68: Amp Footswitch
The Amp Footswitch allows switching between the Green, Red, and Yellow (Warped) Amp Channels when using the BNX3 in stompbox mode. There are different combinations of amp channel switching the BNX3 provides. To select which combination you need for your application, follow these steps: 1. -
Page 69: Expression Parameter Assignment List
Other Functions 5. Rotate the Parameter 3 knob to select the maximum value the assigned parameter reaches when the Control footswitch is turned on (not available when volume is the assigned parameter). 6.While on Control footswitch assignment #1 only, rotate the Parameter 4 knob to select the type of toggle momentary footswitch function you want it to perform,Toggle,... -
Page 70: Modulation Effects Parameters
(LFO 2 Speed) - Controls the modulation speed of Expression LFO 2. Utilities The Utility section contains all of the menus for assigning global functions to the BNX3. Global functions affect the BNX3 in its entirety rather than on a per preset basis.The Utility menus include: Mono/Stereo... -
Page 71: Analog Output Configuration
(bass left output, recorder right output) is selected, the BNX3’s bass processing is summed to mono and sent to the left analog output while the recorder’s output is summed to mono and sent to the right analog output. This is useful if you want to... -
Page 72: V-Switch Threshold
4. Press EXIT to return to the BNX3 presets. Expression Pedal Calibration The Expression Pedal on the BNX3 needs to be recalibrated for use after a factory reset has been performed. This calibration procedure is automatically activated after a factory reset procedure. In the event the pedal’s calibration fails, or if the pedal does not function properly, it can be re-calibrated using... -
Page 73: Midi Channel
This is useful for making a backup copy of customized presets, or copying your presets into another BNX3. The procedure for performing a Sysex Preset Dump is as follows: 1. Connect a MIDI cable from the BNX3 MIDI Out to the the MIDI In of a MIDI recording device or the MIDI in of another BNX3. -
Page 74: Midi Mapping
Other Functions 1. Connect a MIDI cable from the BNX3 MIDI Out to the the MIDI In of a MIDI recording device or the MIDI in of another BNX3. 2. Press the UTILITY button.The Utility button’s LED lights. AMP DuMP 3. - Page 75 Chorus/Mod, Delay, or Reverb effects processing. is used when only the BNX3’s recorder output is to be sent to the digital output. If you have a live mixer with digital input ster bass capability, you can use this configuration in conjunction with the analog output configuration.
-
Page 76: Factory Reset
To reformat the BNX3’s recorder memory follow these steps: 1. Begin with the BNX3’s power turned off. 2. Press and hold the RECORD button on the BNX3’s recorder panel and turn the power on. format? 3.When the BNX3’s main display reads , release the RECORD button. - Page 77 NOTE: Previous versions of G ™ will not work with the BNX3. You must install the new version of G ™ from the CD that came with the BNX3. For the latest version of ™ software, visit DigiTech’s website at www.digitech.com.
-
Page 78: Appendix
Appendix Appendix Preset List Bank 1 Showcase Bank 6 dirtbass Bank 11 big botm 1. HYPERAMP 26. GRINDY 51. FAT-N-LO 2. OCTABASE 27. DIRT BAG 52. OCTSYNTH 3. SYNTHBAS 28. PIE FAZE 53. PHAT BOY 4. ENVELOPE 29. LEADBASS 54. BIGFATTY 5. -
Page 79: Midi Cc List
Appendix MIDI CC List Parameter Parameter Wah On/Off CC 2 Amp Morph CC 79 Wah Type CC 3 Cabinet Morph CC 80 Wah Minimum CC 4 Amp/Cabinet Morph CC 81 Wah Maximum CC 5 Wah Pedal CC 6 Gate On/Off CC 50 Gate Type CC 51... -
Page 80: Specifications
Appendix Specifications General Specifications A/D Converter: 24 bit D/A Converter: 24 bit Sampling Frequency: 44.1 kHz DSP Section: 3 - Audio DNA™ DSP Processors Preset Memory: 65 Factory Presets, 65 User Presets Connections: Bass Input and Outputs: 1/4" TS Jam-A-Long/CD_Input: 1/8"... -
Page 81: Trouble Shooting Guide
Only one recorder quality for all tracks is possible per song. Record mode of first track determines mode for subsequent tracks. I can’t access internal songs recorded on the BNX3. Remove Smart Media Card. Why can’t I select Re-Amp track as record input? Re-Amp is not available unless previous tracks have been recorded. - Page 82 International Distribution 8760 S. Sandy Parkway Sandy, Utah 84070 USA PH (801) 566-8800 FAX (801) 566-7005 DigiTech, GeNetX,Audio DNA, and BNX3 are trade marks of the Harman Music Group Inc. Copyright the Harman Music Group Manufactured and Printed in the USA 09/2002 BNX3 User’s Guide 18-1314-A...