Table of Contents
Advertisement
Quick Links
Advertisement
Table of Contents

Related Manuals for Nellcor OXIMAX N-560


Summary of Contents for Nellcor OXIMAX N-560
- Page 1 Ops.ai Ops.ai 1/24/06 1/24/06 9:31:41 AM 9:31:41 AM...
- Page 2 To obtain information about a warranty, if any, contact Nellcor’s Technical Services Department, or your local representative. Purchase of this instrument confers no express or implied license under any Nellcor Puritan Bennett patent to use the instrument with any sensor that is not manufactured or licensed by Nellcor Puritan Bennett.
-
Page 3: Table Of Contents
C o n t e n t s Contents ........... . . i Figures . - Page 4 Contents No Sensor Attached ..................26 Sensor Message ....................26 Setting the Pulse Beep Volume ................27 Setting the Alarm Volume ..................28 Setting Alarm Silence Duration ................28 Discussion ....................... 28 Procedure ....................... 29 Disabling Audible Alarms ..................30 Discussion .......................
- Page 5 Contents Connecting to the Data Port .................47 Data Port Pinouts ....................48 Data Port Setup ....................49 Discussion .......................49 Procedure ......................49 Nurse Call Interface .....................53 Setting Nurse Call RS-232 Polarity ..............54 Setting Nurse Call Relays Normally Open/Closed ..........54 Printing ........... . 55 Printing N-560 Real-Time Data ................55 Trend Data Printout ....................57 Column Headings ....................58...
- Page 6 Contents Operator’s Menu ..........73 Troubleshooting .
- Page 7 F i g u r e s Figure 1: Front Panel Buttons and Symbols ............5 Figure 2: Rear Panel Symbols ................6 Figure 3: Data Port Pin Layout ................49 Figure 4: Real-Time Data Printout ..............56 Figure 5: Trend Data Printout ................
- Page 8 T a b l e s Table 1: Data Port Pinouts ...................48 Table 2: Nellcor Oximetry Sensor Models and Patient Weights ......64 Table 3: Operator’s Menu ..................73 Table 4: Error Codes ....................76 Table 5: Factory Default Settings .................86 Table 6: Tone Definition ..................96 Table 7: Cable Compliance ................104...
-
Page 9: Safety Information
S a f e t y I n f o r m a t i o n Warnings Warnings are identified by the WARNING symbol shown above. Warnings alert the user to potential serious outcomes (death, injury, or adverse events) to the patient or user. WARNING: Explosion hazard. -
Page 10: Notes
Safety Information CAUTION: When connecting the N-560 to any instrument, verify proper operation before clinical use. Both the N-560 and the instrument connected to it must be connected to a grounded outlet. Accessory equipment connected to the N-560's data interface must be certified according to IEC Standard 60950 for data-processing equipment or IEC Standard 60601-1 for electromedical equipment. -
Page 11: Introduction
Introduction I n t r o d u c t i o n WARNING: The N-560 is intended only as an adjunct in patient assessment. It must be used in conjunction with clinical signs and symptoms. Do not make any clinical judgments based on the oximeter's measurements only. - Page 12 Introduction...
-
Page 13: Description Of Controls, Indicators, And Symbols
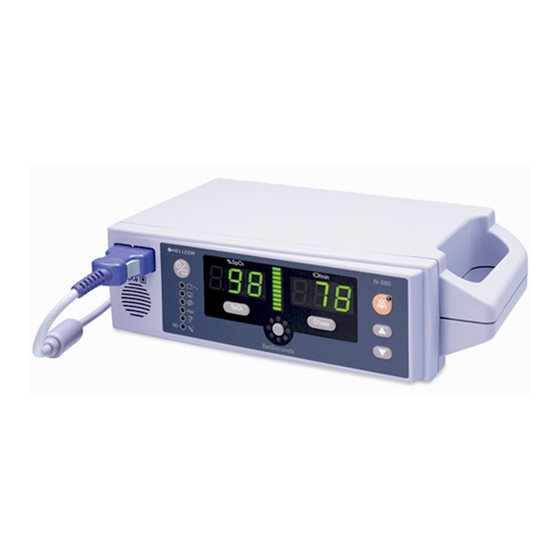
Description of Controls, Indicators, and Symbols D e s c r i p t i o n o f C o n t r o l s , I n d i c a t o r s , a n d S y m b o l s Identification of Front Panel Buttons and Symbols Figure 1: Front Panel Buttons and Symbols... -
Page 14: Identification Of Rear Panel Components
Description of Controls, Indicators, and Symbols Identification of Rear Panel Components 1. Data Port Connector 3. AC Power Connector 4. Equipotential Connector 2. Visual Alarm Connector (ground) Figure 2: Rear Panel Symbols N-560 Symbols The symbols that are located on the rear panel of the N-560 are as follows: 1. -
Page 15: Description Of Controls
Description of Controls, Indicators, and Symbols 1. Type BF Applied Part - Not 6. Pulse Search Defibrillator Proof 2. Pulse Rate 7. Data In Sensor 3. Interference 8. Low Battery 4. Sensor Off 9. AC Power/Battery Charge 5. Sensor Message Description of Controls Note: Each button press, except the button, should result... - Page 16 Description of Controls, Indicators, and Symbols button is used to increase alarm limit values, alarm silence Adjust Up duration, pulse beep volume, alarm volume, and data port baud rate. The button is used to select the communication protocol and time Adjust Up settings.
-
Page 17: Description Of Displays And Indicators
Description of Controls, Indicators, and Symbols Description of Displays and Indicators Indicator (blip bar). A 10-segment LED that Pulse Amplitude indicates pulse beat and shows the relative (non-normalized) pulse amplitude. As the detected pulse becomes stronger, more bars light with each pulse. - Page 18 Description of Controls, Indicators, and Symbols Indicator. Lights continuously when an audible alarm Alarm Silence has been silenced. It flashes when the alarm silence duration has been set to OFF. Indicator. Lights whenever the O software detects Interference that the incoming signal quality is degraded due to interference (see Interference Explained on page 11).
-
Page 19: Interference Explained
Description of Controls, Indicators, and Symbols • Loosen sensor (too tight) • Isolate external interference (electrosurgical device, cell phone) • Clean site (MAX-R) Indicator. The indicator blinks for approximately one Data In Sensor minute when initially connected to the N-560 to indicate that the attached sensor contains a patient sensor event record. - Page 20 Description of Controls, Indicators, and Symbols • incorrect sensor application – sensor placement on an extremity with a blood pressure cuff, arterial catheter, or intravascular line – sensor applied too tightly – incorrect sensor for placement site • intravascular dyes, such as indocyanine green or methylene blue •...
-
Page 21: Description Of Audible Indicators
Description of Controls, Indicators, and Symbols Description of Audible Indicators Following are descriptions of N-560 audible indicators. Power-On Self-Test Pass A 1-second tone indicating that the N-560 has been turned on and has successfully completed the power-on self-test Valid Button Press A short, medium-pitched tone indicating that an appropriate button has been pressed Invalid Button Press... - Page 22 Description of Controls, Indicators, and Symbols...
-
Page 23: Setting Up The N-560
WARNING: As with all medical equipment, carefully route patient cabling to reduce the possibility of patient entanglement or strangulation. WARNING: Disconnect the N-560 and Nellcor sensor from the patient during magnetic resonance imaging (MRI) scanning. Induced current could potentially cause burns. The N-560 may affect the MRI image;... -
Page 24: List Of Components
N-560. Use of another sensor cable will have an adverse effect on performance. Do not attach any cable that is intended for computer use to the sensor port. Do not connect any device other than a Nellcor-approved sensor to the sensor connector. List of Components • N-560 Pulse Oximeter •... -
Page 25: Connecting The N-560 To Ac Power
N-560. Use of another sensor cable will have an adverse effect on performance. Do not attach any cable that is intended for computer use to the sensor port. Do not connect any device other than a Nellcor-approved sensor to the sensor connector. N-560 Operator’s Manual... - Page 26 Setting up the N-560 1. SpO Sensor Port 1. Connect a DOC-10 pulse oximetry cable to the SpO Sensor Port (1) on the front of the N-560. 2. Connect an SpO Sensor to the other end of the DOC-10 pulse oximetry cable.
-
Page 27: Battery Operation
Battery Operation B a t t e r y O p e r a t i o n WARNING: Dispose of an old battery by following local guidelines for disposal of nickel metal hydride batteries. Operating the N 560 on Battery Power The N-560 has an internal battery that may be used to power the N-560 during transport or when AC power is not available. -
Page 28: Low Battery Indicator
Battery Operation Low Battery Indicator Indicator lights and a low priority alarm begins to sound Low Battery when 15 minutes but not more than 20 minutes of monitoring time remain on the existing battery charge. This alarm cannot be silenced while running on battery power. -
Page 29: Using The N-560
CAUTION: If any indicator or display element does not light, or the speaker does not sound, do not use the N-560. Instead, contact qualified service personnel, your local Nellcor representative, or Nellcor's Technical Services Department, 1.800.635.5267. Note: The N-560 should complete the POST function within 12 seconds. -
Page 30: Procedure
Using the N-560 Procedure 1. Turn on the N-560 by pressing and holding the button Power On/Off for more than one second. 2. The N-560 displays/sounds: Display Sound 5 (in pulse rate left window) one beep tone 6 (in pulse rate center window) one beep tone 0 (in pulse rate right window) one beep tone... - Page 31 Note: The device version illustrated is only a sample. The device version identifies the hardware configuration and the software revision. Device version numbers are often needed when calling Nellcor's Technical Services Department, 1.800.635.5267, or your local Nellcor representative for technical assistance. Write down the numbers and have them available prior to requesting technical assistance.
-
Page 32: Sensor Attached
Using the N-560 7. Upon successful completion of the POST, the N-560 sounds a one-second tone indicating that the N-560 has passed the test. WARNING: If you do not hear the POST pass tone, do not use the N-560. WARNING: Ensure that the speaker is clear of any obstruction. Failure to do so could result in an inaudible alarm tone. - Page 33 Using the N-560 Sensor Off Pulse Search Indicator Indicator When a valid pulse is detected, the N-560 enters the Monitoring Mode and displays patient parameters. Look for movement of the blip bar and, if the pulse beep volume is not 0, listen for pulse beeps to verify that displayed measurement values are current and accurate.
-
Page 34: No Sensor Attached
Using the N-560 No Sensor Attached When the sensor is not attached the N-560 displays dashes (---) and the indicator is not lit, indicating that the N-560 failed to detect Pulse Search a sensor. Sensor Message The Sensor Message feature is an indication that the sensor position or site needs to be considered. -
Page 35: Setting The Pulse Beep Volume
Using the N-560 Setting the Pulse Beep Volume 1. SpO Sensor Port WARNING: Use only Nellcor-approved sensors and sensor cables. 1. Connect a DOC-10 pulse oximetry cable to the SpO Sensor Port (1) on the front of the N-560. 2. Connect an SpO Sensor to the other end of the DOC-10 pulse oximetry cable. -
Page 36: Setting The Alarm Volume
Using the N-560 Setting the Alarm Volume With the N-560 in the normal monitoring mode: 1. Press and hold the button until the alarm volume Alarm Silence display appears. 2. While continuing to press the button, press the Alarm Silence Adjust button or button to increase or decrease the alarm... -
Page 37: Procedure
Using the N-560 If the button is pressed during the alarm silence duration, Alarm Silence the alarm silence duration is ended and the audible alarms are re-enabled. Visual indications of an alarm condition cannot be turned off. For example, if the %SpO lower alarm limit is exceeded, the alarm can be silenced for the alarm silence duration, but the %SpO value will continue... -
Page 38: Disabling Audible Alarms
Using the N-560 3. While pressing the button, press and hold the Alarm Silence button to decrease alarm silence duration to OFF, 30, Adjust Down 60, 90, or 120 seconds. Note: Releasing the button sets the alarm Adjust Up Adjust Down silence duration. -
Page 39: Procedure
Using the N-560 Procedure With the N-560 in the normal monitoring mode: 1. Press the button until XX SEC is displayed. Alarm Silence 2. While pressing the button, press and hold the Alarm Silence button until OFF is displayed. Release buttons. Adjust Up 3. -
Page 40: Verify Patient Settings
Using the N-560 Verify Patient Settings With the N-560 in the normal monitoring mode: 1. Press the button to view the current %SpO upper SpO2 Alarm Limit alarm limit. 2. Press the button twice to view the current %SpO SpO2 Alarm Limit lower alarm limit. - Page 41 Using the N-560 4. Press the button twice to view the current Pulse Rate Alarm Limit Pulse Rate lower alarm limit. 5. Press the button to view the current SatSeconds Alarm Limit SatSeconds setting. Note: The SatSeconds (12 O’clock) indicator lights, indicating that SatSeconds units are being reviewed.
-
Page 42: Alarm Limits Changed Indicator
Using the N-560 Alarm Limits Changed Indicator If an alarm limit is changed from the N-560’s power-on default setting, a decimal point appears after the applicable displayed value, during patient monitoring and when alarm limits are viewed. The decimal point remains on the display until the N-560 is turned off or the limit is returned to the default value. - Page 43 Using the N-560 2. Press the button or button to increase or Adjust Up Adjust Down decrease the alarm limit setting. Note: When an alarm limit is changed from power-on default, the N-560 displays a decimal point (.) after the changed parameter. 3.
- Page 44 Using the N-560 5. Press the button to view the current upper Pulse Rate Alarm Limit alarm limit for Pulse Rate. 6. Press the button or button to increase or Adjust Up Adjust Down decrease the alarm limit setting. 7. Press the button twice to view the current Pulse Rate Alarm Limit lower alarm limit for Pulse Rate.
-
Page 45: Setting Satseconds Duration
Using the N-560 Setting SatSeconds Duration Discussion Refer to Describing SatSeconds on page 87 for a description of the SatSeconds function. Procedure With the N-560 in the normal monitoring mode: 1. Press the button. The current SatSeconds SatSeconds Alarm Limit setting is displayed. -
Page 46: Procedure
Using the N-560 Procedure With the N-560 in the normal monitoring mode: 1. Simultaneously, press the button and SpO2 Alarm Limit Pulse Rate button for 3 seconds. Menu option 1 will be displayed. Alarm Limit 2. Press the button until menu item option 4 is displayed. Adjust Up 3. -
Page 47: Setting The Data Port Protocol
Using the N-560 Press the button or button to select the desired Adjust Up Adjust Down baud rate. Possible settings are: • 24 (2,400 bps) • 96 (9,600 bps) • 192 default (19,200 bps). Setting the Data Port Protocol With the N-560 in the normal monitoring mode: 1. -
Page 48: Clearing Trend Information
Using the N-560 3. Press the button. Current protocol is SatSeconds Alarm Limit displayed. 4. Press the button or button to select the Adjust Up Adjust Down desired protocol. Possible settings are: 1 - ASCII 2 - External equipment communications. Refer to the external equip- ment manuals for the interfacing instructions. - Page 49 Using the N-560 2. Press the button to select Option 2. Adjust Up 3. Press the button to clear the trend data. SatSeconds Alarm Limit 4. The N-560 emits 3 beeps, indicating that data is cleared. N-560 Operator’s Manual...
- Page 50 Using the N-560...
-
Page 51: N-560 Trend
N-560 Trend N - 5 6 0 T r e n d Trend Data Operation From the initial measurement of a patient, trend data (a data point) is stored in memory every 4 seconds. Up to 50 alarm limit changes can also be stored in trend data. -
Page 52: Trend Data
N-560 Trend Trend Data Trend data information may be retrieved or cleared through the N-560 data port using options available in a display menu. To access the menu options, simultaneously press the SpO2 Alarm Limit buttons until Option 1 appears on the Pulse Rate Alarm Limit display. -
Page 53: 5: Data Port Printout
N-560 Trend • 24 (2,400 baud rate) • 96 (9,600 baud rate) • 192 default (19,200 baud rate) #5: Data Port Printout Selections are as follows: Option 1 Printout in ASCII characters. Option 2 External equipment communications. Refer to the external equipment manual for the interfacing instructions. - Page 54 N-560 Trend...
-
Page 55: Using The Data Port
Using the Data Port U s i n g t h e D a t a P o r t Overview Patient data can be obtained through the data port on the back of the N-560 by connecting it to an attached PC or serial printer. When connecting the N-560 to a printer or PC, verify proper operation before clinical use. -
Page 56: Data Port Pinouts
Using the Data Port No hardware flow control is used. However, in the ASCII mode, XON/ XOFF flow control is supported. Data Port Pinouts TXD represents the Transmit Data line, and RXD is the Receive Data line. The pinouts for the data port are listed in Table 1. Table 1: Data Port Pinouts Signal Name RXD+ (RS-422 positive input) -
Page 57: Data Port Setup
Using the Data Port Figure 3: Data Port Pin Layout Pins 2, 3, 5, and 11 provide data in RS-232 format. Pins 1, 4, 9, and 12 provide data in RS-422 format. TXD+ and TXD- are the differential transmit data pair. RXD+ and RXD- are the differential receive pair. - Page 58 Using the Data Port 2. Press the button until Option 4 is displayed. Adjust Up 3. Press the Button to select Option 4. The SatSeconds Alarm Limit selected baud rate will be displayed. Note: The available selections are: • 24 = 2400 baud rate •...
- Page 59 Using the Data Port 6. Simultaneously press and hold the button and SpO2 Alarm Limit button for at least 3 seconds. Option 1 will Pulse Rate Alarm Limit be displayed. 7. Press the button until Option 5 is displayed. Adjust Up 8.
- Page 60 Using the Data Port Note: The available selections are: • 1 = Real time ASCII • 2 = External equipment communications. Refer to the external equipment manuals for the interfacing instructions. 9. Press the button or the button to display the Adjust Up Adjust Down desired protocol.
-
Page 61: Nurse Call Interface
Using the Data Port Nurse Call Interface WARNING: The nurse call feature should not be used as the primary source of alarm notification. The audible and visual alarms of the pulse oximeter, used in conjunction with clinical signs and symptoms, are the primary sources for notifying medical personnel that an alarm condition exists. -
Page 62: Setting Nurse Call Rs-232 Polarity
Using the Data Port Pin 11 on the data port is the RS-232 level nurse call signal and pin 5 or 10 is ground (see Table 1 on page 48). When there is no alarm condition, the voltage between pins 10 and 11 is -5 to -12 VDC. Whenever the N-560 is in an alarm condition, the output between pins 10 and 11 is +5 to +12 VDC. -
Page 63: Printing
Printing P r i n t i n g Printing N-560 Real-Time Data Real-time data is continuously sent to the data port on the back of the N-560. Patient data can be obtained through the data port by connecting to a computer or serial printer. When a real-time printout or display is being transmitted to a printer or computer, a new line is printed/displayed every 2 seconds. -
Page 64: Figure 4: Real-Time Data Printout
Printing 1. Connect the serial printer to the N-560's Data Port connector (1). 2. Turn on the printer. 3. Connect the N-560 to an AC outlet. 4. Turn on the N-560. The printer will start printing real time trend data or the PC will start displaying real time data at a rate of one line every 2 seconds. -
Page 65: Trend Data Printout
Printing Trend Data Printout The format of data displayed when a trend printout is requested is the same as the real-time data. The only differences are that “TREND” is displayed in the top row instead of the “CRC: XXXX” software verification number and there is no “Status”... -
Page 66: Column Headings
Printing Column Headings Column headings are displayed or printed after every 25 lines, or if one of the values in the column heading changes. Data Source Data in the highlighted box above represents the model number of the N-560, in this case the N-560. Device/Software Revision Level The next data field tells the user the software level (Version 1.00.00) and a software verification number (CRC: XXXX). -
Page 67: N-560 Mode
Printing The last data field in the top line indicates the upper and lower alarm limits for %SpO and for the pulse rate (PR), and the SatSeconds alarm setting (OFF). The SatSeconds setting may be OFF, 10, 25, 50, or 100 depending on the SatSeconds alarm setting. -
Page 68: Patient Data
Printing Patient Data Patient data is highlighted in the display above. Parameter values are displayed directly beneath the heading for each parameter. In this example, the %SpO is 100, and the pulse rate is 190 beats per minute. An asterisk indicates that the parameter is outside the set limits. If no data for a parameter is available, three dashes (- - -) are displayed. - Page 69 Printing Code Meaning Alarm Off Alarm Silence Low Battery Loss of Pulse w/Interference Loss of Pulse Interference Detected Pulse Rate Upper Limit Alarm Pulse Rate Lower Limit Alarm Pulse Search Saturation Upper Limit Alarm Saturation Lower Limit Alarm Sensor Disconnect Sensor Off Note: A sensor disconnect and sensor off will also cause three dashes ( - - - ) to be displayed in the patient data section of the printout.
- Page 70 Printing...
-
Page 71: Sensors And Accessories
WARNING: Do not use a damaged sensor or pulse oximetry cable. Do not use a sensor with exposed optical components. WARNING: Use only Nellcor sensors and pulse oximetry cables with the N-560. Other sensors or pulse oximetry cables may cause improper N-560 performance. -
Page 72: Table 2: Nellcor Oximetry Sensor Models And Patient Weights
For more information, refer to Table 2 or contact your local Nellcor representative. For a complete and up-to-date listing of all sensors applicable to the N-560, refer to the Sensor Accuracy Grid posted on the Internet at: http://www.mallinckrodt.com/respiratory/resp/Serv_Supp/ProductManuals.html... - Page 73 Sensors and Accessories Table 2: Nellcor Oximetry Sensor Models and Patient Weights (Cont.) Model Sensor Patient Size adhesive sensor, MAX-R >50 kg (>110 lbs) single-patient-use, adult nasal ® OxiCliq A >30 kg (>66 lbs) OxiCliq nonadhesive sensor, single-patient-use, adult, reusable cable...
-
Page 74: Biocompatibility Testing
Devices, Part 1: Evaluation and Testing. The OxiMax sensors have passed the recommended biocompatibility testing and are therefore in compliance with ISO 10993-1. Optional Accessories Several optional accessories are offered with the N-560. Contact Nellcor's Technical Services Department, 1.800.635.5267, or your local Nellcor representative for information about these accessories. •... -
Page 75: Pole Mount Bracket
Sensors and Accessories 1. Visual alarm indicator Pole Mount Bracket An optional pole mount bracket is available for the N-560. The pole mount bracket may be used to attach the N-560 to an IV pole. The pole mount bracket is attached to the rear of the N-560. N-560 Operator’s Manual... - Page 76 Sensors and Accessories...
-
Page 77: N-560 Performance Considerations
Performance Considerations P e r f o r m a n c e C o n s i d e r a t i o n s WARNING: Pulse oximetry readings and pulse signals can be affected by certain ambient environmental conditions, sensor application errors, and certain patient conditions. -
Page 78: Anemia
Performance Considerations Anemia Anemia causes decreased arterial oxygen content. Although SpO readings may appear normal, an anemic patient may be hypoxic. Correcting anemia can improve arterial oxygen content. The pulse oximeter may fail to provide an SpO if hemoglobin levels fall below 5 gm/dl. - Page 79 • there is arterial occlusion proximal to the sensor Use only Nellcor sensors and sensor cables. WARNING: The use of accessories, sensors, and cables other than those specified may result in increased emission and/or decreased immunity and inaccurate readings of the N-560 pulse oximeter.
- Page 80 Performance Considerations • Keep the patient still, if possible If poor perfusion affects performance, consider using the O MAX-R sensor; it obtains measurements from the nasal septal anterior ethmoid artery, an artery supplied by the internal carotid artery. This sensor may obtain measurements when peripheral perfusion is relatively poor.
-
Page 81: Operator's Menu
Operator’s Menu O p e r a t o r ’s M e n u This operator’s menu (Table 3) provides a quick reference to the functions on the N-560. The functions that are in Bold are the default settings. Table 3: Operator’s Menu Sub- Menu... - Page 82 Operator’s Menu...
-
Page 83: Troubleshooting
Troubleshooting T r o u b l e s h o o t i n g WARNING: If you are uncertain about the accuracy of any measurement, check the patient's vital signs by alternate means; then make sure the N-560 is functioning correctly. WARNING: The cover should be removed only by qualified service personnel. -
Page 84: Corrective Action
If you experience a problem while using the N-560 and are unable to correct it, contact Nellcor’s Technical Services Department or your local Nellcor representative. The N-560 service manual, which is for use by qualified service personnel, provides additional troubleshooting information. - Page 85 N-560. This tone not only indicates the successful completion of POST, but it confirms that the audible alarm is functional. Contact qualified service personnel or your local Nellcor representative. 4. The Pulse Search indicator is lit for more than 10 seconds while the sensor is connected to the patient.
- Page 86 Troubleshooting • Perfusion may be too low for the N-560 to track the pulse. Check the patient. Test the N-560 on someone else. Change the sensor site. Try another type of sensor. • Interference may be preventing the N-560 from tracking the pulse.
-
Page 87: Emi (Electro-Magnetic Interference)
N-560 off, then press the button again to turn it back on. If the display shows the error code once again, record the number and provide that information to qualified service personnel, or your local Nellcor representative. • Error Code “EEE 513" is displayed when the battery is discharged to a critically low level. -
Page 88: Obtaining Technical Assistance
N-560. When calling Nellcor’s Technical Services Department, 1.800.635.5267, or your local Nellcor representative, you may be asked to tell the representative the software version number of your N-560. The device version appears in the N-560 display each time the N-560 successfully completes the power-on self-test. - Page 89 Troubleshooting The most recent revision of this manual and the service manual are available on the Internet at: http://www.mallinckrodt.com/respiratory/resp/Serv_Supp/ProductManuals.html N-560 Operator’s Manual...
- Page 90 Troubleshooting...
-
Page 91: Maintenance
Nellcor representative for shipping instructions including a Returned Goods Authorization (RGA) number. Unless otherwise instructed by Nellcor’s Technical Services Department, it is not necessary to return the sensor or other accessory items with the N-560. Pack the N-560 in its original shipping carton. If the original carton is not available, use a suitable carton with appropriate packing material to protect it during shipping. -
Page 92: Cleaning
Maintenance • Inspect the equipment for mechanical and functional damage. • Inspect the safety-relevant labels for legibility. Cleaning CAUTION: Do not spray, pour, or spill any liquid on the N-560, its accessories, connectors, switches, or openings in the chassis. For surface cleaning and disinfecting the N-560, follow your institution's procedures or: •... -
Page 93: Technical Information
Technical Information T e c h n i c a l I n f o r m a t i o n Description of Alarms The N-560 has three levels of audible alarms. 1. High-priority alarm: A high-pitched, fast-pulsating tone indicating loss of pulse with no patient motion. -
Page 94: Factory Defaults
Technical Information Factory Defaults The N-560 is shipped with factory default settings. Authorized technical personnel using the procedures described in the N-560 service manual can change default settings. Table 5: Factory Default Settings Factory Default Parameter Range Setting %SpO Upper Alarm Lower Alarm Limit plus 1 100% Limit... -
Page 95: Satseconds Display
Such frequent alarms can be distracting. The N-560 utilizes Nellcor SatSeconds alarm management. With the SatSeconds technique, upper and lower alarm limits are set in the same way as traditional alarm management. However, the clinician also sets a... - Page 96 Technical Information The method of calculation is as follows: The number of percentage points that the %SpO falls outside the alarm limit is multiplied by the number of seconds that the %SpO level remains outside that limit. This can be stated as an equation: Points x Seconds = SatSeconds Where: Points = SpO...
-
Page 97: Satseconds "Safety Net
Technical Information Figure 6: Alarm Response with SatSeconds Saturation levels may fluctuate rather than remaining steady for a period of several seconds. Often, %SpO levels may fluctuate above and below the alarm limit, reentering the non-alarm range several times. During such fluctuation, the N-560 integrates the number of %SpO points, both positive and negative, until either the SatSeconds limit (SatSeconds setting) is reached, or the %SpO level returns within a... - Page 98 Technical Information...
-
Page 99: Principles Of Operation
Principles of Operation P r i n c i p l e s o f O p e r a t i o n Oximetry Overview The N-560 uses pulse oximetry to measure functional oxygen saturation in the blood. Pulse oximetry works by applying a sensor to a pulsating arteriolar vascular bed, such as a finger or toe. -
Page 100: Automatic Calibration
Principles of Operation measurements on the difference between maximum and minimum absorption (measurements at systole and diastole). By doing so, it focuses on light absorption by pulsatile arterial blood, eliminating the effects of nonpulsatile absorbers such as tissue, bone, and venous blood. There are various matrixes within the O algorithm. -
Page 101: Functional Versus Fractional Saturation
Principles of Operation Functional versus Fractional Saturation This N-560 measures functional saturation -- oxygenated hemoglobin expressed as a percentage of the hemoglobin that can transport oxygen. It does not detect significant amounts of dysfunctional hemoglobin, such as carboxyhemoglobin or methemoglobin. In contrast, hemoximeters such as the IL482 report fractional saturation -- oxygenated hemoglobin expressed as a percentage of all measured hemoglobin, including measured dysfunctional hemoglobins. -
Page 102: Functional Testers And Patient Simulators
Functional Testers and Patient Simulators Some models of commercially available bench top functional testers and patient simulators can be used to verify the proper functionality of Nellcor pulse oximeter sensors, cables and monitors. See the individual testing device’s operator’s manual for the procedures specific to the model of tester being used. -
Page 103: Specifications
Specifications S p e c i f i c a t i o n s Performance Measurement Range 1% to 100% Pulse Rate 0 and 20 beats per minute (bpm) to 250 bpm Perfusion Range 0.03% to 20% Accuracy and Interference Tolerance Saturation 70 to 100% ±2 digits Adults... -
Page 104: Table 6: Tone Definition
High Priority Alarm Volume level Adjustable alarm volume Pitch (±30 Hz) 932 Hz Pulse width (±20 ms) Nellcor = 255 ms IAW IEC 60601-1-8 = 120 ms IAW EN 475 = 150 ms Pulse repetition interval Nellcor = 320 ms (±20 ms) (double burst) - Page 105 Continually Medium Priority Alarm Volume level Adjustable alarm volume Pitch (±30 Hz) 752 Hz Pulse width (±20 ms) Nellcor = N/A IAW IEC 60601-1-8 = 160 ms IAW EN 475 = 200 ms Pulse repetition interval Nellcor = N/A (±20 ms) (double burst)
- Page 106 Specifications Table 6: Tone Definition (Cont.) Audible Indicator Parameter Value POST Pass Volume level Not changeable Pitch (±30 Hz) 784 Hz Pulse width (±20 ms) 1000 ms Pulse repetition interval (±20 ms) (double burst) Repetitions Pulse Beep Volume level Adjustable Pitch (±30 Hz) 296 Hz to 662 Hz (varies with...
-
Page 107: Electrical
Complies With 91/157/EEC Sensors Electrical/Optical Nellcor Pulse oximetry sensors contain light emitting Specifications diodes (LEDs) that emit red (~660 nm) and infrared (~900 nm) light, with a total optical output power of less than 15 mW. This information of sensor wavelength range can be especially useful to clinicians, for example, those performing photodynamic therapy. -
Page 108: Environmental Conditions
Specifications Environmental Conditions Operation Temperature 50 ºF to 113 ºF (10 ºC to 45 ºC) Altitude/Barometric Pressure 390 m to 3,012 m 1,280 ft. to 9,882 ft.) 70 kPa to 106 kPa (20.6 in. Hg to 31.3 in. Hg) Relative Humidity 15% to 95% non condensing to be compliant with IEC 60601... -
Page 109: Physical Characteristics
Specifications Sensor Power Dissipation (Cont.) Sensor Dissipation MAX-P 52.5 mW MAX-A 52.5 mW MAX-AL 52.5 mW MAX-R 52.5 mW Oxiband OXI-A/N 52.5 mW 52.5 mW Oxiband OXI-P/I Durasensor DS-100A 52.5 mW OxiCliq P 52.5 mW OxiCliq N 52.5 mW OxiCliq I 52.5 mW OxiCliq A 52.5 mW... -
Page 110: Compliance
Specifications Compliance Item Standard Description Quality System EN ISO 13485: 2000, Quality system — Medical ISO 13485: 1996 Devices, Particular Requirements for application of ISO 9001: 2000 EC Directive 93/42/EEC Medical Device Directive (Europe + Int.) FDA Guidance FDA RG (Nov. 1993) Reviewers Guide for Premarket Notification Submission... -
Page 111: Manufacturer's Declaration
Specifications Item Standard Description EN 55011, Class B/ EMC Disturbance Group 1 Characteristics — Limits and Methods of Measurement, Industrial Scientific and Medical (ISM) RF Equipment, Edition 3.1,1999-08 Safety Alarms EN 60601-1-8: 2004 General Application of Alarms in Medical Electric Equipment Front panel and case IEC 60878, EN 980, labeling... -
Page 112: Table 7: Cable Compliance
Specifications Table 7: Cable Compliance Cables Comply With: • RF emissions, EN 55011, Class B/Group 1 • EN 60601-1-2; 2001 Maximum Cables and OxiMax Sensors Length OxiCliq-OC-3 cable 3 ft. (0.9 m) DOC-10 pulse oximeter cable 10 ft. 10 in. (3.3 m) Software download cable, RS-232 serial, 15 to 9 pin “D”... -
Page 113: Table 8: Electromagnetic Emissions
Specifications Table 7: Cable Compliance (Cont.) Cables Comply With: (Cont.) • RF emissions, EN 55011, Class B/Group 1 • EN 60601-1-2; 2001 Maximum Cables and OxiMax Sensors (Cont.) Length D-YS sensor 4 ft. (1.2 m) D-YSE sensor 4 ft. (1.2 m) D-YSPD sensor 4 ft. -
Page 114: Table 9: Electromagnetic Immunity
Specifications Table 9: Electromagnetic Immunity The N-560 is intended for use in the electromagnetic environment specified below. The customer or user of the N-560 should assure that it is used in such an environment. IEC 60601 Compliance Electromagnetic Immunity Test Test Level Level Environment —... - Page 115 Specifications Table 9: Electromagnetic Immunity (Cont.) The N-560 is intended for use in the electromagnetic environment specified below. The customer or user of the N-560 should assure that it is used in such an environment. IEC 60601 Compliance Electromagnetic Immunity Test Test Level Level Environment —...
- Page 116 Specifications Table 9: Electromagnetic Immunity (Cont.) The N-560 is intended for use in the electromagnetic environment specified below. The customer or user of the N-560 should assure that it is used in such an environment. IEC 60601 Compliance Electromagnetic Immunity Test Test Level Level Environment —...
-
Page 117: Table 10: Recommended Separation Distances Between Portable And
Specifications Table 10: Recommended Separation Distances Between Portable and Mobile RF Communication Equipment and the N-560 The N-560 is intended for use in an electromagnetic environment in which radiated RF disturbances are controlled. The customer or the user of the N- 560 can help prevent electromagnetic interference by maintaining a minimum distance between portable and mobile RF communications equipment (transmitters) and the N-560 as recommended below, according... - Page 118 Specifications...
-
Page 119: Index
I n d e x Calibration, automatic 92 Symbols Components, list of 16 Connecting a sensor 17 %SpO2 display 9 Connecting to the data port 47 Corrective action 76 AC power indicator 9 Adjust down button 8 Data port pinouts 48 Adjust up button 8 Data port printout, Option 1 45 Alarm limits, setting 34... - Page 120 Index Oximetry overview 91 interference detected 61 Interference indicator 10 Patient settings, verifying 32 Performance considerations 69 Performance verification 69 PH 61 LB 61 PL 61 LM 61 Print, trend 44 Loss of pulse 61 Printing trend information 55 loss of pulse with Interference 61 PS 61 Low battery 61 Pulse amplitude indicator 9...
- Page 121 Index Sensor messages indicator 11 physical 101 Sensor off 61 storage Sensor off indicator 10 altitude 100 sensor power dissipation 100 barometric pressure 100 Sensor, selecting 63 relative humidity 100 Service 83 temperature 100 Setting pulse beep volume 27 Symbols 6 SH 61 Shut down, automatic 19 SL 61...
- Page 122 Index...
- Page 124 Nellcor Puritan Bennett Division 4280 Hacienda Drive Pleasanton, CA 94588 U.S.A. Telephone Toll Free 1.800.NELLCOR Authorized Representative Tyco Healthcare UK LTD 154 Fareham Road Gosport PO13 0AS, U.K. © 2007 Nellcor Puritan Bennett Inc. All rights reserved Rx ONLY 10006635B-0107...