FireplaceXtrordinair 4237 EG Installation Manual
Hide thumbs
Also See for 4237 EG:
- Owner's manual (28 pages) ,
- Installation (3 pages) ,
- Installation (4 pages)
Table of Contents
Advertisement
Quick Links
WARNING:
If the information in these instructions is not followed exactly, a fire or explosion may result
causing property damage, personal injury, or loss of life.
- Do not store or use gasoline or other flammable vapors and liquids in the vicinity of this or any
other appliance.
- WHAT TO DO IF YOU SMELL GAS
• Do not try to light any appliance.
• Do not touch any electrical switch; do not use any phone in your building.
• Immediately call your gas supplier from a neighbor's phone. Follow the gas supplier's
instructions.
• If you cannot reach your gas supplier, call the fire department.
- Installation and service must be performed by a qualified installer, service agency, or the gas supplier.
A barrier designed to reduce the risk of burns from
the hot viewing glass is provided with this appliance
and shall be installed for the protection of children
and other at-risk individuals.
This appliance may be installed in an aftermarket, permanently located, manufactured home
(USA only) or mobile home, where not prohibited by local codes.
This appliance is only for use with the type of gas indicated on the rating plate. A conversion
kit is supplied with the appliance.
INSTALLER: Leave this manual with the appliance.
CONSUMER: Retain this manual for future reference.
Travis Industries, Inc.
Copyright 2021, T.I.
4237 EG
Fireplace
Installation Manual
HOT GLASS WILL CAUSE
BURNS
DO NOT TOUCH GLASS
UNTIL COOLED
NEVER ALLOW CHILDREN
TO TOUCH GLASS
12521 Harbour Reach Dr., Mukilteo, WA 98275
$10.00
Omni-Test Laboratories, Inc.
Built-In Direct-Vent Fireplace
Natural Gas
LP (Propane)
French language manuals at fireplacex.com
Manuels de langue Française à fireplacex.com
9/22/21
Listed by
Report # 0028GF104S
ANSI Z21.88:19
CSA 2.33:19
CSA 2.17-2017
www.travisproducts.com
100-01561
Advertisement
Table of Contents

Related Manuals for FireplaceXtrordinair 4237 EG


Summary of Contents for FireplaceXtrordinair 4237 EG
- Page 1 4237 EG Fireplace Installation Manual WARNING: If the information in these instructions is not followed exactly, a fire or explosion may result causing property damage, personal injury, or loss of life. - Do not store or use gasoline or other flammable vapors and liquids in the vicinity of this or any other appliance.
-
Page 2: Overview
Introduction Overview This manual details the installation requirements for the 4237 EG fireplace. For operating and maintenance instructions, refer to the Owner's Manual. Listing Details This appliance was listed by OMNI-Test Laboratories, Inc. to ANSI Z21.88:19. The listing label is chained to the appliance near the glass frame. -
Page 3: Table Of Contents
CoolSmart TV - Fireplace Preparation Approved Vent Terminations CoolSmart TV Kit Installation Vent Installation Using oval pipe to get past an obstruction Vertical Pipe Shield © Travis Industries 9/22/2021 - 1561 4237 EG... -
Page 4: Safety Warnings
Do not operate if any portion of the heater was submerged in water or if any corrosion occurs. Immediately call a qualified service technician to inspect the appliance and to replace any part of the control system and any gas control which has been underwater. © Travis Industries 9/22/2021 - 1561 4237 EG... - Page 5 Travis Gas Fireplaces. Stoves and Inserts are protected by one or more of the following patents; U.S. 8,469,021, 7,066,170, 6,602,068, 6,443,726, 6,953,037; Canada 2755517 as well as other U.S. and Foreign Patents pending. © Travis Industries 9/22/2021 - 1561 4237 EG...
-
Page 6: Installation Options
A power heat duct kit and a CoolSmart TV kit are available for this fireplace. You may use up to (2) power heat vent kits or (1) CoolSmart TV kit, but not both. If using the CoolSmart TV kit, all (6) of the knockouts on top of the fireplace must be used. © Travis Industries 9/22/2021 - 1561 4237 EG... -
Page 7: Packing List
Install the drywall. Install the hearth (if applicable). Install the facing (if applicable). Install the mantel (if applicable). Install firebacks Install logs Finalize the installation (see page 36). © Travis Industries 9/22/2021 - 1561 4237 EG... -
Page 8: Fireplace Unboxing And Moving Into Position
(place 2x4’s into the firebox to distribute the load). 7. Once the fireplace is near its final position, remove the shipping brackets from the side of the fireplace and slide it into place. © Travis Industries 9/22/2021 - 1561 4237 EG... -
Page 9: Massachusetts Requirements
See Gas Connection section for additional Commonwealth of Massachusetts requirements. © Travis Industries 9/22/2021 - 1561 4237 EG... -
Page 10: Fireplace Placement Requirements
The base of the fireplace must be a minimum 61” (1550mm) below the room ceiling. The firebox opening is 1” (26mm) above the base of the fireplace. For a typical raised fireplace of 10” (254mm), place the fireplace on a platform 9” (229mm) tall. © Travis Industries 9/22/2021 - 1561 4237 EG... -
Page 11: Televisions Placed Above The Fireplace
56-3/4” above the base of the fireplace. WIRING NOTE: If running wiring into the enclosure, you may wish to use thermal insulating wrap around the wiring. Secure the wiring to protect from contact with hot surfaces. © Travis Industries 9/22/2021 - 1561 4237 EG... -
Page 12: Minimum Framing Dimensions
When using a CoolSmart TV kit, see section: “CoolSmart TV - Framing the Chase” on page 57 of this manual or the installation instructions included with the kit for minimum framing dimensions. © Travis Industries 9/22/2021 - 1561 4237 EG... -
Page 13: Minimum Vent "Bump Out" Application
(for qualified installers only) Minimum Vent “Bump Out” application 4237 LP & NG Installations 24” Vertical Vent Section (Min. Rise) Vent Approx. 81” (2058mm) Centerline FP Base to Approx. 101” (2566mm) Roof Eave © Travis Industries 9/22/2021 - 1561 4237 EG... -
Page 14: Nailing Brackets - Standard Install
(see illustration below). NOTE: Make sure the fireplace is square and plumb when placed in the framing. Measured corner- to-corner the fireplace should be square. Use shims to ensure the fireplace is square. © Travis Industries 9/22/2021 - 1561 4237 EG... -
Page 15: Nailing Brackets - Extended Install (Slab Over)
(rotate the nailing brackets as shown below). NOTE: Make sure the fireplace is square and plumb when placed in the framing. Measured corner- to-corner the fireplace should be square. Use shims to ensure the fireplace is square. © Travis Industries 9/22/2021 - 1561 4237 EG... -
Page 16: Corner Installations
Approximate framing dimensions for 45° installations are shown below. Additional space may be required for vent installation depending on the framing location and other site-specific conditions. (a) 68-3/4” (1747mm)* (b) 22-1/4” (566mm) (c) 97-1/4” (2471mm) * These dimensions are for “Standard” installations. © Travis Industries 9/22/2021 - 1561 4237 EG... -
Page 17: Outdoor Fireplace Installations
NECA NFPA 70. Travis Industries is not responsible for any damage caused by water, corrosion, oxidation, or rust to the fireplace, its components, or any optional accessories (e.g. faces, trim, firebacks, etc.) © Travis Industries 9/22/2021 - 1561 4237 EG... -
Page 18: Gas Line Requirements
Contact the local gas supplier if the regulator is at an improper pressure. Gas Line Location The gas line is located on the left side of the appliance in the location shown below. The gas inlet accepts a 1/2” FPT. © Travis Industries 9/22/2021 - 1561 4237 EG... -
Page 19: Directions For Connecting A Gas Pressure Test Gauge
5/16” i.d. rubber or plastic tubing over the tapered test port. Connect the tubing to the test gauge. WARNING: The brass screw must be tightened after testing to prevent gas leakage. © Travis Industries 9/22/2021 - 1561 4237 EG... -
Page 20: Electrical Connection
Route the electrical connection through the ZC cover plate and junction box cover plate and attach to the hookup wires pictured below. Caution: Label all wires prior to disconnection when servicing controls. Wiring errors can cause improper and dangerous operation. © Travis Industries 9/22/2021 - 1561 4237 EG... -
Page 21: Vent Requirements
Horizontal sections require a 1/4" (6mm) rise every 12" (305mm) of travel. Horizontal sections require non-combustible support every three feet (e.g.: plumbing strap). © Travis Industries 9/22/2021 - 1561 4237 EG... -
Page 22: Vertical Pipe Shield
Every horizontal termination on combustible walls requires a vinyl standoff (even if the siding is not vinyl). Attach the horizontal termination shield to the top of the horizontal termination as shown below (use the 4 included self-drilling screws). Note how the screws are installed from the top down. © Travis Industries 9/22/2021 - 1561 4237 EG... -
Page 23: Exhaust Restrictor
To adjust the restrictor to a different position, loosen the 4 screws holding the adjuster plates in place. Slide the to the correct notch (each notch is sequential, position # 1 through 5). Tighten the screws to secure the adjuster plates. 1/4" Nutdriver This restrictor is in position #3. © Travis Industries 9/22/2021 - 1561 4237 EG... -
Page 24: Minimum Vent Configuration
The termination must fall within the shaded area shown in the charts below. Use the indicated restrictor positions. One elbow (30° or 45°) may be used on the horizontal run. © Travis Industries 9/22/2021 - 1561 4237 EG... -
Page 25: Vent Configuration: Horizontal Terminations Using Ng
(Horizontal Length = H1 + H2). or left). It may be a 30°, 45°, 60°, or 90° elbow. This is considered a vertical elbow. © Travis Industries 9/22/2021 - 1561 4237 EG... -
Page 26: Vent Configuration: Horizontal Terminations Using Lp
(Horizontal Length = H1 + H2). or left). It may be a 30°, 45°, 60°, or 90° elbow. This is considered a vertical elbow. © Travis Industries 9/22/2021 - 1561 4237 EG... -
Page 27: Vent Configuration: Vertical Terminations Using Ng
(Horizontal Length = H1 + H2). or left). It may be a 30°, 45°, 60°, or 90° elbow. This is considered a vertical elbow. © Travis Industries 9/22/2021 - 1561 4237 EG... -
Page 28: Vent Configuration: Vertical Terminations Using Lp
(Horizontal Length = H1 + H2). or left). It may be a 30°, 45°, 60°, or 90° elbow. This is considered a vertical elbow. © Travis Industries 9/22/2021 - 1561 4237 EG... -
Page 29: Termination Requirements
Minimum 24” (610mm) horizontal clearance to any surface (such as an exterior wall) – for vertical terminations NOTE: Measure clearances to the nearest edge of the exhaust hood. • Vent termination must not be located where it will become plugged by snow or other material © Travis Industries 9/22/2021 - 1561 4237 EG... -
Page 30: Hearth Requirements
NOTE: If using one of the hearth options, make sure to maintain the proper gap between the flooring and the hearth. Seal the gap with a flexible caulk to allow for expansion and contraction of the flooring. © Travis Industries 9/22/2021 - 1561 4237 EG... -
Page 31: Facing Requirements
NOTE: Screws may be used to secure cement board or tile backer to the fireplace. Do not penetrate the fireplace more than 1/2” (13mm). © Travis Industries 10/22/2021 - 1561 4237 EG... -
Page 32: Facing Warning (Ironworks Face Only)
When using THICK FACING (More than 1”) failure to maintain this space will keep the backing plate for the face from attaching to the appliance. This only applies to the Ironworks face. For facing material thicker than 1” when using the Ironworks Face Thin (standard) facing examples © Travis Industries 9/22/2021 - 1561 4237 EG... -
Page 33: Facing Example -Standard Install
Facing Example – Extended (Slab Over) Install This type of installation allows for marble, granite, other natural stone slabs, or other non-combustible material to be placed over the fireplace and surrounding drywall (see illustration below for details). © Travis Industries 9/22/2021 - 1561 4237 EG... -
Page 34: Adjustable Tile Stop
Adjustable tile stops are included in the screen box. They may be attached to the top and sides of the fireplace opening to form a black edge around the tile opening. Install using the included 18 screws (see photos below). The tile stops may be adjusted from ½” to 1”. © Travis Industries 9/22/2021 - 1561 4237 EG... -
Page 35: Mantel Requirements
A non-combustible SIDE OF FIREPLACE Non-Combustible Mantel header must be used (metal stud). Non-Combustible Facing NOTE: If using a CoolSmart TV kit see section “Mantel Clearances with CoolSmart TV” on page 58. © Travis Industries 9/22/2021 - 1561 4237 EG... -
Page 36: Steps For Finalizing The Installation
(this is used primarily with brick faces). Acid wash (muriatic acid) is used to remove excess mortar. If not properly neutralized with an ammonia solution, the plated face may develop a permanent tarnish when the acid evaporates over time. Contact your dealer if uncertain your facing has been properly neutralized. © Travis Industries 10/21/2021 - 1561 4237 EG... -
Page 37: Pilot Fuel Conservation Timer (Gsb & Gsr Units)
A programmable thermostat may be set to turn on, once per week, to a high temperature for a short time. This will reset the 7-day timer and allow the heater to operate without having to restart the pilot. © Travis Industries 9/22/2021 - 1561 4237 EG... -
Page 38: Glass Frame Removal And Installation
The glass frame tool is shipped inside the fireplace, on the right side of the fireplace opening. The first time it is used you may need to loosen the screw (1/4” wrench). The tool is accessed after removing the screen. NOTE: Replace the tool in this location after use. © Travis Industries 9/22/2021 - 1561 4237 EG... - Page 39 The screen rests against (2) tabs on the upper sides of the fireplace opening. Slide the tabs behind the front wall of the fireplace to make room for the removal of the glass assembly. © Travis Industries 9/22/2021 - 1561 4237 EG...
-
Page 40: Installing The Firebacks
Remove the glass frame from the fireplace. Installing the Firebacks See instructions included with the firebacks. © Travis Industries 9/22/2021 - 1561 4237 EG... -
Page 41: Log Set Installation
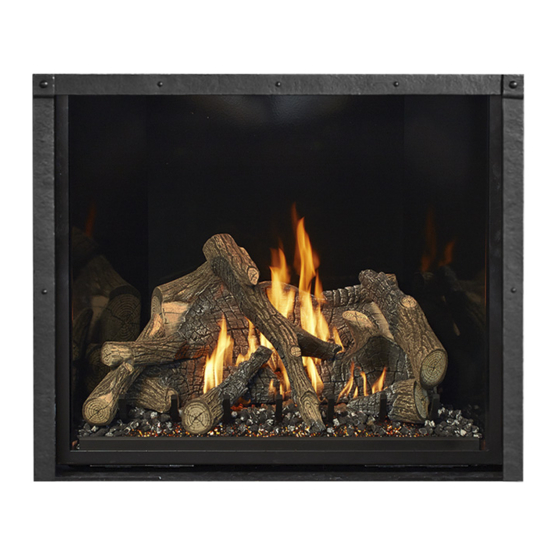
When installed, the nine (9) logs should appear as shown below. Log #1 Log #7 250-05840 250-05846 Log #2 250-05841 Log #3 250-05842 Log #6 250-05845 Log #9 Log #4 Log #5 Log #8 250-05848 250-05843 250-05844 250-05847 © Travis Industries 9/22/2021 - 1561 4237 EG... -
Page 42: Log Set Overview - Birch (Sku# 94500982)
When installed, the nine (9) logs should appear as shown below. Log #1 Log #7 250-05824 250-05830 Log #2 250-05825 Log #3 250-05826 Log #6 250-05829 Log #9 Log #8 Log #4 Log #5 250-05832 250-05831 250-05827 250-05828 © Travis Industries 9/22/2021 - 1561 4237 EG... -
Page 43: Log Set Installation
NOTE: We recommend that you use a piece of paper, cardboard as a shield to mask the log grate and burner from overspray (see below). Scan this code with a QR reader on your cell phone to watch a video of Ember-Glo™ glass setup. http://vimeo.com/289322734 © Travis Industries 9/22/2021 - 1561 4237 EG... - Page 44 With the rear log in place, push it back if using LP gas or pull it forward if using NG gas. Bottom View of Log Push back for LP gas Pull forward for NG gas © Travis Industries 9/22/2021 - 1561 4237 EG...
- Page 45 The hole in the left bottom of the log rests on the locating pin just right of the center of the burner. Push the log backward until it is in contact with the sloped portion of the rear burner. Make sure burner holes are not obstructed. © Travis Industries 9/22/2021 - 1561 4237 EG...
- Page 46 8. Place log #5 as shown below. There is a notch on the lower right of the log that rests against the leftmost fireplace grate finger. The upper portion of the log rests on a flat spot on the top of log #2. © Travis Industries 9/22/2021 - 1561 4237 EG...
- Page 47 #6 onto the left locating pin on the top of log #2 10. Place ember chunks (included with the fireplace) along the front of the front burner. Do not obstruct any burner holes. © Travis Industries 9/22/2021 - 1561 4237 EG...
- Page 48 #1(see below). The other end of log #7 rests on the right end of log# 3. Rotate the lower portion of the log until it is in contact with the fireback. © Travis Industries 9/22/2021 - 1561 4237 EG...
- Page 49 The left end of the log will contact the Ember-Glo™ glass. Push the log down until it is resting on the front edge of the log grate rather than being held up by the ember glass. Place the hole on the right locating pin on log #2 © Travis Industries 9/22/2021 - 1561 4237 EG...
- Page 50 (see below). Work the end of the log into the glass until it is stable. Log #1 15. Finish dressing the firebox with ember chunks over the top of the ember glass in front of the log set. © Travis Industries 9/22/2021 - 1561 4237 EG...
-
Page 51: Lp Conversion Instructions
2. Remove the rear burner. Lift up on the burner and remove it from the firebox (see below). 3. Remove the front burner. Lift up on the burner and remove it from the firebox (see below). © Travis Industries 9/22/2021 - 1561 4237 EG... - Page 52 5. Replace both burner orifices following the steps below. Front #2.5mm Rear #C51 6. Install the LP manifold covers supplied in the stove pack. Secure the manifold covers using the screws removed in step 4. © Travis Industries 9/22/2021 - 1561 4237 EG...
- Page 53 (see right). 10. Replace the glass. 11. Make the gas line connection, bleed the gas line (if applicable), start the heater, and thoroughly leak-test all gas connections and the gas control valve. © Travis Industries 9/22/2021 - 1561 4237 EG...
-
Page 54: Wiring Diagram
Do not operate appliance with the glass front removed, cracked, or broken. Replacement of the glass should be done by a licensed or qualified service person. Contact your local Travis dealer for a Replacement Parts List. © Travis Industries 9/22/2021 - 1561 4237 EG... -
Page 55: Coolsmart Tv - Installation Overview (Optional)
NOTE: A power heat duct kit may also available for this appliance. If so, you may use either the power heat vent kit(s) or the CoolSmart TV kit, but not both. See appliance installation manual for details. © Travis Industries 9/22/2021 - 1561 4237 EG... -
Page 56: Coolsmart Tv - Installation Requirements
(2) 8-32 x 1-1/2” screws attach the trim to the upper manifold. This allows variable thickness of finish material. Dimensions 75” (1905mm) 2-7/8” (74mm) 1-1/4” (32mm) 74” (1880mm) 1-3/4” (45mm) © Travis Industries 9/22/2021 - 1561 4237 EG... -
Page 57: Coolsmart Tv - Framing The Chase
Optional Equipment CoolSmart TV - Framing the Chase © Travis Industries 9/22/2021 - 1561 4237 EG... -
Page 58: Coolsmart Tv - Mantel Clearances With Coolsmart Tv
If you wish to place a TV above the mantel, it must meet the following requirements: Minimum 1” air gap behind TV to wall. The mantel must extend 2” in front of the TV and 1” to both sides. © Travis Industries 9/22/2021 - 1561 4237 EG... -
Page 59: Coolsmart Tv - Fireplace Preparation
(U.L. 181A-P) tape Repeat these same steps with the remaining 5 knockouts. When completed, install the fireplace into the framed chase (see appliance manual for Installation details). © Travis Industries 9/22/2021 - 1561 4237 EG... -
Page 60: Coolsmart Tv Kit Installation
Slide the outlet into the gap and allow it to sit level again. The two mounting tabs will support the manifold. Mounting tabs © Travis Industries 9/22/2021 - 1561 4237 EG... - Page 61 Leave the screws loose so the brackets can be positioned to the back of the chase. Secure the brackets to the chase using screws (not included). Tighten the screws securing the brackets to the manifold. © Travis Industries 9/22/2021 - 1561 4237 EG...
- Page 62 1-1/2” thick. See fireplace installation manual for finishing details. NOTE: The manifold opening protrudes 7/16" proud of the framing. The wall may be finished to the opening if you do not wish to use the grill trim. © Travis Industries 9/22/2021 - 1561 4237 EG...
-
Page 63: Using Oval Pipe To Get Past An Obstruction
The adapters and ridged pipe should be factory ovalized, not field ovalized. 5” round to 6” 5” oval adapter NOTE: All clearances to combustibles must be maintained. 5” Flex 5” to fireplace 3” © Travis Industries 9/22/2021 - 1561 4237 EG... - Page 64 Safety Warnings ............................4 Standard Install ............................14 Televisions above Fireplace........................11 Termination Requirements .......................... 29 Vent Configurations ............................. 25 Vent Requirements ............................. 21 Vinyl Flooring Hearth Requirements ......................30 Wiring Diagram ............................54 © Travis Industries 9/22/2021 - 1561 4237 EG...