AudioCodes MP-20 Series User Manual
Cpe & access gateway products, multimedia home gateway
Hide thumbs
Also See for MP-20 Series:
- Release notes (22 pages) ,
- Frequently asked questions manual (20 pages) ,
- Quick manual (22 pages)

Related Manuals for AudioCodes MP-20 Series


Summary of Contents for AudioCodes MP-20 Series
- Page 1 AudioCodes CPE & Access Gateway Products MP-20x Multimedia Home Gateway User's Manual MP-20x Telephone Adapter Version 4.4.3 Document #: LTRT-50614...
-
Page 3: Table Of Contents
User's Manual Contents Table of Contents Introduction ....................... 17 Cabling the MP-20x Telephone Adapter ............19 Setting up a Network Connection ..............21 Defining Your PC's Network Connection .............. 21 3.1.1 Windows XP ......................22 3.1.2 Linux ........................22 Configuring the MP-20x's Network Connection ............. 23 3.2.1 Logging in to MP-20x Web Interface ...............23 3.2.2... - Page 4 MP-20x Multimedia Home Gateway Configuring VoIP Parameters ................73 Configuring the SIP Signaling Protocol ..............74 9.1.1 Configuring Proxy Redundancy ................79 Configuring Dialing Parameters ................82 9.2.1 Syntax for Digit Maps and Dial Plans ..............86 Configuring Media Streaming ................88 9.3.1 Configuring Codecs ....................89 9.3.1.1...
- Page 5 User's Manual Contents 12.2.1.1 General Tab ...................148 12.2.1.2 Settings Tab ...................148 12.2.1.3 Routing Tab ....................150 12.2.1.4 Advanced Tab ..................150 12.3 WAN Connection ....................151 12.3.1 General Tab ......................151 12.3.2 Settings Tab ......................152 12.3.2.1 Internet Protocol Settings ...............153 12.3.3 Routing Tab ......................156 12.3.4 PPP Tab ........................158 12.3.5 PPTP Tab ......................160 12.3.6 Advanced Tab ......................161...
- Page 6 MP-20x Multimedia Home Gateway 14.4.6 Telnet CLI ......................232 14.4.7 Redirect Server ......................232 14.4.8 BroadSoft BroadWorks DMS Provisioning ............234 14.4.9 Provisioning using DHCP Options 66/67 and TFTP ..........234 14.4.9.1 Default Behavior ..................234 14.4.9.2 Disabling DHCP Options 66 and 67 ............234 15 Security ......................237 15.1 General Security Level Settings................
- Page 7 User's Manual Contents 20.2 Viewing the Device Software Version ..............301 20.3 Configuring Date and Time ................. 302 20.4 Configuration File ....................305 20.4.1 Uploading Configuration File from PC on the Network ..........307 20.4.2 Uploading Configuration File from a Remote Server ..........309 20.4.3 Encrypting the Configuration File using CLI ............312 20.4.4 Automatic Upload using SIP NOTIFY Message ............313 20.5 Firmware Upgrade ....................
- Page 8 MP-20x Multimedia Home Gateway List of Figures Figure 1-1: Rear Panel MP-20xB Models ....................17 Figure 2-1: Cabling the Device (Example using MP-204B) ..............19 Figure 3-1: IP and DNS Configuration ....................22 Figure 3-2: Logging In ..........................23 Figure 3-3: Quick Setup Screen ......................24 Figure 3-4: Internet Connection - Automatic IP Address Ethernet Connection ........25 Figure 3-5: Internet Connection - Manual IP Address Ethernet Connection ..........26 Figure 3-6: Internet Connection - PPPoE ....................27...
- Page 9 User's Manual Contents Figure 11-2: Quality of Service – Traffic Shaping Screen ..............118 Figure 11-3: Add Device Traffic Shaping Screen .................118 Figure 11-4: Edit Device Traffic Shaping Screen .................119 Figure 11-5: Add Shaping Class Screen ....................120 Figure 11-6: Edit Shaping Class ......................120 Figure 11-7: Traffic Priority Screen ......................124 Figure 11-8: Add Traffic Priority Rule Screen ..................125 Figure 11-9: DSCP Settings Screen .....................127...
- Page 10 MP-20x Multimedia Home Gateway Figure 12-47: IP Address Distribution - DHCP Relay ................167 Figure 12-48: DHCP Relay Server Address ..................167 Figure 12-49: IP Address Distribution - Disable DHCP ................167 Figure 12-50: Advanced Routing Properties ..................168 Figure 12-51: Internet Connection Firewall ..................169 Figure 12-52: Bridge Options .......................170 Figure 12-53: Network Bridging Screen ....................170 Figure 12-54: Adding New Network Bridging ..................171...
- Page 11 User's Manual Contents Figure 14-13: Simple Network Management Protocol (SNMP) Screen ..........228 Figure 14-14: Redirect Server Configuration Process .................233 Figure 15-1: Firewall in Action ......................237 Figure 15-2: General Security Level Settings..................238 Figure 15-3: Access Control .........................240 Figure 15-4: Add Access Control Rule ....................240 Figure 15-5: Port Forwarding Screen ....................243 Figure 15-6: Add Port Forwarding Rule ....................243 Figure 15-7: Selecting Protocol Type ....................243...
- Page 12 MP-20x Multimedia Home Gateway Figure 19-2: Media Sharing Screen - Expanded ..................297 Figure 19-3: Folder Settings .........................297 Figure 19-4: Shared Partitions......................298 Figure 20-1: Feature Key Screen ......................299 Figure 20-2: Reboot Screen .........................300 Figure 20-3: About MP20x........................301 Figure 20-4: Date and Time Screen .....................302 Figure 20-5: Daylight Saving Time .......................303 Figure 20-6: Daylight Saving Time –...
- Page 13 User's Manual Contents List of Tables Table 1-1: MP-20x Models ........................17 Table 2-1: MP-204B LEDs Description ....................20 Table 4-1: Login Parameters Description ....................33 Table 5-1: Menu Description ........................38 Table 5-2: Table Action Icons Description ....................41 Table 6-1: Map View Icon Description ....................62 Table 9-1: Signaling Protocol Tab Parameters Description ..............74 Table 9-2: Dialing Tab Parameters Description ..................83 Table 9-3: Dial Plan (for Left of '=' Sign) and Digit Map Syntax .............86...
- Page 14 MP-20x Multimedia Home Gateway This page is intentionally left blank. User's Manual Document #: LTRT-50614...
-
Page 15: Customer Support
Customer Support Customer technical support and services are provided by AudioCodes or by an authorized AudioCodes Service Partner. For more information on how to buy technical support for AudioCodes products and for contact information, please visit our Web site at www.audiocodes.com/support. -
Page 16: Documentation Feedback
50614 The PacketSmart Configuration section was updated. Documentation Feedback AudioCodes continually strives to produce high quality documentation. If you have any comments (suggestions or errors) regarding this document, please fill out the Documentation Feedback form on our Web site at http://www.audiocodes.com/downloads. -
Page 17: Introduction
User's Manual 1. Introduction Introduction AudioCodes MP-20x series of analog Telephone Adapters are cost-effective, feature-rich gateways, allowing the connection of ordinary POTS analog telephones or fax machines to a Voice-over-Broadband (VoBB) service provider. The MP-20x series is designed for the rapidly growing residential and Small Office/Home Office (SOHO) voice-over-IP (VoIP) market. - Page 18 MP-20x Multimedia Home Gateway This page is intentionally left blank. User's Manual Document #: LTRT-50614...
-
Page 19: Cabling The Mp-20X Telephone Adapter
User's Manual 2. Cabling the MP-20x Telephone Adapter Cabling the MP-20x Telephone Adapter The procedure below describes how to cable the MP-20x. To cable the MP-20x: Connect the MP-204’s Ethernet connector labeled WAN to your cable or DSL modem, using the Ethernet cable. -
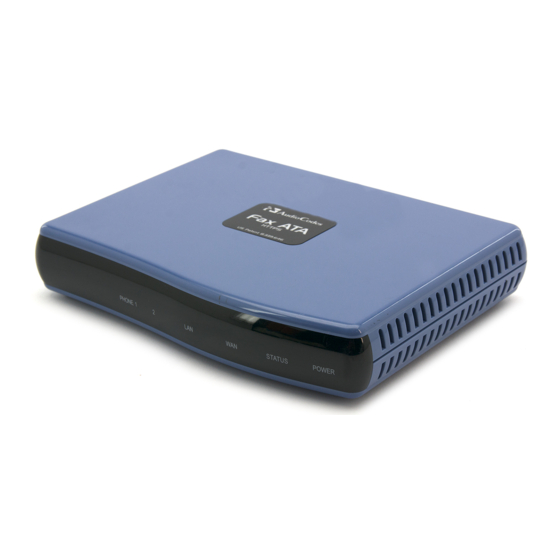
Page 20: Table 2-1: Mp-204B Leds Description
MP-20x Multimedia Home Gateway MP-20x provides LEDs on the front panel for indicating various operating status, as described in the table below: Table 2-1: MP-204B LEDs Description Color State Description Green Power received by MP-20x POWER MP-20x has been powered off Green System start-up successful STATUS... -
Page 21: Setting Up A Network Connection
User's Manual 3. Setting up a Network Connection Setting up a Network Connection The procedure below describes how to set up a network connection. To set up a network connection: Define your PC's network connection (refer to 'Defining Your PC's Network Connection' on page 63) Configure MP-20x's network connection (refer to 'Configuring the MP-20x's Network Connection' on page 65) -
Page 22: Windows Xp
MP-20x Multimedia Home Gateway Figure 3-1: IP and DNS Configuration 3.1.1 Windows XP To configure your PC running Windows XP for dynamic IP addressing: Access 'Network Connections' from the Control Panel. Right-click the Ethernet connection icon, and then select 'Properties'. Under the General tab, select the 'Internet Protocol (TCP/IP)' component, and click the Properties button. -
Page 23: Configuring The Mp-20X's Network Connection
User's Manual 3. Setting up a Network Connection Configuring the MP-20x's Network Connection The Web-based management interface of MP-20x allows you to control the device's system parameters. The interface is accessed through a Web browser. For detailed information on MP-20x's Web-management interface, refer to 'Using the MP-20x's Web Interface' on page 71. -
Page 24: Configuring 'Quick Setup' Screen Parameters
MP-20x Multimedia Home Gateway 3.2.2 Configuring 'Quick Setup' Screen Parameters The 'Quick Setup' screen enables the speedy, precise, and accurate configuration of your Internet connection and other important parameters. To access the 'Quick Setup' screen: From the sidebar menu, click the Quick Setup menu; the 'Quick Setup' screen appear. -
Page 25: Figure 3-4: Internet Connection - Automatic Ip Address Ethernet Connection
User's Manual 3. Setting up a Network Connection 3.2.2.1.1 Automatic IP Address Ethernet Connection 'Automatic IP Address Ethernet Connection' is the default connection type in the 'Connection Type' drop-down list. Figure 3-4: Internet Connection - Automatic IP Address Ethernet Connection If left at the default, MP-20x obtains the WAN IP and DNS IP addresses from a DHCP server on the WAN. -
Page 26: Figure 3-5: Internet Connection - Manual Ip Address Ethernet Connection
MP-20x Multimedia Home Gateway 3.2.2.1.2 Manual IP Address Ethernet Connection To configure manual IP address connection: From the 'Connection Type' drop-down list, select 'Manual IP Address Ethernet Connection'. Figure 3-5: Internet Connection - Manual IP Address Ethernet Connection According to your ISP's instructions, specify the following parameters: •... -
Page 27: Figure 3-6: Internet Connection - Pppoe
User's Manual 3. Setting up a Network Connection 3.2.2.1.3 Point-to-Point Protocol over Ethernet (PPPoE) To configure PPPoE connection: From the 'Connection Type' drop-down list, select 'Point-to-point protocol over Ethernet (PPPoE)'. Figure 3-6: Internet Connection - PPPoE Your ISP should provide you with the following information: •... -
Page 28: Figure 3-8: Layer 2 Tunneling Protocol
MP-20x Multimedia Home Gateway 3.2.2.1.5 Layer 2 Tunneling Protocol (L2TP) To configure L2TP connection: From the 'Connection Type' drop-down list, select 'Layer 2 Tunneling Protocol (L2TP)'. Figure 3-8: Layer 2 Tunneling Protocol Your ISP should provide you with the following information: •... -
Page 29: Configuring 3G/Lte Usb Modem
User's Manual 3. Setting up a Network Connection 3.2.3 Configuring 3G/LTE USB Modem Note: This sub-section is only applicable MP-204B. The procedure below describes how to configure a WAN connection using a 3G/LTE cellular modem. The 3G/LTE cellular modem is connected to the device’s physical port. ... -
Page 30: Figure 3-12: Wan 3G Usb Modem Properties - Settings
MP-20x Multimedia Home Gateway Figure 3-12: WAN 3G USB Modem Properties - Settings Configure the appropriate fields as necessary. In the ‘Access Point PIN Code’ field, enter the modem's personal identification number (PIN), obtained from your Internet Service Provider. In the 'Access Point PUK Code' field, enter the SIM’s PIN Unlock Key obtained from your Internet Service Provider. -
Page 31: Configuring Automatic Internet Dialer Detection
User's Manual 3. Setting up a Network Connection 3.2.4 Configuring Automatic Internet Dialer Detection MP-20x supports the automatic detection of the user's Internet dialer type. This allows you to ignore the Internet connection settings required in Configuring Your Internet Connection. This support is customer ordered and pre-defined in the MP-20x factory settings. - Page 32 MP-20x Multimedia Home Gateway This page is intentionally left blank. User's Manual Document #: LTRT-50614...
-
Page 33: Device Quick Setup
User's Manual 4. Device Quick Setup Device Quick Setup The procedure below describes how to quickly configure your device for connecting it to the Internet (WAN). Preparing Initial Configuration The procedure below describes how to prepare the initial configuration. To initially prepare for configuration: Connect the cables as shown in Section 2 on page 19. -
Page 34: Configuring Sip Signaling Protocol
MP-20x Multimedia Home Gateway Configuring SIP Signaling Protocol The procedure below describes how to configure the SIP Signaling Protocol. To configure the SIP Signaling Protocol: Click the ‘Voice Over IP’ menu in the side menu bar; the ‘Voice Over IP’ screen appears. -
Page 35: Figure 4-4: Line Settings
User's Manual 4. Device Quick Setup Select the One Line Configuration; the table lists the lines according to the selected line configuration mode. Click the corresponding Edit icon to configure the line; the following screen appears: Figure 4-4: Line Settings In the ‘User ID’... - Page 36 MP-20x Multimedia Home Gateway This page is intentionally left blank. User's Manual Document #: LTRT-50614...
-
Page 37: Getting Started With The Web Interface
User's Manual 5. Getting Started with the Web Interface Getting Started with the Web Interface The device's embedded Web server (Web interface) provides a user-friendly Web-based management tool that allows you to configure and monitor the device. The procedures below describe how to access, navigate in, and configure parameters with the Web interface. -
Page 38: Menu Bar Description
MP-20x Multimedia Home Gateway Menu Bar Description The Web interface screens are conveniently grouped into related themes under specific menus. These menus are located in the menu bar. The table below describes these menus. Table 5-1: Menu Description Menu Description Home Displays the Map View (refer to Chapter on page 61). - Page 39 User's Manual 5. Getting Started with the Web Interface Menu Description configuration file. DNS Server Alias a dynamic IP address to a static hostname (see Section 16.2 on page 271). Diagnostics Performs networking diagnostics (see Section 21.1 on page 325). Feature Key Enables new features on the Feature Key (see Section...
- Page 40 MP-20x Multimedia Home Gateway Menu Description Reboot Restarts MP-20x (see Section 20.7 page 323). Regional Modifies the regional settings (see Settings Section 16.6 on page 280). Remote Configures remote administration Administration privileges (see Section 14.2 on page 206). Restore Restores default factory settings (see Factory Section 20.8...
-
Page 41: Managing Tables
User's Manual 5. Getting Started with the Web Interface Managing Tables Tables appear throughout the Web interface for configuring the device. This section describes the how to use these tables to configure the device. The figure below displays a typical table in the Web interface: Figure 5-2: Typical Table Structure Each table row denotes an entry in the table. -
Page 42: Configuring Users
MP-20x Multimedia Home Gateway Configuring Users The 'Users' screen allows you to add new users and assign login usernames and passwords. You may also group users according to your preferences. The default user is "Administrator" with "admin" (case-sensitive) as the username and password. ... -
Page 43: Figure 5-4: Users Settings Screen
User's Manual 5. Getting Started with the Web Interface In the Users table, click the New User icon; the 'Users Settings' screen appears. Figure 5-4: Users Settings Screen Add a new user by configuring the following fields: Full Name: Enter a remote user's full name. User Name: Enter a user name to access your home network. - Page 44 MP-20x Multimedia Home Gateway Email Notification: You can use email notification to receive indications of system events for a predefined severity classification. The available types of events are 'System' or 'Security' events. The available severity of events is 'Error', 'Warning' and 'Information. If the 'Information' level is selected, the user receives notification of the 'Information', 'Warning' and 'Error' events.
-
Page 45: Web User Permissions
User's Manual 5. Getting Started with the Web Interface To configure user groups: On the 'Users' screen, under the Groups group, click New Group icon; the 'Group Settings' screen appears. Figure 5-5: Group Settings Screen In the 'Name' field enter a name for the group. In the 'Description' field, enter a brief description of this group. - Page 46 MP-20x Multimedia Home Gateway (full_name(Administrator)) (email()) (notify_level (0(none)) (1(none)) (directory(1)) (role(admin)) (password(&b7;X&5c;&b9;&a2;)) (enabled(1)) (username(home)) (password(&be;c&5c;&b5;)) (full_name(Home user)) (email()) (notify_level (0(none)) (1(none)) (directory(1)) (role(home)) 5.4.1.1.2 Role and Permissions The example below shows the Print command for viewing existing permissions per role. Note that each role has default privileges.
- Page 47 User's Manual 5. Getting Started with the Web Interface (admin(1)) (basic(1)) (advanced(1)) (name(super)) (permission(ffffffffffffffffffffffffffffffffffffffffffffff00)) (create_role (guest(1)) (home(1)) (admin(1)) (super(1)) (basic(1)) (advanced(1)) (name(basic)) (permission(c0000003c000000000000000000000000000000000000000)) (name(advanced)) (permission(c0000003c0000000000c0000000000000000000000000000)) Returned 0 conf> 5.4.1.1.3 Permission Attributes per Role The example below shows the Print command for viewing the permission attributes. In this example, the permission attributes for the Advanced role are displayed.
- Page 48 MP-20x Multimedia Home Gateway (default(rw)) (all(rw)) (reboot(rw)) (restore_factory(rw)) (firmware_upgrade(rw)) (upload_conf(rw)) (dump_conf(rw)) (ddns(rw)) (firewall_basic(rw)) (firewall_advanced(rw)) (firewall_nat(rw)) (date_time(rw)) (qos(rw)) (qos_advanced(rw)) (docsis_advanced(rw)) (system_monitor(rw)) (system_settings(rw)) (objects_rules(rw)) (remote_admin(rw)) (diagnostics(rw)) (mac_clone(--)) (radius_client(rw)) (radius_server(rw)) (internet_connection(rw)) (network_connections(rw)) (disk_mng(rw)) (file_server(rw)) (print_server(rw)) (ssl_vpn(rw)) (backup(rw)) (ssh(rw)) (routing(rw)) (voice_basic(rw)) (voice_admin(rw)) (groups(rw)) (page_about(rw)) (page_advanced(rw)) (advanced_sys_overview(rw)) (remote_admin_jrmp(--))
- Page 49 User's Manual 5. Getting Started with the Web Interface (dhcps(rw)) (dlm(rw)) (nation_zone(rw)) (dhcp(rw)) (port_forwarding(rw)) (users(rw)) (upnp(rw)) (certificates(rw)) (page_map(rw)) (page_quick_setup_advanced(rw)) (dmz_host(rw)) (wireless_basic(rw)) (wireless_admin(rw)) (wireless_advanced(--)) (change_password(--)) (network_connections_common(rw)) (port_forwarding_advanced(rw)) (primus_advanced(rw)) (packetsmart(rw)) (ipsec(rw)) (installation_wizard(rw)) (l2tp_server(rw)) (media_sharing(rw)) (pptp_server(rw)) (parental_control(rw)) (watchdog(rw)) Returned 0 conf> Set Commands conf>...
- Page 50 MP-20x Multimedia Home Gateway (default(rw)) (all(rw)) (reboot(rw)) (restore_factory(rw)) (firmware_upgrade(rw)) (upload_conf(rw)) (dump_conf(rw)) (ddns(rw)) (firewall_basic(rw)) (firewall_advanced(rw)) (firewall_nat(rw)) (date_time(rw)) (qos(rw)) (qos_advanced(rw)) (docsis_advanced(rw)) (system_monitor(rw)) (system_settings(rw)) (objects_rules(rw)) (remote_admin(rw)) (diagnostics(rw)) (mac_clone(--)) (radius_client(rw)) (radius_server(rw)) (internet_connection(rw)) (network_connections(rw)) (disk_mng(rw)) (file_server(rw)) (print_server(rw)) (ssl_vpn(rw)) (backup(rw)) (ssh(rw)) (routing(rw)) (voice_basic(rw)) (voice_admin(rw)) (groups(rw)) (page_about(rw)) (page_advanced(rw)) (advanced_sys_overview(rw)) (remote_admin_jrmp(--))
- Page 51 User's Manual 5. Getting Started with the Web Interface (dhcps(rw)) (dlm(rw)) (nation_zone(rw)) (dhcp(rw)) (port_forwarding(rw)) (users(rw)) (upnp(rw)) (certificates(rw)) (page_map(rw)) (page_quick_setup_advanced(rw)) (dmz_host(rw)) (wireless_basic(rw)) (wireless_admin(rw)) (wireless_advanced(--)) (change_password(--)) (network_connections_common(rw)) (port_forwarding_advanced(rw)) (primus_advanced(rw)) (packetsmart(rw)) (ipsec(rw)) (installation_wizard(rw)) (l2tp_server(rw)) (media_sharing(rw)) (pptp_server(rw)) (parental_control(rw)) (watchdog(rw)) Returned 0 conf> conf> conf> conf>...
- Page 52 MP-20x Multimedia Home Gateway (access_mail(rw)) (access_wlan(rw)) (access_ssl_vpn(rw)) (access_ssh(rw)) (access_vpn(rw)) (access_printer(rw)) (access_rmt_mng(rw)) (access_http_auth(rw)) (access_ppp(rw)) (access_rmt_upd_tftp(rw)) (default(rw)) (all(rw)) (reboot(rw)) (restore_factory(rw)) (firmware_upgrade(rw)) (upload_conf(rw)) (dump_conf(rw)) (ddns(rw)) (firewall_basic(rw)) (firewall_advanced(rw)) (firewall_nat(rw)) (date_time(rw)) (qos(rw)) (qos_advanced(rw)) (docsis_advanced(rw)) (system_monitor(rw)) (system_settings(rw)) (objects_rules(rw)) (remote_admin(rw)) (diagnostics(rw)) (mac_clone(--)) (radius_client(rw)) (radius_server(rw)) (internet_connection(rw)) (network_connections(rw)) (disk_mng(rw)) (file_server(rw)) (print_server(rw)) (ssl_vpn(rw))
- Page 53 User's Manual 5. Getting Started with the Web Interface (new_connection(rw)) (block_ip_fragments(--)) (tab_local_network(rw)) (wbm_add_user(rw)) (website_restrictions(rw)) (entfy(--)) (clock_set(rw)) (wlan_inter_client(--)) (qos_stats(rw)) (conn_troubleshoot(rw)) (dhcps(rw)) (dlm(rw)) (nation_zone(rw)) (dhcp(rw)) (port_forwarding(rw)) (users(rw)) (upnp(rw)) (certificates(rw)) (page_map(--)) (page_quick_setup_advanced(rw)) (dmz_host(rw)) (wireless_basic(rw)) (wireless_admin(rw)) (wireless_advanced(--)) (change_password(--)) (network_connections_common(rw)) (port_forwarding_advanced(rw)) (primus_advanced(rw)) (packetsmart(rw)) (ipsec(rw)) (installation_wizard(rw)) (l2tp_server(rw)) (media_sharing(rw)) (pptp_server(rw))
-
Page 54: Set Commands
MP-20x Multimedia Home Gateway Set Commands This section describes the Set commands used for viewing and changing the user’s permissions. The example below shows how to enable the 'Advanced' menu page and then to enable the Reboot option under the 'Advanced' page. conf>... -
Page 55: Associated Elements
User's Manual 5. Getting Started with the Web Interface Associated Elements You can define certain elements and then use them later when configuring various features throughout the Web interface. This is very convenient in that it eliminates the need to re- configure the same element, especially if used in multiple configuration areas. -
Page 56: Figure 5-8: Edit Time Segment Screen
MP-20x Multimedia Home Gateway Click the New icon to define the time segment to which the rule applies; the 'Edit Time Segment' screen appears. Figure 5-8: Edit Time Segment Screen Under the Days of Week group, select the days of the week for which you want the rule to be active. -
Page 57: Configuring Network Objects
User's Manual 5. Getting Started with the Web Interface 5.6.2 Configuring Network Objects Network objects is a method used to logically define a set of LAN hosts, according to one or more MAC address, IP address, and host name. Defining such a group can assist when configuring other system rules. - Page 58 MP-20x Multimedia Home Gateway From the 'Network Object Type' drop-down lists, select a source address type: • IP Address • IP Subnet • IP Range • MAC Address • Host Name • DHCP Option (supporting options 60, 61, and 77) •...
-
Page 59: Configuring Protocols
User's Manual 5. Getting Started with the Web Interface 5.6.3 Configuring Protocols The Protocols feature incorporates a list of preset and user-defined applications and common port settings. You can use protocols in various security features such as Access Control and Port Forwarding. You may add new protocols to support new applications or edit existing ones according to your needs. -
Page 60: Logging Out The Web Interface
MP-20x Multimedia Home Gateway Click the New icon; the 'Edit Service' screen appears. Figure 5-14: Advanced - Protocols - Edit Service In the 'Service Name' field, enter the name of the service, and then click the New icon; the 'Edit Service Server Ports' screen appears. Figure 5-15: Advanced - Protocols - Edit Service - Server Ports You may choose any of the protocols available in the drop-down list, or add a new one by selecting 'Other'. -
Page 61: Viewing A Graphical Display Of The Device's Network
User's Manual 6. Viewing a Graphical Display of the Device's Network Viewing a Graphical Display of the Device's Network The Web interface allows you to view a graphical display of the network elements connected to the device. This is displayed in the ‘Map View’ screen, accessed by clicking the Home menu in the menu bar. -
Page 62: Table 6-1: Map View Icon Description
MP-20x Multimedia Home Gateway The table below describes the possible icons that can be displayed in the ‘Map View’ screen: Table 6-1: Map View Icon Description Icon Description Depicts the Internet connection (e.g., WAN Ethernet). Click this icon to open the 'Quick Setup' screen (see Section on page 65). -
Page 63: Configuring Computers For Connecting To Device's Network
User's Manual 7. Configuring Computers for Connecting to Device's Network Configuring Computers for Connecting to Device's Network The procedure below describes how to configure computers to connect to the device's network, Wired Computers This section describes how to configure computers that connect to the device's network through a LAN cable (i.e., wired). -
Page 64: Configuring Computers Running On Linux
MP-20x Multimedia Home Gateway Figure 7-1: Internet Protocol (TCP/IP) Properties Dialog Box Select the Obtain an IP address automatically option. Select the Obtain DNS server address automatically option. Click OK to save the settings. 7.1.2 Configuring Computers Running on Linux The procedure below describes how to configure a computer running on Linux operating system to automatically obtain its IP address from a DHCP server. -
Page 65: Setting Up Your Device
User's Manual 8. Setting up your Device Setting up your Device The procedure below describes how to configure the device for connecting it to the Internet (WAN). You can connect the device to the Internet using one of the following methods: ... -
Page 66: Wan Ethernet
MP-20x Multimedia Home Gateway 8.1.1 WAN Ethernet The device supports the following WAN Ethernet connection types: Manual IP Address Ethernet Connection Automatic IP address Point-to-Point Protocol over Ethernet (PPPoE) Point-to-Point Tunneling Protocol (PPTP) Layer 2 Tunneling Protocol (L2TP) Notes: •... -
Page 67: Automatic Ip Address Ethernet Connection
User's Manual 8. Setting up your Device 8.1.1.2 Automatic IP Address Ethernet Connection The procedure below describes how to connect to the Internet by automatically obtaining a WAN IP address and DNS IP address from a DHCP server on the WAN. This method is the default connection type. -
Page 68: Pptp
MP-20x Multimedia Home Gateway 8.1.1.4 PPTP The procedure below describes how to connect to the Internet by PPTP. To configure PPTP connection: Under the WAN Ethernet group, from the 'Connection Type' drop-down list, select 'Point-to-Point Tunneling Protocol (PPTP)'. Figure 8-5: PPTP WAN Ethernet Connection Configure the following (provided by your ITSP): •... -
Page 69: L2Tp
User's Manual 8. Setting up your Device 8.1.1.5 L2TP The procedure below describes how to connect to the Internet by L2TP. To configure L2TP connection: Under the WAN Ethernet group, from the 'Connection Type' drop-down list, select 'Layer 2 Tunneling Protocol (L2TP)'. Figure 8-6: L2TP WAN Ethernet Connection Configure the following (provided by your ITSP): •... -
Page 70: Using The Automatic Dialer For Internet Connection
MP-20x Multimedia Home Gateway Using the Automatic Dialer for Internet Connection The Automatic Dialer feature allows the service provider to use one type of pre-configured devices for WAN Ethernet (DHCP, LT2P or PPPoE). In the Private Labeling process, the factory setting is burned with the parameters of the different dialers. -
Page 71: Setting Up And Starting The Automatic Dialer
User's Manual 8. Setting up your Device (network (internet_url(<Address or Domain Name for Ping Test>)) 8.2.2 Setting up and Starting the Automatic Dialer The procedure below describes how to setup and start the Automatic Dialer feature. To setup and start Automatic Dialer: Power off the device. - Page 72 MP-20x Multimedia Home Gateway This page is intentionally left blank. User's Manual Document #: LTRT-50614...
-
Page 73: Configuring Voip Parameters
User's Manual 9. Configuring VoIP Parameters Configuring VoIP Parameters The VoIP parameters are mainly configured in the 'Voice over IP' screen. This screen is accessed by clicking the Voice over IP menu in the side menu bar. The ‘Voice over IP' screen provides tabs for configuring the following: ... -
Page 74: Configuring The Sip Signaling Protocol
MP-20x Multimedia Home Gateway Configuring the SIP Signaling Protocol The procedure below describes how to configure the SIP parameters. To configure SIP parameters: From the menu bar, click the Voice Over IP menu; the following screen appears: Figure 9-1: Signaling Protocol Tab Screen Configure the parameters, as required. - Page 75 Defines the user agent parameter that is used in SIP packet headers. user_agent Replaces the default user_agent with the following format: configured_user_agent AudioCodes MP202B; <MAC> Enable PRACK When enabled, the device replies with a PRACK message upon receipt of a reliable provisional response. The device prack/enabled does not initiate reliable provisional responses.
- Page 76 MP-20x Multimedia Home Gateway Parameter Description Host Name or Address Defines the IP address or host name of the SIP proxy. proxy_address Note: This parameter is available only if the ‘Use SIP Proxy’ check box is selected. Proxy Port Defines the port (UDP, TCP, or TLS) of the SIP proxy. proxy_port Note: This parameter is available only if the ‘Use SIP Proxy’...
- Page 77 User's Manual 9. Configuring VoIP Parameters Parameter Description Redundant Proxy Port Defines the port of the redundant proxy. redundant_proxy/port Note: This parameter is available only if the 'Use Redundant Proxy’ check box is selected. Redundant Proxy Keep Alive Period Defines the interval between keep-alive packets (SIP OPTIONS) which are used by the proxy redundancy ka_options/period mechanism to check the connection status.
- Page 78 MP-20x Multimedia Home Gateway Parameter Description Outbound Proxy Port Defines the port on which the outbound Proxy listens. sip_outbound_proxy/port Note: This parameter is available only if 'Use SIP Outbound Proxy' is selected. SIP Timers Note: This group appears only in 'Advanced' mode. Retransmission Timer T1 Defines the SIP T1 retransmission timer according to RFC 3261.
-
Page 79: Configuring Proxy Redundancy
User's Manual 9. Configuring VoIP Parameters 9.1.1 Configuring Proxy Redundancy The Redundant Proxy feature allows the configuration of a backup SIP proxy server to increase Quality of Service (QoS). Once this feature is enabled, the device identifies cases where the primary proxy does not respond to SIP signaling messages. In these cases, the device registers to the redundant proxy and seamlessly continues normal functionality, without any noticeable connectivity failure or malfunction with the primary proxy. -
Page 80: Figure 9-2: Configuring Proxy Redundancy
MP-20x Multimedia Home Gateway In the 'Redundant Proxy Keep Alive Period' field, enter the rate (in seconds) of the keep-alive messages for sending to the proxy. The valid range is 10 to 86,400 seconds (i.e., 24 hours). The default value is 60 sec. To toggle between Symmetric and Asymmetric modes, use the 'Switch back to Primary SIP proxy when available' check box. - Page 81 User's Manual 9. Configuring VoIP Parameters rg_conf/voip/signalling/sip/redundancy_mode/ka_options/ka_type=Usi ng OPTIONS rg_conf/voip/signalling/sip/redundancy_mode/ka_options/timeout=300 rg_conf/voip/signalling/sip/redundancy_mode/redundant_proxy/port=5 rg_conf/voip/signalling/sip/redundancy_mode/redundant_proxy/addr=0 .0.0.0 rg_conf/voip/signalling/sip/redundancy_mode/redundant_proxy/is_sym metric=0 rg_conf/voip/signalling/sip/redundancy_mode/failback/period=120 rg_conf/voip/signalling/sip/sip_outbound_proxy/enabled=1 rg_conf/voip/signalling/sip/sip_outbound_proxy/port=65535 rg_conf/voip/signalling/sip/sip_outbound_proxy/addr=voip.outbandpr oxy.com rg_conf/voip/signalling/sip/sip_t1=500 rg_conf/voip/signalling/sip/sip_t2=4000 rg_conf/voip/signalling/sip/sip_t4=5000 rg_conf/voip/signalling/sip/sip_invite_timer=32000 rg_conf/voip/signalling/sip/proxy_gateway= voip.proxy.com rg_conf/voip/signalling/sip/digit_map=NULL rg_conf/voip/signalling/sip/number_rules=NULL rg_conf/voip/signalling/sip/use_proxy_ip_port_for_registrar=1 rg_conf/voip/signalling/sip/proxy_only=0 rg_conf/voip/signalling/sip/prack/enabled=1 rg_conf/voip/signalling/sip/rport/enabled=1 rg_conf/voip/signalling/sip/connectMediaOn180=0 rg_conf/voip/signalling/sip/stun/enabled=0 rg_conf/voip/signalling/sip/stun/stun_server_ip=0.0.0.0 rg_conf/voip/signalling/sip/stun/stun_need_mask=0.0.0.0 rg_conf/voip/signalling/sip/stun/stun_server_port=3478 rg_conf/voip/signalling/sip/stun/stun_client_port=0 rg_conf/voip/signalling/sip/session_timer=0 rg_conf/voip/signalling/sip/min_session_interval=0 rg_conf/voip/signalling/sip/use_proxy=1 rg_conf/voip/signalling/sip/outgoing_request_no_response_timeout=1 1500...
-
Page 82: Configuring Dialing Parameters
MP-20x Multimedia Home Gateway Configuring Dialing Parameters The procedure below describes how to configure the dialing parameters. To configure dialing parameters: On the 'Voice Over IP' screen, click the Dialing tab; the following screen appears. Figure 9-3: Dialing Tab Screen Configure the parameters, as required. -
Page 83: Table 9-2: Dialing Tab Parameters Description
User's Manual 9. Configuring VoIP Parameters Table 9-2: Dialing Tab Parameters Description Parameter Description Dialing Parameters Dialing Timeout Defines the duration (in seconds) of allowed inactivity between dialed digits. When you work with a proxy, the number you have dialed before dial_timeout the dialing process has timed out is sent to the proxy as the user ID to be called. - Page 84 MP-20x Multimedia Home Gateway Parameter Description Digit Map Defines formats (or patterns) for the dialed number. A match to one of the defined patterns terminates the dialed number. For an explanation on digit_map digit map syntax, see Section 9.2.1 on page 86. Note: This parameter appears only in 'Advanced' mode.
- Page 85 User's Manual 9. Configuring VoIP Parameters Parameter Description SIP INFO Body When the key sequence is set to 'Send Flash Hook Via SIP', you can modify the Message Body field of the SIP INFO message. sip_info_key_seq_body For example: " event flashhook" Note: This parameter appears only when the ‘Flash keys sequence style’...
-
Page 86: Syntax For Digit Maps And Dial Plans
MP-20x Multimedia Home Gateway 9.2.1 Syntax for Digit Maps and Dial Plans Digit maps and dial plans are defined using special syntax rules, configured in the 'Dialing' screen (refer to 'Configuring Dialing Parameters' on page 80). Digit Maps: A phone's digit map allows MP-20x to know when an entered (dialed) telephone number is complete and therefore, when it should immediately initiate the call. -
Page 87: Table 9-4: Digit Map Example
User's Manual 9. Configuring VoIP Parameters Table 9-4: Digit Map Example Digit Pattern Description Example [2-9]11 Received dialed number that begins with any 211, 311, 411, 511, 611, 711, digit from 2 through 9, and ends with digits 11. 811, 911 Received dialed number of 0 Received dialed number of 100 Received dialed number of 101... -
Page 88: Configuring Media Streaming
MP-20x Multimedia Home Gateway Configuring Media Streaming The procedure below describes how to configure the media streaming parameters. To configure media streaming parameters: On the 'Voice Over IP' screen, click the Media Streaming tab; following screen appears. Figure 9-4: Media Streaming Tab Screen Select the 'Enabled' check box under "Wide-Band Restrictions", to restrict Wide-band codecs on FXS ports. -
Page 89: Configuring Codecs
User's Manual 9. Configuring VoIP Parameters rg_conf/voip/media_port=5004 rg_conf/voip/dtmf_payload=101 rg_conf/voip/g726_payload=98 rg_conf/voip/media_tos=0xb8 Table 9-5: Media Streaming Tab Parameters Description Parameter Description Media Streaming Parameters Local RTP Port Range - Defines the port range for Real Time Protocol (RTP) voice transport. Contiguous Series of 8 Ports Starting From: media_port DTMF Relay RFC 2833... -
Page 90: Packetization Time
MP-20x Multimedia Home Gateway 9.3.1.2 Packetization Time The Packetization Time is the length of the digital voice segment that each packet holds. The default is 20 millisecond packets. Selecting 10 millisecond packets reduces the delay but increases the bandwidth consumption. User's Manual Document #: LTRT-50614... -
Page 91: Configuring Voice And Fax
User's Manual 9. Configuring VoIP Parameters Configuring Voice and Fax The procedure below describes how to configure the voice and fax parameters. To configure voice and fax parameters: On the 'Voice Over IP' screen, click the Voice and Fax tab and then click Advanced; the following screen appears. - Page 92 T.38 Relay = Fax is relayed to the remote side according to the T.38 standard Voice Band Data = Switch to G.711 via SIP messaging Bypass = An automatic switch to AudioCodes' proprietary payload type (102, 103). Max Rate Defines the maximum fax rate. max_rate 2.4 Kbps, 4.8 Kbps, 7.2 Kbps, 9.6 Kbps, 12 Kbps or 14.4 Kbps...
- Page 93 Voice Band Data = Switch to G.711 via SIP messaging. Bypass = An automatic switch to AudioCodes' proprietary payload type (102, 103). Note: If the Fax transport mode is Bypass or VBD, it must match the Modem transport mode.
- Page 94 MP-20x Multimedia Home Gateway Parameter Description By Fax Relay: When the device is the receiver side, Switch to CED Transfer Mode Fax relay is enabled upon CED. This allows a high reliable ced_transfer_mode fax-over-IP call establishment at the beginning of CED tone. ...
- Page 95 User's Manual 9. Configuring VoIP Parameters rg_conf/voip/audio/fax/data_bypass_payload=103 rg_conf/voip/audio/fax/audio_startup_enabled=0 rg_conf/voip/audio/fax/fax_audio_start_payload=120 rg_conf/voip/audio/fax/fax_end_report=0 rg_conf/voip/audio/fax/fax_transport_mode=T.38Relay rg_conf/voip/audio/fax/data_transport_mode=Bypass rg_conf/voip/audio/fax/update_fax_to_transparent_enable=1 rg_conf/voip/audio/cng_tone_detection_frequency=1275 rg_conf/voip/audio/output_volume_upon_cng_detection=-16 rg_conf/voip/rtp_mute_on_hold=0 rg_conf/voip/comfort_noise_payload=13 Version 4.4.3 MP-20x Multimedia Home Gateway...
-
Page 96: Configuring Supplementary Services
MP-20x Multimedia Home Gateway Configuring Supplementary Services The procedure below describes how to configure the services parameters. To configure supplementary services: On the 'Voice Over IP' screen, click the Services tab; the following screen appears. Figure 9-6: Services Tab Screen Configure the parameters, as required. -
Page 97: Table 9-7: Services Tab Parameters Description
User's Manual 9. Configuring VoIP Parameters Table 9-7: Services Tab Parameters Description Parameter Description Call Waiting Enabled Enables the Call Waiting feature. call_waiting/enabled Call Waiting SIP Reply Defines the SIP response (180 Ringing or 182 Queued - default) sent when another call arrives while a call is in progress. call_waiting/sip_reply Note: This parameter appears only if Call Waiting is enabled. - Page 98 MP-20x Multimedia Home Gateway Parameter Description 3 Way Conference 3 Way Conference Mode Selects how 3-way conference calls are handled: conference/conf_mode Local: locally by the device Remote: by a remote media server (RFC 4240) Media Server Address The address of the remote media server that handles conference calls.
- Page 99 User's Manual 9. Configuring VoIP Parameters The following is an example of the relevant Telnet parameters: rg_conf/voip/services/hold/enabled=1 rg_conf/voip/services/transfer/enabled=1 rg_conf/voip/services/call_waiting/enabled=1 rg_conf/voip/services/call_waiting/type2_enabled=1 rg_conf/voip/services/call_waiting/sip_reply=Queued rg_conf/voip/services/conference/enabled=1 rg_conf/voip/services/conference/conf_mode=Local rg_conf/voip/services/conference/conf_ms_addr=0.0.0.0 rg_conf/voip/services/call_forward/enabled=0 rg_conf/voip/services/call_forward/cfnr_timeout=5 rg_conf/voip/services/call_forward/cfw_type=Unconditional rg_conf/voip/services/call_forward/sequence=72 rg_conf/voip/services/call_forward/cfw_notifier_enabled=0 rg_conf/voip/services/do_not_disturb/enabled=0 rg_conf/voip/services/do_not_disturb/sequence=68 rg_conf/voip/services/msg_waiting_ind/enabled=1 rg_conf/voip/services/msg_waiting_ind/subscribe=0 rg_conf/voip/services/msg_waiting_ind/subscribe_port=8933 rg_conf/voip/services/msg_waiting_ind/subscribe_ip=voipproxy5.adpt -tech.com rg_conf/voip/services/msg_waiting_ind/expiraition_timeout=30 rg_conf/voip/services/stutter_tone_dur=2500 rg_conf/voip/services/out_of_service_bahavior=Reorder Tone rg_conf/voip/services/restore_defaults/sequence=3228679 rg_conf/voip/services/restore_defaults/enabled=0 rg_conf/voip/services/blind_transfer/enabled=0...
-
Page 100: Voice Menu Guidance
MP-20x Multimedia Home Gateway Voice Menu Guidance The FXS voice menu can be used to query a current firmware version and query or modify basic network configuration parameters, using a standard touch-tone telephone connected to one of the FXS ports. 9.6.1 Configuring Voice Menu Voice Menu can be configured for through the Web interface or the CLI. - Page 101 User's Manual 9. Configuring VoIP Parameters 9.6.1.3.1 Playing current WAN IP address/Subnet Mask/GW and firmware: Connect a telephone to one of the FXS ports. Lift the handset and dial ‘***’ (three stars). Wait for the 'Configuration Menu' voice prompt to be played. ...
-
Page 102: Configuring Micro Pbx Line Settings
MP-20x Multimedia Home Gateway Configuring Micro PBX Line Settings Before you can make phone calls, you need to configure lines. Lines are logical SIP ID numbers (i.e., telephone numbers) which are registered to a SIP proxy server and for which you are charged for calls you make on it. ... -
Page 103: Figure 9-8: Line Settings Screen For A New Line
User's Manual 9. Configuring VoIP Parameters For each line, click the corresponding Edit icon to configure the line; the following screen appears: Figure 9-8: Line Settings Screen for a New Line The screen displays the following read-only information: • Line Number: Line number •... - Page 104 MP-20x Multimedia Home Gateway Table 9-8: Services Tab Parameters Description Parameter Description Enabled Enables the relevant line (x=0,1). line/x/enabled Line Number Defines the Line number. Sends the Caller ID (CID) to the remote side. snd_callerid Line Name Describes the line name in words. description Relating physical ext.
-
Page 105: Configuring Line Extensions
User's Manual 9. Configuring VoIP Parameters Configuring Line Extensions Extensions are the physical telephony extensions on the device. These can be FXS ports (for analog POTS telephones). Once you have defined these lines, you can do the following: Define an arbitrary name for each extension (to help you identify the extension). ... - Page 106 MP-20x Multimedia Home Gateway The following is an example of the relevant Telnet parameters: rg_conf/voip/extension/0/enabled=1 rg_conf/voip/extension/0/name=Phone1 rg_conf/voip/extension/0/type=FXS rg_conf/voip/extension/0/supplementary_services=1 rg_conf/voip/extension/0/auto_dialing/enabled=0 rg_conf/voip/extension/0/auto_dialing/timeout=5 rg_conf/voip/extension/0/auto_dialing/destination=NULL rg_conf/voip/extension/0/line_voice_volume=0 rg_conf/voip/extension/0/line_input_voice_volume=0 rg_conf/voip/extension/0/slic_gain/rx=0 rg_conf/voip/extension/0/slic_gain/tx=0 rg_conf/voip/extension/0/lines/line_0=1 rg_conf/voip/extension/0/lines/line_1=0 rg_conf/voip/extension/1/enabled=1 rg_conf/voip/extension/1/name=Phone2 rg_conf/voip/extension/1/type=FXS rg_conf/voip/extension/1/supplementary_services=1 rg_conf/voip/extension/1/auto_dialing/enabled=0 rg_conf/voip/extension/1/auto_dialing/timeout=5 rg_conf/voip/extension/1/auto_dialing/destination=NULL rg_conf/voip/extension/1/line_voice_volume=0 rg_conf/voip/extension/1/line_input_voice_volume=0 rg_conf/voip/extension/1/slic_gain/rx=0 rg_conf/voip/extension/1/slic_gain/tx=0 rg_conf/voip/extension/1/lines/line_0=0 rg_conf/voip/extension/1/lines/line_1=1 User's Manual Document #: LTRT-50614...
-
Page 107: Configuring Speed Dialing
User's Manual 9. Configuring VoIP Parameters Configuring Speed Dialing Use the 'Speed Dial Settings' screen to associate a called party's contact parameters (including the IP address of his/her ATA and Line ID) with a number that you'll dial to call the called part. -
Page 108: Figure 9-13: Speed Dial Settings Screen (Local Line Destination)
MP-20x Multimedia Home Gateway Figure 9-13: Speed Dial Settings Screen (Local Line Destination) • Direct Call: if you select this option, then configure the following: In the ‘User ID’ field, enter the user ID to call. In the ‘IP Address or Host Name’ field, enter the remote party's IP address or host name. -
Page 109: Enabling Polarity Reversal
User's Manual 9. Configuring VoIP Parameters 9.10 Enabling Polarity Reversal The procedure below describes how to enable polarity reversal. When this feature is enabled, the analog port (FXS) interface polarity is reversed to indicate the start of a VoIP session, and is reversed back when the VoIP session ends. ... - Page 110 MP-20x Multimedia Home Gateway This page is intentionally left blank. User's Manual Document #: LTRT-50614...
-
Page 111: Making Voip Calls With Your Analog Telephones
User's Manual 10. Making VoIP Calls with your Analog Telephones Making VoIP Calls with your Analog Telephones Analog telephone users that are connected to the device can place calls, put calls on hold, transfer calls, and establish three-way conferences. The procedures below decribe how to perform these operations. -
Page 112: Putting A Call On Hold
MP-20x Multimedia Home Gateway 10.3 Putting a Call on Hold The procedure below describes how to put a call on hold. This depends on how you configured the flash-hook functionality, using the ‘Flash keys sequence style’ parameter in Section on page 82. ... -
Page 113: Forwarding Calls To Another Phone
User's Manual 10. Making VoIP Calls with your Analog Telephones 10.5 Forwarding Calls to another Phone The procedure below describes how to automatically forward incoming (received) calls to another phone. Before you can forward calls, you need to enable and configure call forwarding as described in Section on page 96. -
Page 114: Establishing A 3-Way Conference Call
MP-20x Multimedia Home Gateway 10.6 Establishing a 3-Way Conference Call The procedure below describes how to establish a 3-way conference call. The method for doing this depends on how you configured the flash-hook functionality, using the ‘Flash keys sequence style’ parameter in Section on page 82. -
Page 115: Quality Of Service
User's Manual 11. Quality of Service Quality of Service Network-based applications and traffic are growing at a high rate, producing an ever- increasing demand for bandwidth and network capacity. For obvious reasons, bandwidth and capacity cannot be expanded infinitely, requiring that bandwidth-demanding services be delivered over existing infrastructure, without incurring additional, expansive investments. -
Page 116: Qos Wizard
MP-20x Multimedia Home Gateway 11.1 QoS Wizard The QoS wizard allows you to configure your QoS parameters according to predefined profiles, with just a few clicks. A chosen QoS profile automatically defines QoS rules, which you can view and edit in the rest of the QoS tab screens. The QoS wizard also allows you to define the WAN bandwidth. -
Page 117: Configuring Traffic Shaping
User's Manual 11. Quality of Service 11.2 Configuring Traffic Shaping Traffic Shaping is the solution for managing and avoiding congestion where a high speed LAN meets limited broadband bandwidth. A user may have, for example, a 100 Mbps Ethernet LAN with a 100 Mbps WAN interface router. The router may communicate with the ISP using a modem with a bandwidth of 2 Mbps. -
Page 118: Configuring Traffic Shaping
MP-20x Multimedia Home Gateway 11.2.1 Configuring Traffic Shaping The procedure below describes how to configure traffic shaping. To add a traffic shaping device: From the menu bar, click the QoS menu, and then click the Traffic Shaping tab. Figure 11-2: Quality of Service – Traffic Shaping Screen icon;... -
Page 119: Figure 11-4: Edit Device Traffic Shaping Screen
User's Manual 11. Quality of Service Figure 11-4: Edit Device Traffic Shaping Screen Under the Tx Traffic Shaping group, from the ‘Tx Bandwidth’ drop-down list, select ‘Specify’ and define the device’s maximum transmission bandwidth rate in the corresponding field. The purpose is to limit the bandwidth of the WAN interface to that of the weakest outbound link. -
Page 120: Configuring Shaping Classes
MP-20x Multimedia Home Gateway 11.2.2 Configuring Shaping Classes The bandwidth of a device can be divided to reserve constant portions of bandwidth to user-defined traffic types. Such a portion is known as a Shaping Class. When not used by its user-defined traffic type or owner (for example, VoIP), the class is then available to all other traffic. -
Page 121: Class Rules
User's Manual 11. Quality of Service In the ‘Bandwidth’ field, define the bandwidth for the class: • Reserved: reserved (i.e., guaranteed) bandwidth (Committed Information Rate / CIR) in kbps. • Maximum: specify the maximum bandwidth From the ‘Policy’ drop-down list, select the policy for routing packets within the class: •... - Page 122 MP-20x Multimedia Home Gateway In addition, the device cannot control the behavior of its WAN (usually the ISP), which may not have proper QoS handling. Let’s look at a scenario of downloading a large file and surfing the Internet at the same time. Downloading the file is distinguished by small requests, followed by very large responses.
-
Page 123: Configuring Traffic Priority
User's Manual 11. Quality of Service 11.3 Configuring Traffic Priority Traffic Priority allows you to manage and avoid traffic congestion by defining inbound and outbound priority rules for each device on your gateway. These rules determine the priority assigned to packets traveling through the device. QoS parameters (DSCP marking and packet priority) are set per packet, on an application basis. -
Page 124: Figure 11-7: Traffic Priority Screen
MP-20x Multimedia Home Gateway To set traffic priority rules: From the menu bar, click the QoS menu, and then select the Traffic Priority tab; the 'Traffic Priority' screen appears. Figure 11-7: Traffic Priority Screen This screen is divided into two identical groups - ’QoS Input Rules’ and ’QoS Output Rules’ - for prioritizing inbound and outbound traffic respectively. -
Page 125: Figure 11-8: Add Traffic Priority Rule Screen
User's Manual 11. Quality of Service After clicking the appropriate New Entry link, the 'Add Traffic Priority Rule' screen appears. Figure 11-8: Add Traffic Priority Rule Screen Under the Matching group, configure the matching characteristics: From the ‘Source Address’ drop-down list, select 'Any', 'User Defined' or the host as the source address of the packets sent to or received from the network object. - Page 126 MP-20x Multimedia Home Gateway To match packet or data length, select the ‘Length’ check box, and then enter the data or packet length. To match connection duration, select the ‘Connection Duration’ check box, and then enter the duration of the connection (greater or less than). To match connection size, select the ‘Connection Size’...
-
Page 127: Configuring Dscp Mapping
User's Manual 11. Quality of Service 11.4 Configuring DSCP Mapping To understand Differentiated Services Code Point (DSCP), one must first be familiarized with the Differentiated Services (DiffServ) model. DiffServ is a Class of Service (CoS) model that enhances best-effort Internet services by differentiating traffic by users, service requirements and other criteria. -
Page 128: Figure 11-10: Edit Dscp Settings
MP-20x Multimedia Home Gateway To edit an existing entry, click its corresponding Edit icon. To add a new entry, click the New icon. In both cases, the ’Edit DSCP Settings’ screen appears: Figure 11-10: Edit DSCP Settings In the ‘DSCP Value (hex)’ field, enter a hexadecimal number for the DSCP value. In the ‘802.1p Priority’... -
Page 129: Configuring 802.1P Mapping
User's Manual 11. Quality of Service 11.5 Configuring 802.1p Mapping The IEEE 802.1p priority marking method is a standard for prioritizing network traffic at the data link/MAC sub-layer. 802.1p traffic is simply classified and sent to the destination, with no bandwidth reservations established. The 802.1p header includes a 3-bit prioritization field, which allows packets to be grouped into eight levels of priority. -
Page 130: Configuring Class Statistics
MP-20x Multimedia Home Gateway 11.6 Configuring Class Statistics The device provides accurate, real-time information on the traffic passing through your defined device classes. For example, the amount of packets sent, dropped, or delayed are just a few of the parameters that you can monitor per each shaping class. Class statistics are available only if you have defined at least one class (otherwise Note: no information is displayed). -
Page 131: Configuring Basic Voip Qos Example
User's Manual 11. Quality of Service 11.7 Configuring Basic VoIP QoS Example The 'Traffic Shaping' feature only ensures priority to calls that originate from inside the device. When giving VoIP priority over data, the bottleneck is effectively moved from the Cable modem/fiber transceiver into the device. -
Page 132: Figure 11-14: Qos - Edit Device Traffic Shaping - Submitting The Configuration
MP-20x Multimedia Home Gateway Click OK to apply the new definition. Figure 11-14: QoS - Edit Device Traffic Shaping - Submitting the Configuration Click OK again. User's Manual Document #: LTRT-50614... -
Page 133: Network Connections
User's Manual 12. Network Connections Network Connections The procedures below decribe how to configure the following network connections: WAN – see Section 12.1 on page LAN – see Section 12.2 on page VLANs – see Section 12.4 on page ... -
Page 134: Figure 12-1: Network Connections Screen
MP-20x Multimedia Home Gateway To start the Connection Wizard: From the menu bar, click the Network Connections menu; the 'Network Connections' screen appears. Figure 12-1: Network Connections Screen Click the New icon; the ‘Connection Wizard’ screen appears: Figure 12-2: Connection Wizard Screen Select the required network connection group: •... -
Page 135: Wan Ethernet Connections
User's Manual 12. Network Connections 12.1.1 WAN Ethernet Connections You can configure the following WAN Ethernet connection types: The device connected to an external DSL modem and using PPPoE – see Section 12.1.1.1 on page The device connected to an external Cable modem/fiber transceiver without authentication –... -
Page 136: Figure 12-4: Internet Connection – External Dsl Modem
MP-20x Multimedia Home Gateway Select the Internet Connection option, and then click Next; the ‘Internet Connection’ screen appears. Figure 12-4: Internet Connection – External DSL Modem Select the External DSL Modem option, and then click Next; the 'Point-To-Point Protocol over Ethernet (PPPoE)' screen appears. Figure 12-5: Point-to-Point Protocol over Ethernet (PPPoE) Screen Enter the login PPPoE username and password. -
Page 137: External Cable Modem/Fiber Transceiver Without Authentication
User's Manual 12. Network Connections Click Next; the screen 'Connection Summary' opens. Figure 12-6: PPPoE Connection Summary Select the 'Edit the Newly Created Connection' check box if you wish to be routed to the new connection's configuration screen after clicking Finish. Click Finish to save the settings;... -
Page 138: Figure 12-8: Internet Connection – External Cable Modem
MP-20x Multimedia Home Gateway Select the External Cable Modem option, and then click Next. Figure 12-8: Internet Connection – External Cable Modem The ‘Internet Cable Modem Connection' screen appears. Figure 12-9: Internet Cable Modem Connection - Ethernet Select the Ethernet Connection option; the 'Connection Summary' screen appears. User's Manual Document #: LTRT-50614... -
Page 139: Figure 12-10: Ethernet Connection Summary
User's Manual 12. Network Connections Figure 12-10: Ethernet Connection Summary Select the 'Edit the Connection' check box if you wish to be routed to the new connection's configuration screen after clicking Finish. Click Finish to save the settings; the new connection is added to the ‘Network Connections’... -
Page 140: External Cable Modem/Fiber Transceiver With L2Tp
MP-20x Multimedia Home Gateway 12.1.1.3 External Cable Modem/Fiber Transceiver with L2TP You can connect the device to the Internet using an external cable modem/fiber transceiver where the connection is L2TP. L2TP is an extension to the PPP protocol, enabling the device to create VPN connections. -
Page 141: Figure 12-13: Internet Cable Modem Connection - L2Tp
User's Manual 12. Network Connections Figure 12-13: Internet Cable Modem Connection - L2TP Select the Layer 2 Tunneling Protocol (L2TP) with Username and Password Authentication option; the 'Layer 2 Tunneling Protocol (L2TP)' screen appears. Figure 12-14: Layer 2 Tunneling Protocol (L2TP) Screen Enter the L2TP server host name or IP address provided by your ITSP. -
Page 142: Figure 12-15: L2Tp Connection Summary
MP-20x Multimedia Home Gateway Click Next; the screen 'Connection Summary' opens. Figure 12-15: L2TP Connection Summary Select the 'Edit the Newly Created Connection' check box if you wish to be routed to the new connection's configuration screen after clicking Finish. Click Finish to save the settings;... -
Page 143: Dhcp
User's Manual 12. Network Connections 12.1.1.4 DHCP The Dynamic Host Configuration Protocol (DHCP) connection for the physical WAN Ethernet, allows the device to obtain an IP address automatically from the service provider when connecting to the Internet. To create a DHCP connection: On the 'Network Connections' screen, click the New icon;... -
Page 144: Manual Ip Address
MP-20x Multimedia Home Gateway Select the Ethernet Connection option, and then click Next; the 'Connection Summary' screen appears. Figure 12-18: DHCP Connection Summary Select the 'Edit the Connection' check box if you wish to be routed to the new connection's configuration screen after clicking Finish. Click Finish to save the settings;... -
Page 145: Figure 12-20: Internet Connection – Ethernet Connection
User's Manual 12. Network Connections Select the Ethernet Connection option, and then click Next; the following screen appears. Figure 12-20: Internet Connection – Ethernet Connection Select the Ethernet Connection option, and then click Next; the ‘Ethernet Connection' screen appears. Figure 12-21: Ethernet Connection Screen Version 4.4.3 MP-20x Multimedia Home Gateway... -
Page 146: Figure 12-22: Manual Ip Address Configuration Screen
MP-20x Multimedia Home Gateway Select the Manual IP Address Configuration option, and then click Next; the screen ‘Manual IP Address Configuration’ opens. Figure 12-22: Manual IP Address Configuration Screen Configure the IP address and other network parameters, and then click Next; Select the Manual IP Address Configuration option, and then click Next;... -
Page 147: Lan Connection
User's Manual 12. Network Connections 12.2 LAN Connection This section describes how to configure the LAN Ethernet. 12.2.1 LAN Ethernet The LAN Ethernet interface represents the physical ports on the device. To configure the LAN Ethernet: From the menu bar, click the Network Connections menu; the 'Network Connections' screen appears. -
Page 148: General Tab
MP-20x Multimedia Home Gateway 12.2.1.1 General Tab The General tab allows you to assign a name to this connection as well as disable or enable the connection, by clicking the Enable or Disable buttons respectively. 12.2.1.2 Settings Tab The Settings tab screen is displayed below: Figure 12-26: LAN Ethernet Properties –... - Page 149 User's Manual 12. Network Connections Internet Protocol - Select one of the following Internet protocol options from the 'Internet Protocol' drop-down list: • No IP Address - Select 'No IP Address' if you require that your gateway have no IP address.
-
Page 150: Routing Tab
MP-20x Multimedia Home Gateway 12.2.1.3 Routing Tab The Routing tab screen is displayed below: Figure 12-27: LAN Ethernet Properties – Routing Tab 12.2.1.4 Advanced Tab The Advanced tab screen is displayed below: Figure 12-28: LAN Hardware Ethernet Switch Screen – Advanced Tab ... -
Page 151: Wan Connection
User's Manual 12. Network Connections 12.3 WAN Connection This section describes how to configure the WAN Ethernet. 12.3.1 General Tab The General tab displays mainly read-only properties of the connection. The main actions that can be done in this tab screen include the following: ... -
Page 152: Settings Tab
MP-20x Multimedia Home Gateway 12.3.2 Settings Tab The top part of the Settings tab screen displays general communication parameters. It is recommended not to change the default values in this screen unless you are familiar with the networking concepts they represent. Since your device is configured to operate with the default values, no parameter modification is necessary. -
Page 153: Internet Protocol Settings
User's Manual 12. Network Connections The Settings tab screen allows you to configure the following: Table 12-1: Settings Tab - Parameter Descriptions Parameter Description Schedule You can select a Scheduler rule that defines time segments during which the connection is active. To configure scheduler rules, see Section 5.6.1 on page Network... -
Page 154: Figure 12-32: Manually Defining Dns Server
MP-20x Multimedia Home Gateway Use the Following IP Address: Your WAN connection can be configured using a permanent (static) IP address. Your service provider should provide you with this IP address, subnet mask and the default MP-202B IP address. For defining DNS and DHCP servers, see sections 12.3.2.1.1 12.3.2.1.2... -
Page 155: Figure 12-33: Ip Address Distribution - Dhcp Server
User's Manual 12. Network Connections Figure 12-33: IP Address Distribution - DHCP Server • Start IP Address: The first IP address that may be assigned to a LAN host. Since the device's default IP address is 192.168.2.1, this address must be 192.168.2.2 or greater. -
Page 156: Routing Tab
MP-20x Multimedia Home Gateway 12.3.3 Routing Tab You can choose to setup your device to use static or dynamic routing. Dynamic routing automatically adjusts how packets travel on the network, whereas static routing specifies a fixed routing path to neighboring destinations. Figure 12-36: Editing Connection - Routing Tab (For Example, WAN Ethernet) Table 12-2: Routing Parameters Parameter... -
Page 157: Figure 12-37: Route Settings Screen
User's Manual 12. Network Connections Figure 12-37: Route Settings Screen Name: Select the network device. Destination: destination host, subnet address, network address, or default route. The destination for a default route is 0.0.0.0. Netmask: This is used in conjunction with the destination to determine when a route is used. -
Page 158: Ppp Tab
MP-20x Multimedia Home Gateway 12.3.4 PPP Tab The PPP tab displays the PPP settings. Note: This tab is applicable only to PPP connections. Figure 12-38: Editing Connection - PPP Tab Table 12-3: PPP Tab Parameter Descriptions Parameter Description On Demand Use PPP on demand to initiate the PPP session only when packets are actually sent over the Internet. - Page 159 User's Manual 12. Network Connections Parameter Description Time Between Specify the duration between PPP reconnected attempts, as provided by your Reconnect ISP. Attempts PPP Authentication PPP supports four authentication protocols: Password Authentication Protocol (PAP), Challenge Handshake Authentication Protocol (CHAP), Microsoft CHAP version 1, and Microsoft CHAP version 2.
-
Page 160: Pptp Tab
MP-20x Multimedia Home Gateway 12.3.5 PPTP Tab The PPTP tab displays the PPTP settings. Note: This tab is applicable only to PPTP connections. Figure 12-39: Editing Connection - PPTP Tab Table 12-4: PPTP Tab Parameter Descriptions Parameter Description PPTP Server Host PPTP server host name or IP address provided by your ISP. -
Page 161: Advanced Tab
User's Manual 12. Network Connections 12.3.6 Advanced Tab The Advanced tab provides various advanced configurations. Figure 12-40: Editing Connection - Advanced Tab (For Example, WAN Ethernet) Internet Connection Firewall: Your device's firewall helps protect your computer by preventing unauthorized users from gaining access to it through a network such as the Internet. -
Page 162: Vlan Settings
MP-20x Multimedia Home Gateway 12.4 VLAN Settings You can create VLANs for your LAN and WAN interfaces. To create a new VLAN interface: From the menu bar, click the Network Connections menu, and then in the screen 'Network Connections' click the New icon;... -
Page 163: Figure 12-43: Advanced Connection
User's Manual 12. Network Connections Select the 'Advanced Connection' option, and then click Next; the 'Advanced Connection' screen appears. Figure 12-43: Advanced Connection Select the 'VLAN Interface' option, and then click Next; the 'VLAN Interface' screen appears. Figure 12-44: VLAN Interface From the 'Underlying Device' drop-down list, select the underlying device (device's Ethernet connections) for this interface. -
Page 164: Figure 12-45: Connection Summary
MP-20x Multimedia Home Gateway In the 'VLAN ID' field, enter a value to serve as the VLAN ID, and then click Next; the 'Connection Summary' screen appears. Figure 12-45: Connection Summary Check the 'Edit the Newly Created Connection' check box to be routed to the new connection's configuration screen after clicking Finish. -
Page 165: Settings Tab
User's Manual 12. Network Connections 12.4.1 Settings Tab The Settings tab of the 'VLAN Properties' displays general communication parameters. It’s recommended to leave the values in this screen at their defaults unless you’re familiar with the networking concepts they represent. Since your Telephone Adapter is configured to operate with the default values, no parameter modification is necessary. -
Page 166: Ip Address Distribution
MP-20x Multimedia Home Gateway 12.4.1.1 IP Address Distribution The 'IP Address Distribution' section allows you to configure the device's Dynamic Host Configuration Protocol (DHCP) server parameters. The DHCP automatically assigns IP addresses to network PCs. If you enable this feature, make sure that you also configure your network PCs as DHCP clients. -
Page 167: Table 12-8: Assigning Static Ip Addresses To Network Computers
User's Manual 12. Network Connections After selecting 'DHCP Relay' from the drop down list, a New IP Address link appears: Figure 12-47: IP Address Distribution - DHCP Relay Click the New IP Address link; the 'DHCP Relay Server Address' screen appears: Figure 12-48: DHCP Relay Server Address Specify the IP address of the DHCP server. -
Page 168: Routing Tab
MP-20x Multimedia Home Gateway 12.4.2 Routing Tab You can choose to setup your Telephone Adapter to use static or dynamic routing. Dynamic routing automatically adjusts how packets travel on the network, whereas static routing specifies a fixed routing path to neighboring destinations. Figure 12-50: Advanced Routing Properties Table 12-9: Routing Parameters Parameter... -
Page 169: Advanced Tab
User's Manual 12. Network Connections Parameter Description Multicast IGMP Proxy Internal IGMP proxy enables the system to issue IGMP host messages on behalf of hosts that the system discovered through standard IGMP interfaces. IGMP proxy enables the routing of multicast packets according to the IGMP requests of LAN devices asking to join multicast groups. -
Page 170: Lan-Wan Bridge Settings
MP-20x Multimedia Home Gateway 12.5 LAN-WAN Bridge Settings A WAN-LAN bridge is a bridge over WAN and LAN devices. In such a setup, computers on the device LAN side can get IP addresses that are known on the WAN side. ... -
Page 171: Figure 12-54: Adding New Network Bridging
User's Manual 12. Network Connections • Add a New Bridge: Select this option and then click Next; a different 'Network Bridging' screen appears, allowing you to add a bridge over the unbridged connections, by selecting their respective check boxes. Figure 12-54: Adding New Network Bridging Important notes: •... -
Page 172: Editing Lan-Wan Bridging
MP-20x Multimedia Home Gateway 12.5.1 Editing LAN-WAN Bridging You can edit existing LAN-WAN bridges that are listed in the Connections list. This is done in the Bridging tab, which allows you to specify the LAN and WAN devices that you would like to join under the network bridge. -
Page 173: Figure 12-57: Vlan Settings Screen
User's Manual 12. Network Connections To configure VLANs for each network connection in the bridge: Click the Edit icon in the 'VLANs' column corresponding to a network that you want to assign specific Virtual LANs; the ‘VLAN Settings’ screen appears. Figure 12-57: VLAN Settings Screen Select the ‘Enable VLAN’... - Page 174 MP-20x Multimedia Home Gateway This page is intentionally left blank. User's Manual Document #: LTRT-50614...
-
Page 175: Add-On Servers And Disk Management
User's Manual 13. Add-On Servers and Disk Management Add-On Servers and Disk Management The procedures below decribe how to configure additional servers and disk management. 13.1 External File Server The device provides a file server utility, allowing you to perform various tasks on your files, such as manage file server shares and define access control lists. -
Page 176: Automatic File Sharing
MP-20x Multimedia Home Gateway ♦ Allow Guest Access: From the drop-down list, select a permission level, according to which the LAN users access the share: Read/Write: Every LAN user can read and write the shared files without authentication. Read Only: Every LAN user can only read the shared files. -
Page 177: Figure 13-3: User Screen
User's Manual 13. Add-On Servers and Disk Management Associate a user or group of users with the share to grant them access to the shared files, by clicking the New User or New Group link in the Users or Groups table. Note that the user’s settings must have the ‘Microsoft File and Printer Sharing Access’... -
Page 178: Print Server
MP-20x Multimedia Home Gateway 13.2 Print Server The device includes a print server that allows printers attached to the device through the USB connection(s) to be shared by all computers on the LAN. Such a printer appears in the Network Map. You can access the printer settings directly, by clicking the printer icon in the Network Map or as described below. -
Page 179: Connecting And Setting Up A Printer On Windows
User's Manual 13. Add-On Servers and Disk Management Figure 13-6: Advanced – Printer Screen To change the displayed name of the printer, in the ‘Name’ field, enter a new name. To set the printer as the default printer, select the ‘Create Default Device Mode’ check box. -
Page 180: Print Protocols
MP-20x Multimedia Home Gateway Select the printer icon that you want to designate as a LAN printer; a warning appears. Click Yes; you are prompted to select a printer driver from a list. If unavailable, you can either browse to a location on your computer where you have stored the driver, or click Have Disk and insert the CD containing the driver (supplied with your printer). -
Page 181: Internet Printing Protocol
User's Manual 13. Add-On Servers and Disk Management 13.2.2.1 Internet Printing Protocol This section describes how to connect computers to the device printers, using the IPP protocol. 13.2.2.1.1 Setting Up an IPP Printer on Windows The procedure below describes how to set up an IPP printer on Windows XP. ... -
Page 182: Figure 13-10: Specify A Printer
MP-20x Multimedia Home Gateway Select 'Connect to a printer on the Internet…', and then paste the printer's IPP URL in the 'URL' field, and then click Next. Figure 13-10: Specify a Printer You may be asked to select the driver's make and model or its location. If so, provide the location on the device to where you have uploaded the driver (e.g. -
Page 183: Figure 13-11: Printer Screen – Ipp Url (Linux)
User's Manual 13. Add-On Servers and Disk Management 13.2.2.1.2 Setting Up an IPP Printer on Linux The procedure below describes how to set up an IPP printer on Linux operating systems. You should use CUPS Daemon (CUPSD) when operating with Linux. ... -
Page 184: Figure 13-13: Add Printer
MP-20x Multimedia Home Gateway Click Add Printer. Figure 13-13: Add Printer In the 'Name' field, type the printer's name and then click Continue. Figure 13-14: Printer Name User's Manual Document #: LTRT-50614... -
Page 185: Figure 13-15: Printing Protocol
User's Manual 13. Add-On Servers and Disk Management From the 'Device' drop-down list, select 'Internet Printing Protocol (http)' and then click Continue. Figure 13-15: Printing Protocol Paste the printer's IPP URL in the 'Device URI' field, and then click Continue. Figure 13-16: IPP URL The next window displays a manufacturer drop-down list. -
Page 186: Figure 13-17: Print & Fax
MP-20x Multimedia Home Gateway 13.2.2.1.3 Setting Up an IPP Printer on Mac The procedure below describes how to set up an IPP printer on Mac operating systems. To set up an IPP printer on Mac: On your Mac computer connected to the device, open the 'Print & Fax' utility from 'System Preferences';... -
Page 187: Figure 13-18: Printer Browser – Ip Printer
User's Manual 13. Add-On Servers and Disk Management Figure 13-18: Printer Browser – IP Printer In this screen, configure the following: From the 'Protocol' drop-down list, select IPP. In the 'Address' field, enter the device’s IP address (192.168.1.1). In the 'Queue' field, enter the section of the path containing the folder and printer names, as it appears in the 'Printer' screen. -
Page 188: Figure 13-19: Print & Fax – New Ipp Printer
MP-20x Multimedia Home Gateway Click the Add button; the new printer appears in the 'Print & Fax' screen. Figure 13-19: Print & Fax – New IPP Printer User's Manual Document #: LTRT-50614... -
Page 189: Microsoft Shared Printing (Samba)
User's Manual 13. Add-On Servers and Disk Management 13.2.2.2 Microsoft Shared Printing (Samba) The procedure below describes how to set up Microsoft Shared Printing (Samba). To set up Microsoft shared printing (Samba): On your Mac computer connected to the device, open the 'Print & Fax' utility from 'System Preferences';... -
Page 190: Figure 13-21: Printer Browser – Default Browser
MP-20x Multimedia Home Gateway Click the + (add) button; the 'Printer Browser' screen appears. Figure 13-21: Printer Browser – Default Browser Click the More Printers button; the following screen appears. Figure 13-22: Printer Browser – More Printers From the second drop-down list, select 'Network Neighborhood'. User's Manual Document #: LTRT-50614... -
Page 191: Figure 13-23: Printer Browser – Mp264
User's Manual 13. Add-On Servers and Disk Management Select the 'Home' workgroup and then click Choose. Figure 13-23: Printer Browser – MP264 Select MP264, and then click Choose. Select the printer, and from the 'Printer Model' drop-down list, select your printer's make and model. -
Page 192: Line Printer Daemon (Lpd)
MP-20x Multimedia Home Gateway Click Add; the new printer appears in the 'Print & Fax' screen. Figure 13-25: Print & Fax – New Samba Printer 13.2.2.3 Line Printer Daemon (LPD) This section describes how to connect computers to the device printers, using the LPD protocol. -
Page 193: Figure 13-26: Local Printer
User's Manual 13. Add-On Servers and Disk Management Clear the 'Automatically detect and install my Plug and Play printer', and then click Next. Figure 13-26: Local Printer Select the 'Create a new port' option. From the 'Type of port' drop-down list, select 'Standard TCP/IP Port'. Figure 13-27: Select a Printer Port Click Next to activate the 'Add Standard TCP/IP Printer Port Wizard'. -
Page 194: Figure 13-28: Add Port
MP-20x Multimedia Home Gateway In the 'Printer Name or IP Address' field, specify 192.168.1.1, and then click Next. Figure 13-28: Add Port Select the 'Custom' option, and then click Settings. Figure 13-29: Additional Port Information In the 'Configure Standard TCP/IP Port Monitor' window, configure the following parameters: Select the 'LPR' option. -
Page 195: Figure 13-30: Printer Port Monitor Configuration
User's Manual 13. Add-On Servers and Disk Management In the device’s Web interface, open the 'Print Server' screen. Copy the printer's name (for example, "Officejet4000") and paste it in the 'Queue Name' field of the port monitor configuration window. Figure 13-30: Printer Port Monitor Configuration Click OK, and then click Finish;... -
Page 196: Figure 13-31: Add Printer Wizard
MP-20x Multimedia Home Gateway Figure 13-31: Add Printer Wizard Select your printer manufacturer and model from the lists. If it does not appear in the lists, click Have disk to specify the driver location. Specify the name you want to give the printer, and whether you want it to be the default printer. -
Page 197: Figure 13-32: Print & Fax
User's Manual 13. Add-On Servers and Disk Management 13.2.2.3.2 Setting Up an LPD Printer on Mac The procedure below describes how to set up an LPD printer on Mac operating systems. To set up an LPD printer on Mac: On your Mac computer connected to the device, open the 'Print &... -
Page 198: Figure 13-33: Printer Browser – Lpd Printer
MP-20x Multimedia Home Gateway Figure 13-33: Printer Browser – LPD Printer User's Manual Document #: LTRT-50614... -
Page 199: Figure 13-34: Print & Fax – New Lpd Printer
User's Manual 13. Add-On Servers and Disk Management Click Add; the new printer appears in the 'Print & Fax' screen. Figure 13-34: Print & Fax – New LPD Printer Version 4.4.3 MP-20x Multimedia Home Gateway... -
Page 200: Storing And Using Printer Drivers
MP-20x Multimedia Home Gateway 13.2.3 Storing and Using Printer Drivers As explained earlier in this chapter, to use a shared printer connected to the device, a driver for the printer must be installed on the LAN computer from which the print job is to be sent. -
Page 201: Remote Device Management
DHCP server). The default configuration should not include any VoIP service provider settings (such as a SIP proxy). In some cases, AudioCodes can ship devices that are pre-configured with some customer- specific parameters. This set of parameters is usually defined as the new "factory settings"... -
Page 202: Table 14-1: Main Configuration Parameter Groups
MP-20x Multimedia Home Gateway Figure 14-1: Remote Management Interfaces All configuration interfaces access the same internal configuration repository. The configuration file represents the complete set of the device configuration parameters. Specific configuration interfaces (e.g. TR-069) might support access only to a sub-set of these configuration parameters. -
Page 203: Remote Management
User's Manual 14. Remote Device Management 14.1.2 Remote Management Remote management includes the following: Firmware upgrade Status and performance monitoring Alarms, notifications, and logs 14.1.2.1 Firmware Upgrade Service providers require the ability to update the device's firmware in the field (e.g. in case of maintenance releases or releases that support new required features). -
Page 204: Status And Performance Monitoring
MP-20x Multimedia Home Gateway 14.1.2.2 Status and Performance Monitoring The ability to remotely monitor the status of the device is critical to the service provider, who wants to support users without having to send a technician on site (avoiding the "truck roll"). -
Page 205: Alarms, Notifications And Logging
User's Manual 14. Remote Device Management 14.1.2.3 Alarms, Notifications and Logging Instead of periodically polling the device to obtain its current status, the service provider may want the device to notify abnormal events or to send regular reports to a logging server. -
Page 206: Enabling Remote Management
MP-20x Multimedia Home Gateway 14.2 Enabling Remote Management You can access and manage the device not only from within the home network, but also from the Internet. This allows you to view or change settings while travelling. It also enables you to allow your ISP to change settings or help you troubleshoot functionality or communication issues from a remote location. -
Page 207: Figure 14-2: Remote Administration Screen
User's Manual 14. Remote Device Management To enable remote access to the device services: On the 'Advanced' screen, click the Remote Administration icon; the 'Remote Administration' screen appears. Figure 14-2: Remote Administration Screen Select the services that you would like to make available to computers on the Internet. •... - Page 208 MP-20x Multimedia Home Gateway Select the services that you would like to make available to computers on the Internet. • Allow Incoming WAN Access to Web-Management: Allows access (from a Web browser) to the Web management interface and to all system settings and parameters.
-
Page 209: Securing Remote Management With Certificates
User's Manual 14. Remote Device Management 14.3 Securing Remote Management with Certificates The Certificates icon allows you to configure certificates. When a service provider implements remote provisioning in which a unique configuration file (per device) is placed on a server located on the WAN, the service provider can ensure that only its deployed device units are able to connect to the HTTP server via HTTPS. -
Page 210: Figure 14-4: Create Self Signed X509 Certificate Screen
MP-20x Multimedia Home Gateway Figure 14-4: Create Self Signed X509 Certificate Screen Enter the fields as required, and then click Generate; a message appears notifying you that the device is generating the certificate. After a few moments, click Refresh; the 'New Self Signed X509 Certificate' screen appears. -
Page 211: Figure 14-7: File Download Window
User's Manual 14. Remote Device Management On the 'Certificates' screen, click the Download icon corresponding to the new self-signed certificate that you created; the 'File Download' window appears. Figure 14-7: File Download Window Click Save, and then browse to the folder to where you want to save the file; the file is saved as a *.crt file. -
Page 212: Figure 14-9: Ca's Certificates
MP-20x Multimedia Home Gateway Load the CA’s certificate to the device: Select the CA’s tab; the ‘CA’s’ screen appears. Figure 14-9: CA's Certificates Page Click the New icon; the ‘Load CA’s Certificate’ screen appears. Figure 14-10: Load CA's Certificate Page Click Browse, locate the CA certification file that you created, and then click Upload to load the file. -
Page 213: Remote Configuration And Management Interfaces
User's Manual 14. Remote Device Management 14.4 Remote Configuration and Management Interfaces The device supports the following remote configuration and management interfaces: Web Server (GUI) over HTTP/HTTPS TR-069 and TR-104 SNMP Syslog Firmware or configuration file download through HTTP/HTTPS and FTP/TFTP ... -
Page 214: And Tr-104 Cpe Wan Management Protocol
MP-20x Multimedia Home Gateway Secured HTTP (HTTPS) is supported. It is possible to enable HTTPS-only, if required. The HTTP and/or HTTPS port can be modified (from the default 80 and 8080). 14.4.2 TR-069 and TR-104 CPE WAN Management Protocol TR-069 is a WAN management protocol intended for communication between Customer Premise Equipment (CPE) or residential devices (such as the device), and an Auto- Configuration Server (ACS), residing on the service provider's side. -
Page 215: Configuring The Device Via Tr-069 And Tr-104
User's Manual 14. Remote Device Management 14.4.2.1 Configuring the Device via TR-069 and TR-104 TR-069 allows basic configuration of the device. The configuration is defined in a hierarchical tree-like structure according to the TR-069 standard. 14.4.2.1.1 Configuring the WAN Interface Table 14-6: InternetGatewayDevice.WANDevice.i.WANConnectionDevice.i.WANIPConnection.i TR-069/TR-104 Configuration File... - Page 216 MP-20x Multimedia Home Gateway TR-069/TR-104 Configuration File Description Parameter Parameter MaxMTUSize mt_cwmp_param_wan_con The maximum allowed size of an Ethernet n_ip_max_mtu_size_get/se frame from LAN-side devices. t( i) Name mt_cwmp_param_wan_con User-readable name of this connection. n_xxx_name_get/set(i) NATEnabled mt_cwmp_param_wan_con Indicates if NAT is enabled for this n_xxx_nat_enabled_get/set connection.
-
Page 217: Table 14-7: Internetgatewaydevice.landevice.i.lanethernetinterfaceconfig
User's Manual 14. Remote Device Management 14.4.2.1.2 Configuring the LAN Interface Table 14-7: InternetGatewayDevice.LANDevice.i.LANEthernetInterfaceConfig TR-069/TR-104 Configuration File Description Parameter Parameter Enable device_eic_enable_get/set Enables or disables this interface. MACAddress device_mac_address_get The physical address of the interface. MaxBitRate device_max_bit_rate_get The maximum upstream and downstream bit rate available for this connection: ... -
Page 218: Table 14-9: Internetgatewaydevice.services.voiceservice.i.capabilities
MP-20x Multimedia Home Gateway TR-069/TR-104 Configuration File Description Parameter Parameter MaxAddress lan_host_config_managem Specifies the last address in the pool to be ent_get/set assigned by the DHCP server on the LAN interface. rg_conf dhcps/end_ip MinAddress lan_host_config_managem Specifies the first address in the pool to be ent_get/set assigned by the DHCP server on the LAN interface. - Page 219 User's Manual 14. Remote Device Management TR-069/TR-104 Configuration File Description Parameter Parameter MaxProfileCount Maximum number of distinct voice profiles supported. MaxSessionCount Maximum number of voice sessions supported across all lines and profiles. (This might differ from MaxLineCount if each line can support more than one session for CPE provided conference calling.
- Page 220 MP-20x Multimedia Home Gateway TR-069/TR-104 Configuration File Description Parameter Parameter RTPRedundancy Support for RTP payload redundancy as defined in RFC 2198. A true value indicates support for VoiceService.{i}.VoiceProfile.{i}.RTP.Redunda ncy. SignalingProtocols voip/signalling/protocol Signal protocol: “SIP” “MGCP” Each entry can be appended with a version indicator in the form “/X.Y”.
-
Page 221: Table 14-10: Internetgatewaydevice.services.voiceservice.i.capabilities.codecs
User's Manual 14. Remote Device Management Table 14-10: InternetGatewayDevice.Services.VoiceService.i.Capabilities.Codecs TR-069/TR-104 Configuration File Description Parameter Parameter Codec voip/codec/i/name Identifier of the type of codec. EntryID voip/codec/i/ Unique identifier for each entry in the table. PacketizationPeriod voip/codec/i/ptime Comma-separated list of supported packetization periods (in milliseconds), or continuous ranges of packetization periods. -
Page 222: Table 14-12: Internetgatewaydevice.services.voiceservice.i.voiceprofile.i.sip
MP-20x Multimedia Home Gateway TR-069/TR-104 Configuration File Description Parameter Parameter NumberOfLines voip/num_of_fxs_lines Number of instances of Line within this VoiceProfile. Table 14-12: InternetGatewayDevice.Services.VoiceService.i.VoiceProfile.i.SIP TR-069/TR-104 Configuration File Description Parameter Parameter OutboundProxy voip/ Host name or IP address of the outbound signalling/sip/sip_outbou proxy. -
Page 223: Monitoring The Device Status Via Tr-069 And Tr-104
A string identifying the particular device ersion model and version. Manufacturer manufacturer/vendor_na A string identifying the manufacturer of the device, i.e., AudioCodes. ManufacturerOUI manufacturer/vendor_oui Organizationally unique identifier of the device manufacturer. Represented as a six hexadecimal-digit value using all upper-case letters and including any leading zeros. -
Page 224: Table 14-14: Internetgatewaydevice.wandevice.i.wanconnectiondevice.i
MP-20x Multimedia Home Gateway TR-069/TR-104 Configuration File Description Parameter Parameter SoftwareVersion system/external_version A string identifying the software version currently installed in the device. To allow version comparisons, this element must be in the form of dot-delimited integers, where each successive integer represents a more minor category of variation. -
Page 225: Table 14-15: Internetgatewaydevice.landevice.i.lanethernetinterfaceconfig.i.stats
User's Manual 14. Remote Device Management 14.4.2.2.3 LAN Status Table 14-15: InternetGatewayDevice.LANDevice.i.LANEthernetInterfaceConfig.i.Stats TR-069/TR-104 Configuration File Description Parameter Parameter BytesReceived mt_voip_get_state (line, Total number of bytes received over the state) interface since the device was last reset. BytesSent mt_voip_get_state(line, Total number of bytes sent over the interface state) since the device was last reset. - Page 226 MP-20x Multimedia Home Gateway TR-069/TR-104 Configuration File Description Parameter Parameter OutgoingCalls Total outgoing calls attempted. Attempted OutgoingCalls Total outgoing calls answered by the called Answered party. OutgoingCalls Total outgoing calls that successfully Connected completed call setup signaling. OutgoingCallsFailed Total outgoing calls that failed to successfully complete call setup signaling.
-
Page 227: Security Concerns And Measures
User's Manual 14. Remote Device Management 14.4.2.3 Security Concerns and Measures The CPE WAN Management Protocol is designed to allow a high degree of security in the interactions that use it. The CPE WAN Management Protocol is designed to prevent tampering with the transactions that take place between a CPE and ACS, provide confidentiality for these transactions, and allow various levels of authentication. -
Page 228: Enabling Snmp In The Web Interface
MP-20x Multimedia Home Gateway 14.4.3.1 Enabling SNMP in the Web Interface Simple Network Management Protocol (SNMP) enables Network Management Systems (NMSs) to remotely configure and monitor your device. Your ISP may use SNMP to identify and resolve technical problems. Technical information regarding the properties of the device's SNMP agent should be provided by your ISP. -
Page 229: Configuring The Device Via Snmp
User's Manual 14. Remote Device Management 14.4.3.2 Configuring the Device via SNMP The acMP20xConfig MIB section is structured in a similar hierarchy as the device's Web GUI. Each parameter in the MIB has a matching parameter in the Web GUI and a matching parameter in the gateway’s configuration file. -
Page 230: Security Concerns And Measures
MP-20x Multimedia Home Gateway 14.4.3.4 Security Concerns and Measures Since SNMP allows write-access to configuration parameters, it is important to protect this interface. The following security measures are available: A community string (password) can be defined for read-only access and for read/write access. -
Page 231: Syslog
User's Manual 14. Remote Device Management 14.4.4 Syslog Syslog is a standard protocol for reporting and logging of messages over IP network and is defined by RFC 3164. The device enables the service provider to configure a Syslog server and a severity level above which errors are sent to the server. Typically, only error-level messages should be sent to the Syslog server (in order not to flood it with irrelevant debug- level information). -
Page 232: Security Concerns And Measures
It is possible to limit Telnet access to specific IP addresses. 14.4.7 Redirect Server You can use the AudioCodes Redirect server to direct you to the appropriate Provisioning server URL to download the relevant configuration and firmware files. Once the MP-20x is powered up and network connectivity is established, it automatically request for provisioning information. -
Page 233: Figure 14-14: Redirect Server Configuration Process
Automatic Update mechanism can commence. Note: • The MAC addresses of the MP-20x and the Provisioning server's URL are pre- configured on the Redirect server. For more information, contact AudioCodes support. • The default URL of the Redirect server is: rmt_config/url=http://redirect.audiocodes.com/<mac>... -
Page 234: Broadsoft Broadworks Dms Provisioning
MP-20x Multimedia Home Gateway 14.4.8 BroadSoft BroadWorks DMS Provisioning For more information, refer to the BroadSoft Partner Configuration Guide (PartnerConfigGuide_AudioCodes_MP-2xx.pdf). 14.4.9 Provisioning using DHCP Options 66/67 and TFTP DHCP Options 66 and 67 together with the TFTP server allow mass provisioning of MP-20x devices. - Page 235 User's Manual 14. Remote Device Management Add the relevant parameter (see below) on the device's WAN interface to the configuration file located in TFTP directory. The file is downloaded only once and after that, the device no longer declares Options 66 and 67. The following needs to be added to the configuration to disable DHCP Options 66 and 67: rg_conf/dev/eth1/dhcpc/options_66_67_disabled=1 To return to the default behavior, either remove this parameter or set the parameter to "0":...
- Page 236 MP-20x Multimedia Home Gateway This page is intentionally left blank. User's Manual Document #: LTRT-50614...
-
Page 237: Security
User's Manual 15. Security Security The device's security suite includes comprehensive and robust security services: Stateful Packet Inspection Firewall, user authentication protocols and password protection mechanisms. These features together allow users to connect their computers to the Internet and simultaneously be protected from the security threats of the Internet. The firewall, which is the cornerstone of your device's security suite, has been exclusively tailored to the needs of the residential/office user and has been pre-configured to provide optimum security. -
Page 238: General Security Level Settings
MP-20x Multimedia Home Gateway 15.1 General Security Level Settings Use the 'Security Settings' screen to configure the device's basic security settings. Figure 15-2: General Security Level Settings The firewall regulates the flow of data between the home network and the Internet. Both incoming and outgoing data are inspected and then either accepted (allowed to pass through the device) or rejected (barred from passing through the device) according to a flexible and configurable set of rules. -
Page 239: Table 15-1: Behavior For The Three Security Levels
User's Manual 15. Security You can choose from among three pre-defined security levels for the device: Minimum, Typical, and Maximum (the default setting). The table below summarizes the behavior of the device for each of the three security levels. Table 15-1: Behavior for the Three Security Levels Security Level Requests Originating Requests... -
Page 240: Configuring Access Control
MP-20x Multimedia Home Gateway 15.2 Configuring Access Control You may want to block specific computers within the home network (or even the whole network) from accessing certain services on the Internet. For example, you may want to prohibit one computer from surfing the Web, another computer from transferring files using FTP, and the whole network from receiving incoming e-mail. - Page 241 User's Manual 15. Security The parameter 'Protocol' lets you select or specify the type of protocol to be used. In addition to the list of popular protocols it provides, you may also choose any or a specific protocol. If you choose option 'Specify Protocol', the screen refreshes and an 'Add' link appears.
-
Page 242: Configuring Port Forwarding
MP-20x Multimedia Home Gateway 15.3 Configuring Port Forwarding By default, the device blocks all external users from connecting to or communicating with your network. Therefore, the system is safe from hackers who may try to intrude on the network and damage it. However, you may want to expose your network to the Internet in certain limited and controlled ways to enable some applications to work from the LAN (game, voice and chat applications, for example) and to enable Internet access to servers in the home network. -
Page 243: Figure 15-5: Port Forwarding Screen
User's Manual 15. Security To add a new port forwarding service: From the menu bar, click the Security menu, and in the screen 'Security', click the Port Forwarding tab; the screen 'Port Forwarding' opens. Figure 15-5: Port Forwarding Screen Click the New icon;... -
Page 244: Figure 15-8: Specifying Public Ip Address
MP-20x Multimedia Home Gateway Click the Advanced button to configure advanced settings: Select the 'Specify Public IP Address' check box if you want to apply this rule on the device’s non-default IP address defined in the ‘NAT’ screen (see Section 15.7 on page 253). -
Page 245: Figure 15-9: Select Check Box Of Port Forwarding Rule (Active)
User's Manual 15. Security Click OK to save changes. You can disable a port forwarding rule to make a service unavailable without having to remove the rule from the screen 'Port Forwarding'. This can be useful when making the service temporarily unavailable and when expecting to reinstate it in the future. Figure 15-9: Select Check Box of Port Forwarding Rule (Active) ... -
Page 246: Configuring A Dmz Host
MP-20x Multimedia Home Gateway 15.4 Configuring a DMZ Host The DMZ (Demilitarized) Host feature allows one local computer to be exposed to the Internet. Designate a DMZ host to: Use a special-purpose Internet service, such as an on-line game or video- conferencing program, that is not present in the Local Servers list and for which no port range information is available. -
Page 247: Configuring Port Triggering
User's Manual 15. Security 15.5 Configuring Port Triggering Port triggering can be used for dynamic port forwarding configuration. By setting port triggering rules, you can allow inbound traffic to arrive at a specific LAN host, using ports different than those used for the outbound traffic. This is called port triggering since the outbound traffic triggers to which ports inbound traffic is directed. -
Page 248: Figure 15-12: Adding Port Triggering Rules
MP-20x Multimedia Home Gateway To add an entry for the gaming example above: From the drop-down list, select 'User Defined' to add an entry; the screen 'Edit Service' opens. Figure 15-12: Adding Port Triggering Rules Enter a name for the service (e.g., 'game_server'), and then click the link New Trigger Ports;... -
Page 249: Figure 15-15: Edit Service Opened Ports
User's Manual 15. Security Similar to the trigger ports screen, select UDP as the protocol, leave the source port at 'Any', and enter a 333 as the single destination port. Figure 15-15: Edit Service Opened Ports Click OK to save the settings; the screen 'Edit Service' presents your entered information. -
Page 250: Configuring Website Restrictions
MP-20x Multimedia Home Gateway 15.6 Configuring Website Restrictions You can configure the device to block specific Internet websites so that they cannot be accessed from computers in the home network. Moreover, restrictions can be applied to a comprehensive and automatically-updated table of sites to which access is not recommended. -
Page 251: Figure 15-19: Add A Specific Host
User's Manual 15. Security The 'Local Host' drop-down list provides you the ability to specify the computer or group of computers for which you would like to apply the website restriction. You can select between any or a specific computer address in your LAN. If you choose the option 'User Defined', the screen refreshes and the 'Edit Network Object' appears: Figure 15-19: Add a Specific Host Click the New... - Page 252 MP-20x Multimedia Home Gateway If the device fails to locate the website: Use a Web browser to verify that the website is available. If it is, then you probably entered the website address incorrectly. If the website is unavailable, return to the screen 'Website Restrictions' later and click the button Resolve Now to verify that the website can be found and blocked by the device.
-
Page 253: Configuring Nat
User's Manual 15. Security 15.7 Configuring NAT The device features a configurable Network Address Translation (NAT) and Network Address Port Translation (NAPT) mechanism, allowing you to control the network addresses and ports of packets routed through your gateway. When enabling multiple computers on your network to access the Internet using a fixed number of public IP addresses, you can statically define which LAN IP address will be translated to which NAT IP address and/or ports. -
Page 254: Figure 15-23: Adding Nat/Napt Rule
MP-20x Multimedia Home Gateway To add a new NAT/NAPT rule: In the 'NAT/NAPT Rule Sets' section, click the New Entry link; the 'Add NAT/NAPT Rule' screen appears. Figure 15-23: Adding NAT/NAPT Rule This screen is divided into two main sections: 'Matching' and 'Operation'. The 'Matching' section defines the LAN addresses to be translated to the external addresses, which are defined in the 'Operation' section. - Page 255 User's Manual 15. Security Operation section (define the operation to apply on the IP addresses, matching the criteria defined above): NAT or NAPT. • NAT Addresses: NAT address into which the original IP address is translated. The drop-down list displays all of your available NAT addresses/ranges from which you can select an entry.
-
Page 256: Viewing Current Connections
MP-20x Multimedia Home Gateway 15.8 Viewing Current Connections The connection list displays all the connections that are currently open, as well as various details and statistics. You can use this list to close an undesired connection by clicking its corresponding action icon. The basic display includes the name of the protocol, the different ports it uses, and the direction in which the connection was initiated. -
Page 257: Configuring Advanced Filtering
User's Manual 15. Security 15.9 Configuring Advanced Filtering Advanced filtering is designed to allow comprehensive control over the firewall's behavior. You can define specific input and output rules, control the order of logically similar sets of rules and make a distinction between rules that apply to WAN and LAN devices. ... -
Page 258: Figure 15-26: Add Advanced Filter
MP-20x Multimedia Home Gateway This screen is divided into two identical sections, one for 'Input Rule Sets' and the other for 'Output Rule Sets', which are for configuring inbound and outbound traffic, respectively. Each section is comprised of subsets, which can be grouped into three main subjects: Initial rules - rules defined here are applied first, on all devices. -
Page 259: Figure 15-27: Add A Specific Host
User's Manual 15. Security In the 'Matching' section, define a match between IP addresses and a traffic protocol: Configure the source address of the packets sent to or received from the network object. To add an address, select the option 'User Defined' from the drop-down list;... - Page 260 MP-20x Multimedia Home Gateway Under the section 'Logging', select the parameter 'Log Packets Matched By This Rule' to log the first packet from a connection that was matched by this rule. By default, the 'Schedule' rule is always active. However, you can configure scheduler rules to define time segments during which the rule may be active.
-
Page 261: Viewing The Security Log
User's Manual 15. Security 15.10 Viewing the Security Log The Security log displays a list of firewall-related events, including attempts to establish inbound and outbound connections, attempts to authenticate at an administrative interface (Web-based management or Telnet terminal), firewall configuration and system start-up. ... -
Page 262: Figure 15-30: Security Log Settings
MP-20x Multimedia Home Gateway The log table displays the following: • Time: to determine the time the event occurred. • Event: type of event. There are five types of events: ♦ Inbound Traffic: The event is a result of an incoming packet. ♦... - Page 263 User's Manual 15. Security Select the types of activities for which you would like to have a log message generated. • Accepted Events: ♦ Accepted Incoming Connections: Write a log message for each successful attempt to establish an inbound connection to the home network. ♦...
- Page 264 MP-20x Multimedia Home Gateway This page is intentionally left blank. User's Manual Document #: LTRT-50614...
-
Page 265: Advanced Networking Features
User's Manual 16. Advanced Networking Features Advanced Networking Features This chapter describes various advanced networking features such as DHCP. 16.1 IP Address Distribution The device's Dynamic Host Configuration Protocol (DHCP) server makes it possible to easily add computers that are configured as DHCP clients to the home network. It provides a mechanism for allocating IP addresses and delivering network configuration parameters to such hosts. -
Page 266: Figure 16-1: Dhcp Server Summary
MP-20x Multimedia Home Gateway To view services currently provided by the DHCP server: On the 'Advanced' screen, click the IP Address Distribution icon; the 'IP Address Distribution' screen appears. Figure 16-1: DHCP Server Summary Note: If the 'Service' column displays “Disabled”, then DHCP services are not being provided to hosts connected to the network through the device interface. -
Page 267: Configuring The Dhcp Server
User's Manual 16. Advanced Networking Features 16.1.1 Configuring the DHCP Server The procedure below describes how to edit a service provided by the DHCP server. To edit the DHCP server settings for a device: On the 'IP Address Distribution' screen, click the Edit icon corresponding to the entry that you want to edit;... -
Page 268: Configuring Dhcp Relay
MP-20x Multimedia Home Gateway 16.1.2 Configuring DHCP Relay The device can act as a DHCP relay if you want to dynamically assign IP addresses from a DHCP server other than the device's DHCP server. Note: When implementing DHCP relay, you must configure the WAN of the device to operate in routing mode. -
Page 269: Viewing Dhcp Clients
User's Manual 16. Advanced Networking Features 16.1.3 Viewing DHCP Clients The procedure below describes how to view a list of hosts (computers) that are allocated IP addresses by the DHCP server. To view a list of computers currently recognized by the DHCP server: On the 'IP Address Distribution' screen, click the Connection List button;... -
Page 270: Configuring Static Dhcp Clients
MP-20x Multimedia Home Gateway 16.1.4 Configuring Static DHCP Clients The procedure below describes how to define a static (fixed) IP address for a DHCP client. To define a DHCP client with a fixed IP address: On the 'IP Address Distribution' screen, click the Connection List button; the 'DHCP Connections' screen appears. -
Page 271: Configuring A Dns Server
User's Manual 16. Advanced Networking Features 16.2 Configuring a DNS Server The DNS Server icon allows you to manage the device's Domain Name System (DNS) server. The DNS server does not require configuration. However, you can view the list of computers known by the DNS, edit the host names or IP addresses of computers in the list, or manually add a new computer to the list. - Page 272 MP-20x Multimedia Home Gateway To edit the host name or IP address of an entry: Click the Edit icon corresponding to the host that you want to edit; the 'DNS Entry' screen appears. If the host was manually added to the DNS Table, you can modify its host name and/or IP address.
-
Page 273: Configuring Dynamic Dns
User's Manual 16. Advanced Networking Features 16.3 Configuring Dynamic DNS The Dynamic DNS (DDNS) feature allows you to alias a dynamic IP address to a static hostname, allowing your computer to be more easily accessible from various locations on the Internet. Typically, when you connect to the Internet, your ITSP assigns an unused IP address from a pool of IP addresses, and this address is used only for the duration of a specific connection. -
Page 274: Figure 16-10: Personal Domain Name (Dynamic Dns) - Adding
MP-20x Multimedia Home Gateway Figure 16-10: Personal Domain Name (Dynamic DNS) - Adding In the ‘Host Name’ field, enter your full DDNS domain name. From the ‘Connection’ drop-down list, select the connection to which you want to couple the DDNS service. The DDNS service uses only the selected device, unless failover is enabled. - Page 275 User's Manual 16. Advanced Networking Features To temporarily take your site offline (i.e., prevent traffic from reaching your DDNS domain name), select the ‘Offline’ check box. This redirects DNS requests to an alternative, predefined URL. The availability of this feature depends on your DDNS account's level of service.
-
Page 276: Configuring Routing Rules
MP-20x Multimedia Home Gateway 16.4 Configuring Routing Rules This section describes how to configure routing rules and enable routing protocols. These are configured in the ‘Routing’ screen, as described below. To access the Routing screen: On the 'Advanced' screen, click the Routing icon;... -
Page 277: Managing Routing Table Rules
User's Manual 16. Advanced Networking Features 16.4.1 Managing Routing Table Rules The procedure below describes how to add routing rules. To add routing tables: On the 'Advanced' screen, click the New icon in the Routing Table; the 'Route Settings' screen appears. Figure 16-12: Route Settings Screen From the ‘Name’... -
Page 278: Configuring Routing Protocols
MP-20x Multimedia Home Gateway 16.4.2 Configuring Routing Protocols The device supports IGMP multicasting, which allows hosts connected to a network to be updated whenever an important change occurs in the network. A multicast is simply a message that is sent simultaneously to a pre-defined group of recipients. When you join a multicast group you receive all messages addressed to the group, similar to an e-mail message sent to a mailing list. -
Page 279: Enabling Pppoe Relay
User's Manual 16. Advanced Networking Features 16.5 Enabling PPPoE Relay PPPoE relay enables the device to relay packets on PPPoE connections while keeping its designated functionality for any additional connections. To enable PPPoE relay: On the 'Advanced' screen, click the PPPoE Relay icon;... -
Page 280: Selecting Regional Settings For Analog Lines
MP-20x Multimedia Home Gateway 16.6 Selecting Regional Settings for Analog Lines The behavior and parameters of analog telephones lines vary between countries. The set of Call Progress Tones, the protocol used for caller ID and the analog line impedance are all location-specific. -
Page 281: Installation Wizard
User's Manual 16. Advanced Networking Features 16.7 Installation Wizard The procedure below describes how to run the Installation Wizard. It guides you through your Internet connection and helps you subscribe to services that are available to you as an MP-202B user. The wizard progress box, located at the right hand side of the screen, provides a monitoring tool for its steps during the installation process. - Page 282 MP-20x Multimedia Home Gateway This page is intentionally left blank. User's Manual Document #: LTRT-50614...
-
Page 283: Home Media
User's Manual 17. Home Media Home Media The procedures below decribe how to configure home media. 17.1 Universal Plug and Play Universal Plug-and-Play (UPnP) is a networking architecture that provides compatibility among networking equipment, software, and peripherals. UPnP-enabled products can seamlessly connect and communicate with other UPnP-enabled devices without the need for user configuration, centralized servers, or product-specific device drivers. -
Page 284: Adding Upnp-Enabled Pc To Home Network
MP-20x Multimedia Home Gateway 17.1.2 Adding UPnP-enabled PC to Home Network If your computer is running an operating system that supports UPnP such as Windows XP, you can add the computer to your home network and access the Web-based Management directly from Windows. -
Page 285: Monitoring Connection Between The Device And Internet
User's Manual 17. Home Media 17.1.3 Monitoring Connection between the Device and Internet The procedure below describes how to monitor the status of the connection between the device and the Internet. To monitor the status of the connection between the device and the Internet: Open the 'Network Connections' control panel. -
Page 286: Making Local Services Available To Pcs On Internet
MP-20x Multimedia Home Gateway 17.1.4 Making Local Services available to PCs on Internet You can make services provided by computers in the home network available to computers on the Internet. For example, you may designate a PC in your home network to act as a Web server, allowing computers on the Internet to request pages from it. -
Page 287: Figure 17-5: Advanced Settings
User's Manual 17. Home Media Click the Settings button; the 'Advanced Settings' window. Figure 17-5: Advanced Settings Select a local service that you would like to make available to computers on the Internet; the 'Service Settings' window automatically appears. Figure 17-6: Service Settings Enter the local IP address of the computer that provides this service and then click Select other services as desired and repeat the previous step for each. -
Page 288: Figure 17-7: Service Settings – Add Service
MP-20x Multimedia Home Gateway To add a local service that is not listed in the 'Advanced Settings' window: Follow steps 1-3 above. Click the Add button; the 'Service Settings' window appears. Figure 17-7: Service Settings – Add Service Complete the fields as indicated in the window. Click OK to close the window and return to the 'Advanced Settings' window;... -
Page 289: Configuring The Device For Packetsmart
User's Manual 18. Configuring the Device for PacketSmart Configuring the Device for PacketSmart The device can be configured for PacketSmart through the Web interface or the CLI. Note: PacketSmart supports MP-204; PacketSmart support for MP-202 is pending. 18.1 Configuring PacketSmart through the Web Interface This section shows how to configure PacketSmart through the Web interface. -
Page 290: Figure 18-2: Packetsmart Configuration
MP-20x Multimedia Home Gateway Figure 18-2: PacketSmart Configuration User's Manual Document #: LTRT-50614... -
Page 291: Table 18-1: Packetsmart Configuration Parameters Description
User's Manual 18. Configuring the Device for PacketSmart Use the table below as reference when configuring PacketSmart. Table 18-1: PacketSmart Configuration Parameters Description Parameter Description Enabled Select this option to enable the embedded PacketSmart probe software. • Disabled (Default) • Enabled PacketSmart SW Version (Read-only) Displays the PacketSmart probe software... -
Page 292: Configuring Packetsmart Through The Cli
MP-20x Multimedia Home Gateway 18.2 Configuring PacketSmart through the CLI You can alternatively configure PacketSmart through the device's Command Line Interface (CLI). To configure PacketSmart through the CLI: Open a Telnet connection to the MP-20x device (Default: telnet 192.168.2.1) Log in with administrator privileges (Default: admin/admin) Run the following commands under the MP20x>... -
Page 293: Accessing The Packetsmart Web Portal
User's Manual 18. Configuring the Device for PacketSmart 18.3 Accessing the PacketSmart Web Portal This section shows how to access BroadSoft's PacketSmart Web Portal and find analyzed information. To access the PacketSmart Web Portal: Open a web browser and in the URL field, enter https://packetsmart.broadsoft.com/dashboard/ In the PacketSmart Login screen that opens, enter the required fields and then click the Login button. -
Page 294: Figure 18-4: Packetsmart Web Portal – Selecting The Device
MP-20x Multimedia Home Gateway Figure 18-4: PacketSmart Web Portal – Selecting the Device Note: Active devices are indicated with a green tick. For more information, visit the PacketSmart Help website: https://packetsmart.broadsoft.com/help/ User's Manual Document #: LTRT-50614... -
Page 295: Media Sharing
User's Manual 19. Media Sharing Media Sharing Media Sharing enables you to share and stream media files from a storage device connected to a media server. The procedure below shows how to enable media sharing on the device. To enable media sharing: ... -
Page 296: Share Music, Pictures And Video On My Local Network
MP-20x Multimedia Home Gateway 19.1 Share Music, Pictures and Video on My Local Network By default, this option is selected. To disable media sharing, deselect this option. User's Manual Document #: LTRT-50614... -
Page 297: Automatically Share Media In All Folders
User's Manual 19. Media Sharing 19.2 Automatically Share Media in All Folders If this option is selected, all partitions and folders on the storage device are automatically shared. To disable automatic sharing and manually share a specific folder: Deselect the 'Automatically Share Media in All Folders' check box and click Apply; the screen refreshes. -
Page 298: Figure 19-4: Shared Partitions
MP-20x Multimedia Home Gateway Click OK to save the settings; the 'Media Sharing' screen appears, displaying the shared partition. If necessary, repeat the same procedure to share additional partitions and their folders. Figure 19-4: Shared Partitions You can edit the partition or folder sharing settings by clicking the Edit icon. -
Page 299: Maintenance
Figure 20-1: Feature Key Screen Open the Feature Key file you received from AudioCodes, (it should open in Notepad), select and copy the key string and paste it into the Key field. -
Page 300: Figure 20-2: Reboot Screen
MP-20x Multimedia Home Gateway Click OK; the following screen appears: Figure 20-2: Reboot Screen Click OK to reboot. The newly-enabled feature displays “Enabled” in the Status column. User's Manual Document #: LTRT-50614... -
Page 301: Viewing The Device Software Version
User's Manual 20. Maintenance 20.2 Viewing the Device Software Version The About MP20x icon displays information about the device. This includes the software version, release date, and signaling protocol. You can also upgrade the software running on the device, by clicking the Upgrade link (for more information, see Section 20.5 on page 314). -
Page 302: Configuring Date And Time
MP-20x Multimedia Home Gateway 20.3 Configuring Date and Time The procedure below describes how to set the date and time. To configure date, time and daylight savings time settings: On the 'Advanced' screen, click the Time Settings icon; the 'Date & Time' screen appears. -
Page 303: Figure 20-5: Daylight Saving Time
User's Manual 20. Maintenance Under the Daylight Saving Time group, configure the daylight saving settings for your time zone (if they are not automatically detected): • Enabled: Select this check box to enable daylight saving time. • Start: Date and time when daylight saving starts. •... -
Page 304: Figure 20-7: Time Server Settings Screen
MP-20x Multimedia Home Gateway For the device to perform an automatic time update, under the Automatic Time Update group, do the following: Select the 'Enabled' check box. Select the protocol to be used for time update, by selecting either the 'Time of Day' or 'Network Time Protocol' option. -
Page 305: Configuration File
User's Manual 20. Maintenance 20.4 Configuration File The Configuration File icon allows you to view, save, and load the device configuration file. Therefore, you can backup and restore your current configuration. The device also supports configuration file encryption, allowing you to load encrypted configuration files (using the file name extensions *.cfx or *.inx). - Page 306 MP-20x Multimedia Home Gateway You can customize the displayed configuration file, by selecting the following check boxes: • Display modified configuration fields only: Displays only the configuration parameters that have values other than default values. • Display configuration in flat ini-file format: Displays the configuration file in flat INI-file format.
-
Page 307: Uploading Configuration File From Pc On The Network
User's Manual 20. Maintenance 20.4.1 Uploading Configuration File from PC on the Network The procedure below describes how to upload a configuration file from a PC on the network to the device. To upload a configuration file to the device from a PC on the network: Click the Upload Configuration File;... -
Page 308: Figure 20-11: Successful Configuration File Uploading
MP-20x Multimedia Home Gateway Enter the path of the configuration file or click Browse and navigate to the configuration file on your PC. Click OK; the file starts loading from the PC to the device. When loading is complete, the screen 'Successful Configuration File Loading' opens, prompting you to confirm configuration file load. -
Page 309: Uploading Configuration File From A Remote Server
User's Manual 20. Maintenance 20.4.2 Uploading Configuration File from a Remote Server The procedure below describes how to upload a configuration file to the device from a remote server. This allows you to keep your configuration up-to-date, by performing daily checks for a newer configuration file each time the device restarts (i.e., automatic update), or manually checking for a newer configuration file. - Page 310 MP-20x Multimedia Home Gateway From the ‘SSL Mode’ drop-down list, select the type of Secure Socket Layer (SSL) certificate's validation method for accessing the remote server using HTTPS for the following purposes: downloading a new firmware file, downloading a new configuration file, and TR-069.
- Page 311 User's Manual 20. Maintenance Notes: • For additional security, the device can be configured to use HTTPS client- server certification when connecting to a remote server (see Section 14.3 page 209). • The configuration file can have one of the following two formats: a hierarchical conf file (indicated by file extension *.conf) or a flat ini file (indicated by file extension .ini).
-
Page 312: Encrypting The Configuration File Using Cli
MP-20x Multimedia Home Gateway 20.4.3 Encrypting the Configuration File using CLI Encrypted files include the file name extension *.cfx (instead of *.cfg) or *.inx (instead of *.ini). After the device loads the encrypted file from the HTTP server, it automatically identifies the encrypted file by its file name extensions *.cfx or *.inx, and subsequently decrypts the file before saving it to flash memory. -
Page 313: Automatic Upload Using Sip Notify Message
User's Manual 20. Maintenance 20.4.4 Automatic Upload using SIP NOTIFY Message You can enable automatic configuration update for the device from a remote server, using the SIP NOTIFY message. The contents of the configuration file can initiate (“push”) the remote server to update the device to a desired configuration version. ... -
Page 314: Firmware Upgrade
MP-20x Multimedia Home Gateway 20.5 Firmware Upgrade The device provides a built-in mechanism for upgrading its software image. There are two methods for upgrading the software image: Upgrading from a Computer on the Network: This method uses a software image file that is pre-downloaded on a PC's disk drive or located on an accompanying CD. -
Page 315: Upgrading The Device From A Computer On The Network
User's Manual 20. Maintenance 20.5.1 Upgrading the Device from a Computer on the Network The procedure below describes how to upgrade the device from a software image file located on a local computer or network. Note: You can only use files with an *.rmt extension when performing the firmware upgrade procedure. -
Page 316: Figure 20-14: Firmware Upgrade Screen – Check Disabled
MP-20x Multimedia Home Gateway Figure 20-14: Firmware Upgrade Screen – Check Disabled The following is an example of the relevant Telnet parameter: rg_conf/rmt_upd/wan_upgrade_type=3 (Automatic Check Disabled) Under the Upgrade From a Computer in the Network group, click the Upgrade Now button;... -
Page 317: Figure 20-16: Confirming Firmware Upgrade Screen
User's Manual 20. Maintenance Figure 20-16: Confirming Firmware Upgrade Screen Click OK to confirm; the upgrade process commences (a few minutes). Figure 20-17: Upgrading in Progress Screen At the conclusion of the upgrade process, the device automatically reboots and the new software version now runs on the device, maintaining your configurations and settings. -
Page 318: Upgrading The Device From The Internet
MP-20x Multimedia Home Gateway 20.5.2 Upgrading the Device from the Internet The Remote Update mechanism helps you keep your software image up-to-date, by performing routine daily checks for newer software versions, as well as letting you perform manual checks. These updates are from a user-defined URL. ... - Page 319 User's Manual 20. Maintenance If a new version is available: Click the Force Upgrade button. A download process begins. When downloading is complete, you are prompted to confirm upgrade to the new version. Click OK to confirm. The upgrade process begins and takes about one minute to complete.
-
Page 320: Configuring System Settings
MP-20x Multimedia Home Gateway 20.6 Configuring System Settings The 'System Settings' screen allows you to configure various device System and Management parameters. To configure device System and Management settings: On the 'Advanced' screen, click the System Settings icon; the 'System Settings' screen appears. - Page 321 When this duration times out, you must re-login. • User Interface Theme: Defines a different GUI theme that affects the GUI design and available parameters. For more information, contact your AudioCodes distributor. • Language: select a language for the Web interface GUI.
- Page 322 MP-20x Multimedia Home Gateway Under the Outgoing Mail Server group, do the following: • Server: hostname of your outgoing (SMTP) server. • From Email Address: Each email requires a 'from' address and some outgoing servers refuse to forward mail without a valid 'from' address for anti-spam reasons.
-
Page 323: Rebooting The Device
User's Manual 20. Maintenance 20.7 Rebooting the Device The procedure below describes how to reboot the device. To reboot the device: On the 'Advanced' screen, click the Reboot icon; the 'Reboot' screen appears. Figure 20-20: Reboot Screen Click OK to reboot the device. This may take up to one minute. To re-enter the Web interface after rebooting the device, refresh your Internet browser. -
Page 324: Restoring Factory Settings
MP-20x Multimedia Home Gateway 20.8 Restoring Factory Settings You can restore the device to factory default settings. This is useful when, for example, you are initially creating a new network or when you cannot recall changes made to the network. Notes: •... -
Page 325: Diagnostics And Performance Monitoring
User's Manual 21. Diagnostics and Performance Monitoring Diagnostics and Performance Monitoring This chapter provides diagnostics and performance monitoring procedures. 21.1 Running Diagnostics The Diagnostics icon allows you to test network connectivity. In addition, it allows you to view statistics such as the number of packets transmitted and received, round-trip time, and success status. -
Page 326: Running The Ping Test
MP-20x Multimedia Home Gateway 21.1.1 Running the Ping Test The procedure below describes how to run a ping (ICMP) test in the ‘Diagnostics’ screen. This test is done under the Ping (ICMP Echo) group. To run a ping test: In the 'Destination' field, enter the IP address or URL to be tested. -
Page 327: Running A Traceroute
User's Manual 21. Diagnostics and Performance Monitoring 21.1.3 Running a Traceroute The procedure below describes how to run a traceroute test in the ‘Diagnostics’ screen. This test is done under the Traceroute group. To run a traceroute: In the 'Destination' field, enter the IP address or URL to be tested. Click Go;... -
Page 328: Running Debug
MP-20x Multimedia Home Gateway 21.2 Running Debug The Diagnostics icon also allows you to run various Debug tests. To access the 'Debug' screen: On the 'Advanced' screen, click the icon Click the Debug tab; the following screen appears. Figure 21-5: Diagnostics – Debug Screen User's Manual Document #: LTRT-50614... -
Page 329: Running Packet Recording
User's Manual 21. Diagnostics and Performance Monitoring 21.2.1 Running Packet Recording The procedure below describes how to run Packet Recording. Note: For Packet Recording, connect a PC running Wireshark to any LAN port. To run Packet Recording: Under the Packet Recording group, from the 'Recording Level' drop-down list, select the required Recording Level •... -
Page 330: Running Sip Debug Log
MP-20x Multimedia Home Gateway 21.2.2 Running SIP Debug Log The procedure below describes how to run the SIP Debug log. Note: To run the SIP Debug Log, connect a PC running Wireshark to any LAN port. To run the SIP Debug log: Under the SIP Debug Log section of the screen, in the 'Rv Log Filter' field, select ALL. -
Page 331: Running Tcpdump
acp.lua init.lua from ftp://vop-c5:audc76@ftp.audiocodes.com/tools/TCPdump, to your Wireshark directory (C:\Program Files (x86)\Wireshark), replacing the current files in the directory. The .lua files define the ACP filter in Wireshark. 21.2.3.2 Running TCPDump with Destination Port 7555 The procedure below describes how to run TCPDump using Destination Port 7555. -
Page 332: Defining A Different Destination Port (Other Than Port 7555)
MP-20x Multimedia Home Gateway 21.2.3.3 Defining a Different Destination Port (other than Port 7555) The procedure below describes how to use a different destination port by decoding destination packets in Wireshark as "ACP". In the example shown in the figure below, Port 4321 is defined. -
Page 333: Running Generic Commands
User's Manual 21. Diagnostics and Performance Monitoring 21.2.4 Running Generic Commands The procedure below describes how to run generic commands in the debugging process. To run a generic command: Under the Generic Commands group, in the 'Custom Command' field, enter a Telnet command. -
Page 334: Commands Output And Report
MP-20x Multimedia Home Gateway 21.2.5 Commands Output and Report The procedure below describes how to run specific debug commands and reports. Debug command reports can be run for specified periods at given intervals (e.g., run every 30 seconds) or can be run to view immediate results. ... -
Page 335: Figure 21-12: Report Commands Example - Download
User's Manual 21. Diagnostics and Performance Monitoring Click Download. Figure 21-12: Report Commands Example - Download "Do you want to open or save….." .message appears at the bottom of the screen. Figure 21-13: Report Commands Example – Open or Save Click Open;... -
Page 336: Figure 21-15: Report Commands Example – Winzip Report
MP-20x Multimedia Home Gateway Click Yes; a WinZip window appears with the report files ready for viewing.. Figure 21-15: Report Commands Example – WinZip Report To run a debug report to run for immediate viewing: Under the Commands Output and Report group, the following reports can be run for immediate viewing: •... -
Page 337: System Monitoring
User's Manual 21. Diagnostics and Performance Monitoring 21.3 System Monitoring This section describes how to view the device performance statistics. 21.3.1 Viewing Network Connections Status The device constantly monitors traffic within the local network and between the local network and the Internet. You can view up-to-the-second statistical information about data received from and transmitted to the Internet (WAN) and about data received from and transmitted to computers in the local network (LAN). -
Page 338: Viewing The System Log
MP-20x Multimedia Home Gateway 21.3.2 Viewing the System Log The ‘System Log’ screen displays a list of the most recent activity that has occurred on the device. To view the system log: From the menu bar, click the System Monitoring menu. Select the System Log tab. -
Page 339: Viewing Cpu Statistics
User's Manual 21. Diagnostics and Performance Monitoring 21.3.3 Viewing CPU Statistics The 'CPU' screen displays the following system parameters: Gateway ID: Serial number of the device. This number also appears on the printed label located on the rear panel of the device. ... -
Page 340: Viewing Voip Traffic Statistics
MP-20x Multimedia Home Gateway 21.3.4 Viewing VoIP Traffic Statistics The ‘VoIP’ screen displays information on VoIP traffic and settings. To monitor VoIP traffic: From the menu bar, click the System Monitoring menu. Select the VoIP tab. Figure 21-21: VoIP Screen By default, the screen is automatically refreshed. -
Page 341: Viewing Internet Connection Utilization
User's Manual 21. Diagnostics and Performance Monitoring 21.3.5 Viewing Internet Connection Utilization The ‘Internet Connection Utilization’ screen displays the Internet connection bandwidth usage information per computer and application. To monitor Internet connection usage: From the menu bar, click the System Monitoring menu. Select the Internet Connection Utilization tab. - Page 342 MP-20x Multimedia Home Gateway This page is intentionally left blank. User's Manual Document #: LTRT-50614...
-
Page 343: A Technical Specifications
User's Manual A. Technical Specifications Technical Specifications The sub-sections below describe the specifications of AudioCodes’ Device Gateway. Note: For the list of features available in the current software version, refer to the latest Release Notes. Device Gateway Specifications The specifications for the router and VoIP functionality are listed in the table below:... - Page 344 MP-20x Multimedia Home Gateway Feature Details Local Support and Troubleshooting with Web interception and voice notification BroadSoft BroadCloud certification BroadCloud PacketSmart integration (applicable only to MP-204B) Optional 3G/4G dongle (applicable only to MP-204B) Link Layer Discovery Protocol (LLDP) support ...
- Page 345 User's Manual A. Technical Specifications Feature Details Huawei E303 Huawei E3131 Huawei E3272 Huawei E3276 Huawei E3372 Huawei E367 Huawei E392 Huawei E398 Huawei K3765 Huawei K3772 Sierra AC326U ...
- Page 346 AudioCodes CPE & Access Gateway Products MP-20x Multimedia Home Gateway User's Manual MP-20x Telephone Adapter Version 4.4.3 Document #: LTRT-50614 www.audiocodes.com...