Sign In
Upload
Manuals
Brands
Nortel Manuals
Network Router
BSR222
Nortel BSR222 Manuals
Manuals and User Guides for Nortel BSR222. We have
4
Nortel BSR222 manuals available for free PDF download: Configuration, User Manual, Overview, Fundamentals
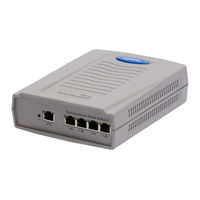
Nortel BSR222 Configuration (451 pages)
Business Secure Router
Brand:
Nortel
| Category:
Network Router
| Size: 8.71 MB
Table of Contents
Table of Contents
3
Before You Begin
29
Preface
29
Text Conventions
29
Hard Copy Technical Manuals
30
Related Publications
30
How to Get Help
31
Getting Help from the Nortel Web Site
31
Getting Help over the Phone from a Nortel Solutions Center
31
Getting Help from a Specialist by Using an Express Routing Code
32
Getting Help through a Nortel Distributor or Reseller
32
Chapter 1 Getting to Know Your Nortel Business Secure Router 222
33
Introducing the Nortel Business Secure Router 222
33
Features
33
Table 1 Feature Specifications
33
Physical Features
34
4-Port Switch
34
Autonegotiating 10/100 Mb/S Ethernet LAN
34
Autosensing 10/100 Mb/S Ethernet LAN
34
Autonegotiating 10/100 Mb/S Ethernet WAN
34
Auxiliary Port
35
Time and Date
35
Reset Button
35
Nonphysical Features
35
Ipsec VPN Capability
35
Nortel Contivity Client Termination
35
Certificates
36
Ssh
36
Https
36
IEEE 802.1X for Network Security
36
Firewall
36
Brute Force Password Guessing Protection
37
Content Filtering
37
Packet Filtering
37
Universal Plug and Play (Upnp)
37
Call Scheduling
37
Pppoe
37
PPTP Encapsulation
38
Dynamic DNS Support
38
IP Multicast
38
IP Alias
38
Central Network Management
38
Snmp
39
Network Address Translation (NAT)
39
Traffic Redirect
39
Port Forwarding
39
DHCP (Dynamic Host Configuration Protocol)
39
Full Network Management
40
Road Runner Support
40
Logging and Tracing
40
Upgrade Business Secure Router Firmware
40
Embedded FTP and TFTP Servers
40
Applications for the Nortel Business Secure Router 222
41
Secure Broadband Internet Access and VPN
41
Figure 1 Secure Internet Access and VPN Application
41
Hardware Setup
42
Chapter 2 Introducing the Webgui
43
Webgui Overview
43
Accessing the Business Secure Router Webgui
43
Figure 2 Login Screen
44
Figure 3 Change Password Screen
45
Figure 4 Replace Certificate Screen
45
Restoring the Factory Default Configuration Settings
46
Procedure to Use the Reset Button
46
Uploading a Configuration File Via Console Port
46
Navigating the Business Secure Router Webgui
47
Figure 5 Example Xmodem Upload
47
Figure 6 MAIN MENU Screen
48
Nn47922
48
Figure 7 Contact Support
49
Chapter 3 Wizard Setup
51
Wizard Overview
51
Wizard Setup: General Setup and System Name
51
Domain Name
52
Wizard Setup: Screen 2
52
Ethernet
53
Figure 9 Wizard 2: Ethernet Encapsulation
53
Pptp
54
Table 2 Wizard 2: Ethernet Encapsulation
54
Figure 10 Wizard 2: PPTP Encapsulation
55
Table 3 Wizard 2: PPTP Encapsulation
55
Pppoe Encapsulation
56
Figure 11 Wizard2: Pppoe Encapsulation
57
Table 4 Wizard2: Pppoe Encapsulation
57
Wizard Setup: Screen 3
58
WAN IP Address Assignment
58
Table 5 Private IP Address Ranges
58
IP Address and Subnet Mask
59
DNS Server Address Assignment
60
WAN MAC Address
60
Table 6 Example of Network Properties for LAN Servers with Fixed IP Addresses
61
Figure 12 Wizard 3
62
Basic Setup Complete
65
Chapter 4 User Notes
67
General Notes
67
General
67
Firewall
68
Nat
68
VPN Client Termination
69
Security
70
Routing
70
Advanced Router Configuration
71
Setting up the Router When the System Has a Server
71
Connecting Two Sites to Establish a Virtual Private Network
71
Adding IP Telephony to a Multi-Site Network
72
Configuring the Router to Act as a Nortel VPN Server (Client Termination)
73
Configuring the Router to Connect to a Nortel VPN Server (Client Emulation)
73
Allowing Remote Management of a LAN-Connected BCM50
74
Setting up the Router for Guest Access
74
Preventing Heavy Data Traffic from Impacting Telephone Calls
75
Setting up a Remote Office with a Unistim IP Telephone
75
Inter-Operability with Third-Party Routers
76
VPN Connections with Cisco Routers
76
Chapter 5 System Screens
77
System Overview
77
DNS Overview
77
Private DNS Server
77
Configuring General Setup
78
Figure 13 Private DNS Server Example
78
Figure 14 System General Setup
79
Table 8 System General Setup
79
Dynamic DNS
81
DYNDNS Wildcard
81
Configuring Dynamic DNS
81
Figure 15 DDNS
82
Table 9 DDNS
82
Configuring Password
83
Figure 16 Password
84
Table 10 Password
84
Predefined NTP Time Server List
85
Configuring Time and Date
86
Table 11 Default Time Servers
86
Figure 17 Time and Date
87
Table 12 Time and Date
88
Alg
90
Configuring ALG
90
Figure 18 ALG
90
Table 13 ALG
91
Chapter 6 LAN Screens
93
LAN Overview
93
DHCP Setup
93
IP Pool Setup
93
DNS Servers
94
Lan Tcp/Ip
94
Factory LAN Defaults
94
RIP Setup
94
Multicast
95
Configuring IP
96
Figure 19 LAN IP
96
Table 14 LAN IP
97
Configuring Static DHCP
100
Figure 20 Static DHCP
100
Table 15 Static DHCP
100
Configuring IP Alias
101
Figure 21 IP Alias
102
Table 16 IP Alias
102
Nn47922
102
Chapter 7 WAN Screens
105
WAN Overview
105
TCP/IP Priority (Metric)
105
Configuring Route
106
Figure 22 WAN: Route
106
Table 17 WAN: Route
106
Configuring WAN ISP
107
Ethernet Encapsulation
107
Figure 23 Ethernet Encapsulation
107
Pppoe Encapsulation
108
Table 18 Ethernet Encapsulation
108
Figure 24 Pppoe Encapsulation
109
PPTP Encapsulation
110
Table 19 Pppoe Encapsulation
110
Figure 25 PPTP Encapsulation
111
Table 20 PPTP Encapsulation
111
Service Type
112
Figure 26 RR Service Type
113
Table 21 RR Service Type
113
Configuring WAN IP
114
Figure 27 WAN: IP
115
Table 22 WAN: IP
116
Configuring WAN MAC
118
Figure 28 MAC Setup
118
Traffic Redirect
119
Figure 29 Traffic Redirect WAN Setup
119
Configuring Traffic Redirect
120
Figure 30 Traffic Redirect LAN Setup
120
Figure 31 Traffic Redirect
121
Table 23 Traffic Redirect
121
Configuring Dial Backup
122
Figure 32 Dial Backup Setup
123
Table 24 Dial Backup Setup
124
Advanced Modem Setup
127
AT Command Strings
127
DTR Signal
127
Response Strings
127
Configuring Advanced Modem Setup
128
Figure 33 Advanced Setup
128
Table 25 Advanced Setup
129
Chapter 8 Network Address Translation (NAT) Screens
131
NAT Overview
131
NAT Definitions
131
What NAT Does
132
Table 26 NAT Definitions
132
How NAT Works
133
Port Restricted Cone NAT
133
Figure 34 How NAT Works
133
NAT Application
134
Figure 35 Port Restricted Cone NAT
134
NAT Mapping Types
135
Figure 36 NAT Application with IP Alias
135
Using NAT
136
SUA (Single User Account) Versus NAT
136
Table 27 NAT Mapping Type
136
SUA Server
137
Default Server IP Address
137
Port Forwarding: Services and Port Numbers
138
Configuring Servers Behind SUA (Example)
138
Table 28 Services and Port Numbers
138
Configuring SUA Server
139
Figure 37 Multiple Servers Behind NAT Example
139
Figure 38 SUA/NAT Setup
140
Table 29 SUA/NAT Setup
140
Configuring Address Mapping
141
Figure 39 Address Mapping
142
Table 30 Address Mapping
142
Figure 40 Address Mapping Edit
144
Table 31 Address Mapping Edit
144
Trigger Port Forwarding
145
Trigger Port Forwarding Example
145
Two Points to Remember about Trigger Ports
146
Figure 41 Trigger Port Forwarding Process: Example
146
Configuring Trigger Port Forwarding
147
Figure 42 Trigger Port
147
Table 32 Trigger Port
148
Chapter 9 Static Route Screens
149
Static Route Overview
149
Configuring IP Static Route
150
Figure 43 Example of Static Routing Topology
150
Figure 44 Static Route Screen
151
Table 33 IP Static Route Summary
151
Configuring Route Entry
152
Figure 45 Edit IP Static Route
152
Table 34 Edit IP Static Route
152
Chapter 10 Firewalls
155
Firewall Overview
155
Types of Firewalls
155
Packet Filtering Firewalls
156
Application Level Firewalls
156
Stateful Inspection Firewalls
156
Introduction to the Business Secure Router Firewall
157
Denial of Service
158
Basics
158
Figure 46 Business Secure Router Firewall Application
158
Types of Dos Attacks
159
Figure 47 Three-Way Handshake
160
Figure 48 SYN Flood
161
Figure 49 Smurf Attack
162
Table 35 ICMP Commands that Trigger Alerts
162
Table 36 Legal Netbios Commands
162
Stateful Inspection
163
Table 37 Legal SMTP Commands
163
Figure 50 Stateful Inspection
164
Stateful Inspection Process
164
Stateful Inspection and the Business Secure Router
165
TCP Security
166
UDP/ICMP Security
167
Upper Layer Protocols
167
Guidelines for Enhancing Security with Your Firewall
168
Packet Filtering Vs. Firewall
169
Packet Filtering
169
When to Use Filtering
169
Firewall
169
When to Use the Firewall
170
Nn47922
170
Chapter 11 Firewall Screens
171
Access Methods
171
Firewall Policies Overview
171
Rule Logic Overview
173
Rule Checklist
173
Security Ramifications
173
Key Fields for Configuring Rules
174
Action
174
Service
174
Source Address
174
Destination Address
174
Connection Direction Examples
174
LAN to WAN Rules
175
WAN to LAN Rules
175
Figure 51 LAN to WAN Traffic
175
Configuring Firewall
176
Figure 52 WAN to LAN Traffic
176
Figure 53 Enabling the Firewall
178
Table 38 Firewall Rules Summary: First Screen
178
Configuring Firewall Rules
180
Figure 54 Creating and Editing a Firewall Rule
181
Table 39 Creating and Editing a Firewall Rule
181
Configuring Source and Destination Addresses
183
Figure 55 Adding or Editing Source and Destination Addresses
183
Table 40 Adding or Editing Source and Destination Addresses
183
Configuring Custom Ports
184
Figure 56 Creating or Editing a Custom Port
184
Table 41 Creating/Editing a Custom Port
184
Example Firewall Rule
185
Figure 57 Firewall Edit Rule Screen Example
185
Figure 58 Firewall Rule Edit IP Example
186
Figure 59 Edit Custom Port Example
186
Figure 60 Myservice Rule Configuration Example
187
Predefined Services
188
Figure 61 My Service Example Rule Summary
188
Table 42 Predefined Services
189
Alerts
191
Configuring Attack Alert
192
Threshold Values
192
Half-Open Sessions
192
TCP Maximum Incomplete and Blocking Period
193
Figure 62 Attack Alert
194
Table 43 Attack Alert
194
Chapter 12 Content Filtering
197
Introduction to Content Filtering
197
Restrict Web Features
197
Days and Times
197
Configure Content Filtering
198
Figure 63 Content Filter
198
Table 44 Content Filter
199
Chapter 13 VPN
201
Ipsec
201
Nortel Business Secure Router 222 VPN Functions
201
VPN Screens Overview
202
Table 45 VPN Screens Overview
202
Other Terminology
203
Encryption
203
Figure 64 Encryption and Decryption
203
Table 46 VPN Screens Overview
203
Data Confidentiality
204
Data Integrity
204
Data Origin Authentication
204
VPN Applications
204
Ipsec Architecture
204
Ipsec Algorithms
205
Figure 65 Ipsec Architecture
205
AH (Authentication Header) Protocol
206
ESP (Encapsulating Security Payload) Protocol
206
Key Management
207
Table 47 AH and ESP
207
Encapsulation
208
Transport Mode
208
Tunnel Mode
208
Figure 66 Transport and Tunnel Mode Ipsec Encapsulation
208
Ipsec and NAT
209
Secure Gateway Address
210
Table 48 VPN and NAT
210
Dynamic Secure Gateway Address
211
Summary Screen
211
Figure 67 Ipsec Summary Fields
211
Figure 68 Summary
212
Table 49 Summary
213
Keep Alive
214
Nailed up
214
NAT Traversal
215
Figure 69 NAT Router between VPN Switches
215
NAT Traversal Configuration
216
Preshared Key
216
Configuring Contivity Client VPN Rule Setup
216
Figure 70 VPN Contivity Client Rule Setup
217
Table 50 VPN Contivity Client Rule Setup
217
Configuring Advanced Setup
218
Figure 71 VPN Contivity Client Advanced Rule Setup
218
Table 51 VPN Contivity Client Advanced Rule Setup
219
ID Type and Content
220
Table 52 Local ID Type and Content Fields
220
ID Type and Content Examples
221
Table 53 Peer ID Type and Content Fields
221
Table 54 Matching ID Type and Content Configuration Example
221
My IP Address
222
Configuring Branch Office VPN Rule Setup
222
Table 55 Mismatching ID Type and Content Configuration Example
222
Nn47922
222
Figure 72 VPN Branch Office Rule Setup
223
Table 56 VPN Branch Office Rule Setup
224
Configuring an IP Policy
231
Figure 73 VPN Branch Office - IP Policy
231
Table 57 VPN Branch Office - IP Policy
232
Port Forwarding Server
236
Configuring a Port Forwarding Server
236
Figure 74 VPN Branch Office - IP Policy - Port Forwarding Server
237
Table 58 VPN Branch Office - IP Policy - Port Forwarding Server
237
IKE Phases
238
Figure 75 Two Phases to Set up the Ipsec SA
238
Negotiation Mode
239
Diffie-Hellman (DH) Key Groups
240
Perfect Forward Secrecy (PFS)
240
Preshared Key
240
Configuring Advanced Branch Office Setup
241
Figure 76 VPN Branch Office Advanced Rule Setup
241
Table 59 VPN Branch Office Advanced Rule Setup
242
SA Monitor
244
Figure 77 VPN SA Monitor
245
Table 60 VPN SA Monitor
245
Global Settings
246
Figure 78 VPN Global Setting
247
Table 61 VPN Global Setting
247
VPN Client Termination
248
Figure 79 VPN Client Termination
249
Table 62 VPN Client Termination
250
VPN Client Termination IP Pool Summary
252
Figure 80 VPN Client Termination IP Pool Summary
253
Table 63 VPN Client Termination IP Pool Summary
253
VPN Client Termination IP Pool Edit
254
Figure 81 VPN Client Termination IP Pool Edit
254
Table 64 VPN Client Termination IP Pool Edit
254
VPN Client Termination Advanced
255
Figure 82 VPN Client Termination Advanced
256
Table 65 VPN Client Termination Advanced
257
Chapter 14 Certificates
261
Certificates Overview
261
Advantages of Certificates
262
Self-Signed Certificates
262
Configuration Summary
263
My Certificates
263
Figure 83 Certificate Configuration Overview
263
Figure 84 My Certificates
264
Table 66 My Certificates
265
Certificate File Formats
266
Importing a Certificate
267
Figure 85 My Certificate Import
268
Table 67 My Certificate Import
268
Creating a Certificate
269
Figure 86 My Certificate Create
269
Table 68 My Certificate Create
270
My Certificate Details
272
Figure 87 My Certificate Details
273
Table 69 My Certificate Details
274
Trusted Cas
276
Figure 88 Trusted Cas
277
Table 70 Trusted Cas
277
Importing a Trusted Ca's Certificate
279
Figure 89 Trusted CA Import
279
Table 71 Trusted CA Import
279
Trusted CA Certificate Details
280
Figure 90 Trusted CA Details
281
Table 72 Trusted CA Details
282
Trusted Remote Hosts
284
Figure 91 Trusted Remote Hosts
285
Table 73 Trusted Remote Hosts
285
Verifying a Certificate of a Trusted Remote Host
286
Trusted Remote Host Certificate Fingerprints
286
Figure 92 Remote Host Certificates
287
Figure 93 Certificate Details
287
Importing a Certificate of a Trusted Remote Host
288
Figure 94 Trusted Remote Host Import
288
Trusted Remote Host Certificate Details
289
Table 74 Trusted Remote Host Import
289
Figure 95 Trusted Remote Host Details
290
Table 75 Trusted Remote Host Details
291
Directory Servers
293
Figure 96 Directory Servers
293
Add or Edit a Directory Server
294
Table 76 Directory Servers
294
Figure 97 Directory Server Add
295
Table 77 Directory Server Add
295
Advertisement
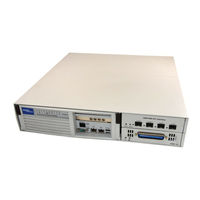
Nortel BSR222 User Manual (349 pages)
Business Secure Router
Brand:
Nortel
| Category:
Network Router
| Size: 3.56 MB
Table of Contents
Table of Contents
3
Before You Begin
25
Preface
25
Text Conventions
25
Hard-Copy Technical Manuals
26
Related Publications
26
EMEA (Europe, Middle East, Africa)
27
How to Get Help
27
Presales Support (CSAN)
27
Technical Support - CTAS
27
Technical Support - GNTS/GNPS
27
USA and Canada Authorized Distributors
27
APAC (Asia Pacific)
28
CALA (Caribbean & Latin America)
28
Technical Support - CTAS
28
Technical Support - GNTS
28
Features
31
Getting to Know Your Nortel Business Secure Router 222
31
Introducing the Nortel Business Secure Router 222
31
Table 1 Feature Specifications
31
4-Port Switch
32
Autonegotiating 10/100 Mb/S Ethernet LAN
32
Autonegotiating 10/100 Mb/S Ethernet WAN
32
Autosensing 10/100 Mb/S Ethernet LAN
32
Physical Features
32
Auxiliary Port
33
Ipsec VPN Capability
33
Nonphysical Features
33
Nortel Contivity Client Termination
33
Reset Button
33
Time and Date
33
Certificates
34
Firewall
34
Https
34
IEEE 802.1X for Network Security
34
Ssh
34
Brute Force Password Guessing Protection
35
Call Scheduling
35
Content Filtering
35
Packet Filtering
35
Pppoe
35
Universal Plug and Play (Upnp)
35
Central Network Management
36
Dynamic DNS Support
36
IP Alias
36
IP Multicast
36
PPTP Encapsulation
36
DHCP (Dynamic Host Configuration Protocol)
37
Network Address Translation (NAT)
37
Port Forwarding
37
Snmp
37
Traffic Redirect
37
Embedded FTP and TFTP Servers
38
Full Network Management
38
Logging and Tracing
38
Road Runner Support
38
Upgrade Business Secure Router Firmware
38
Applications for the Nortel Business Secure Router 222
39
Figure 1 Secure Internet Access and VPN Application
39
Secure Broadband Internet Access and VPN
39
Hardware Setup
40
Chapter 2 Introducing the SMT
41
Introduction to the SMT
41
Accessing the SMT Via the Console Port
41
Initial Screen
41
Logging on to the SMT
42
Navigating the SMT Interface
42
Figure 2 Initial Screen
42
Figure 3 SMT Login
42
Main Menu
43
Table 2 Main Menu Commands
43
Figure 4 Main Menu
44
Table 3 Main Menu Summary
44
Changing the System Password
45
Figure 5 Menu 23.1 System Security: Change Password
45
SMT Menus at a Glance
46
Figure 6 SMT Overview
46
SMT Menu 1 - General Setup
47
Introduction to General Setup
47
Configuring General Setup
47
Figure 7 Menu 1: General Setup
47
Table 4 General Setup Menu Fields
48
Configuring Dynamic DNS
50
Figure 8 Configure Dynamic DNS
51
Table 5 Configure Dynamic DNS Menu Fields
51
WAN and Dial Backup Setup
53
Introduction to WAN and Dial Backup Setup
53
WAN Setup
53
Table 6 MAC Address Cloning in WAN Setup
54
Dial Backup
55
Configuring Dial Backup in Menu 2
55
Figure 10 Menu 2: Dial Backup Setup
56
Table 7 Menu 2: Dial Backup Setup
56
Advanced WAN Setup
57
Figure 11 Menu 2.1 Advanced WAN Setup
58
Table 8 Advanced WAN Port Setup: at Commands Fields
58
Remote Node Profile (Backup ISP)
59
Figure 12 Menu 11.2 Remote Node Profile (Backup ISP)
60
Table 9 Fields in Menu 11.2 Remote Node Profile (Backup ISP)
60
Table 62 Table
60
Editing PPP Options
62
Editing TCP/IP Options
63
Figure 13 Menu 11.2.1: Remote Node PPP Options
63
Table 10 Remote Node PPP Options Menu Fields
63
Figure 14 Menu 11.2.2: Remote Node Network Layer Options
64
Table 11 Remote Node Network Layer Options Menu Fields
64
Editing Logon Script
66
Figure 15 Menu 11.2.3: Remote Node Setup Script
68
Table 12 Menu 11.2.3: Remote Node Script Menu Fields
68
Remote Node Filter
69
Figure 16 Menu 11.2.4: Dial Backup Remote Node Filter
69
Chapter 4 LAN Setup
71
Introduction to LAN Setup
71
Accessing the LAN Menus
71
LAN Port Filter Setup
71
Figure 17 Menu 3: LAN Setup
71
TCP/IP and DHCP Ethernet Setup Menu
72
Figure 18 Menu 3.1: LAN Port Filter Setup
72
Figure 19 Menu 3: TCP/IP and DHCP Setup
72
Figure 20 Figure 21-4 Menu 3.2: TCP/IP and DHCP Ethernet Setup
73
Table 13 DHCP Ethernet Setup Menu Fields
73
IP Alias Setup
75
Table 14 LAN TCP/IP Setup Menu Fields
75
Figure 21 Menu 3.2.1: IP Alias Setup
76
Table 15 IP Alias Setup Menu Field
76
Chapter 5 Internet Access
79
Introduction to Internet Access Setup
79
Ethernet Encapsulation
79
Figure 22 Menu 4: Internet Access Setup (Ethernet)
80
Table 16 Menu 4: Internet Access Setup Menu Fields
80
Configuring the PPTP Client
81
Configuring the Pppoe Client
82
Figure 23 Internet Access Setup (PPTP)
82
Table 17 New Fields in Menu 4 (PPTP) Screen
82
Figure 24 Internet Access Setup (Pppoe)
83
Table 18 New Fields in Menu 4 (Pppoe) Screen
83
Basic Setup Complete
84
Chapter 6 Remote Node Setup
85
Introduction to Remote Node Setup
85
Remote Node Setup
85
Remote Node Profile Setup
86
Ethernet Encapsulation
86
Figure 25 Menu 11 Remote Node Setup
86
Figure 26 Menu 11.1: Remote Node Profile for Ethernet Encapsulation
87
Table 19 Fields in Menu 11.1
87
Pppoe Encapsulation
88
Outgoing Authentication Protocol
89
Figure 27 Menu 11.1: Remote Node Profile for Pppoe Encapsulation
89
Nailed-Up Connection
90
Table 20 Fields in Menu 11.1 (Pppoe Encapsulation Specific)
90
PPTP Encapsulation
91
Figure 28 Menu 11.1: Remote Node Profile for PPTP Encapsulation
91
Table 21 Fields in Menu 11.1 (PPTP Encapsulation)
91
Edit IP
92
Figure 29 Menu 11.1.2: Remote Node Network Layer Options for Ethernet Encapsulation
93
Table 22 Remote Node Network Layer Options Menu Fields
93
Remote Node Filter
95
Figure 30 Menu 11.1.4: Remote Node Filter (Ethernet Encapsulation)
96
Figure 31 Menu 11.1.4: Remote Node Filter (Pppoe or PPTP Encapsulation)
96
Figure 32 Menu 11.1: Remote Node Profile
97
Table 23 Menu 11.1: Remote Node Profile (Traffic Redirect Field)
97
Traffic Redirect Setup
98
Figure 33 Menu 11.1.5: Traffic Redirect Setup
98
Table 24 Menu 11.1.5: Traffic Redirect Setup
98
IP Static Route Setup
101
Figure 34 Menu 12: IP Static Route Setup
101
Figure 35 Menu 12. 1: Edit IP Static Route
102
Table 25 IP Static Route Menu Fields
102
Chapter 8 Dial-In User Setup
105
Dial-In User Setup
105
Figure 36 Menu 14- Dial-In User Setup
105
Figure 37 Menu 14.1- Edit Dial-In User
106
Table 26 Menu 14.1- Edit Dial-In User
106
Network Address Translation (NAT)
107
Using NAT
107
SUA (Single User Account) Versus NAT
107
Applying NAT
107
Figure 38 Menu 4: Applying NAT for Internet Access
108
Figure 39 Menu 11.1.2: Applying NAT to the Remote Node
109
Table 27 Applying NAT in Menus 4 & 11.1.2
109
NAT Setup
110
Address Mapping Sets
110
Figure 40 Menu 15: NAT Setup
110
SUA Address Mapping Set
111
Figure 41 Menu 15.1: Address Mapping Sets
111
Figure 42 Menu 15.1.255: SUA Address Mapping Rules
112
Table 28 SUA Address Mapping Rules
112
User-Defined Address Mapping Sets
113
Ordering Your Rules
114
Figure 43 Menu 15.1.1: First Set
114
Table 29 Fields in Menu 15.1.1
115
Figure 44 Menu 15.1.1.1: Editing or Configuring an Individual Rule in a Set
116
Table 30 Menu 15.1.1.1: Editing or Configuring an Individual Rule in a Set
116
Configuring a Server Behind NAT
117
Figure 45 Menu 15.2: NAT Server Sets
118
Figure 46 15.2.1: NAT Server Configuration
119
Table 31 15.2.1: NAT Server Configuration
119
Figure 47 Menu 15.2: NAT Server Setup
120
General NAT Examples
121
Internet Access Only
121
Figure 48 Multiple Servers Behind NAT Example
121
Figure 49 NAT Example 1
121
Figure 50 Menu 4: Internet Access & NAT Example
122
Example 2: Internet Access with an Inside Server
123
Figure 51 NAT Example 2
123
Example 3: Multiple Public IP Addresses with Inside Servers
124
Figure 52 Menu 15.2: Specifying an Inside Server
124
Figure 53 NAT Example 3
125
Figure 54 Example 3: Menu 11.1.2
126
Figure 55 Example 3: Menu 15.1.1.1
127
Figure 56 Example 3: Final Menu 15.1.1
128
Configuring Trigger Port Forwarding
129
Figure 57 Example 3: Menu 15.2
129
Figure 58 Menu 15.3: Trigger Port Setup
130
Table 32 Menu 15.3: Trigger Port Setup Description
130
Introducing the Firewall
133
Using SMT Menus
133
Activating the Firewall
133
Figure 59 Menu 21: Filter and Firewall Setup
133
Figure 60 Menu 21.2: Firewall Setup
134
Chapter 11 Filter Configuration
135
Introduction to Filters
135
Filter Structure
136
Figure 61 Outgoing Packet Filtering Process
136
Figure 62 Filter Rule Process
137
Filter Set
137
Configuring a Filter Set
138
Figure 63 Menu 21: Filter and Firewall Setup
138
Figure 64 Menu 21.1: Filter Set Configuration
139
Table 33 Abbreviations Used in the Filter Rules Summary Menu
140
Table 34 Rule Abbreviations Used
140
Configuring a Filter Rule
141
Configuring a TCP/IP Filter Rule
141
Figure 65 Menu 21.1.1.1: TCP/IP Filter Rule
142
Table 35 TCP/IP Filter Rule Menu Fields
142
Figure 66 Executing an IP Filter
145
Configuring a Generic Filter Rule
146
Figure 67 Menu 21.1.1.1: Generic Filter Rule
146
Table 36 Generic Filter Rule Menu Fields
147
Example Filter
148
Figure 68 Telnet Filter Example
148
Figure 9 Menu 2
149
Figure 69 Example Filter: Menu 21.1.3.1
149
Figure 70 Example Filter Rules Summary: Menu 21.1.3
150
Filter Types and NAT
151
Firewall Versus Filters
151
Figure 71 Protocol and Device Filter Sets
151
Applying a Filter
152
Applying LAN Filters
152
Figure 72 Filtering LAN Traffic
152
Applying Remote Node Filters
153
Figure 73 Filtering Remote Node Traffic
153
Chapter 12 SNMP Configuration
155
SNMP Configuration
155
Figure 74 Menu 22: SNMP Configuration
155
SNMP Traps
156
Table 37 SNMP Configuration Menu Fields
156
Table 38 SNMP Traps
156
Chapter 13 System Security
159
System Security
159
System Password
159
Figure 75 Menu 23 System Security
159
Configuring External RADIUS Server
160
Figure 76 Menu 23 System Security
160
Figure 77 Menu 23.2 System Security: RADIUS Server
160
Table 39 Menu 23.2 System Security: RADIUS Server
161
IEEE 802.1X
162
Figure 78 Menu 23 System Security
162
Figure 79 Menu 23.4 System Security: Ieee802.1X
162
Table 40 Menu 23.4 System Security: Ieee802.1X
163
System Information and Diagnosis
165
Introduction to System Status
165
System Status
166
Figure 80 Menu 24: System Maintenance
166
Figure 81 Menu 24.1: System Maintenance: Status
167
Figure 82 Menu 24.1 - System Maintenance - Status
167
Table 41 System Maintenance: Status Menu Fields
167
System Information and Console Port Speed
168
System Information
169
Figure 83 System Information and Console Port Speed
169
Figure 84 Menu 24.2.1: System Maintenance Information
170
Table 42 Fields in System Maintenance: Information
170
Console Port Speed
171
Log and Trace
171
Syslog Logging
171
Figure 85 Menu 24.2.2: System Maintenance: Change Console Port Speed
171
Figure 86 Menu 24.3: System Maintenance: Log and Trace
171
Cdr
172
Figure 87 Menu 24.3.2: System Maintenance: Syslog Logging
172
Table 43 System Maintenance Menu Syslog Parameters
172
Packet Triggered
173
Filter Log
173
PPP Log
174
Firewall Log
175
Call-Triggering Packet
175
Figure 88 Call-Triggering Packet Example
175
Wan Dhcp
177
Figure 89 Menu 24.4: System Maintenance: Diagnostic
177
Figure 90 WAN & LAN DHCP
178
Table 44 System Maintenance Menu Diagnostic
178
Firmware and Configuration File Maintenance
179
Filename Conventions
179
Backup Configuration
180
Table 45 Filename Conventions
180
Backup Configuration
181
Using the FTP Command from the Command Line
181
Figure 91 Menu 24.5 - System Maintenance - Backup Configuration
181
Example of FTP Commands from the Command Line
182
GUI-Based FTP Clients
182
Figure 92 FTP Session Example
182
Table 46 General Commands for GUI-Based FTP Clients
182
TFTP and FTP over WAN Management Limitations
183
Backup Configuration Using TFTP
183
TFTP Command Example
184
GUI-Based TFTP Clients
184
Table 47 General Commands for GUI-Based TFTP Clients
184
Back up Via Console Port
185
Figure 93 Menu 24.5 System Maintenance: Backup Configuration
185
Figure 94 Menu 24.5 System Maintenance: Starting Xmodem Download Screen
185
Restore Configuration
186
Figure 95 Backup Configuration Example
186
Figure 96 Successful Backup Confirmation Screen
186
Restore Using FTP
187
Figure 97 Telnet into Menu 24.6
187
Restore Using FTP Session Example
188
Restore Via Console Port
188
Figure 98 Restore Using FTP Session Example
188
Figure 99 System Maintenance: Restore Configuration
188
Uploading Firmware and Configuration Files
189
Figure 100 System Maintenance: Starting Xmodem Download Screen
189
Figure 101 Successful Restoration Confirmation Screen
189
Firmware File Upload
190
Figure 102 Telnet into Menu 24.7.1 Upload System Firmware
190
Configuration File Upload
191
FTP File Upload Command from the DOS Prompt Example
191
Figure 103 Telnet into Menu 24.7.2 System Maintenance
191
FTP Session Example of Firmware File Upload
192
TFTP File Upload
192
Figure 104 FTP Session Example of Firmware File Upload
192
TFTP Upload Command Example
193
Uploading Via Console Port
194
Uploading Firmware File Via Console Port
194
Figure 105 Menu 24.7.1 as Seen Using the Console Port
194
Uploading Xmodem Firmware Using Hyperterminal
195
Uploading Configuration File Via Console Port
195
Figure 106 Example Xmodem Upload
195
Figure 107 Menu 24.7.2 as Seen Using the Console Port
196
Uploading Xmodem Configuration File Using Hyperterminal
197
Figure 108 Example Xmodem Upload
197
System Maintenance Menus 8 to 10
199
Command Interpreter Mode
199
Command Syntax
200
Figure 109 Command Mode in Menu 24
200
Command Usage
201
Figure 110 Valid Commands
201
Table 48 Valid Commands
201
Call Control Support
202
Budget Management
202
Figure 111 Call Control
202
Figure 112 Budget Management
203
Table 49 Budget Management
203
Call History
204
Figure 113 Call History
204
Table 50 Call History Fields
204
Time and Date Setting
205
Figure 114 Menu 24: System Maintenance
205
Figure 115 Menu 24.10 System Maintenance: Time and Date Setting
206
Table 51 Time and Date Setting Fields
206
Resetting the Time
208
Nortel BSR222 Overview (72 pages)
Small and Medium Business Solutions Overview and Configuration Guide
Brand:
Nortel
| Category:
Network Hardware
| Size: 1.57 MB
Table of Contents
Smaller Remote Site (Greenfield and Infrastructure Replacement): Reference Topology
3
Table of Contents
3
How to Get Help
5
New in this Release
7
New Products
7
Getting Started
9
How to Use this Guide
9
First Step
10
Second Step
10
Third Step
11
Preconfiguration Checklist
12
New Products
13
Business Ethernet Switches
13
Existing Products
15
Business Element Manager
17
Business Access Point 120 (BAP120)
17
Business Secure Router 222 (BSR222)
18
Reference Topologies and Assumptions
18
IP Addressing for SMB Devices and DHCP
19
Installing the Element Manager
21
Converged Small Site (Mixed-Vendor Environment): Reference Topology
23
Configuring a Converged Small Site (Mixed-Vendor Environment)
24
Smaller Converged Site (Greenfield and Infrastructure Replacement): Reference Topology
37
Configuring a Smaller Converged Site (Greenfield and Infrastructure Replacement)
38
Smaller Remote Site (Greenfield and Infrastructure Replacement Reference Topology 3
43
Configuring a Smaller Remote Site (Greenfield and Infrastructure Replacement)
44
WAN Interconnected LAN Reference Topologies
49
Configuring Tunnels
50
Interconnection of Peer Sites with Incumbent Routers (Topology 1 with Topology 1)
53
Interconnection of Peer Sites Using BSR222 (Topology 2 with Topology 2)
54
Interconnection of Main and Remote Sites Using BSR222 and BCM200/400 (Topology 2 with BCM 200/400)
55
Interconnection of BSR222 and an Incumbent Router (Topology 1 with Topology 3)
56
Interconnection of Main and Remote Sites Using BSR222 (Topology 2 with Topology 3)
58
Key Factory Security Defaults
61
Maintenance
61
Security Settings
61
Securing Your SMB Network
62
BAP120 Engineering Rules and Guidelines
65
Device Quantities
65
BAP120 Performance Measurements
67
Third-Party Wifi Client Interoperability
68
Advertisement
Nortel BSR222 Fundamentals (42 pages)
Business Secure Router
Brand:
Nortel
| Category:
Network Router
| Size: 1.04 MB
Table of Contents
Table of Contents
3
Acronyms
7
Before You Begin
7
Preface
7
Text Conventions
7
Related Publications
8
Hard-Copy Technical Manuals
9
How to Get Help
9
AC Power Adapter Specifications
10
Chapter 1
11
Introducing the Business Secure Router
11
Chapter 2 Hardware Installation
13
Front Panel
14
Rear Panel
15
Chapter 3 Setting up Your Computer IP Address
17
Static or Dynamic Configuration (Windows 2000/NT/XP)
17
Checking Your Computer IP Address
19
Chapter 4 Configuring Your Business Secure Router
21
Accessing Your Business Secure Router Via the Webgui
21
Using the Wizard to Configure for Internet Access
24
Internet Connection with Ethernet
26
Internet Connection with Pppoe
27
Internet Connection with PPTP
28
WAN IP Address Assignment
29
Test Your Internet Connection
30
Chapter 5 User Notes
31
General Notes
31
General
31
Firewall
32
Nat
32
VPN Client Termination
32
Security
34
Routing
34
Advanced Router Configuration
35
Setting up the Router When the System Has a Server
35
Connecting Two Sites to Establish a Virtual Private Network
35
Adding IP Telephony to a Multi-Site Network
36
Configuring the Router to Act as a Nortel VPN Server (Client Termination)
37
Configuring the Router to Connect to a Nortel VPN Server (Client Emulation)
37
Allowing Remote Management of a LAN-Connected BCM50
37
Setting up the Router for Guest Access
38
Preventing Heavy Data Traffic from Impacting Telephone Calls
38
Setting up a Remote Office with a Unistim IP Telephone
39
Inter-Operability with Third-Party Routers
40
VPN Connections with Cisco Routers
40
Chapter 6 Troubleshooting
41
Problem: None of the Leds Turn on When You Turn on the Business Secure Router
41
Problem: You Cannot Access the Business Secure Router from the LAN
41
Problem: You Cannot Ping any Computer on the LAN
41
Problem: You Cannot Get a WAN IP Address from the ISP
42
Problem: You Cannot Access the Internet
42
Advertisement
Related Products
Nortel BSR252
Nortel BSR222 1.0
Nortel BCM50a
Nortel BES50GE-12T PWR
Nortel BES50GE-24T PWR
Nortel BES50FE-24T PWR
Nortel BES50FE-12T PWR
Nortel BCM50e
Nortel BSG12aw/ew/tw
Nortel BSG12aw
Nortel Categories
IP Phone
Telephone
Switch
Software
Server
More Nortel Manuals
Login
Sign In
OR
Sign in with Facebook
Sign in with Google
Upload manual
Upload from disk
Upload from URL