Sign In
Upload
Manuals
Brands
Lexmark Manuals
All in One Printer
X658DTME
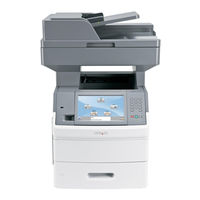
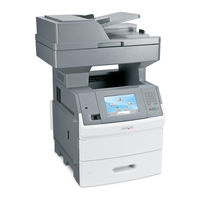
Lexmark X658DTME Manuals
Manuals and User Guides for Lexmark X658DTME. We have
10
Lexmark X658DTME manuals available for free PDF download: Service Manual, User Manual, Product Study Manual, Maintenance Manual, Brochure & Specs, Quick Manual
Lexmark X658DTME Service Manual (665 pages)
Brand:
Lexmark
| Category:
All in One Printer
| Size: 23.34 MB
Table of Contents
Table of Contents
3
Notices and Safety Information
15
Table of Contents
15
Laser Notice
15
Lithium Warning
21
Safety Information
21
Go Back
24
Preface
24
Navigation Buttons
24
Change History
25
Conventions
26
General Information
27
Maintenance Approach
27
Printer Overview
28
Printer Configurations
28
Basic Models
28
Options
29
Available Internal Options
29
Media Handling Options
29
Supported Paper Sizes, Types, and Weights
30
Paper Sizes Supported by the Printer
30
Paper Types and Weights Supported by the Printer
31
Paper Types and Weights Supported by the Output Bins
31
Tools Required for Service
33
Acronyms
34
Diagnostic Information
35
Start
35
Confirm the Installation Status
36
Power-On Reset Sequence
36
Entering Diagnostics Menu
36
User Attendance Messages
37
Error Code Table
45
Service Checks
142
Sensor (Input) Service Check
142
Sensor (Fuser Output) Service Check
142
Sensor (Narrow Media) Service Check
143
Sensor (Duplex Input) Service Check
143
Sensor (Duplex Input) Service Check (External Duplex Only)
144
Sensor (Duplex Exit) Service Check (External Duplex Only)
144
Sensor (Pass Through) Service Check
144
Sensor (Envelope Feeder Empty) Service Check
145
Sensor (ADF Top Door Interlock) Service Check
145
Switch (ADF Closed Interlock) Jam Service Check
146
Sensor (ADF Sheet Through) Static Jam Service Check
147
Sensor (ADF Sheet Through) Late Jam Service Check 290.01
148
Sensor (ADF 1St Scan) Late Jam Service Check
149
Sensor (ADF Sheet Through) Lingering Jam Service Check
150
Sensor (1St Scan) Static Jam Service Check
152
Sensor (2Nd Scan) Static Jam Service Check
153
Sensor (2Nd Scan) Lingering Jam Service Check
153
Sensor (ADF Media Exit) Late Jam Service Check
154
ADF Top Door Open Jam Service Check
156
Media Missing Jam Service Check
156
Sensor (Adf Media Exit) Static Jam Service Check
157
Sensor (ADF Media Exit) Late Jam Service Check
160
Sensor (ADF Media Exit) Static Jam Service Check
160
Sensor (Adf Media Exit) Lingering Jam Service Check
160
Sensor (Input) Late Jam Service Check
162
Sensor (Input) Lingering Jam Service Check
164
Sensor (Input) Early Jam Service Check
165
Sensor (Input) Static Jam Service Check
166
Sensor (Fuser Output) Late Jam Service Check
167
Sensor (Fuser Output) Lingering Jam Service Check
168
Sensor (Fuser Output) Static Jam Service Check
170
Sensor (Narrow Media) Late Jam Service Check
170
Sensor (Narrow Media) Static Jam Service Check
171
Sensor (Duplex Input) Late Jam Service Check
172
Sensor (Duplex Input) Lingering Jam Service Check
174
Sensor (Duplex Input) Static Jam Service Check
175
Sensor (Pass Through) Late Jam Service Check
176
Sensor (Pass Through) Lingering Jam Service Check
177
Sensor (Pass Through) Static Jam Service Check
178
Sensor (Stapler Pass Through) Late Jam Service Check
179
Sensor (Stapler Pass Through) Lingering Jam Service Check
179
Sensor (Stapler Pass Through) Static Jam Service Check
180
Sensor (Output Pass Through) Late Jam Service Check
180
Sensor (Output Pass Through) Lingering Jam Service Check
181
Sensor (Output Pass Through) Static Jam Service Check
181
Sensor (Mailbox Empty) Late Jam Service Check
182
Sensor (Mailbox Empty) Lingering Jam Service Check
182
Sensor (Mailbox Empty) Static Jam Service Check
183
Sensor (Toner Empty) Service Check
184
Sensor Late Jam Service Check
184
Sensor (ADF 2Nd Scan) Late Jam Service Check
185
Sensor (Scanner HP) Service Check
185
System Software Error (900.XX) Service Check
185
Nvram Mismatch Failure (950.00 through 950.29) Service Check
188
Printer Related Troubleshooting
189
Image Quality Trouble
189
Image Quality
190
Faint Print (Low Contrast)
190
Blank Print (no Print)
192
Solid Black
194
Vertical Lines and Bands (Process Direction)
195
Horizontal White Stripes or Bands (Side to Side Direction)
196
Vertical Stripes (Process Direction)
197
Horizontal Stripes (Side to Side Direction)
198
Partial Lack
200
After Image
203
Background (Fog)
204
Media Damage
206
No Fuse
208
Adf & Scanner Related Troubleshooting
209
ADF & Scanner Related Troubleshooting
210
Adf & Scanner Image Quality
210
Dark Image Quality (Using Adf or Scanner)
210
Vertical Lines (Process Direction Using the Adf)
211
Spots (Using Flatbed Scanner)
212
Skew (Using Adf)
214
Media Damage (Using Adf)
215
Network Service Check
216
Diagnostic Aids
219
Understanding the Printer Control Panel
219
Understanding the Home Screen
220
Using the Touch-Screen Buttons
222
Sample Touch Screen
222
Other Touch-Screen Buttons
223
Accessing Service Menus
225
Available Tests
226
Diagnostics Menu
226
Registration (Printer)
229
Print Tests
230
Quick Test
230
Printing Quality Pages
231
Hardware Tests
232
Panel Test
232
Button Test
232
Cache Test
233
Duplex Tests
234
Quick Test (Duplex)
234
Sensor Test (Duplex)
235
Motor Test (Duplex)
235
Duplex Feed
236
Feed Tests (Input Tray)
237
Sensor Test (Input Tray)
237
Input Tray Tests
237
Output bin Tests
238
Base Sensor Test
238
Feed Tests (Output Bins)
238
Q
239
Device Tests
239
Quick Disk Test
239
Disk Test/Clean
239
Printer Setup
240
Printed Page Count
240
Permanent Page Count
240
Serial Number
240
Engine Settings 1 through
240
Model Name
240
Edge to Edge
241
Enable Edge to Edge Copy
241
Ep Setup
242
Ep Defaults
242
Fuser Temperature (Fuser Temp)
242
Fuser Page Count
242
Warm up Time
242
Reports
243
Event Log
243
Charge Roll
243
Gap Adjust
243
Auto Dark Adjust
243
Display Log
243
Clear Log
244
Scanner Tests
245
Back Side Scan Uniformity
245
Asic Test
245
Feed Test
245
Sensor Tests
245
Configuration Menu (CONFIG MENU)
246
Entering Configuration Menu
246
Available Menus
246
Maintenance Counter Value
247
Reset Maintenance Counter
247
USB Scan to Local
248
Print Quality Pages
248
Reports
249
Size Sensing
249
Panel Menus
250
Ppds Emulation
250
Factory Defaults
251
Energy Conserve
251
Min Copy Memory
252
Numpad Job Assist
252
Format Fax Storage
252
Fax Storage Location
252
Adf Edge Erase
252
Fb Edge Erase
253
Scanner Manual Registration
253
Advertisement
Lexmark X658DTME Service Manual (653 pages)
Brand:
Lexmark
| Category:
Printer
| Size: 19.77 MB
Table of Contents
Table of Contents
4
Table of Contents
17
Notices and Safety Information
17
Laser Notice
17
Lithium Warning
23
Safety Information
23
Preface
26
Conventions
26
Connector Locations
26
General Information
27
Maintenance Approach
27
Printer Overview
28
Printer Configurations
28
Basic Models
28
Options
29
Available Internal Options
29
Media Handling Options
29
Supported Paper Sizes, Types, and Weights
30
Paper Sizes Supported by the Printer
30
Paper Types and Weights Supported by the Output Bins
31
Paper Types and Weights Supported by the Printer
31
Printer Configurations
33
Basic Models
33
Tools Required for Service
34
Acronyms
35
Diagnostic Information
37
Start
37
Confirm the Installation Status
38
Power-On Reset Sequence
38
Entering Diagnostics Menu
38
User Attendance Messages
39
Error Code Table
47
Service Checks
67
Sensor (Input) Service Check
151
Sensor (Fuser Output) Service Check
151
Sensor (Narrow Media) Service Check
152
Sensor (Duplex Input) Service Check
152
Sensor (Duplex Input) Service Check (External Duplex Only)
153
Sensor (Duplex Exit) Service Check (External Duplex Only)
153
Sensor (Pass Through) Service Check
154
Sensor (Envelope Feeder Empty) Service Check
154
Sensor (ADF Top Door Interlock) Service Check
154
Switch (ADF Closed Interlock) Jam Service Check
155
Sensor (ADF Sheet Through) Static Jam Service Check
156
Sensor (ADF Sheet Through) Late Jam Service Check 290.01
157
Sensor (ADF 1St Scan) Late Jam Service Check
158
Sensor (ADF Sheet Through) Lingering Jam Service Check
160
Sensor (1St Scan) Static Jam Service Check
162
Sensor (2Nd Scan) Static Jam Service Check
163
Sensor (2Nd Scan) Lingering Jam Service Check
163
Sensor (ADF Media Exit) Late Jam Service Check
165
ADF Top Door Open Jam Service Check
166
Media Missing Jam Service Check
167
Sensor (ADF Media Exit) Static Jam Service Check
168
Sensor (ADF Media Exit) Late Jam Service Check
169
Sensor (ADF Media Exit) Lingering Jam Service Check
171
Sensor (Input) Late Jam Service Check
173
Sensor (Input) Lingering Jam Service Check
175
Sensor (Input) Early Jam Service Check
177
Sensor (Input) Static Jam Service Check
178
Sensor (Fuser Output) Late Jam Service Check
179
Sensor (Fuser Output) Lingering Jam Service Check
180
Sensor (Fuser Output) Static Jam Service Check
182
Sensor (Narrow Media) Static Jam Service Check
183
Sensor (Duplex Input) Late Jam Service Check
184
Sensor (Duplex Input) Lingering Jam Service Check
186
Sensor (Duplex Input) Static Jam Service Check
187
Sensor (Pass Through) Late Jam Service Check
189
Sensor (Pass Through) Lingering Jam Service Check
190
Sensor (Pass Through) Static Jam Service Check
191
Sensor (Stapler Pass Through) Late Jam Service Check
192
Sensor (Stapler Pass Through) Lingering Jam Service Check
193
Sensor (Output Pass Through) Late Jam Service Check
194
Sensor (Output Pass Through) Static Jam Service Check
195
Sensor (Mailbox Empty) Lingering Jam Service Check
196
Sensor (Mailbox Empty) Static Jam Service Check
197
Sensor (Scanner HP) Service Check
198
NVRAM Mismatch Failure (950.00 through 950.29) Service Check
199
Image Quality Trouble
200
Image Quality
201
Faint Print (Low Contrast)
201
Blank Print (no Print)
203
Solid Black
205
Vertical Lines and Bands (Process Direction)
206
Horizontal White Stripes or Bands (Side to Side Direction)
207
Vertical Stripes (Process Direction)
208
Horizontal Stripes (Side to Side Direction)
209
Partial Lack
211
Spots
212
After Image
214
Background (Fog)
215
Skew
216
Media Damage
217
No Fuse
219
ADF & Scanner Related Troubleshooting
220
ADF & Scanner Image Quality
221
Vertical Lines (Process Direction Using the ADF)
222
Spots (Using Flatbed Scanner)
223
Skew (Using ADF)
225
Media Damage (Using ADF)
226
1 I
201
Network Service Check
228
Diagnostic Aids
231
Understanding the Home Screen
232
Using the Touch-Screen Buttons
234
Other Touch-Screen Buttons
235
Accessing Service Menus
237
Diagnostics Menu
238
Available Tests
238
Registration (Printer)
241
Print Tests
242
Quick Test
242
Input Source Tests
243
Button Test
244
Hardware Tests
244
Panel Test
244
Cache Test
245
DRAM Test
245
Duplex Tests
246
USB HS Test Mode
246
Top Margin (Duplex)
247
Duplex Feed 1
248
Input Tray Tests
249
Base Sensor Test
250
Output bin Tests
250
Device Tests
251
Disk Test/Clean
251
Quick Disk Test
251
Permanent Page Count
252
Printer Setup
252
Serial Number
252
Configuration ID
253
Edge to Edge
253
Ep Defaults
254
Ep Setup
254
Fuser Page Count
254
Charge Roll
255
Print Contrast
255
Transfer
255
Clear Log
256
Print Log
256
Asic Test
257
Feed Test
257
Scanner Tests
257
100 C
245
Q
251
E
253
500 D
254
Configuration Menu (CONFIG MENU)
258
Available Menus
258
Maintenance Counter Value
259
Reset Maintenance Counter
259
USB Scan to Local
260
Print Quality Pages
260
Reports
261
Size Sensing
261
Panel Menus
262
Ppds Emulation
262
Factory Defaults
263
Energy Conserve
263
Min Copy Memory
264
Format Fax Storage
264
Adf Edge Erase
264
FB Edge Erase
265
Disable Scanner
266
Paper Prompts
266
Envelope Prompts
266
Action for Prompts
267
Jobs on Disk
268
Disk Encryption
268
Lexmark X658DTME User Manual (318 pages)
Lexmark X652DE: User Guide
Brand:
Lexmark
| Category:
All in One Printer
| Size: 6.19 MB
Table of Contents
Table of Contents
3
Safety Information
13
Learning about the Printer
15
Finding Information about the Printer
15
Printer Configurations
16
Selecting a Location for the Printer
17
Basic Functions of the Scanner
17
Understanding the ADF and Scanner Glass
18
Understanding the Printer Control Panel
19
Understanding the Home Screen
20
Using the Touch-Screen Buttons
22
Other Touch-Screen Buttons
23
Additional Printer Setup
26
Installing Internal Options
26
Available Internal Options
26
Accessing the System Board to Install Internal Options
27
Installing a Memory Card
29
Installing a Flash Memory or Firmware Card
30
Installing an Internal Solutions Port
32
Installing a Printer Hard Disk
38
Installing a Fax Card
42
Attaching Cables
44
Verifying Printer Setup
45
Printing a Menu Settings Page
45
Printing a Network Setup Page
46
Setting up the Printer Software
46
Installing Printer Software
46
Updating Available Options in the Printer Driver
47
Setting up Wireless Printing
48
Information You will Need to Set up the Printer on a Wireless Network
48
Installing the Printer on a Wireless Network (Windows)
49
Installing the Printer on a Wireless Network (Macintosh)
50
Configure the Printer for Wireless Access
51
Configure Your Computer to Use the Printer Wirelessly
52
Installing the Printer on a Wired Network
53
For Macintosh Users
54
Changing Port Settings after Installing a New Network Internal Solutions Port
56
Setting up Serial Printing
58
Setting up the Printer to Fax
60
Choosing a Fax Connection
60
Using an RJ11 Adapter
61
Connecting Directly to a Telephone Wall Jack in Germany
64
Connecting to a Telephone
65
Connecting to an Answering Machine
66
Connecting to a Computer with a Modem
68
Setting the Outgoing Fax Name and Number
69
Setting the Date and Time
70
Turning Daylight Saving Time on
70
Loading Paper and Specialty Media
71
Setting the Paper Size and Paper Type
71
Configuring Universal Paper Settings
71
Loading the Standard or Optional 250-Sheet or 550-Sheet Tray
72
Loading the 2000-Sheet Tray
75
Loading the Multipurpose Feeder
79
Loading the Envelope Feeder
81
Linking and Unlinking Trays
83
Linking Trays
83
Unlinking Trays
83
Assigning a Custom Paper Type Name
84
Changing a Custom Type <X> Name
84
Paper and Specialty Media Guidelines
85
Paper Guidelines
85
Paper Characteristics
85
Unacceptable Paper
86
Selecting Paper
86
Selecting Preprinted Forms and Letterhead
86
Using Recycled Paper and Other Office Papers
87
Storing Paper
87
Supported Paper Sizes, Types, and Weights
88
Paper Sizes Supported by the Printer
88
Paper Types and Weights Supported by the Printer
90
Paper Types and Weights Supported by the Finisher
90
Copying
92
Making Copies
92
Making a Quick Copy
92
Copying Using the ADF
92
Copying Using the Scanner Glass
93
Copying Photos
93
Copying on Specialty Media
93
Making Transparencies
93
Copying to Letterhead
94
Customizing Copy Settings
94
Copying from One Size to Another
94
Making Copies Using Paper from a Selected Tray
95
Copying a Document that Contains Mixed Paper Sizes
95
Copying on both Sides of the Paper (Duplexing)
96
Reducing or Enlarging Copies
96
Adjusting Copy Quality
97
Collating Copies
97
Placing Separator Sheets between Copies
98
Copying Multiple Pages Onto a Single Sheet
98
Creating a Custom Job (Job Build)
99
Job Interrupt
100
Placing Information on Copies
100
Placing the Date and Time at the Top of each Page
100
Placing an Overlay Message on each Page
100
Canceling a Copy Job
101
Canceling a Copy Job While the Document Is in the ADF
101
Canceling a Copy Job While Copying Pages Using the Scanner Glass
101
Canceling a Copy Job While the Pages Are Being Printed
101
Understanding the Copy Screens and Options
101
Copy from
101
Copy to
101
Scale
102
Darkness
102
Content
102
Sides (Duplex)
102
Collate
102
Options
102
Advanced Imaging
103
Margin Shift
103
Edge Erase
103
Improving Copy Quality
104
E-Mailing
105
Getting Ready to E-Mail
105
Setting up the E-Mail Function
105
Configuring the E-Mail Settings
106
Creating an E-Mail Shortcut
106
Creating an E-Mail Shortcut Using the Embedded Web Server
106
Creating an E-Mail Shortcut Using the Touch Screen
106
E-Mailing a Document
107
Sending an E-Mail Using the Touch Screen
107
Sending an E-Mail Using a Shortcut Number
107
Sending an E-Mail Using the Address Book
107
Customizing E-Mail Settings
108
Adding E-Mail Subject and Message Information
108
Changing the Output File Type
108
Canceling an E-Mail
109
Understanding E-Mail Options
109
Original Size
109
Sides (Duplex)
109
Orientation
109
Binding
109
E-Mail Subject
109
E-Mail File Name
109
E-Mail Message
110
Resolution
110
Send as
110
Content
110
Advanced Options
110
Faxing
111
Sending a Fax
111
Sending a Fax Using the Printer Control Panel
111
Sending a Fax Using the Computer
112
Creating Shortcuts
112
Creating a Fax Destination Shortcut Using the Embedded Web Server
112
Creating a Fax Destination Shortcut Using the Touch Screen
113
Using Shortcuts and the Address Book
113
Using Fax Shortcuts
113
Using the Address Book
113
Customizing Fax Settings
114
Changing the Fax Resolution
114
Making a Fax Lighter or Darker
114
Sending a Fax at a Scheduled Time
115
Viewing a Fax Log
115
Blocking Junk Faxes
115
Canceling an Outgoing Fax
116
Canceling a Fax While the Original Documents Are Still Scanning
116
Canceling a Fax after the Original Documents Have Been Scanned to Memory
116
Understanding Fax Options
116
Original Size
116
Content
116
Sides (Duplex)
117
Resolution
117
Darkness
117
Advanced Options
117
Improving Fax Quality
118
Holding and Forwarding Faxes
118
Holding Faxes
118
Forwarding a Fax
119
Advertisement
Lexmark X658DTME User Manual (316 pages)
User Guide
Brand:
Lexmark
| Category:
All in One Printer
| Size: 5.82 MB
Table of Contents
Table of Contents
2
Safety Information
12
Learning about the Printer
14
Finding Information about the Printer
14
Printer Configurations
15
Selecting a Location for the Printer
16
Basic Functions of the Scanner
16
Understanding the ADF and Scanner Glass
17
Understanding the Printer Control Panel
18
Understanding the Home Screen
19
Using the Touch-Screen Buttons
21
Other Touch-Screen Buttons
22
Additional Printer Setup
25
Installing Internal Options
25
Available Internal Options
25
Accessing the System Board to Install Internal Options
26
Installing a Memory Card
28
Installing a Flash Memory or Firmware Card
29
Installing an Internal Solutions Port
32
Installing a Printer Hard Disk
38
Installing a Fax Card
42
Attaching Cables
44
Verifying Printer Setup
45
Printing a Menu Settings Page
45
Printing a Network Setup Page
46
Setting up the Printer Software
46
Installing Printer Software
46
Updating Available Options in the Printer Driver
47
Setting up Wireless Printing
48
Information You will Need to Set up the Printer on a Wireless Network
48
Installing the Printer on a Wireless Network (Windows)
49
Installing the Printer on a Wireless Network (Macintosh)
50
Installing the Printer on a Wired Network
53
For Macintosh Users
54
Changing Port Settings after Installing a New Network Internal Solutions Port
56
Setting up Serial Printing
58
Setting up the Printer to Fax
60
Choosing a Fax Connection
60
Using an RJ11 Adapter
61
Connecting Directly to a Telephone Wall Jack in Germany
64
Connecting to a Telephone
65
Connecting to an Answering Machine
66
Connecting to a Computer with a Modem
68
Setting the Outgoing Fax Name and Number
69
Setting the Date and Time
70
Turning Daylight Saving Time on
70
Loading Paper and Specialty Media
71
Setting the Paper Size and Paper Type
71
Configuring Universal Paper Settings
71
Loading the Standard or Optional 250-Sheet or 550-Sheet Tray
72
Loading the 2000-Sheet Tray
75
Loading the Multipurpose Feeder
79
Loading the Envelope Feeder
81
Linking and Unlinking Trays
83
Linking Trays
83
Unlinking Trays
83
Assigning a Custom Paper Type Name
84
Changing a Custom Type <X> Name
84
Paper and Specialty Media Guidelines
86
Paper Guidelines
86
Paper Characteristics
86
Unacceptable Paper
87
Selecting Paper
87
Selecting Preprinted Forms and Letterhead
87
Using Recycled Paper and Other Office Papers
88
Storing Paper
88
Supported Paper Sizes, Types, and Weights
89
Paper Sizes Supported by the Printer
89
Paper Types and Weights Supported by the Printer
91
Paper Types and Weights Supported by the Finisher
91
Copying
93
Making Copies
93
Making a Quick Copy
93
Copying Using the ADF
93
Copying Using the Scanner Glass
94
Copying Photos
94
Copying on Specialty Media
94
Making Transparencies
94
Copying to Letterhead
95
Customizing Copy Settings
95
Copying from One Size to Another
95
Making Copies Using Paper from a Selected Tray
96
Copying a Document that Contains Mixed Paper Sizes
96
Copying on both Sides of the Paper (Duplexing)
97
Reducing or Enlarging Copies
97
Adjusting Copy Quality
98
Collating Copies
98
Placing Separator Sheets between Copies
99
Copying Multiple Pages Onto a Single Sheet
99
Creating a Custom Job (Job Build)
100
Job Interrupt
101
Placing Information on Copies
101
Placing the Date and Time at the Top of each Page
101
Placing an Overlay Message on each Page
101
Canceling a Copy Job
102
Canceling a Copy Job While the Document Is in the ADF
102
Canceling a Copy Job While Copying Pages Using the Scanner Glass
102
Canceling a Copy Job While the Pages Are Being Printed
102
Understanding the Copy Screens and Options
102
Copy from
102
Copy to
103
Scale
103
Darkness
103
Content
103
Sides (Duplex)
103
Collate
104
Options
104
Improving Copy Quality
105
E-Mailing
106
Getting Ready to E-Mail
106
Setting up the E-Mail Function
106
Configuring the E-Mail Settings
107
Creating an E-Mail Shortcut
107
Creating an E-Mail Shortcut Using the Embedded Web Server
107
Creating an E-Mail Shortcut Using the Touch Screen
107
E-Mailing a Document
108
Sending an E-Mail Using the Touch Screen
108
Sending an E-Mail Using a Shortcut Number
108
Sending an E-Mail Using the Address Book
108
Customizing E-Mail Settings
109
Adding E-Mail Subject and Message Information
109
Changing the Output File Type
109
Canceling an E-Mail
110
Understanding E-Mail Options
110
Original Size
110
Sides (Duplex)
110
Orientation
110
Binding
110
E-Mail Subject
110
E-Mail File Name
111
E-Mail Message
111
Resolution
111
Send as
111
Content
111
Advanced Options
111
Faxing
113
Sending a Fax
113
Sending a Fax Using the Printer Control Panel
113
Sending a Fax Using the Computer
114
Creating Shortcuts
114
Creating a Fax Destination Shortcut Using the Embedded Web Server
114
Creating a Fax Destination Shortcut Using the Touch Screen
115
Using Shortcuts and the Address Book
115
Using Fax Shortcuts
115
Using the Address Book
115
Customizing Fax Settings
116
Changing the Fax Resolution
116
Making a Fax Lighter or Darker
116
Sending a Fax at a Scheduled Time
117
Viewing a Fax Log
117
Blocking Junk Faxes
117
Canceling an Outgoing Fax
118
Canceling a Fax While the Original Documents Are Still Scanning
118
Canceling a Fax after the Original Documents Have Been Scanned to Memory
118
Understanding Fax Options
118
Original Size
118
Content
118
Sides (Duplex)
119
Resolution
119
Darkness
119
Advanced Options
119
Improving Fax Quality
120
Holding and Forwarding Faxes
120
Holding Faxes
120
Forwarding a Fax
121
Lexmark X658DTME User Manual (308 pages)
X65X series
Brand:
Lexmark
| Category:
All in One Printer
| Size: 5.71 MB
Table of Contents
Table of Contents
2
Safety Information
7
Learning about the Printer
9
Finding Information about the Printer
9
Printer Configurations
10
Selecting a Location for the Printer
11
Basic Functions of the Scanner
12
Understanding the ADF and Scanner Glass
12
Understanding the Printer Control Panel
13
Understanding the Home Screen
14
Using the Touch-Screen Buttons
16
Additional Printer Setup
20
Installing Internal Options
20
Accessing the System Board to Install Internal Options
21
Installing a Memory Card
23
Installing a Flash Memory or Firmware Card
24
Installing an Internal Solutions Port
26
Installing a Printer Hard Disk
32
Attaching Cables
38
Verifying Printer Setup
39
Setting up the Printer Software
40
Updating Available Options in the Printer Driver
41
Setting up Wireless Printing
42
Installing the Printer on a Wireless Network (Windows)
43
Installing the Printer on a Wireless Network (Macintosh)
44
Installing the Printer on an Ethernet Network
47
For Windows Users
48
Changing Port Settings after Installing a New Network Internal Solutions Port
50
Setting up Serial Printing
51
In Windows
52
Setting up the Printer to Fax
53
Using an Rj11 Adapter
54
Connecting Directly to a Telephone Wall Jack in Germany
57
Connecting to a Telephone
59
Connecting to an Answering Machine
60
Connecting to a Computer with a Modem
61
Setting the Outgoing Fax Name and Number
63
Setting the Date and Time
63
Turning Daylight Saving Time on
63
Loading Paper and Specialty Media
64
Setting the Paper Size and Paper Type
64
Configuring Universal Paper Settings
64
Loading the Standard or Optional 250-Sheet or 550-Sheet Tray
65
Loading the 2000-Sheet Tray
68
Loading the Multipurpose Feeder
72
Loading the Envelope Feeder
74
Linking and Unlinking Trays
75
Unlinking Trays
76
Assigning a Custom Paper Type Name
76
Paper and Specialty Media Guidelines
78
Paper Guidelines
78
Fiber Content
79
Unacceptable Paper
79
Selecting Paper
79
Selecting Preprinted Forms and Letterhead
79
Using Recycled Paper and Other Office Papers
80
Storing Paper
80
Supported Paper Sizes, Types, and Weights
81
Paper Types and Weights Supported by the Printer
82
Paper Types and Weights Supported by the Finisher
83
Printing
85
Printing a Document
85
Printing on Specialty Media
85
Tips on Using Transparencies
86
Tips on Using Envelopes
86
Tips on Using Labels
87
Tips on Using Card Stock
87
Printing Confidential and Other Held Jobs
88
Printing Confidential and Other Held Jobs from Windows
89
Printing Confidential and Other Held Jobs from a Macintosh Computer
89
Printing from a Mobile Device
90
Printing from a Flash Drive
90
Printing Information Pages
91
Canceling a Print Job
92
Copying
93
Making Copies
93
Copying Photos
94
Copying on Specialty Media
94
Customizing Copy Settings
95
Making Copies Using Paper from a Selected Tray
96
Copying a Document that Contains Mixed Paper Sizes
96
Reducing or Enlarging Copies
97
Adjusting Copy Quality
98
Collating Copies
98
Placing Separator Sheets between Copies
99
Copying Multiple Pages Onto a Single Sheet
99
Job Interrupt
101
Placing Information on Copies
101
Canceling a Copy Job
102
Understanding the Copy Screens and Options
102
Advanced Imaging
104
Separator Sheets
104
Margin Shift
104
Improving Copy Quality
105
E-Mailing
106
Getting Ready to E-Mail
106
Creating an E-Mail Shortcut
107
E-Mailing a Document
108
Customizing E-Mail Settings
109
Canceling an E-Mail
110
Understanding E-Mail Options
110
Advanced Options
111
Faxing
113
Sending a Fax
113
Creating Shortcuts
114
Using Shortcuts and the Address Book
115
Customizing Fax Settings
116
Sending a Fax at a Scheduled Time
117
Viewing a Fax Log
117
Blocking Junk Faxes
117
Canceling an Outgoing Fax
118
Understanding Fax Options
118
Improving Fax Quality
120
Holding and Forwarding Faxes
120
Forwarding a Fax
121
Scanning to an FTP Address
122
Creating Shortcuts
123
Understanding FTP Options
124
Improving FTP Quality
126
Scanning to a Computer or Flash Drive
127
Scanning to a Computer
127
Scanning to a Flash Drive
128
Understanding Scan Profile Options
128
Format Type
129
Default Content
129
Improving Scan Quality
130
Lexmark X658DTME Product Study Manual (70 pages)
Brand:
Lexmark
| Category:
Printer
| Size: 3.69 MB
Table of Contents
Table of Contents
5
Technical Information
9
T65X Printer Specifications
9
T65X Basic Model
9
Fully Configured T65X Model
10
T65X Model Feature/
10
T65X Options and Features
11
T65X and X65X Supply Item Compatibility
11
X65X Specifications
12
X65X Basic Models
12
X65X Options
13
Ptions
13
Theory of Operation
14
Printer Paper Path
14
Internal Duplex: Models T652 & T654
14
Duplex: Models T650
15
Print Engine Transport System
16
Paper Tray Components
16
Multiple Sheet Feed Prevention
16
Electrophotographic Process
17
Charge
17
Exposure
17
Development
17
Transfer
17
Fusing
17
Cleaning
17
EP (Electrophotographic) Components - T65X Diagram
18
Printheads [Oscillating Vs. Spinning Polygon Mirror]
19
T650 & T650N
19
T652Dn & T654Dn
19
Polygon & Oscillating Printhead Assembly Adjustment
20
Oscillating Printhead Assembly Electronic Adjustment
22
Alignment Assembly - Skew Adjustment
23
Document Scanning
25
Document Scanning at ADF
25
Document Scanning at Platen
25
Names and Functions of Components
25
Document Feed Path from the Adf
27
Names and Functions of Components
28
Adf
28
Scanner Manual Registration
29
Operator Panels
30
T65X Panel Buttons
30
Understanding the X65X Printer Control Panel
31
Understanding the ADF (Automatic Document Feed) & Scanner Glass
32
Understanding the Home Screen
33
Customer Menus
34
Service Mode
35
Confirm the Installation Status
35
Power-On Reset Sequence
35
Entering Diagnostics Mode on the T65X
35
Accessing Service Menus on the X65X
36
Accessing SE Menu on the X65Xe MFP and T65X Printer
36
Lexmark X658DTME Maintenance Manual (12 pages)
Maintenance Guide
Brand:
Lexmark
| Category:
All in One Printer
| Size: 0.58 MB
Table of Contents
Table of Contents
2
Maintaining the Printer
3
Cleaning the Exterior of the Printer
3
Cleaning the Scanner Glass
3
Adjusting Scanner Registration
4
Storing Supplies
5
Conserving Supplies
6
Checking the Status of Supplies
6
Checking the Status of Supplies from the Printer Control Panel
6
Checking the Status of Supplies from a Network Computer
6
Ordering Supplies
7
Ordering Print Cartridges
7
Ordering a Maintenance Kit
8
Ordering a Fuser
9
Ordering an ADF Maintenance Kit
9
Ordering a Transfer Roller
9
Ordering Charge Rolls
9
Ordering Pick Rollers
9
Ordering ADF Replacement Parts
10
Ordering Staple Cartridges
10
Recycling Lexmark Products
10
Moving the Printer
10
Before Moving the Printer
10
Moving the Printer to Another Location
11
Setting the Printer up in a New Location
11
Shipping the Printer
12
Lexmark X658DTME Service Manual (15 pages)
Brand:
Lexmark
| Category:
All in One Printer
| Size: 0.79 MB
Lexmark X658DTME Brochure & Specs (8 pages)
X658 Family
Brand:
Lexmark
| Category:
All in One Printer
| Size: 6.88 MB
Lexmark X658DTME Quick Manual (4 pages)
Monochrome Multifunction Laser Printers
Brand:
Lexmark
| Category:
Printer
| Size: 0.14 MB
Advertisement
Related Products
Lexmark 16M1846 - X 658dte B/W Laser
Lexmark X658DTFE
Lexmark X658DE
Lexmark X658DFE
Lexmark X658DTE
Lexmark X658
Lexmark X658DE - Mfp Laser 55PPM P/s/c/f Duplex Adf
Lexmark X658 MFP
Lexmark X658e
Lexmark X656e
Lexmark Categories
Printer
All in One Printer
Printer Accessories
Software
Print Server
More Lexmark Manuals
Login
Sign In
OR
Sign in with Facebook
Sign in with Google
Upload manual
Upload from disk
Upload from URL