Sign In
Upload
Manuals
Brands
KTM Manuals
Motorcycle
450 XC-F
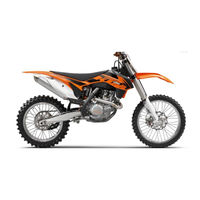
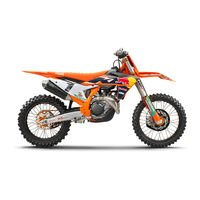
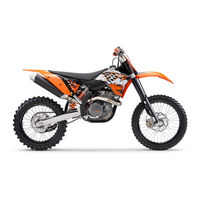
KTM 450 XC-F Manuals
Manuals and User Guides for KTM 450 XC-F. We have
6
KTM 450 XC-F manuals available for free PDF download: Owner's Manual, Setup Instructions
KTM 450 XC-F Owner's Manual (110 pages)
Brand:
KTM
| Category:
Motorcycle
| Size: 2 MB
Table of Contents
Table of Contents
4
1 Means of Representation
6
Symbols Used
6
Formats Used
6
2 Safety Advice
7
Use Definition - Intended Use
7
Degrees of Risk and Symbols
7
Tampering Warning
7
Safe Operation
7
Protective Clothing
8
Work Rules
8
Environment
8
Owner's Manual
8
3 Important Notes
9
Guarantee, Warranty
9
Operating and Auxiliary Substances
9
Spare Parts, Accessories
9
Service
9
Figures
9
Customer Service
9
4 View of Vehicle
10
View of Vehicle, Front Left (Example)
10
View of Vehicle, Rear Right (Example)
11
5 Serial Numbers
12
Chassis Number
12
Type Label
12
Engine Number
12
Fork Part Number
12
Shock Absorber Part Number
12
6 Controls
13
Clutch Lever
13
Hand Brake Lever
13
Throttle Grip
13
Kill Switch
13
Electric Starter Button
13
Map-Select Switch for the Basic Setting (SX-F Factory Edition)
14
Map-Select Switch for Vehicle Operation (SX-F Factory Edition)
14
Overview of Indicator Lamps
14
Opening the Filler Cap
14
Closing the Filler Cap
15
Factory Start (SX-F Factory Edition)
16
Cold Start Button
16
Idle Speed Adjusting Screw
17
Shift Lever
17
Foot Brake Lever
18
Side Stand (XC-F)
18
Plug-In Stand (All SX-F Models)
18
Service Hour Counter (SX-F Factory Edition)
18
7 Preparing for Use
19
Advice on First Use
19
Running in the Engine
20
Preparing the Vehicle for Difficult Riding Conditions
20
Preparing for Rides on Dry Sand
21
Preparing for Rides on Wet Sand
21
Preparing for Rides on Wet and Muddy Surfaces
22
Preparing for Rides at High Temperature and Slow Speed
22
Preparing for Rides at Low Temperatures or in Snow
22
8 Riding Instructions
23
Checks and Maintenance Work When Preparing for Use
23
Starting
23
Starting off
24
Shifting, Riding
24
Applying the Brakes
24
Stopping, Parking
24
Transport
25
Refueling
25
Service Schedule
27
9 Service Schedule
28
Service Work (as Additional Order)
28
10 Tuning the Chassis
29
Checking the Basic Chassis Setting with the Rider's Weight
29
Compression Damping of the Shock Absorber
29
Adjusting the Low-Speed Compression Damping of the Shock Absorber
29
Adjusting the High-Speed Compression Damping of the Shock Absorber
30
Adjusting the Rebound Damping of the Shock Absorber
31
Measuring Rear Wheel Sag Unloaded
32
Checking the Static Sag of the Shock Absorber
32
Checking the Riding Sag of the Shock Absorber
32
Adjusting the Spring Preload of the Shock Absorber
33
Adjusting the Riding Sag
33
Checking the Basic Setting of the Fork
34
Adjusting the Compression Damping of the Fork
35
Adjusting the Rebound Damping of the Fork
36
Handlebar Position
37
Adjusting the Handlebar Position
37
Activating the Factory Start (SX-F Factory Edition)
37
11 Service Work on the Chassis
38
Raising the Motorcycle with the Lift Stand
38
Removing the Motorcycle from the Lift Stand
38
Bleeding the Fork Legs
38
Cleaning the Dust Boots of the Fork Legs
39
Loosening the Fork Protection (SX-F EU, SX-F USA, XC-F)
39
Positioning the Fork Protection (SX-F EU, SX-F USA, XC-F)
39
Removing the Fork Legs
40
Installing the Fork Legs
40
Removing the Fork Protector
41
Sx-F Eu, Sx-F Usa, XC-F)
41
Installing the Fork Protector
41
Installing the Fork Protector
42
Edition)
42
Removing the Lower Triple Clamp
42
Installing the Lower Triple Clamp
43
Checking the Steering Head Bearing Play
44
Position the Brake Caliper. Mount and Tighten Screws
44
Screw, Front Brake Caliper M8
44
Adjusting the Play of the Steering Head Bearing
45
Greasing the Steering Head Bearing
45
Nm Loctite (18.4 Lbf Ft)
45
Preparatory Work Raise the Motorcycle with the Lift Stand
45
Removing the Start Number Plate
46
Installing the Start Number Plate
46
Removing the Front Fender
46
Main Work Remove Screws
46
Main Work
46
Guideline
46
Installing the Front Fender
47
Removing the Shock Absorber
47
Remaining Screws, Chassis M6
47
Guideline
47
Installing the Shock Absorber
48
Removing the Seat
49
Mounting the Seat
49
Removing the Air Filter Box Lid
49
Installing the Air Filter Box Lid
49
Removing the Air Filter
50
Installing the Air Filter
50
Cleaning the Air Filter and Air Filter Box
51
Securing the Air Filter Box Lid
51
Sealing the Air Filter Box
51
Removing the Main Silencer
52
Installing the Main Silencer
52
Changing the Glass Fiber Yarn Filling of the Main Silencer
52
Removing the Fuel Tank
53
Installing the Fuel Tank
55
Checking for Chain Dirt Accumulation
56
Cleaning the Chain
56
Checking the Chain Tension
56
Adjusting the Chain Tension
57
Checking the Chain, Rear Sprocket, Engine Sprocket, and Chain Guide
58
Checking the Frame
59
Checking the Swingarm
60
Checking the Throttle Cable Routing
60
Checking the Rubber Grip
60
Additionally Securing the Rubber Grip
61
Adjusting the Basic Position of the Clutch Lever
61
Checking/Correcting the Fluid Level of the Hydraulic Clutch
61
Changing the Hydraulic Clutch Fluid
61
12 Brake System
63
Checking the Free Travel of the Hand Brake Lever
63
Adjusting the Basic Position of the Hand Brake Lever
63
Checking the Brake Discs
63
Checking the Brake Fluid Level of the Front Brake
64
Adding Front Brake Fluid
64
Checking the Front Brake Linings
65
Changing the Front Brake Linings
65
Checking the Free Travel of Foot Brake Lever
67
Adjusting the Basic Position of the Foot Brake Lever
67
Checking the Rear Brake Fluid Level
68
Adding Rear Brake Fluid
68
Checking the Rear Brake Linings
69
Changing the Rear Brake Linings
69
13 Wheels, Tires
71
Removing the Front Wheel
71
Installing the Front Wheel
71
Removing the Rear Wheel
72
Installing the Rear Wheel
73
Checking the Tire Condition
74
Checking the Tire Air Pressure
74
Checking the Spoke Tension
74
14 Electrical System
76
Removing the Battery
76
Installing the Battery
76
Charging the Battery
77
Changing the Main Fuse
78
15 Cooling System
79
Checking the Antifreeze and Coolant Level
79
Checking the Coolant Level
79
Draining the Coolant
80
Refilling Coolant
81
16 Tuning the Engine
82
Checking the Play in the Throttle Cable
82
Adjusting the Play in the Throttle Cable
82
Adjusting the Idle Speed
83
Checking the Basic Position of the Shift Lever
83
Adjusting the Basic Position of the Shift Lever
83
17 Service Work on the Engine
84
Changing the Fuel Screen
84
Checking the Engine Oil Level
84
Changing the Engine Oil and Oil Filter, Cleaning the Oil Screens
85
Adding Engine Oil
87
18 Cleaning, Care
88
Cleaning the Motorcycle
88
19 Storage
89
Preparing for Use after Storage
89
20 Troubleshooting
90
21 Blink Code
92
22 Technical Data
93
Engine
93
Engine Tightening Torques
93
Capacities
95
Engine Oil
95
Coolant
95
Fuel
95
Chassis
95
Electrical System
96
Tires
96
Fork
96
Sx-F Eu
96
Sx-F Usa
97
SX-F Factory Edition
97
XC-F
97
Shock Absorber
98
Sx-F Eu
98
Sx-F Usa
98
SX-F Factory Edition
99
XC-F
99
Chassis Tightening Torques
100
23 Substances
102
24 Auxiliary Substances
104
25 Standards
106
Index
107
Advertisement
KTM 450 XC-F Owner's Manual (107 pages)
2013 Year
Brand:
KTM
| Category:
Motorcycle
| Size: 3 MB
Table of Contents
Table of Contents
4
1 Means of Representation
6
Symbols Used
6
Formats Used
6
2 Safety Advice
7
Use Definition - Intended Use
7
Degrees of Risk and Symbols
7
Tampering Warning
7
Safe Operation
7
Protective Clothing
8
Work Rules
8
Environment
8
Owner's Manual
8
3 Important Notes
9
Guarantee, Warranty
9
Operating and Auxiliary Substances
9
Spare Parts, Accessories
9
Service
9
Figures
9
Customer Service
9
4 View of Vehicle
10
View of Vehicle, Front Left (Example)
10
View of Vehicle, Rear Right (Example)
11
5 Serial Numbers
12
Chassis Number
12
Type Label
12
Engine Number
12
Fork Part Number
12
Shock Absorber Part Number
12
6 Controls
13
Clutch Lever
13
Hand Brake Lever
13
Throttle Grip
13
Kill Switch
13
Electric Starter Button
13
Map-Select Switch for the Basic Setting (SX-F Factory Edition)
14
Map-Select Switch for Vehicle Operation (SX-F Factory Edition)
14
Overview of Indicator Lamps
14
Opening the Filler Cap
14
Closing the Filler Cap
15
Factory Start (SX-F Factory Edition)
16
Cold Start Button
16
Idle Speed Adjusting Screw
17
Shift Lever
17
Foot Brake Lever
18
Side Stand (XC-F)
18
Plug-In Stand (All SX-F Models)
18
Service Hour Counter (SX-F Factory Edition)
18
7 Preparing for Use
19
Advice on First Use
19
Running in the Engine
20
Preparing the Vehicle for Difficult Riding Conditions
20
Preparing for Rides on Dry Sand
21
Preparing for Rides on Wet Sand
21
Preparing for Rides on Wet and Muddy Surfaces
22
Preparing for Rides at High Temperature and Slow Speed
22
Preparing for Rides at Low Temperatures or in Snow
22
8 Riding Instructions
23
Checks and Maintenance Work When Preparing for Use
23
Starting
23
Starting off
24
Shifting, Riding
24
Applying the Brakes
24
Stopping, Parking
24
Transport
25
Refueling
25
Service Schedule
27
Service Work (as Additional Order)
28
10 Tuning the Chassis
29
Checking the Basic Chassis Setting with the Rider's Weight
29
Compression Damping of the Shock Absorber
29
Adjusting the Low-Speed Compression Damping of the Shock Absorber
29
Adjusting the High-Speed Compression Damping of the Shock Absorber
30
Adjusting the Rebound Damping of the Shock Absorber
31
Measuring Rear Wheel Sag Unloaded
31
Checking the Static Sag of the Shock Absorber
32
Checking the Riding Sag of the Shock Absorber
32
Adjusting the Spring Preload of the Shock Absorber
32
Adjusting the Riding Sag
33
Checking the Basic Setting of the Fork
34
Adjusting the Compression Damping of the Fork
34
Adjusting the Rebound Damping of the Fork
35
Handlebar Position
35
Adjusting the Handlebar Position
35
Activating the Factory Start (SX-F Factory Edition)
36
11 Service Work on the Chassis
37
Raising the Motorcycle with the Lift Stand
37
Removing the Motorcycle from the Lift Stand
37
Bleeding the Fork Legs
38
Cleaning the Dust Boots of the Fork Legs
38
Loosening the Fork Protection
38
Positioning the Fork Protection
39
Removing the Fork Legs
39
Installing the Fork Legs
39
11 Service Work on the Chassis
40
Installing the Fork Protector
40
Removing the Fork Protector
40
Removing the Lower Triple Clamp
40
Installing the Lower Triple Clamp
41
Position the Brake Caliper. Mount and Tighten Screws
42
Screw, Front Brake Caliper M8
42
Adjusting the Play of the Steering Head Bearing
43
Checking the Steering Head Bearing Play
43
Main Work
43
Guideline
43
Nm Loctite
43
Preparatory Work
43
Raise the Motorcycle with the Lift Stand
43
Greasing the Steering Head Bearing
44
Installing the Start Number Plate
44
Nm (7.4 Lbf Ft)
44
Removing the Front Fender
44
Remaining Screws, Chassis M6
44
Removing the Start Number Plate
44
Installing the Front Fender
45
Removing the Shock Absorber
45
Installing the Shock Absorber
46
Mounting the Seat
46
Guideline Remaining Screws, Chassis
46
Removing the Seat
46
Installing the Air Filter Box Lid
47
Removing the Air Filter
47
Removing the Air Filter Box Lid
47
Cleaning the Air Filter and Air Filter Box
48
Installing the Air Filter
48
Removing the Main Silencer
49
Sealing the Air Filter Box
49
Securing the Air Filter Box Lid
49
Changing the Glass Fiber Yarn Filling of the Main Silencer
50
Remaining Screws, Chassis M6
50
Installing the Main Silencer
50
Nm (7.4 Lbf Ft)
50
Finishing Work
51
Removing the Fuel Tank
51
Installing the Fuel Tank
52
Checking for Chain Dirt Accumulation
53
Cleaning the Chain
53
Adjusting the Chain Tension
54
Checking the Chain Tension
54
Checking the Chain, Rear Sprocket, Engine Sprocket and Chain Guide
55
Adjusting the Chain Guide
57
Checking the Frame
57
Checking the Swingarm
57
Checking the Throttle Cable Routing
57
Additionally Securing the Rubber Grip
58
Adjusting the Basic Position of the Clutch Lever
58
Checking the Rubber Grip
58
Checking/Correcting the Fluid Level of the Hydraulic Clutch
58
Changing the Hydraulic Clutch Fluid
59
12 Brake System
60
Checking the Free Travel of the Hand Brake Lever
60
Adjusting the Basic Position of the Hand Brake Lever
60
Checking the Brake Discs
60
Checking the Front Brake Fluid Level
61
Adding Front Brake Fluid
61
Checking the Front Brake Linings
62
Changing the Front Brake Linings
62
Checking the Free Travel of Foot Brake Lever
64
Adjusting the Basic Position of the Foot Brake Lever
64
Checking the Rear Brake Fluid Level
65
Adding Rear Brake Fluid
65
Checking the Rear Brake Linings
66
Changing the Rear Brake Linings
66
13 Wheels, Tires
68
Removing the Front Wheel
68
Installing the Front Wheel
68
Removing the Rear Wheel
69
Installing the Rear Wheel
70
Checking the Tire Condition
70
Checking the Tire Air Pressure
71
Checking the Spoke Tension
71
14 Electrical System
73
Removing the Battery
73
Installing the Battery
73
Charging the Battery
74
Changing the Main Fuse
75
Cooling System
76
Checking the Antifreeze and Coolant Level
76
Checking the Coolant Level
76
Draining the Coolant
77
Refilling Coolant
78
Tuning the Engine
79
Checking the Play in the Throttle Cable
79
Adjusting the Play in the Throttle Cable
79
Adjusting the Idle Speed
80
Checking the Basic Position of the Shift Lever
80
Adjusting the Basic Position of the Shift Lever
80
17 Service Work on the Engine
81
Changing the Fuel Screen
81
Checking the Engine Oil Level
81
Changing the Engine Oil and Oil Filter, Cleaning the Oil Screens
82
Adding Engine Oil
84
18 Cleaning, Care
85
Cleaning the Motorcycle
85
19 Storage
86
Preparing for Use after Storage
87
20 Troubleshooting
88
21 Blink Code
90
22 Technical Data
91
Engine
91
Engine Tightening Torques
91
Capacities
93
Engine Oil
93
Coolant
93
Fuel
93
Chassis
93
Electrical System
94
Tires
94
Fork
94
Sx-F Eu
94
Sx-F Usa
94
XC-F
95
Shock Absorber
95
Sx-F Eu
95
Sx-F Usa
96
XC-F
96
Chassis Tightening Torques
97
23 Substances
99
24 Auxiliary Substances
101
25 Standards
103
Index
104
KTM 450 XC-F Owner's Manual (112 pages)
Brand:
KTM
| Category:
Motorcycle
| Size: 5 MB
Table of Contents
Table of Contents
4
1 Means of Representation
6
Symbols Used
6
Formats Used
6
2 Safety Advice
7
Use Definition - Intended Use
7
Degrees of Risk and Symbols
7
Tampering Warning
7
Safe Operation
8
Protective Clothing
8
Work Rules
8
Environment
8
Owner's Manual
8
3 Important Notes
9
Guarantee, Warranty
9
Operating and Auxiliary Substances
9
Spare Parts, Accessories
9
Service
9
Figures
9
Customer Service
9
4 View of Vehicle
10
View of Vehicle, Front Left (Example)
10
View of Vehicle, Rear Right (Example)
11
5 Serial Numbers
12
Chassis Number
12
Type Label
12
Engine Number
12
Fork Part Number
12
Shock Absorber Part Number
12
6 Controls
13
Clutch Lever
13
Hand Brake Lever
13
Throttle Grip
13
Kill Switch
13
Electric Starter Button
13
Map-Select Switch for the Basic Setting (All SX-F Models)
14
Map-Select Switch for Vehicle Operation (All SX-F Models)
14
Launch Control
14
Overview of Indicator Lamps
14
Opening the Filler Cap
15
Closing the Filler Cap
15
Cold Start Button
16
Idle Speed Adjusting Screw
16
Shift Lever
16
Foot Brake Lever
17
Plug-In Stand (All SX-F Models)
17
Side Stand (XC-F US)
17
7 Preparing for Use
18
Advice on First Use
18
Running in the Engine
19
Starting Power of Lithium-Ion Batteries at Low Temperatures
19
Preparing the Vehicle for Difficult Riding Conditions
19
Preparing for Rides on Dry Sand
20
Preparing for Rides on Wet Sand
20
Preparing for Rides on Wet and Muddy Surfaces
21
Preparing for Rides at High Temperature and Slow Speed
21
Preparing for Rides at Low Temperatures or in Snow
21
8 Riding Instructions
22
Checks and Maintenance Work When Preparing for Use
22
Starting
22
Activating Launch Control
23
Starting off
23
Shifting, Riding
23
Applying the Brakes
24
Stopping, Parking
24
Transport
25
Refueling
25
9 Service Schedule
26
Additional Information
26
Required Work
26
Recommended Work
27
10 Tuning the Chassis
28
Checking the Basic Chassis Setting with the Rider's Weight
28
Air Suspension AER 48 (SX-F EU)
28
Compression Damping of the Shock Absorber
29
Adjusting the Low-Speed Compression Damping of the Shock Absorber
29
Adjusting the High-Speed Compression Damping of the Shock Absorber
29
Adjusting the Rebound Damping of the Shock Absorber
30
Measuring Rear Wheel Sag Unloaded
31
Checking the Static Sag of the Shock Absorber
31
Checking the Riding Sag of the Shock Absorber
32
Adjusting the Spring Preload of the Shock Absorber
32
Adjusting the Riding Sag
33
Checking the Basic Setting of the Fork
33
Adjusting the Fork Air Pressure (SX-F EU)
34
Adjusting the Compression Damping of the Fork
34
Adjusting the Rebound Damping of the Fork
35
Handlebar Position
36
Adjusting the Handlebar Position
36
11 Service Work on the Chassis
38
Raising the Motorcycle with a Lift Stand
38
Removing the Motorcycle from the Lift Stand
38
Bleeding the Fork Legs
38
Cleaning the Dust Boots of the Fork Legs
39
Removing the Fork Protector
39
Installing the Fork Protector
40
Removing the Fork Legs
40
Installing the Fork Legs
40
Removing the Lower Triple Clamp
41
Installing the Lower Triple Clamp
42
Checking the Steering Head Bearing Play
43
Adjusting the Play of the Steering Head Bearing
44
Greasing the Steering Head Bearing
44
Removing the Start Number Plate
45
Installing the Start Number Plate
45
Removing the Front Fender
45
Installing the Front Fender
46
Removing the Shock Absorber
46
Installing the Shock Absorber
47
Removing the Seat
48
Mounting the Seat
49
Removing the Air Filter Box Lid
49
Installing the Air Filter Box Lid
50
Removing the Air Filter
50
Cleaning the Air Filter and Air Filter Box
50
Installing the Air Filter
51
Securing the Air Filter Box Lid
51
Sealing the Air Filter Box
52
Removing the Main Silencer
52
Installing the Main Silencer
52
Changing the Glass Fiber Yarn Filling of the Main Silencer
52
Removing the Fuel Tank
53
Installing the Fuel Tank
54
Checking for Chain Dirt Accumulation
55
Cleaning the Chain
55
Checking the Chain Tension
56
Adjusting the Chain Tension
56
Checking the Chain, Rear Sprocket, Engine Sprocket, and Chain Guide
57
Checking the Frame
59
Checking the Swingarm
59
Checking the Throttle Cable Routing
59
Checking the Rubber Grip
60
Adjusting the Basic Position of the Clutch Lever
60
Checking/Correcting the Fluid Level of the Hydraulic Clutch
60
Changing the Hydraulic Clutch Fluid
61
12 Brake System
62
Checking the Free Travel of the Hand Brake Lever
62
Adjusting the Basic Position of the Hand Brake Lever
62
Checking the Brake Discs
62
Checking the Brake Fluid Level of the Front Brake
63
Adding Front Brake Fluid
63
Checking the Front Brake Linings
64
Changing the Front Brake Linings
64
Checking the Free Travel of Foot Brake Lever
66
Adjusting the Basic Position of the Foot Brake Lever
66
Checking the Rear Brake Fluid Level
67
Adding Rear Brake Fluid
67
Checking the Rear Brake Linings
68
Changing the Rear Brake Linings
69
13 Wheels, Tires
71
Removing the Front Wheel
71
Installing the Front Wheel
71
Removing the Rear Wheel
72
Installing the Rear Wheel
73
Checking the Tire Condition
73
Checking the Tire Air Pressure
74
Checking the Spoke Tension
74
14 Electrical System
76
Removing the Battery
76
Installing the Battery
76
Recharging the Battery
77
Changing the Main Fuse
79
15 Cooling System
80
Checking the Antifreeze and Coolant Level
80
Checking the Coolant Level
80
Draining the Coolant
81
Refilling Coolant
81
16 Tuning the Engine
83
Checking the Play in the Throttle Cable
83
Adjusting the Play in the Throttle Cable
83
Setting the Characteristic Map of the Throttle Response
84
Adjusting the Idle Speed
84
Teaching the Throttle Valve Position
85
Checking the Basic Position of the Shift Lever
85
Adjusting the Basic Position of the Shift Lever
86
17 Service Work on the Engine
87
Changing the Fuel Screen
87
Checking the Engine Oil Level
87
Changing the Engine Oil and Oil Filter, Cleaning the Oil Screens
88
Adding Engine Oil
90
18 Cleaning, Care
91
Cleaning the Motorcycle
91
19 Storage
92
Preparing for Use after Storage
92
20 Troubleshooting
93
21 Blink Code
95
22 Technical Data
96
Engine
96
Engine Tightening Torques
96
Capacities
98
Engine Oil
98
Coolant
98
Fuel
98
Chassis
98
Electrical System
99
Tires
99
Fork
99
Sx-F Eu
99
Sx-F Us
99
XC-F Us
100
Shock Absorber
100
Sx-F Eu
100
Sx-F Us
101
XC-F Us
101
Chassis Tightening Torques
102
23 Substances
104
24 Auxiliary Substances
106
25 Standards
107
26 List of Abbreviations
108
Index
109
Advertisement
KTM 450 XC-F Owner's Manual (90 pages)
Motorcycle
Brand:
KTM
| Category:
Motorcycle
| Size: 23 MB
Table of Contents
Table of Contents
4
Means of Representation
6
Important Notes
7
Location of Serial Numbers
9
Chassis Number
9
Type Label
9
Engine Number
9
Fork Part Number
9
Shock Absorber Part Number
9
Operating Elements
10
Clutch Lever
10
Hot Start Lever
10
Hand Brake Lever
10
Short Circuit Button
10
Electric Starter Button
10
Fuel Tap (450 SX-F, 505 SX-F)
11
Fuel Tap (450 XC-F, 505 XC-F)
11
Opening Filler Cap
11
Closing Filler Cap
12
Choke
12
Shift Lever
12
Foot Brake Pedal
13
Plug-In Stand (450 SX-F, 505 SX-F)
13
Side Stand (450 XC-F, 505 XC-F)
13
Tips and Hints on Putting into Operation
14
Advice on First Use
14
Running in the Engine
15
Riding Instructions
16
Checks before Putting into Operation
16
Starting
16
Starting up
17
Shifting, Riding
17
Braking
17
Stopping, Parking
18
Refueling
18
Greasing and Service Table
19
Important Maintenance Work to be Carried out by an Authorized KTM Workshop
19
Important Maintenance Work to be Carried out by an Authorized KTM Workshop. (as Additional Order)
20
Important Checks and Maintenance Work to be Carried out by the Rider
20
Maintenance Work on Chassis and Engine
22
Jacking up the Motorcycle
22
Removing the Motorcycle from the Work Stand
22
Checking the Basic Chassis Setting with the Rider's Weight
22
Compression Damping of Shock Absorber
22
Adjusting High-Speed Compression Damping of the Shock Absorber
22
Adjusting the Low-Speed Compression Damping of the Shock Absorber
23
Adjusting Rebound Damping of the Shock Absorber
23
Measuring Rear Wheel Sag Unloaded
24
Checking Static Sag of the Shock Absorber
24
Check the Riding Sag of the Shock Absorber
25
Adjusting Spring Preload of the Shock Absorber
25
Adjusting Riding Sag
26
Removing the Shock Absorber
26
Installing Shock Absorber
26
Checking Basic Setting of Fork
27
Adjusting Compression Damping of Fork
27
Adjusting Rebound Damping of Fork
27
Bleeding Fork Legs
28
Cleaning Dust Boots of Fork Legs
28
Loosening the Fork Protection
28
Positioning the Fork Protection
29
Checking Play of Steering Head Bearing
29
Adjusting Play of Steering Head Bearing
29
Fork Offset
30
Setting the Fork Offset
30
Removing the Fork Legs
30
Installing the Fork Legs
31
Removing the Fork Protector
31
Installing the Fork Protector
31
Removing the Lower Triple Clamp
32
Installing the Lower Triple Clamp
32
Greasing the Steering Head Bearing
33
Dismounting the Front Fender
33
Installing the Front Fender
33
Dismount the Start Number Plate
33
Fitting the Start Number Plate
34
Handlebar Position
34
Adjusting Handlebar Position
34
Checking Gas Bowden Cable Route
34
Checking Play in Gas Bowden Cable
35
Adjusting Play in Gas Bowden Cable
35
Checking Chain Dirt
35
Cleaning the Chain
35
Checking the Chain Tension
36
Checking the Chain Tension - Fitting Rear Wheel
36
Checking Rear Sprocket / Engine Sprocket for Wear
37
Checking Chain Wear
37
Adjusting Chain Tension
37
Adjusting Chain Tension - after Checking
38
Adjusting Chain Tension - Fitting Rear Wheel
39
Adjusting Chain Guide (450 SX-F, 505 SX-F)
39
Adjusting Chain Guide (450 XC-F, 505 XC-F)
40
Brake Fluid Reservoir
40
Brake Calipers
40
Checking Brake Discs
40
Checking Free Play of Hand Brake Lever
41
Adjusting Basic Position of Handbrake Lever
41
Checking Front Brake Fluid Level
41
Topping up the Front Brake Fluid
42
Checking the Front Brake Linings
42
Removing Front Brake Linings
43
Mounting Front Brake Linings
43
Changing the Fron Brake Linings
44
Checking Free Play of Foot Brake Lever
44
Adjusting Basic Position of Footbrake Lever
45
Checking Rear Brake Fluid Level
45
Topping up Brake Fluid of Front Brake
46
Checking Rear Brake Linings
46
Removing Rear Brake Linings
47
Mounting Rear Brake Linings
47
Changing Rear Brake Linings
48
Removing Front Wheel
48
Fitting Front Wheel
49
Removing Rear Wheel
50
Fitting Rear Wheel
50
Tire Condition Checking
51
Checking Tire Air Pressure
51
Removing the Battery
52
Installing the Battery
52
Recharging the Battery
53
Removing a Fuse
54
Replacing the Fuse
54
Ignition Curve
54
Ignition Curve Plug Connection
54
Changing Ignition Curve
55
Removing the Seat
55
Mounting the Seat
55
Dismounting the Fuel Tank
55
Installing the Fuel Tank
56
Cooling System
57
Checking Antifreeze and Coolant Level
57
Checking the Coolant Level
58
Draining Coolant
58
Refilling Coolant
59
Removing Main Silencer
59
Fitting the Main Silencer
59
Glass Fiber Yarn Filling of Main Silencer
59
Removing Glass Fiber Yarn Filling from the Main Silencer
60
Fitting Glass Fiber Yarn Filling in Main Silencer
60
Changing Glass Fiber Yarn Filling of Main Silencer
61
Dismounting the Air Filter Box Lid
61
Installing the Air Filter Box Lid
61
Removing the Air Filter
61
Installing the Air Filter
62
Cleaning Air Filter
62
Adjusting Basic Position of Clutch Lever
62
Checking Fluid Level of Hydraulic Clutch
62
Changing Fluid Level of Hydraulic Clutch
63
Carburetor - Idle
63
Carburetor - Adjusting Idle
64
Emptying the Carburetor Float Chamber
65
Checking Engine Oil Level
65
Changing Engine Oil and Oil Filter, Cleaning Oil Screen
66
Draining the Engine Oil
66
Cleaning the Oil Screen
66
Removing the Oil Filter
67
Mounting Oil Filter
67
Filling up with Engine Oil
68
Topping up Engine Oil
68
Checking Spoke Tension
52
Troubleshooting
69
Cleaning
71
Cleaning Motorcycle
71
Storage
72
Technical Data - Engine
73
Capacity- Engine Oil
74
Capacity- Cooling Liquid
74
Technical Data - Engine Tightening Torques
75
Technical Data - Carburetor
77
Technical Data - Chassis
78
Capacity - Fuel
78
Technical Data - Fork
79
Capacity - Fork Oil
79
Technical Data - Shock Absorber
80
Technical Data - Chassis Tightening Torques
81
Wiring Diagram
82
Substances
84
Auxiliary Substances
86
Index
88
KTM 450 XC-F Setup Instructions (32 pages)
Brand:
KTM
| Category:
Motorcycle
| Size: 3 MB
KTM 450 XC-F Setup Instructions (32 pages)
Brand:
KTM
| Category:
Motorcycle
| Size: 3 MB
Advertisement
Related Products
KTM 450 XC-F USA 2014
KTM 450 XC-F 2017
KTM 450 XC-F US 2017
KTM 450 XC-F 2019
KTM 450 XC-F 2016
KTM 450 XC-F US 2016
KTM 450 XC-F 2021
KTM 450 XC-F US 2021
KTM 450 XC-F 2018
KTM 450 XC-F 2020
KTM Categories
Motorcycle
Motorcycle Accessories
Engine
Offroad Vehicle
Bicycle Accessories
More KTM Manuals
Login
Sign In
OR
Sign in with Facebook
Sign in with Google
Upload manual
Upload from disk
Upload from URL