Sign In
Upload
Manuals
Brands
Advantech Manuals
Gateway
WISE-6610 Series
Advantech WISE-6610 Series Manuals
Manuals and User Guides for Advantech WISE-6610 Series. We have
4
Advantech WISE-6610 Series manuals available for free PDF download: User Manual
Advantech WISE-6610 Series User Manual (100 pages)
Indsutrial LoRaWAN Gateway
Brand:
Advantech
| Category:
Gateway
| Size: 6 MB
Table of Contents
Table of Contents
8
Product Overview
12
Chapter 1 Product Overview
12
Specifications
13
Hardware Views
14
Front View
14
Rear View
14
Top View
14
Figure 1.1 Front View
14
Figure 1.2 Rear View
14
Figure 1.3 Top View
14
System LED Panel
15
Dimensions
15
Figure 1.4 System LED Panel
15
Gateway Installation
16
Chapter 2 Gateway Installation
16
Warning
17
Installation Guideline
18
Installing the Gateway
19
Installing Antenna
19
Figure 2.1 Installing the Antenna
19
Figure 2.2 Positioning the Antenna
19
Wall Mounting
20
Figure 2.3 Wall Mount Installation
20
DIN Rain Mounting
21
Figure 2.4 Wall Mount Installation
21
Figure 2.5 Installing the DIN-Rail Mounting Kit
21
Figure 2.6 Correctly Installed DIN Rail Kit
22
Figure 2.7 Removing the DIN-Rail
22
Connecting the Gateway to Ethernet Port
23
RJ45 Ethernet Cable Wiring
23
Power Supply Installation
23
Figure 2.8 Ethernet Plug & Connector Pin Position
23
Figure 2.9 Installing the Power Cable
23
Managing Gateway
24
Chapter 3 Managing Gateway
24
Access Interface
25
Figure 3.1 Login Screen
25
Recommended Practices
26
Changing Default Password
26
Figure 3.2 Changing a Default Password
26
Status
27
General
27
Figure 3.3 Status > General
27
Network
28
Dhcp
28
Figure 3.4 Status > Network
28
Figure 3.5 Status > DHCP
28
Ipsec
29
Dyndns
29
Figure 3.6 Status > Ipsec
29
Figure 3.7 Status > Dyndns
29
System Log
30
Figure 3.8 Status > System Log
30
Figure 3.9 Example Program Syslogd Start with the Parameter -R
30
Configuration
31
Lan
31
Figure 3.10 Configuration > LAN
32
Figure 3.11 Ipv6 Address with Prefix Example
34
Figure 3.12 Ipv4 Dynamic DHCP Network Topology
35
Figure 3.13 LAN Configuration for a Dynamic Network Typology
36
Figure 3.14 Ipv4 Dynamic and Static DHCP Network Topology
36
Figure 3.15 LAN Configuration for an Ipv4 Dynamic and Static DHCP Network Topology
37
Figure 3.16 Ipv6 Dynamic DHCP Server Network Topology
37
Figure 3.17 LAN Configuration for an Ipv6 Dynamic DHCP Server Network Topology
38
Nat
39
Figure 3.18 Configuration > NAT
39
Figure 3.19 Topology for NAT Configuration Example 1
41
Figure 3.20 NAT Configuration for Example 1
41
Figure 3.21 Topology for NAT Configuration Example 2
42
Figure 3.22 NAT Configuration for Example 2
42
Openvpn
43
Figure 3.23 Configuration > Openvpn > 1St Tunnel
43
Figure 3.24 Topology of Openvpn Configuration Example
45
Ipsec
46
Figure 3.25 Configuration > 1St Tunnel
47
Gre
50
Figure 3.26 Topology of Configuration Example
50
Figure 3.27 Configuration > GRE > 1St Tunnel
51
L2Tp
52
Figure 3.28 Topology of GRE Tunnel Configuration Example
52
Figure 3.29 Configuration > L2TP
53
Figure 3.30 Topology of L2TP Tunnel Configuration Example
53
Pptp
54
Figure 3.31 Configuration > PPTP
54
Services
55
Figure 3.32 Topology of PPTP Tunnel Configuration Example
55
Figure 3.33 Configuration > Services > Dyndns
56
Figure 3.34 Dyndns Configuration Example
56
Figure 3.35 Configuration > Services > HTTP
57
Figure 3.36 Configuration > Services > NTP
57
Figure 3.37 Example of NTP Configuration
58
Figure 3.38 Configuration > Services > SNMP
58
Figure 3.39 OID Basic Structure
60
Figure 3.40 SNMP Configuration Example
61
Figure 3.41 MIB Browser Example
61
Figure 3.42 Configuration > Services > SMTP
62
Figure 3.43 SMTP Client Configuration Example
62
Scripts
63
Figure 3.44 Configuration > Services > SSH
63
Figure 3.45 Example of a Startup Script
64
Automatic Update
65
Figure 3.46 Example of Ipv6 Up/Down Script
65
Figure 3.47 Configuration > Automatic Update
66
Customization
67
Adding a Module
67
Figure 3.48 Example of Automatic Update 1
67
Figure 3.49 Example of Automatic Update 2
67
Figure 3.50 User Modules
68
Figure 3.51 User Modules > Lorawan Gateway > MQTT and Lorawan
69
Figure 3.52 User Modules > Lorawan Gateway > Lorawan Status
71
Figure 3.53 User Modules > Lorawan Gateway > Lorawan Server
72
Figure 3.54 User Modules > Lorawan Gateway > Lorawan Server (Https)
73
Figure 3.55 User Modules > Lorawan Gateway > Advantech Application
73
Administration
74
Users
74
Figure 3.56 Administration > Users
74
Change Profile
75
Change Password
75
Figure 3.57 Administration > Change Profile
75
Figure 3.58 Administration > Change Password
75
Set Real Time Clock
76
Backup Configuration
76
Restore Configuration
76
Figure 3.59 Administration > Set Real Time Clock
76
Figure 3.60 Administration > Restore Configuration
76
Update Firmware
77
Figure 3.61 Administration > Update Firmware
77
Reboot
78
Figure 3.62 Administration > Reboot
78
Chapter 4 Configuration in Typical Situations
79
Enabling the Lorawan and Network Server
80
Figure 4.1 Customization > User Modules
80
Figure 4.2 Lorawan Gateway > MQTT and Lorawan
80
Figure 4.3 Lorawan Gateway > MQTT and Lorawan
81
Figure 4.4 Lorawan Gateway > Lorawan Server
82
Figure 4.5 Lorawan Server > Infrastructure > Gateways
82
Figure 4.6 Lorawan Server > Infrastructure > Gateways > Create
83
Figure 4.7 Lorawan Server > Infrastructure > Networks
83
Figure 4.8 Lorawan Server > Infrastructure > Network > Create > General
84
Figure 4.9 Lorawan Server > Infrastructure > Network > Create > ADR
85
Figure 4.10 Lorawan Server > Infrastructure > Network > Create > Channel
86
Figure 4.11 Lorawan Server > Backends > Handlers
87
Figure 4.12 Lorawan Server > Backends > Handlers > Create
88
Figure 4.13 Parse Uplink Sample
89
Figure 4.14 Lorawan Server > Backends > Connectors
89
Figure 4.15 Lorawan Server > Backends > Connectors > Create
90
Figure 4.16 Lorawan Server > Devices > Profiles
91
Figure 4.17 Lorawan Server > Devices > Profiles > Create > General
91
Figure 4.18 Lorawan Server > Devices > Profiles > Create > ADR
92
Figure 4.19 Lorawan Server > Devices > Activated (Nodes)
93
Figure 4.20 Lorawan Server > Devices > Activated (Nodes) > Create
93
Figure 4.21 Lorawan Server > Devices > Commissioned
94
Figure 4.22 Lorawan Server > Devices > Commissioned > Create
94
Figure 4.23 Lorawan Server > Received Frames
95
Figure 4.24 MQTT Subscription
95
Figure 4.25 MQTT Subscription
96
Figure 4.26 Lorawan Server > Infrastructure > Events
96
Changing the Raw Lora Data Format
97
Figure 4.27 User Modules > Lorawan Gateway > Advantech Application
97
Figure 4.28 Data and Status
97
Figure 4.29 User Modules > Lorawan Gateway > MQTT and Lorawan
98
Figure 4.30 Lorawan Server > Activated (Nodes)
98
Figure 4.31 Lorawan Server > Activated (Nodes) > Edit > General
98
Node-RED Setup
99
Figure 4.32 Applying Data to Other Software Applications
99
Figure 4.33 Customization > User Modules
99
Figure 4.34 Node-RED
99
Figure 4.35 Node-RED
99
Advertisement
Advantech WISE-6610 Series User Manual (100 pages)
Indsutrial LoRaWAN Gateway
Brand:
Advantech
| Category:
Gateway
| Size: 4 MB
Table of Contents
Table of Contents
8
Product Overview
12
Specifications
13
Figure 1.1 Front View
14
Figure 1.2 Rear View
14
Figure 1.3 Top View
14
Front View
14
Hardware Views
14
Rear View
14
Top View
14
Dimensions
15
Figure 1.4 System LED Panel
15
System LED Panel
15
Gateway Installation
16
Warning
17
Installation Guideline
18
Figure 2.1 Installing the Antenna
19
Figure 2.2 Positioning the Antenna
19
Installing Antenna
19
Installing the Gateway
19
Figure 2.3 Wall Mount Installation
20
Wall Mounting
20
DIN Rain Mounting
21
Figure 2.4 Wall Mount Installation
21
Figure 2.5 Installing the DIN-Rail Mounting Kit
21
Figure 2.6 Correctly Installed DIN Rail Kit
22
Figure 2.7 Removing the DIN-Rail
22
Connecting the Gateway to Ethernet Port
23
Figure 2.8 Ethernet Plug & Connector Pin Position
23
Figure 2.9 Installing the Power Cable
23
Power Supply Installation
23
RJ45 Ethernet Cable Wiring
23
Managing Gateway
24
Access Interface
25
Figure 3.1 Login Screen
25
Changing Default Password
26
Figure 3.2 Changing a Default Password
26
Recommended Practices
26
Figure 3.3 Status > General
27
General
27
Status
27
Dhcp
28
Figure 3.4 Status > Network
28
Figure 3.5 Status > DHCP
28
Network
28
Dyndns
29
Figure 3.6 Status > Ipsec
29
Figure 3.7 Status > Dyndns
29
Ipsec
29
Figure 3.8 Status > System Log
30
Figure 3.9 Example Program Syslogd Start with the Parameter -R
30
System Log
30
Configuration
31
Lan
31
Figure 3.10 Configuration > LAN
32
Figure 3.11 Ipv6 Address with Prefix Example
34
Figure 3.12 Ipv4 Dynamic DHCP Network Topology
35
Figure 3.13 LAN Configuration for a Dynamic Network Typology
36
Figure 3.14 Ipv4 Dynamic and Static DHCP Network Topology
36
Figure 3.15 LAN Configuration for an Ipv4 Dynamic and Static DHCP Network Topology
37
Figure 3.16 Ipv6 Dynamic DHCP Server Network Topology
37
Figure 3.17 LAN Configuration for an Ipv6 Dynamic DHCP Server Network Topology
38
Figure 3.18 Configuration > NAT
39
Nat
39
Figure 3.19 Topology for NAT Configuration Example 1
41
Figure 3.20 NAT Configuration for Example 1
41
Figure 3.21 Topology for NAT Configuration Example 2
42
Figure 3.22 NAT Configuration for Example 2
42
Figure 3.23 Configuration > Openvpn > 1St Tunnel
43
Openvpn
43
Figure 3.24 Topology of Openvpn Configuration Example
45
Ipsec
46
Figure 3.25 Configuration > 1St Tunnel
47
Figure 3.26 Topology of Configuration Example
50
Gre
50
Figure 3.27 Configuration > GRE > 1St Tunnel
51
Figure 3.28 Topology of GRE Tunnel Configuration Example
52
L2Tp
52
Figure 3.29 Configuration > L2TP
53
Figure 3.30 Topology of L2TP Tunnel Configuration Example
53
Figure 3.31 Configuration > PPTP
54
Pptp
54
Figure 3.32 Topology of PPTP Tunnel Configuration Example
55
Services
55
Figure 3.33 Configuration > Services > Dyndns
56
Figure 3.34 Dyndns Configuration Example
56
Figure 3.35 Configuration > Services > HTTP
57
Figure 3.36 Configuration > Services > NTP
57
Figure 3.37 Example of NTP Configuration
58
Figure 3.38 Configuration > Services > SNMP
58
Figure 3.39 OID Basic Structure
60
Figure 3.40 SNMP Configuration Example
61
Figure 3.41 MIB Browser Example
61
Figure 3.42 Configuration > Services > SMTP
62
Figure 3.43 SMTP Client Configuration Example
62
Figure 3.44 Configuration > Services > SSH
63
Scripts
63
Figure 3.45 Example of a Startup Script
64
Automatic Update
65
Figure 3.46 Example of Ipv6 Up/Down Script
65
Figure 3.47 Configuration > Automatic Update
66
Adding a Module
67
Customization
67
Figure 3.48 Example of Automatic Update 1
67
Figure 3.49 Example of Automatic Update 2
67
Figure 3.50 User Modules
68
Figure 3.51 User Modules > Lorawan Gateway > MQTT and Lorawan
69
Figure 3.52 User Modules > Lorawan Gateway > Lorawan Status
71
Figure 3.53 User Modules > Lorawan Gateway > Lorawan Server
72
Figure 3.54 User Modules > Lorawan Gateway > Lorawan Server (Https)
73
Figure 3.55 User Modules > Lorawan Gateway > Advantech Application
73
Administration
74
Figure 3.56 Administration > Users
74
Users
74
Change Password
75
Change Profile
75
Figure 3.57 Administration > Change Profile
75
Figure 3.58 Administration > Change Password
75
Backup Configuration
76
Figure 3.59 Administration > Set Real Time Clock
76
Figure 3.60 Administration > Restore Configuration
76
Restore Configuration
76
Set Real Time Clock
76
Figure 3.61 Administration > Update Firmware
77
Update Firmware
77
Figure 3.62 Administration > Reboot
78
Reboot
78
Chapter 4 Configuration in Typical Situations
79
Enabling the Lorawan and Network Server
80
Figure 4.1 Customization > User Modules
80
Figure 4.2 Lorawan Gateway > MQTT and Lorawan
80
Figure 4.3 Lorawan Gateway > MQTT and Lorawan
81
Figure 4.4 Lorawan Gateway > Lorawan Server
82
Figure 4.5 Lorawan Server > Infrastructure > Gateways
82
Figure 4.6 Lorawan Server > Infrastructure > Gateways > Create
83
Figure 4.7 Lorawan Server > Infrastructure > Networks
83
Figure 4.8 Lorawan Server > Infrastructure > Network > Create > General
84
Figure 4.9 Lorawan Server > Infrastructure > Network > Create > ADR
85
Figure 4.10 Lorawan Server > Infrastructure > Network > Create > Channel
86
Figure 4.11 Lorawan Server > Backends > Handlers
87
Figure 4.12 Lorawan Server > Backends > Handlers > Create
88
Figure 4.13 Parse Uplink Sample
89
Figure 4.14 Lorawan Server > Backends > Connectors
89
Figure 4.15 Lorawan Server > Backends > Connectors > Create
90
Figure 4.16 Lorawan Server > Devices > Profiles
91
Figure 4.17 Lorawan Server > Devices > Profiles > Create > General
91
Figure 4.18 Lorawan Server > Devices > Profiles > Create > ADR
92
Figure 4.19 Lorawan Server > Devices > Activated (Nodes)
93
Figure 4.20 Lorawan Server > Devices > Activated (Nodes) > Create
93
Figure 4.21 Lorawan Server > Devices > Commissioned
94
Figure 4.22 Lorawan Server > Devices > Commissioned > Create
94
Figure 4.23 Lorawan Server > Received Frames
95
Figure 4.24 MQTT Subscription
95
Figure 4.25 MQTT Subscription
96
Figure 4.26 Lorawan Server > Infrastructure > Events
96
Changing the Raw Lora Data Format
97
Figure 4.27 User Modules > Lorawan Gateway > Advantech Application
97
Figure 4.28 Data and Status
97
Figure 4.29 User Modules > Lorawan Gateway > MQTT and Lorawan
98
Figure 4.30 Lorawan Server > Activated (Nodes)
98
Figure 4.31 Lorawan Server > Activated (Nodes) > Edit > General
98
Node-RED Setup
99
Figure 4.32 Applying Data to Other Software Applications
99
Figure 4.33 Customization > User Modules
99
Figure 4.34 Node-RED
99
Figure 4.35 Node-RED
99
Advantech WISE-6610 Series User Manual (55 pages)
Industrial LoRaWAN Gateway
Brand:
Advantech
| Category:
Gateway
| Size: 3 MB
Table of Contents
Table of Contents
8
Product Overview
12
Specifications
13
Hardware Views
14
Front View
14
Rear View
14
Top View
14
Figure 1.1 Front View
14
Figure 1.2 Rear View
14
Figure 1.3 Top View
14
System LED Panel
15
Dimensions
15
Figure 1.4 System LED Panel
15
Gateway Installation
16
Warning
17
Installation Guideline
18
Installing the Gateway
19
Installing Antenna
19
Figure 2.1 Installing the Antenna
19
Figure 2.2 Positioning the Antenna
19
Wall Mounting
20
Figure 2.3 Wall Mount Installation
20
DIN Rain Mounting
21
Figure 2.4 Wall Mount Installation
21
Figure 2.5 Installing the DIN-Rail Mounting Kit
21
Figure 2.6 Correctly Installed DIN Rail Kit
22
Figure 2.7 Removing the DIN-Rail
22
Connecting the Gateway to Ethernet Port
23
RJ45 Ethernet Cable Wiring
23
Power Supply Installation
23
Figure 2.8 Ethernet Plug & Connector Pin Position
23
Figure 2.9 Installing the Power Cable
23
Managing Gateway
24
Access Interface
25
Figure 3.1 Login Screen
25
Recommended Practices
26
Changing Default Password
26
Figure 3.2 Changing a Default Password
26
Status
27
General
27
Figure 3.3 Status > General
27
Network
28
Dhcp
28
Figure 3.4 Status > Network
28
Figure 3.5 Status > DHCP
28
Ipsec
29
Dyndns
29
Figure 3.6 Status > Ipsec
29
Figure 3.7 Status > Dyndns
29
System Log
30
Figure 3.8 Status > System Log
30
Figure 3.9 Example Program Syslogd Start with the Parameter -R
30
Configuration
31
Lan
31
Figure 3.10 Configuration > LAN
32
Figure 3.11 Ipv6 Address with Prefix Example
34
Figure 3.12 Ipv4 Dynamic DHCP Network Topology
35
Figure 3.13 LAN Configuration for a Dynamic Network Typology
36
Figure 3.14 Ipv4 Dynamic and Static DHCP Network Topology
36
Figure 3.15 LAN Configuration for an Ipv4 Dynamic and Static DHCP Network Topology
37
Figure 3.16 Ipv6 Dynamic DHCP Server Network Topology
37
Figure 3.17 LAN Configuration for an Ipv6 Dynamic DHCP Server Network Topology
38
Nat
39
Figure 3.18 Configuration > NAT
39
Figure 3.19 Topology for NAT Configuration Example 1
41
Figure 3.20 NAT Configuration for Example 1
41
Figure 3.21 Topology for NAT Configuration Example 2
42
Figure 3.22 NAT Configuration for Example 2
42
Openvpn
43
Figure 3.23 Configuration > Openvpn > 1St Tunnel
43
Figure 3.24 Topology of Openvpn Configuration Example
45
Ipsec
46
Figure 3.25 Configuration > 1St Tunnel
47
Gre
50
Figure 3.26 Topology of Configuration Example
50
Figure 3.27 Configuration > GRE > 1St Tunnel
51
L2Tp
52
Figure 3.28 Topology of GRE Tunnel Configuration Example
52
Figure 3.29 Configuration > L2TP
53
Figure 3.30 Topology of L2TP Tunnel Configuration Example
53
Pptp
54
Figure 3.31 Configuration > PPTP
54
Services
55
Figure 3.32 Topology of PPTP Tunnel Configuration Example
55
Advertisement
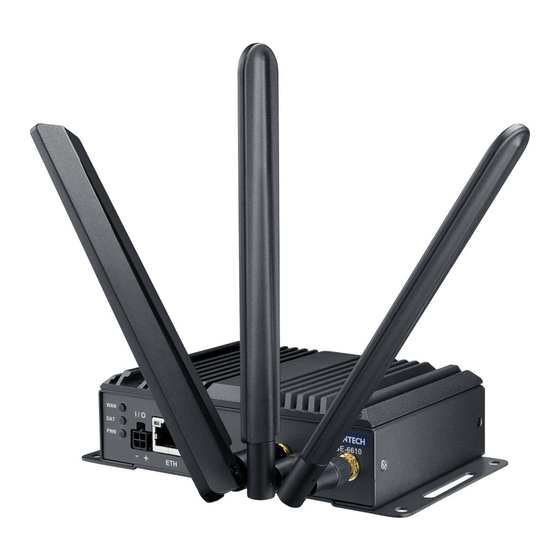
Advantech WISE-6610 Series User Manual (64 pages)
Industrial LoRaWAN Wireless I/O Module
Brand:
Advantech
| Category:
Wireless modules
| Size: 4 MB
Table of Contents
Product Warranty (2 Years)
2
Declaration of Conformity
3
Technical Support and Assistance
3
Document Feedback
4
Warnings, Cautions, and Notes
4
Packing List
5
Safety Instructions
6
Safety Precautions - Static Electricity
6
Federal Communication Commission Interference Statement
7
Industry Canada Statement
7
Table of Contents
9
Chapter 1 Product Introduction
11
Lora and Lorawan
12
WISE-4610 Feature Highlights
12
WISE Series Family
12
System Diagram
13
Battery Switch
13
LED Indicators
14
Membrane Button
15
Packing List
16
Chapter 2 Hardware Installation
17
Modular Design
18
System Dimensions
19
DIN-Rail Mounting
20
Wall Mounting
22
Pole Mounting
23
Chapter 3 Hardware Specifications
25
Lora (Model: WISE-4610P)
26
Gps
26
General
26
Power
27
I/O Specifications
27
WISE-S614/WISE-S614T I/O Module
27
WISE-S615/WISE-S615T RTD I/O Module
28
WISE-S617/WISE-S617T I/O Module
28
WISE-S672 I/O Module
29
I/O Pin Assignment
31
Pin Assignment of WISE-S600T I/O Module with Terminal Block Connectors
32
Application Wiring of WISE-S600 I/O Module with M12 Connectors
33
WISE-S614 I/O Application Wiring
33
WISE-S615 I/O Application Wiring
33
WISE-S617 I/O Application Wiring
34
WISE-S672 Application Wiring
34
Application Wiring of WISE-S600T I/O Module with Terminal Block
35
WISE-S614T I/O Application Wiring
35
WISE-S617T I/O Application Wiring
35
Power Supply Wiring
36
Block Diagram
36
Configuration Interface
36
Chapter 4 Software Functions
37
System Structure
38
Interface Design
40
Lorawan Functions
40
Positioning
41
LED Indicator Behaviors
42
Battery Charging
43
Membrane Button
45
Multiple Power Sources
46
Connection Setting on WISE-4610
47
Configure WISE-4610 by Using WISE-Studio
47
Appendix A Modbus Table with WISE-4610
57
Advertisement
Related Products
Advantech WISE-3310
Advantech WISE-3610
Advantech WISE-710-N600A
Advantech WISE-2934 Series
Advantech WISE-2934-CA
Advantech WISE-2934-EA
Advantech WISE6610N
Advantech WISE-3310-D200L1E
Advantech WISE-R311
Advantech WISE-2410-NB
Advantech Categories
Motherboard
Computer Hardware
Desktop
Network Router
Touch Panel
More Advantech Manuals
Login
Sign In
OR
Sign in with Facebook
Sign in with Google
Upload manual
Upload from disk
Upload from URL