Oce PlotWave 750 Operation Manual
Hide thumbs
Also See for PlotWave 750:
- Operation manual (401 pages) ,
- Safety manual (21 pages) ,
- User manual (148 pages)
Table of Contents
Advertisement
Quick Links
Advertisement
Table of Contents

Related Manuals for Oce PlotWave 750


Summary of Contents for Oce PlotWave 750
-
Page 1: Operation Guide
Operation guide Océ PlotWave ®... - Page 2 Copyright © 2013 Océ. All rights reserved. No part of this work may be reproduced, copied, adapted, or transmitted in any form or by any means without written permission from Océ. Océ makes no representation or warranties with respect to the contents hereof and specifically disclaims any implied warranties of merchantability or fitness for any particular purpose.
-
Page 3: Table Of Contents
Media types, material and sizes on the printer ..................30 Set media material..........................30 Set a media size indication.......................32 Turn on and off the Océ PlotWave 750 ....................33 Turn on and off the controller......................35 Turn the Océ scanner on and off......................36 Climate control on the Océ PlotWave 750.....................37... - Page 4 Contents How to edit a setting..........................65 View and check the settings........................67 Save the settings in a file........................68 Load the settings from a file........................69 Restore the factory defaults........................70 Shut down or restart the controller......................71 Configure the printer settings........................72 Change the regional settings........................72 Define the media series...........................73...
- Page 5 ....................132 Test the remote scan destination....................134 Enable scan-to-file view........................136 Chapter 4 Use the Océ PlotWave 750 to print................137 Send print jobs.............................138 What you need to know before you send your print jobs..............138 Use Océ Publisher Express to send a print job...................139...
- Page 6 The functions of Océ Double Decker® Pro..................222 The Océ Double Decker Pro module....................223 Product specifications..........................225 How to set the tray selection method....................226 Chapter 7 Maintain and troubleshoot the Océ PlotWave 750 system........227 Maintain the printer............................228 Maintenance............................228 Media..............................229 Load rolls of media..........................229 Use the optional roll loader......................232...
- Page 7 Contents How to clear a jam in the folder transport section...............263 How to clear a jam in the second fold section................264 How to clear a jam in the belt unit....................267 The reinforcement unit..........................269 Introduction to reinforcement unit maintenance................269 Remove an empty tape roll......................270 Insert a new tape roll........................272...
- Page 8 Contents...
-
Page 9: Chapter 1 Preface
Chapter 1 Preface... -
Page 10: Trademarks
Trademarks Trademarks Océ, Océ PlotWave 750, Océ Express WebTools, Océ Publisher Express, Océ Publisher Mobile, and Océ Mobile WebTools are registered trademarks of Océ. ® ® ® ® Adobe , Acrobat , Reader are registered trademarks of Adobe Systems Incorporated. -
Page 11: Notes For The Reader
Notes for the reader Notes for the reader Introduction This manual helps you to use the Océ PlotWave 750. The manual contains a description of the product and guidelines to use and operate the Océ PlotWave 750. Definition Attention Getters Parts of this manual require your special attention. -
Page 12: Safety Information
You can download the safety information via http:// global.oce.com/support/ or, if applicable, find it on the user documentation CD/DVD that is delivered together with the machine or obtain the safety information from your local Océ... -
Page 13: Online Support For Your Product
A Knowledge Base (OKB) with answers to your questions or problems is continuously being updated. To find an answer to your question or problem, please visit: http://global.oce.com/support and select your product. In the Support section, use the search field to enter your question. You will get a list of possible answers. - Page 14 Online support for your product Chapter 1 - Preface...
-
Page 15: Chapter 2 Introduction
Chapter 2 Introduction... -
Page 16: The Product Concept And Complete Workflow
The product concept and complete workflow The product concept and complete workflow Definition A complete Océ solution includes several different hardware and software products to manage your complete document workflow. The following illustration gives an overview of a complete Océ solution and the document workflow. Illustration Document Management... - Page 17 The product concept and complete workflow A scan-to-file job starts with an original (1) and ends with a file (4). • Set-up and control the complete workflow. Chapter 2 - Introduction...
-
Page 18: Overview Of The Océ Plotwave 750 System
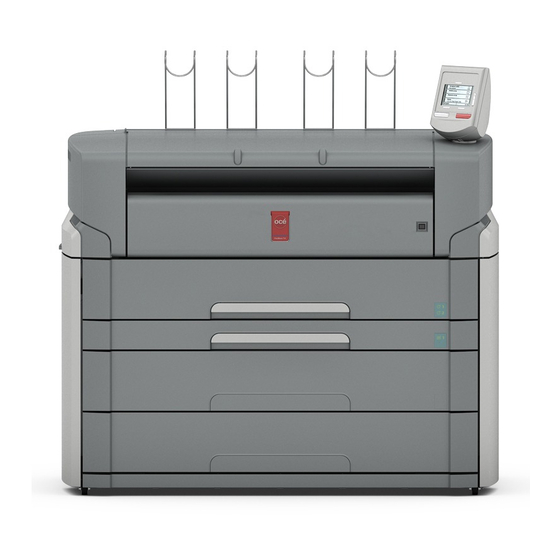
[2] Océ PlotWave 750, 6 roll configuration with one cut sheet tray The default configuration includes 1 drawer with 2 rolls. The Océ PlotWave 750 supports up to 6 rolls (3 roll drawers) and one or two cut sheet tray(s). Possible configurations of the printer are:... - Page 19 Overview of the Océ PlotWave 750 system Océ PlotWave 750 configuration with the Océ TC4 color scanner Océ PlotWave 750 components Component Integrated Top Delivery Tray Printer operator panel Manual feed section Location of the integrated controller Roll drawers or cut sheet trays Océ...
-
Page 20: The Océ Plotwave 750 Key Concepts
Print and copy jobs Print and copy jobs are sent to the Océ PlotWave 750 printer from a user application (print job) or from the scanner (copy job). Print and copy jobs can consist of several sets, which in turn can consist of several pages. - Page 21 The Océ PlotWave 750 key concepts Green button principle The Océ PlotWave 750 is a very user-friendly system. The scanner, in particular, is very easy to operate. Basic copy jobs can be performed by simply pressing the green start key on the scanner operator panel.
-
Page 22: User Interaction
The user can communicate with the Océ PlotWave 750 from local locations and remote locations. Printer or scanner operator panel The Océ PlotWave 750 offers a printer or scanner operator panel that allows you to do the following. • Manipulate aspects of machine behavior on the printer operator panel. - Page 23 User interaction Download Océ Publisher Mobile freely from the Apple App Store or Google Play. Chapter 2 - Introduction...
-
Page 24: Get To Know The Océ Plotwave 750
The Océ PlotWave 750 can also be combined with various finishing options such as a folder, a reinforcement unit, and the Océ Double Decker Pro. The Océ PlotWave 750 can be adapted to the fit in just the way you want it. -
Page 25: The Océ Plotwave 750 Components
The Océ PlotWave 750 components Introduction The Océ PlotWave 750 is available as a digital network printer, a printer and scanner or as a full combination which can print, copy or scan-to-file and finish the output. The Océ PlotWave 750 consists of the following components. - Page 26 The Océ PlotWave 750 controller The Océ PlotWave 750 controller is the heart of the system and controls all the activities of the system. In a standard configuration, the controller is located inside the printer. You can access the controller by opening the side cover on the left flank of the printer.
-
Page 27: Printer Operator Panel
Printer operator panel Printer operator panel Component Key operator key Up/Down toggle key Stop key Right selection key Left selection key Online key Chapter 2 - Introduction... -
Page 28: Scanner Operator Panel
Scanner operator panel Scanner operator panel Océ TC4 scanner Component LED (green and red attention light) Display Upper soft key Scroll wheel key Scroll wheel Lower soft key Green start key Stop key Numeric keys Chapter 2 - Introduction... - Page 29 Scanner operator panel Component Lower soft key 11 / B Left soft keys Upper soft key Chapter 2 - Introduction...
-
Page 30: Media Types, Material And Sizes On The Printer
Media types, material and sizes on the printer Introduction One of the features of the Océ PlotWave 750 printer is the automatic media change function. This function enables the printer to switch to another roll of the same media when there is not enough media on the current roll to finish the print run. - Page 31 Set media material Use the arrow keys to select the media material for the media you just loaded. Press the “Online” key to put the printer online again. The printer now knows which media is used for the specified roll. Chapter 2 - Introduction...
-
Page 32: Set A Media Size Indication
Set a media size indication Set a media size indication Procedure Press the “Online” key on the printer operator panel to put the printer offline. The message “Offline” is displayed in the status window. Press the left selection key to shift the focus to the Media option. A shadow effect is used to indicate that the focus is set to this option. -
Page 33: Turn On And Off The Océ Plotwave 750
Turn on and off the Océ PlotWave 750 Turn on and off the Océ PlotWave 750 Introduction You can separately turn on and off the Océ PlotWave 750 printer, Océ PlotWave 750 controller, and scanner. Power On / off options... - Page 34 Press the key only once to start up the controller. The green LED is turned on when you press the key. You can also shut down the controller in the Océ PlotWave 750 Express WebTools application, from the [Support] tab.
-
Page 35: Turn On And Off The Controller
Press the On / Off key at the front of the printer to turn off the controller inside the printer. The green LED turns off 30-60 seconds after you have pressed the key. [8] On/Off button on the incorporated Océ PlotWave 750 Controller Chapter 2 - Introduction... -
Page 36: Turn The Océ Scanner On And Off
Turn the Océ scanner on and off Turn the Océ scanner on and off Procedure Set the On/Off switch to position “1”. The green LED turns on. The 'Ready to scan’ message appears. Set the On/Off switch to position “0”. [9] On/Off switch on the Océ... -
Page 37: Climate Control On The Océ Plotwave 750
Climate control on the Océ PlotWave 750 Introduction The Océ PlotWave 750 gives the best print results when the printer is located in a room with moderate climate conditions and/or air conditioning. This way, the temperature and humidity levels in the room can be kept at a level that guarantees optimal print results on the Océ... -
Page 38: The Printer Operator Panel
[10] Printer operator panel The keys With the keys on the operator panel you can make a number of settings for the Océ PlotWave 750 printer, such as the media type and size or preferred language. The following keys are available. - Page 39 The printer operator panel Key types Function Stop key The red stop key is used to stop the present print job. After this key is pressed, a dialog will be displayed asking for confir- mation. NOTE The printing process does not stop immediately since a number of prints may already have been submitted to the printer after processing.
- Page 40 The printer operator panel The counter On the operator panel of the Océ PlotWave 750 printer, a counter is displayed to give the user feedback about the progress of the job that is currently being printed. The counter, which is located at the bottom of the upper window on the operator panel, displays the number of sets and/or pages printed.
-
Page 41: Printer Operator Panel Actions
Printer operator panel actions Printer operator panel actions On the Océ PlotWave 750 printer operator panel you can perform a limited number of actions in the off-line menu. The tables below display the settings. Offline menu options Offline menu Menu... - Page 42 Printer operator panel actions Menu Secondary menu(s) Description Demo print Follow the instructions to print a demo file. Print settings Follow the instructions to print a report of the system set- tings. Administrator only Network settings adapter Follow the instructions in the wizard to configure the net- work settings for the adapter.
-
Page 43: Select A Language
Select a language Introduction On the operator panel of the Océ PlotWave 750 printer, you can specify which language you want to use to display printer information, such as status and error messages. By default, you can choose between two languages, which are defined in the Océ Express WebTools for your system... - Page 44 Select a language Chapter 2 - Introduction...
-
Page 45: Define Your Workflow With Océ Express Webtools
Chapter 3 Define your workflow with Océ Express WebTools... -
Page 46: Introduction
Introduction Océ Express WebTools Introduction Océ Express WebTools is an application that runs via the Océ PlotWave 750 controller. It can be accessed on the controller monitor or on any other networked workstation. You can use an ® Internet browser (Microsoft Internet Explorer, or Mozilla Firefox™) to open the homepage of Océ... -
Page 47: The System Requirements
The system requirements The system requirements Introduction You can use a web browser to open the home page of Océ Express WebTools. Depending on the Internet browser you use, you must set the required minimum browser security settings as indicated below. IMPORTANT You must enable cookies. -
Page 48: The System Monitor
The system monitor The system monitor Introduction You can open the system monitor to get an overview of the current status of the printing system. When you click on the [System] tab in the lower left corner of the screen, the system monitor pops up. -
Page 49: Overview Of The Scanner States
Overview of the scanner states Icon Description Loaded roll Not loaded or empty roll Special paper (set as 'Special' on the on operator panel) Cut sheet paper Overview of the scanner states State Icon Description [Scanner is ready] The scanner is ready. [Scanner is busy] The scanner is active. -
Page 50: Toner Level Indication
[System] tab. IMPORTANT Only use Océ PlotWave 750 toner. Make sure you have the correct region version. IMPORTANT You can only add one bottle of toner. If you add more than one bottle, the developing unit will flood. - Page 51 Toner level indication Indication Description Illustration 3. [Refill toner] No toner is available in the machine. • The printer stops printing. • The operator attention light turns red. • You need to add toner in order to continue printing. Chapter 3 - Define your workflow with Océ Express WebTools...
-
Page 52: The Jobs Tab
The [Jobs] tab The [Jobs] tab Illustration [11] Jobs tab The [Jobs] tab NOTE Accessible for any user. For some specific actions you must log on as a Key operator (see User roles and authorizations on page 103). Tasks: Create a new job from a printable file in the Océ Publisher Express section. •... - Page 53 The [Jobs] tab • Get an overview of all scan jobs. All scan jobs are placed in the Smart Inbox [Scans]. When you select a scan job you can use the buttons on top of the Smart Inbox [Scans] section to print, save or delete the scan job.
-
Page 54: The Job States
The job states The job states Introduction When a job is placed in a Smart Inbox or in the Queue, the icon in front of the job name gives information about the status of the job. Overview of the job states in the Smart Inbox State Icon Description... -
Page 55: The Smart Inbox
The Smart Inbox The Smart Inbox Definition A Smart Inbox helps you to manage customized jobs. You get an overview of the Smart Inboxes when you open the [Jobs] tab in Océ Express WebTools. Illustration [12] The Smart Inboxes in the [Jobs] tab Jobs in a Smart Inbox You can use the Smart Inbox to manage your jobs. - Page 56 The Smart Inbox NOTE The Smart Inbox and Jobs Queue concept on For more information on the Smart Inbox, see page Chapter 3 - Define your workflow with Océ Express WebTools...
-
Page 57: The Scanner Accounting Tab
The Scanner accounting tab The Scanner accounting tab Introduction The [Scanner accounting] tab in the Océ Express WebTools allows you to unlock the scanner for copying or scan-to-file. Valid accounting information is required to unlock the scanner. By default [Scanner accounting] is disabled. NOTE Before you can edit a setting or a settings group, you must be logged on as a key operator or power user. - Page 58 The Scanner accounting tab Setting Description [Scanner unlocking lo- The hostname or IP-address from which accounting fields can be en- cation: single host] tered to unlock the scanner. Only valid when 'Scanner unlocking: location' has value 'From single host'. [Scanner unlocking: When set to 'Everyone', no login is needed to enter accounting fields to access] unlock the scanner.
-
Page 59: The Preferences Tab
The [Preferences] tab The [Preferences] tab Illustration [14] The Preferences tab The [Preferences] tab NOTE Before you can edit a setting or a settings group, you must log in as a Key Operator or a Power User. With the [Preferences] tab, you can fine-tune the system to fit your company's workflow and processes. -
Page 60: The Templates Tab
The [Templates] tab The [Templates] tab Illustration [15] The [Templates] tab The [Templates] tab NOTE Before you can edit a setting or a settings group, you must log in as a Key Operator or a Power User. With the [Templates] tab, you can define up to 5 templates for copy jobs and up to 5 templates for scan jobs, as well as the stamps that you can use in the templates. -
Page 61: The Configuration Tab
The [Configuration] tab The [Configuration] tab Illustration [16] The Configuration tab The [Configuration] tab NOTE Before you can edit a setting or a settings group, you must log on as a System administrator or a Power user. The [Overview] displays a summary of the settings organized in different groups. Configure the: •... -
Page 62: The Support Tab
The [Support] tab The [Support] tab Introduction NOTE Log in as System Administrator or Power User. The [Support] tab The [Support] tab consists of seven sections: • [About]: find general information about the system, generate the [Quick Response Card] for Océ... -
Page 63: Define Your Printing System Default Settings
Define your Printing System Default Settings Define your Printing System Default Settings About the default settings in Océ Express WebTools Definition Before you send jobs to the printer, remember the following: The values defined in Océ Express WebTools are default values for the general system behavior. You can define a number of job settings in the Océ... -
Page 64: Set Another Language For Océ Express Webtools
Set another language for Océ Express WebTools Set another language for Océ Express WebTools Introduction The set language in the internet browser defines the language used in Océ Express WebTools. NOTE This language setting does not influence the language on the operator panel. On the operator panel, you can only toggle between the [First language] and the [Second language]. -
Page 65: How To Edit A Setting
How to edit a setting How to edit a setting Procedure Browse to the settings group you want to edit, for example [Preferences] - [System settings] - [Print queue management]. You can find detailed information about the settings in the tooltip. The illustration below shows, for example, the tooltip information of the [Print queue] setting. - Page 66 How to edit a setting You can click [Edit] in the settings group bar to access a window for all settings in the group if you want to edit more settings in the settings group. NOTE Before you can edit a setting or a settings group, you must log on as an authorized user. For example if you click [Edit] in the [Print queue management] settings group bar, a separate window opens, where all the settings of the settings group are listed, and where you can edit all these settings.
-
Page 67: View And Check The Settings
View and check the settings View and check the settings Purpose View and check the settings and the values that are stored when you save the settings file. When to do • Before you save the setting and the values in the Océ Express WebTools. •... -
Page 68: Save The Settings In A File
Save the settings in a file Save the settings in a file Purpose Save the settings and the values that you configured in the Océ Express WebTools in a file. When to do • Duplicate the settings very easily to another printer of the same type. NOTE Not all settings are stored in the settings file. -
Page 69: Load The Settings From A File
Load the settings from a file Load the settings from a file Purpose Load the settings and the values for the Océ Express WebTools from a file. When to do • Duplicate the settings to another printer of the same type. IMPORTANT When you are logged in as a Key operator you can only load the Key operator settings. -
Page 70: Restore The Factory Defaults
Restore the factory defaults Restore the factory defaults When to do • When you want to restore the factory default settings and values of your Océ Express WebTools. IMPORTANT When you are logged in as a Key operator you can only restore the Key operator settings. When you are logged in as a System administrator you can only restore the System administrator settings. -
Page 71: Shut Down Or Restart The Controller
Shut down or restart the controller Shut down or restart the controller Illustration [17] Shutdown button in Océ Express WebTools To remotely shut down the controller, click [Shut down] in the [Support] tab. If the printing system is on, you can also use this button to restart the controller. Chapter 3 - Define your workflow with Océ... -
Page 72: Configure The Printer Settings
Configure the printer settings Configure the printer settings Change the regional settings NOTE Before you can edit a setting or a settings group, you must log on as a key operator or power user. If you want to change the initial configuration of the regional settings, you can do so in the [Preferences] - [System settings] - [Regional settings]. -
Page 73: Define The Media Series
Define the media series Define the media series Introduction You must indicate in the Océ Express WebTools the media series that you use on your system. NOTE Before you can edit a setting or a settings group, you must be logged on as a key operator or power user. -
Page 74: Configure The Sleep Mode Timer
Configure the sleep mode timer Configure the sleep mode timer Introduction If the printer is idle for a defined period it goes into sleep mode. In sleep mode, the printer uses minimal energy. The power supply of the controller remains on. The printer enters the sleep mode when the sleep mode timer expires. -
Page 75: Configure The Pen Settings
Configure the pen settings Configure the pen settings Introduction Normally the pen settings are defined in the application that is used to create a drawing. If the pen settings are not defined in the application, the default pen settings configured in the Océ Express WebTools are used. -
Page 76: Define Your Printing System Preferences
Define your printing system preferences Define your printing system preferences Define the system preferences Introduction Before you start to use your printing system you can define the general system preferences to fine tune it to optimally fit your company's workflow and processes. NOTE Before you can edit a setting or a settings group, you must log on as a key operator or power user. - Page 77 Define the system preferences Settings group Description [Regional settings] The regional settings are configured during the installa- tion of your system. Here you can change the initial con- figuration. NOTE You can toggle between the [First language] and the [Second language] on the printer or scanner operator panel.
-
Page 78: Enable Scan-To-File View
Enable scan-to-file view Enable scan-to-file view Introduction After you have configured your scan destination, you can scan your document. When you enable the scan-to-file view, you can view the scanned file on the controller monitor. Purpose When you use the scan-to-file view on the printer controller monitor, you can check whether the file is correct before saving it. -
Page 79: Define The Print Job Preferences
Define the print job preferences Define the print job preferences Introduction Here you can define the default values for print jobs. If you send a print job using an Océ printer driver or an Océ job submission tool, the job settings defined in the printer driver or the job submission tool always overrule the default settings defined in the .Océ... - Page 80 Define the print job preferences Settings group Contains settings that define [HP-GL/2] How the printer interprets [HP-GL/2] files. [CalComp] How the printer interprets [CalComp] files. [PostScript/PDF] (op- How the printer interprets [PostScript/PDF] files. tional) [TIFF] How the printer interprets [TIFF] files. [ASCII] How the printer interprets [ASCII] files.
-
Page 81: Define The Separation Sheet Preferences
Define the separation sheet preferences Define the separation sheet preferences Introduction If you want to print or copy with a separation sheet, you must enable the function in Océ Express WebTools first. NOTE Before you can edit a setting, you must be logged on as a [Key operator] or [Power user]. How to define the separation sheet preferences [20] Separation sheet settings 1. - Page 82 Define the separation sheet preferences Setting Description [Sheet length when custom roll] [The length of the separation sheet. Only valid when 'Custom' was selected for 'Roll'. For 'Au- tomatic' roll selection, the separation sheet will have the width and length of the previous page.] NOTE To avoid long plots, the separation...
-
Page 83: Define The Default Output Quality For Print Jobs
Define the default output quality for print jobs Define the default output quality for print jobs Introduction The Océ Express WebTools offers 3 settings to optimize the default output quality for print jobs. You can find most of these settings in the [Preferences] - [Print job defaults] tab in the [Image] section. -
Page 84: Define The Default Output Quality For Copy And Scan-To-File Jobs
Define the default output quality for copy and scan-to-file jobs Define the default output quality for copy and scan-to-file jobs Introduction The Océ Express WebTools offers settings to optimize the default output quality for copy and scan-to-file jobs. You can define a default output quality for each template. You can find these settings in the [Preferences] - Copy Template 1 to 5 or Scan Template 1 to 5 tabs. - Page 85 Define the default output quality for copy and scan-to-file jobs Values Description [On] If you select [Auto] the system decides depending on the original type whether background compensation will be on or off. [Off] [Auto] [Lighter/darker] Setting location: Copy Template 1 to 5 and Scan Template 1 to 5. Values Description Numeric value be-...
- Page 86 Define the default output quality for copy and scan-to-file jobs [Optimization] (for Copy only) Setting location: Copy Template 1 to 5. Values Description [Fine details] Quality for the copy. Select [Fine details] to scan in high resolution and get a high quality [Normal] copy.
-
Page 87: File Type And Scan To File
[File type] and Scan to file [File type] and Scan to file Overview Scan to file: Types of [Organization] and [Compression] of black and white, color and grayscale files per [File type] [File type] [Organization] [Compression] [Black/white] col- [Color] and [Black/white] col- [Color] and or mode... -
Page 88: Configure Smart Inboxes To Manage Jobs In Your Printing System
Configure Smart inboxes to manage jobs in your printing system Configure Smart inboxes to manage jobs in your printing system The Smart Inbox and Jobs Queue concept Definition Smart Inboxes are used for customized job management. Concept The Jobs Queue The Smart Inbox Metaphor Production belt... - Page 89 The Smart Inbox and Jobs Queue concept Print jobs, sent via printer drivers, applications or Océ Publisher Express. You can enter the name of the Smart Inbox you want to print to in the printer driver, application or job submitter. ®...
- Page 90 The Smart Inbox and Jobs Queue concept NOTE If a Smart Inbox contains many jobs, you can sort the jobs by clicking on a column name (for example:[Job name] or [Time created]). You can also change the display method of the jobs in the Smart Inbox.
-
Page 91: Use Smart Inboxes In A Multiple-User Environment
Use Smart Inboxes in a multiple-user environment Use Smart Inboxes in a multiple-user environment Introduction A multiple-user environment is a working environment where users directly send jobs to the printer, collect their own prints and make their own copies and scans. In this environment it is important for a user to have easy access to his personal jobs. -
Page 92: Use Smart Inboxes In A Repro Environment
Use Smart Inboxes in a repro environment Use Smart Inboxes in a repro environment Introduction A repro environment is a working environment where a repro operator handles all the jobs. In this environment the repro operator can use the [Smart Inbox] to organize his daily work. Illustration Procedure Open the [Preferences] - [System settings] tab en select [Edit] in the [Smart Inbox management]... -
Page 93: Use Smart Inboxes In A Multiple-User And Repro Environment
Use Smart Inboxes in a multiple-user and repro environment Use Smart Inboxes in a multiple-user and repro environment Introduction A multiple-user and repro environment is a working environment where both users directly send jobs to the printer, collect their own prints, make their own copies and scans and the system is also used by a repro operator. -
Page 94: Open Or Create A Smart Inbox
Open or create a Smart Inbox Open or create a Smart Inbox Open or create a [Smart Inbox] in the [Smart Inbox] section Procedure Select the [Jobs] tab. In the [Smart Inbox] section click [Open Smart Inbox]. Click on the blank field to open a drop-down list that shows all Smart Inboxes that contain one or more jobs, available on your system. -
Page 95: Open Or Create A Smart Inbox In Océ Publisher Express
Open or create a Smart Inbox in Océ Publisher Express Open or create a Smart Inbox in Océ Publisher Express Procedure Select the [Jobs] tab. Click on [Create new job] in the Océ Publisher Express section. In the [Workflow] section click on the Smart Inbox field to open a drop-down list that shows all Smart Inboxes that contain one or more jobs, available on your system. -
Page 96: Smart Inbox Management
Smart Inbox management Smart Inbox management Introduction The Smart Inbox capability is completely customizable. Configure each functionality of it in the [Preferences] - [System settings] - [Smart Inbox management] section. Smart InboxSettings [Smart Inbox capability] [Activate or deactivate the Smart Inbox capability. When enabled, the jobs can be sent and saved to Smart Inboxes. - Page 97 Smart Inbox management * When [Smart Inbox capability] is disabled: • All the Smart Inbox settings are automatically disabled • All jobs are processed as 'Direct print' only • All jobs are deleted when a time-out for a loading a media is reached When you reactivate the [Smart Inbox capability], check and configure all the related Smart Inbox settings.
- Page 98 Smart Inbox management Setting impacted by the [Smart In‐ Impact on the setting Impact on the setting box capability] when [Smart Inbox capa‐ when [Smart Inbox capa‐ bility] is changed from [En‐ bility] is changed from abled] to [Disabled] [Disabled] to [Enabled] [Remote Smart Inbox view] Not changed Not changed...
-
Page 99: Delete A Smart Inbox
Delete a Smart Inbox Delete a Smart Inbox IMPORTANT When you delete a [Smart Inbox], you only delete the view on the [Smart Inbox], but not the content. To permanently delete the jobs from a [Smart Inbox] you must select the jobs in the [Smart Inbox] and click [Delete]. -
Page 100: Configure The Network And Security Settings
Introduction For complete and detailed connectivity information for your Océ System, refer to the 'Large Format Systems Connectivity Manuals' available on http://global.oce.com. For complete and detailed security information for your Océ System, refer to the 'Océ PlotWave - ColorWave Systems Security Manual' available on http://global.oce.com. - Page 101 How to configure the network adapter in Océ Express WebTools For example, click on the value of the [IP type] setting to display a window where you can change the value. NOTE This window also contains a short explanation of the setting. Set the [IP type] (IPv4 or IPv6 or both) Click [Ok] to confirm your entries or [Cancel] to reject your entries.
-
Page 102: How To Configure The Network Settings In The Océ Express Webtools
How to configure the network settings in the Océ Express WebTools How to configure the network settings in the Océ Express WebTools Procedure The relevant IP settings are displayed based on the [IP type] you selected. Enable IP address assignment by DHCP when a DHCP server is available, or enter the IP address of the system and the subnet mask manually Enable preferred DNS configuration by DHCP when a DHCP server is available, or enter the IP address of the DNS server manually... -
Page 103: Access And Passwords
The settings in the Océ Express WebTools can be configured and managed to enable the optimal performance of the Océ PlotWave 750. You can view all the settings in the Océ Express WebTools but when you want to edit a setting, a message appears. -
Page 104: Log In As An Authorized User
Log in as an authorized user Log in as an authorized user Purpose In order to have write access for certain groups of settings, you must log in as an authorized user. There are 3 user roles, System administrator, Key operator and Power user who have authorization to edit specific groups of settings. -
Page 105: Log Out After Your Session
Log out after your session Log out after your session Purpose When you have finished the modification of a setting, it is advised to log out again. Procedure Click the log out hyperlink in the top right-hand corner of the screen. Close the screen of your internet browser. -
Page 106: Change The Password For Authorized Users
Change the password for authorized users Change the password for authorized users When to do For security reasons it is advised to periodically change the password for the 3 access modes (Key operator, System administrator, Power user) to the Océ Express WebTools. The default passwords are: •... -
Page 107: Security Levels
The [Normal] level offers access to all functionalities and protocols. The [High] level limits the use to a limited number of them. Download the 'Océ Large Format Systems Security guide' from the Océ PlotWave 750 page on the Océ website (http://global.oce.com/) to find detailed information on the security levels. -
Page 108: Secure Protocols
Secure protocols Secure protocols IPv6 settings Introduction In case IPv6 is enabled: • You can see all IPv6 information in the [Configuration] - [Overview] tab • If IPv6 is enabled, the System Administrator or Power User can change some of the IPv6 settings.[Connectivity] IPv6 settings The following settings are available for IPv6:... -
Page 109: Enable Ipsec
Enable IPSec Enable IPSec Introduction [IPsec] is a security protocol that you can use: • To limit access to your network to a maximum of 5 hosts. • To encrypt the data between the hosts and the system. NOTE You can enable [IPsec] in Océ Express WebTools via the printer controller monitor or via any other networked workstation. -
Page 110: E-Shredding
E-shredding E-shredding Enable or disable the e-shredding function Introduction The e-shredding function allows you to securely erase jobs from the system. This prevents unauthorized people from recovering the deleted jobs. When the e-shredding function is enabled, you can select an e-shredding algorithm. You can enable the e-shredding function in the Océ Express WebTools. -
Page 111: Select The E-Shredding Algorithm
Select the e-shredding algorithm Select the e-shredding algorithm Introduction The e-shredding function allows you to securely erase jobs from the system. This prevents unauthorized people from accessing the deleted jobs. You can select one of the following algorithms. • [Gutmann]. All jobs on the system are erased in 35 overwrite passes. -
Page 112: Specify The Number Of Overwrite Passes
Specify the number of overwrite passes Specify the number of overwrite passes Introduction The e-shredding function allows you to erase jobs from the system. This prevents unauthorized people from accessing the jobs. You can manually enter the required number of overwrite passes. -
Page 113: Remote Security
Remote Security Remote Security [Remote security] Introduction By default, the first certificate delivered for the use of HTTPS is an Océ self-signed certificate. To ensure a fully trusted authentication, you can request and import a certificate delivered by a Certification Authority (CA-signed certificate). In Océ Express WebTools you can generate the certificates. -
Page 114: Generate A Ca-Signed Certificate Request
generate a CA-signed certificate request generate a CA-signed certificate request Introduction To ensure a fully trusted authentication via HTTPS, you can request and import a certificate delivered by a Certification Authority (CA-signed certificate). In Océ Express WebTools, you can generate a certificate request yourself or you can import a predefined certificate via your computer or network. - Page 115 Remote security: generate a CA-signed certificate request - Save and send the request HjiDZ1khzTJTORxHqjKl3AtE3PXqRsiHouTH5JTceYtaBjCnxCJ4pGKY5iKN8KJiJuZG8PHxY7o W/+zpvxN2VtX7TcyTAvyCThUwL+cqo75tvODo5HMCUa2sLdl8GO9WMLpgZkxH5KzIiO+LcI4 yQbqhENynywS0C2ObXCq3yksF74+XIO0swhoA2yfDp4T+LuF3wxys8lUH3ZhhkOYg== -----END NEW CERTIFICATE REQUEST----- Remote security: generate a CA-signed certificate request - Save and send the request Procedure Click "Save" to save the content of the request in a .csr file (named 'certificate_request.csr' by default).
-
Page 116: Import A Ca-Signed Certificate
Import a CA-signed certificate Import a CA-signed certificate Introduction To ensure a fully trusted authentication via HTTPS, you can request and import a certificate delivered by a Certification Authority (CA-signed certificate). In Océ Express WebTools, you can generate a certificate request yourself or you can import a predefined certificate via your computer or network. - Page 117 Check and import the [Root certificate] into the workstation browser Result The certificate is now installed on the server. Check and import (if needed) the CA Root certificate into the workstation web browser as well. That will secure the complete data workflow between the workstations and the server. Check and import the [Root certificate] into the workstation browser Procedure On each workstation, open the web browser.
-
Page 118: Configure The System For Copy And Scan
Configure the system for copy and scan Configure the system for copy and scan Set the preferences for copy and scan-to-file Define the default output quality for copy and scan-to-file jobs Introduction The Océ Express WebTools offers settings to optimize the default output quality for copy and scan-to-file jobs. -
Page 119: Background Compensation
Define the default output quality for copy and scan-to-file jobs [Background compensation] Setting location: Copy Template 1 to 5 and Scan Template 1 to 5. Values Description [On] If you select [Auto] the system decides depending on the original type whether background compensation will be on or off. - Page 120 Define the default output quality for copy and scan-to-file jobs [Optimization] (for Copy only) Setting location: Copy Template 1 to 5. Values Description [Fine details] Quality for the copy. Select [Fine details] to scan in high resolution and get a high quality [Normal] copy.
-
Page 121: File Type And Scan To File
[File type] and Scan to file [File type] and Scan to file Overview Scan to file: Types of [Organization] and [Compression] of black and white, color and grayscale files per [File type] [File type] [Organization] [Compression] [Black/white] col- [Color] and [Black/white] col- [Color] and or mode... -
Page 122: Define The Templates For Copy And Scan Jobs
Define the templates for copy and scan jobs. Define the templates for copy and scan jobs. Define the [Templates] for copy Introduction The templates enable you to easily perform copy and scan jobs that you do very often. They contain pre-defined settings for copy and/or scan-to-file jobs. In the [Templates] tab, you can define the preferred values for 5 copy templates and 5 scan templates. - Page 123 Define the [Templates] for copy In setting group Action [Copy template 1: Set the general template information. Template description] Examples: the [Name], the [Description], the [Set] activation. [Copy template 1: Top Select the settings to put on the custom card. The custom card pro- vides quick access to frequently used settings.
- Page 124 Define the stamps for copy In setting group Action [Copy template 1: Set the finishing options for the copy: Folding] The folding and the additional binding strip when any. [Copy template 1: NOTE Binding] This option depends on your system configuration (with a 'first fold' or a 'full fold' folder) Click [Edit] in the settings group bar or click the value of a single setting.
-
Page 125: The Scan Templates In Océ Express Webtools
The Scan Templates in Océ Express WebTools The Scan Templates in Océ Express WebTools Introduction You can configure 5 scan templates in Océ Express WebTools. Purpose These templates are displayed on the scanner operator panel and can easily be selected. Configure the scan templates Procedure Open the [Templates] tab... -
Page 126: Define A Scan-To-File Template
Define a scan-to-file template Define a scan-to-file template Introduction When you want to scan an image to generate a file from it, go to Océ Express WebTools to: • first configure the scan-to-file destination • then define a scan template to use on the scanner NOTE Before you can edit a setting, you must be logged on as System administrator or a Power user. - Page 127 Define a scan-to-file template Template 1: File In setting group Action [Scan template 3: Template description] Enter the name of the template that will be dis- played on the scanner panel, and a descrip- tion. These destinations can be predefined under the [Configuration] - [Scan destinations] tab.
- Page 128 Define a scan-to-file template In setting group Action [Scan template 3: Check print] Define whether a check plot is made for each scanned file and how the check prints are or- dered (by set or by page). NOTE The [Scan template 3: Check print] options are available for [Black/ white] scans only.
-
Page 129: Configure The Scan Destinations
Configure the scan destinations Configure the scan destinations Configure scan destinations Introduction When you select the [Scan] tab on the user panel a list of scan destinations is displayed. A scan destination is a place where you send your scanned file to for storage. You can define a maximum number of 10 scan destinations in the [Configuration] - [Scan destinations] tab. - Page 130 Configure scan destinations Location Scan destination type description Local • [Smart Inbox for scans] When you select this scan destination your scanned file is sent to the [Scans] Inbox. This is the fixed scan destination for scan destination 1. [Local to the Smart In- box].
-
Page 131: Configure A Local Scan Destination
Configure a local scan destination Configure a local scan destination Introduction The first template is dedicated to scan to local destination (Smart Inbox). The other scan templates can be configured either for local destination or remote destination. NOTE Before you can edit a setting or a settings group, you must log on as System administrator or Power user. -
Page 132: Configure A Remote Scan Destination
Configure a remote scan destination Configure a remote scan destination NOTE Before you can edit a setting or a settings group, you must log on as System administrator or Power user. Create a web destination with FTP Procedure Create a home directory and a subdirectory on a workstation. For example c:/Ftp/Scan Enable FTP on the workstation Click [Configuration] - [Scan destinations]. - Page 133 Create a network destination with SMB Select [Remote via SMB]. If you defined a username and a password for the shared folder on the remote PC, enter the remote username and the remote password in the required fields. NOTE Make sure the user has write-access privileges on the destination. NOTE If the remote workstation uses domains, you must enter "domain_name\username"...
-
Page 134: Test The Remote Scan Destination
Test the remote scan destination Test the remote scan destination Introduction When you create the remote scan destination (FTP or SMB), use the "Test" button. The test automatically executes the following 5 steps: • Check the remote folder syntax. • Check the validity of the hostname. •... - Page 135 Test the remote scan destination Error code Possible Causes 5, 6, 7 • Check that SMB or FTP protocol is enabled on the remote host • Check that the customer network security policy (firewall/switch) does not block FTP ports • For SMB destination: - check that the security level is set to "Normal"...
-
Page 136: Enable Scan-To-File View
Enable scan-to-file view Enable scan-to-file view Introduction After you have configured your scan destination, you can scan your document. When you enable the scan-to-file view, you can view the scanned file on the controller monitor. Purpose When you use the scan-to-file view on the printer controller monitor, you can check whether the file is correct before saving it. -
Page 137: Use The Océ Plotwave 750 To Print
Chapter 4 Use the Océ PlotWave 750 to print... -
Page 138: Send Print Jobs
What you need to know before you send your print jobs Definition Before you send print jobs to the Océ PlotWave 750, remember the following. • The values defined in the Océ Express WebTools are default values for the general system behavior. -
Page 139: Use Océ Publisher Express To Send A Print Job
• - Edmics (C4) - .c4 • - TIFF - .tif • - PostScript 3 - .ps • - PDF, PDF/A - .pdf • - JPEG - .jpg, .jpeg • - DWF Chapter 4 - Use the Océ PlotWave 750 to print... - Page 140 You can easily create a new Smart Inbox if you name of the Smart Inbox you want to enter a new Smart Inbox name. print to. Click 'Print' to send the print job to the Smart Inbox. Chapter 4 - Use the Océ PlotWave 750 to print...
-
Page 141: Use Océ Publisher Select To Send A Print Job
• Allows you to save jobs (including their configuration) in order to archive or reprint them. • Provides accounting capabilities. • Submits the jobs to an inbox. • Allows you to monitor the status of your jobs. Chapter 4 - Use the Océ PlotWave 750 to print... - Page 142 You can download the latest version of Océ Publisher Select from the Océ website. Refer to the Océ Publisher Select online help and User guide for detailed information on installation and use of Océ Publisher Select. Chapter 4 - Use the Océ PlotWave 750 to print...
-
Page 143: Use The Océ Wide Format Printer Driver For Microsoft® Windows® To Send A Print Job
Select the product name of your printer in the [Printer] area of the [Print] dialog box. Click [Properties]. You can define the default print job settings in Océ Express WebTools. Chapter 4 - Use the Océ PlotWave 750 to print... - Page 144 Check all tabs in the driver and change the settings, if necessary. Click [OK] to send the print job to the [Smart Inbox] or the print queue. Chapter 4 - Use the Océ PlotWave 750 to print...
-
Page 145: Use The Océ Postscript® 3 Driver To Send A Print Job
Check and change the Printer Fea- tures settings if necessary. Click [OK] to send the print job to the Smart Inbox or the Jobs Queue. Chapter 4 - Use the Océ PlotWave 750 to print... -
Page 146: Use Océ Publisher Mobile To Print A File
With Océ Publisher Mobile, you can print a DWF, PDF, PLT (e.g. HP-GL, HP-GL/2, HP RTL), JPEG or TIFF file from your iPhone, iPad or Android tablet. Required tools Google PlayApp StoreDownload the free app from the or and install it on your mobile device. Chapter 4 - Use the Océ PlotWave 750 to print... - Page 147 Use Océ Publisher Mobile to print a file Illustration [24] Océ Publisher Mobile Procedure Open Océ Publisher Mobile on your mobile device Configure the printer Chapter 4 - Use the Océ PlotWave 750 to print...
- Page 148 You can also select a document in a e-mail or a web browser and select 'Open in' - 'Océ Publisher Mobile'. Define the print settings and the number of copies Tap the green button to print Chapter 4 - Use the Océ PlotWave 750 to print...
-
Page 149: Use Ftp To Send A Print Job
• From a Web browser The Océ PlotWave 750 has a dedicated FTP Jobs folder. You cannot delete or change this folder. It is created at installation and protected. The most convenient way to print files through FTP is to drag and drop the files or to copy and paste the files, into this [Jobs] folder on the FTP site of your Océ... -
Page 150: Use Lpr To Send A Print Job
Type the following line command after the Command prompt: lpr -S <hostname or IP address> -P <print queue name> <file name>. NOTE You can use any name for <print queue name>, for example jobs. Chapter 4 - Use the Océ PlotWave 750 to print... -
Page 151: Print A Job From The Smart Inbox
Print a job from the Smart Inbox Procedure Select the [Jobs] tab in the Océ Express WebTools. Select the correct Smart inbox. Select the job and click [Print]. The job is copied to the Jobs Queue. Chapter 4 - Use the Océ PlotWave 750 to print... -
Page 152: Use Océ Mobile Printing And Scanning
Refer to the Océ website http://global.oce.com for more information. The Océ Mobile WebTools functionality of your Océ PlotWave 750 system Océ Mobile WebTools is embedded in your Océ PlotWave 750 system. It allows you to print and scan through a Wi-Fi connection. -
Page 153: Océ Mobile Webtools
Introduction Océ Mobile WebTools provides the following functionalities: • Submit a print-ready file to the Océ PlotWave 750 from a mobile device (smartphone or tablet). • Save a scanned file from the Océ PlotWave 750 onto a mobile device. • Delete a scanned file on the Océ PlotWave 750. - Page 154 • With Océ Mobile WebTools, the user can print a file from the mobile device on the Océ Print PlotWave 750 and the user is able to save a scanned document on the mobile device (see from your mobile device on page...
-
Page 155: Configure The Océ Express Webtools Settings For A Mobile Connection
If required, enter the password for your Wi-Fi network. known as security key) The key will be displayed on the [Quick Response Card]. Click [Ok] to confirm the determined settings. Chapter 4 - Use the Océ PlotWave 750 to print... - Page 156 - Go to the[TCP/IP: IPv4] section. Enter the domain name in the field [Primary DNS suffix]. Result The information you entered in the [Mobile] section will be printed on the [Quick Response Card]. Chapter 4 - Use the Océ PlotWave 750 to print...
-
Page 157: Generate The Quick Response Card
The illustration below is an example. You cannot print and use this [Quick Response Card] for your personal printer. The printer generates a unique [Quick Response Card] with your own personal QR Code based on your settings. Illustration [26] Example of a QR Card Chapter 4 - Use the Océ PlotWave 750 to print... - Page 158 The URL of your printer is also displayed so you can also access Océ Mobile WebTools on your mobile device via the web browser. Print the [Quick Response Card]. Result You can print the [Quick Response Card] in any size from any printer. Chapter 4 - Use the Océ PlotWave 750 to print...
-
Page 159: Connect Your Mobile Device To Océ Mobile Webtools
Open the web browser on your mobile device. Enter the printer's URL, displayed on the [Quick Response Card]. For example: http://hostname(.com)/MobileWebTools. When requested, enter the password in order to connect. Chapter 4 - Use the Océ PlotWave 750 to print... - Page 160 Connect to Océ Mobile WebTools with a URL The password is displayed on the [Quick Response Card]. If it is not available, contact the system administrator. Chapter 4 - Use the Océ PlotWave 750 to print...
-
Page 161: Connect To Océ Express Webtools Using The Ip Address
Océ Mobile WebTools opens in the web browser of your mobile device. You can now use it to print from your mobile device or save scanned files on your mobile device. Chapter 4 - Use the Océ PlotWave 750 to print... -
Page 162: Print From Your Mobile Device
Define the settings of your print job: Settings of your print job Settings Description [Number of sets] Define the number of copies [Media] Indicate on which loaded media you want to print. Chapter 4 - Use the Océ PlotWave 750 to print... - Page 163 After defining your settings, click on the printer icon in the upper right-hand corner. The job is sent to the printer. Result Your document is printed on the Océ PlotWave 750. Your print job appears on the printer user panel and in the jobs queue of Océ Express WebTools while it is being printed. NOTE If the system requires accounting information, your print job is sent to the Smart Inbox named [Mobile] in Océ...
-
Page 164: Save A Scanned Document On Your Mobile Device
Some mobile device browsers change the name or the extension of the file while storing it. Result The file is stored on your mobile device. Click the “delete” icon if you want to delete the file from the inbox on the printer. Chapter 4 - Use the Océ PlotWave 750 to print... -
Page 165: Use The Océ Tc4 Scanner For Copy And Scan-To-File Jobs
Chapter 5 Use the Océ TC4 scanner for copy and scan-to-file jobs... -
Page 166: Use The Scanner Operator Panel
Use the scanner operator panel Introduction This chapter describes how to use the Océ TC4 color scanner. Use the scanner operator panel Introduction Use the scanner operator panel to define the job settings. You can define the job settings in two ways. -
Page 167: Use The Scanner Operator Panel
Use the scanner operator panel Component LED (green and red attention light) Display Upper soft key Scroll wheel key Scroll wheel Lower soft key Green start key Stop key Numeric keys Lower soft key 11 / B Left soft keys Upper soft key Use the scanner operator panel Define job settings with the left soft keys and the scroll wheel... - Page 168 Use the scanner operator panel Repeat from step 4 to define the next setting. NOTE Use the [Defaults] option at the lower-left key to set all settings of the job template to default. Chapter 5 - Use the Océ TC4 scanner for copy and scan-to-file jobs...
-
Page 169: Define Job Settings With The Scroll Wheel And Scroll-Wheel Key Only
Define job settings with the scroll wheel and scroll-wheel key only Define job settings with the scroll wheel and scroll-wheel key only Procedure Select [Scan-to-file] with the upper left soft key. The five job templates appear. Focus on a job template with the scroll wheel. A small diamond in front of a template indicates the focus of the scroll wheel. -
Page 170: Make A Copy Job
Make a copy job Make a copy job Basic copy jobs on the Océ TC4 scanner Introduction to copy jobs Introduction A basic copy job only takes two steps. Feed the original and press the start key. Every other type of copy job is called an extended copy job. An extended copy job takes one additional step;... - Page 171 Steps in an extended copy job Steps in an extended copy job Procedure Feed the original. Define the job settings. Select the required template at the scanner operator panel and change the predefined settings only if necessary. Press the green start key. Result An extended copy job takes one additional action only.
-
Page 172: Do A Basic Copy Job
You can copy faster when you feed the original in landscape direction. Result The scanner makes a copy. The copy is sent to the Océ PlotWave 750 printer and will be printed immediately or stored in the Smart Inbox in Océ Express WebTools. -
Page 173: Scanner Operator Panel
Scanner operator panel Scanner operator panel Océ TC4 scanner Component LED (green and red attention light) Display Upper soft key Scroll wheel key Scroll wheel Lower soft key Green start key Stop key Numeric keys Chapter 5 - Use the Océ TC4 scanner for copy and scan-to-file jobs... - Page 174 Scanner operator panel Component Lower soft key 11 / B Left soft keys Upper soft key Océ TDS600 productive scanner Component Stop key Selection keys Arrow keys Correction key Numeric keys Green start key Function keys Job interrupt key Chapter 5 - Use the Océ TC4 scanner for copy and scan-to-file jobs...
-
Page 175: Stop A Copy Job
Stop a copy job Stop a copy job Introduction You can stop a copy job with the red Stop key on the scanner operator panel. Procedure Press the red Stop key. NOTE This will not affect a set job. Result When you press the red Stop key while the scanner scans, the scan process stops. -
Page 176: Extended Copy Jobs
Extended copy jobs Extended copy jobs Do an extended copy job Introduction The main steps of an extended copy job are described below. • Feed the original. • Define the job settings. • Press the green start key. Before you begin If you must enter the same value for a setting very often, you can set this value as the default value for that setting in a template or in the scan destination you will use, in Océ... - Page 177 In that case you must feed the original portrait. Result The Océ PlotWave 750 makes a copy according to the defined settings. Chapter 5 - Use the Océ TC4 scanner for copy and scan-to-file jobs...
-
Page 178: Available Settings For Copy Jobs
Available settings for copy jobs Introduction The Océ PlotWave 750 provides a lot of settings to manage all your different copy jobs. These settings are used for extended copy jobs. The following table gives an overview and a very short description of the available settings. - Page 179 Available settings for copy jobs Setting Function [Original width] Define the width of the original [37] [Original width] (example) [Delete area] Copy without a specific area [38] [Delete area] (example) [Cut method] Define the cut method of the printer [39] [Cut method] (example) [Add strip] Copy with a strip [40] [Add strip] (example)
-
Page 180: Available Settings For Copy
Available settings for copy jobs Setting Function [Mirror] Mirror the image of the copy [43] [Mirror] (example) [Drawing method] Define the legend location [Stamp] Copy with a stamp [44] Stamp (example) [Collate] Define how to collate the copies. [45] [By set] (left) and [By page] (example) [Optimization] Optimize the copy for speed or fine details [46] Scan quality mode (example) -
Page 181: Improve The Copy Quality According To The Original
PlotWave 750 offers you a range of original types, one range for the B&W mode [Grayscale] and one range specific for the color mode [Color]. If you select an original type, the Océ PlotWave 750 optimizes the print quality automatically for that particular type of input. The illustrations below explain on which aspects the original types are optimized and how they relate to each other in terms of optimization manipulation. - Page 182 How to improve the copy quality of dark and light originals Photo (1) Grays & Lines (2) Lines & Text (3) Transparent (4) Dark Originals (5) Blue Print (6) Enhance sharpness [48] Original type characterization for the color mode: Grayscale How to improve the copy quality of originals from a special type Procedure Place the original face down and right aligned.
- Page 183 How to improve the copy quality of an original with very fine details [50] The [Lighter/darker] icon • Select [Copy] with the upper left soft key. The copy job templates appear. • Open a copy job template with a left soft key. The top 5 settings appear.
-
Page 184: Make Multiple Sets Of Copies
Make multiple sets of copies Make multiple sets of copies Introduction You can use the [Create set] option to make multiple sets of copies. Illustration [52] The [By set] (left) and [By page] icon of the [Collate] setting. How to make multiple sets of copies sorted by set Procedure Feed the first original face down and right aligned. -
Page 185: Make Multiple Sets Of Copies
Repeat this step until all originals are fed. Select [Close set] with the upper-right softkey. Result The Océ PlotWave 750 copies a set of originals sorted by set or by page. Chapter 5 - Use the Océ TC4 scanner for copy and scan-to-file jobs... -
Page 186: Copy With A Separation Sheet
Copy with a separation sheet Copy with a separation sheet Introduction When you perform several copy jobs subsequently, you can divide them by using a separation sheet. The sheets can be colored or differ in length, as they can come from different rolls. When to do Do this when you want your jobs to be divided or clearly separated. -
Page 187: Copy With A Separation Sheet
Copy with a separation sheet - Copy with the separation sheet Copy with a separation sheet - Copy with the separation sheet Before you begin Make sure the settings in Océ Express WebTools are correct. Procedure Feed the original in the scanner. Specify the copy job and the preferred settings. -
Page 188: Make A Copy With A Stamp
Make a copy with a stamp Make a copy with a stamp Introduction A stamp is a predefined text you can set on every copy. In the Océ Express WebTools application, define a maximum of 10 stamps and their default values. Procedure Place the original face down and right aligned. -
Page 189: Scale To Another Media Size
• Define the media format at the [To fit] setting with the scroll wheel. Define the number of copies and press the green start key. Result The Océ PlotWave 750 copies to another media size. Chapter 5 - Use the Océ TC4 scanner for copy and scan-to-file jobs... -
Page 190: Make A Copy On A Cut Sheet
Define the number of copies if necessary and press the green Start key. Place the cut sheet media on the manual feed table of the printer. Result The Océ PlotWave 750 copies on a cut sheet. Chapter 5 - Use the Océ TC4 scanner for copy and scan-to-file jobs... -
Page 191: Make A Copy And Add A Strip
To measure the size of a strip you can use the ruler available at the scanner (metric). Result The Océ PlotWave 750 adds a trailing or leading strip from the copy. Chapter 5 - Use the Océ TC4 scanner for copy and scan-to-file jobs... -
Page 192: Make A Copy Of A Specific Area Of An Original
To measure the size of a strip you can use the ruler available at the scanner (metric). Result The Océ PlotWave 750 copies a specific area of the original to the specified position on the copy. Chapter 5 - Use the Océ TC4 scanner for copy and scan-to-file jobs... -
Page 193: Make A Copy And Delete A Specific Area Of An Original
Define the number of copies if necessary and press the green Start key. Result The Océ PlotWave 750 copies an original without the specified area. Chapter 5 - Use the Océ TC4 scanner for copy and scan-to-file jobs... -
Page 194: Make A Scan-To-File Job
Make a scan-to-file job Make a scan-to-file job Basic scan-to-file jobs on the Océ TC4 scanner Introduction to scan-to-file jobs Introduction A basic scan-to-file job takes three steps. Feed the original, select [Scan] and press the start key. Every other type of scan-to-file job, where you change the scan-to-file settings, is called an extended scan-to-file job. - Page 195 Steps in an extended scan-to-file job without fine tuned job templates Steps in an extended scan-to-file job without fine tuned job templates Procedure Feed the original. Select [Scan]. Define the scan-to-file job settings at the scanner operator panel. • Open a template. •...
-
Page 196: Do A Basic Scan-To-File Job
Do a basic scan-to-file job Do a basic scan-to-file job Introduction This section describes a general workflow for a basic scan-to-file job. Before you begin If you must enter the same value for a setting very often, you can set this value as the default value in a scan template, in the Océ... -
Page 197: Do An Extended Scan-To-File Job
Do an extended scan-to-file job Do an extended scan-to-file job Introduction This section describes a general workflow for an extended scan-to-file job. Before you begin If you must enter the same value for a setting very often, you can set this value as the default value in a scan template, in the Océ... -
Page 198: Stop A Scan-To-File Job
Stop a scan-to-file job Stop a scan-to-file job Introduction You can stop a scan-to-file job with the red Stop key at the scanner operator panel. Procedure Press the red Stop key. Result When you press the red Stop key while the scanner scans, the scan process stops. The scanner rewinds the original and the scan-to-file job is canceled. -
Page 199: Scan-To-Multipage
Scan-to-multipage Scan-to-multipage Introduction Scan-to-multipage allows the user to scan multiple originals into a unique (multipage) file. Scan-to-Multipage will be available for TIFF and PDF/A file types. Other scan-to-file formats only allow single-page scanning. How to Scan-to-multipage Select [PDF Multipage] or [TIFF Multipage] as your ‘File type’. Abort Scan-to-multipage •... -
Page 200: Extended Scan-To-File Jobs
Extended scan-to-file jobs Extended scan-to-file jobs Available settings for scan-to-file jobs The scan-to-file settings Setting Description [Destination] Use this setting to define the default destination for scan-to-file jobs on the controller. You can define a maximum of 10 remote destinations and one of these destinations is the default desti- nation. - Page 201 Available settings for scan-to-file jobs Setting Description [Lighter/darker] Use this setting to define the exposure of the original. Negative values mean less exposure and darker scanned output. Positive values mean more exposure and grayer scanned output. NOTE This setting can only be set if the color mode you se- lect is gray or black and white.
-
Page 202: File Type
[File type] [File type] Depending on the color mode and file type you select the values for the compression mode and organization will change. For some file types, the Compression and Organization settings cannot be set in all situations. With the Scan-to-Multipage functionality it is possible to scan multiple originals into a unique (multipage) file. - Page 203 [File type] Color mode: Color Color mode File type Compression Organization [Color] [TIFF] / [TIFF Multi- • [None] • [Raw] page] • [Packbits] • [Tiled] • [LZW] • [Striped] [PDF] / [PDF Multi- • [None] Not available page] • JPEG Quality •...
-
Page 204: Resolution
[Resolution] [Resolution] Use this setting to define the resolution of the scanned images. The higher the resolution you select, the finer the image quality. Select the required scan resolution with the scroll wheel. Setting Value in dots per inch [Resolution] •... -
Page 205: Original Type And Background Compensation
[Original type] and background compensation [Original type] and background compensation Use the [Original type] setting to define the type of original for copy and scan-to-file jobs. The defined type influences the quality of the output. Use the [Backgnd comp] setting to define the background compensation for your original. Select the type of original and the background compensation with the scroll wheel. -
Page 206: Original Width
[Original width] [Original width] Use this setting to define the width of the original that the scanner scans. Select one of the following: Setting Icon Result [Auto] The scan width is automatically determined based on the actual width of the original. [Standard] Use this setting to a [Standard] width of the original. -
Page 207: Remove Strip
[Remove strip] [Remove strip] Use the 4 settings below to define the blank areas around the image. Remove strips Setting Icon Result [Remove strip] - Use this setting to remove a strip at the top of [Leading] the image. This action decreases the print or file length. -
Page 208: Checkprint
[Checkprint] [Checkprint] Introduction Check print allows the user to create one or more copies of the scanned originals from the scanner panel. The user can specify the number of copies and the collection method from the panel. How to set Check print •... -
Page 209: The Finishing Options
Chapter 6 The finishing options... -
Page 210: Get To Know The Folder Options
Add the Océ folder to fold your outputs according to the selected folding settings. IMPORTANT You can only fold paper. If you attempt to fold polyester, transparent or vellum media, a media jam will occur. Illustration [61] The Océ folder for Océ PlotWave 750 Folder components The components of the folder Component Function... -
Page 211: The Folder
The folder Introduction You can add a folder to the Océ PlotWave 750 system in order fold your outputs. Outputs are folded according to the selected folding width and length with a drawing method. You can only fold paper. Polyester, transparent or vellum media cannot be folded. -
Page 212: Fold Support
Fold support Fold support Introduction The Océ folder for Océ PlotWave 750 supports folding drawings into DIN A and DIN B package formats. This Océ folder offers the selection of ‘Standard’, ‘Ericsson’ or ‘Afnor’ drawing methods when defining the folding requirements. These are a means of communicating the document orientation and legend position. - Page 213 Fold support Drawing method Ericsson This drawing norm is used mostly in the Nordic countries. The drawings have the legend in the upper left corner. Afnor The drawing norm is used mostly in specific industries in France. The legend is always in the lower right corner of the page, independent of the size of the drawing.
-
Page 214: Offline Folding
Offline folding Offline folding Introduction An important feature provided by the folder is offline folding. You can use the same settings for offline folding and normal folding. Define the default settings for offline folding on the printer operator panel (in Offline mode). Do not fold polyester or transparent media. This media can cause media jams. -
Page 215: Maximum Folding Length
Maximum folding length Maximum folding length Introduction There are maximum values for different kinds of media. The table below shows the maximum values for three types of media and the possible folding methods. Maximum folding settings for long prints Paper density (g/m -->... - Page 216 Maximum folding length Output selection Output length Delivery “Stacker” or > 1.22 m < 2.5 m Delivered in first fold delivery “Belt” “Stacker” or > 2.5 m Unfolded, delivered in IRT “Belt” “First fold only” < 2.5 m Delivered in first fold delivery “First fold only”...
-
Page 217: The Reinforcement Unit
The reinforcement unit The reinforcement unit Introduction If you install a reinforcement unit, output can be delivered with a pre-punched, self-adhesive strip, see the illustration below. [65] Example of a reinforcement unit With this strip the copy can be stored in a binder, without running the risk that the punching holes tear out. -
Page 218: Set Reinforcement For The Copy Job In The Scanner Operator Panel Of The Océ Tc4 Scanner
Set reinforcement for the copy job in the scanner operator panel of the Océ TC4 scanner NOTE You can also set reinforcement on the printer operator panel in offline mode. Set reinforcement for the copy job in the scanner operator panel of the Océ TC4 scanner Procedure Access the Copy templates. -
Page 219: The Belt Unit
The belt unit The belt unit Introduction A belt unit offers a large capacity and more flexibility. On the belt unit up to 100 A0 prints can be delivered offset stacked. You can adjust the side guides of the belt, depending on the width of the folded package. -
Page 220: Adjust The Punch Unit
Adjust the punch unit Adjust the punch unit Procedure Open the front door of the high capacity output unit of the folder. Turn the black knob to adjust the folding width. [68] Refer to the sticker inside the unit. Loosen the screw and place the plate according to the folding length. [69] Nut to adjust the folding length in the punch unit Tighten the screw. -
Page 221: Belt Full Detection
Belt full detection The Océ PlotWave 750 has a belt full detection on both belts. The operator alert light on the printer operator will go on if the belt is full. The system can switch belts when the first belt is full. -
Page 222: Get To Know The Océ Double Decker® (Pro) Finishing Module
The functions of Océ Double Decker Introduction The Océ Double Decker Pro is an optional finishing module for the Océ PlotWave 750 to stack high-volume output in an efficient and productive manner. This section describes the components, product specifications and how to make the settings for the Océ Double Decker Pro. -
Page 223: The Océ Double Decker Pro Module
The Océ Double Decker Pro module Introduction Océ Double Decker Pro is an optional finishing module for the Océ PlotWave 750 to stack high- volume output in an efficient and productive manner. Océ Double Decker Pro offers you the following functions. - Page 224 The Océ Double Decker Pro module Component Function Lower tray Collect the media output Tray selection lever Select the tray manually Side cover handle Access the inside to remove jammed media Top cover handle Access the inside to remove jammed media 11 / B Top cover lever...
-
Page 225: Product Specifications
The Océ Double decker Pro supports the same media that is described in the documentation of the Océ PlotWave 750 with the following exception. You cannot use polyester film if you use the Océ Double decker Pro with the Océ PlotWave 750. -
Page 226: How To Set The Tray Selection Method
How to set the tray selection method How to set the tray selection method Introduction If you want to define the tray selection method of the Océ Double Decker Pro, you can do this in Océ Express WebTools. You can set one of the following tray selection settings in the [Preferences] at the Océ... -
Page 227: Maintain And Troubleshoot The Océ Plotwave 750 System
Chapter 7 Maintain and troubleshoot the Océ PlotWave 750 system... -
Page 228: Maintain The Printer
[Clear the temporary store] Use it to clean the Scan-to-file storage area ('Scans' inbox) NOTE After a "Clear" operation, restart of the system is recommended. Chapter 7 - Maintain and troubleshoot the Océ PlotWave 750 system... -
Page 229: Media
[71] Roll retainer Procedure Open the appropriate roll drawer. NOTE Do not open more than one roll drawer at a time to prevent overbalance of the printer. Chapter 7 - Maintain and troubleshoot the Océ PlotWave 750 system... - Page 230 Use both hands to place the holder in the roll drawer. [74] Position the media Use both hands to slide the material under the metal paper guide until it makes contact, as shown in the above illustration. Chapter 7 - Maintain and troubleshoot the Océ PlotWave 750 system...
- Page 231 [76] Buttons for feeding and cutting the paper Press the green button a second time to cut off the material protruding from the paper path. Remove the scrap material. Close the roll drawer. Chapter 7 - Maintain and troubleshoot the Océ PlotWave 750 system...
-
Page 232: Use The Optional Roll Loader
Align the roll with the appropriate size indicator on the roll holder and release the locking mechanism. This line has to be completely visible. Use both hands to place the holder in the roll loader; see the illustration below. [78] Use both hands Chapter 7 - Maintain and troubleshoot the Océ PlotWave 750 system... - Page 233 Specify the size and type of material on the printer operator panel. NOTE Both DIN and ANSI paper series are available on the printer operator panel. Press the “Online” key again. Chapter 7 - Maintain and troubleshoot the Océ PlotWave 750 system...
-
Page 234: Load Cut Sheet Material
Release the right-hand guide by squeezing the light green release handle on the guide; see the illustration below. Move the guide to the required media size indicator. NOTE Make certain that the handle is properly aligned with the appropriate indicator. Chapter 7 - Maintain and troubleshoot the Océ PlotWave 750 system... - Page 235 Adjust the right-hand guide. Carefully place the media in the drawer to avoid damage to the media. Slide the two other guides into position. Also refer to the sticker inside the drawer. Close the drawer. Chapter 7 - Maintain and troubleshoot the Océ PlotWave 750 system...
-
Page 236: Define The Media Type And Media Size
Put the printer online again by pressing the “Online” key. NOTE You only adjust the settings on the printer operator panel when you alter the size or media type. Chapter 7 - Maintain and troubleshoot the Océ PlotWave 750 system... -
Page 237: Toner
Refill the toner Introduction If the “Refill toner” message appears on the printer panel, you must refill the toner immediately. Use only 1 bottle of Océ toner each time the Océ PlotWave 750 indicates the toner must be refilled. NOTE Make sure you use toner suitable for the Océ... - Page 238 Pull the slider towards you to open both the bottle and the refill opening of the toner unit. [83] Open the slider of the toner refill opening Tap the toner bottle gently (sideways) to let the toner flow from the bottle. Chapter 7 - Maintain and troubleshoot the Océ PlotWave 750 system...
- Page 239 When the toner bottle is empty, return the slider of the toner unit to the original position to close the refill opening and the toner bottle. You can now remove the toner bottle from the opening. [84] Close the slider and remove the bottle Chapter 7 - Maintain and troubleshoot the Océ PlotWave 750 system...
-
Page 240: Replace The Waste Toner Container
[85] Location of the waste toner container Remove the waste toner container carefully from the waste toner tube and place the cap provided with the container on the opening. Chapter 7 - Maintain and troubleshoot the Océ PlotWave 750 system... - Page 241 Place a new waste toner container over the waste toner tube and push it into place. Make sure the container is fixed tightly. [87] Place a new waste toner container Chapter 7 - Maintain and troubleshoot the Océ PlotWave 750 system...
- Page 242 Replace the waste toner container Close the left-hand cover to make the system available again for normal use. Result Chapter 7 - Maintain and troubleshoot the Océ PlotWave 750 system...
-
Page 243: Solve Problems On The Printer
Stickers on some parts of the system indicate which green handles, green knobs, green bars and covers, etc. you have to lift, press or open to remove any jammed paper. Chapter 7 - Maintain and troubleshoot the Océ PlotWave 750 system... -
Page 244: How To Detect A Problem With The Help Of Océ Express Webtools
How to correct a problem with the After detecting the problem, it needs to be fixed. Please see help of Océ Express WebTools on page 245 for more information on how to fix the problem. Chapter 7 - Maintain and troubleshoot the Océ PlotWave 750 system... -
Page 245: How To Correct A Problem With The Help Of Océ Express Webtools
Use the Océ Wide format Print- more information, see er Driver for Microsoft® Windows® to send a print job on page 143. • If the error persists, contact Océ Service. Chapter 7 - Maintain and troubleshoot the Océ PlotWave 750 system... - Page 246 [Job cannot be printed because the • Click [Configuration] - [Connectivity] and move to the required PDL is disabled] [Printer languages] header. Check whether printing of this printer description language is [Enabled]. Chapter 7 - Maintain and troubleshoot the Océ PlotWave 750 system...
-
Page 247: Define The Error Report Settings
- Do not forget to disable this setting again, to prevent performance reduction. - This setting is not available when the [Smart Inbox capability] is disabled. Chapter 7 - Maintain and troubleshoot the Océ PlotWave 750 system... -
Page 248: Clear Paper Jams On The Printer
Paper jams can occur in the following areas. Location Folding section Fuser section Manual feed section Roll feed section Cut sheet section [89] Locations where paper jams can occur Chapter 7 - Maintain and troubleshoot the Océ PlotWave 750 system... -
Page 249: Paper Jam In The Fuser Section
If you fail to do so, the OPC drum might get damaged when you remove jammed material. Open the cover on the left-hand side; see the illustration below. During normal use, the left-hand cover has to be closed. This is necessary to ensure proper operation. Chapter 7 - Maintain and troubleshoot the Océ PlotWave 750 system... - Page 250 Remove any jammed printing material from the fuser section. If the printing material is visible for the manual feed section, remove it from the front side of the Océ PlotWave 750. Pull the green knob to release the fuser section cover and close the cover with the help of the green handle.
-
Page 251: Paper Jam In The Manual Feed Section
If the material cannot be removed easily, you must open the cover of the fusing section to get access to the jammed material. Otherwise, the OPC drum may become damaged. Close the manual feeder again. Chapter 7 - Maintain and troubleshoot the Océ PlotWave 750 system... -
Page 252: Paper Jam In The Roll Feed Section
Load rolls of media on page 229. Close the roll drawer again. NOTE If the roll drawers are still highlighted in the illustration on the printer operator panel, re-check the roll feed section. Chapter 7 - Maintain and troubleshoot the Océ PlotWave 750 system... -
Page 253: Paper Jam In The Cut Sheet Section
[94] Remove jammed material from the paper path Close the sheet feeder again. If the covers of the sheet feeder are still highlighted in the illustration on the scanner operator panel, re-check the sheet feeder section. Chapter 7 - Maintain and troubleshoot the Océ PlotWave 750 system... -
Page 254: Paper Jam At The Top Delivery Tray
If you fail to do so, the OPC drum might get damaged when you remove jammed material. Open the cover on the left-hand side of the printer. NOTE Make sure the printer is switched off before you open the fuser section. Chapter 7 - Maintain and troubleshoot the Océ PlotWave 750 system... - Page 255 Pull the green knob to release the fuser section cover and close the cover with the help of the green handle. Close the left-hand cover. Turn the printer on again. Chapter 7 - Maintain and troubleshoot the Océ PlotWave 750 system...
-
Page 256: Maintain The Océ Tc4 Scanner
Pull the top cover towards you and lift the top cover to open it. [98] Open the top cover Clean the glass plate and the white plate with a lint-free cloth and a small quantity of the cleaner. Chapter 7 - Maintain and troubleshoot the Océ PlotWave 750 system... - Page 257 Lift the top cover, turn the top cover towards you and push the top cover down until you hear or feel a click. Turn on the Océ TC4 scanner. Chapter 7 - Maintain and troubleshoot the Océ PlotWave 750 system...
-
Page 258: Calibrate The Scanner
[102] The remove the calibration sheet icon Select [OK] with the lower-right soft key. NOTE When the calibration process stops or fails, follow the instructions on the scanner operator panel carefully. Chapter 7 - Maintain and troubleshoot the Océ PlotWave 750 system... - Page 259 Calibrate the scanner Result The Océ TC4 scanner is calibrated and the scan quality is correct again. Chapter 7 - Maintain and troubleshoot the Océ PlotWave 750 system...
-
Page 260: Clear An Original Jam On The Océ Tc4 Scanner
Lift the top cover, turn the top cover towards you and push the top cover backwards until you hear or feel a click. Result The green light at the scanner operator panel is on. Chapter 7 - Maintain and troubleshoot the Océ PlotWave 750 system... -
Page 261: Scanner Error Messages And Solutions
[104] The error message icon Follow the instructions on the scanner operator panel. Result You solved the error with the help of the instructions on the scanner operator panel. Chapter 7 - Maintain and troubleshoot the Océ PlotWave 750 system... -
Page 262: Maintain The Folder Options
[105] Top cover of the folder Remove any jammed printing material. Open the cover of the first fold section. [106] Opening the first fold section Open the guide plate. Chapter 7 - Maintain and troubleshoot the Océ PlotWave 750 system... -
Page 263: How To Clear A Jam In The Folder Transport Section
[108] Opening the cover of the folder transport section Remove any jammed printing material. Close the cover of the folder transport section from the left side by lifting it up and pushing the hinge away from you. Chapter 7 - Maintain and troubleshoot the Océ PlotWave 750 system... -
Page 264: How To Clear A Jam In The Second Fold Section
If you have a belt unit, put the belt in an upright position. [110] Putting the belt in an upright position Open the delivery unit. [111] Opening the delivery unit Open the guide plate with the green lever. Chapter 7 - Maintain and troubleshoot the Océ PlotWave 750 system... - Page 265 Open the vertical transport with the green lever. [113] Opening the vertical transport Remove any jammed printing material. Close the vertical transport. [114] Closing the vertical transport Close the guide plate. Close the delivery unit Chapter 7 - Maintain and troubleshoot the Océ PlotWave 750 system...
- Page 266 How to clear a jam in the second fold section [115] Closing the delivery unit Chapter 7 - Maintain and troubleshoot the Océ PlotWave 750 system...
-
Page 267: How To Clear A Jam In The Belt Unit
Release the green lever in the lower section of the belt unit (by slightly lifting it and pulling it forward) to open the lower plate. [118] Opening the lower plate Chapter 7 - Maintain and troubleshoot the Océ PlotWave 750 system... - Page 268 Pull up the green lever again (until it locks into position) to close the plate. Close the belt unit door. Put the belt in its operating position by pushing it down gently. Chapter 7 - Maintain and troubleshoot the Océ PlotWave 750 system...
-
Page 269: The Reinforcement Unit
This section covers maintenance activities for the optional reinforcement unit of the folder. The following actions will be described. • Insert a new tape roll • Empty the waste box • Clean the reinforcement knives. Chapter 7 - Maintain and troubleshoot the Océ PlotWave 750 system... -
Page 270: Remove An Empty Tape Roll
Turn the two guide plates away from the pin roller and lock the two guide plates into their open position. [120] Opening the guide plates Remove the trailing strip of the old tape. Chapter 7 - Maintain and troubleshoot the Océ PlotWave 750 system... - Page 271 Open the front side plate of the roll holder (remove the screw and the old kernel.) NOTE Clean the reinforcement knives Clean the reinforcement knives before you put in a new roll. See on page 278. Chapter 7 - Maintain and troubleshoot the Océ PlotWave 750 system...
-
Page 272: Insert A New Tape Roll
Loosen the end of the roll and lead the tape over the large guide roller. [123] Guiding the tape around the guide roller Guide the tape between the upper and lower knife and over the pin roller. Chapter 7 - Maintain and troubleshoot the Océ PlotWave 750 system... - Page 273 Lift the tape from the pin roller and push the tape between the two knives until the holes are aligned. [126] Adjusting the holes on the tape Close the guide plates of the pin roller. Chapter 7 - Maintain and troubleshoot the Océ PlotWave 750 system...
- Page 274 Insert a new tape roll [127] Closing the guide plates Chapter 7 - Maintain and troubleshoot the Océ PlotWave 750 system...
-
Page 275: Prepare The Tape Roll For Operation
Lift the guide and move the protection sheet between the protection sheet rollers. Pull the protection sheet tight. [130] Leading the protection sheet between the rollers Insert the strip of the tape into the closed section of the slide. Chapter 7 - Maintain and troubleshoot the Océ PlotWave 750 system... - Page 276 Hold the upper guide plate down and cut the tape at the knife section. (Quickly pull the strip up so that the upper knife cuts the tape.) [132] Cutting the tape at the knife section Close the side door of the reinforcement unit. Chapter 7 - Maintain and troubleshoot the Océ PlotWave 750 system...
-
Page 277: Empty The Waste Box
Empty the box. Close the waste box. • First push the waste box forward. • Next push the waste box to the right-hand side. [134] Closing the waste box Chapter 7 - Maintain and troubleshoot the Océ PlotWave 750 system... -
Page 278: Clean The Reinforcement Knives
Open the side door of the reinforcement unit. Clean the upper and lower knife using Cleaner K. [135] Cleaning the upper and lower knife Use the Fixing Unit Cleaning Oil (silicon oil) to oil the felt. Chapter 7 - Maintain and troubleshoot the Océ PlotWave 750 system... - Page 279 The picture on the display disappears and the message “Press start to resume job” or “Ready to print” appears, depending on whether or not a job was interrupted to clean the knives. Press the Online key. Chapter 7 - Maintain and troubleshoot the Océ PlotWave 750 system...
-
Page 280: Handle Errors At The Reinforcement Unit
Turn the two guide plates away from the pin roller and lock the two guide plates into their open position. [138] Open the guide plates Remove all tape between the rollers and the knives. Chapter 7 - Maintain and troubleshoot the Océ PlotWave 750 system... - Page 281 Clear a tape jam in the reinforcement unit [139] Removing the tape Move a new trailing strip of tape between the rollers and the knives. Chapter 7 - Maintain and troubleshoot the Océ PlotWave 750 system...
-
Page 282: No Reinforcement Strips On The Output
272. If this error occurs frequently, you must call your Océ representative. Remove all tape between the rollers and the knives. Install a new trailing strip of tape between the rollers and the knives. Chapter 7 - Maintain and troubleshoot the Océ PlotWave 750 system... -
Page 283: Chapter 8 Support
Chapter 8 Support... -
Page 284: Maintenance
[Maintenance] [Maintenance] Definition In the [Support] - [About] tab, the [Maintenance] section provide the following options: • [Make a demo print] • [Clear the system] • [Clear the temporary store] [Maintenance] options [Make a demo print] Use it to make a printout of the internal demo job (demo print) stored in the system. -
Page 285: Service Required Indication
Introduction In order to guarantee best performance of the Océ PlotWave 750, system servicing is required. To make sure the system is serviced in time, the Océ PlotWave 750 has a built-in service indication. NOTE When service is required, please contact [Océ service] in time. -
Page 286: Counter History
[Counter history] [Counter history] Introduction Navigate to the [Support] - [Counter history] tab to get an overview of the consumables used per printed job. The table below gives an overview of the various functionalities you can access in the [Counter history] to sort, group, save or print the information you need. -
Page 287: Preferred Océ Media Types And Sizes
Océ media. You can receive a full list of the Océ media that you can use in your printer (that includes plain or recycled paper, transparent paper, colored papers and different polyester films) from your Océ PlotWave 750 representative. You can select one of the media names listed in the tables below on: •... - Page 288 Preferred Océ media types and sizes Maximum Minimum Roll length 200 meters Not applicable 650 feet A media guide with the latest information is available on the website: http://global.oce.com/supplies/ Chapter 8 - Support...
-
Page 289: Update
Select the [Update] button. Click [Ok] to confirm your entries or [Cancel] to reject your entries. Browse to the location of the patch file(*.oce). Select the file and click 'Open'. Click [Ok] to confirm your entries or [Cancel] to reject your entries. -
Page 290: Licenses
The [Support] - [Licenses] tab in the Océ Express WebTools allows you to manage the licenses that are active on your system. A license is needed to activate certain functions on your Océ PlotWave 750. You can use the [Support] - [Licenses] tab to perform the following tasks. -
Page 291: Save The Currently Active Licenses
Save the currently active licenses Save the currently active licenses Introduction You can save all active licenses into one single file. Purpose Save the currently active licenses, when you want to: • Collect and save all active licenses of different types into one single file •... -
Page 292: Install A New License
Install a new license Install a new license Introduction The Océ applications and optional functions are protected against unauthorized use. You need to activate the license to enable an application or optional function for use. The [Licenses] tab enables you to upload new license files to activate a license. Purpose •... -
Page 293: Remote Service
Remote Service [Océ Remote Service] Introduction The Océ Express WebTools offer remote services online (from the Océ PlotWave 750 or from Océ to the Océ PlotWave 750). You can find these settings in the [Support] - [Océ Remote Service] tab. - Page 294 [Check connection] NOTE For the online viewing and approval of meter reads and/or service call entry via the Web, please refer to the Océ website of your country. It is preferable to create an account: “My account”. After creating the account, access can be requested for both services. NOTE Feedback on the status of the connection and tooltip information are given in system monitor.
-
Page 295: Allow Remote Assistance
Click on [Allow remote assistance] to allow remote access from Océ to the Océ PlotWave 750 system. The Océ PlotWave 750 will now listen for remote access activities from Océ. It will inform the user who is either listening for a connection or has accepted a connection. -
Page 296: Download Log Files
[Download log files] [Download log files] Procedure Click on [Download log files]: The system creates a zip file that contains the relevant technical and audit log files in a text format. The zip file can be saved locally. Chapter 8 - Support... -
Page 297: Audit Log
Audit log Audit log Audit log Definition As a System Administrator, you can download a comma-separated values (CSV) file containing the audit of all security-related events in the system. [Download audit events] and [Clear audit events] Log in as a System Administrator and select the [Audit log] in the [Support] tab. Click on the [Download audit events] button to download a comma-separated values (CSV) file containing the audit events. - Page 298 Audit log Chapter 8 - Support...
-
Page 299: Account Management
Chapter 9 Account management... -
Page 300: An Overview Of Océ Account Center
An overview of Océ Account Center An overview of Océ Account Center Introduction Use Océ Account Center to manage the account information of print jobs, copy jobs and scan jobs for your Océ devices. NOTE For this application a separate user manual is available. Definition Océ... - Page 301 An overview of Océ Account Center User roles and tasks in Océ Account Center Users Tasks 1) Administrator • Create, manage and delete the account dialog. • Publish the account dialog to the Océ Express WebTools and the scanner operator panel. 2) Users •...
-
Page 302: Océ Account Console
Océ Account Console® ® Océ Account Console Introduction to Océ Account Console Definition Océ Account Console is installed on the administrator's workstation. Access to Océ Account Console is password protected and limited to the administrator. Purpose Use Océ Account Console is intended for the following actions. •... -
Page 303: Summary Of Océ Account Console
Summary of Océ Account Console Summary of Océ Account Console Main parts of Océ Account Console An administrator uses Océ Account Console to perform a number of maintenance and configuration tasks. The main functional areas of Océ Account Console are described in the table below. Main parts of Océ... - Page 304 Summary of Océ Account Console Part Description The [Export filters] tab [Overview] section. • [Create...]. Use this option to define the conditions to export data • [Delete]. Remove the export filter. • [Edit...]. Change the conditions to export log data. •...
-
Page 305: Enable Account Management In The Océ Express Webtools
Enable account management in the Océ Express WebTools Enable account management in the Océ Express WebTools Introduction To enable account management you must define the values for the [Logging and accounting] settings group. Definition Use the [Logging and accounting] settings in the Océ Express WebTools to link account information to your job. -
Page 306: Accounting Workflow
After the administrator configures the settings, accounting can be integrated in the workflow. Procedure Define an accounting dialog and publish it. Add the Océ PlotWave 750 to the devices in Océ Account Console and configure the tasks. NOTE Try to retrieve log data every day when the printer is On. -
Page 307: Overview And Tables
Appendix A Overview and tables... -
Page 308: Supported Media Types And Sizes For The Printer
Océ media. You can receive a full list of the Océ media that you can use in your printer (that includes plain or recycled paper, transparent paper, colored papers and different polyester films) from your Océ PlotWave 750 representative. You can select one of the media names listed in the tables below on: •... - Page 309 Media sizes Maximum Minimum Media width 914 millimeters 279 millimeters 36 inch 11 inch Roll length 200 meters Not applicable 650 feet A media guide with the latest information is available on the website: http://global.oce.com/supplies/ Appendix A - Overview and tables...
-
Page 310: Available Media Sizes
Available media sizes Available media sizes Introduction Océ machines and media are matched for the best quality and performance. Océ advises to only use Océ-approved media. You can receive a full list of the Océ media that you can use in your printer (that includes plain paper, transparent paper, colored papers and different polyester films) from your Océ... - Page 311 Available media sizes Others Media Width Length 30 inch 30 inch 42 inch 700 mm 1000 mm B1 (DIN) 707 mm 1000 mm 500 mm 700 mm B2 (DIN) 500 mm 707 mm NOTE For manual feed, only Portrait orientation is supported. B1/B1 DIN are not discriminated on the input table.
-
Page 312: Standard Scale Factor
Standard scale factor Standard scale factor Introduction The Océ PlotWave 750 can scale (reduce and enlarge) the image to a defined format. The overview below shows the scale factor if you need to copy on media of different sizes. IMPORTANT If you select the wrong scale factor you can lose information. -
Page 313: Index
Index Index Clear an original jam on the Océ TC4 scanner...260 Clear paper jams on the printer......248 Account Console...........303 Clear the system...........228, Account management Clear the temporary store......228, Océ Express WebTools........305 Climate control............37 Add a leading strip..........191 Color mode: Black and White......202 Add a trailing strip..........191... - Page 314 Index stop a copy job..........175 Copy quality, according to E-shredding Fine details........181, 182, algorithm............111 Original brightness......181, 182, Disable............110 Original type........181, 182, Enable.............110 Copy sets...............184 Number of overwrite passes......112 copy Edit a setting a specific area.........192, Océ Express WebTools........65 On a cut sheet..........190 Empty the waste box..........277...
- Page 315 Index Folder transport section........210 Job submission Lever..............210 description............138 Reinforcement unit........210 ftp..............149 Second fold section........210 lpr..............150 Stacker............210 Océ PostScript® 3 Driver.......145 Folder..............211 Océ Publisher Select........141 Belt unit............210 Océ Wide format Printer Driver for Microsoft Components...........210 Windows............143 Reinforcement unit........210 Job templates Stacker............210 Scan-to-file..........194, Folding Jobs...
- Page 316 QR Code..........159, preferred transparencies.......287, quick response card........157 Media..............229 scan a document..........164 Humidity............37 URL............159, Minimum browser security settings for Océ Océ PlotWave 750 printer........24 Express WebTools Océ PlotWave 750 for Firefox ............47 functions............24 for Internet Explorer ........47 Océ PostScript® 3 Driver Mobile printing password........155...
- Page 317 Key operator settings........41 scan-to-file jobs........84, Key operator settings key........38 Overview Offline menu options........41 Océ Account Center........300 Online key............38 PlotWave 750 printer........18 Selection keys...........38 scanner states...........49 Stop key............38 system states............48 Up/Down key............38 toner states............49 Printer operator panel actions.......41...
- Page 318 Index Detect problem..........244 Save solve a problem..........245 settings in a file..........68 Scale..............189 Scale formats Standard............312 Quality Scale to another media size.........189 copy jobs...........84, Scan area...............256 print jobs............83 Scan destinations scan-to-file job..........84, local............129, Queue remote.............129 states............54 remote via FTP..........132 Quick Response Card remote via SMB..........132 edit...
- Page 319 Index Separate Strip sheet............186, add a leading or trailing strip......191 Separation sheet Support tab preferences............81 Océ Express WebTools........62 settings..............81 Support Service required indication........285 Downloads:............13 Service Knowledge base..........13 Service required..........285 Manuals............13 Set reinforcement for the copy job in the scanner Media..............13 operator panel............218 OKB..............13...
- Page 320 Index Scanner..........33, 35, Unlock scanner............57 Update..............289 Upload licenses............292 Use the optional roll loader.........232 User interaction Job submission software........22 Océ Express WebTools........22 Océ Publisher Express........22 Océ Publisher Mobile........22 Océ Publisher Select........22 Operator panel..........22 printer drivers...........22 User roles operator............103 Océ Express WebTools........103 power user............103 system...
- Page 321 CANON INC. www.canon.com CANON U.S.A., INC. www.usa.canon.com CANON CANADA, INC. www.canon.ca CANON EUROPA INC. www.canon-europe.com CANON LATIN AMERICA INC. ww.cla.canon.com CANON AUSTRALIA PTY. LTD www.canon.com.au CANON CHINA CO., LTD www.canon.com.cn CANON SINGAPORE PTE. LTD. www.canon.com.sg CANON HONGKONG CO., LTD www.canon.com.hk ©CANON INC.
Need help?
Do you have a question about the PlotWave 750 and is the answer not in the manual?
Questions and answers
Drawers won't open
The drawers on the Océ PlotWave 750 won't open if more than one roll drawer is attempted to be opened at the same time, as this could lead to printer overbalance.
This answer is automatically generated