Table of Contents

Advertisement

Quick Links

Operation guide

Océ PlotWave 345/365

Advertisement

Table of Contents
loading

Summary of Contents for Oce plotwave 345

  • Page 1: Operation Guide

    Operation guide Océ PlotWave 345/365...
  • Page 2 Copyright © 2016, Océ All rights reserved. No part of this work may be reproduced, copied, adapted, or transmitted in any form or by any means without written permission from Océ. Océ makes no representation or warranties with respect to the contents hereof and specifically disclaims any implied warranties of merchantability or fitness for any particular purpose.
  • Page 3 Trademarks Océ, Océ PlotWave 345/365, Océ Express WebTools, Océ Publisher Express, Océ Publisher Mobile, and Océ Mobile WebTools are registered trademarks of Océ. ® ® ® ® Adobe , Acrobat , Reader are registered trademarks of Adobe Systems Incorporated. ®...
  • Page 5: Table Of Contents

    Notes for the reader............................12 Available documentation..........................14 Chapter 2 Get to Know the Printing System................... 17 The Océ PlotWave 345/365..........................18 Connect your Printing System........................19 Working area [Footprint]......................... 19 Connect the mains supply cable and the network cable..............20 Switch on the printing system........................
  • Page 6 Contents Set the scan job default settings......................61 Configure the Smart Inbox settings......................62 The Smart Inbox and the queue concept....................62 The Smart Inbox in the Jobs tab......................63 Create and open a Smart Inbox......................65 Close or delete a Smart Inbox.........................68 The job states............................
  • Page 7 Contents Configure the pen settings........................123 Optimise the print quality and print productivity..................124 Set transparency flattening for PDF..................... 124 Set the wipeout correction for PDF...................... 125 Set the long plot mode.......................... 126 Set the automatic roll switch........................ 127 Set the spool threshold......................... 128 Set the rotation mode..........................129 Set the alignment mode ........................
  • Page 8 Contents Scan templates on the user panel......................190 Advanced settings for scan jobs......................191 Advised settings for scan jobs......................197 The original type............................ 199 File type..............................201 Scan to a USB key..........................203 Scan to the home folder........................204 Save a scanned document on your mobile device................205 Pause, resume, or stop an active job......................206 Clear the system............................
  • Page 9 Contents How to solve problems with jobs....................... 266 Clear an original jam in the scanner......................267 Clear a media jam in the heater section..................... 268 Clear a media jam in the media bypass section..................270 Clear a media jam in the roll feed section....................272 Event messages............................273 Print a demo print............................276 Print a test print............................
  • Page 10 Contents...
  • Page 11: Chapter 1 Introduction

    Chapter 1 Introduction...
  • Page 12: Notes For The Reader

    Notes for the reader Notes for the reader Introduction This manual helps you to use the Océ PlotWave 345/365. The manual contains a description of the product and guidelines to use and operate the Océ PlotWave 345/365. Definition Attention Getters Parts of this manual require your special attention.
  • Page 13: Safety Information

    "http:// which is part of the user documentation. You can download the safety information via downloads.oce.com" or, if applicable, find it on the user documentation CD/DVD that is delivered together with the machine or obtain the safety information from your local Océ representative. To avoid potential hazards, maintenance is strictly preserved to properly qualified and trained service technicians.
  • Page 14: Available Documentation

    Available documentation Documentation Availability User Manual - Operation guide • On the download website under the product "http://downloads.oce.com" name ( Available as a PDF file in multiple languages. Online Help - Océ Express WebTools • Embedded in the application Available in multiple languages.
  • Page 15 Available documentation Océ Publisher Select Documentation Availability User guide - Océ Publisher Select • On the download website under the product "http://downloads.oce.com" name ( Available as a PDF file in multiple languages. Online Help • Embedded in the application Available in multiple languages.
  • Page 16 Available documentation Chapter 1 - Introduction...
  • Page 17: Get To Know The Printing System

    Chapter 2 Get to Know the Printing System...
  • Page 18: 
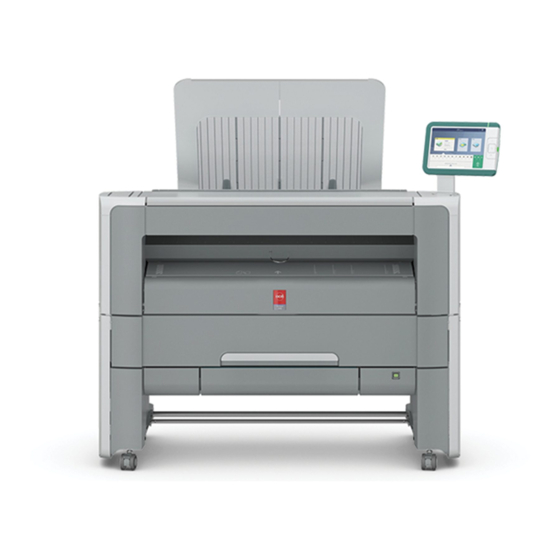
The Océ Plotwave 345/365

    The Océ PlotWave 345/365 The Océ PlotWave 345/365 Introduction The Océ PlotWave 345/365 is a black and white, all-in-one wide format print, copy and scan system with a multi-touch user panel and an optional color scanner. Workflow of the Océ PlotWave 345/365...
  • Page 19: Connect Your Printing System

    Connect your Printing System Connect your Printing System Working area [Footprint] The printing system (with or without the optional [Océ Scanner Express]) requires a specific floor space / working area as indicated in the illustration below. 60mm 1560mm 2.4” 61.4” 803mm 31.6”...
  • Page 20: Connect The Mains Supply Cable And The Network Cable

    Connect the mains supply cable and the network cable Connect the mains supply cable and the network cable Procedure IMPORTANT Make sure the power switch (B) is in 'off' position. 1. Plug the mains supply cable into the power connection at the left back of the printer (A). 2.
  • Page 21: Switch On The Printing System

    Switch on the printing system Switch on the printing system IMPORTANT • Make sure the mains supply cable (A) is plugged in. • Make sure the network cable (C) is plugged in. Procedure 1. Switch on the power switch at the left back of the printer (B). Chapter 2 - Get to Know the Printing System...
  • Page 22: The Hardware

    The Hardware The Hardware The components of the printer (front) Component - function table Component Description / Function [lower left front cover] Remove this cover when you want to move the printer. [lower front cover] Located at the front, used for error recovery. [media bypass] To manually feed cut-sheets up to 36"...
  • Page 23: The Components Of The Printer (Left Side)

    The components of the printer (left side) The components of the printer (left side) Illustration Component - function table Component Description / Function [residual toner compartment] Gives access to the residual toner container. Chapter 2 - Get to Know the Printing System...
  • Page 24: The Components Of The Printer (Back)

    The components of the printer (back) The components of the printer (back) Component - function table Component Description / Function [power switch] Switch the main power supply on or off. You can find the serial number of the printer on the sticker above the power switch.
  • Page 25: The Media Drawer

    The media drawer The media drawer Component - function table Component Description / Function [roll holder] Carries the media roll [media roll] 1 Media placed on roll holder in first position. [media roll] 2 Media placed on roll holder in second position. NOTE The scanner calibration sheet is located at the back of roll 2.
  • Page 26: The User Panel: Océ Clearconnect

    The user panel: Océ ClearConnect The user panel: Océ ClearConnect Introduction The Océ ClearConnect is the multi-touch user panel of the printer. Component Function [status light] Light that gives feedback on the status of the printer. • A green light indicates that the printer is scanning or printing. •...
  • Page 27: The Components Of The Scanner (Optional)

    The components of the scanner (optional) The components of the scanner (optional) NOTE The scanner calibration sheet for the [Océ Scanner Express] is located in the media drawer, at the back of roll 2. The components of the scanner (top cover closed) Component Description/Function [top cover]...
  • Page 28 The components of the scanner (optional) The components of the scanner (top cover opened) Component Description/Function [originals exit] Exits originals for reception into the front origi- nal tray. [original size ruler] Use this ruler to measure the original. [original feed rollers] A set of rollers used to transport the original.
  • Page 29: The Delivery Destination

    The delivery destination The delivery destination Introduction The printer is equipped with a top delivery tray to collect your printed output. The delivery destination In Océ Express WebTools and under [Show all settings] on the user panel you can define the delivery destination for your printed output.
  • Page 30: The Front Original Tray (Optional)

    The front original tray (optional) The front original tray (optional) Introduction The printer can be delivered with a front original tray to hold and collect your originals. Illustration [1] Position 1 - Holds and collects the originals [2] Position 2 - Access the media drawer: lower the tray easily by pushing it down. Chapter 2 - Get to Know the Printing System...
  • Page 31: The Folder (Optional)

    The folder (optional) Introduction The printer can be delivered with an external folder. The Océ PlotWave 345 is compatible with the Océ 2400 fanfold. The Océ PlotWave 365 is compatible with the Océ 2400 fanfold and the Océ 4311 fullfold series.
  • Page 32: Workflow Of The Océ Clearconnect User Panel

    Workflow of the Océ ClearConnect user panel Workflow of the Océ ClearConnect user panel The home screen Introduction The default screen of the Océ ClearConnect user panel is the home screen. From the home screen you can manage jobs and enter the system menu. The home screen Component Function...
  • Page 33 The home screen Component Function Smart Access The dynamic Smart Access changes specifically for a print, copy or scan job and helps you to quickly start a job. [live scan view] The live scan view appears in the Smart Access. The view shows the width and alignment of your document while it slides through the Smart Access.
  • Page 34: The Job Queue And The System Menu

    The job queue and the system menu The job queue and the system menu Introduction The dynamic bar is located in the upper part of the home screen on the user panel display. The dynamic bar consists of the job status with the job queue, the printer status, and the system menu.
  • Page 35 The job queue and the system menu System menu Component Function Printing system • The loaded media in the printer is displayed. and media • Tap the drawer to change the media settings. • Wizards appear, to help you change media or refill toner. [setup menu] The [setup menu] gives general information on the printer.
  • Page 36: Presets, Templates And Advanced Settings

    Presets, templates and advanced settings Presets, templates and advanced settings Introduction Presets and templates help you to submit jobs quickly and easily. Advanced settings help you to fine-tune the settings of your job, and give access to all settings. When you tap the copy tile in the home screen, a window with copy presets and advanced settings opens.
  • Page 37: Job Preview

    Job preview Job preview Introduction The multi-touch user panel offers a detailed preview of your job. Touch the preview thumbnail to access the preview window. Job preview Component Function Job [preview] You can pan the image to see it in more detail. You can shift between the various job files that are part of one location.
  • Page 38: The Cloud

    There are general cloud applications, such as SharePoint or applications via a HTTP URL, but companies can also use their own private and internal clouds. Working with the cloud on the Océ PlotWave 345/365 is very easy: Procedure Description...
  • Page 39 The cloud Procedure Description For print jobs: Open the cloud application locally. PC or mobile de- vice Add and save the file you want to print, in the cloud. Or PC or mobile de- send your file to the printer in the cloud. vice Open your cloud application as location, in the Smart user panel...
  • Page 40 The cloud Chapter 2 - Get to Know the Printing System...
  • Page 41: Define Your Workflow With Océ Express Webtools

    Chapter 3 Define your Workflow with Océ Express WebTools...
  • Page 42: Getting Started

    Getting Started Getting Started Océ Express WebTools Introduction Océ Express WebTools is an application that runs embedded on your printer. Use an up-to-date Internet browser (Google Chrome, Microsoft Internet Explorer or Mozilla Firefox) to open the homepage of Océ Express WebTools on your computer or mobile device. Definition You can use Océ...
  • Page 43: Set Another Language For Océ Express Webtools

    Set another language for Océ Express WebTools Set another language for Océ Express WebTools Introduction The language setting of the Internet browser you use defines the language of Océ Express WebTools. Set another language You can change the language of Océ Express WebTools in your Internet browser. Depending on the Internet browser you use you have to follow several steps to change the language.
  • Page 44: User Roles And Authorizations

    User roles and authorizations User roles and authorizations Introduction You can view all settings in Océ Express WebTools, but when you want to edit a setting a message appears. This message indicates that the setting is password protected. You must log in with a password to change a setting.
  • Page 45: Log In As An Authorized User

    Log in as an authorized user Log in as an authorized user To change certain settings, you must log in as an authorized user. There are three user roles: System Administrator, Key Operator and Power User. They have authorization to edit specific groups of settings.
  • Page 46: Log Out After Your Session

    Log out after your session Log out after your session Purpose When you have finished the modification of a setting, it is advised to log out again. Procedure 1. Click the log out hyperlink in the top right-hand corner of the screen. 2.
  • Page 47: Change The Password For Authorized Users

    Change the password for authorized users Change the password for authorized users When to do For security reasons it is advised to periodically change the password of the three access modes (Key operator, System administrator, Power user) in Océ Express WebTools. IMPORTANT Handle and store all passwords securely and with care.
  • Page 48: The System Monitor

    The system monitor The system monitor Introduction You can open the system monitor to get an overview of the current status of the printing system. When you click on the system tab in the lower left corner of the screen, the system monitor opens.
  • Page 49 The system monitor The scanner states State Icon Description [User intervention re- General error message. quired] [Scanner is busy] The scanner is active. [Scanner is ready] The scanner is ready to start a scan job. The toner states Icon Description Toner OK Toner low, or empty.
  • Page 50: Shut Down Or Restart The System

    Shut down or restart the system Shut down or restart the system NOTE For this procedure, you need to log in as a System Administrator. To remotely shut down the printing system, you can click on [Shut down] in the Support tab of Océ...
  • Page 51: Define The Defaults

    Define the defaults Define the defaults About the default settings in Océ Express WebTools Definition Before you send jobs to the printer, remember the following: The values defined in Océ Express WebTools are default values for the general system behavior. You can define a number of job settings in the printer drivers or the job submission tools.
  • Page 52: How To Edit A Setting

    How to edit a setting How to edit a setting Introduction In Océ Express WebTools, you can make settings to personalise your printing system. NOTE • Before you can edit a setting or a settings group, you must log in as an authorized user. •...
  • Page 53: View And Check The Settings

    View and check the settings View and check the settings Introduction In Océ Express WebTools you can view and check your settings. You can also check which settings are no longer set to the factory default value. Procedure 1. Open the [Configuration] tab or the [Preferences] tab. 2.
  • Page 54: Save The Settings In A File

    Save the settings in a file Save the settings in a file Introduction Save the settings and the values that you configured in Océ Express WebTools in a file. Save the settings in a file to duplicate the settings very easily to another printer of the same type. NOTE Not all settings are stored in the settings file.
  • Page 55: Load The Settings From A File

    Load the settings from a file Load the settings from a file Introduction Load the settings and the values for Océ Express WebTools from a file. Load the settings from a file to duplicate them to another printer of the same type. NOTE •...
  • Page 56: Restore The Factory Defaults

    Restore the factory defaults Restore the factory defaults Introduction Sometimes you want to go back to the initial settings. You can restore the factory default settings in Océ Express WebTools. NOTE Log in as a Key Operator to only restore the Key Operator settings. Log in as a System Administrator to only restore the System Administrator settings.
  • Page 57: Set The Print Job Default Settings

    Set the print job default settings Set the print job default settings Definition In Océ Express WebTools you can configure the default values for the print job settings. When you optimize the print job default settings for your document, you get the best results. The print job settings are grouped under the [Preferences] - [Print job defaults] tab.
  • Page 58 Set the print job default settings Setting Description [Media source] Select the default output material and format for the media used on the printer. • Select [Automatic] to automatically select the media. • Select [Manual feed] to insert a cut sheet. •...
  • Page 59 Set the print job default settings Setting Description [Rotation] Select any option to rotate the image counterclockwise. When you want to print faster, select [Automatic landscape]. You can print faster due to less media transport. Select [Automatic media saving] to use the media in the most effi- cient way.
  • Page 60: Set The Copy Job Default Settings

    Set the copy job default settings Set the copy job default settings In Océ Express WebTools, you can configure the default values for the copy job settings. When you optimize the copy job default settings for your document, you get the best results. The copy job settings are grouped under the [Preferences] - [Copy job defaults] tab.
  • Page 61: Set The Scan Job Default Settings

    Set the scan job default settings Set the scan job default settings In Océ Express WebTools, you can configure the default values for the scan job settings. When you optimize the scan job default settings for your document, you get the best results. The scan job settings are grouped under the [Preferences] - [Scan job defaults] tab.
  • Page 62: Configure The Smart Inbox Settings

    Configure the Smart Inbox settings Configure the Smart Inbox settings The Smart Inbox and the queue concept Definition You can use the Smart Inbox for customized job management. A Smart Inbox works as a personal mailbox from which you print jobs, in which you can store jobs, and where you can scan jobs to.
  • Page 63: The Smart Inbox In The Jobs Tab

    The Smart Inbox in the Jobs tab The Smart Inbox in the Jobs tab Introduction In the Jobs tab you can create jobs or manage your jobs in the queue and the Smart Inbox. NOTE When the [User authentication] setting is enabled, your rights and view on the Jobs tab can differ.
  • Page 64 The Smart Inbox in the Jobs tab Perform actions on your jobs in the Smart Inbox. When you select a job in the Smart Inbox you can use the options listed above to print, edit, send to, save or delete the jobs. Get an overview of all jobs on the system.
  • Page 65: Create And Open A Smart Inbox

    Create and open a Smart Inbox Create and open a Smart Inbox Introduction A Smart Inbox is used as a personal folder to print files from, scan files to, or store files in. In Océ Express WebTools you can create a Smart Inbox in: •...
  • Page 66 Create and open a Smart Inbox Create a Smart Inbox in the [Jobs] tab - Publisher Express section NOTE • With this procedure you not only create a Smart Inbox, but you also send a job to the printer. • The Smart Inboxes created in Publisher Express are only visible on your personal browser. When you send a print job to the specific Smart Inbox, that Smart Inbox also becomes visible on the user panel.
  • Page 67 Create and open a Smart Inbox Create a Smart Inbox in the [Configuration] tab - [ Smart Inbox ] section NOTE The Smart Inboxes created in [Configuration] tab are permanent. Even when the Smart Inbox is empty, it will always be available on the user panel. Step Action Open the [Configuration] - [ Smart Inbox ] tab.
  • Page 68: Close Or Delete A Smart Inbox

    Close or delete a Smart Inbox Close or delete a Smart Inbox Introduction In Océ Express WebTools you can close or delete a Smart Inbox in: • The [Jobs] tab - Smart Inbox section. • The [Configuration] tab - [ Smart Inbox ] section. NOTE •...
  • Page 69: The Job States

    The job states The job states Introduction When a job is placed in a Smart Inbox or in the job queue, the icon in front of the job name gives information about the status of the job. Overview of the job states in the Smart Inbox State Icon Description...
  • Page 70: Configure The Job Management Settings

    Configure the job management settings Configure the job management settings Introduction When you want to control the rights or actions that can be performed on jobs or Smart Inboxes, you can configure the [Job management] settings. Attention: • You can read a full explanation of each setting, when you click on the specific setting's name. •...
  • Page 71: Configure The Network And Security Settings

    Configure the network and security settings Configure the network and security settings Configure the network settings in Océ Express WebTools Introduction Some of the network settings are configured during the installation of your system. When you want to define more network settings, you can do so under the [Configuration] tab. NOTE For more detailed information on network settings, refer to the Océ...
  • Page 72: Set The Security Settings For Microsoft Internet Explorer

    Set the security settings for Microsoft Internet Explorer Set the security settings for Microsoft Internet Explorer Introduction You can use a web browser to open the home page of Océ Express WebTools. Depending on the Internet browser you use, set the required minimum browser security settings as indicated below.
  • Page 73: Set The Security Settings For Mozilla Firefox

    Set the security settings for Mozilla Firefox Set the security settings for Mozilla Firefox Introduction You can use a web browser to open the home page of Océ Express WebTools. Depending on the Internet browser you use, set the required minimum browser security settings as indicated below.
  • Page 74: Set The Link Speed And Duplex Mode

    Set the link speed and duplex mode Set the link speed and duplex mode Introduction Use Océ Express WebTools to set the transmission speed and duplex mode for your network adapter. Before you begin NOTE The list of values you can select depends on the network card type. Procedure 1.
  • Page 75: Enable User Authentication

    Enable user authentication Enable user authentication Introduction You can enable user authentication in Océ Express WebTools. A special user authentication license is required. When user authentication is enabled: • Users have to authenticate to get access to the system. • Users will only see their own jobs. •...
  • Page 76: Enable Access Control

    Enable Access control Enable Access control Introduction When you want to control access to your printer, you need to enable access control in Océ Express WebTools. With access control enabled, you are able to choose up to five hosts who are allowed to communicate with the printer through your network.
  • Page 77: Access Control And Ipsec Settings

    Access control and IPsec settings Access control and IPsec settings Introduction When access control is enabled, you can edit the access control settings. [Access control] and IPsec settings Under [Security] - [Configuration] - [Access control], you can set the following settings for each of the 5 stations: Setting Description...
  • Page 78: Enable Or Disable The E-Shredding Function

    Enable or disable the e-shredding function Enable or disable the e-shredding function Introduction The e-shredding function allows you to securely erase jobs from the system. This prevents unauthorized people from recovering deleted jobs. When the e-shredding function is enabled, you can select an e-shredding algorithm. You can enable the e-shredding function in Océ Express WebTools.
  • Page 79: Select The E-Shredding Algorithm

    Select the e-shredding algorithm Select the e-shredding algorithm Introduction The e-shredding function allows you to securely erase jobs from the system. This prevents unauthorized people from accessing deleted jobs. You can select one of the following algorithms: • [Gutmann]. All jobs on the system are erased in 35 overwrite passes. •...
  • Page 80: Specify The Number Of Overwrite Passes

    Specify the number of overwrite passes Specify the number of overwrite passes Introduction The e-shredding function allows you to erase jobs from the system. This prevents unauthorized people from accessing deleted jobs. You can manually enter the required number of overwrite passes.
  • Page 81: Remote Security

    Remote security Remote security Introduction By default, the first certificate delivered for the use of HTTPS is an Océ self-signed certificate. To ensure a fully trusted authentication, you can request and import a certificate delivered by a Certification Authority (CA-signed certificate). In Océ Express WebTools you can generate the certificates.
  • Page 82: Generate A New Ca-Signed Certificate

    Generate a new CA-signed certificate Generate a new CA-signed certificate Introduction To ensure a fully trusted authentication via HTTPS, you can request and import a certificate delivered by a Certification Authority (CA-signed certificate). In Océ Express WebTools, you can generate a certificate request yourself or you can import a predefined certificate via your computer or network.
  • Page 83 Generate a new CA-signed certificate -----END NEW CERTIFICATE REQUEST----- 5. Copy and paste the content of the request in a .csr file (named 'certificate_request.csr' by default). 6. Restart the controller 7. Send the content of this request to the Certification Authority. Chapter 3 - Define your Workflow with Océ...
  • Page 84: Import A Ca-Signed Certificate: Import The Root Certificate

    Import a CA-signed certificate: Import the root certificate Import a CA-signed certificate: Import the root certificate Introduction To ensure a fully trusted authentication via HTTPS, you can request and import a certificate delivered by a Certification Authority (CA-signed certificate). In Océ Express WebTools, you can generate a certificate request yourself or you can import a predefined certificate via your computer or network.
  • Page 85: Import A Ca-Signed Certificate: Import The Intermediate Certificate

    Import a CA-signed certificate: Import the intermediate certificate Import a CA-signed certificate: Import the intermediate certificate To ensure a fully trusted authentication via HTTPS, you can request and import a certificate delivered by a Certification Authority (CA-signed certificate). When you import the certificate you need to: •...
  • Page 86: Import A Ca-Signed Certificate

    Import a CA-signed certificate Import a CA-signed certificate To ensure a fully trusted authentication via HTTPS, you can request and import a certificate delivered by a Certification Authority (CA-signed certificate). When you import the certificate you need to: • Import the root certificate •...
  • Page 87: Import A Ca-Signed Certificate: Check And Import The Root Certificate

    Import a CA-signed certificate: Check and import the root certificate Import a CA-signed certificate: Check and import the root certificate To ensure a fully trusted authentication via HTTPS, you can request and import a certificate delivered by a Certification Authority (CA-signed certificate). When you import the certificate you need to: •...
  • Page 88: Configure The Presets And Stamping

    Configure the presets and stamping Configure the presets and stamping What you need to know about presets Introduction A preset is a predefined setting that is available on the user panel to easily perform print, copy, and scan jobs. The preset concept supports the green button approach. The default presets are automatically selected on the user panel, so you only have to press the green button to start a job with your predefined settings.
  • Page 89: Set The Default Copy Preset

    Set the default copy preset Set the default copy preset Introduction With a preset you can predefine the settings you need for a copy job. Copy has four preset categories: [Media], [Layout], [Image], and [Finishing] For each category you can set one default preset in Océ Express WebTools. The default preset is automatically used when you press the green button on the user panel.
  • Page 90: Configure The Custom Copy Preset

    Configure the custom copy preset Configure the custom copy preset Introduction With a preset you can predefine the settings you need for a copy job. When you want to use other predefined settings than the default presets, you can configure custom presets in Océ...
  • Page 91: Set The Default Print Preset

    Set the default print preset Set the default print preset Introduction With a preset you can predefine the settings you need for a print job from USB or an external location. Print has four preset categories: [Media], [Layout], [Image], and [Finishing]. For each category you can set one default preset in Océ...
  • Page 92: Configure The Custom Print Preset

    Configure the custom print preset Configure the custom print preset Introduction With a preset you can predefine the settings you need for a print job. When you want to use other predefined settings than the default presets, you can configure custom presets in Océ...
  • Page 93: Make A Custom Preset Available On The User Panel

    Make a custom preset available on the user panel Make a custom preset available on the user panel Introduction When you create a custom preset, you can enable the preset to make it available on the user panel. Before you begin Create the custom copy preset on Create the custom preset first.
  • Page 94: Create A Stamp

    Create a stamp Create a stamp Introduction In the custom preset section of the [Copy job defaults] in Océ Express WebTools you can enable the stamp functionality. Under the [Stamping] tab you can create your own predefined stamp. Procedure 1. Open the [Preferences] - [Stamping] tab. 2.
  • Page 95: Configure The Templates

    Configure the Templates Configure the Templates Scan templates Introduction A template is a group of predefined settings you can configure yourself. Select the template on the user panel to easily submit a job with optimized settings. You can create templates for scanning in Océ Express WebTools under the [Preferences] tab. You can create various templates, enable or disable templates, and select one of the templates as default.
  • Page 96: Create A New Template

    Create a new template Create a new template Introduction Create a new template in Océ Express WebTools. NOTE • Depending on the configuration, less or more settings are available. • More or fewer settings will be shown depending on the selections made. •...
  • Page 97: Delete All Templates

    Delete all templates Delete all templates Introduction You can delete all templates at once with Océ Express WebTools. Procedure 1. Select the [Preferences] - [Scan] tab in Océ Express WebTools for the scan templates. 2. Click on [Delete all] at the right hand side. 3.
  • Page 98: Import Templates

    Import templates Import templates Introduction You can import templates with Océ Express WebTools. Use a zip file with templates that was previously created by the [Export templates] procedure. Procedure 1. Select the [Preferences] - [Scan] tab in Océ Express WebTools for the scan templates. 2.
  • Page 99: Export Templates

    Export templates Export templates Introduction You can export templates with Océ Express WebTools. The export will be saved as a zip file. The zip file contains all available templates. Procedure 1. Select the [Preferences] - [Scan] tab in Océ Express WebTools for the scan templates. 2.
  • Page 100: Restore The Factory Defaults Of The Templates

    Restore the factory defaults of the templates Restore the factory defaults of the templates Introduction You can restore the factory defaults of all templates with Océ Express WebTools. The custom templates are not changed. Procedure 1. Select the [Preferences] - [Scan] tab in Océ Express WebTools for the scan templates. 2.
  • Page 101: Enable Or Disable Scan Templates

    Enable or disable scan templates Enable or disable scan templates Introduction You can enable or disable scan templates. When you enable the templates they become available on the user panel. Procedure 1. Open the [Preferences] - [Scan] tab. 2. Under Actions, click on the [Edit a template] icon next to the preferred template. The template window opens.
  • Page 102: Configure The Locations

    Configure the locations Configure the locations Configure your locations Introduction On the user panel you can find a list of locations you can scan to and print from. To this location you send your scanned files for storage, or you save files on this location and you send them to the printer.
  • Page 103: Enable Or Disable Usb

    Enable or disable USB Enable or disable USB Introduction If you want to use USB as a location, you have to make settings for USB first. You can make the settings in Océ Express WebTools. Illustration Procedure 1. Open the [Configuration] - [External locations] tab. 2.
  • Page 104: Enable And Edit The Home Folder

    Enable and edit the Home folder Enable and edit the Home folder Introduction When you want to use the Home folder as a location you have to enable user authentication first. Only then the Home folder becomes visible in the external location list. When it is present you can edit the functionalities.
  • Page 105: Enable Planwell Collaborate (Optional)

    Enable PlanWell Collaborate (optional) Enable PlanWell Collaborate (optional) Introduction When you have a license installed for PlanWell Collaborate (ARC cloud support), you can enable this external location under the [Configuration] tab. Procedure 1. Open the [Configuration] - [External locations] tab. 2.
  • Page 106: Create An External Location

    Create an external location Create an external location Introduction You can create your own FTP, SMB, WebDAV, external locations with Océ Express WebTools. Before you begin NOTE • Make sure you enable [SMB] protocol. • Make sure you enable [FTP] under the [Configuration] - [Connectivity] tab. •...
  • Page 107 Create an external location 9. Select the [Enabled functionalities]. Enable or disable access to the selected location for print or scan jobs. 10. Click [Ok] to save the external location. NOTE The system will validate the external location and give an error message if the validation fails.
  • Page 108: Set A Default External Location

    Set a default external location Set a default external location Introduction You can set an external location as the default location. The default location is used when you do not select a specific external location for a job. Procedure 1. Select the [Configuration] - [External locations] tab. 2.
  • Page 109: Set A Default Print Destination

    Set a default print destination Set a default print destination Introduction You can configure the default print destination in Océ Express WebTools. When the destination of a print job is not specified in the job ticket or when there is no job ticket, the job is sent to a default destination.
  • Page 110: Troubleshoot The Creation Of An Ftp External Location (After An Error Message)

    Troubleshoot the creation of an FTP external location (after an error message) Troubleshoot the creation of an FTP external location (after an error message) An error message displays to indicate that the creation of the FTP external location failed. According to the error message, perform the verifications proposed in the next table in order to fix the issue.
  • Page 111 Troubleshoot the creation of an FTP external location (after an error message) Error message Action to perform The remote destination test is Check that the Firewall on the FTP server workstation does aborted, because the time-out not prevent the 'FTP passive mode' connection. period has expired.
  • Page 112 Troubleshoot the creation of an FTP external location (after an error message) Error message Action to perform The external location is full. Make some space available on the external location for the 'Scan to' operations. The test of the external location Restart the system and try again.
  • Page 113: Troubleshoot The Creation Of An Smb External Location (After An Error Message)

    Troubleshoot the creation of an SMB external location (after an error message) Troubleshoot the creation of an SMB external location (after an error message) An error message displays to indicate that the creation of the SMB external location failed. According to the error message, perform the verifications proposed in the next table in order to fix the issue.
  • Page 114 Troubleshoot the creation of an SMB external location (after an error message) Error message Action to perform The remote destination cannot The external location server has reached the maximum num- be tested: the remote server has ber of connections. Check with the System administrator or reached the maximum number try again later.
  • Page 115: Troubleshoot The Creation Of A Webdav External Location (After An Error Message)

    Troubleshoot the creation of a WebDAV external location (after an error message) Troubleshoot the creation of a WebDAV external location (after an error message) An error message displays to indicate that the creation of the WebDAV external location failed. According to the error message, perform the verifications proposed in the next table in order to fix the issue.
  • Page 116: Configure The Printer Settings

    Configure the printer settings Configure the printer settings Configure the regional settings Purpose The regional settings are configured during the installation of your printer. When you want to change the initial configuration, you can do this under the [Regional settings]. Define the regional settings for the printer in the following order: •...
  • Page 117: Configure The User Session Time-Out

    Configure the user session time-out Configure the user session time-out Introduction The user panel returns automatically to the home screen and its default configuration. You can set a time limit for the user session. When to do Define a suitable time-out period that does not interfere with the print productivity. Procedure 1.
  • Page 118: Configure The Working Hours

    Configure the working hours Configure the working hours Introduction You can define the working hours of the printer in Océ Express WebTools. Enable [Automatic on] first, to let the printer wake up automatically. Define the working days with the [First workday] setting, for example 'Monday', and [Last workday] setting, for example 'Friday'.
  • Page 119: Configure The Sleep Mode

    Configure the sleep mode Configure the sleep mode Introduction The printer offers an energy save mode that you can use when the printer is idle for a defined period. The configuration of the timer prevents unnecessary power consumption. The printer uses minimal energy because the power supply of the printer is turned off.
  • Page 120: Configure The Media Request Time-Out

    Configure the media request time-out Configure the media request time-out Introduction The user panel displays a message with a media request when the requested media is not available on the printer. • When the [Media request timeout] setting is disabled, the media request will be displayed on the user panel until it is resolved.
  • Page 121: Configure The Media Types

    Configure the media types Configure the media types Introduction You can load various media types on the printer. In Océ Express WebTools you can indicate the media types to make them recognisable for the printer, or set one as default. Procedure 1.
  • Page 122: Configure The Media Sizes

    Configure the media sizes Configure the media sizes Introduction You can load various media sizes on the printer. In Océ Express WebTools you can indicate the media sizes to make them recognizable for the printer. Procedure 1. Open the [Media] - [Media sizes] tab. 2.
  • Page 123: Configure The Pen Settings

    Configure the pen settings Configure the pen settings Introduction You can define the pen settings in the application that you use to create a drawing with. When the pen settings are not defined in the application, you can configure the default pen settings in Océ...
  • Page 124: Optimise The Print Quality And Print Productivity

    Optimise the print quality and print productivity Optimise the print quality and print productivity Set transparency flattening for PDF Introduction In Océ Express WebTools, you can select a setting to flatten transparency information in a PDF document before printing. The setting is used for PDF documents containing transparency information only.
  • Page 125: Set The Wipeout Correction For Pdf

    Set the wipeout correction for PDF Set the wipeout correction for PDF Introduction The [Wipeout correction] for PDF setting allows you to print PDF documents, that contain solid black areas that block parts of the image. If you enable this setting, PDF documents are printed correctly but the processing of the PDF files is slower.
  • Page 126: Set The Long Plot Mode

    Set the long plot mode Set the long plot mode Introduction When the [Long plot mode] setting is enabled, it allows you to print plots up to eight times longer than when the setting is disabled. For the printer to be able to print long prints, the print quality can be reduced. NOTE The setting does not apply for PDF or PostScript files.
  • Page 127: Set The Automatic Roll Switch

    Set the automatic roll switch Set the automatic roll switch Introduction In Océ Express WebTools you can choose to enable or disable the [Automatic roll switch]. When you enable the functionality and a specific roll has been selected, the printer automatically continues printing on an (in size and type) identical roll.
  • Page 128: Set The Spool Threshold

    Set the spool threshold Set the spool threshold Introduction When the job memory is full the printer cannot receive new jobs, therefore it is necessary to partly empty the memory. Set the [Spool threshold] setting to define the spool capacity for your jobs.
  • Page 129: Set The Rotation Mode

    Set the rotation mode Set the rotation mode Introduction If you want to turn an image, you can use the rotation settings. The setting allows you to turn the image according to predefined rotation values or you can let the printer perform the rotation automatically.
  • Page 130: Set The Alignment Mode

    Set the alignment mode Set the alignment mode Introduction When you want to shift the image on the sheet, you can change the alignment mode. With the alignment mode, you can also optimize the print productivity as you reduce the distance the print carriage has to travel.
  • Page 131: Configure Mobile Printing And Scanning

    Configure Mobile Printing and Scanning Configure Mobile Printing and Scanning Océ Mobile WebTools Introduction Océ Mobile WebTools provides the following functionalities: • Submit a print-ready file to the printer from a mobile device. • Save a scanned file from the printer on a mobile device. •...
  • Page 132 Get the latest information on infrastructure and mobile device compatibility http:// Refer to the Océ PlotWave-ColorWave Systems Connectivity manual on the downloads.oce.com product page to get information on the connection requirements, or visit http://www.canon.com/support/ to find more information on mobile connection.
  • Page 133: Configure Océ Express Webtools Settings For A Mobile Connection

    Configure Océ Express WebTools settings for a mobile connection Configure Océ Express WebTools settings for a mobile connection Introduction If you want to give users easy access to Océ Mobile WebTools, the settings must first be configured. With the information you can develop a QR card to create easy access. NOTE •...
  • Page 134: Generate The Quick Response Card

    Generate the Quick Response Card Generate the Quick Response Card Introduction When you want users to easily access the printer from their mobile devices, you can generate the QR (Quick Response) card. The QR card contains all the information to establish a connection between the mobile device and the printer.
  • Page 135: Connect Your Mobile Device To Océ Mobile Webtools

    Connect your mobile device to Océ Mobile WebTools Connect your mobile device to Océ Mobile WebTools Before you connect: • Make sure the system is configured. • Make sure you generate the QR card. • Make sure you activate the Wi-Fi connection on your mobile device. NOTE •...
  • Page 136 Connect your mobile device to Océ Mobile WebTools Chapter 3 - Define your Workflow with Océ Express WebTools...
  • Page 137: Use The Printing System

    Chapter 4 Use the Printing System...
  • Page 138: How To Feed An Original

    How to feed an original How to feed an original Introduction When you want to copy or scan, it is important to correctly feed the original in the printer. IMPORTANT • The scanner can not scan an original that is thicker than 0.8 mm or rigid originals. When you use the carrier sheet that is available as an option, ensure that the combined thickness of both How to the document and carrier sheet does not exceed 0.8 mm.
  • Page 139: How To Auto-Feed An Original

    How to auto-feed an original How to auto-feed an original Introduction When you activate the auto-feed functionality, you do not need to use the green button every time you scan a document. This way you improve your productivity. The scanner is activated automatically and releases the original after the scan procedure.
  • Page 140: How To Use The Carrier Sheet

    How to use the carrier sheet How to use the carrier sheet Introduction The carrier sheet can help you scan an original. The use of the carrier sheet depends on the condition of your original. When to do You can use the carrier sheet when you want to copy or scan: •...
  • Page 141: Print Jobs - Job Submission Tools

    Print Jobs - Job submission tools Print Jobs - Job submission tools Use Océ Publisher Express to send a print job Introduction Océ Publisher Express is a job submitter that is integrated in Océ Express WebTools. NOTE When you use Océ Publisher Express to submit a print job, the maximum job size is 2 GigaByte. Illustration Procedure Step...
  • Page 142 Use Océ Publisher Express to send a print job Step Action Remarks Click on [Add file] and use the You can only print documents with the follow- Browse... button to select the file you ing data formats. When you use other formats, want to print.
  • Page 143: Use The Smart Inbox To Send A Print Job

    Use the Smart Inbox to send a print job Use the Smart Inbox to send a print job Introduction If you have already added a job to the Smart Inbox in Océ Express WebTools, you can print this job via the Smart Inbox. NOTE Create and open a Smart Inbox on For more information on how to create a Smart Inbox, see...
  • Page 144: Use Océ Publisher Select 2 To Send A Print Job

    Océ Publisher Select 2 Use Océ PlotWave 345/365 to: • Open the Océ PlotWave 345/365 application and connect to the printer. • Set up the application settings to your preferences. • Check the media and ink available in the printer.
  • Page 145 Use Océ Publisher Select 2 to send a print job Step Action Select one document of a job to check or adjust the print settings in the bottom screen. Check the print preview. Click on the green print button, to print the job. Track and manage a submitted job in the submitted jobs list.
  • Page 146: Use Océ Wide Format Printer Driver 2 For Microsoft® Windows® To Send A Print Job

    345/365. NOTE ® ® For more information on Océ Wide format Printer Driver 2 for Microsoft Windows , go to oce.downloads.com on page and select your product. ® ® Océ Wide format Printer Driver 2 for Microsoft Windows Procedure Step...
  • Page 147 Use Océ Wide format Printer Driver 2 for Microsoft® Windows® to send a print job Step Action Remarks In the [Options] menu in the upper right hand corner of the screen choose [Advanced options]. Make sure a checkmark is placed in the [Océ...
  • Page 148: Use The Océ Postscript® 3 Driver To Send A Print Job

    Use the Océ PostScript® 3 Driver to send a print job ® Use the Océ PostScript 3 Driver to send a print job Introduction ® Océ provides the Océ PostScript 3 Driver that allows you to send print jobs to your printer. NOTE You need a license to be able to print PostScript files on the printer.
  • Page 149: Use Océ Publisher Mobile To Send A Print Job

    Use Océ Publisher Mobile to send a print job Use Océ Publisher Mobile to send a print job Introduction Océ Publisher Mobile is an application that enables you to easily plot from an Océ system via your iPhone, iPad, or Android device. All Océ...
  • Page 150 Use Océ Publisher Mobile to send a print job Step Action Remarks Tap the "Configure" icon next to the printer The printer configuration window name. opens. Enter the IP address or hostname of the printer Add the settings for the printer. •...
  • Page 151: Print From Your Mobile Device

    Print from your mobile device Print from your mobile device Introduction When you have access to Océ Mobile WebTools you can print a file from your mobile device on the printer . NOTE • You can navigate in a file repository on your mobile device. If needed, install a file explorer application.
  • Page 152: Use Ftp To Send A Print Job

    Use FTP to send a print job Use FTP to send a print job Introduction The printer supports printing through FTP. When you send your print job through FTP the default Océ Express WebTools settings are leading. NOTE • You must enable printing through FTP in Océ Express WebTools. •...
  • Page 153: Use Lpr To Send A Print Job

    Use LPR to send a print job Use LPR to send a print job Introduction The printer supports printing through LPR. When you send your print job through LPR, the default Océ Express WebTools settings are leading. NOTE You must enable printing through LPR in Océ Express WebTools. How to send a print job via LPR Type the following line command after the Command prompt: lpr -S <hostname or IP address>...
  • Page 154: Use The Home Folder To Send A Print Job

    Use the home folder to send a print job Use the home folder to send a print job Introduction When you have enabled user authentication in Océ Express WebTools you can submit a print or scan job to the home folder as a secure location. Before you begin Enable [User authentication] with [User name and password] configured and enable the home Enable and edit the Home folder on page...
  • Page 155: Use The Cloud To Send A Print Job

    Use the cloud to send a print job Use the cloud to send a print job Introduction The cloud can be seen as a virtual network drive you use to send files to, but also to save and share files on. There are general cloud applications, such as SharePoint or applications via a HTTP URL, but companies can also use their own private and internal clouds.
  • Page 156: Troubleshoot Print Job Submission

    Troubleshoot print job submission Troubleshoot print job submission Introduction Check the issues and solutions to troubleshoot print job submission. Issue Solution Unable to print a PDF file using When you submit the print job (File - Print), make sure Adobe Acrobat reader. you check the box 'Choose paper source by PDF page size' in the print dialog.
  • Page 157: Print Jobs

    Print Jobs Print Jobs Do a default print job Introduction When you want to print a job and you do not make any settings, the default presets are used. You only use the Smart Access to start your job. You can see the presets that are used in the job settings section of your job. Before you begin Make sure you submit a job via one of the job submitter applications: Use Océ...
  • Page 158 Do a default print job 2. Select the location of your job. Default, the public Smart Inbox. The jobs are listed in a new window. 3. Select your job from the list. 4. Tap the green button, next to the job settings. Chapter 4 - Use the Printing System...
  • Page 159: Direct Print

    Direct print Direct print Introduction When you want to do a default print job: • You can print with direct print. When you print with direct print, the print job is sent to the queue immediately. • You can print without direct print. When you print without direct print you can start the job locally at the printer.
  • Page 160: Print From A Usb Key

    Print from a USB key Print from a USB key Introduction With a USB key, you can perform print and scan jobs on the printer. Procedure 1. Insert a USB key into the USB port on the multi-touch user panel. The print tile is automatically selected on the user panel, and the USB location is active.
  • Page 161: Print Presets On The User Panel

    Print presets on the user panel Print presets on the user panel Introduction The printer uses the default presets for print and copy jobs, when you do not make different settings. The print presets are divided into four categories: • [Media] •...
  • Page 162: Advanced Settings For Print Jobs

    Advanced settings for print jobs Advanced settings for print jobs Introduction When you tap the [Print] tile on the multi-touch user panel, you can make your own settings. Apart from the preset tiles, you can select the advanced settings under [Show all settings]. The following table gives an overview and a short description of the available settings on the printer.
  • Page 163 Advanced settings for print jobs Preset category: [Layout] Setting Settings values Function [Cut size] [Cut method]: When set to [Synchro], the print is cut depen- • [Synchro] ded of the image. • [Standard] When set to [Standard], the print is cut to a •...
  • Page 164 Advanced settings for print jobs Setting Settings values Function [Positioning] [Alignment]: [Aligns the image on the media.] • [Top left] • [Top] • [Top right] • [Left] • [Center] • [Right] • [Bottom left] • [Bottom] • [Bottom right] [Horizontal shift] [Shifts the image in the horizontal direction (af- ter alignment to one of the positions given in 'Alignment').]...
  • Page 165 Advanced settings for print jobs Preset category: [Image] Setting Settings values Function [Print quality] [Standard] Define the type of original you use [Lines/text] [Photo] [Mirror] [On] [When “on”, the image is mirrored along the [Off] vertical axis (the media transport direction). ] Preset category: [Finishing] Setting Settings values...
  • Page 166: Copy Jobs

    Copy Jobs Copy Jobs Do a default copy job Introduction When you want to copy an original and you do not make any settings, the default presets are used. You only use the Smart Access to submit your job. You can see the presets that are used in the job settings section of your job. Procedure 1.
  • Page 167: Copy Presets On The User Panel

    Copy presets on the user panel Copy presets on the user panel Introduction The printer uses the default presets for print and copy jobs, when you do not make different settings. The copy presets are divided into four categories: • [Media] •...
  • Page 168: The Image Preset For Copy Jobs

    The Image preset for copy jobs The Image preset for copy jobs Introduction With the [Image] preset, the quality and the productivity of a copy job can be defined. There are four pre-defined presets and a fifth custom preset you can create in Océ Express WebTools. Image presets Use the [Image] setting to select the default stamp for your output.
  • Page 169: Advanced Settings For Copy Jobs

    Advanced settings for copy jobs Advanced settings for copy jobs Introduction When you tap the [Copy] tile on the multi-touch user panel, you can make your own settings. Apart from the preset tiles, you can select the advanced settings under [Show all settings]. The following table gives an overview and a short description of the available settings on the printer.
  • Page 170 Advanced settings for copy jobs Preset category:[Layout] Preset Settings values Function [Cut size] [Cut method]: When set to [Synchro], the print is cut depen- • [Synchro] ded of the image. • [Standard] When set to [Standard], the print is cut to a •...
  • Page 171 Advanced settings for copy jobs Preset Settings values Function [Remove strip] [Top] [Erase a strip from the beginning of the origi- nal.] From 0 to 400 mm or 0 to 16". [Bottom] [Erase a strip from the bottom of the original.] From 0 to 400 mm or 0 to 16".
  • Page 172 Advanced settings for copy jobs Preset Settings values Function [Positioning] [Alignment]: [Aligns the image on the media.] • [Top left] • [Top] • [Top right] • [Left] • [Center] • [Right] • [Bottom left] • [Bottom] • [Bottom right] [Horizontal shift] [Shifts the image in the horizontal direction (af- ter alignment to one of the positions given in 'Alignment').]...
  • Page 173 Advanced settings for copy jobs Preset category: [Image] Preset Settings values Settings values Function [Original] [Original type] [Lines/text standard] Define the type of original you use. [Lines/text draft] For more information on choosing [Colored original] the correct original type, see Recom- mended settings for copy jobs on [Folded lines/text]...
  • Page 174 Advanced settings for copy jobs Preset Settings values Settings values Function [Image] [Color highlight- [On] When enabled, all colored informa- ing] [Off] tion is printed darker on the original than black/gray information. For in- stance, marked or highlighted text becomes more visible. NOTE It is only relevant for the copy modes: [Colored orig-...
  • Page 175 Advanced settings for copy jobs Preset Settings values Settings values Function [Area to [Area to erase: X From 0 to 914 mm or [The horizontal offset where the erase] origin] 0 to 36". erase area starts.] [Area to erase: Y From 0 to 6000 mm or [The vertical offset where the erase origin]...
  • Page 176: Recommended Settings For Copy Jobs

    Recommended settings for copy jobs Recommended settings for copy jobs Introduction When you use a certain type of original document you can select specific presets and settings that influence the quality and productivity of your job. Use the advised settings in the table below to get the best results.
  • Page 177: The Original Type

    The original type The original type Introduction When you change the [Original type] setting under [Show all settings] - [Original] on the user panel, you can further optimize the quality of your job. Use the overview to select the correct type. Original types Original type Definition...
  • Page 178: Make A Half Size Copy

    Make a half size copy Make a half size copy Introduction When you want to scale your original to a 50% copy, you can change a preset on the user panel. Procedure 1. Feed the original face up and centered on the original feeding table. 2.
  • Page 179: Make A Copy And Add A Strip

    Make a copy and add a strip Make a copy and add a strip Introduction When you make a copy, you can add a strip to a document. Use [Cut size] to copy an original without a strip and add a strip to the copy. You can add a strip at the top or bottom of a copy.
  • Page 180: Make A Copy And Remove A Strip

    Make a copy and remove a strip Make a copy and remove a strip Introduction When you have an original with a strip, you can remove the strip from your copy. Use the option on the user panel to copy an original with a strip, and remove the strip from the copy.
  • Page 181: Make A Copy Of A Specific Area Of An Original

    Make a copy of a specific area of an original Make a copy of a specific area of an original Introduction You can make a copy of a specific area of an original. Use the option [Remove strip] to copy a specific area.
  • Page 182: Make A Copy And Remove A Specific Area Of An Original

    Make a copy and remove a specific area of an original Make a copy and remove a specific area of an original Introduction You can make a copy and delete a specific area of an original. You can use two settings: [Area to erase: width] and [Area to erase: length] to define the dimensions of the delete area.
  • Page 183: Make A Copy And Scale To Another Size

    Make a copy and scale to another size Make a copy and scale to another size Introduction When you want to scale your copy to another size, you can make changes under the advanced settings. With the custom setting, you can choose any scale percentage you want between the range of 10 - 1000%.
  • Page 184: Make A Copy Of A Dark Original (Diazo)

    Make a copy of a dark original (Diazo) Make a copy of a dark original (Diazo) Introduction It can be difficult to make a good copy of a Diazo original. Diazo originals have a changing lightness with a 'cloudy' background, which can give an unclear output. The Océ PlotWave 345/365 has a special [Diazo] preset, that follows the lightness and changing background of the original and copies to an even and high quality output.
  • Page 185: Make A Copy Of An Original With Highlighted Colors

    The Océ PlotWave 345/365 has a special setting [Color highlighting], that highlights the color accents of the original by making them darker than the other information.
  • Page 186: Make A Copy On A Cut Sheet

    Make a copy on a cut sheet Make a copy on a cut sheet Introduction You can copy on cut sheet media if the required media type or size is not available on the media rolls of the printer. Procedure 1.
  • Page 187: Make A Copy With A Stamp

    Make a copy with a stamp Make a copy with a stamp Introduction A stamp is a mark you can put on every copy. Before you begin To enable the stamp functionality, you must first create a stamp in Océ Express WebTools. For Create a stamp on page more information on how to do this, see Procedure...
  • Page 188: Copy By Set

    Copy by set Copy by set Introduction You can use the [Create set] option to make multiple scans and copy in one set. Procedure 1. Feed the original face up and centered on the original feeding table. 2. Tap the copy tile. A window with a list of presets opens. 3.
  • Page 189: Scan Jobs

    Scan Jobs Scan Jobs Do a default scan job Introduction When you want to scan an original and you do not make any settings the default templates are used. You only use the Smart Access to submit your job. You can see an overview of the template settings that are used in the job settings section of your job.
  • Page 190: Scan Templates On The User Panel

    Scan templates on the user panel Scan templates on the user panel Introduction A template is a group of predefined settings you can configure yourself. Select the template on the user panel to easily submit a job with optimized settings. Scan template workflow The printer uses the scan templates that are configured in Océ...
  • Page 191: Advanced Settings For Scan Jobs

    Advanced settings for scan jobs Advanced settings for scan jobs Introduction When you tap the Scan tile on the multi-touch user panel, you can select a template. When you select a template and tap it again, a window with all settings opens. The following table gives an overview and a short description of the available settings on the printer.
  • Page 192 Advanced settings for scan jobs Setting Settings values Settings values Function [Resolution] [100] [The resolution of the scanned image [200] in dpi.] [300] [400] [600] [Color [Color] [Defines whether a color, grayscale mode] [Grayscale] or black-and-white scan must be [Black and white] made.
  • Page 193 Advanced settings for scan jobs Settings values Settings values Function [Original width] [Auto] The width of the original is automatically de- tected by the scanner. [Standard] The width of the original is a standard size. Select one of the available standard sizes from the list.
  • Page 194 Advanced settings for scan jobs [Remove strip] [Top] [Erase a strip from the beginning of the original.] From 0 to 400 mm or 0 to 16". [Bottom] [Erase a strip from the bottom of the origi- nal.] From 0 to 400 mm or 0 to 16". [Left] [Erase a strip from the left side of the origi- nal.
  • Page 195 Advanced settings for scan jobs Category: [Quality] Setting Settings values Function [Scan quality] [Automatic] Define the quality of the scan. [Normal] • [Automatic] is the default value that selects [High] the best scan quality value for your job based on your scan settings. •...
  • Page 196 Advanced settings for scan jobs Setting Settings values Function [Color highlight- [On] Set to [On]: ing] [Off] • to make notes made with marker pens more visible. • to emphasize colors, of a CAD drawings with colored information and a solely gray- scale (black) background information.
  • Page 197: Advised Settings For Scan Jobs

    Advised settings for scan jobs Advised settings for scan jobs Introduction When you use a certain type of original document you can select specific templates and settings that influence the quality and productivity of your job. Use the advised settings in the table below to get the best results.
  • Page 198 Advised settings for scan jobs Scan template Original document 09 - [CAD color + high- Color CAD drawings with marks from maker pens. light] Colors become more saturated. 10 - [Photo color] Photo-like originals with high color accuracy. Chapter 4 - Use the Printing System...
  • Page 199: The Original Type

    The original type The original type Introduction When you tap the scan tile and select the [Original] - [Original type] setting on the user panel, you can further optimize the quality of your job. Change the original type for color or grayscale. Use the overview to select the correct type. Original types for color •...
  • Page 200 The original type Original type Definition [Photo] Used for photos and high resolution prints. Photo gives a softer con- trast than colored original. [Dark original] Used especially for Diazo originals. Originals with a changing 'cloudy' background. [Folded lines/text] Used for monochrome CAD drawings with folds. Lines and wrinkles are suppressed.
  • Page 201: File Type

    File type File type Depending on the color mode and file type you select, the values for the compression mode and organization change. For some file types and some situations, the compression and organization settings cannot be set. The list below helps you to define the correct file type and color mode, and shows you which compression and organization settings are possible.
  • Page 202 File type Color mode: Grayscale [Color] mode [File type] [Organization] [Compression] [JPEG quality] [Grayscale] [TIFF] [Raw] [LZW] Not applicable [TIFF multipage] [Striped] [Packbits] [Tiled] [None] [PDF] Not applicable [Flate] Not applicable [PDF multipage] [LZW] [None] [JPEG] [Maximum] [High] [Medium] [Low] [PDF/A] Not applicable [Flate]...
  • Page 203: Scan To A Usb Key

    Scan to a USB key Scan to a USB key Introduction When you insert a USB key in the user panel, you can scan to USB. Before you begin • Before you scan to USB, make sure the correct settings are enabled. For more information see, Enable or disable USB on page 103.
  • Page 204: Scan To The Home Folder

    Scan to the home folder Scan to the home folder Introduction When you have enabled user authentication in Océ Express WebTools you can submit a print or scan job to the home folder as a secure location. Before you begin Enable [User authentication] with [User name and password] configured and enable the home Enable and edit the Home folder on page folder as a location first.
  • Page 205: Save A Scanned Document On Your Mobile Device

    Save a scanned document on your mobile device Save a scanned document on your mobile device Introduction When you have access to Océ Mobile WebTools you can scan a document on the printer and save it on your mobile device. Before you begin Make sure you have a working connection.
  • Page 206: Pause, Resume, Or Stop An Active Job

    Pause, resume, or stop an active job Pause, resume, or stop an active job Introduction If you want to pause, resume or stop an active job there are several things you can do. Procedure Pause or resume an active print job Step Action 1.[Pause]...
  • Page 207: Clear The System

    Clear the system Clear the system When to do On the user panel, you can remove all print and copy jobs from the system. Procedure 1. Tap the system thumbnail in the dynamic bar. A new window opens. 2. In the list in the bottom right corner of the screen, select [Clear system]. A wizard opens.
  • Page 208 Clear the system Chapter 4 - Use the Printing System...
  • Page 209: Maintain The Printing System

    Chapter 5 Maintain the Printing System...
  • Page 210: Update Your System

    Update your System Update your System Update the system software on the user panel Introduction You can update the system software on the user panel with a USB device that includes a new version of the software. Before you begin For an update of the system software, get the packages for the system software update from your local representative.
  • Page 211: Update The System Software In Océ Express Webtools

    Update the system software in Océ Express WebTools Update the system software in Océ Express WebTools Introduction You can update the system via Océ Express WebTools. You can find the settings under the [Support] - [Update] tab. The [Update] tab has the following functionalities: •...
  • Page 212: Install The System Security Patches In Océ Express Webtools

    1. Select the [Support] - [Update] tab. 2. Click on the [Install] button for an installation of the system patches. 3. Browse to the location of the [Software package (*.oce)] patch file. Select the file and click 'Open'. 4. Click [Ok] to confirm, or [Cancel] to reject your entries.
  • Page 213: Move The Printing System

    Move the Printing System Move the Printing System Turn off the printing system Introduction When you want to turn off the printing system completely, you have to take a few steps. Procedure 1. Use the [on / off button] at the front of the printer to turn the printing system off. The lighted button starts to blink.
  • Page 214 Turn off the printing system 2. Turn off the [power switch] at the back of the printing system (A). Chapter 5 - Maintain the Printing System...
  • Page 215: Disconnect The Network Cable And The Mains Supply Cable

    Disconnect the network cable and the mains supply cable Disconnect the network cable and the mains supply cable Procedure IMPORTANT Make sure the main power switch (A) is in 'off' position. 1. Disconnect the network cable from the network connection at the right back of the printer (C). 2.
  • Page 216: Move And Re-Adjust The Printing System

    Move and re-adjust the printing system Move and re-adjust the printing system Introduction When you move the printing system to a new location, you must check if it needs re-adjustment to ensure the best output quality. You need two tools for the adjustment procedure. You can find these tools behind the lower right front cover.
  • Page 217 Move and re-adjust the printing system 4. Slide the lower right front cover (1) to remove it. 5. Check if the level indicator arrow is exactly on the middle of the marker. If no, continue with step 5. If yes, continue with step 9. Chapter 5 - Maintain the Printing System...
  • Page 218 Move and re-adjust the printing system 6. Slide the lower right front cover (11) to remove it, and get access to the tools you need for the adjustment procedure. 7. Loosen the nut with the key wrench. Chapter 5 - Maintain the Printing System...
  • Page 219 Move and re-adjust the printing system 8. Use the Allen wrench to adjust the level until the level indicator arrow is exactly on the middle of the marker. 9. Lock the nut with the key wrench. Chapter 5 - Maintain the Printing System...
  • Page 220 Move and re-adjust the printing system 10. Place the lower right front cover back. 11. Place the tools and the lower right front cover back. Chapter 5 - Maintain the Printing System...
  • Page 221 Move and re-adjust the printing system 12. Close the media drawer. Chapter 5 - Maintain the Printing System...
  • Page 222: Connect The Mains Supply Cable And The Network Cable

    Connect the mains supply cable and the network cable Connect the mains supply cable and the network cable Procedure IMPORTANT Make sure the power switch (B) is in 'off' position. 1. Plug the mains supply cable into the power connection at the left back of the printer (A). 2.
  • Page 223: Switch On The Printing System

    Switch on the printing system Switch on the printing system IMPORTANT • Make sure the mains supply cable (A) is plugged in. • Make sure the network cable (C) is plugged in. Procedure 1. Switch on the power switch at the left back of the printer (B). Chapter 5 - Maintain the Printing System...
  • Page 224: Replace The Media

    Replace the Media Replace the Media Remove a media roll IMPORTANT • Handle the media roll with care. A dented media roll can damage the printer. • Do not open the media drawer during the printing process. CAUTION • Watch your fingers when you handle the media roll. •...
  • Page 225 Remove a media roll Procedure 1. Pull firmly on the media drawer to open it. 2. Roll the media back manually, to remove the media from the metal paper guide. Chapter 5 - Maintain the Printing System...
  • Page 226 Remove a media roll 3. Use both hands (as indicated) to lift the roll holder with the media roll and put it on the roll loading station. 4. Pull the handle of the roll holder locking mechanism towards you and remove the roll holder from the core of the media roll.
  • Page 227: Unpack The Media Roll

    Unpack the media roll Unpack the media roll IMPORTANT • Handle the media roll with care. A dented media roll can damage the printer. • Always write the correct media name inside the core, after you unpack the media roll. This way, you will have the correct media information available if you replace the roll before it is empty and you want to reuse it later,.
  • Page 228 Unpack the media roll 3. Carefully remove the media roll from the box. 4. If present, remove the other plug and any plastic on the media roll. Chapter 5 - Maintain the Printing System...
  • Page 229: Load A Media Roll (Position 1)

    Load a media roll (position 1) Load a media roll (position 1) Introduction You can load your media in the front of the drawer on position 1, or in the back of the drawer on position 2. NOTE • To spare your back, it is advised to load an A0 or E-size media roll on position 1 and an A2 or C-size media roll on position 2.
  • Page 230 Load a media roll (position 1) 4. Align the roll with the center of the correct size indicator on the roll holder and release the handle of the locking mechanism. 5. Remove the tapes from the new media roll. Use both hands (as indicated) to place the media roll in the media drawer. Chapter 5 - Maintain the Printing System...
  • Page 231 Load a media roll (position 1) 6. Use both hands to turn the media roll backwards (1) until the media flap has passed the metal paper guide. Chapter 5 - Maintain the Printing System...
  • Page 232 Load a media roll (position 1) 7. Use both hands to slide the media under the metal paper guide (2) until the media is transported automatically. 8. If necessary, press the [clean cut button] to trim a strip of the new media roll. Press once for a strip of approximately 20 cm (7.9 in) or hold the button and release it when the strip has the desired length.
  • Page 233: Load A Media Roll (Position 2)

    Load a media roll (position 2) Load a media roll (position 2) Introduction You can load your media in the front of the drawer on position 1, or in the back of the drawer on position 2. NOTE • To spare your back, it is advised to load an A0 or E-size media roll on position 1 and an A2 or C-size media roll on position 2.
  • Page 234 Load a media roll (position 2) 4. Align the roll with the center of the correct size indicator on the roll holder and release the handle of the locking mechanism. 5. Remove the tapes from the new media roll. Use both hands (as indicated) to place the media roll in the media drawer. Chapter 5 - Maintain the Printing System...
  • Page 235 Load a media roll (position 2) 6. Use both hands to turn the media roll backwards (1) until the media flap has passed the metal paper guide. Chapter 5 - Maintain the Printing System...
  • Page 236 Load a media roll (position 2) 7. Use both hands to slide the media under the metal paper guide (2) until the media is transported automatically. 8. If necessary, press the [clean cut button] to trim a strip of the new media roll. Press once for a strip of approximately 20 cm (7.9 in) or hold the button and release it when the strip has the desired length.
  • Page 237: Media Types

    Media types Media types Introduction Océ machines and media are matched for the best quality and performance. You can receive a list of media (that includes plain or recycled paper, transparent paper, colored papers, and different polyester films) from your local representative. You can select the media names on: •...
  • Page 238 Media types Roll Maximum Minimum Length 200 meters / 650 feet 279 millimeters / 11 inch (minimum cut length) Chapter 5 - Maintain the Printing System...
  • Page 239: Media Sizes

    Media sizes Media sizes Introduction Océ machines and media are matched for the best quality and performance. Océ recommends the use of approved Océ media. You can receive a list of media (that includes plain or recycled paper, transparent paper, colored papers, and different polyester films) from your local representative.
  • Page 240 Media sizes ARCH range Media Width [inch] Length [inch] ARCH1 range Media Width [inch] Length [inch] 15inch 21inch E1 (30 inch) Japanese range Media Width [mm] Length [mm] 440x594 660x841 800x1189 1189 880x1230 1230 Chapter 5 - Maintain the Printing System...
  • Page 241: Refill The Toner

    • You can leave the printer turned on when you refill the toner. • Make sure you use toner suitable for the Océ PlotWave 345/365. • You must use only one bottle of toner at a time. If you use more than one bottle, the compartment will flood and toner will spill.
  • Page 242 Refill the toner Procedure 1. Open the toner compartment. 2. Shake the toner bottle well. Leave the bottle closed. 3. Place the bottle on the refill opening of the toner unit. Chapter 5 - Maintain the Printing System...
  • Page 243 Refill the toner 4. Pull the slider towards you to open both the bottle and the refill opening of the toner unit. 5. Tap the toner bottle gently (sideways), to let the toner flow from the bottle. 6. When the toner bottle is empty, return the slider of the toner unit to the original position to close the refill opening and the toner bottle.
  • Page 244: Replace The Residual Toner Container

    Replace the residual toner container Replace the residual toner container Introduction A sensor detects when the residual toner container is full. When the container is full, the printer stops printing and a message appears on the user panel: [The residual toner container is full or not installed.] [Place the empty container.] Replace the container to continue printing.
  • Page 245 Replace the residual toner container 2. Remove the full residual toner container. NOTE The residual toner container can be disposed normally. 3. Place the empty residual toner container. 4. Close the residual toner compartment. Chapter 5 - Maintain the Printing System...
  • Page 246: Maintain The Scanner

    Maintain the Scanner Maintain the Scanner Clean the scanner Introduction Clean the scanner from time to time, to prevent decrease of copy and scan quality. When to do Clean when: • the transparent contact plates are dirty and static • the original support rollers are dirty, and you use transparent originals Procedure 1.
  • Page 247 Clean the scanner IMPORTANT To clean the scanner, use the soft lint-free muslin towels from the scanner cleaning kit. 2. Use a muslin towel that has been moistened with water and firmly wrung out to clean the following parts of the scanner: •...
  • Page 248 Clean the scanner 4. Press the scanner top cover down gently with both hands, to close it. NOTE Check that the left and right scanner open levers are locked into position. Chapter 5 - Maintain the Printing System...
  • Page 249: Calibrate The Scanner

    Calibrate the scanner Calibrate the scanner Introduction You can calibrate the scanner when you are not satisfied with the copy or scan quality. Use the calibration wizard to calibrate the scanner. Before you begin Clean the scanner before you start the calibration procedure. Dirty parts of the scanner cause Clean the scanner on page copy and scan quality to decrease.
  • Page 250 Calibrate the scanner Chapter 5 - Maintain the Printing System...
  • Page 251: License Management

    Chapter 6 License Management...
  • Page 252: Introduction To License Management

    Introduction to license management Introduction For certain applications your printer uses, you need to activate a license. A product license for the Océ PlotWave 345/365 is always required. You can perform several actions for licenses: Procedure 1. View the currently active licenses.
  • Page 253: Check Your Licenses

    This field displays the name of the option. The following licenses are available for your printer: • The Océ PlotWave 345/365 Product license • [License for Adobe® PDF and Adobe® PostScript® 3] • [License for Adobe® PS/PDF Simplified Chinese fonts (Chinese Simp PS fonts) ] •...
  • Page 254: Save The Currently Active Licenses

    Save the currently active licenses Save the currently active licenses Introduction You can save all active licenses into one single file. When to do Save the currently active licenses before starting a license activation job or if you want to save the current license situation.
  • Page 255: Get A New License File

    Get a new license file Get a new license file Introduction The Océ applications and optional functions are protected against unauthorized use. You need to activate licenses to enable various options. When you want to get a new license you have to provide the correct information to your local representative.
  • Page 256: Activate A New License

    Activate a new license Activate a new license Introduction Under the [Licenses] tab in Océ Express WebTools you can activate new license files. NOTE • It is advised to store the license information of the currently active license files in a back-up file before you activate a new license file.
  • Page 257: Account Management

    Chapter 7 Account Management...
  • Page 258: An Overview Of Océ Account Center

    Océ devices. NOTE "http:// For this application a separate user guide and a Readme are available. Visit downloads.oce.com" , select your printer and find your document in the list. Definition Océ Account Center includes software module: • Océ Account Console.
  • Page 259: Océ Account Console

    Océ Account Console ® ® Océ Account Console Introduction to Océ Account Console Definition Océ Account Console is installed on the administrator's workstation. Purpose Océ Account Console has the following functionalities: • Manage, preview, and publish the account information dialog. •...
  • Page 260: Summary Of Océ Account Console

    Summary of Océ Account Console Summary of Océ Account Console Main parts of Océ Account Console An administrator uses Océ Account Console to perform a number of maintenance and configuration tasks. The main functional areas of Océ Account Console are described in the table below. Main parts of Océ...
  • Page 261 Summary of Océ Account Console Part Description The [Export filters] tab [Overview] section. • [Create...]. Use this option to define a new filter. • [Delete]. Remove the export filter. • [Edit...]. Change the filter definition. • [Copy...]. Make a duplicate of the filter settings to create another ex- port filter.
  • Page 262: Enable Account Management In Océ Express Webtools

    Enable account management in Océ Express WebTools Enable account management in Océ Express WebTools Introduction To enable account management you can define the values in Océ Express WebTools Definition The account information requirements are defined and managed by the administrator. How to define the 'Logging and accounting' settings Open the [Preferences] - [System defaults] tab, and under [Job management] enable the [Force entry of accounting data for print jobs] or [Force entry of accounting data for copy and scan jobs].
  • Page 263: Accounting Workflow

    Configure the task 'Retrieve log data' to run every day at a time that the printer is switched on. 3. Run the task update dialog for the Océ PlotWave 345/365, to provide the dialog to the printer. 4. Enable accounting in Océ Express WebTools.
  • Page 264 Workflow on the printer Chapter 7 - Account Management...
  • Page 265: Chapter 8 Solve Problems

    Chapter 8 Solve Problems...
  • Page 266: How To Solve Problems With Jobs

    How to solve problems with jobs How to solve problems with jobs Procedure 1. When there is a problem with a job, the color of the green job queue bar in Océ Express WebTools turns red. The system monitor section of Océ Express WebTools displays the message: [User intervention required].
  • Page 267: Clear An Original Jam In The Scanner

    Clear an original jam in the scanner Clear an original jam in the scanner Introduction When an original jam occurs in the scanner, the message [Scanner original jam] appears on the user panel. You must remove the original from the scanner. Follow the steps in the wizard on the user panel to clear the jam.
  • Page 268: Clear A Media Jam In The Heater Section

    Clear a media jam in the heater section Clear a media jam in the heater section Introduction When a media jam in the heater section occurs, you have to handle with care. IMPORTANT During normal use, the fuser has to remain closed. Only open it to remove the media after a media jam.
  • Page 269 Clear a media jam in the heater section 3. Remove any jammed printing material from the fuser section. 4. Press the green knob on the media jam clearance handle and close the upper back cover. NOTE Make sure you close the upper back cover properly: make sure you hear a click. Chapter 8 - Solve Problems...
  • Page 270: Clear A Media Jam In The Media Bypass Section

    Clear a media jam in the media bypass section Clear a media jam in the media bypass section Introduction If a media jam occurs in the media bypass section, follow the help wizard on the user panel and take the following steps: Procedure 1.
  • Page 271 Clear a media jam in the media bypass section 3. Remove any jammed media. NOTE When the material cannot be removed easily, open the upper back cover with the media jam clearance handle to access to the jammed material. For more information, Clear a media jam in the heater section on page 268).
  • Page 272: Clear A Media Jam In The Roll Feed Section

    Clear a media jam in the roll feed section Clear a media jam in the roll feed section Introduction If a media jam occurs in the roll feed section, follow the help wizard on the user panel and take the following steps: Procedure 1.
  • Page 273: Event Messages

    Event messages Event messages Introduction Feedback on errors related to print jobs is displayed in the event list. You can open the event list when you click [View events] in the upper right hand corner of the Jobs tab in Océ Express WebTools. Procedure Event message Troubleshoot...
  • Page 274 Event messages Event message Troubleshoot [PS/PDF resource or language prob- The Postscript or PDF file is complex or corrupt. lem; one or more pages not correctly • Try to print it from an application using the Océ Wide printed] ® ®...
  • Page 275 Event messages Event message Troubleshoot [The sheet lenght exceeds the limit • The document will be first folded only. of the second fold. Only the first fold • Check the maximum length settings for second fold applied.] and comply, when you want to get a fanfold package. [Document is not a PDL or the PDL is Check if the printer recognizes the format of the sent job.
  • Page 276: Print A Demo Print

    Print a demo print Print a demo print When to do You can print a demo print to check whether the printer is working correctly. Procedure 1. Tap the system menu thumbnail on the user panel. A window opens. 2. In the list on the right, select [Test prints]. A wizard opens. 3.
  • Page 277: Print A Test Print

    Print a test print Print a test print When to do Print a test print from a specific roll at the request of the helpdesk. The test print provides information that can help to solve quality problems. Procedure 1. Tap the system menu thumbnail on the user panel. A window opens. 2.
  • Page 278: Print The Print Density Chart

    Print the print density chart Print the print density chart When to do To influence the toner usage of your printer, you can print the print density chart and adjust the print density offset. A negative value reduces the toner usage, a positive value increases the toner usage.
  • Page 279: Chapter 9 Support

    Chapter 9 Support...
  • Page 280: Counter History

    Counter history Counter history Introduction Navigate to the [Support] - [Counter history] tab to get an overview of the consumables used per printed job. The table below gives an overview of the various functionalities you can access in the counter history to sort, group, save, or print the information you need.
  • Page 281: Settings In Case Of Errors

    Settings in case of errors Settings in case of errors Introduction If you encounter problems with print jobs, there are a few settings that can help you. Procedure 1. Open the [Preferences] - [System defaults] tab. 2. Under [In case of errors], you can make the following settings: Setting Value Description...
  • Page 282: Audit Log

    Audit log Audit log Definition As a System Administrator, you can download a comma-separated values (CSV) file containing the audit of all security-related events in the system. [Download audit events] and [Clear audit events] Log in as a System Administrator and select the [Audit log] in the [Security] tab. Click on the [Download audit events] button to download a comma-separated values (CSV) file containing the audit events.
  • Page 283: Remote Service: Configure The Proxy

    Remote Service: configure the proxy Remote Service: configure the proxy Introduction Océ Express WebTools offers remote services from the printer to the service organization, or from the service organization to the printer. You can edit these settings under the [Support] - [Remote Service] tab. Remote Service has the following options: •...
  • Page 284: Remote Service: Check The Connection

    Remote Service: check the connection Remote Service: check the connection After you configured the proxy, it is possible to test the connection between the printer and the service organization. Procedure 1. Open the [Support] - [Remote Service] tab, and click on [Check connection]. 2.
  • Page 285: Remote Service: Allow Remote Assistance

    Remote Service: allow remote assistance Remote Service: allow remote assistance When you have made all settings required and you want to allow the service organization to remotely access the printer, you can enable remote assistance. Procedure 1. Open the [Support] - [Remote Service] tab, and click on [Allow remote assistance]. 2.
  • Page 286: Remote Service: Download Log Files

    Remote Service: download log files Remote Service: download log files When you want to have access to all Remote Service log files, you can download them. Procedure 1. Open the [Support] - [Remote Service] tab. 2. Click on [Download log files] in the upper right hand corner. The system creates a zip file that contains the technical and audit log files in a text format.
  • Page 287: Chapter 10 Contact

    Chapter 10 Contact...
  • Page 288: Downloads And Support For Your Product

    User guides, printer drivers and other resources can change without prior notice. To stay up-to- date, you are advised to download the latest resources from: "http://downloads.oce.com" Before you use your product, you must always download the latest safety information for your product: make sure that you read and understand all safety information in the manual entitled 'Safety Guide' .
  • Page 289: Reader's Comment Sheet

    Reader's comment sheet Reader's comment sheet Questions Have you found this manual to be accurate? O Yes O No Were you able to operate the product, after reading this manual? O Yes O No Does this manual provide sufficient background information? O Yes O No Is the format of this manual convenient in size, readability and arrangement (page layout, chapter...
  • Page 290 Please return this sheet to: Océ-Technologies B.V. For the attention of ITC User Documentation. P.O. Box 101, 5900 MA Venlo The Netherlands Send your comments by E-mail to: itc-userdoc@oce.com For the addresses of local Océ organisations see: http://www.oce.com Chapter 10 - Contact...
  • Page 291: Index

    Index Index custom scale...........183 Calibrate the scanner........... 249 Access control Calibration.............249 Enable............76, 77 Carrier sheet............140 Account management Certificates.............. 81 Océ Express WebTools........262 Change Action after media request time-out ....120 Settings............. 52 Active job............32, 34 Check connection Add a strip Remote Service........
  • Page 292 Index default............. 166 Smart Inbox............68 delete a specific area of an original....182 Delivery destination remove a strip..........180 Basic settings............57 scale to another size........183 Demo print with a stamp........... 187 print..............276 Copy jobs.............. 176 settings overview........... 169 Diazo print............184 Copy on a cut sheet..........186 Direct print............
  • Page 293 Index Enable............... 77 Factory default restore............... 56 Feed the original Job management settings........70 description............138 Job memory full........... 128 File extension Job pane..............36 PDF, TIFF, JPEG, CALS........61 Job preview File size..............191 description............37 File type..............191 Job queue............... 34 scan to file............201 Concept.............
  • Page 294 Index Log out Mirror description............46 description............165 Long plot mode Layout settings..........58 set..............126 Mobile printing password........133 Lower front cover........... 22 Move the printing system........216 Lower left front cover..........22 Mozilla Firefox Lower right front cover.......... 22 Security settings..........73 job submission..........
  • Page 295 Index Océ Wide Format Printer Driver 2 for Microsoft Preview your job Windows description............37 job submission..........146 Print a job..............65 On / off button............22 Print delivery Optimize description..........165, 175 Print productivity..........130 Print density chart..........278 printing of PDF documents......125 Print from a USB key..........160 Organization............191 Print job..............
  • Page 296 Index Quick Response Card........... 133 Layout settings..........58 make a half size copy........178 to another size..........183 Scan a job..............65 Re-adjust the printing system......216 Scan destination Recommended settings for copy jobs....176 description............102 Refill toner.............241 Scan job defaults............ 61 Regional settings..........
  • Page 297 Index Shut down the system System patches............ 212 description............50 System Sleep mode shut down or restart........50 go into sleep mode after....... 119 Smart Access............33 Smart card...............75 Template for scan jobs.........190 Smart Inbox Templates..............36 Create..............65 Create..............96 Smart Inbox concept..........
  • Page 298 Index external location..........102 User authentication..........75 User panel............22, 26 User roles..............44 User session Time-out............117 Vertical shift Layout settings..........58 View the settings Océ Express WebTools........53 WebDAV external location..........102 troubleshoot configuration......115 working with the cloud........38 Wi-Fi...............133 Wipeout correction PDF..............
  • Page 300 Canon Inc. www.canon.com Canon U.S.A., Inc. www.usa.canon.com Canon Canada Inc. www.canon.ca Canon Europa Inc. www.canon-europe.com Canon Latin America Inc. www.cla.canon.com Canon Australia PTY. Ltd www.canon.com.au Canon China Co., Ltd www.canon.com.cn Canon Singapore PTE. Ltd www.canon.com.sg Canon Hongkong Co., Ltd www.canon.com.hk ©...

This manual is also suitable for:

Plotwave 365

Table of Contents