Table of Contents
Advertisement
Quick Links
Advertisement
Table of Contents
Troubleshooting

Related Manuals for LeapFrog 3d printer


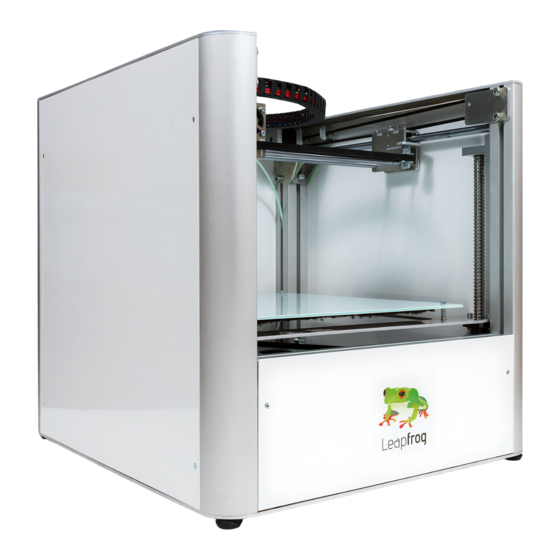
Summary of Contents for LeapFrog 3d printer
- Page 1 Manual Leapfrog Creatr Leapfrog BV...
- Page 2 Manual Leapfrog Creatr Dear customer, Congratulations with the purchase of your very own Leapfrog Creatr Single or Dual Extruder! We would like to help you get started so you can make your first 3D print on the Creatr and many more.
- Page 3 Manual Leapfrog Creatr Leapfrog BV...
-
Page 4: Table Of Contents
Manual Leapfrog Creatr Table of content 1. Installation 1.1 Unpack Page 7 1.2 230 V 115 V Page 9 1.3 Software Page 10 1.4 Connect Page 18 2. Printing 2.1 Print sticker and Kapton tape Page 21 2.2 Connection Page 24 2.3 Preheat... - Page 5 Manual Leapfrog Creatr 4 Troubleshooting - Knowledgebase 4.1 Oh, oh, my filament is not feeding through Page 58 4.2 My object won’t stick to the bed Page 59 4.3 Extruder stops mid-print Page 62 4.4 Min-/max temp triggered error messages Page 70 4.5 Nozzle seemed clogged...
-
Page 6: Installation
The following steps are steps you only have to follow when your brand new Creatr arrives at your doorstep for the first time. Please follow each step thoroughly to make sure the installation will be a success and you can find yourself as a member of the Leapfrog eco-system. This section contains the following: 1.1 Unpack... -
Page 7: Unpack
Manual Leapfrog Creatr 1.1 Unpack In this step we will show you how to unpack your Creatr when it arrives at your doorstep. Before you start, make sure that you have cleared a spot where you want to place the printer. We advise you to not place the Creatr next to a window or at a place where it is draughty. - Page 8 Manual Leapfrog Creatr Cut the tie wraps on the axes [3 in total]. Insert the power cord and USB-cable in the backside of the Creatr. Plug the power cord in the outlet, the USB-cable in your computer and turn on your Creatr.
-
Page 9: 115
Manual Leapfrog Creatr 1.2 230 V 115 V !!! This step is only necessary if your electrical grid provides 115V !!! WARNING: NEVER PERFORM THIS OPERATION WHEN THE POWER PLUG OR USB CABLE IS PLUGGED INTO YOUR CREATR! ... -
Page 10: Software
Manual Leapfrog Creatr 1.3 Software (Windows) Here, we will explain you where to download and install the necessary software that communicates to your printer and turns your design into a printable file. Download Open the Internet browser and go to www.lpfrg.com... - Page 11 Manual Leapfrog Creatr On the website, click on the text “Arduino software”. * For Windows 8 follow the Windows instructions mentioned later in this step. Download “Arduino 1.0.5” (ZIP file). Open the file with an archive utility like Winrar or WinZip.
- Page 12 Unpack the content to any location. Go back to www.lpfrg.com/support/installation and on the website click on the text “Leapfrog Repetier software” to download “Repetier-Host Leapfrog setup” from the website. Windows 8 Installation steps Download “Arduino 1.0.5” (ZIP file). ...
- Page 13 Manual Leapfrog Creatr Drivers On your computer, go to “Control Panel” and select “Device Manager” . Go to Ports, right-click on “Unknown Device” and select “Update Driver Software”. Leapfrog BV...
- Page 14 Manual Leapfrog Creatr Click on “Browse my computer for driver software”. Select the location of your Arduino files. Select the “driver map” and click “Next”. The printer will now be recognized by your computer. Leapfrog BV...
- Page 15 Go to the location where you downloaded your “Repetier setup file” and run the setup. Installing the print profiles for Mac In the Mac version of Repetier-Host the Leapfrog print profiles are not included yet but these can be inserted into the software by following the next steps. Firstly download slic3r from www.slic3r.org and download the profiles from our website at www.lpfrg.com/installation.
- Page 16 Manual Leapfrog Creatr Use the go to folder… and search for Library/Application Support/Slic3r/ as shown in the screenshot below. The final step is to delete the contents of this location and place the contents of the downloaded profiles zip file instead. Now you will be able to select the pre-sets and profiles after restarting Repetier-Host or slic3r as indicated in the next screenshot.
- Page 17 Manual Leapfrog Creatr Leapfrog BV...
-
Page 18: Connect
Phyiscally connect the printer to your computer by inserting the usb cable that is connected to your printer in the back of the printer. Open Repetier-Host Leapfrog and go to “Printer Settings”. In the Device manager you can see which COM port you need to select [the number is displayed after the driver installation] and verify that the baud rate is set to 115200. - Page 19 Manual Leapfrog Creatr Now all that remains is to connect the printer to the power by connecting the power cable to the printer and turning it on using the socket switch on the back. WARNING: ALWAYS MAKE SURE THAT THE FIRST MOVEMENT YOU PERFORM WHEN THE CREATR IS (RE-)CONNECTED IS HOMING ALL THE AXES.
-
Page 20: Printing
Manual Leapfrog Creatr Printing The following steps are general steps you need to follow when making a 3D print with your Creatr. Please follow each step to make sure you will be able to print a beautiful print. This section contains the following: 2.1 Print sticker... -
Page 21: Print Sticker And Kapton Tape
Manual Leapfrog Creatr 2.1 Print sticker and Kapton tape In order for the filament to stick to the print bed, you will need to apply a print sticker or Kapton tape. In this section, we will explain you how to apply this. - Page 22 Manual Leapfrog Creatr If the print sticker is damaged and you cannot position your print on an undamaged spot, remove the sticker by lifting one of the corners of the sticker and peeling it off. If you remove it too quickly, the sticker is more likely to tear.
- Page 23 Manual Leapfrog Creatr Apply the new sticker by placing the sticker on your print bed. If you are satisfied with the position, take of the small part of the sticker. Use a plastic card to apply the sticker, work from the inside to the outside and avoid air bubbles.
-
Page 24: Connection
In this step we will show you how to do this. Open Repetier Host Leapfrog and click the “Connect” button. The button will change from red to green. Your printer is now connected to the computer. Leapfrog BV... -
Page 25: Preheat
Manual Leapfrog Creatr 2.3 Preheat Before you start printing, it is necessary to preheat your printer. The print material needs to be melted and your printbed needs to be warm to make sure the material will stick to your bed. Here, we will explain you how to do this. - Page 26 Manual Leapfrog Creatr Select the extruder you want to print with. If you have a Creatr Single Extruder it is only possible to select one extruder. If you have a Creatr Dual Extruder, it is possible to select two extruders. Follow the below mentioned steps for each individual extruder if you are making a dual colour print [a print with two colors] or if you are printing with a combination of ABS, PLA or PVA.
- Page 27 Manual Leapfrog Creatr Click on “Heat Extruder”. The extruders need to be heated in order for the filament to melt to enable you to print your object. Depending on your print, select to heat one or two extruders. Set the temperature for the printbed. This temperature also differs for each filament type and...
-
Page 28: Filament
Manual Leapfrog Creatr 2.4 Filament In this section of the manual we will explain you how you can load new filament and how to switch between filaments that you already have loaded. Insert new filament Place your filament on the turntable in your Creatr such that the filament is rolled of straight in to the entry hole in the electronics cover. - Page 29 Manual Leapfrog Creatr Lower the printbed 50mm clicking on the middle “+Z” button 5 times. This is necessary because you will be extruding some filament and this needs space. Go to the “Manual Control” tab, at “Extrude” enter “50” mm and click on the “Extrude button”...
- Page 30 Manual Leapfrog Creatr Remove old filament [Only necessary if there is already filament in your printer and you want to switch to a different filament] Heat the extruder, when it is heated to 220 degrees click the “Retract button” until the filament comes loose at the top of the extruder carriage.
-
Page 31: Print Settings
Manual Leapfrog Creatr 2.5 Print settings To fully understand the print profiles, it is best to first explain certain settings involved in the printing process. Support material General explanation Support material is added during the printing process in order to support the overhanging parts of your design. - Page 32 Manual Leapfrog Creatr Soluble support This support type is only accessible for those owning a Creatr Dual extruder, as you will need to print with two different materials and extruders. The advantage of soluble support is that it dissolves and does not leave any marks on the surface of your print.
- Page 33 Manual Leapfrog Creatr Each print setting explained Below, you can see an overview of all the pre-determined print settings. Please read through all of them to understand the difference between the settings. Print settings can be selected in the Slicer tab. Print settings need to be selected before slicing your design as they cannot be altered afterwards.
- Page 34 Manual Leapfrog Creatr High quality – Soluble support We advise to select this setting when: o Your print needs support & o You want a high quality print & o You have a Creatr Dual extruder & soluble support material [PLA or PVA] Here, you will need to print your object in ABS and your support material in PLA or PVA [use the second extruder for support material].
-
Page 35: Printing With Pva
Manual Leapfrog Creatr 2.6 Printing with PVA PVA is a filament type with the special characteristic that it can be dissolved in water making it very useful for many purposes such as support structures for your prints. However this special characteristic also requires delicate handling when printing. -
Page 36: Start Your Print
Manual Leapfrog Creatr 2.7 Start your print This section of the manual will explain you how to print a file if you already have a printable G-code or if you start with a STL file. STL files are files that contain your design, but do not contain the movements the printer needs to make while it is printing. - Page 37 Manual Leapfrog Creatr I have a STL file A STL file is a file format that contains the 3D design of your file. If you have a STL file, you will need to convert it to a printable file format called G-code. Below, the steps how to do this are explained.
- Page 38 Manual Leapfrog Creatr Select your desired print settings (1). For an explanation of the printing settings, look at the next chapter Print settings. Select single or dual extruder under printer settings (2) depending on what you own. NB: for a single extruder print with a dual extruder Creatr you will need to select a dual extruder.
- Page 39 When the slicing has finished, press the button “Run Job”, the printer will automatically home the X-, Y- and Z-axis. Your printer will start printing! On the bottom of the Repetier-Host Leapfrog screen you can see the estimated print time and which layer is being printed.
-
Page 40: When Your Print Is Finished
Manual Leapfrog Creatr 2.8 When your print is finished When your print is finished you still have to remove it from the bed and maybe want to create a smoother finish. This section explains what to do once your print is finished. -
Page 41: Dual Color Printing
2.9 Dual color printing With a Leapfrog Creatr Dual extruder it is possible to print with two materials or two colors at the same time. You can for example print your object in ABS and your support in soluble PLA as explained before. If you want your print to have two different colors, this is also possible. - Page 42 *Note: The first “.stl file” you’ve loaded to create your “.amf file” will be printed with extruder 1. In this case it will be ABS black. Now load the G-Code in Repetier-Host Leapfrog and you can start printing Leapfrog BV...
-
Page 43: Simplify3D Software
Manual Leapfrog Creatr Simplify3D Software If you are using the paid Simplify 3D software instead of the free Repetier-Host Leapfrog version you will need different instructions than the ones given above. Simplify 3D has its own quick start guide which explains most of its features. -
Page 44: Software Set-Up
Manual Leapfrog Creatr 3.1 Software set-up After you receive you have purchased the software you will receive a product key and a download link which is http://www.simplify3d.com/downloads/ at the e-mail address you ordered the software with. The software is distributed via an electronic download. -
Page 45: Connection
Manual Leapfrog Creatr 3.2 Connection In order for your computer to tell your printer what to do, you will need to connect your computer to your printer. In this step we will show you how to do this with the Simplify3D Software. -
Page 46: Preheat
Manual Leapfrog Creatr 3.3 Preheat Before you start printing, it is necessary to preheat your printer. The print material needs to be melted and your printbed needs to be warm to make sure the material will stick to your bed. Here, we will explain you how to do this using the Simplify3D software. - Page 47 Manual Leapfrog Creatr Leapfrog BV...
-
Page 48: Manually Controlling Your Creatr
Manual Leapfrog Creatr 3.4 Manually controlling your Creatr This section of the manual will explain you how to control the axes of your printer and extrusion using the have a G-code manual controls of the printer. Manual controlling in the Simplify3D software is done using the jog controls tab in the machine control panel. - Page 49 Manual Leapfrog Creatr The extrude and retract buttons will extrude and retract filament for the selected extruder. Please note that this can only be done when the extruder is heated. The home buttons will move the axes to the home position. The home position is the point where the coordinates for the axes are 0.
-
Page 50: Start Your Print
Manual Leapfrog Creatr 3.5 Start your print This section of the manual will explain you how to print a file if you already have a printable G-code or if you start with a STL file. STL files are files that contain your design, but do not contain the movements the printer needs to make while it is printing. - Page 51 Manual Leapfrog Creatr I have a STL file A STL file is a file format that contains the 3D design of your file. If you have a STL file, you will need to convert it to a printable file format called G-code. Below, the steps to do so are explained.
- Page 52 Name text box. After doing so you will have to select the profile that you wish to use. This will be the Leapfrog Creatr profiles for either the left extruder, the right extruder or both extruders depending on your choice of extruder. For a single extruder Creatr you should choose the right extruder profile.
- Page 53 Manual Leapfrog Creatr If you want to adjust more settings than just the options that are given in the basic FFF Settings menu you click “Show Advanced” to show the advanced print settings. Now that the model has been imported and the process created we can create the g-code to control the printer.
- Page 54 Manual Leapfrog Creatr A g-code is now being created to print your model. This may take a few minutes. When the slicing finishes the software will ask you if you would like to open the G-code file for previewing. It is advised to always check the preview to make sure the slicing went correctly and as desired.
- Page 55 Manual Leapfrog Creatr A message will pop up asking you if you would like to begin building it on your platform. When you click “Yes” the machine control panel will open and your print job will be started. If you click “No”...
-
Page 56: Extruder Jams
Leapfrog is constantly experimenting with new types of filament to add to our assortment of filaments that we sell. When we start providing a new type of filament you will need the correct print settings to use it. -
Page 57: Troubleshooting - Knowledgebase
Manual Leapfrog Creatr Troubleshooting - Knowledgebase In this section, we provide you with guidelines to get you back on track if something should go wrong. Of course it is possible that you encounter something that is not listed here you can then check out our troubleshootingtrees in Appendix A or paragraph 3.16 where we explain what you can do in such a case. -
Page 58: Oh, Oh, My Filament Is Not Feeding Through
Manual Leapfrog Creatr 4.1 Oh, oh, my filament is not feeding through This can happen, and it is not a big problem. The filament is kept on spools, which means that the filament is curved into one direction. When your filament is not feeding through, make sure to feed the filament completely straight and from the top. -
Page 59: My Object Won't Stick To The Bed
An infill of 0.1 (this equals 10%) will be strong enough in most cases and also solves the warping issue. In Repetier Host Leapfrog, go to the “Slicer” tab, click on the button “Configure”. Now Slic3r will open, go to the tab “Print Settings”, select “Infill” and change the “Fill density”... - Page 60 In Repetier Host Leapfrog, go to the “Slicer” tab, click on the button “Configure”. Now Slic3r will open, go to the tab “Print Settings”, select “Skirt and brim” and change the “Brim width”...
- Page 61 Manual Leapfrog Creatr Check the Z-offset If your object won´t stick to the bed, it is possible that the Z-offset is too big and you need to decrease the Z-offset. Placing the bed a little bit closer to the nozzle will result in better adhesion between the first layer and the heated printbed.
-
Page 62: Extruder Stops Mid-Print
Manual Leapfrog Creatr 4.3 Extruder stops in mid-print This manual will describe step by step what to check and how to solve any issues you encounter if your filament stops extruding in the middle of your print Basic checks To start there are a few basic things to check that can make a big difference: ... - Page 63 Manual Leapfrog Creatr Heat cartridge Check whether the heat cartridge is sufficiently centred in the heat block. In the pictures below you can see a heat cartridge that is centred and one that is not. It is important that the heat cartridge is centred properly so that the heat is distributed equally over the filament and that the thermistor reads the correct temperatures, preventing too cold extrusion which can cause clogging.
- Page 64 Manual Leapfrog Creatr The next steps If all the checks mentioned earlier turn out to be okay, we advise you to follow the next steps Clean your nozzle with your filament It is important that the nozzle has no leftover filament inside it that are stuck. Please heat the nozzle to 220/230 degrees and retract the filament until it is completely out of the extruder.
- Page 65 Manual Leapfrog Creatr Once you have selected the correct filament type, adjust the temperatures by increasing the temperature given for the first layer and the other layers set for the extruder. In the screenshot shown you can see that these are set to 220 degrees Celsius. When you have adjusted the temperature values press the “Save”-icon underneath the “Filament Settings”...
- Page 66 Manual Leapfrog Creatr Changing the distance between the bearing and the driver gear If none of the above has proven to be a solution, you can check if the distance between the driver gear and the bearing of the extruder is set correctly.
- Page 67 Manual Leapfrog Creatr o Step 1: Gain access to the bearing plate In order to gain access to the bearing plate you will have to remove the 2 middle bolts at the front of the extruder carriage first as shown in the next figure.
- Page 68 Manual Leapfrog Creatr o Step 2: Loosening the bearing plate The plate where the bearing is attached to, is fastened with two bolts as shown in the pictures below. Loosen these bolts a little to be able to change the distance between the driver gear and the bearing.
- Page 69 Manual Leapfrog Creatr o Step 4: Determine the proper distance of the bearing Grab a drill with a diameter of 1.5mm (or anything else with this diameter) and stick it on the hole of the hot end tube. It should also be positioned against the groove of the driver gear.
-
Page 70: Min-/Max Temp Triggered Error Messages
Manual Leapfrog Creatr 4.4 Min-/Max temp triggered error messages Always first check all the wiring. Most of the times it comes down to a loose connector, always add some pressure to the connectors to make sure that they are thoroughly connected. You will need to unwind the plastic cover that covers the wires to check this. - Page 71 Manual Leapfrog Creatr After receiving your new thermistor, the following steps will guide you through replacing the thermistor. o Make sure that the filament is not loaded in the extruder. If it is loaded, please retract the filament. o Loosen the Allen screw indicated on the picture with an Allen wrench.
- Page 72 Manual Leapfrog Creatr o Place and tighten the new thermistor in its place and connect the connector. o Slide the heat cartridge into place, and tighten the Allen screw again. o Slide the hot end into the extruder carriage and tighten the other Allen screw again (go through the height difference extruder steps to calibrate the height, see 3.6).
-
Page 73: Nozzle Seemed Clogged
Manual Leapfrog Creatr 4.5 Nozzle seems clogged In most cases the problem can be resolved by increasing the temperature by 10 degrees and extruding. Please follow the steps as described below. Retract the filament. First, in the “Manual Control” tab select the extruder of which the nozzle is clogged. Make sure that it is heated, set “Retract”... - Page 74 Manual Leapfrog Creatr Insert the filament in the extruder. Extrude the new strand of filament. Make sure the extruder is heated, set “Extrude” to 50 mm and extrude until filament is extruded through the nozzle. If the previous step was not the solution, you will need to replace the nozzle with a new nozzle. Please follow the below mentioned steps carefully.
- Page 75 Manual Leapfrog Creatr Let the extruder cool off, you can monitor the temperature of the extruder in Repetier as shown in the picture. Do not check the temperature of the nozzle with your bare hands ! ! ! ...
- Page 76 Manual Leapfrog Creatr Remove the heat cartridge by loosening the Allen screw in the heating block. Turn the hot end, this will allow you to remove the thermistor. Screw off the old nozzle, screw on the new nozzle, and tighten its position by mounting the heating block against it.
-
Page 77: My Extruders Are Not The Same Height
Manual Leapfrog Creatr 4.6 My extruders are not the same height When there is a height difference between the extruders, support material will not properly attach to the printed part or will melt into the printed part. This guide will explain how to level both extruders to the same height. -
Page 78: Uploading Firmware
Manual Leapfrog Creatr 4.7 Uploading firmware It is a fairly easy process to upload the firmware onto the Arduino board. Please follow the following steps one by one. Make sure your USB cable is connected to your Arduino board. - Page 79 Manual Leapfrog Creatr Select the Arduino Mega 2560 board by going to the tab “Extra” in the main menu, select “Board” and select “Arduino Mega 2560 or Mega ADK”. Leapfrog BV...
- Page 80 Manual Leapfrog Creatr Next go to the submenu “File” > “Open”. A window will pop up to select a file. In this window select the folder you received from support. In this folder you will find a file called either “Marlin_gebruikte_**.ino” or “Marlin_gebruikte_**.pde”.
- Page 81 Manual Leapfrog Creatr The final step is to upload the firmware. This is done by pressing the upload button which is indicated by an arrow pointing to the right as shown lighted up in the screenshot below. Once the firmware has been successfully uploaded you can close the menu and all is set for you...
-
Page 82: My Stl File Contains A Hole And Needs To Be Fixed
This means that your file is not complete and when you print your file, there will be a gap in your print where Repetier Host Leapfrog noticed there is a hole in your file. Overall it is difficult to figure out where the hole is located. -
Page 83: Calibrating The Heated Printbed
Manual Leapfrog Creatr 4.9 Calibrating the heated printbed To calibrate your heated bed bring your bed to the Z-home postion and make sure that your nozzles are at the same height. If they are not, please check paragraph 3.6 to level the extruders. -
Page 84: Extruder Offset
Manual Leapfrog Creatr 4.10 Extruder offset To be able to make a good dual extruder print whether it is dual color or soluble support you need the two extruders to be calibrated correctly compared to each other such that there are no holes or overlaps in the print. -
Page 85: Z-Height Does Not Match Model
Manual Leapfrog Creatr 4.11 Z-height does not match model When your printed object turns out to be substantially larger or smaller than your originally model digital model it could be that your printer is equipped with incorrect firmware and therefore takes to many steps on the z-axis each new layer. -
Page 86: Checking The Size Of Your Z-Axis Pulley
Manual Leapfrog Creatr 4.12 Checking the size of your z-axis pulley In order to provide you with the correct firmware for certain models our support team needs to know the diameter of your z-axis pulley. If the firmware troubleshootingtree has led you here this paragraph will explain you how to check the size so that you can let support know. -
Page 87: Adjusting The Z-Offset
Manual Leapfrog Creatr 4.13 Adjusting the z-offset In order to make good prints it is of great importance that the bed is at the right height from the nozzle. If the nozzle is touching the print bed no filament can be extruded and the sticker will be damaged. - Page 88 Manual Leapfrog Creatr When the bed is too far away from the nozzle, you are unable to move the bed further up with the manual control tab because of the sensor. Therefore you will have to use a different way to determine the distance.
-
Page 89: Checking The Internal Usb Cable
You have now gained access to the Leapfrog electronics board at the side of its usb entrance. The internal usb cable is connected to this usb port as shown in the next picture. If you would like a better overview you can also remove the electronics cover. - Page 90 Manual Leapfrog Creatr You have now gained access to the Leapfrog electronics board at the side of its usb entrance. If you would like a better overview you can also remove the electronics cover. All that remains to do is unplug the internal usb cable from the electronics board and plug in the usb cable that comes directly from your computer running the printer in the electronics board instead of in the back of the printer like you usually would.
-
Page 91: Removing The Slic3R Print Profiles
Windows(C:) Users “name of logged in user” AppData Roaming Slic3r print. Removing the print folder will make sure that all the old pre-sets and print profiles are deleted and that after re-installing the software all the Leapfrog pre-sets are reset. Leapfrog BV... -
Page 92: Need Support
Of course it is possible that you run into something that was not explained in this document. Here we explain you what to do in such a case. If you need support, click on the “Ask Leapfrog” button in Repetier-Host Leapfrog or go to https://www.lpfrg.com/support/. ... - Page 93 Manual Leapfrog Creatr In our support ticket system you can again see the “Knowledgebase”. If you have not yet checked if your question is listed here, please do so. If your question is not to be found in the Knowledgebase, create a new ticket by clicking on “New ticket”...
-
Page 94: Appendix A - Troubleshootingtrees
Manual Leapfrog Creatr Appendix A - Troubleshootingtrees When you run into a problem when using your printer but are not sure what is going on it can be hard to find the solution in the user manual. To ease this process and help you find a solution as soon as possible we have created troubleshootingtrees for some problems that will direct you to the solution or refer to the location of the solution in the user manual. - Page 95 Manual Leapfrog Creatr Leapfrog BV...
- Page 96 Manual Leapfrog Creatr Leapfrog BV...
- Page 97 Manual Leapfrog Creatr Leapfrog BV...
- Page 98 Manual Leapfrog Creatr Leapfrog BV...
- Page 99 Manual Leapfrog Creatr Leapfrog BV...
- Page 100 Manual Leapfrog Creatr Leapfrog BV...
- Page 101 Manual Leapfrog Creatr Leapfrog BV...
- Page 102 Manual Leapfrog Creatr Leapfrog BV...
- Page 103 Manual Leapfrog Creatr Leapfrog BV...
-
Page 104: My Print Looks Bad
Manual Leapfrog Creatr Leapfrog BV...
Need help?
Do you have a question about the 3d printer and is the answer not in the manual?
Questions and answers