Table of Contents
Advertisement
Quick Links
Advertisement
Table of Contents

Related Manuals for Martin Xciter


Summary of Contents for Martin Xciter
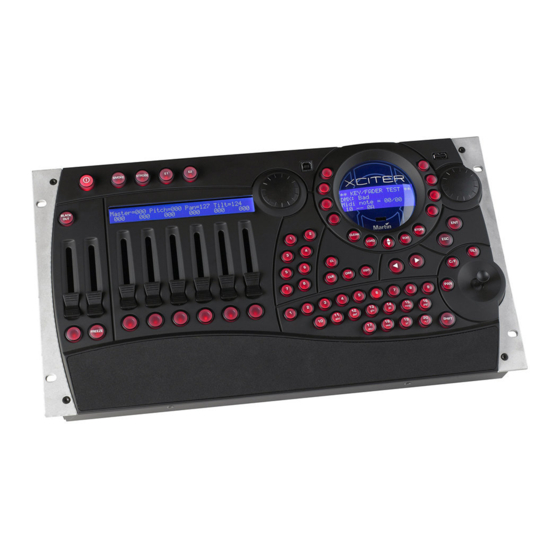
- Page 1 Xciter user manual...
- Page 2 Martin Profession AS shall not be liable for errors contained herein or for incidental or consequential damages in connection with the furnishing, performance or use of this material.
-
Page 3: Table Of Contents
Table of contents Chapter 1. Introduction .................... 7 1.1 Naming conventions used in this manual................... 7 1.2 Safety precautions........................8 Chapter 2. Installation ....................9 2.1 Hardware ............................ 9 2.1.1 Power connection......................9 2.1.2 DMX connection ........................ 9 2.1.2.1 Devices........................9 2.1.2.2 Master/slave ........................ - Page 4 7.1 DMX Config ..........................39 7.2 MIDI ............................40 Chapter 8. Joystick calibration ................41 Chapter 9. Test ......................43 Chapter 10. The Xciter philosophy ................ 45 10.1 Building blocks........................45 10.1.1 Scene..........................45 10.1.2 Sequence ........................45 10.2 Show elements ........................46 10.2.1 Cue ..........................
- Page 5 20.2.2 Update main controller ....................84 20.3 Library manager ........................84 20.3.1 Add a fixture definition....................84 20.3.2 Remove a fixture definition.................... 84 20.3.3 Update Xciter library...................... 84 20.3.4 Export to lib ........................85 20.4 Backup / Restore ........................85 20.4.1 Backup .......................... 85 20.4.2 Restore..........................
- Page 6 20.4.4 Clear password......................86 Chapter 21. Specifications - Xciter ................ 87...
-
Page 7: Chapter 1. Introduction
With Xciter you can control up to 20 fixtures, each up to 48 channels - max of 512 channels (soon to control up to 40 fixtures with a software upgrade). Up to 160 cues containing 4 sequences can run simultaneously. -
Page 8: Safety Precautions
Cue Scene Playback Sequence 1.2 Safety precautions The Xciter is not for domestic use. Use the device only as described. Do not expose the device to rain or moisture. Make sure the device is properly grounded. Do not operate the device with the cover removed. -
Page 9: Chapter 2. Installation
50Hz – 60Hz 2.1.2 DMX connection Xciter has one DMX-512 universe. On the back panel of the console you can see one 5-pin input, one 3-pin output and one 5-pin output. The 3-pin and 5-pin outputs belong to the same DMX universe but they are both buffered. -
Page 10: Midi Connection
Warning: Martin accessories only. DO NOT connect other devices, as this may damage the console. 2.1.6 USB link to PC You need a USB-A to USB-B cable to connect your Xciter to a desktop or laptop. Use the USB link to upload new firmware, download and upload fixture definitions and do backup/restore of shows. -
Page 11: Software
Before Xciter can communicate with your PC or laptop, you need to install the USB drivers and applications first. You can find them on the disk that comes with the Xciter. We recommend that you get the latest applications from the Martin support site. They may contain newer firmware and new fixture definitions. -
Page 13: Chapter 3. Power On/Off
The intro screens appear on LCD1 and LCD2. 3.2 Power off The Xciter’s power off is safeguarded by a 2 second delay. Meaning you have to hold the ON button for at least 2 seconds. 1. Hold [ON] until the Displays and LED’s go dark. -
Page 15: Chapter 4. Joystick Operation
Joystick operation Chapter 4. Joystick operation If you are using the Xciter for the first time, you may need to calibrate the joystick. See joystick calibration in the setup menu. 1. Press {Joystick} in the setup menu. 2. Move the joystick to all extremes (in a circle). -
Page 17: Chapter 5. Desk Light Operation
Desk light operation Chapter 5. Desk light operation If you have a desk light installed. You can adjust the intensity by holding down [SHIFT] while you turn SCR1. Xciter user manual... -
Page 19: Chapter 6. Setup Menu
Chapter 6. Setup menu The setup menu is only accessible from the start-up screen. If the Xciter is not in programmer mode, it will ask for the password to go to programmer mode. You have to provide this password to enter the setup menu. -
Page 21: Chapter 7. Fixture Library
‘library manager’ holds a couple of hundred more fixtures from other brands. Later in this manual you will learn how to put them from the PC library in the Xciter library. The console needs a fixture library to access the internal control channels (dimmer, shutter, color wheels, gobo wheels, effect wheels, pan, tilt…) of fixtures. - Page 22 [STORE] to store the parameters of the selected channel. 6. Repeat the previous steps (a – e) until you have configured all control channels. Xciter checks whether you have configured all control channels before exiting the fixture definition editor. If not Xciter asks you to retry.
-
Page 23: Edit Existing Fixture Definition
2. Press [EDIT] to edit the selected fixture definition. Use the same procedure as described in 7.1 to edit the definition. Xciter will not allow you to edit critical parameters (like channel cnt) of a fixture definition if this definition is used in the patch. -
Page 24: Remove Fixture Definition
2. Press [CLEAR] to remove the selected fixture definition. Xciter will ask for a confirmation. 3. Press [ENT] to confirm, [ESC] to cancel. Xciter will not allow you to delete a fixture definition if this definition is used in the patch. Xciter user manual... -
Page 25: Chapter 8. Patch
Chapter 8. Patch Before you start programming, Xciter needs to know which devices are connected to its DMX universe and how it will control them. This is where the patch comes in. To patch a device means to connect it to the Xciter controls, so you are able to manipulate it. -
Page 26: Patch An Unpatched Fixture Number
However, you can re-address fixtures without corrupting the show, provided that you also re-address the devices on your rig accordingly. Example: If you patch a fixture two channels further in the Xciter you also need to put the fixture address in the rig two channels further. - Page 27 [ENT] to confirm, [ESC] to cancel. 8. When you specify a start address, Xciter will check if there is enough space behind that address to place the fixture. If not, the console reports this and suggests the start address of the next available space. Press [ENT] to accept the suggested number, [ESC] to decline.
-
Page 28: Edit A Patched Fixture Number
[CLEAR] and NL 1-10 to input a new number. 3. When you specify a start address, Xciter will check if there is enough space behind that address to place the fixture. If not, the console reports this and suggests the start address of the next available space. Press [ENT] to accept the suggested number, [ESC] to decline. -
Page 29: Dimmer Patch
Most dimmers however have only one control channel, which you can move freely across the DMX chain. That is why Xciter does not use predefined devices in the dimmer patch. Above all you have more direct access to physical DMX channels. The more experienced user may take advantage of this low level access to control other devices with the dimmer patch. -
Page 30: Create Or Edit Dimmer Devices
1 or more. 6. Press [ESC] to exit the label editor and return to the dimmer patch menu. Xciter asks if you wish to store the new labels. Press [ENT] to confirm, [ESC] to decline. Xciter returns to the dimmer patch menu. -
Page 31: Da Patch
13. Repeat these previous steps until you have configured all control channels you need under the selected dimmer number and until you have patched all dimmer numbers you need. 14. Press [ESC] to exit the dimmer patch. Xciter will ask whether you want to save the new dimmer setup. Press [ENT] to confirm, [ESC] to decline. - Page 32 Patch 2. Press the softkey to the right of the DA scene you wish to edit. Example: smoke. Xciter shows a dialog on LCD2 that looks a lot like the programmer. 3. There are actually two scenes that you can set for each button: an ON scene and an OFF scene. The ON scene appears when the DA button is active;...
-
Page 33: Chapter 9. Auto Start
Auto start Chapter 9. Auto start When start is enabled, Xciter will run a certain cue list after startup. As you will see in the cue list editor, you can also execute lamp procedures in the cue list. Example: If the operator is late, other persons, who do not know the console, can still do a lamp on and start up a small show with the auto start function. -
Page 35: Chapter 5. Access Level
Example: You have a visiting DJ who does not know anything about the console. Have him run a cue list with go and give him some playbacks. 10.2 Changing user modes 10.2.1 From programmer to other In programmer mode, Xciter allows you to access the setup menu immediately. 1. Press {Access level} in the setup menu. Xciter user manual... -
Page 36: From Other To Programmer
6. Press [ESC] to leave the dialog. 10.2.2 From other to programmer In a user mode other than programmer Xciter will ask for the programmer password when you try to enter the setup menu. 7. Use ARROW or SCR1 to move the cursor. -
Page 37: Chapter 6. File Manager
Xciter has its own file system stored on FLASH memory which does not need battery backup. The file system makes it easier to transfer single files to a PC or laptop. We also remove corrupt files when Xciter boots. A corrupt file is mostly the result of a power failure during storage. But most important, you can only loose one file (one scene, one sequence, one fixture definition, etc.) when the power fails. -
Page 39: Chapter 7. Advanced Setup
Press {Advanced} in the setup menu to go to the advanced setup. 12.1 DMX Config The standard DMX refresh rate of the Xciter is 33 Hz. Some fixtures may not work at this rate. In that case, you need to adjust the DMX timings. -
Page 40: Midi
1. Press {MIDI} in the advanced setup. On the left you have the Xciter show elements and on the right the MIDI commands to launch them. If there is no MIDI command linked to the show element, ‘NO cmd’ will appear behind the show element. -
Page 41: Chapter 8. Joystick Calibration
2. Move the joystick to all extremes in a circular motion a couple of times. 3. Press [STORE] to store the calibration data. Xciter confirms with ‘Limits saved! Press any key! 4. Press any button to continue. Xciter returns to the setup menu. -
Page 43: Chapter 9. Test
Test Chapter 14. Test The test menu contains some testing tools, which are meant for debugging purposes. They will not be detailed in this manual. Xciter user manual... -
Page 45: Chapter 10. The Xciter Philosophy
The scene represents a single look, created with some or all of the patched fixtures. Xciter has two kinds of scenes: background scenes and playback scenes. The background scene is added to a cue, whilst the playback scene is assigned to a fader. -
Page 46: Show Elements
Visible bank Xciter has got 160 virtual banks of 6 playback faders. Of course only one bank (6 faders) is visible at a time. Use playback faders to cross fade up to 6 playback scenes with a cue. We will explain how to use playbacks further in this manual. -
Page 47: Cue List
FOLLOW with FT x S: Xciter adds x seconds to the scene time of the current cue before launching the next cue. • GOTO with To=x: Xciter jumps to step x of the cue list. If you place this function at the end of a cue list with To=1, that list will loop infinitely. •... -
Page 48: Preset
Although presets require some experience, they are worth checking out because they can save you a lot trouble when you modify the rig. Xciter can store up to 160 presets, depending on the preset content. 15.4 Process priority We call a running scene or sequence a process. -
Page 49: Chapter 11. Program Features
16.1 Select/deselect device Xciter permits you to use moving lights and dimmers together in scenes, so you can switch between fixture and dimmer pages freely without loosing device selections or channel settings. 1. Press [FIX] to select fixtures (intelligent lights). -
Page 50: Device Groups
4. Release [SHIFT]. 16.5 Fixture information In case you have forgotten which fixture type and DMX address is assigned to a button, Xciter can also display this information while you are programming. 1. Hold [SHIFT], hold [FIX] and release [SHIFT]. -
Page 51: Channel Status Indicators
The active layer has a higher priority than the inactive one. When you adjust a control channel Xciter puts the value in both layers, yet it will only store channels of the active layer. -
Page 52: Presets
Inactive layer COLW1 COLW1 COLW1 COLW1 NOT stored 4. When you are modifying color values, Xciter puts them in both layers. The color values are stored because they reside in the active layer. fixture 1 fixture 2 fixture 3 fixture 4 Active channels <--->... -
Page 53: Toggle Dmx / Percentage Display
There should be a % sign. 16.7.2 Insert and add scenes When you start from scratch, there are no scenes present in the editor. The scene counter is at 00/00. 1. Create your first scene in the programmer. Xciter user manual... -
Page 54: Modify Scene And Fade Time
If you wish to create a single scene, skip the following steps. 3. Press {Add} to add a new step behind the last or press {Insert} to insert a new step before the current. Xciter stores the previous step automatically. -
Page 55: Fade Curve
Program features When you start from scratch, the Xciter uses default timing (ST = 1.0 sec, FT = 1.0 sec). 1. Press {ST: 1.0 S} to change the scene time. Use ARROW or SCR1 to modify the value. Use [CLEAR] and NL 1-10 to input a new value. -
Page 56: Preview Sequence
Leave the even fixtures unchanged. Select the odd fixtures and invert the pan channel in the programmer. Select all fixtures again and adjust the pan value. The pan of the odd fixtures should move in the opposite direction of the even fixtures. Xciter user manual... -
Page 57: Pan / Tilt Modifiers
2. Use ARROW or SCR1 to scroll through the list. 3. Select channels with the softkeys on the right. 4. Press [EDIT] to assign a generator number to the selected channel(s). Use ARROW or SCR1 to modify the generator number (max 255). Xciter user manual... - Page 58 To toggle the effect parameters between fade and snap, use the SM bounce buttons below them. Xciter’s powerful engine will also fade between effect parameters, bringing you fluent transitions between effects. If you put ‘speed’, ‘swing’ and ‘Coffs’ in fade (default), they will gradually change from scene to scene according to the fade time (FT) you specified in the scene/sequence editor.
-
Page 59: Chapter 17. Effect Generator Examples
Chapter 17. Effect generator examples The most powerful feature of the Xciter is its effect generator. You can use up to 255 effect generators in a scene or step. They can be applied to any control channel. In the following examples you will see you can create dimmer and color chases in a single scene. -
Page 60: How To Create A Dimmer Chase
12. When you use bounce mode and do not divide your fixtures evenly across the effect you may see a gap in the dimmer chase. Xciter also has a solution for this. Put Coffs on 90 degrees and hold the SHIFT button while you press the SM bounce button under the parameter Span. -
Page 61: How To Create A Color Chase
5. On the left side you see the current shape that will run on top of the COLW1 channel. This is ‘sine by default’. Press the softkey next to it. Xciter shows the list of available shapes. 6. Use SCR1 to scroll through the list until you see Sawnt. Select it by pressing the corresponding softkey on the right side. -
Page 62: How To Use The Bpm Generators (Generators 251-255)
17.6 How to use the audio features of the effect generator Xciter’s effect generator allows you to put the audio signal itself on a fixture channel. Since audio changes fast, we recommend you use a fast fixture channel like the dimmer. To use this feature you need an audio feed (a 6.3mm jack coming from the audio mixer). - Page 63 Effect generator examples 10. Set the ‘Fdlay’ or fixture delay to a very low value, like 4 and see what happens. The dimmers should open with a small delay per fixture when the beat comes in. Xciter user manual...
-
Page 65: Chapter 18. Storing To Memory
With this function you can store a background scene and assign it to a cue button. 1. Press {BG scene} in the store dialog. Xciter prompts you to select a cue button. Cue 101 is selected by default. The first digit is the page; the second and third are the cue button itself. -
Page 66: Store As Playback Scene
With this function you can store a playback scene and assign it to a fader. 1. Press {PB scene} in the store dialog. Xciter prompts you to select a fader bank and fader. Bank 101 is selected by default. This first digit is the page: the second and third are the bank itself. -
Page 67: Chapter 19. Editing Existing Stuff
3. Press the softkey next to the scene name to select it. 4. Press [EDIT] to edit the selected scene. Xciter will take a clone of the scene and place it in the scene editor. 5. Press [CLEAR] to delete the selected scene. Xciter will ask for confirmation. -
Page 68: Quick Edit During Show
2. Use PG and NL 1-20 to select the preset number. There are 8 pages of 20 presets, giving you a total of 160 pan/tilt presets. 3. Press [ENT] to start editing or [ESC] to cancel. Press [CLEAR] to delete the selected preset. Xciter will ask for confirmation. -
Page 69: Chapter 18. Run Mode Features
20.1 Sequence transparency across cues. When you are putting sequences behind cue buttons you have to keep in mind that Xciter has sequence transparency. When there is no sequence in the next cue to take over the sequence in the current cue, the sequence from the current cue will keep running. -
Page 70: No Transparency
• BG1 starts running on the cue scene level. Launch cue2: • Xciter kills the sequence and cue scene processes that were started with cue 1. • SEQ2 starts running on layer B. • SEQ4 starts running on layer D. -
Page 71: Basic Cue Dialog
Xciter asks to select a cue and shows playback controls on LCD2. 2. Use PG to select a cue page and NL to select a cue number. If the cue has content, Xciter will run it. The button of the activated cue starts blinking. The basic dialog is the first screen to pop up. It shows you the sequences that are currently assigned to the selected cue. -
Page 72: Internal Trigger
Example: Default you see ‘I>’, which means internal forward. You can change the trigger and step mode for each sequence live. 1. Press the softkey to the right of the sequence you wish to change. Xciter displays the trigger and step mode dialog. -
Page 73: Audio Trigger
20.2.2.4 Audio trigger When you choose the audio trigger, the sequence will react to beats from the four band audio filter. Xciter shows the audio trigger dialog. In this dialog you can configure the number of beats before an actual sequence trigger occurs and the audio bands on which to trigger. -
Page 74: Add/Replace Background Scene
2. Use SCR1 to locate the sequence you wish to add. 3. Press the softkey on the right of the sequence name to select it. 4. Select the layer where you wish to place the sequence by pressing {A}, {B}, {C} or {D}. Xciter jumps back to the extended dialog. -
Page 75: Assign Playback Scenes To Banks And Faders
Example: When you launch a cue for some slow music, you need a bank of playbacks that do something on the mirror ball. If you link that bank to the cue, Xciter will jump to it the moment you launch the cue. Of course you can still scroll to other banks. -
Page 76: Store Run Mode Settings
The next time you call this cue, the sequence will still be present and deactivated. You can activate it again, strobing the dimmer, when it suits the music. 20.5 Playback controls When you are in cue (run mode), Xciter shows playback controls on LCD2. Playback controls involve the following: •... -
Page 77: Activate And Bounce Override Playbacks
2. Use PG and NL 1-20 to select a cue list. The cue list number appears on LCD1. The first digit is the page number; the second is the cue list itself. Xciter reports ‘List empty’ if the cue list is empty or ‘contains list’ if it has content. -
Page 78: Clear Cue List
4. All transitions between steps are automatic, except for steps with the ‘GO’ option. When you see a GO on the second line of the LCD, Xciter is waiting for an action from the user. The right arrow button starts blinking. - Page 79 18. Repeat steps 3-6 until you have built the cue list. 19. Press [STORE] to store the cue list to memory. 20. Press [ESC] to exit the cue list editor. For more information on step options we refer to ‘Xciter philosophy’. Xciter user manual...
-
Page 81: Chapter 19. Direct Access Features
The first fader on the left controls the master intensity. Use it to manipulate the relative intensity of fixtures and generic dimmers. For those fixtures that do not have a dimmer, Xciter has the shutter close value (see library). This value is sent to those particular fixtures, when you pull the master intensity below 3%. -
Page 83: Chapter 20. Pc Software
PC software Chapter 22. PC software 22.1 Software installation Run ‘Install.exe’ from the Xciter CD. This will install all necessary application files and drivers to your PC or laptop. 22.2 Firmware manager Use this application to update the firmware in your console. You can download new firmware from the Martin support site. -
Page 84: Update Main Controller
Xciter. If Xciter is not detected, the software reports. Press ‘Rescan’ if you want the software to scan for Xciter again. If the software keeps giving an error message, contact the nearest Martin dealer for advice. -
Page 85: Export To Lib
3. Start the BR (Backup / Restore) application. If Xciter is not detected, the software reports this. Press ‘Rescan’ if you want the software to scan for Xciter again. If the software keeps giving an error message, contact the nearest Martin dealer for advice. -
Page 86: Clear Show
4. The application will start deleting show files from the Xciter. Wait until it reports ‘clear show success’. 22.4.4 Clear password 1. Press the ‘Clear password’ button. 2. The application will search for the password file and deletes it from the Xciter. Wait until it reports ‘clear password success’. Xciter user manual... - Page 87 Specifications - Xciter Chapter 23. Specifications - Xciter Dimensions Length x width x height: 483 x 265 x 120mm (19 x 10.4 x 4.7 in.) Weight: 4.65 kg (10.3 lbs) Power supply Operating range: 85-265V AC, 50–60Hz Maximum power: 15W...
- Page 88 Export / import show, library via USB link to PC Included items User manual 5 meter (16 ft.) 3-pin XLR cable XLR termination plug 3-wire 1.5 meter (5 ft.) IEC mains cable Ordering information Xciter ctrl; 90-260V, 50-60Hz: P/N 90736000 Xciter user manual...
Need help?
Do you have a question about the Xciter and is the answer not in the manual?
Questions and answers