Table of Contents
Advertisement
Advertisement
Table of Contents

Related Manuals for Martin ELP CL


Summary of Contents for Martin ELP CL
- Page 1 ELP CL LED Profile User Guide...
-
Page 2: Dimensions
Martin®, HARMAN and all other trademarks in this document pertaining to services or products by Martin Professional or its affiliates and subsidiaries are registered as the property of HARMAN Professional Denmark. -
Page 3: Table Of Contents
Table of contents Dimensions ................... 2 Safety information ................. 5 Introduction ................... 8 Before using the product for the first time ........8 Fixture overview ..................9 Physical installation ................10 Fixture location ................. 10 Mounting the fixture ..............10 Fastening the fixture to a flat surface ........ - Page 4 Use of color filters ..............21 Use of gobos and irises ............22 Maintenance ..................23 Cleaning ..................23 Fuse replacement ..............23 DMX protocol ..................25 Control menus ..................27 Troubleshooting .................. 30 Specifications ..................31...
-
Page 5: Safety Information
Keep this user manual for future use. For the latest user documentation and other information about this and all Martin® products, please visit the Martin® website at http://www.martin.com If you have any questions about how to install, operate or service the fixture safely, please contact your Martin®... - Page 6 Use one of the 16 A rated power relay cables available as optional accessories from Martin to relay power from the fixture’s MAINS OUT socket to the MAINS IN socket of the next fixture. If you link fixtures to power in a chain in this way, do not exceed the following limits: •...
- Page 7 The ELP CL fixture fixtures fall into the following risk groups according to EN 62471 and IEC/TR 62778 at the distances indicated below.
-
Page 8: Introduction
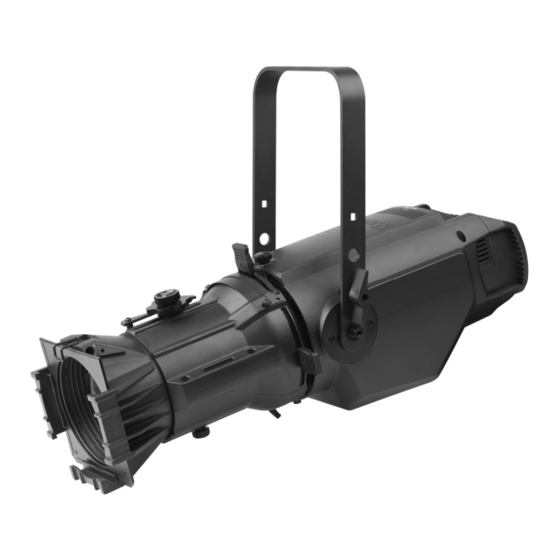
Introduction The ELP CL from Martin® is an ellipsoidal/profile lighting fixture with a 260W red, green, blue, amber & lime LED engine that produces a sharp gobo projection with a flat field The fixture provides a calibrated color mixing system that offers 2 modes of operation: •... -
Page 9: Fixture Overview
TRUE1 socket) 8 – Mounting bracket / yoke 9 – Tilt locking knob for mounting bracket 10 – Heatsink vent 11 – Safety eye to attach safety bond 12 – Rear handles for positioning Martin ELP CL Profile user guide... -
Page 10: Physical Installation
ELP Profile fixture. Installation must be carried out by qualified professionals only. Contact your Martin supplier for assistance if you have any questions about how to install this product safely. Fixture location The ELP Profile fixture is intended for interior use only. -
Page 11: Securing With A Safety Cable
Loop the safety cable through the attachment eye at the rear of the fixture (see illustration above) and around a secure anchoring point. If a safety cable attachment point becomes damaged or deformed, do not use the fixture. Return it to a Martin Service Centre for repair. Martin ELP CL Profile user guide... -
Page 12: Changing The Lens Tube
5. Replace the thumbwheel screws (2) and (3). For the top screw (2), ensure the focusing knob is in place on the screw with the gear teeth on the underside. Rotate the focusing knob until the gear teeth mesh with the bar on the lens tube housing. 6. Tighten the screws. Martin ELP CL Profile user guide... -
Page 13: Ac Power Connection
To link fixtures to power in a daisy-chain, use the 16 amp rated 12 AWG / 2.5 mm power relay cables available from Martin (see ‘Accessories’ on page 33) to link fixtures’ MAINS OUT sockets to MAINS IN sockets. Using the 16 amp rated cables available as accessories from Martin, you can link: •... -
Page 14: Data Network Requirements
(-) and pin 5 = data 2 hot (+). To split the link into branches, use an opto-isolated splitter such as the Martin™ DMX 5.3 Splitter. Terminate the link by installing a termination plug in the output socket of the last fixture. The termination plug, which is a male XLR plug with a 120 Ohm, 0.25 W resistor soldered between... -
Page 15: Fixture Setup
Address sharing can be useful for diagnostic purposes and symmetric control, particularly when combined with the inverse pan and tilt options. Martin ELP CL Profile user guide... -
Page 16: Setting Dmx Personality
INV SQ LAW (Inverse square law) light intensity control is coarser at low levels and finer at high levels. S-CURVE light intensity control is finer at low levels and high levels and coarser at medium levels. Martin ELP CL Profile user guide... -
Page 17: Display
Press ENTER to confirm (or press MENU to exit without making a change). Fixture test This menu allows you to run self-test sequences on the fixture’s LED emitters. Each color of emitters will be switched on in turn. Martin ELP CL Profile user guide... -
Page 18: Fixture Information
RED, GREEN, BLUE, LIME, AMBER can be made dimmer or brighter from -128 to 127. LOAD DEFAULTS will load the factory set calibration values. SAVE DEFAULTS will replace the factory set calibration values with the current calibration settings. Martin ELP CL Profile user guide... -
Page 19: Setting Options By Rdm
As a minimum, the ELP Profile fixtures support the following RDM functions: Device discovery DISC_UNIQUE_BRANCH DISC_MUTE DISC_UN_MUTE Device management QUEUED_MESSAGE STATUS_MESSAGES STATUS_ID_DESCRIPTION SUPPORTED_PARAMETERS DEVICE_INFO DEVICE_MODEL_DESCRIPTION MANUFACTURER_LABEL DEVICE_LABEL SOFTWARE_VERSION_LABEL BOOT_SOFTWARE_VERSION_ID BOOT_SOFTWARE_VERSION_LABEL Martin ELP CL Profile user guide... - Page 20 DMX_PERSONALITY DMX_START_ADDRESS DEVICE_HOURS IDENTIFY_DEVICE LAST_STATE DIMMER_CURVE Martin ELP CL Profile user guide...
-
Page 21: Effects
Push the securing clip to one side to release it. Ensure the securing clip is clicked back into place to prevent the color filter frame from falling out. Martin ELP CL Profile user guide... -
Page 22: Use Of Gobos And Irises
2. Slide the cover towards the front of the fixture. 3. Slide the goboholder into the accessory gate in the fixture. 4. Slide the cover back so that it holds the goboholder in place and tighten the thumbscrews. Martin ELP CL Profile user guide... -
Page 23: Maintenance
If one or more of these factors is present, inspect fixtures within their first 100 hours of operation to see whether cleaning is necessary. Check again at frequent intervals. This procedure will allow you to assess cleaning requirements in your particular situation. If in doubt, consult your Martin dealer about a suitable maintenance schedule. - Page 24 The equipment must only be serviced or repaired by an authorized Martin service technician. Installation, on-site service and maintenance can be provided worldwide by the Martin Professional Global Service organization and its approved agents, giving owners access to Martin’s expertise and product knowledge in a partnership that will ensure the highest level of performance throughout the product’s lifetime.
-
Page 25: Dmx Protocol
Lime fine 0-255 Amber 0-100% 0-255 Amber fine Color Scene 0-10 No function 11-19 2000K-2700K 20-28 2700K-3200K 29-37 3200K-4200K 38-46 4200K-5600K 47-55 5600K-8000K 56-65 8000K-10,000K 66-74 Light Pink 75-84 Pale Amber Gold 85-93 Yellow Martin ELP CL Profile user guide... - Page 26 Dark Pink 151-160 Magenta 161-169 Medium Purple 170-179 Dark Lavender 180-188 Deep Purple 189-198 Sky Blue 199-207 Light Blue 208-217 Medium Blue 218-226 Deep Blue 227-236 Blue Green 237-245 Moss Green 246-255 Primary Green Martin ELP CL Profile user guide...
-
Page 27: Control Menus
RMS dimming curve) PWM Freq 600-1200Hz No Data Blackout If data connection is lost, fixture will blackout If data connection is lost, Hold fixture holds latest received data value at all channels Martin ELP CL Profile user guide... - Page 28 (not user- resettable) LED Hours 0 - XXXX h Number of hours fixture LEDs have been powered on since manufacture (not user-resettable) SW Version XX.XX.XX Displays currently active software version Martin ELP CL Profile user guide...
- Page 29 Fine tune offset position of Blue, Lime, emitters to achieve uniform Amber behavior across multiple fixtures Load Def Load Load factory default calibration settings Save Def Save Replace factory default calibration settings with current calibration settings Martin ELP CL Profile user guide...
-
Page 30: Troubleshooting
Attempt to control the fixture with another DMX control device. …potential interference Move the fixture if it is being operated very from proximity to a high- close to an unshielded high-voltage voltage installation. installation. Martin ELP CL Profile user guide... -
Page 31: Specifications
TM-30 Rf (IES TM-30-15 Fidelity Index) ................ >84 TM-30 Rg (IES TM-30-15 Gamut Index) ..............>111 TLCI (Television Lighting Consistency Index) ............... >85 Construction Color(s) ....................Black or white variant Housing ....................Die-cast aluminum Protection rating ......................IP20 Martin ELP CL Profile user guide... - Page 32 Canadian EMC ............ICES-003 Class B, ICES-005 Class B Australia/NZ ......................... RCM Included Items Power input cable (0.75mm , 18 AWG), bare ends to Neutrik TRUE1 NAC3FX-W (female), 1.5 m (4.9 ft.) Mounting bracket User manual Martin ELP CL Profile user guide...
- Page 33 Martin ELP Lens Tube 36°, White ............P/N 9045115168 Martin ELP Lens Tube 50°, White ............P/N 9045115170 Specifications are subject to change without notice. For the latest product specifications, see www.martin.com Disposing of this product Martin products are supplied in compliance with Directive 2012/19/EC of the European Parliament and of the Council of the European Union on WEEE (Waste Electrical and Electronic Equipment), where applicable.
- Page 34 The label shown below is displayed on this product. If it becomes difficult or impossible to read, it must be replaced using the illustration below to reproduce new labels sized 18 x 45 mm (each label), in black on a yellow background. Martin ELP CL Profile user guide...
- Page 36 www.martin.com...
Need help?
Do you have a question about the ELP CL and is the answer not in the manual?
Questions and answers