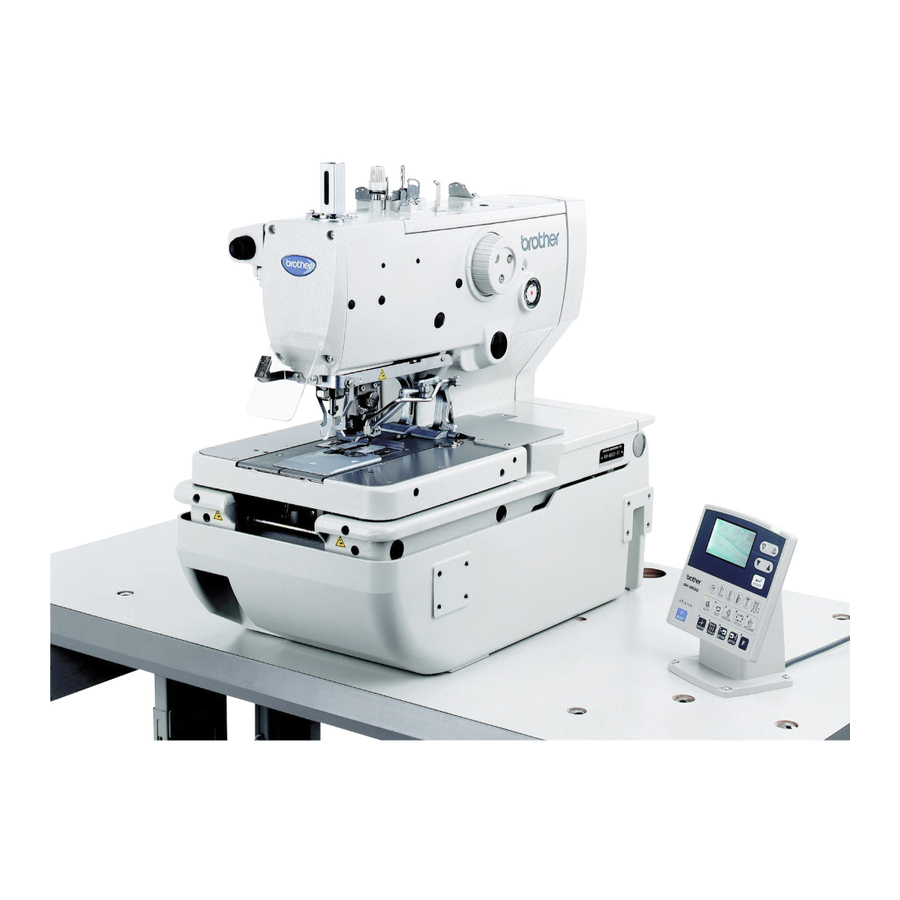
Brother RH-9820 Instruction Manual
Electronic eyelet button holer
Hide thumbs
Also See for RH-9820:
- Service manual (237 pages) ,
- Instruction manual (134 pages) ,
- Parts book (132 pages)

Related Manuals for Brother RH-9820


Summary of Contents for Brother RH-9820
- Page 1 RH-9820 INSTRUCTION MANUAL Please read this manual before using the machine. Please keep this manual within easy reach for quick reference. ELECTRONIC EYELET BUTTON HOLER...
- Page 2 Thank you very much for buying a BROTHER sewing machine. Before using your new machine, please read the safety instructions and the explanations given in the instruction manual.! With industrial sewing machines, it is normal to carry out work while positioned directly in front of moving parts such as the needle and thread take-up lever, and consequently there is always a danger of injury that can be caused by these parts.
-
Page 3: Safety Instructions
..……… This symbol ( ) indicates something that you must do. The picture inside the circle indicates the nature of the thing that must be done. (For example, the symbol at left means “you must make the ground connection”.) RH-9820... - Page 4 Furthermore, do not excessively bend the cords or secure them too firmly Contact your Brother dealer or a qualified electrician with staples. for any electrical work that may need to be done. If this is not observed, fire or electric shocks may The sewing machine weighs approximately 120 kg.
-
Page 5: Maintenance And Inspection
In addition, do not subject the machine head to extra Ask your Brother dealer or a qualified electrician to force while it is tilted back. carry out any maintenance and inspection of the If this is not observed, the machine head may electrical system. - Page 6 The following warning labels appear on the sewing machine. Please follow the instructions on the labels at all times when using the machine. If the labels have been removed or are difficult to read, please contact your nearest Brother dealer. Do not touch the knife or press any...
- Page 7 0332B 0331B Belt cover (Rear) 0333B 0486B 0334B 0485B RH-9820...
-
Page 8: Table Of Contents
3-18. Installing the dust bag........ 26 7-6. Manual sewing (manual mode)....65 3-19. Installing and removing the work clamp 7-7. Switching the sewing mode while sewing plates ............27 is in progress..........67 3-20. Lubrication ..........28 3-20-1. Adding oil..........28 3-20-2. Lubrication.......... 29 RH-9820... - Page 9 9-16-2. Making fine adjustments to the knife 10. SEWING CIRCULAR STITCHES ..position ..........88 11. ERROR CODES ......9-17. Adjusting the cutting pressure ....90 9-18. Adjusting the work clamp lift amounts ..91 12. TROUBLESHOOTING..... 9-19. Adjusting the work clamp positions ... 92 RH-9820...
-
Page 10: Names Of Major Parts
Upper shaft pulley Treadle unit (11) Feed base Treadle (commercially-available) (12) Cotton stand Safety devices: (13) Finger guard (16) Needle guide cover (14) Eye guard (17) Belt cover (15) Needle bar guard *: CF is a trademark of SanDisk Corporation. RH-9820... -
Page 11: Machine Specifications
This is not covered by specification designations, but compatibility is possible by replacement of gauge parts. (Ask the place of purchase for details.) SPECIFICATIONS RH-9820-00 RH-9820-01 RH-9820-02 Men’s clothes, ladies’ clothes Jeans and work clothes Sewing speed... -
Page 12: Sewing Shapes
2. MACHINE SPECIFICATIONS 2-2. Sewing shapes Eyelet buttonhole Without bartack Taper bartack Straight bartack Round bartack Straight buttonhole Without bartack Taper bartack Straight bartack Round bartack Circular stitch 0536B-0539B 0540B-0543B 0544B RH-9820... -
Page 13: Installation
Furthermore, do not excessively bend the cords or secure them too firmly with staples. Contact your Brother dealer or a qualified electrician If this is not observed, there is the danger that fire or for any electrical work that may need to be done. -
Page 14: When Setting Up On Top Of The Table
(From underneath table) For valve unit For oiler For cotton stand 2 x 2 mm dia. 10 depth (from underneath table) For power switch For bed base For table leg For provisionally holding bed base Melamine veneer panel 0338B RH-9820... -
Page 15: When Embedding Into The Table
If the table is more than 50 mm thick, the square neck bolts will not be long enough, so hollow out the underside of the table to a diameter of 26 mm so that the thickness is 40 1595B 1594B RH-9820... -
Page 16: Installing The Control Box
Before installing the control box (1), 0340B check that the model plate (2) on the control box (1) is “RX9820” to indicate that it is an RX-control box for RH-9820 sewing machines. (1) Control box (3) Bolts [4 pcs.] (4) Plain washers [4 pcs.] (5) Nuts [8 pcs.]... -
Page 17: Installing The Table Reinforcement Plates (Embedded Installation Only)
(A) to the table. * Insert the bolts (A) securely so that their heads do not protrude out from the top of the table. (Refer to “3-12. Installing the treadle unit (when using the treadle)”.) Table 0343B (Continued on next page) RH-9820... - Page 18 NOTE: The fixing bolt (5) is needed when moving the machine head, so store it in a safe place. Provisionally secure RH-9820...
-
Page 19: When Embedding Into The Table
The fixing bolt (8) is needed when moving the machine head, so store it in a safe place. Be sure to use the rubber sheets (4). If they are not used, the amount of vibration will be excessive. 1642B 1650B 1651B RH-9820... -
Page 20: Tilting Back And Returning The Machine Head
2. To return the machine head from the first step: After gently lifting up the machine head, remove the head support lever (4) from section A of the hinge support shaft (5), and then hold the bed at both sides and gently return it to its original position. RH-9820... -
Page 21: Installing The Belt Cover And Feed Bar Cover U
If the knot is above the pin (4), it may become hit by the hammer and this may cause the wick (6) to break. Once installation is complete, return the machine head to its original position. 0354B RH-9820... -
Page 22: Installing The Operation Panel
The cotton stand can also be installed on the far right side of the table, but if this is done, the threading method will change. (Refer to “4-5. Threading the thread when the cotton stand is installed on the right side”.) 0357B RH-9820... -
Page 23: Installing The Air Unit And Valve Unit
<2-pedal foot switch operation method> When the work clamp switch (left side) is depressed, the work clamp will be lowered, and when the start switch (right side) is depressed, the sewing machine will start. Work clamp switch Start switch 4923Q 0361B RH-9820... -
Page 24: Installing The Treadle Unit (When Using The Treadle)
<Treadle operation method> When the treadle (3) is depressed to the 1st step, the work clamp will be lowered, and when it is depressed to the 2nd step, the sewing machine will start. 1st step 2nd step 4441Q 0360B RH-9820... -
Page 25: Installing The Hand Start Switch (When Using The Hand Start Switch)
When the work clamp switch (left side) is depressed, the work clamp will be lowered, and when the start switch (right side) is depressed, the sewing machine will start. Start switch Work clamp switch 0363B 0364B [When embedding into the table] 0385B (Continued on next page) RH-9820... - Page 26 (8). In addition, when the screws (8) are loosened, the hand start switch (1) can be moved forward, back and sideways to adjust its position. Once adjustment is complete, securely tighten the screws (8). 0312B RH-9820...
-
Page 27: Connecting The Cords
Check that the connectors are facing the correct way, and then insert them firmly until they lock into place. Secure the cables with fastening bands and cord clamps, while being careful not to pull on the connectors. (Continued on next page) RH-9820... - Page 28 (Y home position, cooling fan) sensor 12-pin P8 (SENSOR1) STOP switch 6-pin P13 (HEAD) (Zigzag check, low thread trimming OFF) sensor P10 (SENSOR2) 6-pin Valve harness 12-pin P12 (AIR1) (7), (8) Hammer valve harness 10-pin P25 (AIR2) (7), (8) 0366B RH-9820...
- Page 29 Y-feed motor 4-pin blue P8 (YPM) (7), (8) X-feed motor 4-pin white P10 (XPM) (7), (8) NOTE: Route the X-feed, Y-feed and -feed motor harnesses so that they do not touch the PMD P.C. board. 0367B (Continued on next page) RH-9820...
- Page 30 Securely close the cord presser plate (9). If dust gets inside the control box, it may cause problems with operation. 7. Check that the cords do not get pulled, and then gently return the machine head to its original position. RH-9820...
-
Page 31: Connecting The Ground Wire
Check that the cords are not clamped by the cover at this time. <For European destinations> For European destinations, there are other ground wire connection locations in addition to those mentioned above. Refer to the CE instruction manual for further details. 0336B RH-9820... -
Page 32: Connecting The Power Cord
2. Insert the power plug into a properly-grounded AC power supply. The inside of the control box uses single-phase power. NOTE: Do not use extension cords. They may cause problems with correct operation of the sewing machine. <Single-phase specifications> <Three-phase specifications> Green/yellow wire (Ground wire) 0371B RH-9820... -
Page 33: Connecting The Air Tubes
(1) to the underside of the table with the screw (2). 2. Pass the air tubes and the valve cords through the accessory cord holder (small) (3), and secure the cord holder (small) (3) to the underside of the table with the screw (4). 0373B RH-9820... -
Page 34: Installing The Air Hose
(4) and turn it in the direction of the arrow. 4. Open the cock (5). Air will enter the bowl and the pointer will move. 5. Repeat steps 1 to 4 until the desired air pressure is obtained. Close Open 0376B RH-9820... -
Page 35: Installing The Eye Guard
NOTE: Throw away the cutting scraps before they reach the tip of the venturi tube (3). If they cover the tip of the venturi tube, the inside of the knife trash tube (4) will become blocked. 1597B 1598B RH-9820... -
Page 36: Installing And Removing The Work Clamp Plates
(4) and remove it. 6. Remove the left work clamp plate (9) in the same way as for the right work clamp plate (4). <Installation> Install by carrying out the “Removal” procedure given above in reverse. RH-9820... -
Page 37: Lubrication
Keep the oil out of the reach of children. NOTE: Use only the lubricating oil <NIPPON OIL CORPORATION Sewing Lube 10N; VG10> specified by Brother. * If this type of lubricating oil is difficult to obtain, the recommended oil to use is Exxon Mobil Essotex SM10, VG10. -
Page 38: Lubrication
2. Move the feed base (3) to a position where it will not interfere with lubrication. 3. Turn the looper base and add 2 - 3 drops of oil in the places indicated by the arrows. 4. Once lubrication is complete, install the work clamp plates. RH-9820... -
Page 39: Preparation Before Sewing
If the set screw (5) is tightened, it may damage the inside of the needle bar and it may not be possible to insert the needle. (seen from the right side) <Recommended needle> DO x 558 80 - 120 Nm (Schmetz 558) (Seen from the front) 0395B RH-9820... -
Page 40: Threading The Upper Thread
When using threading mode for threading, the tension discs (1) will open so that the thread can be threaded more easily. (Refer to “5-7. Using threading mode”.) Use the accessory threader (2). ( in the illustration shows the position for inserting the threader.) Upper thread 1600B 0398B RH-9820... -
Page 41: Threading The Lower Thread
Before threading, refer to “4-5. Threading the threads when the cotton stand is installed on the right side”. in the illustration show the positions for inserting the threader.) (Refer to “4-2. Threading the upper thread” for details on using the threader.) <-00 and -02 specifications> <-01 specifications> 0400B RH-9820... -
Page 42: Threading The Gimp
Gimp should not be clamped <-00 specifications> Gimp should be clamped Gimp should not be clamped (when using a (when using about thicker gimp) #8 spun thread or finer as the gimp) <-01 specifications> Gimp should be clamped <-02 specifications> RH-9820... -
Page 43: Threading The Threads When The Cotton Stand Is Installed On The Right Side
When installing the cotton stand on the right side, it is recommended that you use the accessory thread guide (3). (4) Lower thread (5) Gimp (6) Upper thread Install the thread spool pins (1) and (2) so that their thread holes face as shown in the illustration below. Operator Direction of thread holes 0405B RH-9820... -
Page 44: Setting The Material
Specifications Adjustment range L1422 10 - 50 mm L1826 10 - 46 mm L2230 10 - 42 mm L2634 10 - 38 mm L3442 10 - 30 mm 3. Once adjustment is complete, securely tighten the screws (3). 0480B RH-9820... -
Page 45: Using The Sewing Machine
This key is used to switch the material setting position to “front” or “back”. (8) MANUAL key This key is used to start manual mode. (17) FRONT indicator Illuminates when the material setting position is set to (9) MANUAL indicator “front”. Illuminates during manual mode. RH-9820... - Page 46 This key is used to change the sewing length. (35) Display (26) Shortcut 3 key This shows program numbers and messages. This key is used to change the cutting spacing. (27) Shortcut 4 key This key is used to change the stitch pitch. RH-9820...
-
Page 47: Starting The Sewing Machine
Indexer Cut length changeover device Upper thread nipper device Upper thread breakage detector Air pressure detector 0264B 0267B *2: The “standby condition” is the name for the period from the point after switching to one of these modes 1644B until the first operation occurs. RH-9820... -
Page 48: Program Setting Method
You can also start program mode by pressing a shortcut key. In this case, the parameter number that corresponds to the shortcut key will be selected. (Refer to the next page.) 0412B 0315B RH-9820... - Page 49 (6) Cutting spacing (Parameter No. 03) (7) Stitch pitch (Parameter No. 04) (8) No. of eyelet stitches (Parameter No. 05) (9) Bartack length (Parameter Nos. 06, 08, 10) : Loads the parameter number corresponding to the bartack shape for parameter No. 40. 0416B RH-9820...
-
Page 50: Parameter List
0.5 - 2.0 mm 1.5 mm Straight bartack length 2.0 - 6.0 mm (up to 3.0 mm on one 5.0 mm side) 0268B - 0275B *1: The sewing length setting range and initial value vary depending on the machine sub-class. RH-9820... - Page 51 *4: If the sewing speed is set to a speed that is slower than the slow start speed, the slow start speed used for sewing will be the same as the normal sewing speed. RH-9820...
- Page 52 No. of tying stitches at the sewing end 0 - 4 stitches 0 stitches X correction value -1 - 6 Y correction value -1 - 6 -3 - 3 1 correction value -3 - 3 2 correction value 0284B - 0291B RH-9820...
- Page 53 1 - 4 stitches (within 45 degrees) 1 stitch Stitch pattern for no cutting 1: Same stitch pattern as for cutting before sewing 2: Same stitch pattern as for cutting after sewing 0292B 0294B 0471B 0295B 1645B 0297B 1646B RH-9820...
- Page 54 Spare (For future version upgrades) Program copy OFF, 1 - 20 (Specify the program number for the copy source) Bartack shape 1: Without bartack 2: Taper bartack 3: Straight bartack 4: Round bartack 0298B - 0300B 1647B 0301B RH-9820...
-
Page 55: Checking The Sewing Pattern In Test Mode
The number of remaining stitches (4) on the display will decrease by 2 each time. When the final stitch is reached, the buzzer will sound. Thread trimming and cutting operation will not be carried out in test mode. 0421B (Continued on next page) RH-9820... - Page 56 The number of remaining stitches (4) on the display will increase by 2 each time. [Once sewing continues to the final stitch and the buzzer sounds] Press the start switch (6). Keep pressing until the feed base returns to the material setting position. 0232B 0424B 0318B RH-9820...
-
Page 57: Switching Cutting Operation
0308B 0309B Press the BEFORE or AFTER key during the standby condition in automatic mode, test mode or manual mode. The cutting operation changes as shown in the illustration each time a key is pressed. RH-9820... -
Page 58: Changing The Material Setting Position
The feed base will move forward (to the sewing start position). 0426B [To move the feed base backward (standard material setting position)] Press the FRONT/BACK key once more. The feed base will move backward (to the standard material setting position). 0427B RH-9820... -
Page 59: Using Threading Mode
After 3 minutes have passed, the tension discs will close. Once the upper thread has been threaded, press the RESET key. After the home positions are detected, the needle bar and feed base will return to the material setting position. The tension discs will close. 0429B RH-9820... -
Page 60: Using The Sewing Machine (Sewing Operation)
Refer to “5-5. Switching cutting operation” for details on switching the cutting operation. 0432B Place the material to be sewn under the work clamps, and then press the work clamp switch (5). The work clamps will be lowered. 0419B RH-9820... -
Page 61: Using The Stop Switch
The buzzer will stop sounding. 0437B 0438B Eliminate the cause of the problem. Press the RESET key once more. After the home positions are detected, the needle bar and feed base will move to the material setting position. 0392B RH-9820... - Page 62 Automatic sewing will resume. 0440B NOTE: If the STOP switch is pressed before the upper shaft motor starts operating or after it has stopped, it will not be possible to continue sewing from the point where sewing was paused. RH-9820...
-
Page 63: Canceling Manual Sewing Or Test Feeding
The buzzer will sound. 0436B 0320B <Clearing the suspended display> Press the RESET key. • The buzzer will stop sounding. • After the home positions are detected, the needle bar and feed base will move to the material setting position. 0437B RH-9820... -
Page 64: Adjusting The Thread Tension
When the tension nut (2) is turned clockwise, the upper thread trailing length will decrease, and when it is turned counterclockwise, the length will increase. 0442B <Lower thread tension adjustment> Adjust by turning the tension nut (3). Decrease Increase 0443B RH-9820... - Page 65 1. Loosen the screw (7), and then turn the L thread take-up spring guide (8) to adjust the stroke. When turned in the direction of the arrow, the stroke of the thread tension spring (6) will increase. 2. Once adjustment is complete, tighten the screw (7). 0444B RH-9820...
-
Page 66: Using The Sewing Machine (Operation Panel: Advanced Operation)
The program number (1) changes in the order shown in the illustration each time the key is pressed. The key changes the order in the opposite direction. NOTE: Cycle program mode is not available if an independent program has been selected. 0413B RH-9820... - Page 67 Set the step number (2) to “3”. 0239B 0413B Repeat steps 4 and 5 above to set the contents for step 3 of the cycle program to “P01”, the same contents as for step 1. (Continued on next page) RH-9820...
- Page 68 Press one of the following keys to exit cycle program mode. 0445B NOTE: When a cycle program is selected for automatic sewing to be carried out, the cutting operation used is the operation that is currently selected (cutting before sewing or cutting after sewing). RH-9820...
-
Page 69: Setting Memory Switches
0415B To change the settings for other memory switch Nos., repeat the operations in steps 2 - 4 above. 0311B Exit memory switch mode. Normal sewing machine operation will then be possible. 0448B RH-9820... -
Page 70: List Of Memory Switch Settings
Parameter display during automatic mode 3: Sewing speed Sets the parameter settings that appear in the display (2) during automatic 4: Number of mode. stitches. 0222B Display screen contrast 0 - 30 The contrast becomes stronger as the value is increased. RH-9820... -
Page 71: Resetting The Data (Initialization)
[To carry out initialization] “INITIALIZING” will be displayed and initialization will start. If you would like to cancel the initialization procedure, press the RESET key. 0415B 0311B [To exit initialization mode] Normal sewing machine operation will then be possible. 0448B RH-9820... -
Page 72: Changing The Production Counter Setting
Apply the changed setting. The mode will return to automatic mode. 0415B 0600B NOTE: If you press the AUTO key while the counting value (1) is flashing, the mode will return to automatic mode and the setting will not be changed. RH-9820... -
Page 73: Displaying The Help Screen
POWER switch to the ON side. How to switch to production counter While the sewing machine is at standby in setting mode automatic mode, hold down the ENTER key and press the key. 0304B 0305B 0306B RH-9820... -
Page 74: Manual Sewing (Manual Mode)
Place the material to be sewn under the work clamps, and then press the work clamp switch (6). The work clamps will be lowered. 0531B Press the start switch (7). The feed base will move to the sewing start position. NOTE: If cutting operation is set to “Cutting before sewing”, the hammer will operate. 0532B RH-9820... - Page 75 (Keep pressing until the feed base returns to the material setting position.) Thread trimming will be carried out and the feed base will return to the material setting position.) NOTE: If cutting operation is set to “Cutting after sewing”, the hammer will operate. 0532B RH-9820...
-
Page 76: Switching The Sewing Mode While Sewing Is In Progress
If a stop (or interruption) has been cleared during automatic sewing, manual sewing or test mode, you can switch the mode to the desired mode by pressing the corresponding mode key. The sewing mode changes as shown in the illustration each time a key is pressed. Test mode Automatic mode Manual mode 0441B RH-9820... -
Page 77: Cleaning And Inspection
5. Move the feed base (1) by hand and remove any thread scraps and dust from around the gimp solenoid (2). <For -02 specifications only> 6. Tilt back the machine head and remove any thread scraps that have collected in the thread scrap collection pocket (3) in the bed base. RH-9820... -
Page 78: Checking The Air Filter
This section describes the cleaning procedures that should be carried out periodically about once a month. 8-2-1. Cleaning the control box air inlet port Use a vacuum cleaner to clean the filters in the air inlet ports 0457B (2) of the control box (1). RH-9820... -
Page 79: Cleaning And Inspection As Required
If water collects in the bed base (1), carry out the inspections in “8-1-2. Checking the air filter”. If water still continues to collect, there may be a problem with the air cylinder, so it is recommended that you install an automatic drain (commercially-available). 0460B RH-9820... -
Page 80: Standard Adjustments
“0” before carrying out inspection, adjustment and repair Ask your Brother dealer or a qualified electrician to of any parts which use the pneumatic equipment. carry out any maintenance and inspection of the electrical system. -
Page 81: Adjusting The Zigzag Width (Stitch Width)
“9-8. Adjusting the needle guard”, “9-9. Adjusting the spreader installation positions”, “9-10. Adjusting the spreader timing”. The index marks are a guide to the zigzag width. Lower the needle onto a piece of paper or similar to accurately measure the zigzag width. RH-9820... -
Page 82: Adjusting The Zigzag Base Line Position
0.5 mm in the paper (1) when the needle comes to the needle down position. Hole width approx. 0.5 mm 0564B RH-9820... - Page 83 8. Turn the upper shaft pulley (6) to lower the needle so that it makes a small hole in the paper (5). If the inner needle drop positions (A) are not aligned, carry out the adjustments in steps 9 - 12 on the next page. (Continued on next page) 0475B RH-9820...
- Page 84 12. Tighten the socket bolt (9). 13. Repeat steps 4 - 12 until the inner zigzag base line is aligned correctly. 14. Once adjustment is complete, return the cap (11), cover (10) and face plate (8) to their original positions. 0434B RH-9820...
-
Page 85: Adjusting The Needle And Looper Timing
9. Move the LS holder base (10) to the left or right to adjust so that length <a> and length <a'> are the same. 10. Once adjustment is complete, securely tighten the screw (9). (Seen from the front) 0487B 0488B RH-9820... -
Page 86: Adjusting The Looper Stroke
7. With the upper shaft pulley (1) stopped, turn the lower shaft cam (4) to adjust so that the tip of the eye looper (6) is aligned with the needle center (7). 8. Once adjustment is complete, push the lower shaft cam (4) against the surface of the bearing collar (8), and then securely tighten the two set screws (5). RH-9820... -
Page 87: Adjusting The Height Of The Needle Bar
5. In order to make the needle bar turn smoothly, adjust so that there is no play in the needle bar, but so that there is enough of a gap between the needle bar clamps (3) and the needle bar feed rock link (6) for oil to get into. 6. Once adjustment is complete, securely tighten the two screws (4) and install the face plate. RH-9820... -
Page 88: Adjusting The Clearance Between The Loopers And Needle
If it crosses the needle more than necessary, it will place a load on the needle and this may cause the needle to break. Alternatively, if it does not cross the needle at all, the tips of the loopers will interfere with the needle and skipped stitches may occur. RH-9820... -
Page 89: Adjusting The Spreader Installation Positions
4. Once adjustment is complete, tighten the set screw (8). NOTE: Spreader L (1) and spreader R (6) should not protrude above the eye looper (2) or looper R (7) respectively. If they do, skipped stitches or needle breakages may occur. RH-9820... -
Page 90: Adjusting The Spreader Timing
3. Turn the eccentric pin (7) to adjust. 4. After adjusting, tighten the set screw (6) and the two screws (5) in that order. NOTE: Make sure that spreader R (1) and spreader L (2) do not obstruct the needle after adjustment. RH-9820... -
Page 91: Adjusting The Height Of The Throat Plate
Press down gently on the throat plate (8) from above while adjusting it. If the adjustment is carried out while the throat plate (8) is lifted up, the correct adjustment result will not be obtained. 7. Once adjustment is complete, tighten the screws that were loosened and return all other parts to their original positions. RH-9820... -
Page 92: Changing The Cutting Length (Replacing The Hammer)
If the knife that was being used previously is replaced by a knife with a different number, replace the hammer also. If the same hammer is used for two or more different types of knife, different knife incisions will be formed on the hammer, and this may cause problems with the accurate cutting of the material or may damage the knife. RH-9820... -
Page 93: Adjusting The Cutting Surface Of The Hammer
1. Grip the hammer in a vise. 2. Use the flat file to file the cutting surface of the hammer smoothly until a single knife incision can still be seen faintly. 0505B Once filing is complete, install the hammer. RH-9820... -
Page 94: Adjusting The Contact Between The Knife And The Hammer
(4) causes it to return correctly. If the hammer bracket (3) does not return correctly, it may obstruct the work clamps and damage may result. 4. Once adjustment is complete, tighten the two nuts (1). 0470B RH-9820... -
Page 95: Making The Cutter Driving Shaft And Driving Shaft Presser Move Together
* Tighten the set screw (10) securely. If the set screw (10) is loose and protrudes from the surface of the cutter driving shaft (2), damage may result. 6. Install the face plate (8) and the upper cover (7), and then open the cock (5) to resume the supply of air. RH-9820... -
Page 96: Replacing The Knife And Adjusting Its Position
Replace the knife and hammer as a set. If the same hammer is used for two or more different types of knife, different knife incisions will be formed on the hammer, and this may cause problems with the accurate cutting of the material or may damage the knife. RH-9820... -
Page 97: Making Fine Adjustments To The Knife Position
7. If they do not overlap uniformly, turn off the power and carry out the adjustment in steps 8 - 13. Once adjustment is complete, repeat steps 4 - 6 to check, and if further adjustment is needed, repeat step 0555B (Continued on next page) RH-9820... - Page 98 12. Turn the eccentric pin (10) to adjust. * Make fine adjustments by turning centering on the pivot (11). 13. Once adjustment is complete, tighten the socket bolts (9), (8) and (7) in that order. (Seen from directly above the knife base) RH-9820...
-
Page 99: Adjusting The Cutting Pressure
If the material cannot be cut cleanly, do not increase the cutting pressure to too high a pressure. Check the timing between the knife and the hammer. (Refer to “9-13-2. Adjusting the contact between the knife and the hammer”.) 0469B RH-9820... -
Page 100: Adjusting The Work Clamp Lift Amounts
Check that work clamp R (8) is pressed securely against the block or the gauge (10). 7. Install feed base cover R (7) and feed base cover U (4). Adjust the lift amount for the left-side work clamp in the same way. RH-9820... -
Page 101: Adjusting The Work Clamp Positions
1. Loosen the two set screws (5), and then adjust the sideways position of the clamp lever (6). 2. Once adjustment is complete, tighten the two set screws (5). Adjust the position for the left-side work clamp in the same way. RH-9820... -
Page 102: Adjusting The Positions Of The Work Clamp Plates
6. Once adjustment is complete, tighten the nut (8). 7. Press the STOP switch (10), and then press the RESET key (11) to end test mode. Adjust the gap between the throat plate (1) and needle plate L in the same way. RH-9820... -
Page 103: Adjusting The Cloth Opening Amounts
6. Calculate the cloth opening amounts for both sides. 7. Carry out adjustment if the two cloth opening amounts are not the same, or if the cloth opening amount at either side is lower than 0.8 mm. (Refer to following page.) RH-9820... -
Page 104: Adjusting The Upper Thread Feeding Amount
More thread Less thread 0477B 1. Loosen the screw (2). 2. Move the thread take-up lever (1) up or down to adjust the upper thread feeding amount. 3. Once adjustment is complete, securely tighten the screw (2). RH-9820... -
Page 105: Adjusting The Lower Thread Feeding Amount <-01 Specifications Only
9-24-1. Replacing the upper movable knife 1. Remove the screw (1), and then remove the upper movable knife (2). 2. Install the new upper movable knife with the screw (1). <-00 and –01 specifications> <-02 specifications> <-00 and -01 specifications> <-02 specifications> 0401B RH-9820... -
Page 106: Adjusting The Upper Movable Knife
When the upper movable knife (1) has returned to its original position, the upper thread is trimmed at position A. <-02 specifications> When the upper movable knife (1) starts moving, the upper thread is trimmed at position B. <-00 and -01 specifications> <-02 specifications> 0565B RH-9820... -
Page 107: Adjusting The Position Of The Thread Trimmer Lever Bracket
3. Turn the looper base (3) and check that the thread trimmer lever bracket (4) moves underneath the thread trimmer hammer (5) without obstructing any other parts. 4. Once adjustment is complete, securely tighten the screw (2). (Seen from the front) 0546B RH-9820... -
Page 108: Replacing And Adjusting The Movable Knife And Fixed Knife (For The Lower Thread And Gimp) <-01 Specifications
(5). After replacing the knives, carry out the adjustments from “9-25-2. Adjusting the cutting pressure” to “9-25-5. Adjusting the thread handler”. Once adjustment is complete, install work clamp plate U (2). 0520B RH-9820... -
Page 109: Adjusting The Cutting Pressure
(8) and the thread trimmer arm (7) move smoothly with no play. If the meshing amount is too small, problems with the lower thread nipper will occur and the thread will be pulled out at the sewing start. 0522B RH-9820... -
Page 110: Adjusting The Thread Nipper Assembly And Opener
If the thread nipper assembly (3) is installed at an angle, thread nipper D (1) may touch the throat plate and fail to open, and problems with the lower thread nipper will occur and the thread will be pulled out at the sewing start. RH-9820... - Page 111 (c) Thread nipper D (1) should not open when the thread trimmer arm (6) returns after thread trimming, so that the thread nipper opener (4) returns without going over the opener pin (10). 3. Once adjustment is complete, securely tighten the two 0554B screws (5). RH-9820...
-
Page 112: Adjusting The Thread Handler
5. Once adjustment is complete, securely tighten the pan screw (6) and the screw (7). NOTE: If the height of the throat plate (4) has been changed, the triangular shape (A) defined by the final stitch, lower thread and gimp will change, and so you should adjust the thread handler (1). RH-9820... -
Page 113: Replacing And Adjusting The Movable Knife And Fixed Knife (For The Lower Thread And Gimp) <-02 Specifications
If the shoulder screw (2) is tightened as far as it will go, the movable knives will no longer operate. Gradually loosen the shoulder screw (2) to a point where the movable knives turn smoothly. 3. Once adjustment is complete, securely tighten the nut (1). 0527B RH-9820... -
Page 114: Adjusting The Movable Knife Installation Position
4. Turn thread trimmer lever arm B (7) until the thread trimmer link lever J assembly (5) touches against the screw (6), and then tighten the screw (1). 5. Once adjustment is complete, install work clamp plate U. NOTE: Check that the movable knife driving plate (4) and thread trimmer lever arm B (7) turn smoothly with no play. RH-9820... -
Page 115: Adjusting The Position Of The Auxiliary Clamp
2. Adjust the installation position of the auxiliary clamp (4) with respect to the article being sewn so that the button clamp (2) moves above the needle plate (3). 3. Once adjustment is complete, securely tighten the socket bolt (1). 0530B RH-9820... -
Page 116: Adjusting The Gimp Trailing Length <-02 Specifications Only
[A] to adjust so that 2 - 4 mm of the gimp protrudes from the seam at the sewing start. 3. Once adjustment is complete, securely tighten the screw (3). The gimp trailing length at the sewing end is uniform because of thread trimming. RH-9820... -
Page 117: Adjusting The Position Of The Lower Thread Presser <-02 Specifications Only
If adjustment is required, remove the lower thread presser base (8), loosen the nut (9), and then turn the screw (10) to adjust. 4. Once adjustment is complete, tighten the nuts (5) and (9) that were loosened, and install the lower thread presser base (8). RH-9820... -
Page 118: Installing (Replacing) The Auxiliary Clamp On The Left Side
2. Remove the feed base unit (1) from the bed. (Refer to “5-3. Feed mechanism” in the service manual.) 3. Disconnect the air tubes (2) and (3) from the joints (4) and (5). 4. Remove retaining ring C (6). RH-9820... - Page 119 9. Set the joint (14) and the cylinder rod (15) so that they are facing as shown in the illustration. (Top) (Bottom) 1170B 10. Insert the shaft (16) of the auxiliary clamp connecting rod into the hole in the feed base, and then install retaining ring C (6). 11. Tighten the two screws (7). (Continued on next page) RH-9820...
- Page 120 16. Remove retaining ring C (21), and then remove the auxiliary clamp arm (22). 17. Remove retaining ring C (23), loosen the two set screws (24), and then remove clamp fulcrum shaft J (25) in the direction of the arrow. RH-9820...
- Page 121 22. Install the auxiliary clamp L assembly (34) to the auxiliary clamp arm (22), and then secure it by tightening the socket bolt (35). (Refer to “9-26-4. Adjusting the position of the auxiliary clamp”.) 23. Install the spring (20) to the auxiliary clamp arm (22) and the clamp shaft holder (29). (Continued on next page) RH-9820...
- Page 122 25. Tighten the two set screws (24) so that the clearance between the clamp shaft holder (36) and clamp lever R (37) is 2.5 r 0.5 mm. Check that the sides of work clamp R (38) and needle plate R (39) are aligned at this time. If they are not aligned, loosen the socket bolt (40) and adjust. RH-9820...
-
Page 123: Adjusting The Throttle Valves
The hammer lifting speed will tend to become too slow after about six turns. If you would like to give the highest priority to cutting scrap collection performance, adjust to within a range of 6 to 8 turns while continually checking hammer operation. RH-9820... -
Page 124: Adjusting The Throttle Vales Of The Solenoid Valves
5A and 5B) thread trimming errors may occur. If loosened by less than seven Operation will become slower, and cycle time will turns increase and an error code may be displayed. RH-9820... -
Page 125: Sewing Circular Stitches
1 mm. As a result, the knife installation position should also be moved back. 1612B <Knife pressure> The cutting area will be smaller than for eyelet shapes, so it is recommended that you decrease the knife pressure. RH-9820... -
Page 126: Error Codes
Check the connection of the machine head safety switch connector P9 at the main P.C. board. An operation panel key was still being Turn off the power and check that no keys are being E065 pressed when the power was turned on, pressed. or key is faulty. RH-9820... - Page 127 Sewing machine motor is overheating, or E150 Check that the upper shaft motor connector P4 and temperature sensor is faulty. synchronizer connector P5 are connected at the power supply motor P.C. board. RH-9820...
- Page 128 θ-feed motor encoder connector P5 is connected at position sensor connection. the main P.C. board. Turn off the power, and then check if there are any θ-feed motor stopped due to a problem. E221 problems in the θ-feed direction. RH-9820...
- Page 129 Turn the power off and then back on again. head memory. E480 Problem with RAM on main P.C. board. Turn the power off and then back on again. [P.C. board and connector positions] Power supply P.C. board PMD P.C. board Main P.C. board 0535B RH-9820...
- Page 130 Replace with the power supply motor P.C.B. for the RH-9820 as soon as possible. E580 Error in EEPROM version detected. Turn off the power and carry out level 3 initialization. E581 Error in memory switch version detected.
-
Page 131: Troubleshooting
Repair with an oilstone or replace the Looper tip is blunt. looper with a new one. Install the needle so that it faces Needle is not installed correctly. correctly. Select a needle that is suitable for the Needle is too thin. sewing conditions. RH-9820... - Page 132 Lower thread tension is too strong or too Adjust the lower thread tension to the weak. correct tension. Tension or stroke of thread take-up Adjust the tension and stroke of the spring is incorrect. thread take-up spring. RH-9820...
- Page 133 MEMO RH-9820...
-
Page 134: Instruction Manual
INSTRUCTION MANUAL http://www.brother.com/ 15-1, Naeshiro-cho, Mizuho-ku, Nagoya 467-8561, Japan. Phone: 81-52-824-2177 © 2006, 2008 Brother Industries, Ltd. All Rights Reserved. RH-9820 SA7887-201 E 2008.01. B (1)
Need help?
Do you have a question about the RH-9820 and is the answer not in the manual?
Questions and answers