
Related Manuals for iDirect iNFINITI 3000


Summary of Contents for iDirect iNFINITI 3000
- Page 1 Installation and Commissioning Guide iDirect iNFINITI series™ 3000 5000 7000 Satellite Routers Release 7.0 June 16, 2006...
- Page 2 Copyright © 2006, iDirect, Inc. All rights reserved. This manual may not be reproduced, in part or in whole, without the permission of iDirect, Inc. The specifications and information regarding the products in this manual are subject to change without notice. All statements, information, and recommendations in this manual are believed to be accurate, but are presented without warranty of any kind, express, or implied.
-
Page 3: Table Of Contents
8.2 Set up iSite for Cross Polarization 8.3 Preparing for the Cross Polarization Test 8.4 Running the Cross Polarization Test 8.4.1 Adjusting Azimuth 8.4.2 Adjusting Elevation 8.4.3 Peaking the Polarization 8.4.4 After the Cross Polarization Test iDirect iNFINITI series Installation and Commissioning Guide, Release 7.0... - Page 4 B.3 Starting the Console Pointing B.4 Using the DVM for Console Pointing B.5 Pointing B.6 Final Adjustments Appendix C Disabling the PWM Voltage through iBuilder Appendix D Pinout for RJ-45 to DB-9 Adapter iDirect iNFINITI series Installation and Commissioning Guide, Release 7.0...
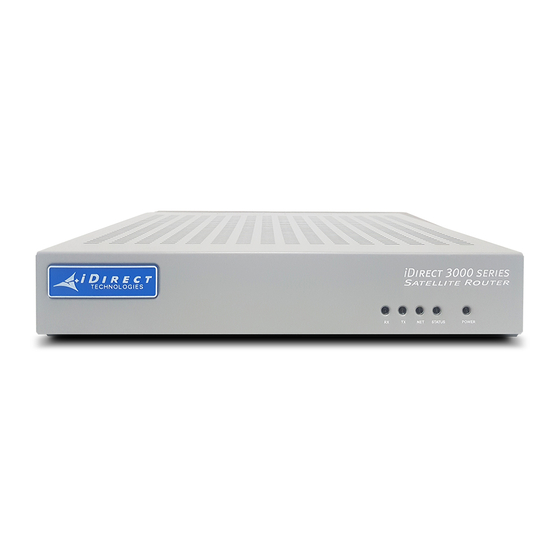
- Page 5 Figure 6-1: Antenna Elevation Offset Figure 7-1: Comparing Signal Strength Figure 7-2: Locking into a Carrier Stream Figure 8-1: iSite Cross Polarization Figure 11-1: iDirect 3000 series Satellite Router Front Panel iDirect iNFINITI series Installation and Commissioning Guide, Release 7.0...
- Page 6 Tables Table 7-1: Signal Strength Ranges (PWM) Table 11-1: iDirect 3000/5000/70000 LED Status Table B-1: Signal Strength Ranges (DVM) iDirect iNFINITI series Installation and Commissioning Guide, Release 7.0...
-
Page 7: Getting Started
This Quick Reference Guide is intended to help the user quickly install and commission iDirect iNFINITI series™ 3000, 5000 and 7000 Satellite Routers. Throughout this manual we will refer to an iDirect iNFINITI series™ 3000, 5000 or 7000 Satellite Router as, simply, “the Satellite Router.”... - Page 8 Installation and Commissioning Guide, Release 7.0...
-
Page 9: Install Isite Software And Remote Modem Images On Your Laptop
Run the iSite program wizard to install the software on your laptop (or PC). Components of the iSite Software and Remote Modem Images Currently, the Images for iDirect NetModem and Satellite Router remote modem products are bundled together, in addition to the iSite software. - Page 10 Installation and Commissioning Guide, Release 7.0...
-
Page 11: Establish A Console Connection To The Satellite Router
Access your Satellite Router through HyperTerminal Connect the RJ-45 to DB-9 adapter to the COM1 port of your laptop. Plug the other end of the cable into the Console port of the iDirect Satellite Router. Power Up your Satellite Router. - Page 12 Select COM1 in the Connect To dialog box Using the default variables illustrated in the COM1 Properties dialog box below, enter the session properties. iDirect iNFINITI series Installation and Commissioning Guide, Release 7.0...
- Page 13 Satellite Router, reexamine your settings to be certain that they are correct. At the iDirect login prompt, enter the default login “root”. At the Password prompt, enter the default login “iDirect”. iDirect iNFINITI series Installation and Commissioning Guide, Release 7.0...
-
Page 14: Telnet To The Idirect Application
You are now in the Linux software running on the Satellite Router. You can access the iDirect application running on the Satellite Router by telneting to it from Linux. Telnet to the iDirect Application At the Linux prompt, enter “telnet 0” to telnet to the iDirect application. -
Page 15: Discovering The Satellite Router's Ip Address
You will now be in the iDirect application. To find out the IP address of the Satellite router, complete the following procedure. Discovering the Satellite Router’s IP Address At the Satellite Router prompt, enter the command “laninfo”. iDirect iNFINITI series Installation and Commissioning Guide, Release 7.0... -
Page 16: Modifying Your Laptop's Ip Address And Subnet Mask
Windows 2000 and Windows XP. Launch the status dialog box for your Local Area Connection object by double- clicking on the icon. The dialog box should look similar to the one displayed below. iDirect iNFINITI series Installation and Commissioning Guide, Release 7.0... - Page 17 Click the Properties button. In the Local Area Connection Properties dialog box, select Internet Protocol in the scroll-down box, and then click the Properties button. iDirect iNFINITI series Installation and Commissioning Guide, Release 7.0...
- Page 18 Enter the Satellite Router’s IP address as the Default Gateway address Click OK to save your changes. You should now be able to connect to the Satellite Router using the iSite GUI. iDirect iNFINITI series Installation and Commissioning Guide, Release 7.0...
-
Page 19: Download The Application And Images Package To The Satellite Router
Router using a crossover LAN cable. (Newer laptops (or PCs) will adjust when you use a straight through cable, but older machines will not.) Launch iSite. iSite will automatically discover the Satellite Router. iDirect iNFINITI series Installation and Commissioning Guide, Release 7.0... - Page 20 Right-click the Satellite Router and select Login Enter the default password “iDirect” and click OK. iDirect iNFINITI series Installation and Commissioning Guide, Release 7.0...
- Page 21 Select the remote, right-click and select Download Package In the Download Package dialog box select the Open button. iDirect iNFINITI series Installation and Commissioning Guide, Release 7.0...
- Page 22 Locate and select the Remote_iNFINITI image package on your laptop. In the dialog, select: Download Package • Don’t check versions • Download images only • Don’t reset • Click Start iDirect iNFINITI series Installation and Commissioning Guide, Release 7.0...
- Page 23 Wait while the download progresses. Observe the information in the Information section of the Download Package dialog until you see “Done”. You have successfully downloaded the package to your Satellite Router. Next, download the options file iDirect iNFINITI series Installation and Commissioning Guide, Release 7.0...
- Page 24 Installation and Commissioning Guide, Release 7.0...
-
Page 25: Download The Options File To The Satellite Router
Follow the steps in this section to download the remote options file to the satellite router. In iSite, right-click on the remote and select Download Option from Disk. Locate the Options file on your laptop (or PC), highlight it and click Open. iDirect iNFINITI series Installation and Commissioning Guide, Release 7.0... - Page 26 Reset will log you out of the Satellite Router. Reset changes the IP address of the Satellite Router to the NOTE value provided by your Service Provider in the downloaded options file. iDirect iNFINITI series Installation and Commissioning Guide, Release 7.0...
- Page 27 Commissioning Your Service Provider may change your Satellite Router NOTE password from the default iDirect password. Log in with the new password they provide you. iDirect iNFINITI series Installation and Commissioning Guide, Release 7.0...
- Page 28 Installation and Commissioning Guide, Release 7.0...
-
Page 29: Set Up Your Antenna
You are now ready to perform the initial alignment of your antenna. Set the antenna’s polarization to the approximate value provided by iSite’s Look Angle Calculator. Set elevation to the value provided by iSite’s Look Angle Calculator. iDirect iNFINITI series Installation and Commissioning Guide, Release 7.0... -
Page 30: Figure 6-1: Antenna Elevation Offset
To prepare the antenna for pointing, move the antenna off the desired azimuth, by swinging the antenna 20° away in azimuth. This will enable you to get a clear sky reading and compare signal strengths during the antenna pointing procedure. iDirect iNFINITI series Installation and Commissioning Guide, Release 7.0... -
Page 31: Point The Antenna Using A Voltmeter On The Transmit Ifl Cable
Log in to Your Satellite Router After powering on your Satellite Router, you should still have IP connectivity. In iSite, select your remote in the iSite Tree View, right-click on it, and then select Login. iDirect iNFINITI series Installation and Commissioning Guide, Release 7.0... - Page 32 Satellite Router. In this example 10.0.5.1. Select Admin, and then click OK. A new password may have been assigned at your Network Operator’s Help Desk. If “iDirect” doesn’t work, obtain the correct password by contacting the Network Help Desk.
-
Page 33: Calculate Polarization, Azimuth, And Elevation
On the Look Angle Calculator tab, Longitude parameters should already be entered for you in Spacecraft Position. If they are not, enter the appropriate longitude values for the satellite that you are using. iDirect iNFINITI series Installation and Commissioning Guide, Release 7.0... -
Page 34: Perform Pulse Width Modulation (Pwm) Antenna Pointing
Detecting RF energy, but not locked on the downstream carrier 12 – 24 Locked on the downstream carrier You can only get a reading of >= 12 volts when you are locked NOTE onto the correct spacecraft or network. iDirect iNFINITI series Installation and Commissioning Guide, Release 7.0... -
Page 35: Figure 7-1: Comparing Signal Strength
The signal reading on the pointing graph will turn red, then yellow, and finally, completely green, as you sweep the reflector to lock onto the downstream carrier. Figure 7-1: Comparing Signal Strength iDirect iNFINITI series Installation and Commissioning Guide, Release 7.0... -
Page 36: Figure 7-2: Locking Into A Carrier Stream
If the desired signal is not found, increase or decrease elevation setting by 2° increments and repeat the azimuth sweep, until the correct signal is found. Figure 7-2: Locking into a Carrier Stream iDirect iNFINITI series Installation and Commissioning Guide, Release 7.0... - Page 37 In iSite, click Stop to exit the modem’s antenna pointing mode Power down the Satellite Router. You must power down the Satellite Router before continuing to WARNING the next section, “Fine-tune the Antenna Pointing and Cross Polarization” on page iDirect iNFINITI series Installation and Commissioning Guide, Release 7.0...
- Page 38 Installation and Commissioning Guide, Release 7.0...
-
Page 39: Fine-Tune The Antenna Pointing And Cross Polarization
Launch iSite and connect to the Satellite Router using its IP address Log in as Admin with a valid password. In the iSite main menu, select Configure, select Align Antenna, and then click Cross Polarization. Figure 8-1: iSite Cross Polarization iDirect iNFINITI series Installation and Commissioning Guide, Release 7.0... -
Page 40: Preparing For The Cross Polarization Test
The satellite provider will then ask to have the azimuth, polarization, and/or elevation adjusted. The polarization is usually adjusted first. If the correct isolation cannot be achieved, then the operator may ask to adjust the azimuth and/or elevation. iDirect iNFINITI series Installation and Commissioning Guide, Release 7.0... -
Page 41: Adjusting Azimuth
Wait for the satellite provider to take a measurement. The satellite provider may tell you to continue moving the feed in the same direction, or to reverse the direction. Continue until the satellite provider tells you that the polarization is peaked. iDirect iNFINITI series Installation and Commissioning Guide, Release 7.0... -
Page 42: After The Cross Polarization Test
Wait for the Satellite Provider to verify that the cross polarization is still good after everything is tightened. Confirm that the Network Operator at the help desk has recorded the cross polarization results Proceed to the 1 dB Compression Point test. iDirect iNFINITI series Installation and Commissioning Guide, Release 7.0... -
Page 43: Establish The 1 Db Compression Point
The 1 dB compression point has now been established. This completes the Satellite Provider’s portion of the call. Disconnect the Satellite Provider from the call. Do not power off the Satellite Router yet. iDirect iNFINITI series Installation and Commissioning Guide, Release 7.0... - Page 44 Installation and Commissioning Guide, Release 7.0...
-
Page 45: Record The Geo Location - Mobile Secure Remotes Only
You should verify that you have entered the correct geographic location coordinates. Type “ extras show ” at the console prompt to display the current settings for latitude and longitude. Reset the Satellite Router. iDirect iNFINITI series Installation and Commissioning Guide, Release 7.0... - Page 46 Installation and Commissioning Guide, Release 7.0...
-
Page 47: Bring The Satellite Router Into The Network
11.1 Series 3000, 5000 and 7000 Front Panel LEDs Various combinations of the LEDs on the front panel of the 3000/5000/7000 series remote will indicate the different states of your iDirect Satellite Router. Figure 11-1: iDirect 3000 series Satellite Router Front Panel... - Page 48 Indicates that the IDU’s transmitter is disabled. GREEN Indicates that the IDU transmitter is successfully locked to the downstream. YELLOW Indicates that the IDU is not locked to the downstream carrier. iDirect iNFINITI series Installation and Commissioning Guide, Release 7.0...
-
Page 49: Post Acquisition Activities
Satellite Router are at the correct revision level. If necessary they will upgrade the software on the Satellite Router and issue a reset. The Network Help Desk will let you know when they are finished. iDirect iNFINITI series Installation and Commissioning Guide, Release 7.0... -
Page 50: Remote Duties
(AutoNegotiation: None) These readings should be checked periodically to ensure that the service is not degrading. These readings will be monitored from the Network Help Desk. Heavy weather or sandstorms can cause iDirect iNFINITI series Installation and Commissioning Guide, Release 7.0... - Page 51 During heavy weather or sandstorms the levels should be monitored because it is important that they return to the original readings once the weather or sandstorm has cleared. iDirect iNFINITI series Installation and Commissioning Guide, Release 7.0...
- Page 52 Installation and Commissioning Guide, Release 7.0...
-
Page 53: Adjusting Power Settings And Configuring Ucp Parameters
In iBuilder, right-click the remote in the network tree and select from Modify Item the menu. Select the tab. Information In the section of the dialog box, enter the 1 dB compression Transmit Properties point as the value for Max Power iDirect iNFINITI series Installation and Commissioning Guide, Release 7.0... - Page 54 Right-click the remote in the network tree and apply the configuration. iDirect iNFINITI series Installation and Commissioning Guide, Release 7.0...
-
Page 55: Set The Initial Tx Power For A Remote
BUC and geographic location.) b. Increase the transmit power by increments of 3 dB until the remote acquires into the network. iDirect iNFINITI series Installation and Commissioning Guide, Release 7.0... - Page 56 In iMonitor, right-click the remote in the network tree and select Remote Status/ from the menu. Then select the tab. Remote Status Select the tab and observe the column Remote Status Tx Pwr [dBm] iDirect iNFINITI series Installation and Commissioning Guide, Release 7.0...
- Page 57 2 dB to 3 dB above the transmit Initial Power power determined using iMonitor. • For mesh remotes, set to the same setting as the transmit Initial Power power determined using iMonitor. iDirect iNFINITI series Installation and Commissioning Guide, Release 7.0...
-
Page 58: Set The Clear Sky C/N Parameters For A Mesh Remote
, enter the value recorded for from iMonitor. SCPC Clear Sky C/N Down C/N [dB] , enter the value recorded for TDMA Loopback Clear Sky C/N TDMA LB C/N [dB] from iMonitor. iDirect iNFINITI series Installation and Commissioning Guide, Release 7.0... - Page 59 Right-click the remote in the network tree and apply the configuration. iDirect iNFINITI series Installation and Commissioning Guide, Release 7.0...
- Page 60 Installation and Commissioning Guide, Release 7.0...
-
Page 61: Idirect Technical Support And Sales Information
703.648.8151, or you are welcome to enter a service issue through our web-based ticketing system. If you are not a direct customer of iDirect, support can be provided at a billable rate using a major credit card for payment. - Page 62 Installation and Commissioning Guide, Release 7.0...
-
Page 63: Appendix A Loading Images Using The Tftp Server
For example, if your laptop’s IP address is 10.10.1.2 and you are loading 6.0.3 remote package the command will be “tftp_package.sh 10.10.1.2 remote 6_0_3.pkg”. Once the transfer is complete, reset the unit using the “reboot” command. iDirect iNFINITI series Installation and Commissioning Guide, Release 7.0... - Page 64 Installation and Commissioning Guide, Release 7.0...
-
Page 65: Appendix B Pointing The Antenna Through The Console Port
Power up the Satellite Router and let it boot up completely. From console or telnet session enter the command “options set ODU odu_disable_tx_pwm 1” Press Enter. Type “options flash” Press Enter. Reset the Satellite Router. iDirect iNFINITI series Installation and Commissioning Guide, Release 7.0... -
Page 66: Starting The Console Pointing
Table B-1: Signal Strength Ranges (DVM) Signal Strength Ranges Volts DC Antenna Status 0-2.5 VDC RF energy is detected, but from the wrong satellite 2.6 – 5.0 VDC Carrier lock, correct satellite iDirect iNFINITI series Installation and Commissioning Guide, Release 7.0... -
Page 67: Pointing
Write down the final antenna pointing voltage reading and give the reading to the operator at the Network Help Desk. When finished pointing, disconnect power from the Satellite Router to stop the pointing process. iDirect iNFINITI series Installation and Commissioning Guide, Release 7.0... - Page 68 Installation and Commissioning Guide, Release 7.0...
-
Page 69: Appendix C Disabling The Pwm Voltage Through Ibuilder
Power up the Satellite Router and let it boot up completely. In iBuilder, right-click on the remote and select modify. In the Modify Configuration dialog box, make sure that the Disable Tx PWM check box is selected. Reset the Satellite Router. iDirect iNFINITI series Installation and Commissioning Guide, Release 7.0... - Page 70 Installation and Commissioning Guide, Release 7.0...
-
Page 71: Appendix D Pinout For Rj-45 To Db-9 Adapter
In addition to the Satellite Router console cable, you will need an RJ-45 to DB-9 adapter. The pinouts are as follows: Table D-1: DB-9 to RJ-45 Adapter Pinout DB-9 to RJ-45 Adapter Pin-Out RJ-45 Color Code DB-9 Blue Orange Black Green N.C. Yellow Brown White/Gray iDirect iNFINITI series Installation and Commissioning Guide, Release 7.0... - Page 72 Installation and Commissioning Guide, Release 7.0...
Need help?
Do you have a question about the iNFINITI 3000 and is the answer not in the manual?
Questions and answers