Table of Contents
Advertisement
Quick Links
Download this manual
See also:
User Manual
Advertisement
Chapters
Table of Contents

Subscribe to Our Youtube Channel
Related Manuals for Inter-Tel AXXESS 8500


Summary of Contents for Inter-Tel AXXESS 8500
- Page 1 Axxess ® Model 8500 Phone User Guide...
-
Page 3: Intercom Call
(usually 911). You do not have to press If using an IP Phone, consult your System Administrator and your local Inter-Tel servicing company for important information about dialing emer- gency services from your phone before you begin using it. -
Page 4: Answering An Outside Call
NSWERING AN UTSIDE EITHER, Lift the handset. OR, Press ANSWER OR, Press the flashing button. EDIALING AN UTSIDE Select a line and press REDIAL LACING A ALL ON Press (Hold) and hang up or place another call. To return to the call, lift the handset and press the flashing button. ESPONDING TO A If you hear a “call waiting”... -
Page 5: Forwarding Calls
. (Model 8560 and 8660 users must then select a menu button.) Do one of the following: • To forward to an outside telephone number: Select an outside line and dial a telephone number. • To forward to an extension number: Dial the extension number. -
Page 6: Listening To Voice Mail Messages
If your button is not lit, access your mailbox as follows: Dial the voice mail extension number. (You hear the main menu.) During or after the greeting, press Enter your mailbox number and your personal password (if programmed). Then press ISTENING TO OICE Access your mailbox as described on... -
Page 9: Table Of Contents
Programming Your Feature Buttons ......... 51 ©Inter-Tel, Inc. September 2003 printed in US... - Page 10 All products and services mentioned in this publication are the trademarks, service marks, regis- tered marks, or registered service marks of their respective owners. ® ® Inter-Tel and Axxess are registered trademarks of Inter-Tel, Inc. authorized Inter-Tel dealer. Tech_Pubs@inter-tel.com PAGE...
-
Page 11: Finding Your Way
Finding Your Way SECTION CONTENTS Welcome ..........2 About This Guide . -
Page 12: Welcome
(Remote Fea- ture Access and Voice Mail). BOUT UIDE This guide contains instructions for using the Model 8500 Phone on the Inter-Tel ® Axxess telephone and voice mail systems. To help you find information more quickly, this guide is divided into four separate sections, as indicated by the tabs. -
Page 13: About Your Phone
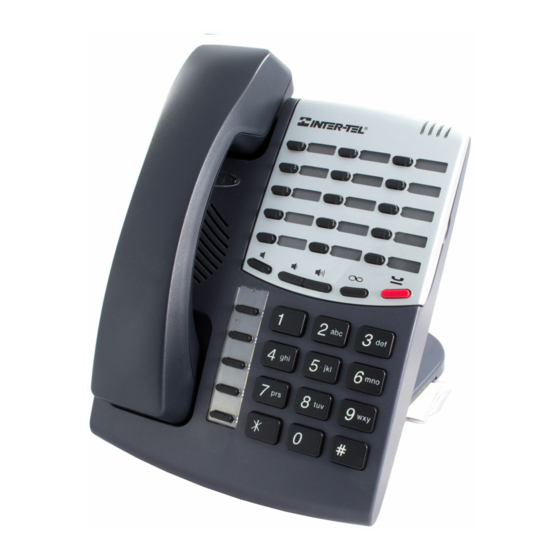
BOUT HONE Your phone has two basic types of buttons in addition to a Message Indicator lamp. • Dialpad Buttons: Allow you to enter numbers and letters. • Feature Buttons: Provide quick access to various phone and voice mail features. Internal Speaker Hearing Aid-Compatible (HAC) Handset... -
Page 14: Feature Button Functions
In addition to the buttons identified in the preceding table, your phone has a Special button ( ). Depending on how your telephone system is configured, you may need to press this button before you dial a feature code. NOTE:... -
Page 15: About Voice Mail
BOUT OICE Voice mail is an application that is part of the Inter-Tel Voice Processor. With the voice mail application, you and other callers can send and receive recorded messages from any station or touchtone telephone. To use this and other features, each user (you included) is assigned a “voice mailbox,”... -
Page 16: What You See And Hear
EE AND As you can see, your 8500 Phone and telephone system come equipped with a lot of “bells and whistles.” To help you understand what everything means, it is recom- mended that you read the following information before you use your phone: •... -
Page 17: Software Compatibility
OFTWARE OMPATIBILITY Your phone is compatible with system software versions 7.0 and later. Phones using software versions 3.0 to 6.x have limited functionality in the following areas: • button will not work; however, you can still use this feature by dial- STN SPDL ing the Station Speed-Dial feature code (see •... - Page 18 ® Axxess Model 8500 Phone User Guide...
-
Page 19: Getting Started
Getting Started SECTION CONTENTS Introduction ..........10 Adjusting Your Phone’s Viewing Angle . -
Page 20: Introduction
NTRODUCTION Now that you know what your Model 8500 Phone can do, it’s time to start using it. In this section, you’ll learn how to make and receive calls, transfer calls, retrieve voice mail messages, and much more. DJUSTING Your Model 8500 Phone has an adjustable base that allows you to tilt your phone to enhance the viewing angle. -
Page 21: Setting Up Voice Mail
ETTING OICE To begin using your voice mailbox you will need to complete a few basic set-up pro- cedures to initialize your mailbox, customize your personal greetings, and record your voice mail directory name. See Initializing Your Mailbox One of the first things you should do is initialize your mailbox. This allows you to: •... -
Page 22: Recording Your Personal Greetings
Recording Your Personal Greetings You can store two different personal greetings in your voice mailbox: a primary and an alternate. You can then select which greeting you want played when a caller reaches your voice mailbox. Because the purpose of this greeting is to tell callers why they have reached your voice mailbox, you should include the following information: •... -
Page 23: Recording Your Voice Mail Directory Name
Recording Your Voice Mail Directory Name Your recorded name is used to identify you in the voice mail directory and to verify your mailbox number when messages are addressed to you. To change your directory name: Access your mailbox as described on Press to select the Personal Options Menu. -
Page 24: Making And Receiving Calls
AKING AND ECEIVING Making and receiving calls is the basic purpose of any phone. With your Model 8500 Phone, you can make/receive intercom and outside calls and make emergency calls. Intercom Calls Your extension number allows other people to place intercom calls to you, without dialing any extra codes. - Page 25 If there is no answer or if the phone is busy when you place an intercom call, you can do any of the following: • To leave a station message, press • To leave a voice mail message, press answer. (See page 28 NOTE: This option is only available if the called phone has a voice mailbox.
-
Page 26: Receiving Intercom Calls
Receiving Intercom Calls Your phone can receive both intercom and non-handsfree intercom calls. If the hands- free feature is enabled on your phone, intercom calls are automatically answered. Non-handsfree intercom calls (see If your handsfree feature is disabled, or if you receive a non-handsfree intercom call, you must pick up the handset or press a button to answer the call. -
Page 27: Outside Calls
With outside calls, you can talk to people who aren’t members of your phone system. When you make an outside call, however, you must dial any area codes or long dis- tance digits that your telephone company requires. Placing Outside Calls... -
Page 28: Receiving Outside Calls
Enter the extension or outside number to which you want to redirect the call. See page 24 for more information. Emergency Calls With the telephone system, you do not have to access an outside line (press ) to dial an emergency number. OUTGOING To make an emergency call: Dial A call is automatically placed to the preset emergency number. -
Page 29: Placing Calls On Hold
LACING ALLS You can place calls on hold in one of two ways: individual or system. • Individual Hold places the call on hold at one phone. It can then be directly picked up at that phone or it can be picked up at another phone using the Reverse Transfer (Call Pickup) feature (see •... -
Page 30: Placing Conference Calls
LACING ONFERENCE With the Conference feature, you can establish a conference call with up to three intercom and/or outside parties (four, including you). To place a conference call: While on the first call, press Place another intercom or outside call. Press to place the call on hold. -
Page 31: Transferring Calls
Press TRANSFER Select an outgoing line and dial the desired telephone number. Wait for an answer, announce the call, and then hang up. If the number is busy, there is no answer, or the transfer is refused, press the flash- ing button to return to the caller. -
Page 32: Using Reverse Transfer
SING EVERSE RANSFER The Reverse Transfer (Call Pick Up) feature allows you to answer a call that is ring- ing or holding at another phone. For example, if the attendant transfers a call to you but you have stepped away from your phone, you can pick up the call using another phone. -
Page 33: Forwarding Calls
Do one of the following: • To forward to an outside telephone number: Select an outgoing line and dial a telephone number. • To forward to an extension number: Dial the extension number. -
Page 34: Automatic System Forwarding
Automatic System Forwarding allows your system administrator to route calls based on the type of call and the status of your telephone. Although you cannot program the path of a system forward, you can enable or disable this feature on your phone. -
Page 35: Redialing A Number
NOTE: If your headset has a power-saver mode, make sure the system administrator has the Headset Connect Tone flag enabled in the telephone system. If this flag is not enabled, you may miss the first few seconds of incoming calls. -
Page 36: Using The Speaker And Microphone
SING THE PEAKER AND If you are not using a headset, you can talk handsfree using your speaker and micro- phone. You can also use the speakerphone for on-hook dialing, call monitoring, and background music. Mute Button To mute the microphone so that you can hear the other party, but they cannot hear you (this does not put them on hold): Press MUTE... -
Page 37: Enhanced Speakerphone Mode
Enhanced Speakerphone Mode The Enhanced Speakerphone Mode improves transmission quality while on a speak- erphone call over a limited volume level range (typically the range is 1 to 3). NOTE: To use this feature, the system administrator or installer must program your phone for Enhanced Speakerphone Mode. -
Page 38: Using The Message Button
SING THE ESSAGE In today’s busy world, it’s almost guaranteed that you will call someone that is on another call, does not answer, or is in DND. But, with the the other person know you called. When you leave a message, you can: •... -
Page 39: Accessing Your Mailbox
CCESSING If you have a message waiting in your mailbox, you must access your voice mailbox to retrieve it. TIP: Generally, pressing next step. For example, when leaving a voice mail message for another voice mail user, you can press to skip the person’s introductory message and proceed directly to the recording phase. -
Page 40: Listening To Messages
SING OICE Once you’ve accessed your mailbox, the system will tell you how many new and saved messages you have. You can then listen to messages, delete messages, save messages, etc. Listening to Messages To listen to messages: Access your mailbox as described on EITHER, Press OR, Press to listen to your saved messages. - Page 41 If the extension number is not available, you will have the option of leaving voice mail. If the telephone number is not available, you cannot reply to the mes- sage. •...
-
Page 42: Undeleting Messages
Undeleting Messages NOTE: This feature is available only in software versions 5.1 and later. If you accidently delete a voice mail message, you can retrieve it within a specific time frame (programmed by your system administrator). Any retrieved messages are then restored to your saved-message queue. -
Page 43: Sending Messages
Sending Messages To send a message: Access your mailbox as described on Press Dial the desired mailbox number or group list number. Press to accept the subscriber’s name. Record your message after the tone. While recording, you have the following options: •... -
Page 44: Canceling Unheard Messages
Canceling Unheard Messages NOTE: This feature is available only in versions 5.1 and later system software. You can cancel unretrieved messages that you have sent to individuals, but not mes- sages that you sent to group lists. To cancel unheard messages: Access your mailbox as described on While listening to the voice mail main menu, press Press... -
Page 45: Using Do-Not-Disturb Mode
DND message you have selected. Your telephone system can have up to 20 different DND messages, each of which can be changed by the system administrator, installer, or programmer. Your trainer or sys- tem administrator will give you a list of the programmed DND messages. -
Page 46: Using Reminder Messages
SING EMINDER Never be late for a meeting again! With Reminder Messages, you can program your phone, up to 24 hours in advance, to alert you at a specified time. At the programmed time, the reminder message signals you with eight short tones. If you are on a call, you still hear the tones. -
Page 47: Moving On
Moving On SECTION CONTENTS Introduction ..........38 Setting Preferences . -
Page 48: Introduction
NTRODUCTION Now that you’ve mastered the basics, it’s time to move on to the advanced features. In this section, you’ll learn how to program your phone, use directories, access your voice mailbox remotely, and perform various other functions. ETTING REFERENCES Your phone and voice mailbox are automatically set to specific defaults. -
Page 49: Selecting A Ring Tone
OR, Dial 1-9 to select a specific tone. When you hear the tone you want, press Enabling Background Music If your telephone system is equipped with a music source, you can listen to music through your speaker. To enable or disable background music:... -
Page 50: Changing The Language
Enabling Automatic Call Answer The Automatic Call Answer feature determines whether or not you are automatically connected to a caller when you lift the handset (or press you are automatically connected when you go off-hook. If it is disabled, you must first lift the handset (or press To enable/disable this feature for ringing outside calls: With the handset in the cradle, dial... -
Page 51: Changing Your Mailbox Password
Voice Mail Options Your voice mailbox contains personal options that allow you to customize voice mail functions. However, before you change your voice mail options, you must first initial- ize your mailbox (see Changing Your Mailbox Password Your password prevents unauthorized access to your mailbox. To change your password: Access your mailbox as described on Press... -
Page 52: Changing The Call Screening Transfer Method
Changing the Call Screening Transfer Method NOTE: The Call Screening feature is available only if it is enabled for your mailbox (ask your system administrator). Depending on the transfer method you select, transferred calls from voice mail may be unannounced (as usual), or one of the following may occur: •... -
Page 53: Changing The Message Search Order
NOTE: This feature is available only in versions 5.1 and later system software. With the Inter-Tel Voice Processor, callers can use your mailbox to send you a fax. To use this feature, you must specify the destination fax number. To change your Fax Destination Number:... -
Page 54: Programming Remote Messaging
With Remote Messaging, you can program the Voice Processor (voice mail) to call you when your mailbox receives new messages. Using a “cascade” (a series of up to nine telephone numbers), voice mail will call each number until it successfully con- nects to a device (e.g., pager, answering machine, etc.). - Page 55 • To program a cascade level: Press wish to program (1-9). You then have the following options: — To set up or change an extension or telephone number: Press press Then enter the number. — To set up or change a pager number: Press —...
-
Page 56: Speed Dialing
PEED IALING Speed dialing allows you (and your system administrator) to store and access fre- quently dialed numbers. Each number is stored in your phone (Station Speed Dial) or in the phone system (System Speed Dial) and is identified by a location number. Once programmed, you can quickly dial these numbers by entering a feature code and dial- ing the desired location number. -
Page 57: Storing Station Speed-Dial Numbers
With the handset in the cradle, dial Dial the speed-dial location (0-9) you want to program. Dial the extension number or telephone number to be stored at the location you selected in step 2. If your number includes an asterisk, pound, a hookflash (a quick hang up and release), or a pause, press pound, three times for a hookflash, or four times for a pause. -
Page 58: Programming Station Speed-Dial Numbers
Programming Station Speed-Dial Numbers If your phone has programmable buttons, you can program one or more as speed-dial buttons. After the button is programmed, you must select a speed-dial location to associate with the button. NOTE: Before you program a speed-dial button, you need to store a number in a speed-dial location (see the instructions above). -
Page 59: Using Record-A-Call
SING ECORD If your telephone system is equipped with a Voice Processor (voice mail), you may have access to the Record-A-Call feature. If so, you can record an ongoing call as a mailbox message. You can then retrieve the message, just as you would any other mailbox message. -
Page 60: Paging
AGING The Paging feature allows you to make an announcement through phone speakers or external speakers (if your system is equipped with external paging equipment). To prevent announcements from transmitting through every phone in the system, this fea- ture uses page zones. Each zone contains a different combination of extensions and external paging equipment, and is programmed by your system administrator. -
Page 61: Performing A Hookflash During A Call
ERFORMING A OOKFLASH Certain telephone service companies may require a timed hookflash (a quick hang up and release). To generate a hookflash while using a line: Press and dial ROGRAMMING Depending on how your system is programmed, some of your feature buttons may be “user-programmable.”... -
Page 62: Programming Direct Station Selection Buttons
ROGRAMMING IRECT A button programmed as a Direct Station Selection/Busy Lamp Field (DSS/BLF) but- ton provides a way to dial the associated extension with one touch. In addition, if the button is equipped with a lamp, you can visually monitor the status of the associated extension. -
Page 63: Programming Secondary Extension Buttons
ROGRAMMING ECONDARY With the Secondary Extension Appearances feature, you can program various buttons on your phone to indicate the call activity at a different extension (primary phone). In addition to being able to see when a call is ringing, answered, or on hold, you can use your secondary extension button to answer a call that is ringing at the primary phone. -
Page 64: Using Account Codes
CCOUNT ODES If your telephone system is programmed to use the Station Message Detail Recording (SMDR) feature, you might be required to enter account codes when you place a call. These codes add information to phone record reports that the system will periodically print. -
Page 65: Screening Calls
CREENING ALLS NOTE: This feature is available only if your telephone system is equipped with a Voice Processor (voice mail). If your voice mailbox is programmed correctly, you can screen calls that are trans- ferred from voice mail. This allows you to accept and/or refuse specific calls. -
Page 66: Using The Voice Mail Directory
To perform a directory search using your dialpad buttons: Press a single digit on your telephone dialpad for each letter or character entered. For example, dialpad button “JONES,”... -
Page 67: Programming Remote Feature Access
ROGRAMMING EMOTE If you are away from your desk and forgot to put your phone in DND, don’t worry. With the Remote Feature Access, you can place your phone in DND or forward calls from any other phone on the system. And, if you have a special dial-up line, you can access your phone features from an outside line. -
Page 68: Remote Feature Access
If Busy If No Answer or Busy b. Enter an extension number or enter an outside line access code followed by a telephone number. To turn off Call Forward: Enter Hang up. . You can now use any of the following fea- ®... -
Page 69: Requesting Agent Help
EQUESTING GENT Your telephone system may be programmed to support the Agent Help feature, which allows you to request help from a designated “Agent Help Extension” (usually your supervisor) during a call. When your request call rings at the Agent Help Extension, the supervisor can choose to join the call or reject the request. -
Page 70: Working In Hunt Groups
ORKING IN Your system may be programmed with “hunt groups.” Hunt groups are groups of phones that share a common extension number in addition to having individual exten- sion numbers. This allows someone to call anyone in the group (using the common extension) or a specific member (using the individual extension). - Page 71 Logging In and Out of ACD Hunt Groups Agents can log in to and out of the ACD hunt group at any time. While logged in, the agent receives calls through the ACD hunt group. When the agent is logged out, calls to that ACD hunt group bypass the agent.
-
Page 72: Ending An Acd Hunt Group Call
When you log in to a group, you may be automatically connected to a call after you hear a short ring burst. If the ACD Agent ID Automatic Connect option is enabled for your hunt group and you are using a headset, you will be automatically connected. If this option is not enabled for your hunt group, the call will ring until you answer it or until it times out to another extension. -
Page 73: Learning More
Learning More SECTION CONTENTS PAGE Introduction ..........64 What the Administrators Can Do for You . -
Page 74: Introduction
— Customizing voice mail prompts NOTE: Because the telephone system is very flexible and programmable, the proce- dures for using the features might vary slightly from the descriptions in this guide. If so, your trainer or system administrator can tell you how your system differs and how to use the features. -
Page 75: Frequently Asked Questions (Faqs)
Or, your telephone system may not be using a software version that supports this feature (the “undelete” feature is supported by soft- ware versions 5.3 and later). - Page 76 First, contact your system administrator if you have a question that is not covered in this user guide. If you need further assistance, contact your local authorized Inter-Tel dealer. All Inter-Tel sales, service, and support are handled at the local level.
-
Page 77: Default Feature Codes
EFAULT EATURE Use the blank spaces below to enter custom feature codes, if necessary. UTSIDE CCESS ACCESS CODE NAME Select Line Group 1-208 Automatic Route Selection Emergency Call Outgoing Call *These defaults may differ depending on the software version. XTENSION UMBERS EXTENSION NAME Phone Extensions... -
Page 78: General Feature Codes
ENERAL EATURE FEATURE NAME Account Code – Following Calls Account Code – Optional ACD Agent Log In ACD Agent Log Out ACD Agent Log In/Out ACD Agent Wrap-Up Terminate Agent Help Request Agent Help Reject Answer (Ringing Call) Automatic Intercom Access On/Off Automatic Line Access On/Off Automatic Line Answer Background Music On/Off... - Page 79 ENERAL EATURE FEATURE NAME Microphone Mute On/Off Page Page Receive On/Off Program Baud Rate Program Buttons Program Station Password Queue (Callback) Request Record-A-Call Redial Redirect Call Reminder Message Reminder Message Cancel Remote Programming Reverse Transfer (Call Pick-Up) Ring Intercom Always On/Off Ring Tone Selection Routing Off Station Speed Dial...
- Page 80 NOTES ® Axxess Model 8500 Phone User Guide...
-
Page 81: Index
Index About This Guide 2 About Voice Mail 5 About Your Phone 3 Accessing Your Mailbox 29 Account Codes 54 ACD Agent Wrap-Up Period 62 ACD Hunt Groups 60 Adding Parties to a Conference 20 Adjusting Your Phone’s Viewing Angle 10 Administrators 64 Agent Help 59 Agent IDs 60... - Page 82 Disabling account codes 54 automatic call answer 40 background music 39 call forwarding 23 cascade levels 45 do-not-disturb 35 enhanced speakerphone 27 group listen feature 26 handsfree 14 hunt group calls 60 message envelope options 41 paging 50 record-a-call 49 time/date option 41 Disconnecting a Headset 25 Displaying Speed-Dial Assignments 48...
- Page 83 Lamps 6 Language 40 Last Number Dialed/Saved 25 Leaving Messages 28 Listening to Messages 30 Logging In and Out of ACD Hunt Groups 61 Mailbox Almost Full 29 Making and Receiving Calls 12, 14 Making Emergency Calls 18 Making Pages 50 Manual Call Forwarding 23 Members, Hunt Group 60 Message...
- Page 84 Remote Access Password 57 Remote Feature Access 58 Remote Messaging 44 Requesting a callback 15 a reminder message 36 Agent Help 59 agent help 59 Responding to a Waiting Call 18 Retrieving Messages 28 Returning feature buttons to default 51 phone to default 40 to a call 19 to default operation 40...
-
Page 85: Voice Mail Flowchart
OICE LOWCHART NOTE: At any menu level, you can press ACESSING YOUR MAILBOX • EITHER, Press the Mes- sage button to respond to a message from voice mail. OR, Call the voice mail extension number, press , and enter your mailbox number. - Page 86 Part No. 550.8114 Issue 8.0, September 2003 A661/9225A...
Need help?
Do you have a question about the AXXESS 8500 and is the answer not in the manual?
Questions and answers