Table of Contents
Advertisement
Quick Links
Model 513
Installation Guide
This product is intended for installation by a professional
installer only! Attempts to install this product by a person other than a
trained professional may result in severe damage to a vehicle's electrical
system and components.
© 2009 Directed Electronics, Vista, CA
N5103P 2009-07
Advertisement
Table of Contents

Related Manuals for Python 513


Summary of Contents for Python 513
- Page 1 Model 513 Installation Guide This product is intended for installation by a professional installer only! Attempts to install this product by a person other than a trained professional may result in severe damage to a vehicle’s electrical system and components.
- Page 2 Bitwriter®, Code Hopping™, Doubleguard®, ESP2™, FailSafe®, Ghost Switch™, Learn Routine™, Nite-Lite®, Nuisance Prevention® Circuitry, Revenger®, Silent Mode™, Soft Chirp®, Stinger®, Valet®, Vehicle Recovery System®, VRS®, and Warn Away® are all Trademarks or Registered Trademarks of Directed Electronics. The Bitwriter® (p/n 998U) requires chip version 2.7 or newer to program this unit.
-
Page 3: Table Of Contents
Contents Warning! Safety first ..................5 What is Included ....................7 Installation points to remember ................8 Virtual tach ....................8 D2D ......................8 Before beginning the installation ..............9 After the installation ..................9 Component locations and finding wires ............10 Valet/program switch ................10 Status LED ....................11 Making your wiring connections ...............12 Primary harness (H1), 12-pin connector .............13 Auxiliary harness (H2), 6-pin connector .............13... - Page 4 Feature menus ....................43 Menu 1 - Basic ..................43 Menu 2 - Advanced ................44 Menu 3 - Remote start ................45 Feature descriptions ..................46 Menu 1 - Basic ..................46 Menu 2 - Advanced ................49 Menu 3 - Remote start ................52 Additional features ..................54 Table of zones ....................55 Long term event history ..................56 Shutdown diagnostics ..................57...
-
Page 5: Warning! Safety First
Sirius-Ready, SAT Radio R Warning! Safety first The following safety warnings must be observed at all times: • Due to the complexity of this system, installation of this product must only be performed by an authorized Directed Electronics dealer. • When properly installed, this system can start the vehicle via a command signal from the remote control. - Page 6 vehicle starts when performing the Neutral Safety Shutdown Circuit test, the remote start unit has not been properly installed. The remote start module must be removed or properly reinstalled so that the vehicle does not start in gear. All installations must be performed by an authorized Directed Electronics dealer. OPERATION OF THE REMOTE START MODULE IF THE VEHICLE STARTS IN GEAR IS CONTRARY TO ITS INTENDED MODE OF OPERATION.
-
Page 7: What Is Included
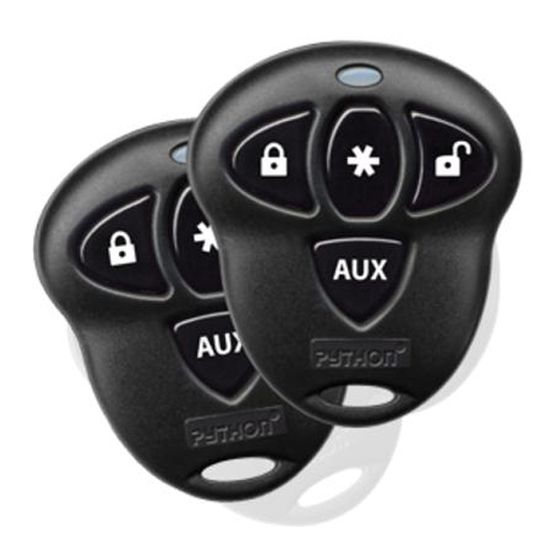
What is Included • A control module • A transceiver/antenna • Two 4-button 1-way transmitters (474P) • A Stinger™ DoubleGuard® two-stage shock sensor • A Revenger™ Soft Chirp™ six-tone programmable siren • A status LED indicator light • A push-button Valet® switch •... -
Page 8: Installation Points To Remember
Installation points to remember This product is designed for fuel-injected, automatic transmission vehicles only. Installing it in a standard transmission vehicle is dangerous and is contrary to its intended use. ➤ Virtual tach Virtual Tach is the default RPM-sensing method for the new remote start systems. Virtual Tach gives the installer the performance of a hard wired tach wire, with the convenience of voltage sensing. -
Page 9: Before Beginning The Installation
➤ Before beginning the installation • Please read this entire installation guide before beginning the installation. The installation of this remote start system requires interfacing with many of the vehicle’s systems. Many new vehicles use low-voltage or multiplexed systems that can be damaged by low resistance testing devices, such as test lights and logic probes (computer safe test lights). -
Page 10: Component Locations And Finding Wires
Component locations and finding wires For detailed information on where to locate components, and how to find the wires you need, please refer to the Direct Tech web site at www.directechs.com. ➤Valet/program switch IMPORTANT! When the vehicle is delivered, please show the user where this switch is located and how to disarm the system with it. -
Page 11: Status Led
➤Status LED Things to remember when positioning the Status LED: • It should be visible from both sides and the rear of the vehicle, if pos- sible. • It needs at least 1/2-inch clearance to the rear. • It is easiest to remove a small panel, such as a switch blank or a dash bezel, before drilling a 9/32-inch hole. -
Page 12: Making Your Wiring Connections
Making your wiring connections Before making your connections, plan how your wires will be routed through the vehicle. For instance, the red 12V constant input and the remote start igni- tion wires are often routed together to the ignition switch harness. In order to keep the wiring neat and make it harder to find, you may wish to wrap these wires together in electrical tape or conceal them in tubing similar to what the manufacturer used. -
Page 13: Primary Harness (H1), 12-Pin Connector
➤ Primary harness (H1), 12-pin connector H1/1 RED/WHITE (-) 200mA AUX TRUNK RELEASE OUTPUT H1/2 (+) CONSTANT POWER INPUT H1/3 BROWN (+) SIREN OUTPUT H1/4 EMPTY NOT USED H1/5 BLACK (-) CHASSIS GROUND INPUT H1/6 VIOLET (+) DOOR TRIGGER INPUT, ZONE 3 H1/7 BLUE (-) INSTANT TRIGGER INPUT, ZONE 1... -
Page 14: Remote Start Ribbon Harness
➤ Remote start ribbon harness PINK/WHITE (-) 200mA PROGRAMMABLE IGN2/ACC2 RELAY TURN ON YELLOW (+) IGNITION INPUT TO ALARM PINK (-) 200mA IGNITION RELAY TURN ON ORANGE (-) 200mA ACCESSORY RELAY TURN ON PURPLE (-) 200mA STARTER RELAY TURN ON ORANGE/BLACK (-) 500mA ANTI GRIND/GROUND WHEN ARMED OUTPUT BLUE... -
Page 15: Remote Start Harness, (H3) 5-Pin Connector
➤ Remote start harness, (H3) 5-pin connector H3/1 BLACK/WHITE (-) NEUTRAL SAFETY SWITCH INPUT H3/2 VIOLET/WHITE TACHOMETER INPUT WIRE H3/3 BROWN (+) BRAKE SHUTDOWN INPUT WIRE H3/4 GRAY (-) HOOD PINSWITCH INPUT, ZONE 6 H3/5 BLUE/WHITE (-) 200 mA 2ND STATUS/REAR DEFOGGER - Latched Pulsed ➤... - Page 16 Warning! Never use this wire to drive anything but a relay or a low-current input, supplied output is only 200mA. Connecting directly to a solenoid, motor, or other high-current device will cause the module to fail. H1/2 (+)12v CONSTANT POWER INPUT Before connecting this wire, remove the supplied fuse.
- Page 17 H1/5 BLACK (-) CHASSIS GROUND We recommend that you do not use a factory ground. Ground all your com- ponents including the siren, to the same point in the vehicle, preferably the kick panel. Scrape away any paint and use a factory bolt, or make your own ground with a self-tapping screw and a star washer.
- Page 18 H1/7 BLUE (-) INSTANT TRIGGER , ZONE 1 This input responds to negative input with an instant trigger, it is ideal for a trunk pin. It can also be used with Directed single-stage sensors. This wire will report Zone 1. H1/8 GREEN (-) DOOR TRIGGER INPUT, ZONE 3...
- Page 19 H1/9 BLACK/WHITE (-) 200mA DOME LIGHT OUTPUT SUPERVISION OUTPUT Connect this wire to the optional dome light supervision relay as shown below: Important! This output is only intended to drive a relay. It cannot be connected directly to the dome light circuit, as the output cannot support the current draw of one or more light bulbs.
- Page 20 H1/11 WHITE (+/-) SELECTABLE LIGHT FLASH OUTPUT This wire is connected to the (+) parking light wire in the vehicle. If the light flash polarity jumper on the side of the unit to the opposite position (See Internal Pro- gramming Jumper section of this guide) this wire supplies a (-) 200 mA output. (+) Positive Light Flash Output WHITE H1/11 (+) LIGHT FLASH OUTPUT...
-
Page 21: Auxiliary Harness (H2), 6-Pin Connector
➤ Auxiliary harness (H2), 6-pin connector H2/1 LIGHT BLUE (-) 200mA 2nd UNLOCK OUTPUT This wire produces a (-) 200mA output for progressive locks in which the driver door unlocks first and the remaining locks unlock with a second press of the unlock button. - Page 22 H2/3 VIOLET/BLACK (-) 200mA PROGRAMMABLE AUX 2 OUTPUT This wire provides 200 mA programmable output whenever the transmitter but- tons controlling AUX 2 channel is pressed. Warning! Never use this wire to drive anything but a relay or a low-current input, supplied output is only 200mA.
- Page 23 (+)WAIT-TO-START WIRE © 2009 Directed Electronics. All rights reserved.
-
Page 24: Heavy Gauge Relay Satellite
H2/6 LIGHT GREEN/BLACK (-) 200mA FACTORY DISARM OUTPUT This wire sends a (-) 200mA pulse every time the remote start is activated, trunk release is activated (programmable on/off), or when the doors are unlocked with the remote. This can be used to pulse the disarm wire of the vehicle's fac- tory anti-theft device. - Page 25 RED (2) (+) 12V INPUT FOR HIGH CURRENT OUTPUTS Remove the two 30-amp fuses prior to connecting these wires and do not re- place them until the satellite has been plugged into the control module. These wires are the source of current for pink ignition, orange accessory, purple starter, and the coils for the relays in the relay pack.
-
Page 26: Relay Satellite 4-Pin Connector
➤ Relay satellite 4-pin connector BLUE (-) 200mA STATUS OUTPUT This wire supplies a 200mA output when remote start process begins. ORANGE (-) 200mA ACCESSORY RELAY TURN ON The wire supplies a (-) 200mA output and controls up to two additional relays. Connect this wire to power additional accessory wires. -
Page 27: Remote Start, (H3) Secondary Harness
➤ Remote start, (H3) secondary harness H3/1 BLACK/WHITE (-) NEUTRAL SAFETY SWITCH INPUT Connect this wire to the provided toggle (override) switch as shown in figure A. Connect the other wire from the toggle switch to the park/neutral switch in the vehicle. - Page 28 H3/2 VIOLET/WHITE TACHOMETER INPUT This input provides information to the unit about the engine’s revolutions per minute (RPMs). In vehicles with conventional coils this wire can be connected to the negative side of the coil - or to the non-common wire at the fuel injector. Tach Learning Once connected, you must teach the system the tach signal.
-
Page 29: Aux 4, Horn, (H4) 2-Pin Connector
➤ AUX 4, Horn, (H4) 2-pin connector H4/1 ORANGE/BLACK (-) 200 mA PROGRAMMABLE AUX 4 OUTPUT This wire provides a (-) 200mA output whenever the transmitter button(s) control- ling AUX 4 is pressed. (see also the Feature Descriptions section and previous AUX 3 description) Warning! Never use this wire to drive anything but a relay or a low-current input, supplied out-... -
Page 30: Neutral Safety Switch Interface
Neutral safety switch interface Some vehicles do not have an electrical neutral safety switch. Instead, the ve- hicle has a mechanical neutral safety switch that physically interrupts the starter wire and is used when the vehicle is in any drive gear. If the remote start is interfaced before this switch, it will provide protection from starting in gear. -
Page 31: Plug-In Led And Valet/Program Switch
Plug-in LED and valet/program switch These plug into the module. The Status LED plugs into the white two-pin socket, while the Valet /Program Switch should be plugged into the blue two-pin socket. The Status LED and Valet switch fits into a 9/32-inch hole. Status LED Valet/Program Switch ������... -
Page 32: Shock Sensor Harness, 4-Pin Connector
Shock sensor harness, 4-pin connector GREEN (-) MULTIPLEX INPUT, ZONE 4 Inputs shorter than 0.8 seconds will trigger the Warn Away® response, while inputs longer than 0.8 seconds will trigger full alarm sequence and report Zone 4. If installing an optional Directed Electronics dual stage sensor, connect to the green wire as shown below. -
Page 33: Tachometer Settings
Tachometer settings ➤ Virtual tach To program Virtual Tach: After the install is complete, remote start the car. If the car does not start on the first attempt, let the remote start attempt again. Once the car starts, let it run until the parking lights come on. When the parking lights come on, shut off the remote start with the remote - that's it! Virtual Tach is programmed. -
Page 34: Tach Learning
➤ Tach learning To learn the tach signal: 1. Start the vehicle with the key. 2. Within 5 seconds, press and hold the Valet/Program switch. 3. After 3 seconds the LED will light constant when the tach signal is learned. 4. -
Page 35: Programming Jumpers
Programming jumpers ➤ Tach threshold On/Off In most cases, this jumper can be left in the Off position. Some new vehicles use less than 12 volts in their ignition systems. The unit may have trouble learning the tach signal in these vehicles. Changing the jumper to the On setting changes the trigger threshold of the digital tach circuit so that it will work with these type vehicles. -
Page 36: Transmitter/Receiver Learn Routine
Transmitter/receiver Learn Routine™ The system comes with transmitters that have been taught to the receiv- er. The receiver can store up to 4 different transmitter codes in memory. If the learn routines have been programmed previously using the Bit- writer, the routines may be locked. Before proceeding with reprogram- ming the learn routines, they must be unlocked with the Bitwriter. - Page 37 Step Function Auto Learn Standard Configuration (default) The auto learn configuration automatically sets up the remote but- ton configuration. Delete remotes: This feature erases all remotes from the system memory. This is useful in cases when a customer’s remote is lost or stolen.
- Page 38 If you want to program Step 3 after programming Step 1, release the Valet/ Program switch, press it twice and release it to advance to Step 3. Then press it once more and hold it. The siren chirps three times and the LED flashes three times to confirm it is ready to receive the code from the transmitter.
-
Page 39: Transmitter Configurations
Transmitter configurations The transmitters are programmed with the standard configuration by using the Auto Learn functions in the Transmitter/Receiver Learn Routine. For more informa- tion about the remote control functions, see the Owners Guide. ➤ Standard configuration operates Arm / Lock Panic ON/ Panic operates Disarm/Unlock... -
Page 40: Multi-Level Security Arming
Multi-level security arming Multi-Level Security Arming is a feature that allows the user to select which system inputs or sensors will be active, or will be bypassed when the system is armed. (See Table of Zones section of this guide.) Pressing the arm button again within five seconds of arming the system activates the Multi-Level Security feature. -
Page 41: System Features Learn Routine
System features learn routine The System Features Learn Routine dictates how the unit operates. It is possible to access and change any of the feature settings using the Valet/program switch, however this process can be simplified using the Bitwriter®. Any of the settings can be changed and then assigned to one of four remote controls. - Page 42 Choose. Within 10 seconds, press and release the Valet/Program switch the number of times corresponding to the feature number you want to program, and then press and hold the switch. (See Feature Menus.) After a second the LED flashes and the siren chirps to indicate which feature is accessed.
-
Page 43: Feature Menus
Feature menus The default settings are indicated in bold type. Features that have additional set- tings that can be programmed using the Bitwriter® are indicated with an asterisk (*) The number in parenthesis indicates the number of times the LED flashes and the horn honks. -
Page 44: Menu 2 - Advanced
➤ Menu 2 - Advanced Menu Two-chirp setting One-chirp setting Item 30 second siren duration 60 second siren duration* Nuisance Prevention Circuitry On Nuisance Prevention Circuitry OFF Progressive door trigger Instant door trigger Disarm from Valet, 1 pulse Disarm from Valet, 2-5 pulses Door trigger error chirp On Door trigger error chirp OFF Ignition controlled domelight On... -
Page 45: Menu 3 - Remote Start
➤ Menu 3 - Remote start Menu Two-chirp setting One-chirp setting Item Engine checking: Virtual Tach Voltage(2), OFF(3), Tachometer(4) Remote start runtime: 12 mins 24 min, 60 min Parking light output: Constant Flashing Cranking time: 0.6 sec 0.8, 1.0, 1.2, 1.4, 1.6, 1.8, 2.0, 4.0 second Activation pulse 1 2nd Ignition/Acc output: Ignition... -
Page 46: Feature Descriptions
Feature descriptions The features of the system are described below. Features that have additional settings only when programming with the Bitwriter® are indicated by the follow- ing icon: Default settings are in bold. The numbers in parentheses indicate the number of times the Status LED flashes. - Page 47 1-6 PANIC WITH IGNITION ON: This feature controls whether or not the panic mode is available with the ignition on. In some states, there are laws prohibiting a siren sounding in a moving vehicle. This feature makes the system compliant with these regulations.
- Page 48 1-11 CODE HOPPING® ON/OFF: The system uses a mathematical formula to change its code each time the transmitter and receiver communicate. This makes the group of bits or "word" from the transmitter very long. The longer the word is, the easier it is to block its transmission to the unit. Disabling the Code Hopping® feature lets the receiver ignore the Code Hopping®...
-
Page 49: Menu 2 - Advanced
➤ Menu 2 - Advanced 2-1 SIREN DURATION 30/60 SECONDS: It is possible to program the unit to sound for 30 or 60 seconds during the triggered sequence. Some states have laws regulating how long a security system can sound. When using the Bitwriter®, the siren can be programmed to sound for any length of time from 1 second to 180 seconds. - Page 50 2-5 DOOR TRIGGER ERROR ON/OFF: This feature controls the error chirp that is generated if the system is armed with the door trigger active. This is useful in vehicles that have a long dome light delay after the door has been closed. If the system is armed before the dome light has turned off, the security system will generate the door trigger error chirp.
- Page 51 2-10 FACTORY ALARM DISARM—WITH UNLOCK(1), BEFORE UNLOCK(2), REMOTE START ONLY(3): In the default setting the factory alarm disarm output disarms the factory alarm anytime the Unlock button is pressed. The BEFORE UNLOCK output disarms the factory alarm before the unlock output activates and before remote start is activated.
-
Page 52: Menu 3 - Remote Start
2-16 AUX 4 VALIDITY (1)/LATCHED(2)/LATCHED RESET WITH IGNI- TION(3)/30(4), 60(5), 90(6) SEC TIMED OUTPUT: AUX 3 can be pro- grammed for these output configurations. The unit is set to the default validity output. To change the configuration, use the two-chirp setting to toggle through the different configurations. - Page 53 3-3 Parking Lights Constant: In the default setting, the parking lights (if con- nected) comes on solid during the remote start runtime. In the two- flash setting the parking lights will flash during the remote start runtime. 3-4 CRANK TIME 0.6/0.8/1.0/1.2/1.4/1.6/1.8/2.0/4.0 SECONDS: If the unit is programmed for no engine checking or voltage sense, the crank time must be set to the appropriate duration.
-
Page 54: Additional Features
3-11 TIMER MODE RUN TIME—12, 3, 6, 9 MINUTES: Selects the time in minutes that the system will operate the engine when timer mode activates the remote start. During the runtime the remote start can be shut down with any of the shutdown inputs. -
Page 55: Table Of Zones
Table of zones When using the Diagnostic functions, use the Table of Zones to see which input has triggered the system. It is also helpful in deciding which input to use when connecting optional sensors and switches. Input Description Zone No Trigger Type Trunk Input BLUE (H1/7) -
Page 56: Long Term Event History
Long term event history The system stores the last two full triggers in memory. These are not erasable. Each time the unit sees a full trigger, the older of the two triggers in memory will be replaced by the new trigger. To access long term event history: With the ignition off, press and hold the Valet/Program switch. -
Page 57: Shutdown Diagnostics
Shutdown diagnostics To perform shutdown diagnostics: With the ignition OFF, press and hold the Valet/Program switch. Turn the ignition ON and then back OFF while holding the Valet/Pro- gram switch. Release the Valet/Program switch. Press and release the Valet/Program switch. The LED flashes to report the last shutdown for one minute or until the ignition is turned on, as shown in the following table: LED Flashes... -
Page 58: Safety Check
Safety check Before vehicle reassembly, the remote start system must be checked to ensure safe and trouble-free operation. The following test procedure must be used to verify proper installation and operation of the system. The installation must be com- pleted before testing, including connection to the brake switch and hood switch. Test the BRAKE shutdown circuit: With the vehicle in Park (P), activate the remote start system. -
Page 59: Troubleshooting
Troubleshooting ➤ Alarm • Shock sensor doesn't trigger the alarm: Has the NPC system been triggered? If so, you will hear 5 chirps when disarm- ing. To check this, turn the ignition key on and off to clear the NPCs memory, and then retest the shock sensor. -
Page 60: Remote Start
• Status LED doesn't work. You've probably guessed already, but here goes: Is it plugged in? (See Plug-In LED and Valet/Program Switch section of this guide.) Is the LED plugged into the correct socket? • Door locks operate backwards This unit has easily-reversed lock/unlock outputs. Recheck wire connections to see if you have reversed these. - Page 61 • The vehicle starts, but immediately dies. Does the vehicle have an immobilizer? The vehicle’s immobilizer will cut the fuel and/or spark during unauthorized starting attempts. Is the remote start programmed for voltage sense? If so, the crank time may not be set high enough.
-
Page 62: Wiring Quick Reference Guide
Wiring quick reference guide © 2009 Directed Electronics. All rights reserved. -
Page 63: Relay Satellite Wiring Quick Reference Guide
Relay satellite wiring quick reference guide © 2009 Directed Electronics. All rights reserved. - Page 64 The company behind this system is Directed Elec tron ics Since its inception, Directed Electronics has had one purpose, to provide consumers with the finest vehicle security and car stereo products and accessories available. The recipient of nearly 100 patents and Innovations Awards in the field of advanced electronic technology, Directed is ISO 9001 registered.
Need help?
Do you have a question about the 513 and is the answer not in the manual?
Questions and answers