Table of Contents
Advertisement
Quick Links
Advertisement
Table of Contents

Related Manuals for Develop ineo 3300P


Summary of Contents for Develop ineo 3300P
- Page 1 User's Guide ineo 3300P...
-
Page 2: Table Of Contents
User's Guide Contents 1—Safety information ............................ 8 2—Learning about the printer ........................12 Finding information about the printer ...................... 12 Selecting a location for the printer ......................13 Printer configurations ..........................14 Using the printer control panel ........................ 15 Understanding the printer control panel light sequences ............... 16 Using the Embedded Web Server ...................... - Page 3 User's Guide Printing a menu settings and network setup page.................. 37 4—Loading paper and specialty media ....................... 38 Setting the paper size and type ......................38 Configuring Universal paper settings ...................... 38 Using the standard bin and paper stop ....................39 Loading trays ............................
- Page 4 User's Guide Printing a document..........................60 Adjusting toner darkness ........................61 Canceling a print job ..........................61 Canceling a print job from the computer .................... 61 7—Understanding the printer menus ......................62 Menus list ..............................62 Paper menu ............................63 Default Source menu ..........................
- Page 5 User's Guide General Settings menu ........................87 Print Settings ............................93 8—Saving the environment ........................103 Saving paper and toner ........................103 Using recycled paper ........................103 Conserving supplies ......................... 103 Saving energy ............................103 Using Sleep and Hibernate modes ....................104 Adjusting Sleep mode ........................
- Page 6 User's Guide Moving the printer ..........................117 Before moving the printer ......................... 117 Moving the printer to another location ....................117 Shipping the printer .......................... 118 11—Managing the printer .......................... 119 Finding advanced networking and administrator information ............... 119 Viewing reports ............................. 119 Configuring supply notifications from the Embedded Web Server ............
- Page 7 User's Guide Solving print problems .......................... 194 Printing problems ..........................194 Print quality problems ........................202 Embedded Web Server does not open ....................233 Contacting technical support ........................ 235 14—Notices ............................... 236 Copyright notice ............................ 236 Trademarks ............................236 Software License Agreement........................ 237 Noise emission levels ...........................
-
Page 8: 1-Safety Information
User's Guide 1—Safety information Connect the power cord to a properly grounded electrical outlet that is near the product and easily accessible. Do not place or use this product near water or wet locations. CAUTION—POTENTIAL INJURY: This product uses a laser. Use of controls or adjustments or performance of procedures other than those specified herein may result in hazardous radiation exposure. - Page 9 User's Guide CAUTION—POTENTIAL INJURY: Do not cut, twist, bind, crush, or place heavy objects on the power cord. Do not subject the power cord to abrasion or stress. Do not pinch the power cord between objects such as furniture and walls. If any of these things happen, a risk of fire or electrical shock results. Inspect the power cord regularly for signs of such problems.
- Page 10 User's Guide ■ Warning and Caution Symbols The labels and symbols used in this manual and on the printer help prevent injury to the operator and others around the printer as well as damage to property. Those labels and symbols have the following meanings: WARNING Ignoring this warning could cause serious injury or even death.
- Page 11 User's Guide WARNING Connect the power cord to an electrical outlet that is equipped with a grounding terminal. Do not place metal clips, any other small metallic objects, or a container containing liquid on the printer. Liquid and metallic objects dropped inside the printer could result in a fire, electrical shock, or breakdown.
-
Page 12: 2-Learning About The Printer
User's Guide 2—Learning about the printer Finding information about the printer What are you looking for? Find it here Initial setup instructions: Setup documentation—The setup documentation came with the printer. • Connecting the printer • Installing the printer software Additional setup and instructions for using the printer: User's Guide and Quick Reference Guide—The guides are available on the Printer Driver and •... -
Page 13: Selecting A Location For The Printer
User's Guide Selecting a location for the printer When selecting a location for the printer, leave enough room to open trays, covers, and doors. If you plan to install any hardware options, then leave enough room for them also. It is important to: •... -
Page 14: Printer Configurations
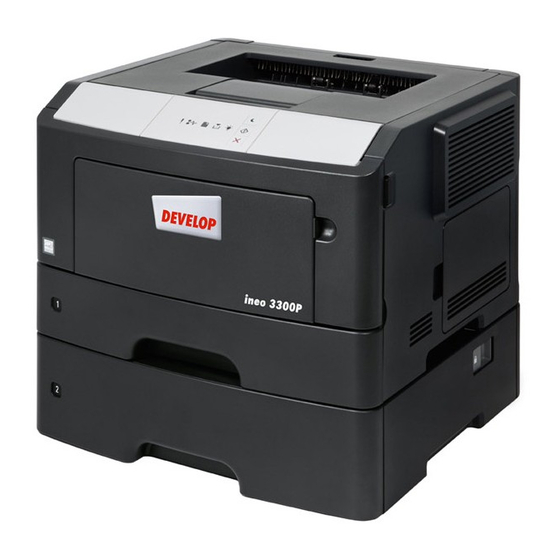
User's Guide Left side 65 mm (2.56 in.) Rear 3.94 in. 100 mm ( 305 mm (12 in.) Printer configurations CAUTION—POTENTIAL INJURY: To reduce the risk of equipment instability, load each tray separately. Keep all trays closed until needed. You can configure your printer by adding one optional 250- or 550-sheet tray. For instructions on installing the optional tray, see Installing optional trays. -
Page 15: Using The Printer Control Panel
User's Guide Controller board access door Standard 250-sheet tray Optional 250- or 550-sheet tray 50-sheet multipurpose feeder Front door Using the printer control panel Light or button Color Description Error light Yellow An error has occurred. Paper jam light Yellow A paper jam has occurred. -
Page 16: Understanding The Printer Control Panel Light Sequences
User's Guide Light or button Color Description Toner low or replace Yellow The toner cartridge is low imaging unit light on toner, or the imaging unit needs to be replaced. Ready or data light Green The printer is in Ready state. - Page 17 User's Guide If the printer control panel light sequence matches a light sequence in the following table, then see the message in the same row. Light sequence Message Close front door Replace imaging unit Replace unsupported toner cartridge Replace unsupported imaging unit Toner cartridge, imaging unit mismatch...
- Page 18 User's Guide Light sequence Message Service error Load paper Remove paper from standard bin Change paper Toner cartridge low Imaging unit low Ready Waiting Busy Not ready - 18 -...
- Page 19 User's Guide If the printer control panel light sequence matches a light sequence in the “Primary light sequence” column of the following table, then press twice quickly on the printer control panel. Search for a matching light sequence in the “Supplemental light sequence” column, and then see the message in the same row.
- Page 20 User's Guide Primary light sequence Supplemental light sequence Message Memory full Paper jam, clear standard bin Paper jam, remove standard tray to clear duplex Paper jam, open rear door Paper jam, remove standard tray to clear duplex Paper jam, remove standard tray to clear duplex Paper jam, open front...
-
Page 21: Using The Embedded Web Server
User's Guide Using the Embedded Web Server Note: This functionality is available only in network printers or printers connected to print servers. Use the Embedded Web Server to: • Check the status of the printer supplies. • Configure supply notifications. •... -
Page 22: 3-Additional Printer Setup
User's Guide 3—Additional printer setup Installing internal options CAUTION—SHOCK HAZARD: If you are accessing the controller board or installing optional hardware or memory devices sometime after setting up the printer, then turn the printer off, and unplug the power cord from the electrical outlet before continuing. If you have other devices attached to the printer, then turn them off as well, and unplug any cables going into the printer. -
Page 23: Installing An Optional Card
User's Guide Installing an optional card CAUTION—SHOCK HAZARD: If you are accessing the controller board or installing optional hardware or memory devices sometime after setting up the printer, then turn the printer off, and unplug the power cord from the electrical outlet before continuing. If you have other devices attached to the printer, then turn them off as well, and unplug any cables going into the printer. - Page 24 User's Guide 4. Push the card firmly into place as shown in the illustration. Warning—Potential Damage: Improper installation of the card may cause damage to the card and the controller board. Note: The entire length of the connector on the card must touch and be flushed against the controller board.
-
Page 25: Installing Hardware Options
User's Guide Installing hardware options Installing optional trays CAUTION—SHOCK HAZARD: If you are accessing the controller board or installing optional hardware or memory devices sometime after setting up the printer, then turn the printer off, and unplug the power cord from the electrical outlet before continuing. If you have any other devices attached to the printer, then turn them off as well, and unplug any cables going into the printer. - Page 26 User's Guide 7. Align the printer with the tray, and then slowly lower the printer into place. Note: Optional trays lock together when stacked. 8. Connect the power cord to the printer, then to a properly grounded electrical outlet, and then turn on the printer.
-
Page 27: Attaching Cables
User's Guide Attaching cables Connect the printer to the computer using a USB or parallel cable, or to the network using an Ethernet cable. Make sure to match the following: • The USB symbol on the cable with the USB symbol on the printer •... -
Page 28: Accessing The Controller Board
User's Guide Accessing the controller board CAUTION—SHOCK HAZARD: If you are accessing the controller board or installing optional hardware or memory devices sometime after setting up the printer, then turn the printer off, and unplug the power cord from the electrical outlet before continuing. If you have any other devices attached to the printer, then turn them off as well, and unplug any cables going into the printer. -
Page 29: Setting Up The Printer Software
User's Guide Setting up the printer software Installing the printer driver For Windows users 1. Insert the Printer Driver and Documentations CD in the CD/DVD drive of your PC. 2. Follow the instructions on the screen. 3. The PostScript driver may not be installed to your PC which runs Windows Vista if it is connected to the printer via a USB cable. -
Page 30: Installing The Local Printer Settings Utility
User's Guide 4. Add the printer. a. (For Mac OS X v10.3/v10.4/v10.5/v10.6) Apple menu > System preferences > Print & Fax > + (For Mac OS X v10.7/v10.8) Apple menu > System preferences > Print & Scan > + b. Select your printer. c. -
Page 31: Networking
User's Guide Networking Notes: • Purchase a wireless network adapter first before setting up the printer on a wireless network. For information on installing the wireless network adapter, see the instruction sheet that came with the adapter. • A Service Set Identifier (SSID) is a name assigned to a wireless network. Wired Equivalent Privacy (WEP), Wi-Fi Protected Access (WPA), WPA2, and 802.1X - RADIUS are types of security used on a network. -
Page 32: For Macintosh Users
User's Guide For Macintosh users 1. Allow the network DHCP server to assign an IP address to the printer. 2. Obtain the printer IP address either: From the printer control panel From the TCP/IP section in the Network/Ports menu By printing a network setup page or menu settings page, and then finding the TCP/IP section Note: You will need the IP address if you are configuring access for computers on a different subnet than the printer. - Page 33 User's Guide For Linux users Adding the Printer Using Printer configuration Connect the machine to a computer or the network. Insert the Printer Driver and Documentations CD in the CD/DVD drive of your computer. From the System menu, select Administration > Printing. Click New Printer.
-
Page 34: Preparing To Set Up The Printer On A Wireless Network
User's Guide Preparing to set up the printer on a wireless network Notes: • Make sure your wireless network adapter is installed in your printer and working properly. • Make sure your access point (wireless router) is turned on and is working properly. Make sure you have the following information before setting up the printer on a wireless network: •... -
Page 35: Connecting The Printer To A Wireless Network Using The Wi-Fi Protected Setup Pin
User's Guide Notes: If you do not know the SSID of the network that your computer is connected to, then launch the wireless utility of the computer network adapter, and then look for the network name. If you cannot find the SSID or the security information for your network, then see the documentation that came with the access point, or contact your system support person. -
Page 36: Connecting The Printer To A Wireless Network Using The Printer Software
User's Guide Connecting the printer to a wireless network using the printer software Using the Wireless Setup Utility (Windows only) The Wireless Setup Utility lets you: • Configure the printer to join an existing wireless network. • Add a printer to an existing ad hoc network. •... -
Page 37: Printing A Menu Settings And Network Setup Page
User's Guide 4. Click Submit. 5. Turn off the printer, and then disconnect the Ethernet cable. Then wait for at least five seconds, and then turn the printer back on. 6. To verify if your printer is connected to the network, print a network setup page again. Then in the Network Card [x] section, see if the status is “Connected”. -
Page 38: 4-Loading Paper And Specialty Media
User's Guide 4—Loading paper and specialty media The selection and handling of paper and specialty media can affect how reliably documents print. For more information, see Avoiding jams Storing paper. Setting the paper size and type Using the Embedded Web Server 1. -
Page 39: Using The Standard Bin And Paper Stop
User's Guide Using the printer settings on the computer 1. Depending on your operating system, access the Paper menu using the Local Printer Settings Utility or Printer Settings. 2. Select the tray containing the Universal paper size, and then select Universal as the paper size. Using the standard bin and paper stop The standard bin holds up to 150 sheets of 20-lb paper. -
Page 40: Loading Trays
User's Guide Loading trays CAUTION—POTENTIAL INJURY: To reduce the risk of equipment instability, load each tray separately. Keep all other trays closed until needed. 1. Pull out the tray completely. Note: Do not remove trays while a job prints or while the following light sequence appears on the printer control panel. - Page 41 User's Guide 2. Squeeze, and then slide the width guide tab to the correct position for the size of the paper you are loading. - 41 -...
- Page 42 User's Guide 3. Unlock the length guide. Squeeze, and then slide the length guide tab to the correct position for the size of the paper you are loading. Notes: For some paper sizes like letter, legal, and A4, squeeze and slide the length guide tab backward to accommodate their length.
- Page 43 User's Guide 4. Flex the sheets back and forth to loosen them, and then fan them. Do not fold or crease the paper. Straighten the edges on a level surface. 5. Load the paper stack. Note: Make sure the paper is below the maximum fill indicator located on the side of the width guide. Notes: Load with the printable side facedown when using recycled or preprinted paper.
-
Page 44: Loading The Multipurpose Feeder
User's Guide 6. Insert the tray. 7. From the Embedded Web Server or your computer, set the paper size and type in the Paper menu to match the paper loaded in the tray. Notes: If the printer is not connected to a network, then access the Paper menu using Local Printer Settings Utility or Printer Settings, depending on your operating system. - Page 45 User's Guide a. Pull the multipurpose feeder extender. b. Pull the extender gently so the multipurpose feeder is fully extended and open. 2. Squeeze the tab on the left width guide, and then move the guides for the paper you are loading. - 45 -...
- Page 46 User's Guide 3. Prepare the paper or specialty media for loading. Flex sheets of paper back and forth to loosen them, and then fan them. Do not fold or crease the paper. Straighten the edges on a level surface. Hold transparencies by the edges. Flex the stack of transparencies back and forth to loosen them, and then fan them.
- Page 47 User's Guide Load paper, transparencies, and card stock with the recommended printable side faceup and the top edge entering the printer first. For more information on loading transparencies, see the packaging the transparencies came in. Load letterhead faceup with the top edge entering the printer first. For two-sided (duplex) printing, load letterhead facedown with the bottom edge of the sheet entering the printer first.
-
Page 48: Linking And Unlinking Trays
User's Guide 5. From the Embedded Web Server or from your computer, set the paper size and type in the Paper menu to match the paper loaded in the multipurpose feeder. Note: Depending on your operating system, access the Paper menu using Local Printer Settings Utility or Printer Settings. -
Page 49: Configuring A Custom Paper Type Name
User's Guide Warning—Potential Damage: Paper loaded in the tray should match the paper type assigned in the printer. The temperature of the fuser varies according to the specified paper type. Printing issues may occur if settings are not properly configured. Configuring a custom paper type name Using the Embedded Web Server 1. -
Page 50: Assigning A Custom Paper Type
User's Guide Assigning a custom paper type Using the Embedded Web Server 1. Open a Web browser, and then type the printer IP address in the address field. Notes: Print a network setup page or menu settings page, and then locate the IP address in the TCP/IP section. -
Page 51: 5-Paper And Specialty Media Guide
User's Guide 5—Paper and specialty media guide Paper guidelines Selecting the correct paper or specialty media reduces printing problems. For the best print quality, try a sample of the paper or specialty media before buying large quantities. Paper characteristics The following paper characteristics affect print quality and reliability. Consider these characteristics when evaluating new paper stock. -
Page 52: Unacceptable Paper
User's Guide Grain direction Grain refers to the alignment of the paper fibers in a sheet of paper. Grain is either grain long, running the length of the paper, or grain short, running the width of the paper. For 60–90-g/m (16–24-lb) bond paper, grain long paper is recommended. -
Page 53: Selecting Preprinted Forms And Letterhead
User's Guide • Do not use coated papers unless they are specifically designed for electrophotographic printing. Selecting preprinted forms and letterhead Use these guidelines when selecting preprinted forms and letterhead: • Use grain long for 60 to 90 g/m (16 to 24 lb) weight paper. •... -
Page 54: Tips On Using Envelopes
User's Guide When printing on card stock: • Make sure the Paper Type is Card Stock. • Select the appropriate Paper Texture setting. • Be aware that preprinting, perforation, and creasing may significantly affect the print quality and cause jams or other paper handling problems. •... -
Page 55: Tips On Using Labels
User's Guide Tips on using labels Print samples on the labels being considered for use before buying large quantities. Note: Use only paper label sheets. Vinyl, pharmacy, and two-sided labels are not supported. When printing on labels: • Use labels designed specifically for laser printers. Check with the manufacturer or vendor to verify that: The labels can withstand temperatures up to 240°C (464°F) without sealing, excessive curling, wrinkling, or releasing hazardous emissions. -
Page 56: Tips On Using Transparencies
User's Guide Tips on using transparencies • Print a test page on the transparencies being considered for use before buying large quantities. • Feed transparencies from the standard tray, or the multipurpose feeder. • Use transparencies designed specifically for laser printers. Transparencies must be able to withstand temperatures up to 185°C (365°F) without melting, discoloring, offsetting, or releasing hazardous emissions. - Page 57 User's Guide Paper size Standard tray Optional 250- or Multipurpose feeder Duplex mode 550-sheet tray 148 x 210 mm (5.8 x 8.3 in.) 105 x 148 mm (4.1 x 5.8 in.) JIS B5 182 x 257 mm (7.2 x 10.1 in.) Letter 216 x 279 mm (8.5 x 11 in.) Legal...
-
Page 58: Supported Paper Types And Weights
User's Guide Paper size Standard tray Optional 250- or Multipurpose feeder Duplex mode 550-sheet tray 10 Envelope 105 x 241 mm (4.1 x 9.5 in.) DL Envelope 110 x 220 mm (4.3 x 8.7 in.) C5 Envelope 162 x 229 mm (6.4 x 9 in.) B5 Envelope 176 x 250 mm (6.9 x 9.8 in.) Other Envelope... - Page 59 User's Guide Paper type 250- or 550-sheet tray Multipurpose feeder Duplex mode Glossy paper Paper labels Vinyl labels Bond Envelope Rough envelope Letterhead Preprinted Colored Paper Light Paper Heavy Paper Rough/Cotton One-sided paper labels designed for laser printers are supported for occasional use. It is recommended to print 20 or fewer pages of paper labels per month.
-
Page 60: 6-Printing
User's Guide 6—Printing This chapter covers printing, printer reports, and job cancelation. Selection and handling of paper and specialty media can affect how reliably documents print. For more information, see Avoiding jams Storing paper. Printing documents Printing a document 1. From the Embedded Web Server or your computer, set the paper size and type in the Paper menu to match the paper loaded in the tray. -
Page 61: Adjusting Toner Darkness
User's Guide Adjusting toner darkness Using the Embedded Web Server 1. Open a Web browser, and then type the printer IP address in the address field. Notes: Print a network setup page or menu settings page, and then locate the IP address in the TCP/IP section. -
Page 62: 7-Understanding The Printer Menus
User's Guide 7—Understanding the printer menus You may print a menus list by printing the menu settings and network setup pages. Access the menus from a network printer by using the Embedded Web Server. If your printer is connected by USB cable, then access the menus using the Local Printer Settings Utility for Windows or Printer Settings for Macintosh. -
Page 63: Paper Menu
User's Guide Paper menu Default Source menu Default Source Set a default paper source for all print jobs. Tray [x] Notes: MP Feeder • Tray 1 (standard tray) is the factory default setting. Manual Paper • From the Paper menu, set Configure MP to "Cassette" for MP Feeder Manual Envelope to appear as a menu setting. -
Page 64: Paper Size/Type Menu
User's Guide Paper Size/Type menu Tray [x] Size Specify the paper size loaded in each tray. Notes: • A4 is the factory default setting. • If two trays contain paper of the same size and type, and the trays JIS-B5 have the same settings, then the trays are automatically linked. - Page 65 User's Guide MP Feeder Size Specify the paper size loaded in the multipurpose feeder. Notes: • A4 is the factory default setting. • From the Paper menu, set Configure MP to “Cassette” for MP JIS B5 Feeder Size to appear as a menu. Letter •...
- Page 66 User's Guide Manual Paper Size Specify the paper size being manually loaded. Note: A4 is the factory default setting. JIS B5 Letter Legal Executive Oficio (Mexico) Folio Statement Universal Manual Paper Type Specify the paper type being manually loaded. Notes: Plain Paper Card Stock •...
-
Page 67: Configure Mp Menu
User's Guide Manual Envelope Type Specify the envelope type being manually loaded. Note: Envelope is the factory default setting. Envelope Rough Envelope Custom Type [x] Note: Only installed trays and feeders are listed in this menu. Configure MP menu Configure MP Determine when the printer selects paper from the multipurpose feeder. -
Page 68: Paper Texture Menu
User's Guide Paper Texture menu Plain Texture Specify the relative texture of the plain paper loaded. Smooth Note: Normal is the factory default setting. Normal Rough Card Stock Texture Specify the relative texture of the card stock loaded. Smooth Notes: Normal •... - Page 69 User's Guide Letterhead Texture Specify the relative texture of the letterhead loaded. Note: Normal is the factory default setting. Smooth Normal Rough Preprinted Texture Specify the relative texture of the preprinted paper loaded. Note: Normal is the factory default setting. Smooth Normal Rough...
-
Page 70: Paper Weight Menu
User's Guide Paper Weight menu Plain Weight Specify the relative weight of the plain paper loaded. Light Note: Normal is the factory default setting. Normal Heavy Card Stock Weight Specify the relative weight of the card stock loaded. Light Note: Normal is the factory default setting. Normal Heavy Transparency Weight... - Page 71 User's Guide Rough Envelope Weight Specify the relative weight of the rough envelope loaded. Note: Normal is the factory default setting. Light Normal Heavy Letterhead Weight Specify the relative weight of the letterhead loaded. Note: Normal is the factory default setting. Light Normal Heavy...
-
Page 72: Paper Loading Menu
User's Guide Paper Loading menu Recycled Loading Determine and set two-sided printing for all print jobs that specify Recycled as the paper type. Duplex Bond Loading Determine and set two-sided printing for all print jobs that specify Bond as the paper type. Duplex Letterhead Loading Determine and set two-sided printing for all print jobs that specify... -
Page 73: Custom Types Menu
User's Guide Custom Types menu Custom Type [x] Associate a paper or specialty media type with a Custom Type [x] name or a user-defined custom name created in the Embedded Web Server, in the Paper Local Printer Settings Utility. Card Stock Notes: Transparency •... -
Page 74: Reports Menu
User's Guide Portrait Height Set the portrait height. Notes: 3–14.17 inches 76–360 mm • If the height exceeds the maximum, then the printer uses the maximum height allowed. • 14 inches is the US default setting. You can increase the height in 0.01-inch increments. -
Page 75: Network/Ports Menu
User's Guide Network/Ports menu Standard Network Note: Only active ports appear in this menu. All inactive ports are omitted. PCL SmartSwitch Set the printer to automatically switch to PCL emulation when a print job requires it, regardless of the default printer language. Notes: •... -
Page 76: Reports Menu
User's Guide Mac Binary PS Set the printer to process Macintosh binary PostScript print jobs. Notes: • Auto is the factory default setting. Auto • Off filters print jobs using the standard protocol. • On processes raw binary PostScript print jobs. Reports menu Print Setup Page Print a report containing information about the network printer settings, such... -
Page 77: Tcp/Ip Menu
User's Guide TCP/IP menu Note: This menu is available only in network printers or printers connected to print servers. Set Hostname Set the Hostname. IP Address View or change the current TCP/IP address. Note: Manually setting the IP address sets the Enable DHCP and Enable Auto IP settings to Off. -
Page 78: Ipv6 Menu
User's Guide DNS Server Address View or change the current DNS server address. Backup DNS Server Address View or change the backup DNS server addresses. Backup DNS Server Address 2 Backup DNS Server Address 3 Enable HTTPS View or change the current HTTPS setting. Note: Yes is the factory default setting. -
Page 79: Wireless Menu
User's Guide Wireless menu Note: This menu is available only in printer models connected to a wireless network. Wi-Fi Protected Setup (WPS) Establish a wireless network and enable network security. Start Push Button Method Notes: Start PIN Method • Start Push Button Method connects the printer to a wireless network by pressing buttons on both the printer and the access point (wireless router) within a given period of time. -
Page 80: Appletalk Menu
User's Guide AppleTalk menu Note: This menu is available only in printer models connected to a wired network or when an optional network card is installed. Activate Enable or disable AppleTalk support. Note: Yes is the factory default setting. View Name Show the assigned AppleTalk name. -
Page 81: Standard Usb Menu
User's Guide Standard USB menu PCL SmartSwitch Set the printer to automatically switch to PCL emulation when a print job received through a USB port requires it, regardless of the default printer language. Notes: • On is the factory default setting. •... - Page 82 User's Guide Mac Binary PS Only shown if PostScript level is non-zero Note: Auto is the factory default setting. Auto ENA Address Only shown if ENA attached to device’s USB port [xxx].[xxx].[xxx].[xxx] ENA Netmask [xxx].[xxx].[xxx].[xxx] ENA Gateway [xxx].[xxx].[xxx].[xxx] - 82 -...
-
Page 83: Standard Parallel [X] Menu
User's Guide Standard Parallel [x] menu Note: This menu appears only when an optional parallel card is installed. PCL SmartSwitch Set the printer to automatically switch to PCL emulation when a print job received through a serial port requires it, regardless of the default printer language. - Page 84 User's Guide Parallel Buffer Set the size of the parallel input buffer. Notes: Disabled Auto • Auto is the factory default setting. 3K to [maximum size allowed] • Disabled turns off job buffering. Any print jobs already buffered on the printer hard disk are printed before normal processing resumes.
- Page 85 User's Guide Mac Binary PS Set the printer to process Macintosh binary PostScript print jobs. Notes: • Auto is the factory default setting. Auto • Off filters print jobs using the standard protocol. • On processes raw binary PostScript print jobs. ENA Address Set the network address information for an external print server.
-
Page 86: Security Menu
User's Guide Security menu Set Date and Time menu Current Date and Time View the current date and time settings for the printer. Manually Set Date and Time Enter the date and time. Note: Setting the date and time using this menu automatically sets Enable NTP [input date/time] to No. -
Page 87: Settings Menu
User's Guide Settings menu General Settings menu Display Language Set the language of the text appearing on the Embedded Web Server, Local Printer Settings for Windows, or Printer Settings English for Macintosh. Francais Note: Not all languages are available for all printers. Deutsch Italiano Espanol... - Page 88 User's Guide Eco-Mode Minimize the use of energy, paper, or specialty media. Notes: Energy • Off is the factory default setting. Off resets the printer to its factory default settings. Energy/Paper Paper • Energy minimizes the power used by the printer. •...
- Page 89 User's Guide Timeouts Set the amount of time the printer waits after a job is printed before it goes into a reduced power state. Sleep Mode Notes: Disabled • “30 min” is the factory default setting. 1–180 min • “Disabled” appears only when Energy Conserve is set to Off.
- Page 90 User's Guide Timeouts Set the amount of time the printer waits after a job is printed before it enters Hibernate mode. Hibernate Timeout Notes: Disabled • Disabled is the factory default setting in all countries 1 hour except European Union countries and Switzerland. 2 hours •...
- Page 91 User's Guide Timeouts Set the amount of time in seconds the printer waits for additional data before canceling a print job. Wait Timeout Notes: Disabled • “40 sec” is the factory default setting. 15–65535 sec • Wait Timeout is available only when the printer is using PostScript emulation.
- Page 92 User's Guide Print Recovery Notes: Jam Assist • On is the factory default setting. On sets the printer to automatically dump blank or partially printed pages to the standard bin after a jammed page has been cleared. • Off requires the user to remove all pages from all possible jam locations.
-
Page 93: Print Settings
User's Guide Print Settings Setup menu Printer Language Set the default printer language. PCL Emulation Notes: PS Emulation • PCL Emulation is the factory default setting. • PCL Emulation uses a PCL interpreter for processing print jobs. • PS Emulation uses a PostScript interpreter for processing print jobs. -
Page 94: Finishing Menu
User's Guide Finishing menu Sides (Duplex) Specify whether two-sided (duplex) printing is set as the default for all print jobs. 1 sided Notes: 2 sided • “1 sided” is the factory default setting. • You can set two-sided printing from the software program. For Windows users: Click File >Print. - Page 95 User's Guide Separator Sheets Specify whether to insert blank separator sheets. Notes: Between Copies • Off is the factory default setting. Between Jobs • Between Copies inserts a blank sheet between each copy of a print job if Between Pages Collate is set to (1,1,1) (2,2,2).
-
Page 96: Quality Menu
User's Guide Paper Saver Border Print a border when using Paper Saver. Note: None is the factory default setting. None Solid Quality menu Print Resolution Specify the printed output resolution in dots per inch. Note: 600 dpi is the factory default setting. 300 dpi 600 dpi 1200 dpi... -
Page 97: Job Accounting Menu
User's Guide Gray Correction Automatically adjust the contrast enhancement applied to images. Note: Auto is the factory default setting. Auto Brightness Adjust the printed output either by lightening or darkening it. You can conserve toner by lightening the output. -6 to 6 Note: 0 is the factory default setting. - Page 98 User's Guide Log Action at End of Frequency Specify how the printer operates at the end of the log file update cycle. Note: None is the factory default setting. None Email Current Log Email & Delete Current Log Post Current Log Post &...
-
Page 99: Xps Menu
User's Guide E-mail Address to Send Logs Specify the E-mail address to use to send the job accounting logs. Note: This option is available when "E-mail Current Log", "E-mail & Delete [user-defined string] Current Log", or "E-mail & Delete Oldest Log" is selected in Log Action at Near Full/Log Action at Full. -
Page 100: Postscript Menu
User's Guide PostScript menu Print PS Error Print a page containing the PostScript error. Note: Off is the factory default setting. Lock PS Startup Disable the SysStart file. Mode Note: Off is the factory default setting. - 100 -... -
Page 101: Pcl Emul Menu
User's Guide PCL Emul menu PCL Emulation Settings Specify the font pitch for scalable monospaced fonts. Pitch Notes: 0.08–100 • 10 is the factory default setting. • Pitch refers to the number of fixed-space characters per inch (cpi). • Pitch can be increased or decreased in 0.01-cpi increments. •... - Page 102 User's Guide PCL Emulation Settings Specify whether the printer automatically performs a line feed (LF) after a carriage return (CR) control command. Auto LF after CR Note: Off is the factory default setting. Tray Renumber Configure the printer to work with printer software or programs that use different source assignments for trays and feeders.
-
Page 103: 8-Saving The Environment
User's Guide 8—Saving the environment Saving paper and toner Studies show that as much as 80% of the carbon footprint of a printer is related to paper usage. You can significantly reduce your carbon footprint by using recycled paper and the following printing suggestions, such as printing on both sides of the paper and printing multiple pages on one side of a single sheet of paper. -
Page 104: Using Sleep And Hibernate Modes
User's Guide Using Sleep and Hibernate modes Sleep mode saves energy by lowering power consumption during extended periods of inactivity. Hibernate mode is an ultra-low-power operating mode. When operating in Hibernate mode, all other systems and devices are powered down safely. When in Hibernate mode, the printer does not respond to print jobs. -
Page 105: Adjusting Sleep Mode
User's Guide Adjusting Sleep mode To save energy, decrease the number of minutes the printer waits before it enters Sleep Mode. Available settings range from 1 to 120 minutes. The factory default setting is 30 minutes. Using the Embedded Web Server 1. -
Page 106: Using Schedule Power Modes
User's Guide Using Schedule Power Modes Schedule Power Modes lets the user schedule when the printer goes into a reduced power state or into the Ready state. Using the Embedded Web Server 1. Open a Web browser, and then type the printer IP address in the address field. Notes: Print a network setup page or menu settings page, and then locate the IP address in the TCP/IP section. -
Page 107: 9-Securing The Printer
User's Guide 9—Securing the printer Using the security lock feature The printer is equipped with a security lock feature. Attach a security lock compatible with most laptop computers in the location shown to secure the printer in place. Statement of Volatility Your printer contains various types of memory that can store device and network settings, and user data. -
Page 108: Erasing Volatile Memory
User's Guide • The printer is being serviced by someone from outside your organization. • The printer is being removed from your premises for service. • The printer is being sold to another organization. Erasing volatile memory The volatile memory (RAM) installed in your printer requires a power source to retain information. To erase the buffered data, simply turn off the printer. - Page 109 User's Guide 3. Press until the printer control panel light sequence matches the light sequence in the following illustration, and then press - Blinking - Blinking The printer will restart several times during this process. Note: Wipe All Settings securely removes device settings, jobs, and passwords from the printer memory.
-
Page 110: 10-Maintaining The Printer
User's Guide 10—Maintaining the printer Warning—Potential Damage: Failure to maintain optimum printer performance periodically, or to replace parts and supplies, may cause damage to your printer. Cleaning the printer Cleaning the printer Note: You may need to perform this task after every few months. Warning—Potential Damage: Damage to the printer caused by improper handling is not covered by the printer warranty. -
Page 111: Estimated Number Of Remaining Pages
Extremely low print coverage for extended periods of time may negatively affect actual yield. Part name Part number For Europe Toner Cartridge 10K for ineo 3300P (Use and Return) A63V 10H Toner Cartridge 10K for ineo 3300P A63V 10J - 111 -... -
Page 112: Ordering An Imaging Unit
User's Guide Part name Part number For the Asia Pacific Toner Cartridge 10K for ineo 3300P (Use and Return) A63V 10K Toner Cartridge 10K for ineo 3300P A63V 10J Ordering an imaging unit Extremely low print coverage for extended periods of time may cause imaging unit parts to fail prior to exhaustion of toner from toner cartridge. -
Page 113: Replacing Supplies
User's Guide Replacing supplies Replacing the toner cartridge 1. Press the button on the right side of the printer, and then open the front door. 2. Pull the toner cartridge out using the handle. 3. Unpack the toner cartridge, and then remove all packing materials. 4. -
Page 114: Replacing The Imaging Unit
User's Guide 5. Insert the toner cartridge into the printer by aligning the side rails of the cartridge with the arrows on the side rails inside the printer. Warning—Potential Damage: Do not expose the imaging unit to direct light for more than 10 minutes. - Page 115 User's Guide 2. Pull the toner cartridge out using the handle. 3. Lift the blue handle, and then pull the imaging unit out of the printer. 4. Unpack the new imaging unit, and then shake it. - 115 -...
- Page 116 User's Guide 5. Remove all packing materials from the imaging unit. Warning—Potential Damage: Do not expose the imaging unit to direct light for more than 10 minutes. Extended exposure to light may cause print quality problems. Warning—Potential Damage: Do not touch the photoconductor drum. Doing so may affect the print quality of future print jobs.
-
Page 117: Moving The Printer
User's Guide Moving the printer Before moving the printer CAUTION—POTENTIAL INJURY: Before moving the printer, follow these guidelines to avoid personal injury or printer damage: • Turn the printer off using the power switch, and then unplug the power cord from the electrical outlet. •... -
Page 118: Shipping The Printer
User's Guide Shipping the printer When shipping the printer, use the original packaging. - 118 -... -
Page 119: 11-Managing The Printer
User's Guide 11—Managing the printer This chapter covers basic administrative support tasks using the Embedded Web Server. Finding advanced networking and administrator information This chapter covers basic administrative support tasks using the Embedded Web Server. For more advanced system support tasks, see the Networking Guide on the Printer Driver and Documentations CD. Viewing reports You can view some reports from the Embedded Web Server. - Page 120 User's Guide 1. Open a Web browser, and then type the printer IP address in the address field. Notes: Print a network setup page or menu settings page, and then locate the printer IP address in the TCP/IP section. The IP address appears as four sets of numbers separated by periods, such as 123.123.123.123.
-
Page 121: Copying Printer Settings To Other Printers
User's Guide Copying printer settings to other printers Note: This feature is available only in network printers. 1. Open a Web browser, and then type the printer IP address in the address field. Notes: Print a network setup page or menu settings page, and then locate the IP address in the TCP/IP section. -
Page 122: 12-Clearing Jams
User's Guide 12—Clearing jams Carefully select paper and specialty media and load them properly to avoid most jams. For more information, see Avoiding jams. If jams do occur, then follow the steps outlined in this chapter. Note: Jam recovery is set to Auto by default. The printer reprints jammed pages unless the memory required to hold the pages is needed for other printer tasks. - Page 123 User's Guide • Do not slide the paper into the tray. Load paper as shown in the illustration. • Make sure the guides in the tray or the multipurpose feeder are properly positioned and are not pressing tightly against the paper or envelopes. •...
-
Page 124: Accessing Jam Areas
User's Guide Accessing jam areas Open the doors and pull out the trays to access jam areas. Access area Description Standard bin Rear door Standard 250-sheet tray (Tray 1) Optional 250- or 550-sheet tray (Tray 2) Multipurpose feeder door Front door Notes: •... -
Page 125: [X]-Page Jam, Open Front Door. [20Y.xx]
User's Guide [x]-page jam, open front door. [20y.xx] - On - On If the printer control panel light sequence matches the light sequence in the preceding illustration, then press twice quickly to see the supplemental light sequence. - 125 -... - Page 126 User's Guide - On - On - On If the supplemental light sequence matches the light sequence in the preceding illustration, then do the following. CAUTION—HOT SURFACE: The inside of the printer might be hot. To reduce the risk of injury from a hot component, allow the surface to cool before touching it.
- Page 127 User's Guide Lift the blue handle, and then pull the imaging unit out of the printer. Warning—Potential Damage: Do not touch the photoconductor drum. Doing so may affect the print quality of future print jobs. Place the imaging unit aside on a flat, smooth surface. Warning—Potential Damage: Do not expose the imaging unit to direct light for more than 10 minutes.
- Page 128 User's Guide Firmly grasp the jammed paper on each side, and then gently pull it out. Note: Make sure all paper fragments are removed. Insert the imaging unit by aligning the arrows on the side rails of the unit with the arrows on the side rails inside the printer, and then insert the imaging unit into the printer.
-
Page 129: [X]-Page Jam, Open Rear Door. [20Y.xx]
User's Guide [x]-page jam, open rear door. [20y.xx] - On - On If the printer control panel light sequence matches the light sequence in the preceding illustration, then press twice quickly to see the supplemental light sequence. - On - On - On If the supplemental light sequence matches the light sequence in the preceding illustration, then do the following. - Page 130 User's Guide 1. Press the button on the right side of the printer, and then open the front door. 2. Gently pull down the rear door. CAUTION—HOT SURFACE: The inside of the printer might be hot. To reduce the risk of injury from a hot component, allow the surface to cool before touching it.
-
Page 131: [X]-Page Jam, Clear Standard Bin. [20Y.xx]
User's Guide 3. Firmly grasp the jammed paper on each side, and then gently pull it out. Note: Make sure all paper fragments are removed. 4. Close the rear and front doors. 5. From the printer control panel, press to clear the message and continue printing. [x]-page jam, clear standard bin. - Page 132 User's Guide - On - On - On If the supplemental light sequence matches the light sequence in the preceding illustration, then do the following. 1. Firmly grasp the jammed paper on each side, and then gently pull it out. Note: Make sure all paper fragments are removed.
-
Page 133: [X]-Page Jam, Remove Tray 1 To Clear Duplex. [23Y.xx]
User's Guide [x]-page jam, remove tray 1 to clear duplex. [23y.xx] - On - On If the printer control panel light sequence matches the light sequence in the preceding illustration, then press twice quickly to see the supplemental light sequence. Supplemental light sequences Light sequence - On... - Page 134 User's Guide Light sequence - On - Blinking - On - On - On - On If the supplemental light sequence matches any of the light sequences in the preceding illustrations, then do the following. CAUTION—HOT SURFACE: The inside of the printer might be hot. To reduce the risk of injury from a hot component, allow the surface to cool before touching it.
- Page 135 User's Guide 1. Pull out the tray completely. 2. Locate the blue lever, and then pull it down to release the jam. Note: If the jammed paper is not visible in the duplex area, then open the rear door, and then gently remove the jammed paper.
-
Page 136: [X]-Page Jam, Remove Tray [X]. [24Y.xx]
User's Guide 3. Firmly grasp the jammed paper on each side, and then gently pull it out. Note: Make sure all paper fragments are removed. 4. Insert the tray. 5. From the printer control panel, press to clear the message and continue printing. [x]-page jam, remove tray [x]. - Page 137 User's Guide Supplemental light sequences Light sequence - On - On - On - On - On - On - On - On If the supplemental light sequence matches any of the light sequences in the preceding illustrations, then do the following. - 137 -...
- Page 138 User's Guide 1. Pull out the tray completely. 2. Firmly grasp the jammed paper on each side, and then gently pull it out. Note: Make sure all paper fragments are removed. 3. Insert the tray. 4. From the printer control panel, press to clear the message and continue printing.
-
Page 139: [X]-Page Jam, Clear Manual Feeder. [250.Xx]
User's Guide [x]-page jam, clear manual feeder. [250.xx] - On - On If the printer control panel light sequence matches the light sequence in the preceding illustration, then press twice quickly to see the supplemental light sequence. - 139 -... - Page 140 User's Guide - On - On - On - On If the supplemental light sequence matches the light sequence in the preceding illustration, then do the following. 1. From the multipurpose feeder, firmly grasp the jammed paper on each side, and then gently pull it out. Note: Make sure all paper fragments are removed.
-
Page 141: 13-Troubleshooting
User's Guide 13—Troubleshooting Understanding the printer messages Toner cartridge messages Cartridge, imaging unit mismatch [41.xy] - On - On - Slowly blinking - Slowly blinking If the printer control panel light sequence matches the light sequence in the preceding illustration, then do the following: 1. - Page 142 User's Guide Cartridge low [88.xx] - On - On If the printer control panel light sequence matches the light sequence in the preceding illustration, then you may need to order a toner cartridge. If necessary, press on the printer control panel to continue printing.
- Page 143 User's Guide - Slowly blinking - On - On If the printer control panel light sequence matches the light sequence in the preceding illustration, then press on the printer control panel, if necessary, to continue printing. Cartridge very low [88.xy] - Blinking - On - On...
- Page 144 User's Guide Non-Printer Manufacturer cartridge, see User’s Guide [33.xy] - Blinking - Blinking - Blinking - On If the printer control panel light sequence matches the light sequence in the preceding illustration, then the printer has detected a non-Printer Manufacturer supply or part installed in the printer. Your printer is designed to function best with genuine Printer Manufacturer supplies and parts.
- Page 145 User's Guide Replace cartridge, 0 estimated pages remain [88.xy] - On - On If the printer control panel light sequence matches the light sequence in the preceding illustration, then press twice quickly to see the supplemental light sequence. - 145 -...
- Page 146 User's Guide - On - Blinking - On If the supplemental light sequence matches the light sequence in the preceding illustration, then replace the toner cartridge. For more information, see the instruction sheet that came with the supply or see the “Replacing supplies”...
- Page 147 User's Guide - On - Blinking - On If the supplemental light sequence matches the light sequence in the preceding illustration, then install a toner cartridge that matches the region number of the printer. x indicates the value of the printer region. y indicates the value of the cartridge region.
- Page 148 User's Guide Reinstall missing or unresponsive cartridge [31.xy] - On - On If the printer control panel light sequence matches the light sequence in the preceding illustration, then press twice quickly to see the supplemental light sequence. - On - On - On - 148 -...
- Page 149 User's Guide If the supplemental light sequence matches the light sequence in the preceding illustration, then try one or more of the following: • Remove the toner cartridge, and then reinstall it. • Remove the toner cartridge, and then install a new one. For more information, see the instruction sheet that came with the supply.
-
Page 150: Imaging Unit Messages
User's Guide Imaging unit messages Imaging unit low [84.xy] - Blinking - On If the printer control panel light sequence matches the light sequence in the preceding illustration, then you may need to order an imaging unit. If necessary, press on the printer control panel to continue printing. - Page 151 User's Guide - Slowly blinking - Blinking - On If the printer control panel light sequence matches the light sequence in the preceding illustration, then press on the printer control panel, if necessary, to continue printing. Imaging unit very low [84.xy] - Blinking - Blinking - On...
- Page 152 User's Guide Non-Printer Manufacturer imaging unit, see User’s Guide [33.xy] - Blinking - Blinking - Blinking - Blinking If the printer control panel light sequence matches the light sequence in the preceding illustration, then the printer has detected a non-Printer Manufacturer supply or part installed in the printer. Your printer is designed to function best with genuine Printer Manufacturer supplies and parts.
- Page 153 User's Guide Replace imaging unit, 0 estimated pages remain [84.xy] - On - Blinking - On If the printer control panel light sequence matches the light sequence in the preceding illustration, then replace the imaging unit. For more information, see the instruction sheet that came with the supply. Note: If you do not have a replacement imaging unit, then see the “Ordering supplies”...
- Page 154 User's Guide - On - Blinking If the printer control panel light sequence matches the light sequence in the preceding illustration, then press twice quickly to see the supplemental light sequence. - On - On - Blinking If the supplemental light sequence matches the light sequence in the preceding illustration, then try one or more of the following: •...
- Page 155 User's Guide Replace unsupported imaging unit [32.xy] - On - On - On - Blinking If the printer control panel light sequence matches the light sequence in the preceding illustration, then remove the imaging unit, and then install a supported one. For more information, see the instruction sheet that came with the supply.
-
Page 156: Paper Loading Messages
User's Guide Paper loading messages Change [paper source] to [custom type name], load [orientation] - Blinking - On If the printer control panel light sequence matches the light sequence in the preceding illustration, then try one or more of the following: •... - Page 157 User's Guide Change [paper source] to [custom string] load [orientation] - Blinking - On If the printer control panel light sequence matches the light sequence in the preceding illustration, then try one or more of the following: • Load the tray or feeder with the correct size and type of paper, and then press on the printer control panel to continue printing.
- Page 158 User's Guide Change [paper source] to [paper size] load [orientation] - Blinking - On If the printer control panel light sequence matches the light sequence in the preceding illustration, then try one or more of the following: • Load the tray or feeder with the correct size and type of paper, and then press on the printer control panel to continue printing.
- Page 159 User's Guide Change [paper source] to [paper type] [paper size] load [orientation] - Blinking - On If the printer control panel light sequence matches the light sequence in the preceding illustration, then try one or more of the following: • Load the tray or feeder with the correct size and type of paper, and then press on the printer control panel to continue printing.
- Page 160 User's Guide Incorrect paper size, open [paper source] [34] - On - On If the printer control panel light sequence matches the light sequence in the preceding illustration, then press twice quickly to see the supplemental light sequence. - 160 -...
- Page 161 User's Guide - On - On - On - On If the supplemental light sequence matches the light sequence in the preceding illustration, then try one or more of the following: • Load the correct size of paper. • From the printer control panel, press to clear the light sequence and print using a different tray.
- Page 162 User's Guide Load [paper source] with [custom type name] [orientation] - On - On If the printer control panel light sequence matches the light sequence in the preceding illustration, then try one or more of the following: • Load the tray or feeder with the correct size and type of paper. •...
- Page 163 User's Guide Load [paper source] with [custom type string] [orientation] - On - On If the printer control panel light sequence matches the light sequence in the preceding illustration, then try one or more of the following: • Load the tray or feeder with the correct size and type of paper. •...
- Page 164 User's Guide Load [paper source] with [paper size] [orientation] - On - On If the printer control panel light sequence matches the light sequence in the preceding illustration, then try one or more of the following: • Load the tray or feeder with the correct size of paper. •...
- Page 165 User's Guide Load [paper source] with [paper type] [paper size] [orientation] - On - On If the printer control panel light sequence matches the light sequence in the preceding illustration, then try one or more of the following: • Load the tray or feeder with the correct size and type of paper. •...
- Page 166 User's Guide Load Manual Feeder with [custom type name] [orientation] - On - On If the printer control panel light sequence matches the light sequence in the preceding illustration, then try one or more of the following: • Load the multipurpose feeder with the correct size and type of paper. •...
- Page 167 User's Guide Load Manual Feeder with [custom type string] [orientation] - On - On If the printer control panel light sequence matches the light sequence in the preceding illustration, then try one or more of the following: • Load the multipurpose feeder with the correct size and type of paper. •...
- Page 168 User's Guide Load Manual Feeder with [paper size] [orientation] - On - On If the printer control panel light sequence matches the light sequence in the preceding illustration, then try one or more of the following: • Load the feeder with the correct size and type of paper. •...
- Page 169 User's Guide Load Manual Feeder with [paper type] [paper size] [orientation] - On - On If the printer control panel light sequence matches the light sequence in the preceding illustration, then try one or more of the following: • Load the multipurpose feeder with the correct size and type of paper. •...
-
Page 170: Printer Communication Error Messages
User's Guide Remove paper from standard output bin - Blinking If the printer control panel light sequence matches the light sequence in the preceding illustration, then do the following: 1. Remove the paper stack from the standard output bin. 2. From the printer control panel, press to continue printing. - Page 171 User's Guide - On - On If the printer control panel light sequence matches the light sequence in the preceding illustration, then press twice quickly to see the supplemental light sequence. - On - Blinking - On If the supplemental light sequence matches the light sequence in the preceding illustration, then try one or more of the following: •...
- Page 172 User's Guide Standard parallel port disabled [56] - On - On If the printer control panel light sequence matches the light sequence in the preceding illustration, then press twice quickly to see the supplemental light sequence. - On - Slowly blinking - Slowly blinking - On - 172 -...
- Page 173 User's Guide If the supplemental light sequence matches the light sequence in the preceding illustration, then try one or more of the following: • From the printer control panel, press to continue printing. Note: The printer discards any data received through the parallel port. •...
- Page 174 User's Guide If the printer control panel light sequence matches the light sequence in the preceding illustration, then press twice quickly to see the supplemental light sequence. - On - On - On If the supplemental light sequence matches the light sequence in the preceding illustration, then try one or more of the following: •...
- Page 175 User's Guide - On - On If the printer control panel light sequence matches the light sequence in the preceding illustration, then press twice quickly to see the supplemental light sequence. - On - Blinking - Blinking - On If the supplemental light sequence matches the light sequence in the preceding illustration, then try one or more of the following: •...
-
Page 176: Insufficient Memory Error Messages
User's Guide 2. Click Settings >Network/Ports >Standard USB. 3. In the USB Buffer field, enter 2. 4. Click Submit. If the printer is connected to a computer by a USB cable, then access the Standard USB menu through the Local Printer Settings Utility for Windows or through Printer Settings for Macintosh. Insufficient memory error messages Insufficient memory to collate job [37] - On... - Page 177 User's Guide - On - On - On If the supplemental light sequence matches the light sequence in the preceding illustration, then try one or more of the following: • From the printer control panel, press to print the portion of the job already stored and begin collating the rest of the print job.
- Page 178 User's Guide - On - On If the printer control panel light sequence matches the light sequence in the preceding illustration, then press twice quickly to see the supplemental light sequence. - On - Blinking - On If the supplemental light sequence matches the light sequence in the preceding illustration, then press on the printer control panel to clear the light sequence.
- Page 179 User's Guide Memory full [38] - On - On If the printer control panel light sequence matches the light sequence in the preceding illustration, then press twice quickly to see the supplemental light sequence. - 179 -...
-
Page 180: Miscellaneous Messages
User's Guide - On - On - On - On If the supplemental light sequence matches the light sequence in the preceding illustration, then try one or more of the following: • From the printer control panel, press to continue printing. A data loss will occur. •... - Page 181 User's Guide Complex page, some data may not have printed [39] - On - On If the printer control panel light sequence matches the light sequence in the preceding illustration, then press twice quickly to see the supplemental light sequence. - On - On - On...
- Page 182 User's Guide If the supplemental light sequence matches the light sequence in the preceding illustration, then try one or more of the following: • From the printer control panel, press to continue printing. A data loss may occur. • From the printer control panel, press to cancel the print job.
-
Page 183: Service Error
User's Guide Service error - Blinking - Blinking - Blinking - Blinking - Blinking - Blinking If the printer control panel light sequence matches the light sequence in the preceding illustration, then turn off the printer, and then turn it back on. If the lights are still blinking after 10 seconds, then the printer may need to be serviced. - Page 184 User's Guide Too many trays attached [58] - On - On If the printer control panel light sequence matches the light sequence in the preceding illustration, then press twice quickly to see the supplemental light sequence. - On - On - On - On - 184 -...
- Page 185 User's Guide If the supplemental light sequence matches the light sequence in the preceding illustration, then do the following: 1. Turn off the printer. 2. Unplug the power cord from the electrical outlet. Note: Optional trays lock together when stacked. Remove stacked trays one at a time from the top to the bottom.
-
Page 186: Solving Printer Problems
User's Guide Solving printer problems • Basic printer problems • Option problems • Paper feed problems Basic printer problems The printer is not responding Action Step 1 Go to step 2. Turn on the printer. Make sure the printer is turned on. Is the printer turned on? Step 2 Press the Sleep button to wake the... - Page 187 User's Guide Action Step 5 Go to step 6. Make sure to match the following: Check if the cables connecting the printer and the computer are inserted in the • The USB symbol on the correct ports. cable with the USB symbol on the printer •...
- Page 188 User's Guide Action Step 9 Go to step 10. Turn off the printer, remove all packing materials, then reinstall Make sure to install all hardware options the hardware options, and then properly and remove any packing turn on the printer. material.
-
Page 189: Option Problems
User's Guide Option problems Cannot detect internal option Action Step 1 The problem is Go to step 2. solved. Turn off the printer, then wait for about 10 seconds, and then turn on the printer. Does the internal option operate correctly? Step 2 Go to step 3. -
Page 190: Tray Problems
User's Guide Tray problems Action Step 1 The problem is solved. Go to step 2. Open the tray and do one or more of the following: Check for paper jams or misfeeds. Check if the paper size indicators on the paper guides are aligned with the paper size indicators on the tray. - Page 191 User's Guide Action Step 3 Go to step 4. Reinstall the tray. For more information, see the setup Check if the tray is installed. documentation that came with the tray. Print a menu settings page, and then check if the tray is listed in the Installed Options list.
-
Page 192: Paper Feed Problems
User's Guide Paper feed problems Paper frequently jams Action Step 1 Go to step 2. The problem is solved. Pull out the tray, and then do one or more of the following: Make sure paper lies flat in the tray. Check if the paper size indicators on the paper guides are aligned with the paper size indicators on the tray. -
Page 193: Paper Jam Message Remains After Jam Is Cleared
User's Guide Paper jam message remains after jam is cleared Action Open front door and remove all trays. Contact technical support. The problem is solved. Clear any jammed pages. Note: Make sure all paper fragments are removed. Press to clear the message and continue printing. Does the paper jam message remain? Jammed pages are not reprinted Actions... -
Page 194: Solving Print Problems
User's Guide Solving print problems Printing problems Print jobs do not print Action Step 1 The problem Go to step 2. is solved. From the document you are trying to print, open the Print dialog and check if you have selected the correct printer. Note: If the printer is not the default printer, then you must select the printer for each document that you want to print. - Page 195 User's Guide Action Step 3 The problem Go to step 4. is solved. If printer control panel light sequence indicates an error, then clear the message. For more information on printer control panel error light sequences, see Understanding the printer messages.
-
Page 196: Printing Slows Down
User's Guide Printing slows down Notes: • When printing using narrow paper, the printer prints at a reduced speed to prevent damage to the fuser. • The printer speed may be reduced when printing for long periods of time, or printing at elevated temperatures. - Page 197 User's Guide Action Step 3 Install additional The problem printer memory. is solved. From the Eco-Mode menu, change the environmental settings. To access the Eco-Mode menu, do either of the following: • If the printer is on a network, then open a Web browser and type the printer IP address in the address field.
-
Page 198: Job Prints From The Wrong Tray Or On The Wrong Paper
User's Guide Job prints from the wrong tray or on the wrong paper Actions Step 1 The problem Go to step 2. is solved. Check if you are printing on paper that is supported by the tray. Resend the print job. Does the job print from the correct tray or on the correct paper? Step 2 The problem... -
Page 199: Incorrect Characters Print
User's Guide Incorrect characters print Action Step 1 Turn off the printer, and then turn it Go to step 2. back on to deactivate Hex Trace Check if the printer control panel light sequence matches mode. the light sequence in the following illustration: Hex Trace - Slowly blinking Do both light sequences match? -
Page 200: Tray Linking Does Not Work
User's Guide Tray linking does not work Note: The trays and the multipurpose feeder do not automatically detect the paper size. You must set the size from the Paper Size/Type menu. Action From the Paper menu, set the paper size and type to match the paper The problem Contact loaded in the trays to be linked. -
Page 201: Large Jobs Do Not Collate
User's Guide Large jobs do not collate Action Step 1 The problem Go to step 2. is solved. From the Finishing menu, set Collate to On. To access the Finishing menu, do either of the following: If the printer is on a network, then open a Web browser and type the printer IP address in the address field. -
Page 202: Print Quality Problems
User's Guide Unexpected page breaks occur Action Step 1 The problem Go to step 2. is solved. From the Setup menu, adjust the print timeout setting. To access the Setup menu, do either of the following: • If the printer is on a network, then access the Embedded Web Server: Open a Web browser, and then type the printer IP address in the address field. - Page 203 User's Guide Action Step 1 Go to step 2. The problem is solved. Check if there is packing material left on the imaging unit. Remove the toner cartridge, and then the imaging unit. Check if the packing material is properly removed from the imaging unit. Warning—Potential Damage: Do not expose the imaging unit to direct light for more than 10 minutes.
-
Page 204: Clipped Pages Or Images
User's Guide Clipped pages or images Action Step 1 Go to step 2. The problem is solved. Move the width and length guides in the tray to the correct positions for the paper loaded. Resend the print job. Is the page or image clipped? Step 2 Go to step 3. -
Page 205: Shadow Images Appear On Prints
User's Guide Action Step 3 Go to step 4. The problem is solved. Depending on your operating system, specify the paper size and type from Printing Preferences or the Print dialog. Resend the print job. Is the page or image clipped? Step 4 Contact The problem is solved. - Page 206 User's Guide Action Step 1 Go to step 2. Load paper with the correct paper type and weight in the tray. Check if the paper loaded in the tray has the correct paper type and weight. Is paper with the correct paper type and weight loaded in the tray? Step 2 Go to step 3.
-
Page 207: Gray Background On Prints
User's Guide Action Step 4 Contact technical support. The problem is solved. Replace the imaging unit, and then resend the print job. Do shadow images still appear on the prints? Gray background on prints Action Step 1 The problem Go to step 2. is solved. -
Page 208: Incorrect Margins On Prints
User's Guide Action Step 2 The problem Contact is solved. technical Reinstall the imaging unit and the toner cartridge. support. Remove the toner cartridge. Remove the imaging unit. Warning—Potential Damage: Do not expose the imaging unit to direct light for more than 10 minutes. Extended exposure to light may cause print quality problems. -
Page 209: Paper Curl
User's Guide Action Step 2 Go to step 3. Do one or more of the following: From the Paper menu, check if the paper size setting matches • Change the paper size the paper loaded in the tray. To access the Paper menu, do setting to match the paper either of the following: loaded in the tray. - Page 210 User's Guide Action Step 2 Go to step 3. Change the paper type and weight to match the paper From the Paper menu, set the paper size and type to match the loaded in the tray. paper loaded in the tray. To access the Paper menu, try one or more of the following: •...
-
Page 211: Print Irregularities
User's Guide Print irregularities Action Step 1 Go to step 2. The problem is solved. Move the width and length guides in the tray to the correct positions for the size of the paper loaded in the tray. Resend the print job. Do print irregularities still appear? Step 2 Go to step 3. - Page 212 User's Guide Action Step 3 Go to step 4. The problem is solved. Depending on your operating system, specify the paper type and weight from Printing Preferences or the Print dialog. Resend the print job. Do print irregularities still appear? Step 4 From the Paper Texture menu, change the Go to step 5.
-
Page 213: Repeating Defects Appear On Prints
User's Guide Repeating defects appear on prints Action Step 1 Go to step 2. Check if the distance between the defects equal to 80 mm Measure the distance between the (3.15 in.) defects. Take note of the distance, and Check for a distance between then contact technical support the defects that equals:... -
Page 214: Print Is Too Dark
User's Guide Print is too dark Action Step 1 Go to step 2. The problem is solved. From the Quality menu, reduce the toner darkness. To access the Quality menu, do either of the following: If the printer is on a network, then open a Web browser and type the printer IP address in the address field. - Page 215 User's Guide Action Step 2 Go to step 3. Change the paper type, texture, and From the Paper Menu, check if the paper weight to match the type, texture, and weight match the paper paper loaded in the loaded in the tray. To access the Paper tray.
- Page 216 User's Guide Action Step 4 From the Paper Texture menu, change Go to step 5. the texture settings to match the paper Check if the paper loaded in the tray has you are printing on. To access the Paper texture or rough finishes. Texture menu, do either of the following: •...
-
Page 217: Print Is Too Light
User's Guide Print is too light Action Step 1 Go to step 2. The problem is solved. From the Quality menu, increase the toner darkness. To access the Quality menu, do either of the following: If the printer is on a network, then open a Web browser and type the printer IP address in the address... - Page 218 User's Guide Action Step 2 Go to step 3. Change the paper type, texture, and weight to match the paper loaded in From the Paper Menu, check if the tray. the paper type, texture, and weight match the paper loaded in the tray.
- Page 219 User's Guide Action Step 4 From the Paper Texture menu, Go to step 5. change the texture settings to match Make sure that the paper has no the paper you are printing on. To texture or rough finishes. access the Paper Texture menu, do either of the following: •...
- Page 220 User's Guide Action Step 6 Go to step 7. The problem is solved. Shake the imaging unit to redistribute the toner. Remove the toner cartridge, and then the imaging unit. Firmly shake the imaging unit. Warning—Potential Damage: Do not expose the imaging unit to direct light for more than 10 minutes.
-
Page 221: Skewed Print
User's Guide Skewed print Action Step 1 Go to step 2. The problem is solved. Move the width and length guides in the tray to the correct positions for the size of the paper loaded. Resend the print job. Is the print still skewed? Step 2 Contact technical... -
Page 222: Printer Is Printing Solid Black Pages
User's Guide Printer is printing solid black pages Action Step 1 Go to step 2. The problem is solved. Reinstall the imaging unit. Remove the toner cartridge, and then the imaging unit. Warning—Potential Damage: Do not expose the imaging unit to direct light for more than 10 minutes. -
Page 223: Transparency Print Quality Is Poor
User's Guide Transparency print quality is poor Action Step 1 Go to step 2. Set the paper type to Transparency. From the Paper Menu, set the paper type to match the paper loaded in the tray. To access the Paper Menu, do either of the following: •... -
Page 224: Streaked Horizontal Lines Appear On Prints
User's Guide Streaked horizontal lines appear on prints Action Step 1 Go to step 2. The problem is solved. Depending on your operating system, specify the tray or feeder from Printing Preferences or the Print dialog. Resend the print job. Do streaked horizontal lines still appear on prints? Step 2 Go to step 3. - Page 225 User's Guide Action Step 3 Go to step 4. The problem is solved. Load paper from a fresh package. Note: Paper absorbs moisture due to high humidity. Store paper in its original wrapper until you use it. Resend the print job. Do streaked horizontal lines still appear on prints? Step 4 Go to step 5.
-
Page 226: Streaked Vertical Lines Appear On Prints
User's Guide Streaked vertical lines appear on prints Action Step 1 Go to step 2. The problem is solved. Depending on your operating system, specify the paper type, texture, and weight from Printing Preferences or the Print dialog. Resend the print job. Do streaked vertical lines still appear on prints? Step 2 Go to step 3. - Page 227 User's Guide Action Step 4 Go to step 5. The problem is solved. Reinstall the imaging unit. Remove the toner cartridge, and then the imaging unit. Warning—Potential Damage: Do not expose the imaging unit to direct light for more than 10 minutes. Extended exposure to light may cause print quality problems.
-
Page 228: Horizontal Voids Appear On Prints
User's Guide Horizontal voids appear on prints Action Step 1 Go to step 2. The problem is solved. Make sure your software program is using a correct fill pattern. Resend the print job. Do horizontal voids appear on prints? Step 2 Go to step 3. -
Page 229: Vertical Voids Appear On Prints
User's Guide Action Step 4 Contact The problem technical is solved. Replace the imaging unit, and then resend the print job. support. Do horizontal voids appear on prints? Vertical voids appear on prints Action Step 1 Go to step 2. The problem is solved. - Page 230 User's Guide Action Step 2 Go to step 3. The problem is solved. From the Paper Menu, set the paper type and weight to match the paper loaded in the tray. To access the Paper Menu, do either of the following: If the printer is on a network, then open a Web browser and type the printer...
- Page 231 User's Guide Action Step 4 Go to step 5. The problem is solved. Redistribute the toner in the imaging unit. Remove the toner cartridge, and then the imaging unit. Firmly shake the imaging unit. Warning—Potential Damage: Do not expose the imaging unit to direct light for more than 10 minutes.
-
Page 232: Toner Specks Appear On Prints
User's Guide Toner specks appear on prints Action Replace the imaging unit, and then resend the print job. Contact technical support. The problem is solved. Do toner specks appear on prints? Toner rubs off Action Step 1 Go to step 2. Change the paper type and weight settings to match the paper loaded in From the Paper Menu, check the... -
Page 233: Embedded Web Server Does Not Open
User's Guide Action Step 2 Change the texture settings in the Contact technical support. Paper menu. Check if you are printing on paper with texture or rough finishes. Are you printing on textured or rough paper? Uneven print density Action Replace the imaging unit, and then resend the print job. - Page 234 User's Guide Action Step 2 Go to step 3. problem is Make sure the printer IP address is correct. solved. View the printer IP address: From the TCP/IP section in the Network/Ports menu By printing a network setup page or menu settings page, and then finding the TCP/IP section Note: An IP address appears as four sets of numbers separated by periods, such as 123.123.123.123.
-
Page 235: Contacting Technical Support
User's Guide Action Step 4 Go to step 5. problem is Check if the cable connections to the printer and print server are secure. solved. Connect the cables properly. For more information, see the setup documentation that came with the printer. Open a Web browser, and then type the printer IP address. -
Page 236: 14-Notices
Trademarks DEVELOP and ineo are registered trademarks or trademarks of Konica Minolta Business Solutions Europe GmbH. Mac and the Mac logo are trademarks of Apple Inc., registered in the U.S. and other countries. -
Page 237: Software License Agreement
User's Guide Software License Agreement This package contains the following materials provided by KONICA MINOLTA, INC. (KM) software included as part of the printing system (“Printing Software”), the digitally-encoded machine-readable outline data encoded in the special format and in the encrypted form (“Font Programs”), other software which runs on a computer system for use in conjunction with the Printing Software (“Host Software”), and related explanatory written materials (“Documentation”). -
Page 238: Noise Emission Levels
User's Guide 10. IN NO EVENT WILL KM OR ITS LICENSOR BE LIABLE TO YOU FOR ANY CONSEQUENTIAL, INCIDENTAL INDIRECT, PUNITIVE OR SPECIAL DAMAGES, INCLUDING ANY LOST PROFITS OR LOST SAVING, EVEN IF KM HAS BEEN ADVISED OF THE POSSIBILITY OF SUCH DAMAGES, OR FOR ANY CLAIM BY ANY THIRD PARTY. -
Page 239: For Eu Member States Only
User's Guide For EU member states only This symbol means: Do not dispose of this product together with your household waste! Please contact the Local Authority for appropriate disposal instructions. In the case of a new device being purchased, the used one can also be given to our dealer for appropriate disposal. Recycling of this product will help to conserve natural resources and prevent potential negative consequences for the environment and human health caused by inappropriate waste handling. -
Page 240: Temperature Information
User's Guide Temperature information Ambient temperature 15.6°C to 32.2°C (60°F to 90°F) Shipping and storage temperature -20°C to 40°C (-4°F to 104°F) Power consumption Product power consumption The following table documents the power consumption characteristics of the product. Note: Some modes may not apply to your product. Mode Description Power consumption... -
Page 241: Sleep Mode
User's Guide Sleep Mode This product is designed with an energy-saving mode called Sleep Mode. The Sleep Mode saves energy by lowering power consumption during extended periods of inactivity. The Sleep Mode is automatically engaged after this product is not used for a specified period of time, called the Sleep Mode Timeout. Factory default Sleep Mode Timeout for this product (in minutes): 30 min. - Page 242 Konica Minolta Business Solutions Europe GmbH Europaallee 17 D-30855 Langenhagen Germany A63P-9566-01A Phone +49 (0)511 7404-0...
Need help?
Do you have a question about the ineo 3300P and is the answer not in the manual?
Questions and answers