
Related Manuals for TIPTEL 309


Summary of Contents for TIPTEL 309
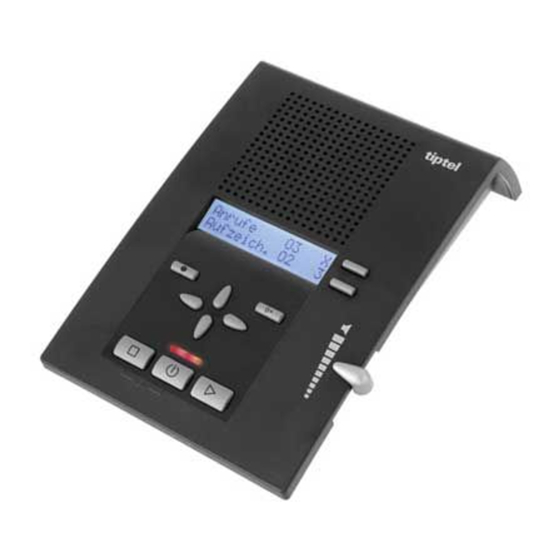
- Page 1 Operating instructions (en) Professional answering machine with caller ID and excellent recording quality tiptel 309 tiptel...
-
Page 3: Table Of Contents
Contents Contents Contents ..................3 Safety notices ................5 Controls ..................6 Assignment of keys ..............7 Service ..................9 Scope of delivery ..............9 Setting up ................9 Connecting ................9 Announcements ................ 12 General ................. 12 Examples of announcements ..........12 Recording an announcement .......... - Page 4 Contents Settings ..................28 Setup options (functions) ............. 28 Setup menu ................29 Appendix ................... 31 Service .................. 31 Guarantee ................31 CE sign ................. 32 Ecological information ............33 Troubleshooting ..............34 Default setting ............... 35 Technical specifications ............36 Index ..................
-
Page 5: Safety Notices
Never open up the device yourself. Do not allow the plug con- tacts to touch sharp or metallic objects. Only clean the tiptel 309 with a soft, moist cloth. Do not use chemicals or abrasive cleaners. Protect the device from damp, dust, liquids and vapours. -
Page 6: Controls
Controls Controls... -
Page 7: Assignment Of Keys
Assignment of keys Assignment of keys Playback: Starts the playback of new messages which you have not yet listened to. Press and hold "Playback" to repeat the last 3 seconds of the message. Playback pressed for 2 seconds: Starts playback of all messages. - Page 8 Assignment of keys Select: Press this key to select input fields and functions which appear in the display next to the corresponding key. Stop and On/Off pressed at the same time: Opens the setup menu.
-
Page 9: Service
Power supply unit 5V / 1A / DC Operating instructions Setting up Your tiptel 309 has been manufactured for normal conditions of use. Solvents in furniture lacquers, wood oils and paint preservatives may corrode the bases of the device. Bases altered in this way may then leave stains on furniture. - Page 10 Service Socket with several slots Plug the existing telephone into the socket (slot F). Insert the power supply unit with the small connector into the "POWER" jack and then insert the power supply unit into a 230V wall socket. Insert the TAE adaptor into a free end of the connection cable. Insert the second free end of the connection cable into the "LINE"...
- Page 11 Service Socket with only one slot Insert the power supply unit with the small connector into the "POWER" jack and then insert the power supply unit into a 230V wall socket. Disconnect the existing telephone cable from the telephone and insert the freed-up connector into the "LINE"...
-
Page 12: Announcements
Announcements Announcements General Your tiptel 309 allows you to make two different announcements (announcement 1 & 2) and also has a built-in internal announcement (message 3). You can toggle between announcements using the lower "Select" key. Announcement 3 cannot be altered. An an- nouncement can be between two seconds and three minutes long. -
Page 13: Recording An Announcement
Announcements Recording an announcement Press "Select" to choose The announcement will appear at your desired announcement. the bottom-right of the display. Press and hold "Announce- Wait until you hear a short beep. ment". Then "Recording.." will appear on the display. Start speaking (speak into The display will show how many the microphone from a dis-... -
Page 14: Checking Announcements
Announcements If you record announcement 2 as a non-recordable message, your tiptel 309 will automatically switch to this message if the recording memory is full. Checking announcements Press "Select" to choose The announcement will appear at your desired announcement. -
Page 15: Switching On And Off
Switching on and off Switching on and off Make sure there is enough recording memory available. You can delete all messages or individual ones, whichever the case may be. Press "Select" to choose The announcement will appear at your desired announcement. the bottom-right of the display. - Page 16 The LED will flash for as long as there are messages which have not yet been listened If the recording memory is full, your tiptel 309 will automatically switch to announcement 2 if this is a non-recordable an- nouncement.
-
Page 17: Playing Back And Deleting Messages
Playing back and deleting messages Playing back and deleting messages Playing back new messages Press "Playback". Playback of the new messages which you have not yet listened to will begin. The message's se- quence number and the phone number of the caller of the current message will appear on the dis- play. -
Page 18: Playing Back Specific Messages
Playing back and deleting messages Playing back specific messages Press "Control" (up). The list of messages will open. Search for the message that you want to play back with the "Control" keys (up/down). To play back the chosen Playback will begin. message: Press "Playback". -
Page 19: Search (Skip)
Playing back and deleting messages Search (Skip) Press the "Control" left/right The current message will stop keys during playback. and will replay or skip to the next one. Deleting individual messages Press the "Select" key next to The current message will be de- the "delete"... -
Page 20: Personal Information (Dictation)
Personal information (dictation) Personal information (dictation) You can record your personal information into the in-built micro- phone. A recording must be at least 2 seconds long. Press "Record". Wait until you hear a short beep. Then "Recording" will appear on the display. -
Page 21: Caller List
Caller list Caller list General The numbers of the last 30 incoming calls will be saved, specifying the day of the week and time of day that that the call was received. If the caller's phone number was shown on the device during the call, this number will still be shown in the caller list. - Page 22 Caller list If the name of the caller is shown, you can switch to the phone number (and back again) by pressing the "Select" key next to the caller's name.
-
Page 23: Message Function
Message function The message function allows a caller who knows the message code to leave a message, even when your tiptel 309 is set to play a non- recordable announcement. When your tiptel 309 is set to play a re- cordable announcement, the message function gives the caller the possibility to skip past the announcement. -
Page 24: Remote Operation
Remote operation Remote operation You can operate you tiptel remotely from anywhere in the world us- ing the numeric keys on a touch tone (MFV) telephone. To operate your tiptel 309 remotely, you will need your personal remote access code. Instructions on how to individually configure the remote ac- cess code can be found in the "Settings"... -
Page 25: Remote Operating Functions
If 180 seconds have passed since the last key input, a voice on your tiptel 309 will say "please confirm", to check if you are still on the line. You must answer this confirmation request by pressing any key (e.g. ... - Page 26 Altering your announcement Altering your announcement Your tiptel 309 will prompt you to Press "9" then "1" or "2", de- speak. ... pending on which announce- ment you would like to change.
-
Page 27: Switching On The Device Remotely
Remote operation Switching off the device remotely Switching off the device Your tiptel 309 will disconnect and Press "*" then "0". will not accept any further incom- ing calls. Switching on the device remotely Call your tiptel 309 from an- After 50 seconds, you will hear a other phone. -
Page 28: Settings
Rings ......Between 1 and 9 rings. Here you can set the number of times your tiptel 309 will ring before diverting the call to the answer- ing machine. -
Page 29: Setup Menu
Settings Remote access .... Yes or No. If you choose "Yes" and there are new messages, your tiptel 309 will an- swer a call after one ring (regardless of how many rings you have set it to). If there are no new messages, the device will only answer a call after the set amount of rings. - Page 30 Settings Press the "Select" key next to The display will show the current the setting you would like to setting. change until the desired set- ting appears on the display. If you are required to enter The cursor will blink. Move the digits, press the "Select"...
-
Page 31: Appendix
Your contact for services arising from guarantee obligations is the authorised dealer where you bought the device. TIPTEL will grant a guarantee of 2 years from the date of handover for the material and for the manufacturing of the telecommunications terminal unit. -
Page 32: Ce Sign
Please do not damage or remove this seal because otherwise, your guarantee will expire. The General Terms and Conditions of TIPTEL, which are part of the contract for a dealer, shall also apply. In the event of a complaint,... -
Page 33: Ecological Information
The packaging materials do not consist of plastics but of partially recycled cardboard and paper. If you do not have further use of your TIPTEL device, TIPTEL will take back the device without any charge. The device will be properly... -
Page 34: Troubleshooting
Appendix Troubleshooting The device cannot function during a power failure. The internal clock will pause. All other settings will however be saved, so when the power supply is restored the device's settings will remain just as they were before. All you have to do is reset the clock (see p. 28). Please try first of all to narrow down the cause and rectify the prob- lem with the aid of the following table. -
Page 35: Default Setting
Default setting You will see the tiptel 309's factory settings in the following list. You can change these presets individually. You can return to the default setting at any time by going to the setup menu and selecting "basic setting". -
Page 36: Technical Specifications
Appendix Technical specifications Dimensions (W x H x D) tiptel 309 140 x 50 x 210 mm Power supply unit 25 x 50 x 65 mm Weight tiptel 309 350 g Power supply unit 80 g Operating voltage Power supply unit... -
Page 37: Index
Index Index Assignment of keys ....7 Message code ....23, 29 Message function ....23 Message length ....28 Basic setting ......29 Browsing the caller list ..21 Network clock ....... 28 Non-recordable Caller ID ......15, 17 announcement ..... - Page 38 Index Switching on ......15 Switching on remotely ..27 Safety notices ......5 Scope of delivery ....9 Search (Skip) ....19, 25 TAE adaptor ......9 Service ........31 Talking clock ......28 Setting up ......5, 9 Technical specifications ..
- Page 44 Tiptel.com GmbH Business Solutions Halskestraße 1 D - 40880 Ratingen Tel.: 0900 100 – 84 78 35* Vanity Tel.: 0900 100 – TIPTEL* *(1.49 euros/min. from Deutsche Telekom landlines, Internet: www.tiptel.de varying mobile network charges possible) International: Internet: www.tiptel.com Tiptel GmbH...
Need help?
Do you have a question about the 309 and is the answer not in the manual?
Questions and answers