Table of Contents

Related Manuals for NTI SERIMUX-SECURE-x


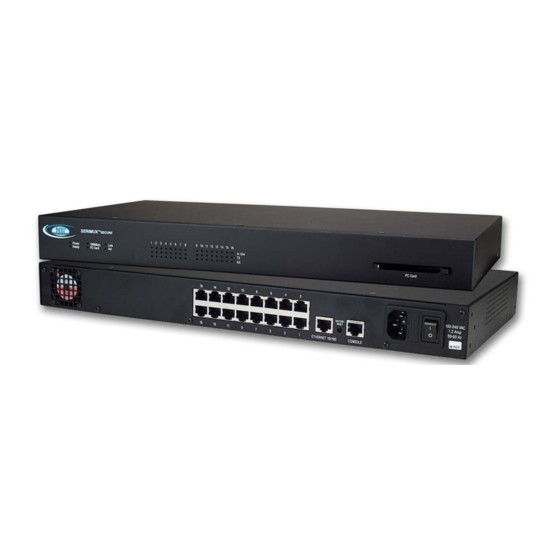
Summary of Contents for NTI SERIMUX-SECURE-x
- Page 1 NETWORK 1275 Danner Dr Tel:330-562-7070 TECHNOLOGIES Aurora, OH 44202 Fax:330-562-1999 INCORPORATED www.nti1.com ® SERIMUX SECURE SERIMUX-SECURE-x Secure Access Console Switch Installation and Operation Manual MAN008 Rev 2/10/2004...
-
Page 2: Warranty Information
Warranty Information The warranty period on this product (parts and labor) is one (1) year from the date of purchase. Please contact Network Technologies Inc at (800) 742-8324 (800-RGB-TECH) or (330) 562-7070 or visit our website at http://www.nti1.com information regarding repairs and/or returns. A return authorization number is required for all repairs/returns. COPYRIGHT Copyright ©... -
Page 3: Table Of Contents
TABLE OF CONTENTS Introduction...................................... 1 SERIMUX Model Support ................................1 Key Features ....................................1 Materials ......................................1 User Groups ....................................1 Root and Admin Usernames and Passwords ..........................1 Adding Port Administrators and Users ............................2 Features and Functions ................................. 2 Ways to Configure the SERIMUX .............................. - Page 4 Enable SERIMUX Memory............................... 22 Configuring System Logging Services ............................22 Viewing System Logs................................23 Port Logging ....................................23 Using the Configuration Menu ..............................24 System Logging ..................................24 Alerts and Notifications................................. 25 Introduction ....................................25 Configuring SMTP Alerts ................................26 SNMP Information..................................
- Page 5 Web Interface................................... 48 Resetting Factory Defaults............................... 48 Setting Date and Time ................................. 49 Configuring A Device Name................................. 50 Adding, Editing, and Removing Users ............................50 Using the Configuration Menu ..............................51 Firmware Upgrade ................................... 51 Restoring Factory Defaults ..............................51 Setting Date and Time ................................
- Page 6 Figure 28- Port logging menu ................................24 Figure 29- System status logging setup via Configuration menu ..................... 25 Figure 30- SERIMUX used for system alerts and notifications ......................25 Figure 31- SMTP configuration menu .............................. 26 Figure 32- SMNP configuration menu.............................. 27 Figure 33- Configure a port for to enable logging of port events......................
-
Page 7: Introduction
• Microsoft Windows Server 2003 Special Administration Console (SAC) support • A web interface that supports both HTTP and HTTPS and simplifies configuration Materials Materials Supplied with this kit: • NTI SERIMUX-SECURE Secure Console Access Server • RJ45 M/M UTP CAT5 Patch Cable • Console Adapter RJ45-DB25 Female •... -
Page 8: Adding Port Administrators And Users
Adding Port Administrators and Users The system administrator and root user can add port administrators and users easily with the web interface by choosing System administration > User administration > Add user. Root’s password must be modified from the command line using the command passwd. -
Page 9: Ways To Configure The Serimux
Ways to Configure the SERIMUX This section discusses the three ways to configure the SERIMUX, web interface, configuration menu, and command line interface. Web Interface The web interface provides an easy way to configure the SERIMUX. The root user and system administrator can configure all features from it. -
Page 10: Ways Of Accessing The Serimux: Overview
Ways of Accessing the SERIMUX: Overview There are four ways to access the SERIMUX including: • Web Interface • Port Access Menu • Direct Port Access • Custom Menus Web Interface Access Menu The web interface menu provides easy and convenient access to ports. All users can access the menu by entering the SERIMUX IP address or host name in a web browser’s URL window. -
Page 11: Direct Port Access
Direct Port Access Users can connect directly to a properly configured port through a Telnet or SSH session. Configuration requirements include setting the Host Mode to Console Server Mode and the Protocol to either Telnet or SSH. Ports, by default, are set to Console Server Mode and Telnet. -
Page 12: Configuring Http And Https
2. Configure a terminal emulation program, such as HyperTerminal, using the following settings: = 9600 data bits parity = none stop bits flow control = none. 3. Establish a connection to the console port and press Enter to get a command prompt. 4. -
Page 13: Configuring For Ssh
Configuring for SSH Options The Port Access Menu and individual ports can be configured for SSH. Configuring the Port Access Menu for SSH 1. Access the web interface. 2. Log in as root, admin, or a member of the port administration group. The default password for root is dbps, The default password for admin is admin. -
Page 14: Adding, Editing, And Removing Users
Figure 8- Configure a port for SSH Adding, Editing, and Removing Users The root user and system administrator can add, remove, or edit users from the web interface. Procedure 1. Access the web interface. 2. Log in as root or admin. The default password for root is dbps The default password for admin is admin. -
Page 15: About Shell Options
Figure 9- The Edit user menu About Shell Options The shell program selection determines the interface the user sees when establishing a Telnet or SSH session with the SERIMUX. User Group Shell Program Options root Command line system admin Command line, configuration menu, port access menu, custom menus port admin Configuration menu, port access menu, custom menus user... -
Page 16: Adding, Editing, And Removing Users
Figure 10- Using configuration menu to configure SSH 4. Choose 2 (Serial port configuration) and then an individual port number or 0 (zero) for all ports. 5. Choose 3 (Host mode configuration) and then 4 (Protocol) and 2 (for SSH). 6. - Page 17 SERIMUX Supported PC Card List Ethernet LAN Cards: Manufacturer Description Model Name Specification 3Com Megahertz 589E 3COM 3CXE589ET-AP 10 Mbps LAN card TP/BNC LAN PC Card Wireless LAN Cards: Manufacturer Description Model Name Specification Cisco Systems 340 Series 11 Mbps Wireless LAN Cisco Systems AIR-PCM340/Aironet 340 Wireless LAN Adapter...
-
Page 18: Adding A Compact-Flash Card
Adding a Compact-flash Card A PC card slot is located on the front panel of the SERIMUX. (See Fig. 11) To install and configure the compact-flash card on the SERIMUX, do the following. 1. Insert the card into the PC card slot. 2. -
Page 19: Automatic Configuration File Backup
Automatic Configuration File Backup The SERIMUX provides for automatic configuration backup and restoration. The following describes fields related to this function. • Automatically backup configuration: Choose Yes to enable and No to disable automatic backup. • Restore previously saved configuration: Click Restore to import the previously saved configuration. •... -
Page 20: Adding A Wireless Lan Card
Adding a Wireless LAN Card To install and configure a wireless LAN card on the SERIMUX, do the following. 1. Insert the card into the PC slot. 2. Access the web interface. 3. Under the PC card heading, choose Configuration. 4. -
Page 21: Adding A Serial Modem
Adding A Serial Modem The modem must first be inserted and installed on the system before it can be used. To configure the modem do the following: 1. Access the web interface. 2. From the menu choose Configuration under the PC card heading. 3. -
Page 22: Configuring Ports
Configuring Ports Configuring Ports Introduction This chapter provides information on configuring serial ports. Key port configuration attributes include the host mode, which defines a type of communication between the port and a remote host, the protocol, authentication, user access restrictions, and serial communication attributes. -
Page 23: Dial-In Modem Mode
Dial-In Modem Mode In this mode, the SERIMUX assumes an external modem is attached to the serial port and is waiting for a dial-in connection from a remote site. When a user dials-in using a terminal application, the SERIMUX accepts the connection and displays a menu listing available serial ports. -
Page 24: Configuring Host Mode
Configuring Host Mode To configure a serial port for host mode, enter the values in the applicable fields. To access the Host mode configuration screen, do the following: 1. Access the web interface. 2. Under the Serial Port heading, choose Configuration. 3. -
Page 25: Supported Protocols
Supported Protocols In configuring a serial port, the user has three protocol options. The three protocols available are: RawTCP, SSH, and Telnet. • Choose SSH as the protocol for users logging in from an SSH client program to access a port. •... -
Page 26: Using The Configuration Menu
Using the Configuration Menu Host Mode Configuration 1. Access the configuration menu. 2. Choose Serial port configuration > an individual port number or 0 (zero) for all ports > Host mode configuration. Figure 23- Configure Host mode via Configuration menu 3. -
Page 27: System And Port Logging
System and Port Logging System and Port Logging Introduction The SERIMUX provides four options for saving system and port logs. The options are: a syslog server, NFS server, compact-flash card, and the SERIMUX memory. When memory is selected as the storage location, log files are saved to volatile memory, meaning files are lost when the power is turned off. -
Page 28: Enable A Compact-Flash Card
Figure 26- NFS server configuration menu Enable A Compact-flash Card The compact-flash card must be installed and configured on the SERIMUX before it can be used for system logging or storing SERIMUX configuration information. See Adding a Compact-flash Card on page 11. Enable SERIMUX Memory The SERIMUX memory is already enabled for port logging and only needs to be configured for system or port logging. -
Page 29: Viewing System Logs
Figure 27- Configure system logging services Viewing System Logs The system logs can be viewed from the web interface on the System logging page or from the location where they have been saved. The following table lists the file locations of the system logs. System Logfile Log Storage File Location... -
Page 30: Using The Configuration Menu
Figure 28- Port logging menu Viewing Port Logs The port logs can be viewed from the web interface on the Port logging page or from the location where they have been saved. The following table lists the file locations of the system logs. System Logfile Log Storage File Location... -
Page 31: Alerts And Notifications
Configure System Logging To configure the SERIMUX for system logging, do the following: 1. Access the configuration menu. 2. Choose System Status and log > System logging. Figure 29- System status logging setup via Configuration menu 3. Enter the desired parameters for the menu items. 4. -
Page 32: Configuring Smtp Alerts
Configuring SMTP Alerts Most SMTP servers check the sender’s email address with the host domain name to verify the address as authentic. Consequently, when assigning an email address for the device email address, any arbitrary username with the registered hostname may be used. An example is username@company.com. To configure the SERIMUX for SMTP alerts, the following parameters are required: •... -
Page 33: Configuring Snmp
Configuring SNMP To configure the SERIMUX for SNMP do the following: 1. Access the SERIMUX web interface. 2. Under the Network heading, choose SNMP configuration. 3. Fill in information for the MIB-II system objects section and choose Yes under EnableAuthenTrap. •... -
Page 34: Managing The Snmp Protocol
Managing the SNMP Protocol The SERIMUX SNMP protocol can be managed using an NMS or SNMP browser. However, before the NMS or SNMP browser can access the data, the Access control settings must list the IP address of the host from which the browser is executed. See the preceding graphic for details. -
Page 35: Using The Configuration Menu
Using the Configuration Menu Configuring SNMP To configure SNMP from the configuration menu, do the following: 1. Access the Configuration menu. 2. Choose Network configuration > SNMP configuration. Figure 35- Configure SNMP via Configuration menu 3. Enter the desired parameters for the menu items. 4. -
Page 36: Configuring Security And Authentication
Configuring Security and Authentication Configuring Security and Authentication Introduction The SERIMUX provides several ways to control access to the network and the devices on the network. One method is through IP filtering, which allows or prevents users with specific IP addresses from accessing devices or serial ports on the network. IP filtering can be permitted or restricted for all ports globally or on a per port basis. -
Page 37: Serial Port Ip Filtering
The following table displays examples of allowed remote hosts Input format Allowable Hosts Base Host IP Subnet mask Address Any host 0.0.0.0 0.0.0.0 192.168.1.120 192.168.1.120 255.255.255.255 192.168.1.1 - 192.168.1.254 192.168.1.0 255.255.255.0 192.168.0.1 - 192.168.0.0 255.255.0.0 192.168.255.254 192.168.1.1 - 192.168.1.126 192.168.1.0 255.255.255.128 192.168.1.129 - 192.168.1.128... -
Page 38: Sniff Session
Figure 40- Configure User access control Sniff Session A Sniff Session enables multiple users to access a single serial port for viewing the data stream. Users who are registered for a sniff session can access a specific serial port even if another user is using the port. The SERIMUX supports multiple concurrent sniff sessions. -
Page 39: Viewing A Sniff Session
N T I S E R I M U X S E C U R E N e t w o r k T e c h n o l o g i e s I n c N e t w o r k ( E t h e r n e t ) Figure 41- User in a Sniff Session Viewing A Sniff Session A sniff user enters a sniff session by starting a Telnet session on a specified port. -
Page 40: Authentication
Authentication The SERIMUX supports multiple methods of user authentication. The following methods are supported: Local, TACACS+, RADIUS, LDAP, and Kerberos. The type of authentication protocol you use is dependent on your environment. N T I S E R I M U X S E C U R E N e t w o r k T e c h n o l o g i e s I n c Figure 43- SERIMUX supports user authentication... -
Page 41: Configuring Authentication For The Web Server
Configuring Authentication for the Web Server 1. Access the web interface. 2. Choose Network > Web server configuration. The following screen appears. Figure 45- Configure WEB server for authentication 3. Choose an authentication method and then Save & apply. Note: When using remote authentication for the web server, such as Radius, TACACS+, LDAP or Kerberos, the user must also be added to the local database. -
Page 42: Port Ip Filtering
Port IP Filtering To configure the SERIMUX for Port IP filtering, do the following: 1. Access the configuration menu. 2. Choose Serial port configuration. 3. Choose an individual port number or 0 (zero) for all ports > IP filtering. Figure 47- Configure Port IP filtering through the Configuration menu 4. -
Page 43: Custom And Default Menus
Custom and Default Menus Custom and Default Menus Introduction The SERIMUX has several default menus for easy configuration and access by different users. Depending on access privileges, the menus available are the Web Interface, Configuration Menu, and Port Access menu. A custom menu feature for creating menus is also available through the web interface. -
Page 44: Adding Menu Items
Adding Menu Items Once a menu name is defined and users are added, menu items can then be added. To add menu items, do the following: 1. Choose Configuration under Custom Menus and then the Menu Name hyperlink for the menu to be configured. 2. -
Page 45: Assigning Users To A Menu
Assigning Users To A Menu Once a menu has been created, users can be assigned to the menu by doing the following: 1. Access the web interface. 2. Under the Custom Menus heading, choose Configuration > Menu Users. A list of available users is displayed. Figure 52- Assign users to a menu 3. -
Page 46: Port Access Menu
Port Access Menu Another default menu is the Port Access Menu, which is available to all users. Access to this menu can be established through a Telnet or SSH session or through the web interface by selecting Serial ports > Connection > Port access menu connection. Figure 54- The Port Access menu through the Configuration menu Users access this menu through a Telnet or SSH session using the IP address of the SERIMUX followed by the port number 7000. -
Page 47: Configuring For Dial-In Modem Access
Configuring For Dial-In Modem Access To configure a serial port for a dial-in modem, enter the values for these fields: Host mode, Modem init string, and Inactivity timeout. To access the Host mode configuration screen, do the following: 1. Access the web interface. 2. -
Page 48: Using The Configuration Menu
Figure 57- Configure port for dial-in terminal server access 5. Fill in the appropriate fields as they apply to the configuration. • Host mode: The options are console server mode, terminal server mode, dial-in modem mode, and dial-in terminal server mode. •... -
Page 49: Dial-In Terminal Server Access
Figure 58- Use Configuration menu to configure port for dial-in modem access 4. Choose Dial-in modem and configure the other configuration parameters. 5. Use the ESC key to return to the main menu. 6. Choose Save changes. Dial-in Terminal Server Access Individual serial ports on the SERIMUX can be configured for a dial-in terminal server access. -
Page 50: Port Clustering
Port Clustering Port Clustering Introduction Port clustering is the ability to manage many serial ports on one or multiple slave devices from one master device using a single IP address. For instance, the SERIMUX can manage up to 16 slave devices or a maximum 544 serial ports with one Master device. -
Page 51: Clustering Parameters
Figure 62- Configure Slave ports on the Master Unit 4. Select Enable from the "Enable/Disable this unit" drop down menu. A new configuration screen appears. Figure 63- Enable a Slave unit and setup the port information 5. Enter the IP address of the slave unit in the IP address field. 6. -
Page 52: Using The Configuration Menu
Figure 64- Setup clustering parameters • Base destination port: This is the physical port number on a remote slave unit. By default the base destination port on the first slave unit is 7001. However, the user can change the base destination port number to another number and the rest of the ports on the unit will be sequentially numbered from the base destination port. -
Page 53: Command Line Interface
Command Line Interface Command Line Interface Introduction The SERIMUX runs the embedded Linux Hard Hat operating system. The command line interface for configuration purposes is accessible only by the root user. The system administrator has read only privileges from the command line. By default the root user is connected to the CLI (command line interface) when Telnetting to the SERIMUX. -
Page 54: Important File Locations
Important File Locations The SERIMUX has several files that are important for administrative use. Below is a brief listing of some files that the root user or system administrator might desire to either monitor or edit. Default Script The default script file is executed whenever the SERIMUX is booted. The file is /usr/rc.user and can be modified with the vi editor. The modified script becomes effective when the system is rebooted. -
Page 55: Setting Date And Time
The alternative method to reset the unit is through the web interface. The web interface provides the option of retaining the IP settings. To use the web interface to reset the SERIMUX, do the following: 1. Access the web interface. 2. -
Page 56: Configuring A Device Name
3. To use an NTP server, choose Enable, the NTP server’s IP address, the Time offset, and the Date and Time fields. To use the internal battery fill in the Date and Time fields only. 4. Choose Save & apply. Configuring A Device Name The system administrator can assign a device name to the SERIMUX. -
Page 57: Using The Configuration Menu
Using the Configuration Menu Firmware Upgrade Before upgrading firmware from the configuration menu it is necessary to: • Download the firmware to a system on the same subnet • Set up a terminal emulation program that supports Zmodem transfer protocol To upgrade the firmware with the configuration menu, do the following: 1. -
Page 58: Setting Date And Time
4. Choose Configuration import. 5. Choose one or more selection to be reset to defaults. Press A to toggle the Network Configuration to be restored. You will be prompted to import Network configuration with or without the IP configuration, or not to Import the network configuration at all with this function. Press B to toggle the Serial port to be restored, Press C to toggle the Clustering configuration to be restored, and so on. -
Page 59: Accessing The Boot Loader Program
Accessing the Boot Loader Program The Boot Loader program can be accessed during the boot process. The main function of the program is to provide a backup means for restoring the firmware if the SERIMUX will no longer boot. It also provides a hardware testing module that detects and tests hardware components on the unit. -
Page 60: Microsoft Sac Support
Note: Use the ESC key to back up to earlier menu screens. 6. Enter the information for the first menu items. • Protocol: The choices are BOOTP or TFTP • IP address assigned: Enter the IP address of the SERIMUX •... -
Page 61: Accessing The Windows Server 2003 Console Port From The Serimux Gui
Figure 78- Setup SERIMUX for SAC support Set other fields as appropriate. See "Configuring Host Mode" on page 17 for more information. Choose Save & apply. Configure serial port communication settings, by doing the following: a. Choose Serial port parameters from the menu. b. -
Page 62: Hardware Information
Figure 80- Windows Server 2003 controls Use the SERIMUX GUI to perform SAC functions. The following table describes attributes of the controls on the GUI. Field Description Connect Connects to the SAC console port via the command line interface. Restart Reboots the Microsoft Server 2003. -
Page 63: Hardware Specifications: Serimux 16 And Serimux 32 Dc Powered
Hardware Specifications: SERIMUX 16 and SERIMUX 32 DC Powered Attribute Value Operating temperature 40°F to 120°F (5°C to 50°C) Storage temperature -20°F to 140°F (-29°C to 60°C) Humidity 10% to 90% non-condensing Power supply Internal 36 - 72 Vdc, 1.2A (max) Power consumption 0.25A /48Vdc, 12W (typical), 40W (max) Fuse (internal) -
Page 64: Serial Port Pinouts
Cable Adapters The SERIMUX comes with four cable adapters. The following illustrations show cable adapter pin outs. Additional adapters can be purchased from NTI. DB-25 Male Console Adapter (NTI P/N DB25M-RJ45F-T) DB-25 Male to RJ45 Connector Pin Assignments RJ45 Signal... - Page 65 DB-9 Female Console Adapter (NTI P/N DB9F-RJ45F) DB-9 Female to RJ45 Pin Assignments RJ45 Signal DB-9F Signal Connected to Connected to Connected to Connected to Connected to Connected to Connected to DB-25 Female Console Adapter (NTI P/N DB25F-RJ45F) DB-25 Female to RJ45 Pin Assignments...
-
Page 66: Certifications
• Europe: EN60950 (CB Scheme Report) Working Inside the SERIMUX NOTICE: Do not attempt to service the SERIMUX except when following the instructions from NTI Technical Support personnel. In such a case, first perform the following actions: • Turn OFF the SERIMUX. -
Page 67: Safety Instructions
• Do not spill food or liquids on the SERIMUX. If it gets wet, contact NTI Technical Support. • Do not push any objects into the openings of the SERIMUX. Doing so can cause fire or electric shock by shorting out interior components. -
Page 68: Index
Index Index EMS support 54 enabling system logging 21 encryption accessing a port SSH 7 web interface 4 wireless LAN 14 applyconf 47 assigning IP settings 5 authentication 35 configuration menu 35 factory default reset button 48 configuring 35 factory default values 49 local 35 factory defaults resetting 48... -
Page 69: Figure 50- Creating Menu Names
SAC support 54 saveconf 47 menus saving and applying changes 5 adding menu items 38 serial modem assigning users 39 adding 15 creating menu names 37 serial port pinouts 58 creating submenu 38 SMTP port access menu 40 configuring 29 using the configuration menu 35 SMTP alerts 25 Microsoft Server 2003 SAC support 54...
Need help?
Do you have a question about the SERIMUX-SECURE-x and is the answer not in the manual?
Questions and answers