Sign In
Upload
Manuals
Brands
NTI Manuals
Switch
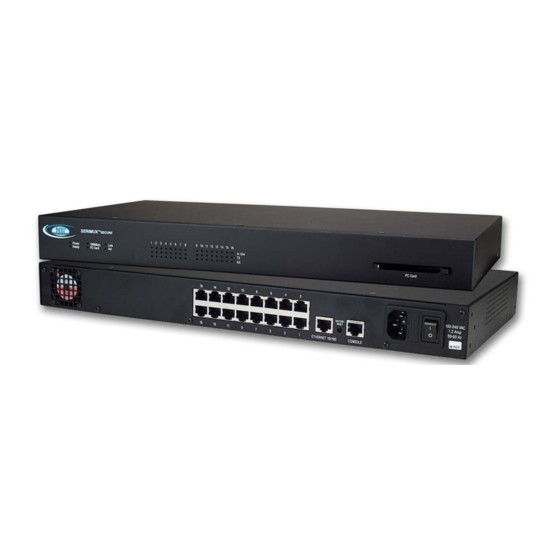
SERIMUX-SECURE-x
User Manuals: NTI SERIMUX-SECURE-x Serial Switch
Manuals and User Guides for NTI SERIMUX-SECURE-x Serial Switch. We have
1
NTI SERIMUX-SECURE-x Serial Switch manual available for free PDF download: Installation And Operation Manual
NTI SERIMUX-SECURE-x Installation And Operation Manual (69 pages)
Secure Access Console Switch
Brand:
NTI
| Category:
Switch
| Size: 1 MB
Table of Contents
Warranty Information
2
Table of Contents
3
Introduction
7
SERIMUX Model Support
7
Key Features
7
Materials
7
User Groups
7
Root and Admin Usernames and Passwords
7
Adding Port Administrators and Users
8
Features and Functions
8
Ways to Configure the SERIMUX
9
Web Interface
9
Configuration Menu
9
Command Line Interface
9
Figure 1- SERIMUX SECURE WEB Interface- Main Menu
9
Figure 2- SERIMUX-SECURE Telnet Session- Configuration Menu
9
Ways of Accessing the SERIMUX: Overview
10
Web Interface Access Menu
10
Port Access Menu
10
Figure 3- WEB Interface- Port Login Screen
10
Direct Port Access
11
Custom Menus
11
Saving and Applying Changes
11
Getting Started
11
Introduction
11
Assigning IP Settings from the Console Port
11
Figure 4- Attach a Workstation to the Console Port
11
Configuring HTTP and HTTPS
12
Figure 5- the IP Configuration Menu
12
Figure 6- Enable Web Server HTTP/HTTPS Service
12
Configuring for SSH
13
Options
13
Configuring the Port Access Menu for SSH
13
Configuring a Port for SSH
13
Figure 7- Configure the Port Access Menu for SSH
13
Adding, Editing, and Removing Users
14
Procedure
14
Figure 8- Configure a Port for SSH
14
About Shell Options
15
Using the Configuration Menu
15
Configuring SSH
15
Figure 9- the Edit User Menu
15
Adding, Editing, and Removing Users
16
Installing and Configuring PC Cards
16
Introduction
16
Compatible PC Cards
16
Figure 10- Using Configuration Menu to Configure SSH
16
Adding a Compact-Flash Card
18
Configuring the Compact-Flash Card
18
Figure 11- Location of PC Card Slot
18
Figure 12- PC Card Configuration Menu
18
Automatic Configuration File Backup
19
Adding a Network Card
19
Figure 13- Network PC Card Configuration Menu
19
Adding a Wireless LAN Card
20
Figure 14- Configure a Wireless Network PC Card
20
Adding a Serial Modem
21
Using the Configuration Menu
21
Adding and Configuring a PC Card
21
Figure 15- Configure a Serial Modem PC Card
21
Figure 16- Use Configuration Menu to Add a PC Card
21
Configuring Ports
22
Introduction
22
Host Mode Configuration
22
Console Server Mode
22
Terminal Server Mode
22
Figure 17- Host Mode Configuration- Console Server Mode
22
Figure 18- Host Mode Configuration- Terminal Server Mode
22
Dial-In Modem Mode
23
Dial-In Terminal Server Mode
23
Figure 19- Host Mode Configuration- Dial-In Modem Mode
23
Figure 20- Host Mode Configuration- Dial-In Terminal Server Mode
23
Configuring Host Mode
24
Figure 21- Configure Serial Port for Host Mode
24
Supported Protocols
25
Port Parameters
25
DTR Behavior
25
Inter-Character Timeout
25
Figure 22- Setup Serial Port Communication Parameters
25
Using the Configuration Menu
26
Host Mode Configuration
26
Port Parameters
26
Figure 23- Configure Host Mode Via Configuration Menu
26
Figure 24- Setup Port Communication Parameters Via Configuration Menu
26
System and Port Logging
27
Introduction
27
Enabling System Logging Services
27
Enable Syslog Server
27
Enable NFS Server
27
Figure 25- SYSLOG Server Configuration Menu
27
Enable a Compact-Flash Card
28
Enable SERIMUX Memory
28
Configuring System Logging Services
28
Figure 26- NFS Server Configuration Menu
28
Viewing System Logs
29
Port Logging
29
Figure 27- Configure System Logging Services
29
Using the Configuration Menu
30
System Logging
30
Figure 28- Port Logging Menu
30
Alerts and Notifications
31
Introduction
31
Figure 29- System Status Logging Setup Via Configuration Menu
31
Figure 30- SERIMUX Used for System Alerts and Notifications
31
Configuring SMTP Alerts
32
SNMP Information
32
Figure 31- SMTP Configuration Menu
32
Configuring SNMP
33
Figure 32- SMNP Configuration Menu
33
Managing the SNMP Protocol
34
Configuring Port Event Handling
34
Figure 33- Configure a Port for to Enable Logging of Port Events
34
Figure 34- Configure Port for Event Handling
34
Using the Configuration Menu
35
Configuring SNMP
35
Configuring SMTP
35
Figure 35- Configure SNMP Via Configuration Menu
35
Figure 36- Configure SMTP Via Configuration Menu
35
Configuring Security and Authentication
36
Introduction
36
Configuring Network IP Filtering
36
Console and Web IP Filtering
36
Figure 37- SERIMUX Access Controlled by IP Filtering
36
Figure 38- IP Filtering Menu
36
Serial Port IP Filtering
37
Using IP Tables
37
Configuring User Access Control
37
Figure 39- Serial Port IP Filtering
37
Figure 40- Configure User Access Control
38
Sniff Session
38
Figure 41- User in a Sniff Session
39
Figure 42- Sniff Session User Menu
39
Viewing a Sniff Session
39
Authentication
40
Configuring Authentication Methods for Port Access
40
Figure 43- SERIMUX Supports User Authentication
40
Figure 44- Configure SERIMUX for Authentication
40
Configuring Authentication for the Web Server
41
Using the Configuration Menu
41
Network IP Filtering
41
Figure 45- Configure WEB Server for Authentication
41
Figure 46- Use Configuration Menu to Setup IP Filtering
41
Port IP Filtering
42
Sniff Sessions
42
Authentication
42
Figure 47- Configure Port IP Filtering through the Configuration Menu
42
Figure 48- Setup User Authentication through the Configuration Menu
42
Custom and Default Menus
43
Introduction
43
Making Custom Menus
43
Adding Users
43
Creating Menu Names
43
Figure 49- Add Users to the System
43
Adding Menu Items
44
Assigning Users to a Menu
45
Using the Configuration Menu
45
Figure 52- Assign Users to a Menu
45
Figure 53- the Configuration Menu
45
Port Access Menu
46
Configuring Remote Dial-In Access
46
Figure 54- the Port Access Menu through the Configuration Menu
46
Figure 55- SERIMUX Supports Remote Dial-In Access for Users
46
Adding a PC Modem
47
Configuring for Dial-In Modem Access
47
Configuring for Dial-In Terminal Server Access
47
Figure 56- Configure Port for Dial-In Modem Access
47
Using the Configuration Menu
48
Dial-In Modem Access
48
Figure 57- Configure Port for Dial-In Terminal Server Access
48
Dial-In Terminal Server Access
49
Figure 58- Use Configuration Menu to Configure Port for Dial-In Modem Access
49
Figure 59- Use Configuration Menu to Configure Port for Dial-In Terminal Server Access
49
Port Clustering
50
Introduction
50
Configuring Port Clustering
50
Assigning Master Clustering Mode
50
Configuring Slave Ports on the Master Unit
50
Figure 60- SERIMUX Used for Port Clustering
50
Figure 61- Assign the Master Cluster Device
50
Clustering Parameters
51
Figure 62- Configure Slave Ports on the Master Unit
51
Figure 63- Enable a Slave Unit and Setup the Port Information
51
Using the Configuration Menu
52
Clustering
52
Figure 64- Setup Clustering Parameters
52
Figure 65- Setup Clustering Using Configuration Menu
52
Command Line Interface
53
Introduction
53
Linux Commands
53
Important File Locations
54
Default Script
54
Booting Sequence
54
User Storage Space
54
System Administration
54
Introduction
54
Upgrading the Firmware
54
Web Interface
54
Resetting Factory Defaults
54
Figure 66- Locate the Firmware Upgrade File
54
Setting Date and Time
55
Figure 68- Reset Factory Defaults through Web Interface
55
Figure 69- Set the Date and Time
55
Configuring a Device Name
56
Adding, Editing, and Removing Users
56
Figure 70- Administrator's User Administration Window
56
Figure 71- Edit a User
56
Using the Configuration Menu
57
Firmware Upgrade
57
Restoring Factory Defaults
57
Figure 72- Configuration Menu
57
Figure 73- Reset Factory Defaults through Configuration Menu
57
Setting Date and Time
58
Adding, Editing, and Removing Users
58
Figure 74- Choose Which Factory Defaults to Reset
58
Figure 75- Edit Users through Configuration Menu
58
Accessing the Boot Loader Program
59
Hardware Test Menu
59
Disaster Recovery
59
Figure 76- the Boot Loader Program
59
Figure 77- Firmware Upgrade Via Boot Loader Program
59
Microsoft SAC Support
60
About SERIMUX Support for Microsoft Windows Server 2003
60
Set up Overview
60
Setting up the SERIMUX for SAC Support
60
Accessing the Windows Server 2003 Console Port from the SERIMUX GUI
61
Figure 78- Setup SERIMUX for SAC Support
61
Figure 79- Access Windows Server 2003 Console Port from SERIMUX GUI
61
Hardware Information
62
Introduction
62
Hardware Specifications: SERIMUX 16 and SERIMUX 32 AC Powered
62
Figure 80- Windows Server 2003 Controls
62
Hardware Specifications: SERIMUX 16 and SERIMUX 32 DC Powered
63
Hardware Specifications: SERIMUX 8 AC Powered
63
LED Indicators
63
About Serial Port Cabling
63
Serial Port Pinouts
64
Cable Adapters
64
Certifications
66
Safety
66
Working Inside the SERIMUX
66
Replacing the Battery
66
Safety Instructions
67
Emissions
67
Immunity
67
Index
68
Figure 50- Creating Menu Names
69
Figure 51- Adding Menu Items
69
Advertisement
Advertisement
Related Products
NTI SERIMUX-S-x
NTI SERIMUX-CS-x
NTI SERIMUX-CS-4
NTI SERIMUX-CS-8
NTI SERIMUX-CS-16
NTI SERIMUX-CS-24
NTI SERIMUX-CS-32
NTI SE-AV-xx-L
NTI SE-AV-xx-L/RS
NTI SE-AV-16-RS
NTI Categories
Extender
Boiler
Switch
Media Converter
Cables and connectors
More NTI Manuals
Login
Sign In
OR
Sign in with Facebook
Sign in with Google
Upload manual
Upload from disk
Upload from URL