
Related Manuals for Suzuki Katana 1100


Summary of Contents for Suzuki Katana 1100
- Page 1 SUZUKI SERVICE MANUAL 99500-39080-03E (5€) .\ULLKI .HOIOR LTD I'RI.\TED 1.\ J'I!',I.\ O(/OREN.
- Page 2 Further information concerning the EPA emission regulations and Suzuki's emission control _lfJ program can be found in the SUZUKI EMIS SERVICING INFORMATION SION CONTROL PROGRAM MANUAL/SERVICE BULLETIN. SUZUKI MOTOR CO., LTD. Technical Department Motorcycle Service Division © COPYRIGHT SUZUKI MOTOR CO., LTD. 1987...
- Page 3 GENERAL INFORMATION :~~.~~~~~ ~====~---:l VIEW OF GSX1100F SERIAL NUMBER LOCATION. 1 1 FUEL AND OIL RECOMMENDA TlON 1 1 BREAK-IN PROCEDURES 1- 2 CYLINDER IDENTIFICA TlON 1- 2 SPECIAL MA TERIALS PRECAUTIONS AND GENERAL INSTRUCTIONS 1- 5 SPECIFICA TIONS 1- 6 _ _ _- - - - - - l...
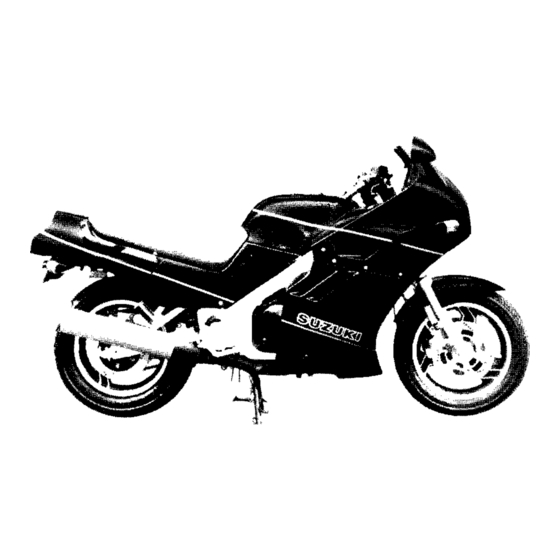
- Page 4 GENERAL INFORMATION VIEW OF GSX1100F RIGHT SIDE LEFT SIDE SERIAL NUMBER LOCATION The frame serial number or.V.I.N. (Vehicle Identification Num ber) is stamped on the steering head pipe. The engine serial number is located on the right side of the crankcase. These numbers are required especially for registering the machine and ordering spare parts.
-
Page 5: Break-In Procedures
GENERAL INFORMATION BRAKE AND CLUTCH FLUID Specification and classification: DOT4 WARNING: • Since the brake system of this motorcycle is filled with a glycol-based brake fluid by the manufacturer, do not use or mix different types of fluid such as silicone-based and petroleum-based fluid for refilling the system, otherwise serious damage will result. -
Page 6: Special Ma Terials
GENERAL INFORMATION SPECIAL MATERIALS The materials listed below are needed for maintenance work on the GSX OOF, and should be kept on hand for ready use. They supplement such standard materials as cleaning fluids, lubricants, emery cloth and the like. How to use them and where to use them are described in the text of this manual. MATERIAL PART PAGE... - Page 7 GENERAL INFORMATION 1-4 MATERIAL PART PAGE PART • Disc plate mounting bolt 7-35 ~-G-e-a-r-s-h-if-t-c-a-m--s-to-p-p-e-r-b-O--lt--j-3~ THREAD LOCK "1360" 99000-32130 .-S-t-a-rt-e-r-m-o-t-o-r hou si n g sc rew 6-14 7-19 • Oil pump mounting bolt 3-48 Front fork damper rod bolt • Countershaft bearing retain- 3-51 er screw • Gearshift cam guide/pawl...
-
Page 8: Precautions And General Instructions
GENERAL INFORMATION PRECAUTIONS AND GENERAL INSTRUCTIONS Observe the following items without fail when servicing, disassembling and reassembling motorcycles. D Do not run engine indoors with little or no ventilation. D Be sure to replace packings, gaskets, circlips, O-rings and cotter pins with new ones. CAUTION: Never reuse a circlip. -
Page 9: Specifica Tions
GENERAL INFORMATION SPECIFICATIONS DIMENSIONS AND DRY MASS Overall length 2185 mm (86.0 in) Overall width 765 mm (30.1 in) Overall height..............1290 mm (50.8 in) Wheelbase 1490 mm (58.7 in) Ground clearance 130 mm (5.1 in) Dry mass 244 kg (537 Ibs) 246 kg (542 Ibs).. - Page 10 GENERAL INFORMATION CHASSIS Front suspension Telescopic, coil spring, oil damped Rear suspension Full-floating suspension system, spring preload fully adjustable, damping force 4-way adjustable Steering angle 34° (right & left) Caster 62°00' Trail. 112 mm (4.4in) Turning radius 3.0 m (9.8ft) Front brake Disc brake, twin Rear brake...
-
Page 11: Table Of Contents
• PERIODIC MAINTENANCE AND TUNE-UP PROCEDURES CONTENTS PERIODIC MAINTENANCE SCHEDULE 2- 1 PERIODIC MAINTENANCE CHART 2- 1 LUBRICA TlON POINTS 2- 2 MAINTENANCE AND TUNE-UP PROCEDURES 2- 3 BA TTERY 2- 3 CYLINDER HEAD NUTS & EXHAUST PIPE DOL TS 2- 4 2- 4 AIR CLEANER... -
Page 12: Periodic Maintenance Chart
PERIODIC MAINTENANCE AND TUNE-UP PROCEDURES PERIODIC MAINTENANCE SCHEDULE II\IIPORTAI\lT: The periodic maintenance intervals and service requirements have been established in accordance with EPA regulations. Following these instructions will ensure that the motorcycle will not exceed emission standards and it will also ensure the reliability and performance of the motorcycle. NOTE: More frequent servicing may be performed on motorcycles that are used under severe conditions however, it is not necessary for ensuring emission level compliance. - Page 13 PERIODIC MAINTENANCE AND TUNE-LIP PROCEDURES LUBRICATION POINTS Proper lubrication is important for smooth operation and long life of each working part of the motorcycle. Major lubrication points are indicated below. [ill Grease Clutch lever holder Throttle cable and brake lever holder Drive chain Brake pedal pivot and brake rod link [ill...
-
Page 14: Ba Ttery
PERIODIC MAINTENANCE AND TUNE-LIP PROCEDURES MAINTENANCE AND TUNE-UP PROCEDURES This section describes the servicing procedures for each item of the Periodic Maintenance requirements. BATTERY I Inspect Every 6000 km (4000 miles. 12 months). • Remove the seat. • Remove the battery lead wires from the battery terminals. -
Page 15: Air Cleaner
PERIODIC MAINTENANCE AND TUNE-UP PROCEDURES - - - - - CYLINDER HEAD NUTS AI\lD EXHAUST PIPE BOLTS Tighten Initially at 1000 km (600 miles. 2 months) and Every 6000 km (4000 miles. 12 months) thereafter. CYLINDER HEAD ----~"l:,. • Remove the seat, frame covers and fuel tank. (Refer to page 3-3.) _ _. -
Page 16: Val Ve Clearance
PERIODIC MAINTENANCE AND TUNE-UP PROCEDURES • Carefully use air hose to blow the dust from the cleaner element. CAUTION: Always use air pressure on the outside of the cleaner element. If air pressure is used on the inside, dirt will be forced into the pores of the cleaner element thus restricting air flow through the cleaner element. - Page 17 PERIODIC MAINTENANCE AND TUNE-UP PROCEDURES . - . _ - - .. _ - - - - _ . NOTE: - - ~ ® • The cam must be at positions, in order check the valve clearance or to adjust valve clearance. Clearance readings should not be taken with the cam in any other position than these two positions.
-
Page 18: Spark Plugs
PERIODIC MAINTENANCE AND TUNE-UP PROCEDURES Notch position Cam Position - - - - - - - - - - - - - . _ . Intake Camshaft Exhaust Camshaft - - - - - - - - - - - - - - - -- - - - - - - - - - - ... - Page 19 PERIODIC MAINTENANCE AND TUNE-UP PROCEDURES ENGII\lE OIL AI\lD OIL FILTER lReplace Initially at 1000 km (600 miles, 2 months) andl [ Every 6000 km (4000 miles, 12 months) thereafter. Oil should be changed while the engine is hot. Oil filter replacement at the above intervals should be done together with engine oil change.
-
Page 20: Fuel Line
PERIODIC MAINTENANCE AND TUNE-UP PROCEDURES FUEL LINE (FUEL LINE AND VAPOR HOSE... California Version only) ~-;-~~~;-;t-I-~iti~-IY at 1000 km (600 miles.- 2 months) and Every 6000 km (4000 miles. 12 months) thereafter. Replace Every four years. L_______________ CARBURETOR IDLE RPM (Idling adjustment) (600~iles~2-mon~hs) Inspect Initially at 1000 km- ~~ months~~_~r_:~~:r... - Page 21 PERIODIC MAINTENANCE AND TUNE-UP PROCEDURES 2-10 WARNING: The clutch system of this motorcycle is filled with a glycol-based brake fluid. Do not use or mix different types of fluid such as silicone-based and petroleum-based. Do not use any brake fluid taken from old. used or unsealed containers.
-
Page 22: Drive Chain
2-11 PERIODIC MAINTENANCE AND TUNE-UP PROCEDURES - - - - - - - - - - - - - - , DRIVE CHAIN Inspect Initially at 1000 km (600 miles. 2 months) and Every 6000 km (4000 miles. 12 months) thereafter. Clean and Lubricate Every 1000 km (600 miles). -
Page 23: Brakes
PERIODIC MAINTENANCE AND TUNE-LIP PROCEDURES 2-12 • After washing and drying the chain, oil it with a heavy-weight motor oil. CAUTION: Do not use any oil sold commercially as 'drive chain oil". Such oil can damage the "0" rings (or seals). CAUTION: The standard drive chain is DAIDO 0.1.0 532ZLV. - Page 24 2-13 PERIODIC MAINTENANCE AND TUNE-LIP PROCEDURES BRAKE PEDAL HEIGHT ® • Loosen the lock nut and rotate the push rod to locate brake pedal 50 mm (2.0 in) below the top face of the footrest . ® • Retighten the lock nut to secure the push rod in the proper position.
-
Page 25: Tires
PERIODIC MAINTENANCE AND TUNE-UP PROCEDURES 2-14 • Fill up the master cylinder reservoir to the upper end of the inspection window, (for front brake) and "UPPER" line. (for rear brake) Replace the reservoir cap to prevent entry of dirt. • Attach a pipe to the caliper bleeder valve, and insert the free end of the pipe into a receptacle. -
Page 26: Steering
2-15 PERIODIC MAINTENANCE AND TUNE-UP PROCEDURES TIRE TREAD CONDITION Operating the motorcycle with excessively worn tires will decrease riding stability and consequently invite a dangerous situation. It is highly recommended to replace a tire when the remaining depth of tire tread reaches the following specifica tion. -
Page 27: Rear Suspension
PERIODIC MAINTENANCE AND TUNE-UP PROCEDURES 2-16 FRONT FORKS Inspect Initially at 1000 km (600 miles, 2 months) and Every 12000 km (7500 miles, 24 months) thereafter. Inspect the front forks for oil leakage, scoring or scratches on the outer surface of the inner tubes. Replace any defective parts, if necessary. - Page 28 2-17 PERIODIC MAINTENANCE AND TUNE-UP PROCEDURES CHASSIS BOLTS AND NUTS The nuts and bolts listed below are important safety parts. They must be retightened when necessary to the specified torque with a torque wrench. (Refer to page 2-18 for the locations of the following nuts and bolts on the motorcycle.) f-8-Steeri~g ~t~-~ he::-:-~~It----"~-'-- f~;·~ 3~g~m55 -1-l25.~b~t40.0--...
- Page 29 PERIODIC MAINTENANCE AND TUNE-UP PROCEDURES 2-18...
- Page 30 ENGINE - - - - - - C O N T E N T S - - - - - COMPRESSION CHECK 3- --;' ENGINE COMPONENTS REMOVABLE WITH THE ENGINE IN PLACE 3- 2 ENGINE REMOVAL AND REINSTALLATION 3- 3 ENGINE DISASSEMBL Y 3-10 ENGINE COMPONENTS INSPECTION AND SERViCiNG...
- Page 31 ENGINE COMPRESSION CHECK The compression of a cylinder is a good indicator COMPRESSION TEST PROCEDURE NOTE: of its internal condition. The decision to overhaul the cylinders is often based on the results of a Before testing the engine for compression compression test.
- Page 32 ENGINE 3-2 ENGINE COMPONENTS REMOVABLE WITH THE ENGINE IN PLACE The parts listed below can be removed and reinstalled without removing the engine from the frame. Refer to the page listed in this section for removal and reinstallation instructions ENGINE LEFT SIDE See page Gearshift lever 3- 6...
- Page 33 ENGINE ENGINE REMOVAL AND REINSTALLATION ENGINE REMOVAL " Before taking the engine out of the frame, wash the engine with a steam cleaner. The procedure of engine removal is sequen tially explained in the following steps, and engine installation is effected by reversing the removal procedure. • Remove the seat.
- Page 34 ENGINE • Loosen each carburetor clamp screw • Remove the carburetor assembly and disconnect the throttle ® cable and starter cable • Disconnect the various lead wires. 0)· Battery lead wire (coupler Generator lead wires (coupler @). Neutral indicator switch lead wire (coupler ©). Signal generator lead wires (coupler @).
- Page 35 ENGINE • Remove the eight exhaust pipe clamp bolts with a 6-mm hexagon wrench. • Loosen the exhaust pipe/muffler connection bolts, left and right. • Remove the muffler mounting bolts, left and right. • Remove the left and right exhaust pipe/muffler. • Place an oil pan under the engine and remove the oil drain plug to drain out engine oil.
- Page 36 ENGINE • Remove the oil cooler by removing the mounting bolts. • Remove the gearshift lever by removing the mounting bolt. ~ • Remove the engine sprocket cover by removing the bolts. CAUTION: Do not operate the clutch lever to prevent clutch piston retainer damage.
- Page 37 ENGINE • Remove the side-stand switch assembly by removing the screws and clamps. • Support the engine with a proper engine jack. • Remove the engine mounting bolts, nuts and spacer at the engine reM side. • Remove the frame down tube mounting bolts and nuts, right and left.
- Page 38 ENGINE ENGINE REINSTALLATION NOTE: Reinstall the engine in the reverse order of en The engine mounting nuts are self-locking. gine removal. Once the nut has been removed, is no long • Install the brackets, spacers, bushes, bolts and any use. Be sure to use new nuts and nuts properly, as shown in the following illus ...
- Page 39 ENGINE • Replace the plug caps on the spark Steering head pipe Frame NO.~»-- plugs so that their code markings corre Ignition coil NO.2 & NO.3 Ignition coil NO.1 & spond to the cylinder numbers arranged in the order of 1,2,3 and 4 from the left. Clamp Breather cover • Locate the carburator clamps, as shown...
- Page 40 ENGINE 3-10 ENGINE DISASSEMBLY • Remove the oil filter by using the special tool. 09915-40611: Oil filter wrench NOTE: Refer to page 2-8 for installation procedures. • Remove the cylinder head cooling oil hoses by removing the bolts. • Remove the cylinder head cover by removing the bolts. 09914-25811: 6 mm "T' type hexagon wrench •...
- Page 41 3-11 ENGINE • Remove the ten camshaft journal holders by removing the bolts. NOTE: Be sure to loosen camshaft journal holder bolts evenly by shifting the wrench diagonally. • Remove the two camshafts, intake and exhaust. • Pullout the cam chain guide. • The cylinder head becomes free for removal when its one ®...
- Page 42 ENGINE 3-12 • Firmly grip the cylinder block at both ends, and lift it straight up. If the block does not come off, lightly tap on the finless portions of the block with a plastic mallet to shake the gasketed joint loose. CAUTION: Be careful not to damage the fins when removing or handling the cylinder block.
- Page 43 3-13 ENGINE • Remove the signal generator rotor by removing the bolt. 09914-25811: 6 mm type hexagon wrench • Disconnect the oil pressure switch lead wire. • Remove the signal generator stator by removing the three screws. • Remove the clutch cover by removing the bolts. 09911-73730: 5 mm type hexagon wrench ~*",...
- Page 44 ENGINE 3-14 • Remove the thrust washer • With the spacer removed, the primary driven gear (integral with the clutch housing) is free to disengage from the primary drive gear. • Remove the primary driven gear assembly with the genera tor/oil pump drive gears.
- Page 45 3-15 ENGINE • Remove the oil pump driven gear by removing the circlip. 09900-06107: Snap ring pliers NOTE: Do not lose the circlip, pin and washers. • Remove the starter clutch cover by removing the bolts. 09911-73730: 5 mm "T" type hexagon wrench • Remove the starter idle gear and its shaft.
- Page 46 ENGINE 3-16 • Flatten the lock portion of the oil seal retainer and remove it by removing the four bolts. • Remove the neutral position indicator switch by removing the screws. NOTE: ® 0· (1), Do not lose the O-ring switch contact and its spring • Remove the countershaft bearing retainer by removing the...
- Page 47 3-17 ENGINE 0· • Remove the shim and O-ring • Remove the oil sump filter by removing the three bolts. • Remove the left oil pipe by removing the bolt. ® • Remove the oil sump filter guide by removing the two bolts.
- Page 48 ENGINE 3-18 • Remove the crankshaft assembly from the upper crankcase. • Pull out the two dampers and cam chain guide (]). ® • Remove the O-rings. NOTE: © Bear in mind that the crankshaft thrust bearings are located between shaft and case. ®...
- Page 49 3-19 ENGINE • Unhook the gearshift cam stopper spring from the lower crankcase. • Remove the circlip from the gearshift cam, and then draw out the gearshift cam from the other side. ® • Remove the gearshift cam stopper by removing the circlip 09900-06107: Snap ring pliers NOTE: (4),...
- Page 50 EIIIGINE 3-20 ENGINE COMPONENTS INSPECTION AND SERVICING CYLINDER HEAD SERVICING CAUTION: Be sure to identify each removed part as to its location, and lay the parts out in groups designated as "No.1", "No.2", "Exhaust", "Inlet", so that each will be restored to the original location during assembly.
- Page 51 3-21 ENGINE CYLINDER HEAD DISTORTION Decarbonize the combustion chambers. •••• • Check the gasketed surface of the cylinder head for distortion with a straightedge and thickness gauge, taking a clearance reading at several places indicated. If the largest reading at any position of the straightedge exceeds the limit, replace the cylinder head.
- Page 52 ENGINE 3-22 VALVE STEM WEAR If the valve stem is worn down to the limit, as measured with a micrometer, where the clearance is found to be in excess of the limit indicated, replace the valve; if the stem is within the r&2.
- Page 53 3-23 ENGINE VALVE AND SEAT COI\IDITION VALVE SEAT WIDTH • Coat the valve seat with Prussian blue uniformly. Fit the valve and tap the coated seat with the valve face in a rotating manner, in order to obtain a clear impression of the seating contact.
- Page 54 ENGINE 3-24 If the contact area is too high on the valve, or if it is too wide, Contact area too high use the 15° cutter to lower and narrow the contact area. and too wide on face of valve -----1 If the contact area is too low or too narrow, use the 45°...
- Page 55 3-25 ENGINE VALVE STEM END CONDITION CAUTION: Refacing valve stem end face is permissible where the length will not be reduced to less than 2.5 mm. If this length becomes shorter than 2.5 mm, then the valve must be replaced. After installing the valve whose stem end has been ®...
- Page 56 ENGINE 3-26 REASSEMBLY • Oil each oil seal, and press-fit them into position with the finger tip. CAUTIOI\!: Do not reuse the oil seals. NOTE: Be sure to restore the plate on the cylinder head of exhaust side. ® • Install the valve spring lowr seats, (for exhaust) and (for intake).
- Page 57 3-27 ENGINE • Put on the valve spring retainer and, using the valve lifter, press down the springs, fit the cotter halves to the stem end, and release the lifter to allow the cotter to wedge in between retainer and stem. Be sure that the rounded lip ®...
- Page 58 ENGINE 3-28 ® Cam height Intake cams : 33.580 mm (1.3220 in) Service Limit Exhaust cams: 33.240 mm (1.3087 in) CAMSHAFT JOURNAL WEAR Determine whether or not each journal is worn down to the limit by measuring the oil clearance with the camshaft installed in place.
- Page 59 3-29 ENGINE 09900-20205: Micrometer (0 - 25 mm) Standard 0.0. Camshaft journal (IN & EX): 21.959 - 21.980 mm (0.8645 - 0.8654 in) CAMSHAFT RUNOUT Measure the runout with a dial gauge. Replace the camshaft if the runout exceeds the limit. Camshaft runout (IN &...
- Page 60 ENGINE 3-30 CAM CHAIN IDLER Rotate the sprocket by hand to inspect for an abnormal noise and a smooth rotation. If defect is found, replace the cam chain idler assembly with a new one. CAM CHAIN 20-PITCH LENGTH Pull the chain tight to remove any slack, then using vernire 192021 calipers, measure the 20-pitch length of cam chain.
- Page 61 3-31 ENGINE Cylinder bore Service Limit: 78.080 mm (3.0740 in) 09900-20508: Cylinder gauge set ------- PISTON DIAMETER Using a micrometer, measure the piston outside diameter at the place shown in Fig. If the measurement is less than the limit, replace the piston. Service Limit: 77.880 mm (3.0661 in) 09900-20204: Micrometer (75 - 100 mm) 15 mm...
- Page 62 ENGINE 3-32 1--------- PISTON RING FREE END GAP AND PISTON ' - - - 1 , RING END GAP Before installing piston rings, measure the free end gap of each ring using vernier calipers. Next, fit the ring in the cylinder, and measure each ring end gap using a thickness gauge.
- Page 63 3-33 ENGINE Using a micrometer, measure the piston pin outside diameter at three positions. Piston pin 0.0. Service Limit: 19.980 mm (0.7866 in) 09900-20205: Micrometer (0 - 25 mm) CONROD SMALL END I.D. Using a small bore gauge, measure the conrod small end inside diameter.
- Page 64 ENGINE 3-34 , - - - - - - - - - - - - - - - - - - - - - - - - - . - . NOTE: Never try to remove or loosen the conrod cap bolts due to their possible loosening in the rod.
- Page 65 3-35 ENGINE Conrod 1.0. specification 1.0. specification Code 41.000 - 41.008 mm (1.6142 - 1.6145 in) 41.008 - 41.016 mm (1.6145 - 1.6148 in) Crank pin 0.0. specification Code 0.0. specification 37.992 - 38.000 mm (1.4957 - 1.4961 in) 37.984 - 37.992 mm (1.4954 - 1.4957 in)
- Page 66 ENGINE 3-36 1----------- -- • When mounting the conrad on the crankshaft, make sure that numeral figure of the conrad faces rearward. • Tighten the conrad fitting nuts with specified torque. Tightening torque: 49 - 53 N'm (4.9 - 5.3 kg-m. 35.5 - 38.5 Ib-ft) • Check the control for smooth turning.
- Page 67 3-37 ENGINE • Check the corresponding crankcase journal I.D. code num ber CD, "A" or "B" which are stamped on the rear of upper crankcase . • Check the corresponding crankshaft journal O.D. code number "A", "B" or "C". Bearing selection table Crankshaft 0.0.0 Code Green...
- Page 68 ENGINE 3-38 Bearing thickness specification Upper (Grooved bearing with oil hole ... For lower case) CD CD Color (Part No.) Specification Green 1.486 - 1.490 mm (12229-06BOO-OAO) (0.0585 - 0.0587 in) Black 1.490 - 1.494 mm (12229-06BOO-OBO) (0.0587 - 0.0588 in) Brown 1.494 - 1.498 mm CD CD...
- Page 69 3-39 ENGINE • If the right-side thrust bearing is within the standard range, reinsert the right-side thrust bearing, and remove the left-side thrust bearing. • As shown in the illustration, use a thickness gauge to measure the clearance before inserting of the left-side thrust bearing, and select a left-side thrust bearing from the selection table.
- Page 70 ENGINE 3-40 CLUTCH DRIVE PLATES AND DRIVEN PLATES Clutch plates in service remain in oily condition as they are lubricated with oil. Because of this condition, both drive and driven plates are subject to little wearing action and therefore last much longer. Their life depends largely on the quality of oil used in the clutch and also on the way the clutch is operated.
- Page 71 3-41 ENGINE CLUTCH RELEASE CYLINDER DISASSEMBLY • Remove the gearshift lever and engine sprocket cover. (Refer to page 3-6.) • Remove the clutch hydraulic line by removing the union bolt (1). NOTE: Completely wipe off any clutch fluid adhering to any part of motorcycle.
- Page 72 ENGINE 3-42 TRANSMISSION Low driven gear (2.1 4th driven 9 ear 3rd driven 9 ear Top driven 9 ear 2nd driven 9 Driveshaft drive gear rshaft/Low Counte gear ® 4th drive ® 3rd drive 9 Top drive 9 "" 2nd drive 9 0.-~1...
- Page 73 3-43 ENGINE COUNTERSHAFT DISASSEMBLY • Remove the left end bearing and oil seal ® • Remove the Top drive gear circlip from the groove and ® slide the circlip toward the 3rd drive gear 09900-06104: Snap ring pliers ® • Slide the Top drive gear toward the 3rd drive gear ®...
- Page 74 ENGINE 3-44 COUNTERSHAFT AND DRIVESHAFT REASSEMBLY Assemble the countershaft and driveshaft in the reverse order of disassembly. Pay attention to following points: NOTE: Before installing the gears, rotate the bearing by hand to inspect for abnormal noise and smooth rotation. Replace the bearing if there is anything unusual.
- Page 75 3-45 ENGINE • When installing the pair of the lock washers sure to align the three grooves of the lock washer with the three tabs of the lock washer ® • Before installing the spacer fit a new O-ring onto the driveshaft.
- Page 76 ENGINE 3-46 TRANSM ISSION ©) ~ ~ © -..~ CG=J)
- Page 77 3-47 ENGINE GEARSHIFT FORK-GROOVE CLEARANCE Using a thickness gauge, check the gearshift fork clearance in the groove of its gear. The clearance for each of the three gearshift forks plays an important role in the smoothness and positiveness of shifting action.
- Page 78 ENGINE 3-48 • Install the gearshift cam related parts. Gearshift cam Gearshift cam stopper Circlip Circlip ® Spring CAUTION: Always use new circlips • Position the gearshift cam as shown Fig. so that the gearshift forks and transmission can be installed easily. NOTE: When installing the cam stopper plate align the pin groove...
- Page 79 3-49 ENGINE ® • Fit the bearing pins and C-rings on the upper crankcase. • Install the countershaft assembly and driveshaft assembly on the upper crankcase. NOTE: Be sure to install the bearing dowel pins in the respective positions. Install the countershaft end cap to the position Make sure that the countershaft turns freely while holding the driveshaft.
- Page 80 ENGINE 3-50 ® • Fit the O-rings, CAUTION: Replace the O-rings with new ones to prevent oil leakage. • Before installing the crankshaft, apply SUZUKI Moly paste to each journal bearing lightly. • Install the crankshaft with the cam chain to the upper crankcase.
- Page 81 3-51 ENGINE ® • Install the left oil pipe with bolt. 0· • Fit a new a-ring and shim • Fit a new gasket and install the oil sump filter to the lower crankcase to face the arrow mark to the front. CAUTION: Replace the gasket and a-ring with new ones to prevent oil leakage.
- Page 82 ENGINE 3-52 • Install the gearshift shaft with the center of the gear on shaft side aligned the center of gearshift cam driven gear. • Install the washer and fix the gearshift shaft with the clip ® • Install the washer oil pump driven gear (1).
- Page 83 3-53 ENGINE • Install the primary driven gear assembly onto the counter shaft, and apply engine oil to the needle bearing and spacer. • Install the thrust washer onto the countershaft. • Install the clutch sleeve hub onto the countershaft. • After tightening the clutch sleeve hub nut, be sure to lock the nut by firmly bending the tongue of the washer.
- Page 84 ENGINE 3-54 • Coat SUZUKI Bond No. 1207B lightly to the portion around mating surface between upper and lower crankcases as shown in the Fig. 99104-31140: SUZUKI Bond No. 1207B • Install the dowel pins, a new gasket and clutch cover, and tighten the cover bolts securely.
- Page 85 3-55 ENGINE • Pass the signal generator lead wire through upper crankcase as shown in the Fig. • Install the oil seal retainer with four bolts and positively bend the lock portion of the retainer. • Insert the clutch push rod into the countershaft. • Install the neutral position indicator switch with two screws.
- Page 86 ENGINE 3-56 • Install the starter idle gear and its shaft. • Coat SUZUKI Bond No. 1207B lightly to the portion around mating surface between upper and lower crankcases as shown in the Fig. 99104-31140: SUZUKI Bond No. 1207B • Install the dowel pin, a new gasket and starter clutch cover, and tighten the cover bolts securely.
- Page 87 3-57 ENGINE • Top and 2nd rings have letter "N" marked on the side. Be sure to bring the marked side to top when fitting them to the piston. • The first member to go into the oil ring groove is spacer After placing spacer, fit the two side rails Side designa ...
- Page 88 ENGINE 3-58 • Be sure to install the pistons in the cylinder from which they were taken out in disassembly, refer to the letter mark, "1" through "4", scribed on the piston. • Have each piston pin oiled lightly before installing it. • Place a cloth beneath the piston, and install the circlips.
- Page 89 3-59 ENGINE • Place the six O-rings and two dowel pins on the cylinder. CAUTION: Replace the O-rings with new ones to prevent oil leakage. • Be sure to replace the cylinder head gasket with new one to prevent gas leakage. NOTE: Be sure to identify the top surface by "UP"...
- Page 90 ENGINE 3-60 • Place the cam chain guide properly. • While holding down the cam chain, rotate the crankshaft in normal direction to bring the "T" mark on the rotor to the center of pick-up coil. CAUTION: To turn over crankshaft. torque nut with a mm wrench.
- Page 91 3-61 ENGINE • The other arrow marked "2" is now pointing straight upward. Count the chain roller pins toward the intake camshaft, starting from the roller pin directly above this arrow marked "2" and ending with the 22nd roller pin. Engage the cam chain with intake sprocket, locating the 22nd pin at the above the arrow marked "3"...
- Page 92 ENGINE 3-62 • Each camshaft journal holder is identified with a cast-on letter. Install the dowel pins to each camshaft journal holder. • Secure the ten camshaft journal holders evenly by tightening the camshaft journal holder bolts sequentially. Try to equal ize the pressure by moving the wrench diagonally from one bolt to another and from one camshaft journal holder to another, to push shafts down evenly.
- Page 93 3-63 ENGINE NOTE: Be sure to face the arrow mark on the cam chain idler to the front. • Tighten the four bolts to the specified torque. Tightening torque: 9 - 11 N·m (0.9 - 1.1 kg-m. 6.5 - 8.0 Ib-ft) • Pour about 50 ml of engine oil in each oil pocket in the head.
- Page 94 ENGINE 3-64 • Coat SUZUKI Bond No. 1207B lightly to the portion around mating surface between upper and lower crankcases as shown in the Fig. 99104-31140: SUZUKI Bond No. 1207B • Install a new gasket and the signal generator cover with five bolts.
- Page 95 3-65 ENGINE • Place the right and left oil hoses and tighten the bolts to the specified torque. Tightening torque: 8 - 12 N·m (0.8 - 1.2 kg-m. 6.0 - 8.5 Ib-ft) CAUTION: Replace the O-rings and @) with new ones to prevent oil leakage.
- Page 96 FUEL AND LUBRICATION SYSTEM , - - - - - - - - - - - CONTENTS - - - - - - - - - - - - - . FUEL TANK, FUEL COCK AND FUEL LEVEL GAUGE 4- 1 FUEL TANK REMOVAL 4- 1 FUEL COCK REMOVAL...
- Page 97 FUEL AND LUBRICATION SYSTEM FUEL TANK, FUEL COCK AND FUEL LEVEL GAUGE FUEL TANK REMOVAL • Remove the seat and frame covers. • Turn the fuel cock to "ON" position. • Remove the fuel tank bracket by removing the bolts. • Disconnect the fuel level gauge lead wires.
- Page 98 FUEL AND LLlBRICATION SYSTEM CARBURETOR CARBURETOR CONSTRUCTION ® Air vent connector Washer Retainer screw Starter Plunger (iJ) Needle valve Spring Starter shaft Jet needle ® ® Float arm pin Top cap Throttle lever Piston valve ® Balance screw Vacuum inspection screw Needle jet Float ®...
- Page 99 J FUEl AND LUBRICATION SYSTEM SPECIFICATIONS SPECIFICATIONS ITEM E-03 E-33 I\IIIKUI\lI BST34SS Type +- 1.0. NO. 48B 11 48B21 Bore 34 mm (1.3 in) +- - ± Idle r/min. 1100 100 r/min +- ± Float height 14.6 1.0 mm (0.57 ± 0.04 in) +-...
- Page 100 FUEL AND LUBRICATION SYSTEM DIAPHRAGM AND PISTON OPERATION The carburetor is a variable-venturi type, whose venturi cross section area is increased or decreased automatically by the piston according to the vacuum present on the downstream side of the venturi. Vacuum is admitted into the diaphragm chamber through an orifice provided in the piston. Rising vacuum overcomes the spring force, causing the piston to rise to increase the said area and thus prevent the air velocity from increasing.
- Page 101 FUEl AND LUBRICATION SYSTEM SLOW SYSTEM This system supplies fuel during engine operation with throttle valve closed or slight opened. The fuel from float chamber is metered by pilot jet where it mixes with air coming in through pilot air jet.
- Page 102 FUEL AND LUBRICATION SYSTEM MAil\! SYSTEM As throttle valve is opened, engine speed rises, and this increases vacuum in the venturi. Consequently the piston valve moves upward. Meanwhile, the fuel in float chamber is metered by main jet, and the metered fuel enters needle jet in which it mixes with the air admitted through main air jet to form an emulsion.
- Page 103 FUEL AND LUBRICATION SYSTEM STARTER SYSTEM Turning the choke (or starter) lever allows starting plunger to draw fuel into the starter circuit from the float chamber. Starter jet meters this fuel, which then flows into starter pipe and mixes with the air coming from the float chamber.
- Page 104 FUEL AND LUBRICATION SYSTEM FUEL SYSTEM When turning starter motor, negative pressure is generated in the combustion chamber. This negative pressure works on the diaphram of fuel cock through passageway provided in the carburetor main bore and vacuum pipe, and diaphragm builds up a negative pressure which is higher than the spring pressure. Fuel valve is forced to open due to diaphragm operation, and thus allows fuel to flow into carburetor float chamber.
- Page 105 FUEl AND LUBRICATION SYSTEM REMOVAL Refer to page 3-4. DISASSEMBLY Disassemble the carburetor as shown in the illustration on page 4-2. INSPECTION Check following items for any damage or clogging. Pilot jet Needle valve mesh and O-ring Main jet Diaphragm Pilot air jet Gasket and O-ring Main air jet...
- Page 106 FUEl AND LUBRICATION SYSTEM 4-10 REASSEMBLY AND REMOUNTING Reassemble and remount the carburetor assembly in the reverse order of disassembly and removal. Pay attention to the following points: • Place the tongue of diaphragm to carburetor body properly. • When engaging two carburetors or two pairs of carburetors, ®...
- Page 107 4-11 FUEL AND LUBRICATION SYSTEM BALANCING CARBURETORS Check the four carburetors for balancing according to the following procedures. NOTE: When balancing the carburetors, remove the fuel tank and fuel should be supplied by a separate fuel tank and be sure to plug the fuel cock vacuum line.
- Page 108 FUEl AND LUBRICATION SYSTEM 4-12 ---, • After making sure that the steel ball stays steady at the center line, disconnect the hose from the adaptor and ---.J -- connect the next hose to the adaptor. Turn air screw to bring ] -ll the other steel ball to the center line.
- Page 109 4-13 FUEL AND LUBRICATION SYSTEM LUBRICATION SYSTEM OIL PRESSURE Start the engine and check if the oil pressure indicator light is turned on. If it keeps on lighting, check the oil pressure indicator light circuit. If it is in good condition, check the oil pressure in the following manner: • Install the oil pressure gauge with the adaptor in the position shown in the figure.
- Page 110 FUEl AND LUBRICATION SYSTEM 4-14 OIL SUMP FILTER At the same time wash the oil pan. Check to be sure that the strainer is free from any sign of rupture and wash the strainer clean periodically. When installing oil sump filter, be sure to face the arrow mark on its oil guide to the front.
- Page 111 4-15 FUEL AND LUBRICATION SYSTEM OIL COOLER • Oil Pressure Regulator: The oil pressure regula tor is threaded into the oil passage in the oil pan. • Relief Valve: A relief valve is mounted in the oil pan, in a parallel circuit with the oil cooler; when the relative oil pressure between the entrance and exit to the oil cooler exceeds 6.0 kg/cm (600 kPa), the relief valve operates.
- Page 112 r---- EXHAUsT --- EXHAUST CAMSHAFT INTAKE CAMSHAFT INTAKE-i I~OURNA~~_ _~~M FACES ---.J'I CAM FACES JOURNALS " ..J " I I I• ' " " " , , • I EXHAUST j.-fEiiiiUST ROCKER ' " INTAKE ROCKER [jNTAKE ~~SHAFTS SHA~J...
- Page 113 4-17 FUEL AND LUBRICATION SYSTEM ENGINE LUBRICATION SYSTEM...
- Page 114 FUEL AND LUBRICATION SYSTEM 4-18 CYLINDER HEAD COOLING SYSTEM CHART STUD BOLT r'-----_ST--:-U_DB_O_LT_I It·: ~---------I[rIPE 1~1------ ~', ~ " CYLINDER HEAD COVER HOSES PUMP~ OIL SUMP FILTER " • • I • I , , , ==OIL PAN...
- Page 115 4-19 FUEL AND LUBRICATION SYSTEM CYLINDER HEAD COOLING SYSTEM...
- Page 116 • EMISSION CONTROL INFORMATION , - - - - - - - - - - CONTENTS - - - - - - EMISSION CONTROL CARBURETOR COMPONENTS 5- 1 EVAPORATIVE EMISSION CONTROL SySTEM 5- 2 CANISTER HOSE ROUTING................. 5- 3 5- 4 AIR SUCTION SySTEM AIR SUCTION HOSE ROUTING...
- Page 117 EMISSION CONTROL INFORMATION EMISSION CONTROL CARBURETOR COMPONENTS GSX 11 OOF motorcycles are equipped with precision, manufactured carburetors for emission level control. These carburetors require special mixture control components and other precision adjustments to function properly. There are several carburetor mixture control components in each carburetor assembly. Three (3) of these components are machined to much closer tolerances than standard machined carburetor jets.
- Page 118 EMISSION CONTROL INFORMATION EVAPORATIVE EMISSION CONTROL SYSTEM r----------------------- - - - - - - - - - - - - - - - - - - - (Only for California model) --~-- Fuel tank Surge hose Roll-over valve Fuel hose Vacuum hose __________ Air vent hose l-way...
- Page 119 EMISSION CONTROL INFORMATION CANISTER HOSE ROUTING (Only for California model) 1-way valve Purge hose (To No.3 Carbo & No.4 Carb.) 3-way connector Surge hose Purge hose Painted line in red (To NO.1 Carbo & NO.2 Carb.) ("IN-HOSE" from fuel tank to canister) 1-way valve To fuel tank...
- Page 120 EMISSION CONTROL INFORMATION AIR SUCTION SYSTEM (Only for California model) To No.3 & No.4 air suction reed valve Air switching valve ¢:::J From 2nd air cleaner II'"""IL..-_~ Vacuum hose------.j No.1 & No.2 air suction reed valve < FRESH AIR EXHAUST GAS...
- Page 121 EMISSION CONTROL INFORMATION AIR SUCTION HOSE ROUTING (Only for California model) To fuel cock 3-way--[=~- -.. To carburetor joint Vacuum hose t - - - A i r suction hose NO.3 Air switching valve Fairing brace To No.1 cylinder & No.
- Page 122 ELECTRICAL SYSTEM , - - - - - - - - - - - CONTENTS CHARGING SYSTEM 6- 1 IGNITION SySTEM 6- 8 STARTER SySTEM 6-11 COMBINATION METER 6-15 FUEL LEVEL METER/GAUGE 6-17 DIGITAL CLOCK 6-18 LAMPS 6-18 SWiTCHES........6-20 RELAy 6-22 BATTERy...
- Page 123 ELECTRICAL SYSTEM CHARGING SYSTEM DESCRIPTIOI\l (GEI\lERATOR WITH IC REGULATOR) The generator features a solid state regulator that is mounted inside the generator. All regulator components are enclosed into a solid mold, and this unit is attached to the brush holder frame. The regulator voltage setting cannot be adjusted.
- Page 124 ELECTRICAL SYSTEM CHARGING OUTPUT CHECK Battery • Remove the seat. ---------.---t: 1--------1 I~~------ • Start the engine and keep it running at 5000 r/min. • Using the pocket tester, measure the DC voltage the between the battery terminals, IDCV) If the tester reads under 13.5 V, check the generator, Tester regulator and rectifier.
- Page 125 ELECTRICAL SYSTEM • Remove the bearing retainer screws. • Separate the generator housing from the generator end housing ® • Remove the rotor from the generator end housing using the hand press ~---------------------, INSPECTION ROTOR BEARING Rotate the rotor bearings by hand to inspect for abnormal noise and smooth rotation.
- Page 126 ELECTRICAL SYSTEM ROTOR COIL CONTINUITY CHECK Using the pocket tester, check the continuity between the two slip rings of the rotor. If there is no continuity, replace the rotor. Also check that the rotor is insulated. 09900-25002: Pocket tester SLIP RING If the slip ring surfaces are dirty, charging performance decreases.
- Page 127 ELECTRICAL SYSTEM REGULATOR Use a variable DC power source, switch and bulb to check the IC regulator, which requires two steps described below: First check: Set the variable DC power source to the 12 V, turn the switch ON position. If the bulb does not light, replace the IC regulator.
- Page 128 ELECTRICAL SYSTEM REASSEMBLY AND REMOUNTING Reassemble and remount the generator in the reverse order of disassembly and removal. Pay attention to the following points: CAUTION: The removed oil seal and a-rings should be replaced with new ones. • Apply grease to the lip of the oil seal. 99000-25030: SUZUKI super grease "A"...
- Page 129 ~EL~EE.C·~rR~IC~A~L:..:S:.:.Y..:.ST_E_M 6--77 INFORMATIO~ REASSEMBLY - - - ' '':enera to r driven gear (iJ) Rotor over No,2 er (4 pcs ~SliP DamPer housing Bearing ring side) Damp Bearing cover No, seal § Bearing nd houslIlg pcs) ® Generator e O-rln 1,;., I~older ®...
- Page 130 ELECTRICAL SYSTEM IGNITION SYSTEM DESCRIPTION The fully transistorized ignition system consists of a signal generator, ignitor, ignition coils, and spark plugs. The signal generator comprises rotor tip and pick-up coil. The signal generator is mounted at the right end of the crankshaft. The output of the signal generator goes to the ignitor unit, where it turns ON and OFF the transistor alternately.
- Page 131 ELECTRICAL SYSTEM ,----------------- . _ - - - - - - - - --- INSPECTION Electro tester IGNITION COIL (Checking with Electro Tester) NOTE: Make sure that the three-needle sparking distance of electro tester is set at mm (0.3 in). • With the tester and jumper wire, test the ignition coil for sparking performance in accordance with the following two steps.
- Page 132 ElECTRICAL SYSTEM 6-10 ---_._------, --- - - - - - - - - - - - - - - - - - - - - - - SPARK PLUG The plug gap is adjusted to 0.6 - 0.7 mm (0.02 - 0.03 in). The gap is correctly adjusted by using a thickness gauge.
- Page 133 6-11 ELECTRICAL SYSTEM STARTER SYSTEM DESCRIPTION The starter system is shown in the diagram below: namely, the starter motor, relay, interlock switch, starter button, engine stop switch, IG switch and battery. Depressing the starter button (on the right handlebar switch box) energizes the relay, causing the contact points to close which connects the starter motor to the battery.
- Page 134 ELECTRICAL SYSTEM 6-12 • Disassemble the starter motor as shown in the illustration. J~" '"~/ O-ring " ' / Housing end (Gear-side) (/l~/ , ' , .,,~ ©~\ 111~ ,~~~"' ·I·<"'''''.~ ® O-ring (2 PCS) Armature ® Starter motor case eu/~ ®...
- Page 135 6-13 ELECTRICAL SYSTEM ARMATURE COIL Using a pocket tester, check the coil for open and ground by placing probe pins on each commutator segment and rotor core (to test for ground) and on any two segments at various places (to test for open), with the brushes lifted off the commutator surface.
- Page 136 ElECTRICAL SYSTEM 6-14 HOUSING END (Gear-side) • Apply grease to the lip of the oil seal. 99000-25030: SUZUKI super grease "Au • Apply a small quantity of Thread Lock "1342" to the starter motor housing screws and install both housing ends. (See page 6-12.) 99000-32050: Thread lock "1342"...
- Page 137 6-15 ELECTRICAL SYSTEM ION METER COMBINAT ISASSEMBLY REMOVAL AND upper fairings. the lower an • Remove headlight. • Remove the mb;nat;on meteL as follows. Remove the co mbination meter assem bl e the co • •...
- Page 138 ELECTRICAL SYSTEM 6-16 INSPECTION Using the pocket tester, check the continuity between lead wires in the following diagram. If the continuity measured is incorrect, replace the respective parts. 09900-25002: Pocket tester NOTE: When making this test it is not necessary to remove the combinaTion meter.
- Page 139 6-17 ELECTRICAL SYSTEM FUEL LEVEL METER/GAUGE FUEL METER INSPECTION To test the Fuel Meter two different checks may be used. The first, and simplest test will tell if the meter is operating but will not indicate the meters accuracy throughout the range. To perform this test, remove the seat and right frame cover and disconnect the B/W and Y lead wires of the fuel gauge...
- Page 140 ELECTRICAL SYSTEM 6-18 DIGITAL CLOCK BATTERY REPLACEMENT This clock is powered by built-in long-life lithium batteries. If the clock loses the function, replace the battery as follows. • Remove the lower and upper fairings. • Remove the headlight. • Remove the combination meter. •...
- Page 141 6-19 ELECTRICAL SYSTEM TAIL/BRAKE LIGHT 1 TURN SIGNAL LIGHT CAUTION: Do not overtighten the lens fitting screws.
- Page 142 ElECTRICAL SYSTEM 6-20 SWITCHES Inspect each switch for continuity with the pocket tester referring to the chart. If any abnormality is found, replace the respective switch assemblies with new ones. 09900-25002: Pocket tester IGNITION SWITCH DIMMER SWITCH e+~1W w.----J--- Be _ _~__ ----o:==t==o---------1 --~~~...
- Page 143 6-21 ELECTRICAL SYSTEM OIL PRESSURE SWITCH WIRE COLOR • Continuity, when engine is stopped. Gray • No continuity, when engine is running. Brown White __ . . ~:=--~_~ r_o_u_n~ c -__ Yellow ---+-- - - - - - Yellow with White tracer f - - - - - - - ...
- Page 144 ElECTRICAL SYSTEM 6-22 RELAY SIDE-STAND RELAY The side-stand relay is located on the battery holder of front side. , - - - - - - - = - - - - - - - - - - - - - - - , INSPECTION ®...
- Page 145 6-23 ELECTRICAL SYSTEM BATTERY ------- --- - --l SPECI FICATIONS ~~~d~sig_n_a_t~~n YB 14L-B2 or FB 14L-B2 Capacity 12V, 50.4 kC (14 Ah)/l OHR Standard----+- - - - - - _ . _ - - - - - - - - - - - - - - - - - ._...
- Page 146 ELECTRICAL SYSTEM 6-24 - - - - - - - - "-I RECHARGING OPERATION BASED ON S.G. READING To read the S.G. on the hydrometer, bring the electrolyte in the hydrometer to eye level and read the graduation on the float scale bordering on the meniscus (curved-up portion of electro ...
- Page 147 CHASSIS CONTENTS - - - 7- 1 FAIRING......7- 3 WiND-SHIELD....................FRONT WHEEL..... 7- 6 BRAKE FRONT 7-10 FORK 7-16 FRONT STEERING....7-22 7-26 REAR BRAKE 7-31 REAR WHEEL TIRE AND WHEEL....... 7-36 REAR SUSPENSiON..................7-41 CyLiNDER 7-49 CLUTCH MASTER...
- Page 148 CHASSIS FAIRING U P er fairing . . 9 falr~d_Shield Lower brace ® Fairing/wI) F,;dng ,,,ew 2 - 4 N·m 30 Ib.ft) --=- ._ Panel (L.H. 'lghtening torque: 0 4 kg-m, 1.5 Panel~~_ ® (0.2 -_. REMOVAL the seat. • Remove I ft and •...
- Page 149 CHASSIS • Remove the lower fairing assembly by removing the screws. 09900-00401: L-type hexagon wrench set • Remove the upper fairing assembly by removing the screws. 09900-00401: L-type hexagon wrench set REINSTALLATION Reinstall the fairing in the reverse order of removal.
- Page 150 CHASSIS WIND-SHIELD Wind-shield ® Wind-shield slider guide (R.H.) ® Wind-shield slider guide (L.H.) Rubber ® Wind-shield slider ® Driveshaft right-end holder Driveshaft ® Wind-shield bracket (R.H.) ® Wind-shield bracket (L.H.) • @ Motor . _ - _ . _ - _ •...
- Page 151 CHASSIS • Remove the wind-shield by removing the screws. • Remove the headlight assembly by removing the bolts. • Loosen the driveshaft joint screws. • Remove the motor assembly by removing the bolts. • Remove the left and right wind-shield brackets by removing the bolts.
- Page 152 CHASSIS REASSEMBLY AND REMOUNTING Reassemble and remount the wind-shield in the reverse order of disassembly and removal. Pay attention to the following points: • Apply grease to each sliding part before reassembling. 99000-25030: SUZUKI super grease "A" • • Before remounting the wind-shield assembly, check the wind-shield for smooth operation by using the 12V battery and jumper wires.
- Page 153 CHASSIS FRONT WHEEL .---------------------------------------- -------1 kg-m-L_--'tJ~_ Item N·m f---®- 55 _ 88 5.5 - 8.8 40.0 - 63.5 - - - - - - - 1 - · _ - - - - + - - - - - - 1 -~---I 15-25 1.5-2.5...
- Page 154 CHASSIS • Remove both brake discs off the front wheel by removing the mounting bolts. INSPECTION AND DISASSEMBLY TIRE Refer to page 7-36. WHEEL BEARINGS Inspect the play of the wheel bearing inner race by hand while it is in the wheel. Rotate the inner race by hand to inspect for abnormal noise and smooth rotation.
- Page 155 CHASSIS • Insert the adaptor into the wheel bearing. • After inserting the wedge bar from the opposite side, lock the wedge bar in the slit of the adaptor. • Drive out the wheel bearing by knocking the wedge bar. CAUTION: The removed bearings should be replaced with new ones.
- Page 156 CHASSIS BRAKE DISC • Make sure that the brake disc is clean and free of any greasy matter. Apply Thread Lock "'360" to the disc mounting bolts and tighten them to the specified torque. Tightening torque: 15 - 25 N·m (1.5 - 2.5 kg-m, 11.0 - 18.0 Ib-ft) 99000-32130: Thread Lock "1360"...
- Page 157 CHASSIS 7-10 FRONT BRAKE , - - - - - - - - - - - - - - - - - - - - - - - - - - - - - - - - - _ . _ . _ Tightening torque ·Ib-i"t kg~m...
- Page 158 7-11 CHASSIS CALIPER REMOVAL AND DISASSEMBLY • Disconnect the brake hose off the brake caliper and catch the brake fluid in a suitable receptacle. CAUTION: Never re-use the brake fluid left over from the servicing and stored for long periods. WARNING: Brake fluid.
- Page 159 CHASSIS 7-12 CALIPER INSPECTION Inspect the caliper bore wall for nicks, scratches or other damage. Inspect the piston surface for any scratches or other damage. Inspect each rubber part for damage and wear. ! ------------- CALIPER REASSEMBLY AND REMOUNTING Reassemble and remount the caliper in the reverse order of removal and disassembly.
- Page 160 7-13 CHASSIS DISC SERVICING • Remove the front wheel. (page 7-6) • Remove the brake caliper. (page 7-6) • Remove the disc. (page 7-7) • Install the disc. (page 7-9) DISC INSPECTION Using a micrometer, check the disc for wear. Its thickness can be checked with disc and wheel in place.
- Page 161 CHASSIS 7-14 • Remove the master cylinder assembly by removing the two clamp bolts. • Remove the brake lever by removing the bolt. • Remove the reservoir cap and diaphragm by removing the two screws. • Drain brake fluid. • Remove the dust seal boot. • Remove the circlip with the snap ring pliers.
- Page 162 7-15 CHASSIS MASTER CYLINDER REASSEMBLY AND REMOUNTING Reassemble and remount the master cylinder in the reverse order of removal and disassembly. Pay attention to the following points: CAUTION: Wash the master cylinder components with fresh brake fluid before reassembly. Never use cleaning solvent or gasoline to wash them. Apply brake fluid to the cylinder bore and all the internal parts to be inserted into the bore.
- Page 163 CHASSIS 7-16 FRONT FORK lnj} Tightening torque Item kg-m Ib-ft 15-25 1.5-25 11.0 - 18.0 15-25 15-2.5 1.0-180 - - - - - - - - - 0.6-09 45 - 6.5 REMOVAL AND DISASSEMBLY • Remove the upper and lower fairings. (Page 7-1,7-2) •...
- Page 164 7-17 CHASSIS • Remove the front fork stabilizer by removing the screws. IIiii' • Loosen the front fork upper and lower mounting bolts, left and right. • Remove the front forks, left and right. • Remove the rubber cap, stopper ring and front fork cap. NOTE To remove the stopper ring, it will be necessary to push the front fork cap inwards..
- Page 165 CHASSIS 7-18 • Remove the damper rod bolt by using the special tools. (I) 09940-34520: ''T' handle 09940-34530: Attachment "A" 09900-00410: Hexagon wrench set • Remove the damper rod and rebound spring out of the inner • tube. • Separate the inner tube out of the outer tube. CAUTION: The outer tube and inner tube "ANTI-FRICTION"...
- Page 166 7-19 CHASSIS INNER AND OUTER TUBE Inspect the inner tube sliding surface and outer tube sliding surface for any scuffing DAMPER ROD RING Inspect the damper rod ring for wear and damage. REASSEMBLY AI\ID REMOUNTING Reassemble and remount the front fork in the reverse order of removal and disassembly.
- Page 167 CHASSIS 7-20 OUTER TUBE METAL, OIL SEAL AND DUST SEAL • Clean the metal groove of outer tube and metal outer surface. • Install the outer tube metal oil seal retainer and oil seal 0· CAUTION: 2 Use special care to prevent damage to the "Teflon" coated surface of the Anti-friction metal when mounting it.
- Page 168 7-21 CHASSIS FRONT FORK CAP • Install the fork cap stopper ring into the ring groove. CAUTION: Always insure that it is completely seated in stopper ring groove and securely fitted . • Set the upper surface of the inner tube at 3 mm depth from the upper surface of the steering stem upper bracket.
- Page 169 CHASSIS 7-22 STEERING ~---~--- - - - - - - -...
- Page 170 7-23 CHASSIS REMOVAL AND DISASSEMBLY • Remove the upper and lower fairings. (Page 7-1, 7-2) • Remove the brake calipers, left and right. (Page 7-6) • Remove the front wheel. (Page 7-6) • Remove the front fender and front fork stabilizer. (Page 7-16, 7 -17) • Remove the front forks, left and right.
- Page 171 CHASSIS 7-24 • Install a proper bolt onto the steering stem head. • Remove the steering stem lower bearing by using the special tool. CAUTION: The removed bearing should be replaced with new one. 09941-84510: Bearing remover 1------ • Drive out the steering stem bearing races, upper and lower by using a proper drift.
- Page 172 7-25 CHASSIS • Apply grease to the upper and lower bearings. 99000-25030: SUZUKI super grease "A". STEM NUT • Tighten the steering stem nut to the specified torque. Tightening torque: 40 - 50 N·m (4.0 - 5.0 kg-m, 29.0 - 36.0 Ib-ft) 09940-14911: Steeri ng stem nut wrench • Turn the steering stem lower bracket about five or six times to the left and right so that the taper roller bearing will be...
- Page 173 CHASSIS 7-26 REAR BRAKE Tightening torque kg:~-_=l~=-i~!i~=~ item :-_2.:~ L2~~_- 20 25 18.? 15-25 1.5-25: 110-180 --,--- ---t---------- 6- 9 0.6 0.9 +145 - 6.5 ~O=-1l3.5 18- 23 1.8--2.3 . -L __ , 25 40 25 4.0 \ 18.0 ...
- Page 174 7-27 CHASSIS CUPER REMOVAL AND DISASSEMBLY • Remove the union bolt and catch the brake fluid in a suitable receptacle. CAUTION: Never reuse the brake fluid left over from the servicing and stored for long periods. WARNING: Brake fluid, if it leaks, will interfere with safe running and discolor painted surfaces.
- Page 175 CHASSIS 7-28 REASSEMBLY AND REMOUI\ITING Reassemble and remount the caliper in the reverse order of removal and disassembly. Pay attention to the following points: CAUTION: Wash the caliper components with fresh brake fluid before reassembly. Never use cleaning solvent or gasoline to wash them. Apply brake fluid to the caliper bore and piston to be inserted into the bore.
- Page 176 7-29 CHASSIS • Remove the reservoir tank and its hose from the master cylinder. • Drain brake fluid from reservoir tank. • Slide the dust seal boot sideways and remove the push rod by using the snap ring pliers. 09900-06108: Snap ring pliers • Remove the spring/primary cup/ piston/ secondary cup out of the master cylinder.
- Page 177 CHASSIS 7-30 - - - - - - - - - - - - - - - - - - - , MASTER CYLINDER REASSEMBLY AND REMOUNTING Reassemble and remount the master cylinder in the reverse order of removal and disassembly. Pay attention to the following points: CAUTION: Wash the master cylinder components with fresh brake...
- Page 178 CHASSIS_ 7-31 ~~AR WHEEL ---="""----:;Tr;i;:;-gh"ht~8ningtor~ue_ Ib.ft_ 9~._ kg-rn -. -- - - 0 N r n _ _ _ 680 _. i "' - ::--' 3 -' 94-' 27 11 0_ '-8.0 15--2.5 - - - - r--; 5- 2 - ...
- Page 179 7-32 CHASSIS • Remove the axle shaft and disengage the drive chain from [' the rear sprocket. • Remove the rear wheel. • Remove the rear sprocket dlong with Its mounting drum Off/ the wheel hub. • Remove the dampers out of the wheel hub. •...
- Page 180 7-33 CHASSIS • Drive out the wheel bearings and sprocket drum bearing by using a proper tool. CAUTION: The removed bearings and oil seal should be replaced with new ones. - - - - - · · - - - - - - l AXLE SHAFT Using a dial gauge, check the axle shaft for runout and replace it if the runout exceeds the limit.
- Page 181 CHASSIS 7-34 DAMPER Inspect the dampers for wear and damage. REASSEMBLY AND REMOUNTING Reassemble and remount the rear wheel in the reverse order of removal and disassembly. Pay attention to the following points: WHEEL BEARING • Apply grease to the bearings before installing. 99000-25030: SUZUKI super grease "A"...
- Page 182 7-35 CHASSIS SPROCKET DRUM BEARING AND SPROCKET • Install the bearing by using the special tool. 09913-75520: Bearing installer • Apply grease to the bearing and oil seal lip. 99000-25030: SUZUKI super grease "A" NOTE: vVhen installing the rear sprocket on its mounting drum, the stamped mark on the sprocket is positioned outside.
- Page 183 CHASSIS 7-36 TIRE AND WHEEL REMOVAL The most critical factor of a tubeless tire is the seal between the wheel rim and the tire bead. Because of this, we recommend using a tire changer which is also more efficient than tire levers For tire removal the following tools are required.
- Page 184 7-37 CHASSIS 1------------- • Place the center shaft to the wheel, and fix the wheel firm by the rim holder _ _ _ _ - - ® • Attach the operation arm to the center shaft. 1---------- --::----- --- • Attach the bead breaker to the operation arm, and dismount the bead from the rim.
- Page 185 CHASSIS ]-38 INSPECTION WHEEL Wipe off any rubber substance or rust from the wheel, and inspect the wheel rim. If anyone of the following items is observed, replace it with a new wheel. A distortion or crack. Any scratches or flaws in the bead seating area. Wheel runout (Axial &...
- Page 186 7-39 CHASSIS INSTALLATION Any dust or rust around the valve hole must be cleaned off. Then install the valve in the rim. CAUTION: When installing the valve, tighten the nut by hand as much as possible. Holding the nut under this condition, tighten the lock nut@.
- Page 187 CHASSIS 7-40 • Bounce the tire several times while rotating. This makes the tire bead expand outwards, and thus makes inflation easier. NOTE: Before inflating, confirm that the balance mark lines up with the valve stem. • Pump up the tire with air. WARNING: Do not inflate the tire to more than 4.0 kg/cm (56 psi).
- Page 188 7-41 CHASSIS REAR SUSPENSION SWINGARM i""~'~ Tightening torque 1 - - - - - . Item N·m kg-m Ib-ft I - - - 22 - 33 2.2 3.3 16.0 - 24.0 ® 55 88 5.5 - 8.8 40.0 - 63.5 - - - - - - - - - - - - - - - _ _ - - - - -...
- Page 189 CHASSIS 7-42 SHOCK ABSORBER AND CUSHION LEVER -------, - - - - ~ - - - - - - - - - - - - - - - - - - - - - - - - - " Tightening torque ~ - - - - - - - ~ - - - - - - - - - - - - ~ ~ m...
- Page 190 7-43 CHASSIS REMOVAL • Remove the left and right frame covers. • Remove the rear wheel. (Page 7-31) • Disconnect the brake hose from its clamps on the swingarm. (I). • Remove the spring pre-load adjuster mounting bolts • Remove the shock absorber upper end bolt and nut. • Remove the left-side muffler by removing its connection bolts and mounting bolts.
- Page 191 7-44 CHASSIS • Remove the shock absorber by removing its lower end bolt and nut. • Remove the cushion lever/rod out of the swingarm by removing the bolt and nut. • Separate the cushion rod and cushion lever by removing the bolt and nut.
- Page 192 7-45 CHASSIS • Remove the covers, spacers and dust seals out of the cushion lever and rod. • Drive out the respective bearings with proper socket wrench. CAUTION: The removed dust seals. stopper rings and bearings should be replaced with new ones. SWINGARM Inspect the swingarm pivot bearings by hand while they are in the swingarm.
- Page 193 CHASSIS 7-46 !--_._--- -------- Inspect the swingarm pivot shaft runout with the dial gauge. The swingarm pivot shaft must be replaced if the runout exceeds the limit. 09900-20606: Dial gauge (1/100) 09900-20701: Magnetic stand (Not available in U.S.A.) 09900-21304: V-block (Not available in U.S.A.) Service Limit: 0.3 mm (0.01 in) -.-J Inspect the drive chain buffer for wear and damage.
- Page 194 7-47 CHASSIS REASSEMBLING INFORMATION Left-side Right-side "UP" Mark ,.to\ / '\ \ Swingarm ~rf;l- r,-" , - - - - - , - - - - - - - , " .j,-' ' . . . / li-A-- - - - Cushion lever rod Shock absorber 0 - \ - - - - - 40-60 Nm...
- Page 195 CHASSIS 7-48 FINAL INSPECTION AND ADJUSTMENT After installing the rear suspension and rear wheel, the following adjustments are required before driving motorcycle. Drive chain Rear brake Tire pressure Shock absorber REAR SUSPENSION SETTING Rear suspension is adjustable according to the rider's require ments.
- Page 196 7-49 CHASSIS CLUTCH MASTER CYLINDER Tightening torque I----------,---~'''------____,'C---'---_,____---_____i ~t-e-m--__+I--N-.m--_+I- kg-m Ib-ft ® 8 - 12 0.8 - 1.2 6.0 - 8.5 REMOVAL • Remove the starter interlock switch. • Place a rag underneath the union bolt on the master cylinder to catch spilied drops of brak fluid.
- Page 197 • . ' SERVICING INFORMATION - _ · CONTENTS TROUBLESHOOTING..8- 1 WIRING DIA GRAM................8- 8 WIRE, CABLE AND HOSE ROUTING 8-10 SPECIAL TOOLS 8-19 TIGHTENING TORQUE..............8-22 SERVICE DATA 8-25 L..
- Page 198 SERVICING INFORMATION TROUBLESHOOTING ENGINE Complaint Symptom and possible causes Remedy - - - - - - - - - - - - - - - - - - - - - - - - - - - - - - - - - + - - - - - - - - - - - - - - - - Engine will not start, Compression too low or is hard to start.
- Page 199 SERVICING INFORMATION Complaint Symptom and possible causes Remedy - - - - - - - - 1 Noisy engine. Noise seems to come from crankshaft 1. Rattling bearings due to wear. Replace. 2. Big-end bearings worn and burnt. Replace. 3. Journal bearings worn and burnt. Replace.
- Page 200 SERVICING INFORMATION Complaint Remedy Symptom and possible causes " - - - - - - - - - - - - - ··1 much engine oil in the engine. Check with level window, Dirty or heavy exhaust smoke. drain out excess oil. 2.
- Page 201 SERVICING INFORMATION ELECTRICAL Complaint Symptom and possible causes Remedy No sparking or poor Defective ignition coil. Replace. sparking. 2. Defective spark plugs. Replace. 3_._D_e_fe~_c_t_i_v_e_S_i_g_n_a_l_g_e_n_8_r_a_to_r_o_r_i_g ---1~_Ia_c~e_. __ n _i_to_r_u_n_i_t. Spark plugs soon be- 1. Mixture too rich. Adjust carburetors. come fouled with 2.
- Page 202 SERVICING INFORMATION BATTERY Sympton Probable cause Remedy "Sulfation", acidic 1. Not enough electrolyte. Add distilled water, if the battery has not white powdery sub been damaged and "sulfation" has not stance or spots on sur advanced too far, and recharge. faces of cell plates.
- Page 203 SERVICING INFORMATION CHASSIS Complaint Symptom and possible causes Remedy _-- 1. Steering stem nut overtightened. Heavy steering Adjust. Broken bearing in steering stem. Replace. Distorted steering stem. Replace. Not enough pressure in tires. Adjust. 5. Incorrect mounting of steering damper. Adjust.
- Page 204 SERVICING INFORMATION BRAKES Comp~~!nt ~I-----_R--e-m-e-d_y----- s_y_m p_t_o_m a_n_d_p_oS_S_i_b_l_e_c_a u_s_e_s f - - Insufficient brake 1. Leakage of brake fluid from hydraulic system. Repair, or replace. power 2. Worn pads. Replace. 3. Oil adhesion on engaging surface of pads. Clean disc and pads 4.
- Page 205 " ENGINE STOP lffi ~~"~' ,,::,,~~ 'W';"TI DIODE IGtojlllOl< SWll(>< m· '" 7 ,., ... » ",~~~" ~,,"". nlllillf TImID » 0 ::-;;.. Ill'" III BV,'---r"h--B,~~:RN S'GNA' Lg-----LJ.J--lQ "-f'h-"~' "'" 8W-l,jJ-BW~ ""o",~:. w'jJEw3@ ~8''W TAil '8RA+<E liGHT .~1]:-:~ ~~AHRT Tr~,AN 0"...
- Page 206 (") mIiI·.r~"~"-'W·T'· » ,GNITION COli I SP .."" pi "' : ' ,,~. ~f~" :::r~"TI"~ ,~., ' T1 " .." "0"' 'WH'" ("") l1li""'. SlDi 5'''''''0 flU..,. '<;;"'''011 SoIGIl6Al •• •• ,,~n C") " » Inlm "Tl O · -~,."' ~>;.
- Page 207 SERVICING INFORMATION 8-10 WIRE, CABLE AND HOSE ROUTING WIRE ROUTING _ - \ - - - - - Wiring harness Turn signal relay To RH. Turn signal Clamp Clamp ""::::---U!I! . Cia mp I- -----",...~j;w.«I[~li~w~~~ Headlight coupler Battery Starter relay Side-stand relay Ignition Clamp...
- Page 208 SERVICING INFORMATION 8-11 CABLE ROUTING CALIFORNIA MODEL ONLY Front Steering head Ignition switch Clamp (RH) Air suction reed valve hoses NOTE: Pass the starter cable Throttle cable through the clamp (LH) Starter cable in the same manner of the throttle cable. Front fork (RH) Throttle calbe Throttle cable...
- Page 209 8-12 SERVICING INFORMATION FRONT BRAKE HOSE ROUTING "0 Cl.. ---\- .q- \ ..>t!.~ (j') ..0 ..>t!. ro c 20 cD:§,...
- Page 210 c::o l> After touching the brake hose union I'Tl :::lJ :::: to the master cylinder stopper, tighten the union bolt. l> :2 ..Reservoir ----_ :::lJ ::I: tank hose l> Rear brake hose :::! " Rear brake master cylinder ~,:J Pass the rear brake hose Clamp through the brake hose guide...
- Page 211 SERVICING INFORMATION 8-14 CLUTCH HOSE ROUTING ' 1 \...
- Page 212 8-15 SERVICING INFORMATION FUEL HOSE/VACUUM HOSE ROUTING No.1 Carbo No.2 Carbo Crankcase breather hose Fuel cock Fuel hose (RH) Fuel hose (LH) Crankcase breather hose Fuel cock Fuel hose (LH) Vacuum hose ' " " '__--Frame No.1 Carbo No.2 Carbo No.3 Carbo...
- Page 213 SERVICING INFORMATION 8-16 FUEL TANK HOSE ROUTING...
- Page 214 ::I: I'T'I :::c <: ::I: ..., Breather cover _-----Carb air vent hose :::c Air cleaner case ~' ~ F"" h"," ~carb_ aIr vent hose Fuel hose (LH) Fuellevel gauge water/fuel drain hose -'" ' - Fuel tank water drain hose Air cleaner water drain hose Battery breather Clamp...
- Page 215 SERVICING INFORMATION 8-18 BATTERY BREATHER HOSE ROUTING Battery breather hose Fuel level gauge- water/fuel Fuel tank water drain hose drain hose...
- Page 216 8-19 SERVICING INFORMATION SPECIAL TOOLS II"~' , , - ' 09900-00401 "L' type hexagon wrench 0990000410 09900-06105 09900-06107 09900-06108 Hexagon bit wrench set Snap ring pliers Snap ring pliers Snap ring pliers - - - - - - - - - - - ...
- Page 217 SERVICING INFORMATION 8-20 09914-25811 09915-63210 09913-61510 09914-24510 6 mm 'T' type hexagon 09915-40611 Compression gauge Bearing puller T-handle wrench Oil filter wrench adaptor - - - - - - - + - - - - - - - - - - - + - - - - - - - - - - - + - - - - - - - - - - - - + - - - - - - 09915-74540 09915-64510 09915-74510...
- Page 218 8-21 SERVICING INfORMATION 09940-50112 09941-44510 Front fork oil seal 09941-34513 Swingarm bearing 09941-50110 09941-74910 installer Steering race insta lI_e_r _--l_re_m_o_v_e_r ...l.._B_ea_r_in...;g:;.,..re_m_o_ve_r -'-_St_e_e_ri_n..:;g_b_e_a_r_in...;;g;..in_s_ta_lI_e_r..f - - - - - - - - - - Not available in U.S.A. 09941-84510 09943-74111 Bearing remover Fork oil level gauge...
- Page 219 SERVICING INFORMATION 8-22 TIGHTENING TORQUE ENGINE ITEM Ib-ft kg-m Cylinder head cover bolt and union bolt 13 - 15 1.3 - 1.5 9.5 - 11.0 Cylinder head nut 35 - 40 3.5 - 4.0 25.5 - 29.0 Cylinder head bolt 7 - 1 1 0.7 - 1.
- Page 220 8-23 SERVICING INFORMATION CHASSIS ITEM kg-m Ib-ft I-------~----~-----------------+--------+-----------+----------- Front axle nut 55 - 88 5.5 - 8.8 40.0 - 63.5 - ~_+_--1-5._-_2_5 5_-~ I--_Fr _ _ o _n_t_a_x_l_e_p_i_n_c_h_n_u_t 1_. _ _ 1 1.0 - 18.0 20 - 30 ~ ~~2.0 # 3 . 0 ~~~5 - 21.5 Front fork upper clamp bolt Front fork lower clamp bolt 15 - 25...
- Page 221 SERVICING INFORMATION 8-24 TIGHTENING TORQUE CHART For other bolts and nuts not listed above, refer to this chart: Tightening torque Bolt Diamter Conventional or "4" marked bolt "7" marked bolt --=1-- (mm) ---N--.-m--I kg-m ib-tt---+---N-.m----i" kg-m -j-b.-ft-----1 ~.~=~:~ ~.~=~:~ 1.;=~ O~;=~:~ ~:~=~.~ : --t...
- Page 222 8-25 SERVICING INFORMATION SERVICE DATA VALVE GUIDE Unit: mm (in) ITEM STANDARD LIMIT Valve diam. 28.5 ( 1.12 ) ( 1.0 ) Valve lift ( 0.35 ) ( 0.32 ) Valve clearance (when cold) 0.10 0.15 IN. & EX. ( 0.004 ...
- Page 223 SERVICING INFORMATION 8-26 ITEM STANDARD LIMIT - - - l - - - - - - - - - - - ---- - - ~21.959-21.980 Camshaft journal 0.0. & ( 0.8645 - 0.8654 ) ----------------1 ,----- -.----- - - - - - - Camshaft runout 0.10 IN.
- Page 224 8-27 SERVICING INFORMATION ITEM STANDARD LIMIT ---+------------- -------------------~I 1 - - - - - - - - - - Piston pin bore 20.002 - 20.008 20.030 0.7875 - 0.7877 ) 0.7886 ) -(-~~97 ~ ~ ~ g~7~~f;---I---(-S~7 ~ f~---)---1 f-Piston pi;O. D · - - - - - - - - - - - - - r - - - - CRANKSHAFT CON ROD Unit: mm (in)
- Page 225 8-28 SERVICING INFORMATION ITEM STANDARD ' L I M I T ~U:h master cyli nder piston d iam. --1--3-.--9-5-7----1-3-.9-8-4------1------- 4 ( 0.5495 - 0.5506 ) Clutch release cylinder bore ------t--------·--.:..-·-3-8--.-1-0-0----3-8-.1-6-2--'------·-----1 --------------.------1 ----------' - ---- -----1----------- 1.4999 - 1.5024 ) Clutch release cylinder piston diam'l 38.042 - 38.075 ( 1.4977 - 1.4990 )
- Page 226 8-29 SERVICING INFORMATION SPECIFICATION ITEM California model only ---~ f - - - - - - - - - - - - - - - - - - - - - Pilot outlet (P.O.) 0.8 mm + c------------- - - - - - - - - - - - - - - f...
- Page 227 SERVICING INFORMATION 8·30 WATTAGE Unit: W ITEM SPECIFICATION Headlight - 5/21 Tail/Brake light Running/Turn signal light 5/21 Speedometer light Tachometer light Fuel meter light Turn signal indicator light High beam indicator light Neutral indicator light 1--- Oil pressure indicator light License light BRAKE WHEEL...
- Page 228 8-31 SERVICING INFORMATION ITEM STANDARD LIMIT Tire tread depth Front ( 0.06 ) ~-:1 ( 0.08 ) SUSPENSION Unit: mm (in) ITEM STANDARD LIMIT NOTE Front fork stroke ( 5.5 ) f - - - - - - - - - - - Front fork spring free length ---------1---...
- Page 230 Ir- Prepared by SUZUKI MOTOR CO., LTD. Technical Department Motorcycle Service Division 1st Ed. October, 1987 Part No.: 99500-39080-03E Printed in Japan...
Need help?
Do you have a question about the Katana 1100 and is the answer not in the manual?
Questions and answers
Qual a quantidade de oleo na suspensão dianteira da katana 1100 88
The front suspension (front fork) oil capacity for the 1988 Suzuki Katana 1100 is 478 ml (16.2 US oz).
This answer is automatically generated