Polycom RMX 1500 Hardware Manual
Realpresence collaboration server
Hide thumbs
Also See for RMX 1500:
- Administrator's manual (1118 pages) ,
- Getting started manual (192 pages) ,
- Hardware manual (34 pages)
Table of Contents
Advertisement
Quick Links
Download this manual
See also:
Administrator's Manual
Advertisement
Table of Contents

Subscribe to Our Youtube Channel
Related Manuals for Polycom RMX 1500


Summary of Contents for Polycom RMX 1500
- Page 1 [Type the document title] Version June 2013 DOC2729A Polycom® RealPresence® Collaboration Server (RMX) 1500 Hardware Guide Polycom Document Title...
- Page 2 Every effort has been made to ensure that the information in this manual is accurate. Polycom, Inc., is not responsible for printing or clerical errors. Information in this document is subject to change without notice.
- Page 3 2. This device must accept any interference received, including interference that may cause undesired operation. Modifications: Any modifications made to this device that are not approved by Polycom, Inc. may void the authority granted to the user by the FCC to operate this equipment.
- Page 4 Härmed intygar Polycom (UK) Ltd att denna Polycom RMX står I överensstämmelse med de väsentliga egenskapskrav och övriga relevanta bestämmelser som framgår av direktiv 1999/5/EG. A full copy of the Declaration of Conformity can be obtained from Polycom Ltd, 270 Bath Road, Slough, Berkshire, SL1 4DX, UK. China CCC EMC statement 警告...
- Page 5 If trouble is experienced with this equipment, for repair or warranty information, please contact Polycom Inc in the U.S.A. 1-888- 248-8294. If the equipment is causing harm to the telephone network, the telephone company may request that you disconnect the equipment until the problem is resolved.
-
Page 7: Table Of Contents
First-time Power-up ..................... 1-13 RealPresence Collaboration Server (RMX) 1500 Components ........1-14 RealPresence Collaboration Server (RMX) 1500 Front Panel ......... 1-14 Opening the RMX 1500 Front Panel ..............1-14 Front Panel Components ..................1-14 RealPresence Collaboration Server (RMX) 1500 Rear Panel ........1-15 RTM IP 1500 ...................... - Page 8 Polycom RealPresence Collaboration Server (RMX) 1500 Harware Guide Component Installation & Replacement ......2-1 Installing or Replacing the RTM ISDN 1500 Card .............2-1 Removing the Blank Cover or the Existing RTM ISDN 1500 Card from the RealPresence Collaboration Server (RMX) 1500 ............2-1...
-
Page 9: Hardware Description
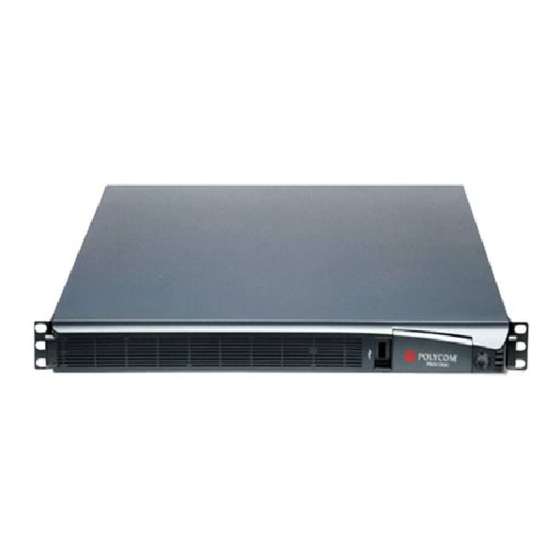
Collaboration Server 1500 and RMX 1500 are used interchangeably throughout this document. Main Features The Polycom RealPresence Collaboration Server (RMX) 1500 offers the following features: • Linux® based • Support for standard network interfaces (H.323, SIP, ISDN, PSTN and LAN) •... -
Page 10: Realpresence Collaboration Server (Rmx) 1500 Specifications
Weight Up to 12 Kg (26.5 lbs). Media Protocols Audio G.711a/u, G.722, G.722.1C, G.722.1, G.723.1, G.719 G.729A, Polycom Siren™ 14, Siren 22 (in mono or stereo) and Siren LPR. Video H.261, H.263, H.264, H.264 High Profile Network Interfaces IP, ISDN, PSTN and LAN H.323, SIP, ISDN, PSTN, VoIP and LAN... -
Page 11: Realpresence Collaboration Server (Rmx) 1500 System Capacities
RealPresence Collaboration Server (RMX) 1500 System Capacities Conferencing Capacities The following table summarizes the different system capacities. Table 1-2 System Functions and Capacities RMX 1500 Series System Functions MPMx - Q MPMx -S MPMx -D Maximum number of Video participants in a conference... -
Page 12: Resource Capacities
60 (at 128 Kbps) - 4 E1/T1 4 E1/T1 On the RMX 1500 with a MPMx-Q media card, the use of HD resolution with Continuous Presence requires an additional license. Table 1-4 System Resource Capacities per Line Rate per Card Type in VSW... -
Page 13: Site Requirements
Keep the area around the RMX 1500 clean and free of clutter. • Decide on a suitable location for the equipment rack that will hold the RMX 1500 unit. It should be situated in a clean, dust-free area that is well ventilated. Avoid areas where heat, electrical noise and electromagnetic fields are generated. -
Page 14: Installation Precautions
Place the RMX 1500 on a hard, flat surface such as a desktop or mount it on 19” rack. • The airflow of the RMX 1500 is from front to back. Be sure that the areas in the front and rear side of the system are clear for proper ventilation. -
Page 15: Installing The Rtm Isdn 1500 Card On The Realpresence Collaboration Server (Rmx) 1500
Server (RMX) 1500 The ISDN card is shipped out of the box and must be manually installed into the rear of the RMX 1500. It is recommended that the ISDN card be installed before the RMX 1500 is placed in a rack. -
Page 16: Telescopic Rail Runner Assembly
Polycom RealPresence Collaboration Server (RMX) 1500 Hardware Guide Table 1-5 Rail Runners Kit Contents Item Item Part/Kit no. Item Item Sample Quantity Rack spacer Rack spacer Front & Rear assembly kit Flat head screw - M5*10mm Rail runner assembly Flat head screw -... - Page 17 Position the Rack Spacer (item no. 3) onto the marked rack post together with left rack rail runner (item no. 1 which is labeled LEFT) and fasten the flat head screws 3*10mm (item no. 4) as shown in the following figure: RMX 1500 rack assembly view RMX 1500 rack assembly view with rail runner clip...
- Page 18 Adjust the telescopic rack rail runner to the rack opening and mount it onto the marked position of the rear post as described in step 2. Figure 1-3 Detail of Rear RMX 1500/2000/4000 Rack Spacer Assembly Repeat steps 2 and 3 for the right rack rail runner. Install the flat head screw...
-
Page 19: Mounting The Realpresence Collaboration Server (Rmx) 1500 On A Shelf
Chapter 1-Hardware Description Repeat step 5 for the right rack rail runner Figure 1-5 RMX 1500 Bolt Installation The installation is complete. Mounting the RealPresence Collaboration Server (RMX) 1500 on a Shelf — Install the shelf supplied by the rack manufacturer, in the rack. -
Page 20: Connecting The Realpresence Collaboration Server (Rmx) 1500 To Ac Power
Make sure that the power (push) button is switched OFF on the RMX 1500. ON/OFF button USB Slot Insert the power cable into the power connector on the rear panel of the RMX 1500. Connecting Cables to the RealPresence Collaboration Server (RMX) 1500 To connect the cables: •... -
Page 21: First-Time Power-Up
Activation Key. For example, ISDN, Encryption and Network Separation each have different Polycom Software Licenses. • On the RMX 1500 MPMx-Q assembly, the use of HD with Continuous Presence requires an additional licence. The parameters in the lan.cfg file are uploaded from the USB key to the RMX’s memory and applied during the power-up sequence. -
Page 22: Realpresence Collaboration Server (Rmx) 1500 Components
RealPresence Collaboration Server (RMX) 1500 Components On the RMX 1500, components are located on both the front and rear of the MCU as listed in Table 1-6, "RMX 1500 Front Panel Description". For more information see the descriptions of the "RealPresence Collaboration Server (RMX) 1500 Front Panel” on page 1-14 and "RealPresence... -
Page 23: Realpresence Collaboration Server (Rmx) 1500 Rear Panel
RealPresence Collaboration Server (RMX) 1500 Rear Panel The RMX 1500 rear panel contains the RTM IP 1500 and optionally, the RTM ISDN 1500. In addition, the rear panel houses the power supply with fan & AC inlet, and Serial port. - Page 24 Figure 1-8 RMX 1500 RTM IP Rear Panel Layout The following items appear on the RMX 1500 rear panel: Table 1-7 RMX 1500 Rear Panel - RTM IP 1500 Component Description Item...
-
Page 25: Rtm Isdn 1500
The RTM ISDN card is installed on the rear panel of the RMX interfaces between the RMX unit and the ISDN/PSTN switch. With the RMX 1500, you can either have a dedicated E1 or T1 Type Network Service. It is not possible to have a mixed E1 and T1 ISDN Network Service. -
Page 26: Isdn/Pstn Clock Source
A single clock source triggers an alarm that can be turned off by setting the appropriate flag in the system configuration. RealPresence Collaboration Server (RMX) 1500 Power Supply Subject to availability on the RMX 1500 there are two types of power supplies (Power-One & Astec), both are identical in their functionality. Power Supply LEDs On the RMX 1500 there are three LEDs that indicate the power status. -
Page 27: Realpresence Collaboration Server (Rmx) 1500 Leds
LEDs reflect the state of the components. The LEDs on the rear panel indicate the state of the external connections and the status of the RTM IP card. RealPresence Collaboration Server (RMX) 1500 Front Panel LEDs The following items appear on the RMX 1500 front panel: Table 1-9 RMX 1500 Front Panel LED’s... -
Page 28: Realpresence Collaboration Server (Rmx) 1500 Rear Panel Leds
Polycom RealPresence Collaboration Server (RMX) 1500 Hardware Guide RealPresence Collaboration Server (RMX) 1500 Rear Panel LEDs RTM IP 1500 LEDs The following LEDs appear on the RTM IP 1500: Table 1-10 RTM IP 1500 LEDs Component LED Color Indication Name LAN LEDs (1-2);... -
Page 29: Rtm Isdn 1500 Leds
Amber PS Fail - Problem with power supply. This amber LED is driven by internal circuitry and will illuminate when a power rail has failed. Green When the power cable is plugged-in, the AC LED becomes lit. 1-21 Polycom, Inc. - Page 30 Polycom RealPresence Collaboration Server (RMX) 1500 Hardware Guide 1-22 Polycom, Inc.
-
Page 31: Component Installation & Replacement
Removing the Blank Cover or the Existing RTM ISDN 1500 Card from the RealPresence Collaboration Server (RMX) 1500 Ensure that the power switch on the RMX is turned OFF (O). Remove the cover by unscrewing the captive screws that fasten the card to the MCU. Slide out the cover. Polycom, Inc. -
Page 32: Installing A New Or Replacement Rtm Isdn 1500 Card
1500/2000/4000 Getting Started Guide, Chapter 2, “Procedure 2: Product Registration” on page 2-28. In the ISDN/PSTN Network Services define a New ISDN Network Service. For more information see, Polycom® RealPresence® Collaboration Server 1500, 2000, 4000 , Chapter 16, “Adding/Modifying ISDN/PSTN Network Services” on page 16-45. Polycom, Inc. -
Page 33: Pin Assignment
Appendix A Pin Assignment PRI Port Assignment Pin 8 Pin 1 Table A-1: PRI Port Assignment Signal Name Receive Ring Receive Tip No connection Transmit Ring Transmit Tip No connection No connection No connection Polycom, Inc. - Page 34 Polycom RealPresence Collaboration Server (RMX) 1500 Hardware Guide Polycom, Inc.
Need help?
Do you have a question about the RMX 1500 and is the answer not in the manual?
Questions and answers