Yamaha Electone STAGEA ELS-01C Owner's Manual
Yamaha els-01c: user guide
Hide thumbs
Also See for Electone STAGEA ELS-01C:
- New features manual (8 pages) ,
- Owner's manual (252 pages) ,
- Playing manual (84 pages)

Related Manuals for Yamaha Electone STAGEA ELS-01C


Summary of Contents for Yamaha Electone STAGEA ELS-01C
- Page 1 ELS-01/01C/01X Owner’s Manual Excellence Winner of STC's International Technical Publications Competition, 2004...
- Page 2 Yamaha service personnel. disconnect the electric plug from the outlet, and have the instrument inspected by qualified Yamaha service personnel.
- Page 3 Yamaha cannot be held responsible for damage caused by improper use or ELS-01 / ELS-01C / ELS-01X Model No.
-
Page 4: Accessories
You are the proud owner of a fine electronic organ, the Electone STAGEA ELS-01/01C/01X. The Yamaha Electone combines the most advanced tone generation technology with state-of-the- art digital electronics and features to give you stunning sound quality with maximum musical versatility. -
Page 5: Main Features
The Registration Menu buttons feature a total of 240 Registrations, allowing you to instantly set up the Electone for playing your favorite type of music. The ELS-01C/01X contains even more — an additional 60 Registrations that utilize the expressive VA Voices and Organ Flute Voices. The Registrations in Registration Menu are divided into five basic categories for ease of selection. - Page 6 • The illustrations and LCD screens as shown in this owner’s manual are for instructional purposes only, and may appear somewhat different from those on your instrument. • The panel illustrations and LCD screens shown in this owner's manual are taken from the ELS-01C, Version 1.60.
-
Page 7: Table Of Contents
Registration Memory 12 Internet Direct Connection ..189 3 Organ Flutes (ELS-01C/01X) ..35 Connecting the Instrument to the Internet.....189 Accessing the Website from the Electone ....190 4 Voice Controls and Effects . -
Page 8: Panel Layout
Panel Layout Front Panel (The panel illustration below is taken from the ELS-01C.) LOWER KEYBOARD VOICE 1, 2 UPPER KEYBOARD VOICE 1, 2 (page 23) (page 22) REVERB buttons (page 43) REVERB UPPER KEYBOARD VOICE 1 UPPER KEYBOARD VOICE 2... - Page 9 LCD display/ DISPLAY SELECT PEDAL VOICE 1, 2 LEAD VOICE 1, 2 (page 10) (page 23) (page 22) DISPLAY SELECT LEAD VOICE 1 LEAD VOICE 2 BRILLIANCE VOLUME BRILLIANCE VOLUME VOICE A.B.C. BRILLIANT BRILLIANT DISPLAY M.O.C. VIOLIN SYNTH ACOUS- VIRTUAL Monitor speaker FOOT SWITCH...
-
Page 10: Lcd Display/Display Select
USB/MIDI connectors (page 205) Knee lever (page 183) Speaker Speaker switch Right footswitch (page 84) I/O connectors Left footswitch (page 180) (page 203) Expression pedal (page 12) Second expression pedal (ELS-01C/01X); (page 185) Pedalboard Output terminals (page 204) Pedalboard (ELS-01X) ELS-01/01C/01X Owner’s Manual... -
Page 11: Quick Introductory Guide
Make sure that the POWER switch of the speaker is set to on. NOTE If you are using the ELS-01C or ELS-01X, also set the REAR SPEAKER switch When using the rear speaker, to on (not available on the ELS-01). -
Page 12: Using The Lcd Display
Press the Expression pedal down with your foot. Maximum volume Minimum volume Using the LCD Display NOTE This instrument features a special touch panel that allows you to change the parameters When cleaning the display, by simply touching the ‘virtual’ buttons or sliders on the display. (Please note that two use a soft, dry cloth. -
Page 13: Pressing Buttons On The Display
Pressing Buttons on the Display There are three types of buttons: those that select a function, those that switch a function on/off, and those that open a list or menu of parameters. To select the desired function, simply press the button in the display directly. For switching on/off or opening a parameter list, see the instructions below. - Page 14 Adjusting Parameter Values by Using the Display Sliders You can adjust some parameters such as Volume, Reverb, Pan and so on, by using the ‘virtual’ sliders in the display. There are two ways to move the slider in the display: touching it directly, and using the Data Control dial.
-
Page 15: Lcd Display Settings
LCD Display Settings Here you can change the display settings: displayed language (English or Japanese), touch panel sound, and display brightness. Selecting the Display Language The LCD display can be shown in two languages, English and Japanese. The default setting is English. Press the [UTILITY] button to call up the GLOBAL Page of the NOTE Utility Display. -
Page 16: Adjusting The Display Brightness
Muting the Touch Panel Sound The Electone is set by default with the touch panel sound turned on, giving you audio feedback when you press a button or control. If you want to mute the touch panel sound, follow the procedure below. Press [UTILITY] button to call up GLOBAL Page of the Utility Display. -
Page 17: Voice Display
Voice Display You can visually confirm the currently assigned Voices to each keyboard, currently selected rhythm, Registration Shift, and so on, in the Voice Display. How to call up the Voice Display: The Voice Display always appears when the Electone is turned on. To call up the Voice Display from any other display, press the [VOICE DISPLAY] button. -
Page 18: Voice Sections
Voice Sections Reference Page Shows the Voices currently assigned to each Voice section. You can also mute specific Selecting a Voice (page 23) Voice section by pressing its button (the button is grayed-out). RHYTHM Reference Page Shows the currently selected rhythm. Selecting a rhythm (page 51) A.B.C. -
Page 19: Registration Menu
NOTE Voices, Lower Keyboard Voices, Pedal Voices, rhythm and so on. Each Registration Additional basic Menu button (1 – 5) includes 48 Registrations (or 60 Registrations on the ELS-01C/ Registrations are preset on the Registration Memory 01X), each specially suited for playing in a different music style. -
Page 20: Registration Menu List
Twilight Sax *D Orchestra Swing*D Bright 16 Beat *A Funk *A Hip Hop Pop *A Organ Bossa *A Orchestra 3001*A (ELS-01C/ Bright 16 Beat *B Funk *B Hip Hop Pop *B Organ Bossa *B Orchestra 3001*B 01X) Bright 16 Beat *C... -
Page 21: Confirming The Version Of Your Electone
Confirming the Version of Your Electone You can confirm the version of your Electone by the following procedure. Press the [UTILITY] button to call up the GLOBAL Page of the Utility Display. Press the [Version] button in the display. The Version dialog appears in the display. Pressing [OK] closes the dialog. Factory Set (Initializing the Electone) Reference Page All current settings including Registration Memory, User Voices, User Rhythms, and... -
Page 22: Voices
Voices This Electone features hundreds of high quality Voices. Any of these Voices can be used on the Upper Keyboard, Lower Keyboard and Pedalboard. Up to four Voice sections are available on the Upper Keyboard for playing together in a layer, while the Lower Keyboard and Pedalboard each have two Voice sections. -
Page 23: Selecting Voices With The Voice Buttons
Voices for the Lower Keyboard Up to two different Voice sections are available on the Lower Keyboard for playing together: Lower Keyboard Voice 1 and Lower Keyboard Voice 2. Voices for each section can be selected from the panel. Lower Keyboard Voice 1 Lower Keyboard Voice 2 LOWER KEYBOARD VOICE 1 LOWER KEYBOARD VOICE 2... - Page 24 For example, if you have pressed the [PIANO] button, the following display (Voice Menu) will appear. Select the desired Voice name from the Voice menu. The Voice menu contains many Piano Voices, more than can fit on one display page. To change the display pages, press the appropriate number buttons in the display.
- Page 25 Changing the Voice volume There are two ways to set the Voice volume: using the VOLUME buttons on the panel and using the volume slider in the display. The VOLUME buttons let you make coarse adjustments to the volume while the slider gives you fine control. Using the VOLUME buttons on the panel (coarse) Press one of the VOLUME buttons of each Voice section on the panel to set the desired level for each Voice.
- Page 26 Pressing a Voice button once calls up the Voice Menu display for the selected button. Pressing it a second time calls up the Voice Condition display. Successive presses alternate between the two displays. UPPER KEYBOARD VOICE 1 BRILLIANCE VOLUME BRILLIANT STRINGS BRASS WOOD-...
- Page 27 About the Solo function The Lead Voice 2 section features an exclusive Solo function. Solo lets you instantly switch to a solo Lead Voice in the middle of your performance, muting all other Upper Keyboard Voices. Select the Voice that you wish to play solo in the Lead Voice 2 section.
-
Page 28: Selecting Voices From The User Buttons
Selecting Voices from the User buttons This Electone has a wide variety of Voices from which you can choose – far greater than what is immediately apparent from the Voice buttons on the panel. Each Voice section has one or two User buttons (numbered 1 or 2) which can be found at the right side of each Voice section. - Page 29 To directly select the desired category, hold down one of the User buttons and simultaneously press the desired Voice button. 1. While holding down the User button… UPPER KEYBOARD VOICE 1 BRILLIANCE VOLUME BRILLIANT STRINGS BRASS WOOD- TUTTI SYNTH WIND PIANO ORGAN PERCUS-...
-
Page 30: Voice List
Voice List This list shows all available Voices on the Electone. Numbers written at the left side of each column in this list indicate the numbered buttons displayed in the Voice Menu. ELS-01/01C/01X STRINGS/VIOLIN Trombone Sec 1 Recorder 2 Vocal Strings 1 Trombone Sec 2 Ocarina... - Page 31 Pop Lead 4 Theatre Organ 8 Harp 3 Funk Bass 10 Pop Lead 5 Accordion 1 Elec Guitar 1 Dance Bass 1 Pop Lead 6 Accordion 2 Elec Guitar 2 Dance Bass 2 Pop Lead 7 Accordion 3 Elec Guitar 3 Dance Bass 3 Synth Cla 1 Accordion 4...
- Page 32 ELS-01C/01X (VA) Voice Name Range Description VA ACOUSTIC V-Flute 1 G2 – A6 Flute with breath and other noises, which may squeak in higher registers. Setting the Touch Tone (After) higher and applying keyboard pressure can recreate flutter tonguing. V-Flute 2 C2 –...
- Page 33 Voice Name Range Description V-E.Violin C1 – C6 Synth violin. V-Bowe C1 – C5 Simulation of a hybrid bowed-saxophone sound. V-Claviolin G2 – G5 A hybrid sound combining a violin and wind instrument. V-Air Bow C2 – G5 A bowed instrument sound with noise. V-Waspy Horn C1 –...
- Page 34 AWM Voices and VA Voices The ELS-01C/01X features two different types of Voices: AWM (Advanced Wave Memory) and VA (Virtual Acoustic). VA Voices are available only on the Lead Voice 2 section while AWM Voices are available on all sections except Lead Voice 2.
-
Page 35: Organ Flutes (Els-01C/01X)
Organ Flutes (ELS-01C/01X) The ELS-01C/01X has an Organ Flutes feature that allows you to create your own organ Voices, giving you access to an unlimited combination of organ sounds. With this function, you can recreate all of the classic organ sounds by adjusting the flute footage levels and the percussive sounds, just like on conventional organs. - Page 36 Press the [ATTACK/VOLUME] button in the upper right on the display to adjust the volume and Rotary Speaker settings. ATTACK/VOLUME Page ATTACK Determines the level of each volume in the percussive portion of the Voice. Footage settings are 4', 2-2/3' and 2'. The LENGTH lever determines the duration of the attack sound.
- Page 37 EFFECT TYPE Reference Pages Select the Rotary Speaker (tremolo) effect type. Pressing the button for which the effect type (or “OFF”) is displayed calls up a list of the effect types. Select the desired type Effect List (page 50) from among the list, then close the list by pressing [CLOSE] button on the display. Rotary Speaker (page 48) Select the desired effect type Pressing [U.
-
Page 38: Voice Controls And Effects
Voice Controls and Effects The Electone is equipped with two general kinds of functions that can be used to change the sound of the Voices: Voice Controls and Effects. Each Voice has been given certain factory-preset effect settings to best enhance its sound. However, if you wish, you can change the sound to suit your preferences by using the controls and effects described in this section. -
Page 39: Selecting From The Voice Condition Display
Selecting from the Voice Condition display Choose a Voice on the panel, then press the same button on the panel again (or press the name of the selected Voice in the display). The Voice Condition display appears. Voice Condition Display for each Voice has four pages that can be switched by pressing [1] –... - Page 40 Parameters that are available your finger from side to side). The faster you move the key laterally, the faster only on the ELS-01C/01X are and greater the pitch change becomes, within a range of +/- one octave. You can indicated by a dark frame...
- Page 41 Voice Condition [Page 2] 1 - 1 1 - 2 1 - 3 1 - 4 3 - 1 3 - 2 The items included in this page differ between the Lead Voice sections and the other sections. SLIDE ( ) only applies to Lead Voice 1 and 2.
- Page 42 SLIDE (only for Lead Voices) Reference Page Applies a portamento effect to notes played in legato. The Slide function is effective Controlling Lead Slide (with within a one-octave range for Lead Voices. Slide has no effect when playing notes Knee Lever); (page 185) beyond a one-octave range.
-
Page 43: Selecting From The Panel
By selecting [PRESET] in the list, the original (factory) effect category for the selected Voice is automatically set. Selecting [THRU] bypasses the effect (no effect is added to the selected Voice). TYPE 1 (Page 3)/ TYPE 2 (Page 4) Determines the type of the effect. Pressing the TYPE button on the display calls up the effect type list, corresponding to the selected effect category. - Page 44 REVERB [Page 1] DEPTH: NOTE Fine adjustment of the depth of reverberation or the level of the reflected sounds. Coarse reverb depth settings are made with the panel REVERB buttons. The REVERB Depending on the reverb depth value (set by the buttons let you make coarse adjustment in seven settings to the reverb depth while the slider), two adjacent REVERB slider gives you fine control.
- Page 45 Determines the reverb length for each of the Voice sections and the Organ Flute Voice. Higher settings increase the reverberance. Range: 0.3s – 30.0s ORGAN (only for the ELS-01C/01X) Determines the amount of reverb applied to the Organ Flute Voice. This parameter Reference Page corresponds to the REVERB slider contained in the ATTACK/VOLUME Page of the Organ Flute display.
- Page 46 REVERB [Page 4] TYPE Reference Page Determines the reverb type for rhythm, accompaniment, keyboard percussion, and Connecting a Microphone or microphone signal. Guitar (page 209) TIME Determines the length of reverb applied to the rhythm, accompaniment, keyboard percussion, and microphone signal. Range: 0.3s –...
- Page 47 Sustain The sustain effect, selectable for the Upper, Lower and Pedal Voices, causes Voices to Reference Page gradually fade out when the keys are released. The sustain on/off and sustain length Knee Lever (page 183) settings are independent for each keyboard, providing maximum expressive control. The Knee Lever can also be used to switch the sustain on/off.
-
Page 48: Rotary Speaker
Rotary Speaker Rotary Speaker recreates the rich, swirling sound of the popular rotating speaker effect. The Rotary Speaker effect can be switched in real time as you play, with either the front panel button or the Left Footswitch (when properly set for Footswitch operation). The Rotary Speaker effect CANNOT be turned on only by turning on the [ROTARY SP SPEED] button. - Page 49 ROTARY SPEAKER Display DISPLAY SELECT VOICE A.B.C. DISPLAY M.O.C. FOOT UTILITY INTERNET SWITCH RHYTHM PROGRAM VOICE EDIT PATTERN SEQUENCE U.ORGAN L.ORGAN ROTARY SP FLUTES FLUTES SPEED SPEED Determines the speed of the speaker rotation. Range: 2.69Hz – 39.7Hz MODE Determines the slow/stop mode when [ROTARY SP SPEED] button is off. If [SLOW] is selected, a slow chorus effect is applied when you turn off the button on the panel.
-
Page 50: Effect List
Effect List REVERB XG CHORUS 3 DUAL ROTSP 1 AT WAH+ODRV HALL 1 XG CHORUS 4 DUAL ROTSP 2 XG AT WAH+OD HALL 2 GM CHORUS 1 DIST+ROT SP TC WAH+DIST HALL 3 GM CHORUS 2 ODRV+ROT SP XG TC WH+DST HALL M GM CHORUS 3 AMP+ROT SP... -
Page 51: Rhythm/Keyboard Percussion
Rhythm/Keyboard Percussion This Electone features 274 different real rhythms featuring actual KEYBOARD PERCUSSION drum and percussion sampled sounds. Automatic Accompaniment functions are used with the rhythms, providing appropriate and completely automatic accompaniment to match the style of the RHYTHM VOLUME selected rhythm. - Page 52 Select the desired rhythm name from the Rhythm menu. The Rhythm menu contains many Pops rhythms, more than can fit on the display page. To change the display pages, press the appropriate number buttons in the display. The color of the selected rhythm name changes to orange, indicating that it has been selected.
-
Page 53: Operating The Rhythm From The Panel
FILL IN This is designed for use as a temporary and regular rhythmic pattern to spice up a repeating rhythm. There are four Fill In sections that can be played by pressing the selected (lit) MAIN/FILL IN [A] – [D] buttons as desired. When one measure pattern of Fill In finishes playing, the rhythm is automatically shifts to the Main section. - Page 54 INTRO Pressing one of the INTRO [1] – [3] buttons automatically adds a INTRO short introduction before starting the actual (Main) rhythm. First press one of the INTRO [1] – [3] buttons, then press the [START] or [SYNCHRO START] button to actually start the rhythm.
-
Page 55: Changing The Rhythm Volume
To use the Break patterns: As you play the Electone along with the rhythm, occasionally press the [BREAK] button. SYNCHRO START BREAK START Moreover, you can start/stop the rhythm and switch the sections by using the Footswitch. See page 181 for details. Changing the rhythm volume There are two ways to set the rhythm volume: using the VOLUME buttons on the panel and using the volume slider in the display. -
Page 56: Adjusting The Tempo
Adjusting the tempo Turn the TEMPO dial clockwise to increase the tempo, and counter-clockwise to decrease it. TEMPO Decreasing Increasing TEMPO Indicator the tempo the tempo BAR / BEAT TEMPO TEMPO display shows the current tempo. Displayed values are given in beats per minute. -
Page 57: Changing The Rhythm Reverb
Each rhythm has its original (preset) tempo. Press [PRESET TEMPO] button in the display to restore the tempo to the original setting. Changing the rhythm reverb You can adjust the amount of reverb applied to the rhythms and the percussion sounds Reference Page used in the rhythms in the Rhythm Condition display. -
Page 58: Selecting Rhythms From The User Buttons
Selecting rhythms from the User buttons As with the Voice sections, the Rhythm section also has User buttons (numbered 1 or 2) from which rhythms can be selected. You can select original User rhythms that you have created with the Rhythm Pattern Program function. This also allows you to assign two or three rhythms from the same category to be selected from different buttons;... -
Page 59: Rhythm List
Rhythm List This list shows all available rhythms on the Electone. Numbers written at the left side of each column in this list indicate the numbered buttons displayed in the Rhythm Menu. MARCH Fast Jazz 2 British 16Beat Bossa Nova 1 Marching Band 1 Combo Swing 16Beat 1... - Page 60 BALLAD DANCE Certain rhythms created for use with slow, soft Power Ballad Ibiza 1 Songs or for Songs that do not use a bass part at the Dramatic Ballad Ibiza 2 Table 1: beginning, may not have drum sections. To use Movie Ballad 1 Euro Trance these rhythms, refer to the following information.
-
Page 61: Accompaniment
Accompaniment The Accompaniment function provides arpeggiated chords and other instrumental embellishments when rhythms are used. Accompaniment controls are selected from the Rhythm Menu and Rhythm Condition display. Press any one of the RHYTHM buttons once. Accompaniment parts At the bottom of the display, there are seven part buttons, such as Chord 1, Chord 2, Pad, and so on. -
Page 62: Automatic Accompaniment - Auto Bass Chord (A.b.c.)
Adjust the volume and amount of reverb applied to the Accompaniment. Pressing the same rhythm button on the panel again calls up the Rhythm Condition display. The two sliders at the right side of the display can control the Accompaniment volume and reverb. - Page 63 A.B.C. MODE OFF: Cancels the Auto Bass Chord function. SINGLE FINGER: The Single Finger mode provides the fastest and easiest means to obtain many different chord/bass combinations. You can produce major, minor, 7th, and minor 7th chords by simply using one, or at most, two or three fingers to play the chords. The chord produced will sound in the same octave regardless of where it is played on the Lower keyboard.
-
Page 64: Melody On Chord (M.o.c.)
MEMORY LOWER: When this is set to on, the Lower keyboard Voices and chord accompaniment keep playing even after you release your fingers from the Lower keyboard, while the rhythm plays. PEDAL: When this is set to on, the Pedalboard Voices and bass accompaniment keep playing even after you release your foot from the Pedalboard, while the rhythm plays. -
Page 65: Keyboard Percussion
Mode 2: Produces harmonies of up to three notes in a range close to the melody played. Mode 3: Produces harmonies of up to four notes in a range relatively distant from the melody played. KNEE On/off switch for Knee Lever control over Melody On Chord operation. To use the Melody On Chord function with Knee Lever control, first switch the Knee setting to Reference Page ON, then select one of the three modes (described above). - Page 66 Select the desired percussion kit. As a default, EL Kit is assigned to the keyboards but you can change the kit from a total of 16 different kits. Pressing the Kit button on the display calls up the Percussion Kit List. Choose the desired Kit within the list, then press the [CLOSE] button at the top right of the display to close the list.
-
Page 67: Preset Keyboard Percussion List
Preset Keyboard Percussion List EL Kit Standard Kit 1* Preset 2 (PK) Preset 1 (LK) Preset 1 (UK) Preset 2 (PK) Preset 1 (LK) Preset 1 (UK) Bass Drum Heavy Kick SD Brush Roll Side Stick Surdo Mute Snare Drum Heavy Snare Surdo Open SD Brush Shot 1... - Page 68 SFX Kit 1 SFX Kit 2 Preset 2 (PK) Preset 1 (LK) Preset 1 (UK) Preset 2 (PK) Preset 1 (LK) Preset 1 (UK) Cutting Noise 1 Phone Call Cutting Noise 2 Door Squeak Door Slam String Slap Scratch Cut Scratch H 3 Wind Chime Telephone Ring...
- Page 69 Arabic Kit Pop Latin Kit Preset 2(PK) Preset 1 (LK) Preset 1 (UK) Preset 2 (PK) Preset 1 (LK) Preset 1 (UK) Kick Soft Bongo H Open 1 f Side Stick Bongo H Open 3 f Snare Soft Bongo H Rim Arabic Hand Clap Bongo H Tip Snare Drum...
-
Page 70: Assigning Sounds To The User Keyboard Percussion
Assigning sounds to the User Keyboard Percussion You can assign any desired drum and percussion sound to any key or pedal, and your original setups can be saved to eight memory locations: User 1 through User 8. The User setting saved in User memory location can be called up by using the KEYBOARD PERCUSSION [1] or [2] buttons. - Page 71 Assign an instrument to a particular key or pedal by simultaneously holding down the desired instrument name in the display and pressing the key (or pedal) to which the instrument is to be assigned. ˙ The key to which the instrument is to be assigned Instrument Name NOTE Though eight User Keyboard...
-
Page 72: Copying The Keyboard Percussion Settings
To erase all instruments: You can clear all assignments using the [CLEAR] button in the display (ASSIGN Page). Press, then release the [CLEAR] button. The following display appears, prompting confirmation of the operation. Press [CLEAR] in the display to erase all data. When [CLEAR] is selected, a “Completed”... - Page 73 Within the Menu buttons, select the User location as the destination — for example, User 1. Press the COPY [FROM] button in the display. A list appears, letting you select the copy source location. Select the copy source (Preset 1 here) from the list. A message appears, prompting confirmation of the operation.
- Page 74 Detailed settings for each percussion instrument You can independently adjust the settings of pan, pitch, reverb and volume for each instrument. The settings here are system settings that cannot be memorized to Registration memory. Turn off the volume of the relevant keyboard (the keyboard to which the instrument to be changed is assigned).
- Page 75 RESET Initializes settings such as pan, pitch, and reverb to their default values. Pressing the [EXECUTE] button calls up the following display, prompting confirmation of the operation. Press the [EXECUTE] button in the display to restore (initialize) the default settings. When [EXECUTE] is selected, a “Complete”...
-
Page 76: Kit Assign List
Kit Assign List EL Kit Timbale 1 Low Mid Tom H Mid Tom L CYMBAL Timbale 2 High High Tom Mid Tom H Crash Cymbal 1 Timbale 2 Low BASS DRUM High Tom Crash Cymbal 2 Timbale 3 High Kick BASS DRUM Crash Cym Mute Timbale 3 Low... - Page 77 Hybrid Tom 3 Tom Room 6 Kick 2 PERCUSSION 1 Hybrid Tom 4 BASS DRUM Kick Soft Conga H Open Hybrid Tom 5 Kick PERCUSSION 1 Conga L Hybrid Tom 6 Kick Tight Conga H Open Conga H Mute BASS DRUM Kick Soft Conga L Bongo H...
- Page 78 Conga Analog H Timbale H Claves Maracas Bongo H Timbale L Guiro Long Vibraslap Bongo L Cowbell Dance Guiro Short PERCUSSION 2 Timbale H Claves 2 Maracas Surdo Mute Timbale L Guiro Long Vibraslap Surdo Open Cowbell Analog Guiro Short PERCUSSION 2 Cuica Mute Claves 2...
- Page 79 PERCUSSION 2 Arabic Kit BONGO Surdo Mute ARABIC 1 Bongo H Open 1 f Surdo Open Nakarazan Dom Bongo H Open 3 f Cuica Mute Nakarazan Edge Bongo H Rim Cuica Open Hager Dom Bongo H Tip Cabasa Hager Edge Bongo H Heel Shaker Zagrouda H...
-
Page 80: Registration Memory
Registration Memory Registration Memory allows you to store virtually all the settings you make on the panel and LCD, providing a convenient way to instantly change all Voice settings and rhythms while you’re playing, with the simple touch of a single button on the Registration Memory panel. The buttons are conveniently located between the Upper and Lower keyboards for easy access while playing. - Page 81 Functions and settings that cannot be memorized: The following settings cannot be stored to a Registration Memory number. • Pitch (page 188) • MIDI Control settings (fpage 217) • Mic. Volume (page 210) • Mic. Reverb (page 210) • LCD related settings (page 15) •...
-
Page 82: Selecting Registrations
Selecting Registrations Simply press the numbered button that corresponds to the Registration you wish to select. • You can also recall Registrations by using the right footswitch. This function is called “Registration Shift” (page 84). • You can also program the Registrations to change automatically at specific points within the Rhythm Sequence. -
Page 83: Saving The Registration Data To Smartmedia Card
Saving the Registration data to SmartMedia card You can save your Registration Memory settings to an external storage device, such as Reference Page SmartMedia cards, with sixteen Registrations comprising a single file. Saving Registrations as The instructions below explain how to save the Registration data to a SmartMedia card. Registration Data (File);... -
Page 84: Initializing Registration Memory
Initializing Registration Memory Deleting all Registration data in Registration Memory initializes the Registration Reference Page Memory. Be careful when using this operation, since it erases all your existing data. In order to avoid inadvertently losing your important data, save it to an external storage Factory Set (Initializing the Electone);... - Page 85 Setting the Registration Shift mode in the Regist Shift display Press the [FOOT SWITCH] button on the panel. Press the [RIGHT] button at the top right of the display to call up the RIGHT Page (Regist Shift display). REGIST SHIFT Display DISPLAY SELECT VOICE A.B.C.
- Page 86 USER In the User mode, each press of the Right Footswitch selects Registrations according to the order you’ve specified. To set the User Registration order: Press the desired numbered button in the Registration Memory section. Press the [SET] button in the display. The Registration number appears in the display, indicating that the Registration is entered.
- Page 87 DELETE: For deleting a Registration number at the current cursor position. To delete the unnecessary number, move the cursor to a numbered position and press [DELETE] in the display. CLEAR: For erasing all current user Registration Shift settings. After selecting [CLEAR], a message appears prompting confirmation of the operation. Select [CLEAR] to clear all data.
- Page 88 Registration Shift, OFF: The current Registration number is displayed. Registration Shift, in “SHIFT” mode: Next Registration Current Registration The current Registration number (left) and the next number (right) are displayed. Registration Shift, in “JUMP” mode: Destination number can be changed. The current Registration number (left) and the destination number (right) will be displayed.
-
Page 89: Unifying A Specific Parameter
Unifying a specific parameter In the Voice Display, Page 2, you can conveniently “unify” a specific parameter used in different Voice groups at one time. This is useful when you are changing, for example, the Voice Brilliance setting for the Upper Keyboard and want the same setting to be applied to the entire instrument. - Page 90 Select the parameter and part in the Parameter Select pop-up menu. After selecting the desired parameter, the pop-up menu automatically closes. The amount of the selected parameter for each Registration is shown in the display. Parameter value for each Registration Selected parameter Select the targeted Registration numbers and turn them on.
- Page 91 Unifies the currently turned-on parameter’s values. You unify the relevant parameter values in each Registration memory number or offset them. Keep in mind that you cannot restore the original data once you change the parameter’s value. Unifying the currently turned-on parameter’s value: Pressing [SET] unifies the currently turned-on parameter’s values to the one in the currently selected Registration (at the cursor position).
-
Page 92: Music Data Recorder (Mdr)
Registration settings to a SmartMedia card or other external media. If you install the optional floppy disk drive, the UD-FD01 to the ELS-01, you can record your performances/settings to floppy disks instead of SmartMedia cards. (The ELS-01C/ 01X has a built-in floppy disk drive.) Contents 1 Calling Up the M.D.R. - Page 93 • Do not reuse a seal that has been peeled off. slot. Data Backup • For maximum data security, Yamaha recommends that you keep two copies of important data on separate SmartMedia cards. This gives you a backup if one card is lost or damaged.
- Page 94 Follow the important precautions below. • To maintain the disk drive in optimum working order Yamaha recommends that you use a commercially-available dry-type head cleaning disk to clean the head about once a month. Ask...
-
Page 95: Formatting External Media
Formatting External Media If you find that you are unable to use new, blank external media (such as SmartMedia cards, floppy disks or USB storage devices) or old ones that have been used with other devices, you may need to format them. Formatting erases all the data in the media and makes it ready to record. -
Page 96: Selecting A Song
Selecting a Song In the SONG SELECT Page, you can select a blank song to which you want to record your performance or save the Registration settings, or you can select a desired song for playback. To select the desired song: In the SONG SELECT Page, songs in the currently selected media are displayed. - Page 97 One display contains eight songs, Song 1 – Song 8. To change the display page and call up other songs, press the appropriate number buttons in the display. For example, pressing the [2] button calls up Song 9 –16, while the [3] button calls up Song 17 –...
- Page 98 To change the media/folder: Press the [FOLDER SELECT] button in the SONG SELECT Page to call up the Folder Select display. Current Media/Folder Displays the currently selected media/folder. For example, if “SmartMedia:/Folder1/” is shown, the folder named “Folder1” in the SmartMedia card is selected. Media/Folder List Displays the media or folders.
-
Page 99: Song Icons
Indicates that write-protect or copy-protect is effective for the media. Indicates a song that has been created with the ELS-01. Indicates a song that has been created with the ELS-01C or ELS-01X. Indicates a song that has been created with an EL-series Electone, such as the EL-900. - Page 100 Media Contents: Folders, Songs, and Files Folders: A folder is a storage location in the media, used to organize multiple songs in groups. If you’ve saved hundreds of songs to a SmartMedia card or USB storage device, it may be difficult to find the desired song quickly. Organizing your songs in folders, with similar songs grouped together (for example, according to genre or tempo), makes it easier to find the songs you want.
-
Page 101: Recording
Recording Recording your performance Set the desired Registrations on the Electone. Make all the Electone settings necessary for the song you will record. This means entering the all Registrations you will need for Never attempt to eject the the entire performance in the Registration Memory. Make sure also to select the media or turn the power off Registration that you will use at the beginning of the song. -
Page 102: Recording Each Part Separately
Re-recording (Retry) If you make a mistake during recording, you can re-record the song from the beginning. Press the [RETRY] button while the song is still running. This automatically stops recording and returns you to the starting point of the song. - Page 103 The following setting lets you record only Lower Keyboard and Pedalboard parts. Press the [F] (Play) button, and start playing after the hourglass icon disappears. Press the [J] (Stop) button when you are finished with your performance to stop recording. Now you’ve recorded the first parts of your performance.
-
Page 104: Changing The Song Name
Punch-in Recording This lets you re-record a specific phrase or section which you don’t want to use, either that of a specific part(s) or all parts. NOTE This function is best used when the phrase to be re-recorded has definite Select the song which contains the phrase you want to change. - Page 105 Press the [CHANGE SONG NAME] button. The following display appears. Move the cursor to the desired point by using the [E][F] buttons in the display or the Data Control dial. Cursor DATA CONTROL Select the desired character type: alphabet, upper or lowercase, NOTE or symbol.
- Page 106 To delete the entered character: Move the cursor to the character you want to delete. Cursor DATA CONTROL Press the [DELETE] button at the bottom right in the display. The character is deleted. To convert into kanji (Japanese language): This applies only if you are using the (Kana-Kan) button in Japanese.
-
Page 107: Saving Registrations As Registration Data (File)
Saving Registrations as Registration Data (File) You can also record Registrations by themselves, without recording a performance. Bulk data, including Registration Memory and Registration Shift settings, Rhythm Patterns (User rhythms) Rhythm Sequence data, and User Voices, are also saved in the operation. -
Page 108: Replacing Registrations
Press the lowest blank (empty) Registration button. Press the [SAVE] button. The Registration data will be added. When you play back this song, the top Registration in this display will be loaded to the Electone. You can also change the order of the Registration data. See page 109. - Page 109 Next Regist Settings (Changing the order of the Registration data) When playing back a song which uses more than 16 Registration numbers, you can use two or more Registration banks saved in a single song and recall them one by one as NOTE you play the song.
- Page 110 Registration Data List From this list, select the Registration you want to move, copy or delete. The selected Registration is highlighted in orange. When more than five Registration banks are saved in the song, a scroll button is available for scrolling through the Registration Data List.
-
Page 111: Recalling Recorded Registrations
Recalling Recorded Registrations Registrations (and bulk data) recorded to song numbers can be easily loaded back to the Electone by the following procedure. The M.D.R. independently records the following five types of data: • REGIST • USER VOICE • K.B.P. •... -
Page 112: Playing Back A Song
Playing Back a Song Select the song to be played back. For details on selecting a song, see page 96. Press the [F] (Play) button in the display to load the Registration data. An hourglass icon appears, indicating the Registration data is loading. Reference Page If the song contains more than two Registration banks, the first one will be loaded. - Page 113 Playing Back the Selected Part(s) You can also play back selected parts of your recorded performance, while other parts are temporarily turned off. This function is especially useful for playing a single part, such as the melody, over previously recorded accompaniment parts. To play back the selected part(s): During playback, press each part button to turn the part you want to playback to “PLAY”...
-
Page 114: Changing The Tempo
Changing the Tempo You can change the tempo of the song as the song is playing in the M.D.R. display, either while the song is stopped or while it is playing. To Change the Tempo: Use the TEMPO buttons in the display or Data Control dial to change the tempo. -
Page 115: Repeat Playback
Repeat Playback This feature allows you to repeatedly play back either all songs on a folder or only one specific song. Select the song you wish to play back. If you wish to play back all songs on a folder, select the first song that will be played back. -
Page 116: Playing Back Xg Songs
Exit from the Repeat Setting display by pressing the [CLOSE] button at the top right of the display. Press the [F] (Play) button in the SONG SELECT Page to begin playback. When you stop playback, the repeat setting is automatically cancelled. Playing Back XG Songs The Electone allows you to playback XG song data, created on the computer or Reference Page... - Page 117 Select the desired song for playback. Press the [F] (Play) button in the display to start song playback. The following display appears, letting you set the volume or mute settings for each part. PART buttons Sets the each part for playback or mute (off ). Each press of the button toggles between PLAY and OFF.
-
Page 118: Other Functions (Tools)
Other Functions (Tools) The TOOLS Page in the M.D.R. display has many functions, such as song copy, song delete, etc. Song Copy This function lets you copy data recorded in one song to another song. You can copy and exchange the data even between two different media. (Only songs created with the ELS-01/01C/01X can be copied. - Page 119 Confirm that the desired song to be copied is displayed in the upper half of the display. If you want to change the song, press the COPY FROM [CHANGE] button to call up the Song Select display and select another song. Press the COPY TO [CHANGE] button to call up the Song Select display, then select the destination song.
-
Page 120: Song Delete
Eject the source media. After ejecting the source media, the message “Insert the destination media” will appear on the display. Insert the destination media to which you want to copy. The Song Copy display appears. “MEMORY:/” (the internal memory to which the song has been copied in step #5) is displayed in the SONG FROM. - Page 121 To move the protected song in a SmartMedia card with a computer, you’ll need to use the Musicsoft Downloader application. If you move the song without Musicsoft Downloader, the song cannot be played back. Musicsoft Downloader can be obtained at the following Internet address: http://music.yamaha.com/download/ ELS-01/01C/01X Owner’s Manual...
-
Page 122: Converting To Xg
Converting to XG This function allows you to convert the ELS-01/01C/01X song data to XG format data. You can playback the data using XG devices. The converted XG song data may sound differently from the original data. Confirm that the media should contain enough amount of available memory before the conversion. - Page 123 Press the [CONVERT] button. After the process of the conversion the LCD returns to the original display. To call up the XG song in the display, press [XG] button in the SONG SELECT Page of the M.D.R. display. For more information, see page 116. XG Song Copy Select the XG song to be copied.
- Page 124 XG Song Delete Select the XG song to be deleted. For details on selecting an XG song, see page 116. Press the [TOOLS] button at the top right of the display to call up the TOOLS Page, then select the [XG SONG DELETE] button. The XG Song Delete display appears.
- Page 125 Confirm that the desired song to be converted is displayed in the upper half of NOTE the display. If you want to change the song, press the [CHANGE] button of the If the source song’s name Change From section to call up the Song Select display and select the desired contains full size characters song.
-
Page 126: Checking The Remaining Memory
Confirm that the desired song to be converted is shown in upper half of the display. If you want to change the song, press the [CHANGE] button of the Change From section to call up the Song Select display and select the desired song. Press the [CHANGE] button of the Change To section in the display, then select the destination. -
Page 127: Voice Edit
• Selecting a Voice for editing....128 • Editing an AWM Voice ....130 • Editing a VA Voice (only for ELS-01C/01X)..135 Voice Structure The internal structure of the Voices of this Electone is explained below. -
Page 128: Editing A Voice
You can edit the Voice’s volume and timbre. Moreover, you can also add AWM Elements to a VA Voice to create your own original Voice. VA Voices are available only on the Lead Voice 2 section of the ELS-01C/01X. All Voices in the other Voice sections are AWM Voices. - Page 129 While holding down the [VOICE EDIT] button, press the Voice button corresponding to the Voice you wish to edit. If you press [VOICE EDIT] without selecting a Voice, the following display will prompt you to complete the step. While this display appears, press the desired Voice button.
- Page 130 Editing an AWM Voice You can edit an AWM Voice on the AWM Page and LAYER Page in the Voice Edit display. In the AWM Page, the tonal balance of the entire Voice can be corrected by some EQ parameters. In the LAYER Page, you can make detailed edits to each Element.
- Page 131 LAYER Page Element select buttons Select the Element you wish to edit. Element On/Off switches The [AWM1] – [AWM4] buttons indicate the Elements which make up the selected Voice, and the [VA] button indicates the VA tone generator (the [VA] button is grayed out when you are editing an AWM Voice).
- Page 132 LEVEL Determines the output level of the Element. Range: 0 – 127 NOTE LIMIT Determines the lowest and highest notes in the range for which the Element sounds. The setting of the HIGH slider cannot be set lower than that of the LOW slider. Some Elements are not affected by this parameter.
- Page 133 CUTOFF FREQ. Determines the cutoff frequency of the filter. Range: 9600 – 24000 cent RESONANCE Determines the amount of resonance (harmonic emphasis) applied to the signal at the cutoff frequency. Some Elements are not affected by this parameter. Range: 16 – 140 Filter —...
- Page 134 LAYER Page 3 LFO WAVE Determines the LFO waveform used to vary the sound. For details, see page 135. LFO SPEED Determines the speed of the LFO waveform. Higher values make the speed faster. Range: 2 – 93 LFO PMD (Pitch Modulation Depth) Determines the amount by which the LFO waveform varies the pitch of the sound.
- Page 135 The following five waveforms are available. sine Editing a VA Voice (only for ELS-01C/01X) You can edit a VA Voice in the VA Page of the Voice Edit display. If you are using the ELS-01, the VA Page cannot be selected.
- Page 136 ATTACK RATE Determines how quickly the sound will reach its maximum level after the key is played. Lower values produce a slower attack. Range: -64 – +63 DECAY RATE Determines how much time it takes to reach its second level from the first (maximum) level.
-
Page 137: Saving The Edited Voice
Saving the edited Voice Edited AWM Voices can be saved as User Voices (up to sixteen), and edited VA Voices can be saved as VA Custom Voices (up to six). Press the [SAVE] button at the top right of the display to call up the SAVE Page. -
Page 138: Quitting Voice Edit
Quitting Voice Edit You can quit the Voice Edit function from any of its display pages. Press the [VOICE EDIT] button on the panel. If your original Voice has already been saved, the Voice Edit function quits automatically. If the edited Voice has not been saved, a message appears prompting confirmation of the operation. -
Page 139: Rhythm Program
Rhythm Program The Electone includes powerful rhythm programming functions: Rhythm Pattern Program and Rhythm Sequence Program. Rhythm Pattern Program allows you to record your own original rhythms and save them as user rhythms. Rhythm Sequence Program lets you connect the existing rhythms or your original rhythms to create complete rhythm tracks, which you can automatically play back during your performance. -
Page 140: Rhythm Pattern Program
Rhythm Pattern Program Rhythm Pattern Program lets you use any of the different instrument sounds (drum and percussion) assigned to each key on the Upper and Lower keyboards in creating your own rhythms. Up to 48 of your original rhythms can be saved as User Rhythms. Entering the Rhythm Pattern Program There are two ways to program a User pattern: copying a preset rhythm that is similar to the rhythm you want to create, and creating your own rhythm from scratch. - Page 141 To create your own rhythm from scratch: Press the [PATTERN] button and release it without selecting a Rhythm button. A blank pattern is loaded to the Rhythm Pattern Program. A Rhythm consists of 15 sections: Intro 1 – 3, Main A – D, Fill In A – D, Ending 1 – 3, and Break. In Rhythm Pattern Program, you can enter or edit percussion notes one by one, or assemble each part from other different rhythms to create your own new User Rhythm.
-
Page 142: Basic Settings For The Rhythm Pattern
Basic settings for the Rhythm Pattern In the SETTING Page of the display, set the conditions of the rhythm, such as time signature, measure length, and so on. You can also customize the part settings in this SETTING Page — deleting any part or copying a part from another rhythm to the currently selected rhythm. - Page 143 Select a section to which you want to enter or edit the rhythm pattern. Pressing the SECTION button on the display calls up the Section Select pop-up menu. After selecting the desired section, the pop-up menu automatically closes. You can play the selected section by pressing the Rhythm [START] button on the panel.
- Page 144 ASSEMBLE Copies the part from another rhythm to the currently selected rhythm. You can assemble various sections from multiple rhythms to create your original rhythm. Pressing the [ASSEMBLE] button calls up the following display. Select copy source (Rhythm, Section, and Part) Select the part for the copy destination Press here to execute the copy...
-
Page 145: Entering Percussion Sounds To A Rhythm Pattern - Step Write
Step Write and Real Time Write There are two different methods you can use to program rhythms: Step Write and Real Time Write. Step Write allows you to enter percussion sounds as individual note values. As a method, it is very similar to writing down the notes on a sheet of music paper; each note is entered one at a time, and though you can hear each individual note entered, you cannot actually hear the pattern playing as you create it. - Page 146 Select the desired Drum Kit. You can select a kit from 20 Drum kits and 5 SFX kits. For details on each kit, see page 167. Pressing the button indicating the currently selected kit calls up the kit Select the pop-up menu, then select the desired kit from the pop-up menu.
- Page 147 Set the Gate Time. (This is optional, and only necessary when you want to enter a sustaining sound, such as a whistle.) For a list of instruments that require a Gate Time setting, refer to the Percussion Kit List on page 167. For details on Gate Time, refer to page 156. Use the ACCENT buttons to enter the sound to the selected point.
-
Page 148: Editing Entered Percussion Notes
Editing Entered Percussion Notes You can change the accent level, position, or gate time of the entered sound, or delete the entered sound. To change the accent level of an entered note: Select the desired note for changing the accent level. NEXT INSTRUMENT Selects the entered instruments one by one, from left key to right. - Page 149 Change the accent level by using the ACCENT buttons or Accent box. The Accent box allows for finer changes. Accent box Touch on the box to enable the Accent box. Turning the Data Control dial changes the accent level over a range of 0 – 127. The minimum setting results in no sound.
- Page 150 To change the length of an entered note: The length of sustaining sounds such as Snare Roll and Whistle can be changed by adjusting the Gate Time. See page 157 for more information. To erase an entered note: Select the note you want to erase (as in Step 1 on page 148). Press the [REST] button in the ACCENT section of the display.
- Page 151 Select [CLEAR] to erase the selected instrument. A bell sound indicates that the instrument has been erased. The following method can also be used to erase one instrument. While holding down the [CLEAR] button, press the key on the keyboard corresponding to the instrument you wish to erase. A bell sound indicates that the instrument has been erased.
- Page 152 About Quantize The Quantize function is a process of rounding off timing or duration values, so that each note plays with precise timing. You can select nine types of Quantize value. With this button, change the displayed Quantize buttons With Step Write It allows you to automatically correct the length (duration) and timing of each note you enter.
-
Page 153: Entering Percussion Sounds To A Rhythm Pattern - Real Time Write
Entering Percussion Sounds to a Rhythm Pattern – Real Time Write While you listen to the entered rhythm or metronome click, play the Upper/Lower keyboards to enter the desired percussion sounds. Select the desired part to which the percussion sounds are entered, and the desired drum kit, by following Steps 1 –... -
Page 154: Creating Backing Patterns (Rhythmic Chord Function)
You can erase an instrument while rhythm is played. To erase an instrument/key assignment: While holding down the [CLEAR] button, press the key on the keyboard corresponding to the instrument you wish to erase. All instances of the selected instrument will be erased from the pattern. When you want to erase all instruments, or edit entered percussion notes, you need to stop the rhythm then edit. - Page 155 Press the [EXECUTE] button to execute the copy. The desired accompaniment part (Rhythmic Chord pattern) has been copied. To create your own backing patterns with the Rhythmic Chord function: The Rhythmic Chord pattern can be entered by the same methods as the rhythm: Step Write and/or Real Time Write.
- Page 156 Set the appropriate Quantize value. For details on the Quantize function, refer to page 152. Set the Gate Time. You can adjust the Gate Time setting by using GATE TIME buttons in the display, or Data Control dial. DATA CONTROL Gate time determines the actual length of time a note sounds.
-
Page 157: Changing The Voices For Accompaniment Parts
To change the Gate Time: Select the note for which you want to change the gate time (see Step 1 on page 148). Press the Gate Time box to enable the box. Turn the Data Control dial to change the Gate Time. Changing the Voices for Accompaniment Parts In Rhythm Pattern Program, you can create your original drum patterns using Main Drum and Add Drum, and original backing patterns using Chord 1 and Chord 2. -
Page 158: Adjusting Volume And Panning
Select the desired part for which you wish to change the Voice. The Voice menu appears. Select the desired Voice, and the Voice menu automatically NOTE closes. The Voice menu that appears here is not the same as the After selecting the desired Voice, customize the accompaniment to your personal one for the Voice Sections. -
Page 159: Effect Settings
PAN Display Determines the position of each accompaniment part in the stereo image. Range: L64 – R63 Effect Settings You can set Reverb, Chorus, and Variation effects as desired for your original rhythm. Reverb adds a warm ambience to the sound, simulating the complex reflections of actual performance spaces, such as a concert hall or a small club. - Page 160 CHORUS Display CHORUS TYPE Determines the type of the chorus effect. Pressing the CHORUS TYPE button calls up the chorus type list. Select the desired chorus type, and the list automatically closes. Chorus sliders Determines the amount of chorus effect applied to each accompaniment part. Range: 0 –...
- Page 161 VARIATION Display VARIATION (Variation Effect Category) Reference Page Selects the effect category of the variation effect. Pressing the VARIATION button calls Effect List (page 50) up the effect category list. Select the desired effect category, and the list automatically closes. After changing the category, the variation type below automatically changes corresponding to the selected category.
-
Page 162: Detailed Settings For Each Percussion Instrument
Detailed settings for each percussion instrument You can independently adjust the settings of pan, pitch, reverb and volume for each instrument. Press the [DRUM SETUP] button at the top of the display to call up the DRUM SETUP Page. Select the desired part, Main Drum or Add Drum. Press the appropriate key (the key to which the instrument to be changed is assigned). -
Page 163: Saving Rhythm Patterns
Percussion Kit Name Indicates the currently selected kit. Pressing this button calls up the Percussion Kit list, Reference Page letting you select the desired kit. When you change the kit, the instruments you have Percussion Kit List already entered are replaced with the instruments of the newly selected kit. (page 167) Determines the position of the currently selected instrument in the stereo image. - Page 164 Press the [SAVE] button to save the pattern, or press [CANCEL] to abort the operation. Remaining Memory (amount of memory available for storing rhythms) is shown on the display as a percentage. Remaining Memory When the pattern cannot be saved because of lack of available memory space, a “Data full”...
-
Page 165: Quitting The Rhythm Pattern Program
Quitting the Rhythm Pattern Program You can quit the Rhythm Pattern Program from any of its display pages. Press the [PATTERN] button. If a rhythm is playing, it will automatically be stopped. If you leave Rhythm Pattern Program without having edited any patterns, this simply quits the Rhythm Pattern Program. -
Page 166: Selecting Rhythm From An External Media
About file types that can be loaded to the Electone This Electone is compatible with Style File Format data. The Style File Format (SFF) is Yamaha’s original style data format, which uses a unique conversion system to provide high-quality automatic accompaniment based on a wide range of chord types. -
Page 167: Percussion Kit List
Percussion Kit List Standard Kit 1 Standard Kit 2 Hit Kit Room Kit Rock Kit Electro Kit Live!Std Kit Live!Funk Kit Live!Std+P Kit Live!Funk+P Kit C -1 Surdo Mute Surdo Mute Surdo Mute Surdo Mute Surdo Mute Surdo Mute Surdo Open Surdo Open Surdo Open Surdo Open... - Page 168 Analog Kit Dance Kit Jazz Kit Brush Kit Symphony Kit EL Kit 1 Live!Brush Kit Live!Brush+P Kit C -1 Surdo Mute Kick Dance 1 Surdo Mute Surdo Mute Surdo Mute Scratch Surdo Open Kick Dance 2 Surdo Open Surdo Open Surdo Open Concert BD D -1...
- Page 169 EL Kit 2 Live!Studio Kit SFX Kit 1 SFX Kit 2 Arabic Kit Cuban Kit Pop Latin Kit Maracas High Surdo Mute C -1 Surdo Mute Surdo Open Maracas Low Hi Q D -1 Surdo Muff Whip Slap Surdo Rim Scratch H Cuica High Scratch L...
-
Page 170: Rhythm Sequence Program
Rhythm Sequence Program With the Rhythm Sequence Program function, you can string together any of the Electone’s existing rhythms and the rhythms of your own creation together to make complete rhythm compositions. You can save four rhythm compositions (each can contain up to 140 bars) to the Sequence buttons on the panel for future recall. -
Page 171: Programming A Sequence
Press one of the Sequence buttons ([SEQ. 1] – [SEQ. 4]) on the left half in the display to select the rhythm sequence number you want to edit. The lamp of the selected numbered sequence button in the Rhythm section lights. - Page 172 Select the desired rhythm from the displayed rhythm menu. Select a rhythm section (Main A – D, Fill in A – D, Intro 1 – 3, NOTE Ending 1 – 3, or Break) by pressing one of the rhythm control When entering an Intro buttons on the panel.
-
Page 173: Auditioning A Sequence
Auditioning a Sequence You can play a sequence you are editing at any time to audition the changes. Move the cursor to the desired position for playback. Move the cursor by using the Data Control dial, or the POSITION buttons on the display. - Page 174 Moves the cursor to the first position. Moves the cursor one step to the left. Moves the cursor one step to the right. Moves the cursor five steps to the right. DATA These are data controls for entering rhythms and deleting existing rhythms in the rhythm row.
-
Page 175: Programming A Registration Sequence
Programming a Registration Sequence The Registration Sequence feature allows you to have desired Registrations automatically called up in sequence, when playing a Rhythm Sequence. It lets you program the timing (bar/beat/clock) at which the Registration is changed. You can also program the Next Regist function in Registration Sequence. -
Page 176: Editing An Existing Registration Sequence
Press the DATA [SET] button in the display. The Registration number appears in the display (in the timing order), indicating that the Registration is entered. Up to 140 Registrations can be entered. If some Registration numbers are entered to the same Bar/Beat/Clock, the last entered one takes priority. -
Page 177: Quitting The Rhythm Sequence Program
To move the Registration number timing, press the DATA [SET] button. To move the Next Regist timing, press the NEXT REGIST [SET] button. The position of the Registration number or Next Regist is changed and displayed in the proper order. To erase an entry: Using the POSITION buttons, move the cursor and select the data (Registration number or Next Regist) you want to delete. -
Page 178: Playing Rhythm Sequences
Playing Rhythm Sequences To play any of the rhythm sequences you have created: Press the appropriate Sequence button ([SEQ. 1] – [SEQ. 4]) on the panel. The SEQ button’s lamp lights. RHYTHM VOLUME MARCH WALTZ SWING& POPS R & B SEQ. -
Page 179: Saving Rhythm Pattern And Rhythm Sequence Data To External Media
To start a sequence using the Left Footswitch: You can start or stop the Rhythm Sequence playback using the left footswitch. Press the desired Sequence buttons, making sure that all their LEDs are lit. Press the [FOOT SWITCH] button on the panel to call up the Footswitch display, LEFT Page. -
Page 180: Footswitches
Footswitches, Knee Lever and Expression Pedals These leg- and foot-operated controls allow you to execute various performance functions and switch the effect on/off, without taking your hands from the keyboard. Contents 1 Footswitches ......180 2 Knee Lever. -
Page 181: Controlling The Rhythm
DISPLAY SELECT VOICE A.B.C. DISPLAY M.O.C. FOOT UTILITY INTERNET SWITCH RHYTHM PROGRAM VOICE EDIT PATTERN SEQUENCE U.ORGAN L.ORGAN ROTARY SP FLUTES FLUTES SPEED In this display, you can assign the control function to the Left Footswitch: Rhythm, Glide, and Rotary Speaker. If you choose OFF here, the Left Footswitch will not control any function. -
Page 182: Controlling Glide
INTRO 1 – INTRO 3 These functions correspond to the INTRO [1] – [3] buttons on the panel. For example, when the INTRO [1] button is selected in this display and you press the Footswitch, the rhythm section is switched to Intro 1. ENDING 1 –... -
Page 183: Knee Lever
Controlling Rotary Speaker You can control the Rotary Speaker effect (on/off ) by using the Left Footswitch. Reference Page Rotary Speaker (page 48) When the [Rotary Speaker] button is selected in this display and you press the Footswitch, the Rotary Speaker effect is switched on or off. This function corresponds to the [ROTARY SP SPEED] button on the panel. -
Page 184: Controlling Melody On Chord
To apply sustain, press the Knee Lever to the right. Sustain is constantly applied as long as the Knee Lever is pressed. Releasing the Knee Lever turns sustain off. When the Knee Lever is folded up: Sustain is applied constantly, as long as the front panel Sustain buttons are on. When the Knee Lever is vertical: Sustain is cancelled. -
Page 185: Expression Pedals
Expression Pedals The Expression pedal can be used to control the volume with your foot as you play. Moreover, the ELS-01C/01X has another Expression Pedal, the 2nd Expression Pedal. Reference Page The 2nd Expression Pedal can be used to control the Pitch Bend and the Tempo of the Getting Started (page 11) Rhythm. -
Page 186: Controlling Pitch Bend
Press the [UTILITY] button on the front panel. The Utility display appears. Press the [EXP.] button in the upper right of the display to call up the EXP. (Expression) Page. DISPLAY SELECT VOICE A.B.C. DISPLAY M.O.C. FOOT UTILITY INTERNET SWITCH RHYTHM PROGRAM VOICE EDIT PATTERN SEQUENCE... -
Page 187: Controlling The Rhythm Tempo
Controlling the Rhythm Tempo MODE Determines the range of tempo change. Range: 1 – 12 The setting 2 (NARROW) results in a small amount of tempo change (70% – 140%); the setting 12 (WIDE) results in a large amount of tempo change (50% – 200%). TEMPO When you want to control the tempo with the 2nd Expression Pedal, set this to “ON.”... -
Page 188: Transpose And Pitch Controls
Transpose and Pitch Controls There are two pitch-related controls on the Electone: Transpose and Pitch. Transpose allows you to change the key of the instrument and Pitch lets you finely adjust the tuning. Transpose and Pitch can be adjusted in the Utility display. (The settings here cannot be recorded to the Music Data Recorder.) Press the [UTILITY] button. -
Page 189: Internet Direct Connection
Internet Direct Connection This convenient, powerful feature lets you directly connect your Electone to the Internet. In this section, you may come across some unfamiliar terms and phrases related to computers and online communications. To look up the meaning of these terms, refer to the Internet Glossary (page 202). -
Page 190: Accessing The Website From The Electone
Connection example 2: NOTE Connecting by cable (using a modem with router) Some types of modems require an optional hub LAN cable ADSL modem network for simultaneously Router capability connecting to several devices (such as computer, musical instrument, etc.). LAN cable USB-LAN adapter Connection example 3: Wireless connection... -
Page 191: Scrolling The Display
In the Control Menu located in the left part of the display, you can control the displayed website and set various settings. The browser display, to the right of the control menu, is the area in which the website is displayed. Reference Page The first page shown when opening a browser and connecting to the Internet is Changing the Home Page... - Page 192 Monitoring the Internet Connection Status The four icons and a message indicate the current Internet connection status. 2 3 4 Offline indicator ( This is shown when the instrument is not connected to the Internet. When this appears, you cannot view any web pages. Communication Status indicator ( This flashes when the web page is being loaded, indicating that communication with the site is in progress.
-
Page 193: Refreshing A Web Page/Canceling Loading Of A Web Page
Communication status indicator The following three messages will be shown depending on the status of accessing web site. Now opening web page ... Indicates loading of the web page. Web page has been displayed. Indicates the web page has been loaded and the web page is completely displayed. -
Page 194: Saving Bookmarks Of Your Favorite Pages
Saving Bookmarks of Your Favorite Pages You can “bookmark” the page you’re viewing, and set up a custom link so the page can be instantly called up in the future. With the desired page currently selected, press the [BOOKMARK] button in the control menu. The Bookmark display appears, showing a list of the currently saved bookmarks. - Page 195 Select the position of the new bookmark by pressing the desired position directly, or using the [UP]/[DOWN] button or the Data Control Dial. DATA CONTROL To save the bookmark, press the [EXECUTE] button, or press the [CANCEL] button to cancel. To return to the browser, press the [EXIT] button.
-
Page 196: Editing Bookmarks
Editing Bookmarks From the Bookmark display, you can change the names and rearrange the order of your bookmarks, as well as delete unnecessary bookmarks from the list. UP/DOWN Moves the selection position in the Bookmark list. JUMP Opens the web page of the selected bookmark. Used when saving a bookmark (page 194). -
Page 197: Changing The Home Page
Changing the Home Page You can specify any desired page on the site to be the home page. In advance, open the page you wish to set as your new home page. Press the [SETTING] button in the control menu to call up the Internet Setting display. -
Page 198: About The Internet Settings Display
About the Internet Settings Display From the Internet Settings display, you can make various settings related to the Internet connection, including preferences for the menus and displays. The Internet Settings display has four sub-displays: Browser, LAN, Wireless LAN, and Others. Browser Encode Selects the character code encoding for the browser. -
Page 199: Lan
In this display page, you can make settings for the LAN connection. These settings are needed for not only wired LAN connection but also wireless LAN connection. Make a written note of these settings, in case you have to enter the settings again. Use DHCP DNS server 1 DNS server 2... -
Page 200: Others
Access Point Pressing the [Display Information] button calls up the access point list. It shows the NOTE access points near the Electone. An access point that is Once you select the desired access point and press the [OK] button, a message appears encrypted in a non-WEP format cannot be used. -
Page 201: Exiting From The Internet Display
Connection information Shows detailed information on the current connection. Exiting from the Internet Display Pressing any button other than [INTERNET] button quits the Internet Direct Connection and closes the website display. Pressing the [INTERNET] button again automatically opens the previously opened website. Initializing Internet Settings The settings of the Internet function are not initialized when using the Initialize operation of the Electone (page 21);... -
Page 202: Glossary Of Internet Terms
A hardware system or computer used as a central point for a network, providing access to files and services. Site Short for “website,” this refers to the group of web pages that are opened together. For example, the collection of web pages whose addresses begin with “http://www.yamaha.co.jp/” is referred to as the Yamaha site. SSID This is an identification name for specifying a particular network over a wireless LAN connection. -
Page 203: Accessory Jacks And Controls
Connections On the underside of the Electone keyboard is a separate panel equipped with various input/ output terminals and miscellaneous controls. On the ELS-01X, the backside of the pedalboard is also equipped with output terminals, as described below. Contents 1 Accessory Jacks and Controls ... . .203 •... - Page 204 PHONES jacks Reference Page For connection of a stereo headphone set. When headphones are connected to this Using Headphones (page jack, sound to the Electone’s built-in speaker system is automatically cut off, allowing 206) you to play without disturbing others. AUX IN AUX OUT AUX OUT...
- Page 205 OPTICAL TO DEVICE TO HOST MIDI OPTICAL OUT terminal Reference Page For connection using an optical-fiber cable. This terminal outputs a digital signal of Recording the Sounds of the 44.1 kHz, 16 bits. Electone to an External Recorder (page 208) USB terminals - 1 USB TO DEVICE terminal(s) Reference Pages...
-
Page 206: Connection Examples - External Devices
Connection Examples – External Devices Before connecting the Electone to other electronic components, turn off the power to all the components. Before turning the power of the components on or off, set all volume levels to minimum (0). Otherwise, electrical shock or damage to the components may occur. - Page 207 Connection example: Using a mixer for live performance Generally, when you use the Electone on stage (in concert, etc.), you should connect it to a mixer. By using a mixer, you can easily adjust the volume and tone quality of each component. To connect to a mixer, use the AUX OUT jacks of the Electone.
-
Page 208: Recording The Sounds Of The Electone To An External Recorder
Recording the Sounds of the Electone to an External Recorder You can record your Electone performance to an external recorder, such as an MD recorder or cassette tape recorder, using the OPTICAL OUT terminal or AUX OUT jacks. Using the OPTICAL OUT terminal allows you to record to external media with exceptionally high-quality digital sound (providing the external recorder has an Optical NOTE In terminal). -
Page 209: Connecting A Microphone Or Guitar
Connecting a Microphone or Guitar By connecting a microphone to the Electone, you can enjoy singing along with your own performance. The Electone outputs your vocals or guitar sounds through the built-in speakers. Connect your microphone to the MIC./LINE IN jack (standard 1/4"phone jack). -
Page 210: Controlling External Midi Devices From The Electone
To adjust the volume/reverb: Press the [UTILITY] button on the panel to call up the Utility display. Using the MIC. REVERB and VOLUME sliders in the GLOBAL Reference Page Page, adjust the amount of the reverb applied to the microphone, Reverb (page 46) and the volume. -
Page 211: Controlling The Electone From An External Device
Before purchasing a USB-LAN adapter or USB storage devices, please If necessary, use a USB hub. Only self-powered (battery or consult your Yamaha dealer, or an authorized Yamaha distributor for advice, or see the external power supply) types Yamaha website (http://www.global.yamaha.com/). -
Page 212: Connection With Computer
Before you can actually transfer data between the Electone and a computer via the USB connection, you will need to install an appropriate MIDI driver. Download the latest MIDI driver software from the Yamaha web site at “http://music.yamaha.com/download/.” Connecting your Electone to a computer opens up a whole new world of musical NOTE possibilities. -
Page 213: Midi
Using the MIDI IN/OUT terminals By using an optional MIDI interface such as the UX16, you can connect the Electone NOTE to the computer, with the MIDI IN/OUT terminals on the instrument. Connect the Electone and the MIDI Interface with two standard MIDI cables (one connecting the Depending on your particular MIDI interface, you may have OUT terminal on the Electone to the MIDI IN terminal on the interface, and the... - Page 214 As shown in the illustration above, in an electronic instrument the sampled note (previously recorded note) stored in the tone generator section (electronic circuit) is played based on information received from the keyboard, and output through the speakers. So then what is the information from the keyboard that becomes the basis for note production? For example, let’s say you play a “C”...
-
Page 215: Midi Messages Of The Electone
MIDI Messages of the Electone MIDI messages can be divided into two groups: the Channel Messages and System Messages. Channel Messages consist of data related to the performance on the keyboard for a specific channel. System Messages consist of data that allows several MIDI devices to communicate with each other. -
Page 216: Midi Channels
MIDI Channels MIDI data is assigned to one of sixteen MIDI channels. Using these channels, 1 – 16, the performance data for sixteen different instrument parts can be simultaneously sent over one MIDI cable. Think of the MIDI channels as TV channels. Each TV station transmits its broadcasts over a specific channel. -
Page 217: Midi Control
Deletes unnecessary MIDI data and keeps it from being transmitted from the Electone. After Touch and Rhythm start/stop are automatically filtered on the ELS-01. In addition, Horizontal Touch and Second Expression are automatically filtered on the ELS-01C/01X. Set the parameter for which you wish to disable transmission to ON. ELS-01/01C/01X Owner’s Manual... - Page 218 INTERNAL/EXTERNAL Switches control over the displayed items between the Electone (INTERNAL) or the connected device (EXTERNAL). - 1 LEAD 1 Determines Internal or External control of the Lead Voices. INT. (Internal): Lead Voice 1 is played from the Upper keyboard of the Electone. (If the To Lower function is on, it is played from Lower keyboard.) EXT.
-
Page 219: Appendix
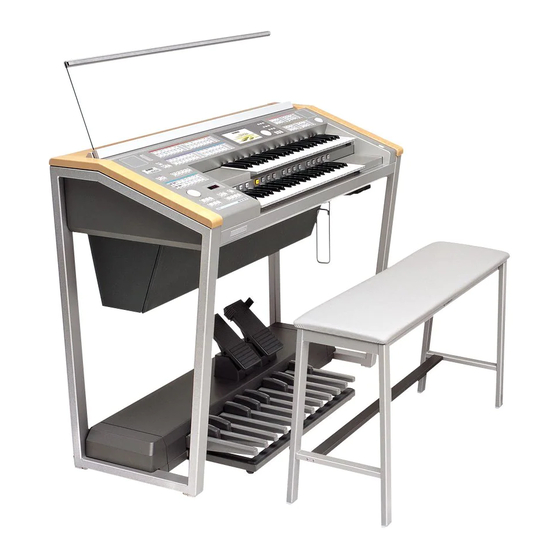
Appendix Bench Assembly Have a Phillips-head (+) screwdriver ready. Bench for the ELS-01 Bench for the ELS-01C/01X Turn the bench board over and install two Turn the bench board over and install the legs for the front side. legs with the included eight screws. -
Page 220: Installing The Pedalboard (Els-01X)
Installing the Pedalboard (ELS-01X) If you are using the ELS-01X, uninstall the pedalboard before moving the Electone and install it again after moving. Installing the Pedalboard Securely connect the output cord to the left Precautions side of the pedalboard. Also, connect the pedalboard cord by Before installing/uninstalling, turn the power of the Electone off. -
Page 221: Installing Optional Hardware
Installing Optional Hardware Installing the Floppy Disk Drive The optional UD-FD01 floppy disk drive can be installed Fold the USB cable inside the case as to the bottom of the instrument by using the included shown. floppy disk drive case and screws. Have a Phillips-head (+) screwdriver ready. -
Page 222: Midi Data Format
˛ Bn, 0A, 00-7F 5-14ch ˛ Bn, 0B, 00-7F Expression 16ch 16ch Control 5-14ch Bn,10, 00-7F VA After Touch (1ch)* (ELS-01C/01X only) Bn, 40, 00-7F Hold 5-14ch ˛ Bn, 41, 00-7F Portamento 5-14ch ˛ Bn, 42, 00-7F Sostenuto 5-14ch ˛... - Page 223 Bn, 01, 00-7F Modulation ˛ 1-16ch Bn, 04, 00-7F 2nd Expression ˛ 16ch Control (4ch)** LEAD 1 (ELS-01C/01X only) Bn, 05, 00-7F Portamento Time 1-16ch ˛ Bn, 06, 00-7F Data Entry 1-16ch ˛ Bn, 26, 00-7F Bn, 07, 00-7F Volume 1-16ch ˛...
-
Page 224: Realtime Messages
Code (Hexadecimal) Function Receive Transmit Remarks Bn, 54, 00-7F Portamento Control 1-16ch ˛ Bn, 5B, 00-7F Reverb Send Level 1-16ch ˛ Bn, 5D, 00-7F Chorus Send Level 1-16ch ˛ Bn, 5E, 00-7F Variation Effect Send Level 1-16ch ˛ Bn, 60, 00-7F Data Increment 1-16ch ˛... - Page 225 F0, 43, 70, 70, 73, F7 EL ON Ø ˛ F0, 43, 70, 70, 78, 00, 00, F7 Bar Signal ˛ Ø ˛: don’t care N: Device Number (“0” on ELS-01/01C/01X) ID: Model ID (ELS-01C=4DH, ELS-01=4EH, ELS-01X=51H) ELS-01/01C/01X Owner’s Manual...
- Page 226 1. Switches Switch Receive Transmit Left Footswitch Ø Ø Knee Lever Ø Ø Fill In Ø ˛ Intro/Ending Ø ˛ Solo Bar Ø Ø 2. Panel Switch Events MIDI Exclusive Format F0, 43, 70, 78, 41, cc, dd, F7 Selectors Switch Remarks Code...
- Page 227 Brilliance Switch Remarks Code Receive Rx Range Transmit Tx Range Upper Keyboard Voice 1 Brilliance Ø [00-06] Ø [00-06] 00:BRILLIANT, 06:MELLOW Lower Keyboard Voice 1 Brilliance Ø [00-06] Ø [00-06] 00:BRILLIANT, 06:MELLOW Upper Keyboard Voice 2 Brilliance Ø [00-06] Ø [00-06] 00:BRILLIANT, 06:MELLOW Lower Keyboard Voice 2 Brilliance...
- Page 228 3. MIDI Parameter Voice Section Parameters MIDI Exclusive Format Panel Voice Parameters (Address mm: 0 – 7 = UK1 , UK2 , LK1 , LK2 , LEAD 1 , LEAD 2 , PEDAL 1 , PEDAL 2) F0, 43, 70, 78, 44, hh, mm, ll, ..., F7 Address Size Data...
- Page 229 Address Size Data Parameter Data Receive Rx Range Transmit Tx Range 00-07 Effect 1 Type MSB/LSB Ø Ø 00-7F 00-7F 00-7F 00-7F 00-7F 00-7F 00-7F 00-7F 00-07 0000-7F7F Effect 1 Parameter 1 MSB/LSB 0000-7F7F Ø 0000-7F7F Ø 0000-7F7F 00-07 0000-7F7F Effect 1 Parameter 2 MSB/LSB 0000-7F7F 0000-7F7F...
- Page 230 Address Size Data Parameter Data Receive Rx Range Transmit Tx Range 00-01 00-7F Footage 1' 00:MIN Ø 00-7F Ø 00-7F 7F:MAX 00-01 00-7F Response 00:FAST Ø 00-7F Ø 00-7F 7F:SLOW 00-01 00-7F Attack 4' 00:MIN 00-7F 00-7F Ø Ø 7F:MAX 00-01 00-7F Attack 2-2/3'...
- Page 231 Rhythm Rhythm Parameters Address Size Data Parameter Data Receive Rx Range Transmit Tx Range 00-0B 0000-7F7F Rhythm Assign Number 0000-7F7F Ø 00-7F Ø 00-7F 00-7F 00-7F 00-0B Rhythm Selector Number 00-0B Ø 00-0B Ø 00-0B 00-7F Percussion Volume 00:MIN Ø 00-7F ˛...
- Page 232 MIDI Implementation chart M.O.C. Function Parameters Address Size Data Parameter Data Receive Rx Range Transmit Tx Range 00-7F Melody On Chord Mode 00:OFF Ø 00-7F Ø 00-03 01:1 02:2 03:3 00-7F M.O.C. Knee Lever Control 00:OFF Ø 00-7F Ø 00-01 (On/Off) 01:ON Section Parameters...
- Page 233 Address Size Data Parameter Data Receive Rx Range Transmit Tx Range 00-7F MIDI Control Expression (INT/EXT) 00:Internal Ø 00-7F ˛ 01:External 00-7F MIDI Control Lead 1 (INT/EXT) 00:Internal Ø 00-7F ˛ 01:External 00-04 Registration Menu 00-04 00-04 00-04 Ø Ø 00-04 00-04 00-04...
-
Page 234: Midi Implementation Chart
MIDI Implementation Chart Date: 19-Sep-2003 YAMAHA [Electone-EL mode] / Model: ELS-01/01C/01X Version: 1.00 Function Transmitted Recognized Remarks Basic Default 1, 2, 3, 16 1-3, 5-16 Channel Changed 1-16 Mode Default Mode 3 Mode 3 Messages ˛ ˛ Altered ************************ ˛... - Page 235 Date: 19-Sep-2003 YAMAHA [Electone-XG mode] / Model: ELS-01/01C/01X Version: 1.00 Function Transmitted Recognized Remarks Basic Default 1, 2, 3, 16 1-16 Channel Changed 1-16 1-16 Mode Default Mode3 Mode 3 Messages ˛ ˛ Altered ˛ ************************ Note 36-96 0-127 Number...
-
Page 236: Troubleshooting
Some buttons on the panel do not respond. The UPPER/LOWER ORGAN FLUTES and LEAD VOICE 2 buttons are invalid on the ELS-01. If you upgrade the ELS-01 to the ELS-01C/01X, these buttons can be used. Some of the LEDs in the DISPLAY SELECT section do The LEDs of on/off buttons (UPPER/LOWER ORGAN FLUTES, VOICE EDIT, not light. - Page 237 Problem Possible Cause and Solution When keys are pressed, the sounds of percussion The Keyboard Percussion function has been turned on. When not using the instruments are also heard. function, be sure to turn it off (page 65). Even though a User button’s rhythm has been Since the User buttons contain User rhythms, no rhythm will sound if a pattern selected and started, the pattern does not sound.
- Page 238 Problem Possible Cause and Solution Recording is stopped before the performance is • The amount of recorded data on the media is close to the maximum limit. finished. Either use another media or delete the data of unnecessary songs. • When you overwrite the song, the length of a subsequently recorded part cannot exceed the length of the previously recorded parts.
-
Page 239: Specifications
Specifications Electone STAGEA ELS-01 Electone STAGEA ELS-01C Electone STAGEA ELS-01X TONE GENERATION AWM (4) AWM (4) + VA + Organ Flutes KEYBOARD Upper: 49 keys (C – C), Upper: 61 keys (C – Lower: 49 keys (C – C), Lower: 61 keys (C –... - Page 240 Bench, Owner's Manual, Tutorial Guidebook, SmartMedia card Specifications and descriptions in this owner’s manual are for information purposes only. Yamaha Corp. reserves the right to change or modify products or specifications at any time without prior notice. Since specifications, equipment or options may not be the same in every locale, please check with your Yamaha dealer.
-
Page 241: Index
Index Numerics 2nd Expression Pedal............. 185 [D.] (Disable) ................82 DATA CONTROL dial ..............10 DECAY RATE................136 DELAY (Effect)................50 A.B.C./M.O.C..............62, 64 DELAY (Vibrato) ................41 ACCENT.................. 147 DEPTH (Reverb) ................44 Accompaniment................ 61 DEPTH (Vibrato) ................41 Add Drum ................. 61 Display Select................10 AFTER touch (Pitch).............. - Page 242 Headphones ................206 [M.] (Memory)................80 Home Page ................197 M.O.C..................64 HORIZONTAL touch ..............40 MAIN..................52 Main Drum .................61 MAIN/FILL IN ................52 MASTER VOLUME..............11 INITIAL touch ................39 MDR...................92 Initialize (Factory Set) ............... 21 Melody On Chord ..............64 Initialize (Internet Settings) ............. 201 MEMORY (A.B.C.) ..............64 Initialize (Registration Memory) ..........
- Page 243 PAD................... 61 Real Time Write ...............145, 153 PAN (Voice Edit) ..............132 Recording................101 PAN (Voice) ................39 Recording (Lead Voice 1 Voice only)........102 Part (Rhythm) ................61 Recording (Part) ..............102 PART SETUP (MDR) ............97, 117 REGIST EDIT (MDR)..............107 PATTERN ................140 Registration Memory ..............80 Pause ..................
- Page 244 Tempo (MDR) ................. 114 WAH ..................50 TEMPO (Rhythm) ..............56 Wireless LAN ................199 THRU (Effect)................50 TIME (Slide) ................42 TO LOWER................26 XG..................6, 116 TOP (Lead Voice) ..............40 TOP (Shift End) ................. 87 TOUCH PANEL SOUND ............16 TOUCH TONE................
- Page 245 MEMO ELS-01/01C/01X Owner’s Manual...
- Page 246 For details of products, please contact your nearest Yamaha representative or the authorized distributor listed below. CENTRAL & SOUTH AMERICA ASIA MEXICO THE PEOPLE’S REPUBLIC OF CHINA Yamaha de México S.A. de C.V. Yamaha Music & Electronics (China) Co.,Ltd. Calz. Javier Rojo Gómez #1149, 25/F., United Plaza, 1468 Nanjing Road (West),...
- Page 248 Yamaha Manual Library http://www.yamaha.co.jp/manual/ U.R.G., Pro Audio & Digital Musical Instrument Division, Yamaha Corporation © 2004 – 2005 Yamaha Corporation WF37040 503MWCP1.2-02B0 This document is printed on chlorine free (ECF) paper with soy ink. Printed in Japan...