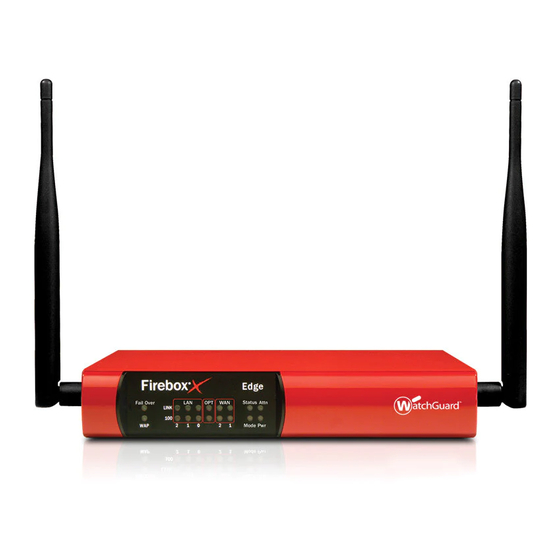
Watchguard Firebox X15 User Manual
Firebox x edge e-series version 10 all firebox x edge e-series standard and wireless models
Hide thumbs
Also See for Firebox X15:
- User manual (266 pages) ,
- Quick start manual (2 pages) ,
- Reference manual (264 pages)

Related Manuals for Watchguard Firebox X15


Summary of Contents for Watchguard Firebox X15
-
Page 1: User Guide
WatchGuard Firebox X Edge e-Series User Guide Firebox X Edge e-Series version 10 All Firebox X Edge e-Series Standard and Wireless Models... - Page 2 Guide Revision: 02/12/2008 Copyright, Trademark, and Patent Information Copyright © 1998 - 2008 WatchGuard Technologies, Inc. All rights reserved. All trademarks or trade names mentioned herein, if any, are the property of their respective owners. Complete copyright, trademark, patent, and licensing information can be found in the Reference Guide, available online: http://www.watchguard.com/help/documentation/.
-
Page 3: Table Of Contents
Table of Contents Chapter 1 Introduction to Network Security ................... 1 About networks and network security ......................1 About Internet Connections ......................... 1 About protocols..............................2 How Information Travels on the Internet....................2 About IP addresses..............................3 Private addresses and gateways......................3 About subnet masks ........................... - Page 4 Disable pop-up blocking........................... 14 Disable the pop-up blocker in Internet Explorer 6.x or 7.x ............14 Disable the pop-up blocker in Firefox 2.x ..................14 Disable the pop-up blocker in Safari 2.0.................... 14 Connect the Firebox X Edge ..........................15 Connect the Edge to more than four devices..................
- Page 5 Enable SNMP polling ............................. 52 Use HTTP instead of HTTPS ......................... 54 Change the HTTP server port........................55 About WatchGuard System Manager access..................... 55 Rename the Firebox X Edge e-series in WSM ..................55 Enable centralized management with WSM..................56 Enable remote management with WFS v7.3 or earlier..............
- Page 6 Configure WAN failover ..........................97 Enable WAN failover with the Setup Wizard..................97 Configure the Edge for serial modem failover ................98 Configure your modem for WAN failover ..................99 Dial-up account settings ......................... 99 DNS settings.............................. 100 Dial-up settings............................100 About virtual local area networks (VLANs) ....................
- Page 7 About the HTTP proxy............................. 130 HTTP proxy: Proxy Limits........................... 130 HTTP requests: General settings......................130 HTTP proxy: Deny message........................131 Define exceptions ........................... 133 HTTP responses: Content types ......................133 HTTP requests: URL paths ......................... 134 HTTP responses: Cookies........................... 134 Block cookies from a site ........................
- Page 8 See the event log file ............................178 To see the event log file..........................178 About logging to a WatchGuard Log Server ..................179 Send your event logs to the Log Server....................179 Send logs to a Syslog host ........................181 Chapter 12 Certificates ..........................
- Page 9 Set a WebBlocker profile for an LDAP group ..................199 LDAP authentication and Mobile VPN with IPSec................199 Before You Begin............................. 200 Enable Single Sign-On........................... 201 Install the WatchGuard Single Sign-On (SSO) agent..............201 See active sessions and users ........................204 Firebox user settings........................... 204 Active sessions .............................. 204 Local User account ............................
- Page 10 Run the Setup Wizard..........................231 Define the server location........................231 Set general server parameters ........................ 232 Change expiration settings and user domains ................. 234 Change notification settings........................235 Enable or disable logging ........................237 Add or prioritize Log Servers ......................237 Send messages to the Windows Event Viewer ................
- Page 11 Chapter 19 About Mobile VPN with PPTP ....................265 Enable PPTP on the Edge..........................267 Configure DNS and WINS settings....................268 Prepare the client computers........................268 Create and connect a PPTP VPN from a Windows Vista client ............ 268 Create and connect a PPTP VPN from a Windows XP client............269 Create and connect a PPTP VPN from a Windows 2000 client ............
- Page 12 Firebox X Edge e-Series...
-
Page 13: Introduction To Network Security
Introduction to Network Security About networks and network security A network is a group of computers and other devices that are connected to each other. It can be two computers that you connect with a serial cable, or many computers around the world connected through the Internet. -
Page 14: About Protocols
Introduction to Network Security About protocols A protocol is a group of rules that allow computers to connect across a network. Protocols are the grammar of the language that computers use when they speak to each other across a network. The standard protocol when you connect to the Internet is the IP (Internet Protocol). -
Page 15: About Ip Addresses
An IP address consists of four octets (8-bit binary sequences) expressed in decimal format and separated by periods. Each number between the periods must be within the range of 0 and 255. Some examples of IP addresses are: 206.253.208.100 = WatchGuard.com 4.2.2.2 = core DNS server 10.0.4.1 = private IP Private addresses and gateways Many companies create private networks that have their own address space. -
Page 16: About Subnet Masks
Introduction to Network Security About subnet masks Because of security and performance considerations, networks are often divided into smaller portions called subnets. All devices in a subnet have similar IP addresses. For example, all devices that have IP addresses whose first three octets are 50.50.50 would belong to the same subnet. A network IP address’s subnet mask, or netmask, is a string of bits that mask sections of the IP address to show how many addresses are available and how many are already in use. -
Page 17: About Dhcp
IP address from a DNS server. A URL (Uniform Resource Locator) includes a domain name and a protocol. An example of a URL is: http://www.watchguard.com/. In summary, the DNS is the system that translates Internet domain names into IP addresses. A DNS server is a server that performs this translation. -
Page 18: About Ports
Introduction to Network Security World Wide Web access uses Hypertext Transfer Protocol (HTTP) Email uses Simple Mail Transfer Protocol (SMTP) or Post Office Protocol (POP3) File transfer uses File Transfer Protocol (FTP) Resolving a domain name to an Internet address uses Domain Name Service (DNS) Remote terminal access uses Telnet or SSH (Secure Shell) When you allow or deny a service, you must add a policy to your Firebox configuration. -
Page 19: About Firewalls
Introduction to Network Security About Firewalls A firewall separates your trusted computers on the internal network from the external network, or the Internet, to decrease risk of an external attack. The figure below shows how a firewall divides the trusted computers from the Internet. -
Page 20: The Firebox X Edge And Your Network
Introduction to Network Security Firewalls use access policies to identify and filter different types of information. They can also control which policies or ports the protected computers can use on the Internet (outbound access). Many firewalls have sample security policies, and users can select the policy that is best for them. With others, including the Firebox, the user can customize these policies. -
Page 21: Chapter 2 Installation
Installation Before you begin To install the WatchGuard Firebox X Edge e-Series in your network, you must complete these steps: Identify and record the TCP/IP properties for your Internet connection. Disable the HTTP proxy and pop-up blocker properties of your web browser. - Page 22 Installation Check package contents Make sure that the package for your Firebox X Edge e-Series includes these items: Firebox X Edge e-Series User Guide on CD-ROM Firebox X Edge e-Series Quick Start Guide LiveSecurity Service activation card Hardware warranty card AC power adapter (12 V/1.2A) with international plug kit Power cable clip Use this clip to attach the cable to the side of the Edge.
-
Page 23: Network Addressing Requirements
Installation Identify your network settings To configure your Firebox X Edge, you must know some information about your network. Use this section to learn how to identify your network settings. For an overview of network basics, see About networks and network security. -
Page 24: Finding Your Tcp/Ip Properties On Microsoft Windows Nt
Installation Finding your TCP/IP properties on Microsoft Windows 2000, Windows 2003, and Windows XP 1. Select Start > All Programs > Accessories > Command Prompt. The Command Prompt window appears. 2. At the command prompt, type and press Enter. ipconfig /all 3. -
Page 25: Disable The Http Proxy
Register your Firebox and activate LiveSecurity Service To enable all of the features on your Firebox X Edge, you must register on the WatchGuard LiveSecurity web site and retrieve your feature key. You have only one user license (seat license) until you apply your feature key. -
Page 26: Disable The Http Proxy In Firefox 2.X
Installation Disable the HTTP proxy in Firefox 2.x 1. Open the browser software. 2. Select Tools > Options. The Options window appears. 3. Click the Advanced icon. 4. Select the Network tab. Click Settings. 5. Click the Connection Settings button. The Connection Settings dialog box appears. -
Page 27: Connect The Firebox X Edge
Installation Connect the Firebox X Edge Many people configure their Firebox X Edge e-Series on one computer before they put it on the network. Use this procedure to connect a computer to your Firebox X Edge: 1. Shut down your computer. 2. -
Page 28: Connect The Edge To More Than Four Devices
Installation Add computers to the trusted network You can connect as many as three computers to the trusted interface of the Firebox X Edge e-Series if you connect each computer to one of the Edge’s Ethernet ports 0 through 2. You can use 10/100 BaseT Ethernet hubs or switches with RJ-45 connectors to connect more than three computers. -
Page 29: About User Licenses
If you require users to authenticate, you can assign a maximum timeout and an idle timeout for each user. The Edge administrator can set a global session maximum timeout. Reboot the Edge to close all sessions. You can purchase license upgrades from your reseller, or from the WatchGuard website: http://www.watchguard.com/products/purchaseoptions.asp. User Guide... -
Page 30: Use Dhcp
Installation Set your computer to connect to the Edge Before you can use the Quick Setup Wizard, you must configure your computer to connect to the Firebox X Edge. You can set your network interface card to use a static IP address, or use DHCP to get an IP address automatically. - Page 31 Installation Use a static IP address This procedure configures a computer with the Windows XP operating system to use a static IP address. If your computer does not use Windows XP, read the operating system help for instructions on how to set your computer to use a static IP address.
- Page 32 The Quick Setup Wizard is complete The Quick Setup Wizard shows a link to the WatchGuard web site to register your product. After you complete the wizard, the Firebox X Edge restarts. If you change the IP address of the trusted interface, you must change your network settings so that your IP address matches the subnet of the trusted network before you connect to the Firebox X Edge again.
-
Page 33: Configuration Pages Overview
About Edge Configuration Pages After you connect the WatchGuard Firebox X Edge e-Series to your network, you must configure the Edge. You can create firewall rules to enforce the security requirements of your company. You can also use the Edge configuration pages to create a user account, look at network statistics, and see the configuration of the Edge. - Page 34 3. When a security certificate notification appears, click Yes. You see this warning because the certificate given by the Edge is signed by the WatchGuard certificate authority, which is not a trusted authority on your browser. This warning will appear each time you use HTTPS to connect to the Firebox X Edge unless you permanently accept the certificate, or generate and import a certificate for the Edge to use.
-
Page 35: Navigating The Firebox X Edge User Interface
Configuration Pages Overview Navigating the Firebox X Edge User Interface On the left side of the System Status page is the navigation bar you use to get to other Firebox X Edge configuration pages. You must enable JavaScript in your browser to use the navigation bar. Each menu item contains secondary menus that you use to configure the properties of that feature. - Page 36 Configuration Pages Overview Network page The Network page shows the current configuration of the trusted, optional, and external networks. On this page, you can also view WAN failover and any static routes you have configured. Adjacent to each section is a button you can use to change configurations and to see network statistics.
-
Page 37: Firebox Users Page
Configuration Pages Overview Firebox Users page The Firebox Users page shows statistics on active sessions and local user accounts. It also has buttons to close current sessions and to add, edit, and delete user accounts. This page also shows the MUVPN client configuration files that you can download. For more information, see About Mobile VPN client configuration files. -
Page 38: Administration Page
Configuration Pages Overview Administration page The Administration page shows whether the Firebox X Edge uses HTTP or HTTPS for its configuration pages, if the Edge is configured as a managed Firebox client, and which feature upgrades are enabled. It has buttons to change configurations, add upgrades, and see the configuration file. -
Page 39: Firewall Page
Configuration Pages Overview Firewall page The Firewall page shows incoming and outgoing policies and proxies, blocked web sites, and other firewall settings. This page also has buttons to change these settings. For more information, look at the topics below Proxy Settings in the Table of Contents. User Guide... -
Page 40: Logging Page
Configuration Pages Overview Logging page The Logging page shows the current event log, and the status of the Log Server and syslog logging. For more information, see the topics under Logging in the Table of Contents. Firebox X Edge e-Series... -
Page 41: Webblocker Page
Configuration Pages Overview WebBlocker page The WebBlocker page shows the WebBlocker settings, profiles, allowed sites, and denied sites. For more information, see About WebBlocker. User Guide... -
Page 42: Spamblocker Page
Configuration Pages Overview spamBlocker page The spamBlocker page shows spamBlocker status and settings, including actions for suspected spam and the use of trusted email forwarders. For more information, see About spamBlocker. Firebox X Edge e-Series... -
Page 43: Gateway Av/Ips Page
Configuration Pages Overview Gateway AV/IPS page The Gateway AV/IPS page shows the Gateway AntiVirus and Intrusion Prevention Service status and settings. It tells you which proxies are enabled for the service, and what version of the signature database you are using. The Gateway AV/IPS menu contains links to change Gateway AV and IPS settings and to update signatures. -
Page 44: Vpn Page
The VPN page shows information on managed VPN gateways, manual VPN gateways, echo hosts, and buttons to change the configuration of VPN tunnels. You can add the Firebox X Edge e-Series to a Watchguard System Manager VPN network with the WSM Access page in Administration. For more information, see the topics... -
Page 45: Monitoring The Firebox X Edge
Configuration Pages Overview Monitoring the Firebox X Edge When you expand System Status on the navigation bar, you see a list of monitoring categories. With these pages, you can monitor all the components of the Edge and how they work. The Firebox X Edge monitor pages are not set to refresh automatically. -
Page 46: Connections
Configuration Pages Overview Connections This status page shows all TCP/IP connections that go through the Edge. It is divided between proxy filters and packet filters. The packet filter list is sorted by protocol, with TCP protocols at the top of the list, then UDP connections, then other IP protocols. -
Page 47: Dhcp Leases
Configuration Pages Overview Components list This status page shows the software that is installed on the Edge. Each attribute is shown separately: Name Version Build number Build time Remove link - The Remove column does not usually show any components. Any components shown on this list are those supplied by an Edge technical support representative given to you for troubleshooting. -
Page 48: Dynamic Dns
Configuration Pages Overview Dynamic DNS This status page shows the state of the Dynamic DNS configuration. Last Last time the DNS was updated. Next Next time the DNS will be updated. Hostile sites This status page shows the amount of time an IP address is blocked from access through the Firebox when they are added to the Hostile Sites list. -
Page 49: License
LiveSecurity This page shows you the most recent alerts from the WatchGuard LiveSecurity Service. When a new alert is available, you see a note in the upper right corner of the System Status page. Click the alert notice to see the alert. -
Page 50: Protocols
Configuration Pages Overview Protocols This status page shows the protocol statistics for IP, ICMP, TCP, and UDP. Routes This status page shows the Edge routing table. Interface Interface associated with the route. Network Network that the route has been created for. Gateway Gateway that the network uses. -
Page 51: Vpn Statistics
Configuration Pages Overview Traffic Control This status page shows how traffic control handles packets. Priority You can set four levels of priority for Traffic Control: o Interactive o High o Medium o Low Rate Rate set for each priority. Ceiling Maximum bandwidth each priority can use. - Page 52 Configuration Pages Overview Firebox X Edge e-Series...
-
Page 53: Configuration And Management Basics
Configuration and Management Basics About basic configuration and management tasks After your Firebox X Edge e-Series is installed on your network and operating with a basic configuration file, you can start to add custom configuration settings to meet the needs of your organization. The topics in this section help you perform these basic management and maintenance tasks. -
Page 54: Before You Begin
Configuration and Management Basics Before You Begin Do not edit your configuration file manually. Always use a WatchGuard Management Server or the Firebox X Edge web interface to make changes to your configuration. User passwords in the backup configuration file are encrypted, but the full file is not encrypted. We recommend that you encrypt your backup configuration file and keep it in a safe location. -
Page 55: Create A Backup Configuration File
Configuration and Management Basics Back up your Edge configuration After you have configured your Firebox X Edge e-Series, you can save your Edge configuration file to your local hard drive for backup purposes. You can use your backup file to restore your Edge to a previous configuration if you make a change that does not work the way you intended, or after you reset the Edge to factory default settings. - Page 56 Configuration and Management Basics About factory default settings The term factory default settings refers to the configuration on the Firebox X Edge when you first receive it before you make any changes. The default network and configuration properties for the Edge are: Trusted network The default IP address for the trusted network is 192.168.111.1.
-
Page 57: About Feature Keys
If you do not start the Edge one more time, when you try to connect to the Edge you will see a web page that shows the message, Your WatchGuard Firebox X Edge is running from a backup copy of firmware. You could also see this message if the Reset button is stuck in the depressed position. - Page 58 Configuration and Management Basics Get a feature key Before you activate a new feature, you must have a license key certificate from WatchGuard that is not already registered on the LiveSecurity web site. 1. Open a web browser and connect to: https://www.watchguard.com/activate.
-
Page 59: Restart The Firebox Locally
Configuration and Management Basics About Restarting the Firebox You can restart the Firebox X Edge e-Series from a computer on the trusted network. If you enable external access to the Edge, you also can restart the Edge from a computer on the Internet. The Firebox X Edge restart cycle is approximately one minute. - Page 60 Configuration and Management Basics Restart the Firebox remotely If you want to be able to connect to the Edge to manage it or restart it from a computer external to the Edge, you must first configure the Edge to allow incoming HTTPS traffic to the Edge trusted interface IP address. For more information on how to configure the Edge to receive incoming traffic, see Set access control options (incoming).
- Page 61 Configuration and Management Basics About using NTP to set system time To set the system time for Edge, you can specify a NTP server to set the time automatically. The Network Time Protocol (NTP) synchronizes computer clock times across a network. The Firebox can use NTP to get the correct time automatically from NTP servers on the Internet.
-
Page 62: To Set The System Time
Configuration and Management Basics To set the system time 1. To connect to the System Status page, type in the browser address bar, and the IP address https:// of the Firebox X Edge trusted interface. The default URL is: https://192.168.111.1 2. - Page 63 Configuration and Management Basics 5. If you set the system time automatically, the Firebox X Edge gets the current time from the selected server in the NTP Servers list. If that server is not available, the Edge uses the next server. o To add a time server, type the server name in the Add New Server field and click Add.
-
Page 64: Snmp Polls
Configuration and Management Basics About SNMP Simple Network Management Protocol (SNMP) is a set of tools for monitoring and managing networks. SNMP uses management information bases (MIBs) that give configuration information for the devices the SNMP server manages or monitors. The Firebox X Edge supports SNMPv2c and SNMPv3. - Page 65 Configuration and Management Basics About MIBs A MIB (Management Information Base) is a database of objects that can be monitored by a network management system. The Firebox X Edge e-Series supports six different public, read-only MIBs: IP-MIB IF-MIB TCP-MIB UDP-MIB SNMPv2-MIB RFC1213-MIB User Guide...
-
Page 66: Use Http Instead Of Https
Configuration and Management Basics About selecting HTTP or HTTPS for management HTTP (Hypertext Transfer Protocol) is the language used to move files (text, graphic images, and multimedia files) on the Internet. HTTPS (Hypertext Transfer Protocol over Secure Socket Layer) is a more secure version of HTTP. -
Page 67: Change The Http Server Port
With WatchGuard System Manager v8.3.1 and above, you can manage policies, updates, and VPNs for many Edge devices from one location. With WatchGuard System Manager v7.3 or below, you can use VPN Manager to create managed VPN tunnels between a Firebox X Edge and a different WatchGuard Firebox. -
Page 68: Enable Centralized Management With Wsm
Access configuration page. If you disable the remote management feature, you get read-write access to the Edge configuration again. Do not select this check box if you use WatchGuard System Manager only to manage VPN tunnels. 6. Type a status passphrase for your Firebox X Edge and then type it again to confirm. - Page 69 Configuration and Management Basics 8. In the Management Server Address text box, type the IP address of the Management Server if it has a public IP address. If the Management Server has a private IP address, type the public IP address of the Firebox that protects the Management Server.
-
Page 70: Enable Remote Management With Wfs V7.3 Or Earlier
Configuration and Management Basics Enable remote management with WFS v7.3 or earlier Use these instructions to configure remote access from WatchGuard Firebox System v7.3 or earlier. These versions of WatchGuard Firebox System use VPN Manager and the Firebox is the DVCP Server. -
Page 71: Allow Traffic From A Management Server
One advantage of your LiveSecurity Service is continuous software updates. As new threats appear and WatchGuard adds product enhancements, you receive alerts to let you know about new versions of your Firebox X Edge e-Series software. To install any firmware on the Edge, you must have a current LiveSecurity subscription. -
Page 72: Method 2: Install Software Manually
Configuration and Management Basics Method 2: Install software manually The second method uses the Firebox X Edge e-Series configuration pages. This method can be used with Windows or other operating systems. You must first download the Software Update file, which is a small compressed file. -
Page 73: Available Upgrade Options
Configuration and Management Basics About upgrade options You use two items to add upgrades to your Firebox X Edge: a feature key and a license key. It is important to understand the differences between these two keys. Your Firebox X Edge comes with certain features by default. These features are specified by the feature key. If you purchase an upgrade for your Edge, you must apply a new feature key to your Edge. - Page 74 Configuration and Management Basics Add a feature to your Firebox X Edge When you purchase an upgrade for your Firebox X Edge, you receive a license key. This can be a paper certificate or an email message. You can use this procedure to manually apply a new feature key to your Edge, or you can use the feature key synchronization feature available on the System Status page to automatically apply your feature key after you activate it on the LiveSecurity web site.
-
Page 75: Upgrade Your Firebox X Edge Model
After you purchase an upgrade license key you can upgrade a Firebox X Edge e-Series 10e or a Firebox X Edge 20e to a higher model: 1. Go to the upgrade site on the WatchGuard web site (www.watchguard.com/upgrade) and log into your LiveSecurity service account. - Page 76 Configuration and Management Basics Firebox X Edge e-Series...
-
Page 77: Chapter 5 Network Settings
About network interface setup A primary component of the WatchGuard Firebox setup is the configuration of network interface IP addresses. When you run the Quick Setup Wizard, the external and trusted interfaces are set up so traffic can flow through the Firebox. -
Page 78: Setup Wizard
Network Settings Change the Firebox IP addresses with the Network Setup Wizard The easiest method to change the network IP addresses of the Firebox X Edge e-Series is with the Network Setup Wizard. 1. To connect to the System Status page, type in the browser address bar, followed by the IP https:// address of the Edge trusted interface. -
Page 79: If Your Isp Uses Dhcp
Network Settings Configure external interfaces You must configure your external network manually if you do not use the Network Setup Wizard. When you configure the external network, set the method your Internet service provider (ISP) uses to give you an IP address for your Firebox. If you do not know the method, get the information from your ISP or corporate network administrator. -
Page 80: If Your Isp Uses Static Ip Addresses
Network Settings If your ISP uses static IP addresses If your ISP uses static IP addresses, you must enter the address information into your Firebox X Edge before it can send traffic through the external interface. To set your Firebox X Edge to use a static IP address for the external interface: 1. -
Page 81: If Your Isp Uses Pppoe
Network Settings If your ISP uses PPPoE If your ISP uses PPPoE, you must enter the PPPoE information into your Firebox X Edge before it can send traffic through the external interface. For more information in PPPoE, see Advanced PPPoE settings. -
Page 82: Advanced Pppoe Settings
In most cases, the default setting of three is the best. Enable PPPoE debug trace WatchGuard Technical Support uses this check box to troubleshoot PPPoE problems. With this option on, the Firebox X Edge makes a file that you can send to Technical Support. Use this option only when Technical Support tells you because it decreases Edge performance. -
Page 83: Configure Your External Interface As A Wireless Interface
Network Settings Configure your external interface as a wireless interface You can configure your primary external interface (WAN1) for your Edge as a wireless interface. 1. To connect to the System Status page, type in the browser address bar, followed by the IP https:// address of the Firebox X Edge trusted interface. -
Page 84: About Advanced External Network Settings
Network Settings About advanced external network settings On the External Network Configuration page, select the Advanced tab to change the settings for link speed or change the MAC address for the Edge’s external interface. Select Automatic from the Link Speed drop-down list to have the Edge select the best network speed, or select a static link speed that you know is compatible with your equipment. - Page 85 Network Settings Change the MAC address of the external interface Some ISPs use a MAC address to identify the computers on their network. Each MAC address gets one static IP address. If your ISP uses this method to identify your computer, then you must change the MAC address of the Firebox X Edge external interface.
-
Page 86: About Changing The Ip Address Of The Trusted Network
Network Settings About configuring the trusted network You must configure your trusted network manually if you do not use the Network Setup Wizard. You can use static IP addresses or DHCP for the computers on your trusted network. The Firebox X Edge e- Series has a built-in DHCP server to give IP addresses to computers on your trusted and optional networks. -
Page 87: Change The Ip Address Of The Trusted Network
Network Settings Change the IP address of the trusted network To change the IP address of the trusted network: 1. To connect to the System Status page, type in the browser address bar, followed by the IP https:// address of the Firebox X Edge trusted interface. The default URL is: https://192.168.111.1 2. - Page 88 Network Settings Enable DHCP server on the trusted network The DHCP Server option allows the Firebox X Edge e-Series to give IP addresses to the computers on the trusted network. When the Edge receives a DHCP request from a computer on the trusted network, it gives the computer an IP address.
- Page 89 Network Settings Set trusted network DHCP address reservations 1. You can manually give the same IP address to a specified computer on your trusted network each time that computer makes a request for a DHCP IP address. The Firebox X Edge identifies the computer by its MAC address.
-
Page 90: Make The Firebox A Dhcp Relay Agent
Network Settings About DHCP relay agents One way to get IP addresses for the computers on the trusted or optional networks is to use a DHCP server on a different network. The Firebox can send a DHCP request from a DHCP client to a DHCP server at a different location through a VPN tunnel. -
Page 91: Use Static Ip Addresses For Trusted Computers
Network Settings Use static IP addresses for trusted computers You can use static IP addresses for some or all of the computers on your trusted network. If you disable the Firebox X Edge DHCP server and you do not have a DHCP server on your network, you must manually configure the IP address and subnet mask of each computer. -
Page 92: Restrict Access To The Trusted Interface By Mac Address
Network Settings Restrict access to the trusted interface by MAC address 1. To connect to the System Status page, type in the browser address bar, and the IP address https:// of the Firebox X Edge trusted interface. The default URL is: https://192.168.111.1 2. - Page 93 Network Settings 4. Click Scan to have the Edge find all known hardware addresses on the network. If you want the Edge to try to resolve host names for all Windows computers it finds during the scan process, make sure the Try to resolve Windows host names during scan check box is selected.
-
Page 94: About Configuring The Optional Network
Network Settings 6. To manually add a hardware address and its host name to your configuration, click Add. The Add Allowed Address Control dialog box appears. 7. Select the Log attempted access from MAC addresses not in the list check box if you want the Edge to generate a log message each time a computer whose hardware address is not in the list tries to get access to the Edge. -
Page 95: Enable The Optional Network
Network Settings Enable the optional network 1. To connect to the System Status page, type in the browser address bar, followed by the IP https:// address of the Firebox X Edge trusted interface. The default URL is: https://192.168.111.1 2. From the navigation bar, select Network > Optional. The Optional Network Configuration page appears. - Page 96 Network Settings Enable DHCP server on the optional network The DHCP Server option sets the Firebox X Edge to give IP addresses to the computers on the optional network. When the Edge receives a DHCP request from a computer on the optional network, it gives the computer an IP address.
-
Page 97: Set Optional Network Dhcp Address Reservations
Network Settings Set optional network DHCP address reservations You can manually assign an IP address to a specified computer on your optional network. The Firebox X Edge identifies the computer by its MAC address. 1. Use your browser to connect to the System Status page. From the navigation bar, select Network > Optional. -
Page 98: Make The Firebox A Dhcp Relay Agent
Network Settings About DHCP relay agents One way to get IP addresses for the computers on the trusted or optional networks is to use a DHCP server on a different network. The Firebox can send a DHCP request from a DHCP client to a DHCP server at a different location through a VPN tunnel. -
Page 99: Allow Wireless Connections To The Optional Interface
Network Settings Allow wireless connections to the optional interface The Firebox X Edge e-Series Wireless can be configured as a wireless access point with three different security zones. You can enable wireless devices to connect to the Edge Wireless as part of the trusted network or part of the optional network. -
Page 100: Add A Static Route
If you do not add a route to a remote network, all traffic to that network is sent to the Firebox default gateway. WatchGuard User Forum is a good source of data about network routes and routers. - Page 101 Network Settings 4. From the Type drop-down list, select Host or Network. Select Network if you have a full network behind a router on your local network. Select Host if only one host is behind the router or you want traffic to go to only one host. 5.
-
Page 102: Create A Dyndns Account
DynDNS.com immediately. For more information on dynamic DNS, go to http://www.dyndns.com. WatchGuard is not affiliated with DynDNS.com. Create a DynDNS account To set up your account, go to the DynDNS web site: http://www.dyndns.com. - Page 103 Network Settings 5. In the System drop-down list, select the system to use for this update. For an explanation of each option, see http://www.dyndns.com/services/. o The option dyndns sends updates for a Dynamic DNS host name. Use the dyndns option when you have no control over your IP address (for example, it is not static, and it changes on a regular basis).
- Page 104 Network Settings Configure the Firebox to use BIDS Telstra customers in Australia must use client software to connect to the BigPond network. The Firebox X Edge e-Series uses BIDS to make this connection. If you do not connect to the BigPond network, it is not necessary to use BIDS.
-
Page 105: Multiple Wan Configuration Options
WAN failover configuration. To purchase an Edge Pro upgrade for your Firebox X Edge, contact your reseller or go to theWatchGuard online store: https://www.watchguard.com/store. It is not necessary to configure new policies when you use a second external interface. The second interface uses the same policies and network properties as the primary external interface. -
Page 106: About Multi-Wan And Dns
Network Settings About multi-WAN and DNS When you configure more than one external interface on your Edge, it is a good idea to enter two DNS server addresses when you configure DHCP settings for the trusted and optional networks. Some ISPs allow queries to their DNS servers only if the query comes from that ISP network. -
Page 107: Configure Advanced Wan2 Settings
Network Settings Configure advanced WAN2 settings You can configure additional settings for your second WAN interface (WAN2) on the Advanced tab below WAN 2. 1. From the Link Speed drop-down list, select Automatic if you want the Edge to select the best network speed. - Page 108 Network Settings Configure the Edge to use round-robin load balancing 1. From the navigation bar, select Network > External. If you have an Edge Pro license, you see the options to configure your Edge with a multi-WAN configuration. 2. Select the Use multi-WAN check box. 3.
-
Page 109: Configure Wan Failover
Network Settings Configure WAN failover If you have an Edge Pro license, you can configure your Firebox X Edge with a WAN failover configuration and use a second external interface connected to a broadband Internet connection. To configure the WAN failover network: 1. -
Page 110: Configure The Edge For Serial Modem Failover
Network Settings 2. Select the Enable failover using the Ethernet (WAN2) interface check box. 3. Type the IP addresses of the hosts to ping for the WAN1 (external) and WAN2 (failover) interfaces. The Firebox X Edge will send pings to the IP addresses you type here. If pings to the host on that network are not successful, the Edge starts the failover. -
Page 111: Configure Your Modem For Wan Failover
Network Settings Configure your modem for WAN failover Use the settings available in the Modem (Serial Port) Configuration area of the Network > External page to set up your external modem for failover. The Edge has been tested with these modems: Hayes 56K V.90 serial fax modem Zoom FaxModem 56K model 2949 U.S. -
Page 112: Dns Settings
Network Settings DNS settings If your dial-up ISP does not give DNS server IP addresses, or if you must use a different DNS server, you can manually enter the IP addresses for a DNS server to use after failover occurs. 1. -
Page 113: About Virtual Local Area Networks (Vlans)
Network Settings About virtual local area networks (VLANs) An 802.1Q VLAN (virtual local area network) is a collection of computers on a LAN or LANs that are grouped together independent of their physical location. When you create a VLAN, you create a new software-based network interface that you can use in your configurations. -
Page 114: Add A Vlan Tag To The Trusted Or Optional Interface
Network Settings Add a VLAN tag to the Trusted or Optional Interface To mark sent to the trusted or optional interface on your Edge as part of a VLAN: 1. To connect to the System Status page, type in the browser address bar, followed by the IP https:// address of the Firebox X Edge trusted interface. -
Page 115: Before You Begin
Wireless Setup About wireless setup The Firebox X Edge e-Series Wireless can be configured as a wireless access point with three different security zones. You can enable wireless devices to connect to the Edge Wireless as part of the trusted network or part of the optional network. -
Page 116: About Wireless Configuration Settings
Wireless Setup About wireless configuration settings When you enable wireless access to the trusted, optional, or wireless guest network, some configuration settings are common to all three security zones. Change the SSID The SSID (Service Set Identifier) is the unique name of your wireless network. To use the wireless network from a client computer, the wireless network card in the computer must have the same SSID as the Firebox X Edge e-Series Wireless network the computer will connect to. -
Page 117: Log Authentication Events
For more information on the fragmentation threshold parameter, see the FAQ at https:// www.watchguard.com/support/faqs/edge. You must log in to your LiveSecurity account to see this FAQ. Change the RTS threshold RTS/CTS (Request To Send / Clear To Send) is a function that helps prevent problems when wireless clients can receive signals from more than one wireless access point on the same channel. -
Page 118: Set The Encryption Level
Wireless Setup Set the wireless authentication method Five authentication methods are available in the Firebox X Edge e-Series Wireless. We recommend that you use WPA2 if possible because it is the most secure. The five available methods, from least secure to most secure, are: Open System Open System authentication allows any user to authenticate with the access point. -
Page 119: About Wireless Connections To The Trusted Interface
Wireless Setup About wireless connections to the trusted interface If you enable wireless connections to the trusted interface, we recommend that you enable and use the Edge feature that allows you to restrict access to the trusted interface by MAC address. This prevents users from connecting to the Edge from unauthorized computers that could contain viruses or spyware. - Page 120 Wireless Setup 8. From the Authentication drop-down list, select the type of authentication to enable for wireless connections to the trusted interface. We recommend that you use WPA2 if the wireless devices in your network can support WPA2. 9. From the Encryption drop-down list, select the type of encryption to use for the wireless connection and add the keys or passwords required for the type of encryption you select.
-
Page 121: Allow Wireless Connections To The Optional Interface
Wireless Setup Allow wireless connections to the optional interface 1. To connect to the System Status page, type in the browser address bar, and the IP address https:// of the Firebox X Edge trusted interface. The default URL is: https://192.168.111.1 2. - Page 122 Wireless Setup 6. In the Network name (SSID) text box, type a unique name for your Edge wireless optional network or use the default name. 7. To change the fragmentation threshold, type a value in the Fragmentation Threshold field. The possible values are 256 through 2346.
-
Page 123: Enable A Wireless Guest Network Manually
Wireless Setup Enable a wireless guest network manually You can also use the wireless guest network configuration wizard available on the Wizards page of your Edge configuration menu. 1. To connect to the System Status page, type in the browser address bar, and the IP address https:// of the Firebox X Edge trusted interface. - Page 124 Wireless Setup 5. If you want to configure the Edge as a DHCP server when a wireless device tries to make a connection, select the Enable DHCP Server on Wireless Guest Network check box. To learn more about configuring the settings for the DHCP Server, see Enable DHCP server on the trusted network.
-
Page 125: Set The Operating Region And Channel
Wireless Setup About wireless radio settings The Firebox X Edge e-Series Wireless uses radio frequency signals to send and receive traffic from computers with wireless ethernet cards. Several settings are specific to Edge channel selection. You can see and change these settings if you connect to the Edge Wireless and select Network >... -
Page 126: Configure The Wireless Card On Your Computer
Wireless Setup Configure the wireless card on your computer These instructions are for the Windows XP with Service Pack 2 operating system. To see the installation instructions for other operating systems, go to your operating system documentation or help files. 1. -
Page 127: About Using Policies In Your Network
Firewall Policies About policies The Firebox uses two categories of policies to filter network traffic: packet filters and proxies. A packet filter examines each packet’s IP and TCP/UDP header. If the packet header information is legitimate, then the Firebox allows the packet. Otherwise, the Firebox drops the packet. A proxy also examines the header information, but it also examines the content. -
Page 128: Policy Rules
Firewall Policies As an example of how a policy might be used, suppose the network administrator of a company wants to activate a Windows terminal services connection to the company’s public web server on the optional interface of the Firebox. He or she routinely administers the web server with a Remote Desktop connection. At the same time, he or she wants to make sure that no other network users can use the Remote Desktop Protocol terminal services through the Firebox. - Page 129 Firewall Policies About policy-based routing To send network traffic, a router usually examines the destination address in the packet and looks at the routing table to find the next-hop destination. In some cases, you want to send traffic to a different path than the default route specified in the routing table.
- Page 130 Firewall Policies About using common packet filter policies You can control the traffic between the trusted, optional, and external networks using packet filter policies. The Firebox X Edge supplies a list of frequently used policies, called common policies, that you can use to easily allow or deny the most common traffic categories.
-
Page 131: Editing Common Packet Filter Policies
Firewall Policies Editing common packet filter policies You can edit some default settings of a common packet filter policy. On the Incoming tab, you can define a service host, redirect the port, enable logging, or restrict the IP addresses on the external network that can connect to a computer behind the Firebox X Edge e-Series. On the Outgoing tab, you can enable logging and restrict the IP addresses on the trusted or optional networks that can connect to the external network with this policy in the From field. -
Page 132: Set Access Control Options (Outgoing)
Firewall Policies Set access control options (outgoing) 1. From the Edit Policies page, select the Outgoing tab. 2. From the Outgoing Filter drop-down list, select the rule you want to apply. This rule affects only outgoing traffic. 3. To specify which computers on your trusted and optional network can use this policy, in the From field, select Any and click Remove. -
Page 133: About Custom Policies
Firewall Policies About custom policies You must define a custom policy for traffic if you need to allow for a protocol that is not included by default as a Firebox configuration option. A custom policy is also necessary if: You must create an additional packet filter for a policy. You must change the port or protocol for a policy. -
Page 134: Filter Incoming Traffic For A Custom Policy
Firewall Policies Add a custom packet filter policy manually You can add a custom policy without the wizard. 1. To connect to the System Status page, type in the browser address bar, and the IP address https:// of the Firebox X Edge trusted interface. The default URL is: https://192.168.111.1 2. -
Page 135: Filter Outgoing Traffic For A Custom Policy
Firewall Policies Filter outgoing traffic for a custom policy These steps restrict outgoing traffic through the Firebox X Edge. For information on how to restrict incoming traffic, see Filter incoming traffic for a custom policy. 1. From the Outgoing Filter drop-down list, select Allow or Deny. To allow all outgoing traffic from the trusted or optional network to the external network using this policy, skip to step 10. -
Page 136: Control Traffic From The Trusted To Optional Network
Firewall Policies About policies for the optional network By default, the Firebox X Edge e-Series allows all traffic that starts in the trusted network and tries to go to the optional network, and denies all traffic that starts in the optional network and tries to go to the trusted network. -
Page 137: Disable Traffic Filters Between Trusted And Optional Networks
Firewall Policies Disable traffic filters between trusted and optional networks To allow network traffic from the optional network to the trusted network, you must allow all traffic between the trusted and optional networks. Select the Disable traffic filters check box to allow all incoming and outgoing traffic between the trusted and optional interfaces. - Page 138 Firewall Policies About policy precedence Precedence is the sequence in which the Firebox examines network traffic and applies a policy rule. The Firebox automatically sorts policies from the most detailed to the most general. It compares the information in the packet to the list of rules in the first policy. The first rule in the list to match the conditions of the packet is applied to the packet.
-
Page 139: About Proxy Policies
Proxy Settings About proxy policies All WatchGuard policies, whether they are packet filter policies or proxy policies, are important tools for network security. While a packet filter examines each packet’s IP and TCP/UDP header, a proxy monitors and scans whole connections. It examines the commands used in the connection to make sure they are in the correct syntax and order. -
Page 140: Enable A Common Proxy Policy
Proxy Settings About adding and configuring proxy policies When you add a proxy policy to your Firebox configuration, you specify types of content that the proxy must look for as it filters traffic. If the content matches (or does not match) the criteria you set in the proxy definition, the proxy allows or denies the network traffic. -
Page 141: Set Access Control Options
Proxy Settings To add or edit a custom proxy policy: 1. To connect to the System Status page, type in the browser address bar, and the IP address https:// of the Firebox X Edge trusted interface. The default URL is: https://192.168.111.1 2. -
Page 142: About The Http Proxy
Proxy Settings About the HTTP proxy Hyper Text Transfer Protocol (HTTP) is a request/response protocol between clients and servers. The HTTP client is usually a web browser. The HTTP server is a remote resource that keeps or creates HTML files, images, and other content. -
Page 143: Http Proxy: Deny Message
Proxy Settings HTTP responses: General settings When the remote HTTP server accepts the connection request from the HTTP client, most browser status bars show, "Site contacted. Waiting for reply..." Then the HTTP server sends the appropriate response to the HTTP client. - Page 144 Proxy Settings Configure the HTTP proxy policy deny message 1. To connect to the System Status page, type in the browser address bar, and the IP address https:// of the Firebox X Edge trusted interface. The default URL is: https://192.168.111.1 2.
-
Page 145: Define Exceptions
WatchGuard web site http://www.watchguard.com, type . If you want to www.watchguard.com allow all subdomains that contain watchguard.com, you can use the asterisk (*) as a wildcard character. For example, to allow users to go towatchguard.com, www.watchguard.com, and support.watchguard.com type *watchguard.com To add an HTTP proxy exception: 1. -
Page 146: Http Requests: Url Paths
Proxy Settings Add, delete, or modify content types 1. Select the HTTP Content tab. 2. Select the Allow only safe content types check box if you want to limit content types allowed through the proxy. A list of common MIME types is included by default. 3. -
Page 147: About The Ftp Proxy
Proxy Settings About the FTP proxy FTP (File Transfer Protocol) is used to send files from one computer to a different computer over a TCP/IP network. The FTP client is usually a computer. The FTP server can be a resource that keeps files on the same network or on a different network. -
Page 148: Ftp Proxy: Proxy Limits
Proxy Settings FTP proxy: Proxy limits On the FTP Settings tab, you can set the maximum user name length, password length, file name length, and command-line length allowed through the proxy. These limits help protect your network from buffer overflow attacks. - Page 149 Proxy Settings FTP proxy: Upload and download content You can control the type of files that the FTP proxy allows for downloads and uploads. For example, because many hackers use executable files to deploy viruses or worms on a computer, you could select to deny requests for *.exe files.
-
Page 150: Edit The Pop3 Proxy
Proxy Settings About the POP3 proxy POP3 (Post Office Protocol v.3) is a protocol that moves email messages from an email server to an email client on a TCP connection on port 110. Most Internet-based email accounts use POP3. With POP3, an email client contacts the email server and checks for any new email messages. -
Page 151: Pop3 Proxy: Proxy Limits
For a complete description of the actions the POP3 proxy takes and the results your users see when the POP3 proxy finds and blocks content, see the FAQs for the Edge at http://www.watchguard.com/support/faq/edge. Timeout This setting limits the number of seconds that the email client tries to open a connection to the email server before the connection is closed. - Page 152 Proxy Settings %(filename)% Puts the name of the attached file. %(virus)% Puts the type of virus found. %(action)% Puts the action taken by the proxy policy. %(reason)% Puts the reason the proxy policy denied the content. %(recovery)% Puts whether you can recover the attachment. It is important to know how the POP3 proxy denies email.
-
Page 153: Pop3 Proxy: Content Types
Proxy Settings POP3 proxy: Content types Certain kinds of content embedded in email can be a security threat to your network. Other kinds of content can decrease the productivity of your users. On the POP3 Content tab, you limit content types, and block specified path patterns and URLs. -
Page 154: Pop 3 Proxy: Deny Unsafe File Name Patterns
Proxy Settings POP3 proxy: Allow only safe content types The headers for email messages include a Content Type header to show the MIME type of the email and the MIME type of any attachments. The content type or MIME type tells the computer the types of media the message contains. -
Page 155: Edit The Smtp Proxy
Proxy Settings About the SMTP proxy SMTP (Simple Mail Transport Protocol) is a protocol used to send email messages between email servers and also between email clients and email servers. It usually uses a TCP connection on port 25. You use the SMTP proxy to control email messages and email content. - Page 156 Proxy Settings Set access control options On the Outgoing or Incoming tab, you can set rules that filter IP addresses, network addresses, or host ranges. This is the same functionality you have in packet filter policies. 1. Select the Outgoing tab. 2.
- Page 157 Proxy Settings SMTP proxy: Proxy limits On the SMTP Settings tab, you can adjust timeout, email size, and line length limits. This stops the SMTP proxy from using too many network resources and can prevent some types of attacks. You can also customize the deny message that users see when an email message is blocked by the SMTP proxy.
-
Page 158: Smtp Proxy: Deny Message
Proxy Settings SMTP proxy: Deny message In the Deny Message field, you can write a custom plain text message that will appear in the recipient email message when the proxy blocks that message. You can use these variables: %(type)% Puts the content type of the email message. %(filename)% Puts the name of the attached file. -
Page 159: Smtp Proxy: Email Content
Proxy Settings SMTP proxy: Email content Certain kinds of content embedded in email can be a security threat to your network. Other kinds of content can decrease the productivity of your users. On the SMTP Content tab, you limit content types, and block specified path patterns and URLs. -
Page 160: Add Or Remove File Name Patterns
Proxy Settings Add or remove a content type 1. To add additional content types to the default list, type the MIME type and click Add. 2. To remove a content type, select it from the list and click Remove. You cannot remove message/* because the SMTP proxy cannot work without them. - Page 161 Proxy Settings About the H.323 proxy If you use Voice-over-IP (VoIP) in your organization, you can add an H.323 or SIP (Session Initiation Protocol) proxy policy to open the ports necessary to enable VoIP through your Firebox. These proxy policies have been created to work in a NAT environment to maintain security for privately addressed conferencing equipment behind the Firebox.
- Page 162 The WatchGuard SIP proxy is a transparent proxy that opens and closes ports necessary for SIP to operate. The WatchGuard SIP proxy can support both the SIP Registrar and the SIP Proxy when used with a call management system that is external to the Firebox. In this release, we do not support SIP when your call management system is protected by the Firebox.
-
Page 163: About The Outgoing Proxy
About additional security subscriptions for proxies You can purchase additional security subscriptions that work with the Firebox X Edge proxies to add even greater security to your network. These are subscription-based services offered by WatchGuard. For purchase information, visit the WatchGuard LiveSecurity web site at http://www.watchguard.com/store... - Page 164 Proxy Settings Firebox X Edge e-Series...
- Page 165 Default Threat Protection About intrusion prevention The Firebox X Edge e-Series includes a set of default threat protection features designed to keep out network traffic from systems you know or think are a security risk. This set of features includes: Permanently blocked site The Blocked Sites list is a list of IP addresses you add manually to your configuration file.
-
Page 166: About Blocked Sites
Default Threat Protection About Blocked Sites The Blocked Sites feature helps protect your network from systems you know or think are a security risk. After you find the source of suspicious traffic, you can block all connections from that IP address. You can also configure the Firebox to send a log message each time the source tries to connect to your network. -
Page 167: Block A Site Permanently
Default Threat Protection Block a site permanently 1. To connect to the System Status page, type in the browser address bar, and the IP address https:// of the Firebox X Edge trusted interface. The default URL is https://192.168.111.1 2. From the navigation bar, click Firewall > Intrusion Prevention. Click on the Blocked Sites tab. 3. -
Page 168: Block Sites Temporarily
Default Threat Protection Block sites temporarily To see a list of IP addresses auto-blocked by the Edge, go to System Status > Hostile Sites. You can look at the temporary Blocked Sites list together with your log messages to help you make decisions about which IP addresses to block permanently. -
Page 169: About Blocked Ports
Default Threat Protection About blocked ports You can block the ports that you know can be used to attack your network. This stops specified external network services. When you block a port, you override all the rules in your firewall configuration. You can block a port because: Blocking ports protects your most sensitive services. -
Page 170: Block A Port
Default Threat Protection Block a port Be very careful if you block port numbers higher than 1023. Clients frequently use these source port numbers. 1. To connect to the System Status page, type in the browser address bar, and the IP address https:// of the Firebox X Edge trusted interface. -
Page 171: Drop Dos Flood Attacks
Default Threat Protection About denial-of-service attacks The Firebox X Edge e-Series includes an integrated denial-of-service (DoS) protection feature to protect against some of the most common and frequent DoS and Distributed DoS (DDos) attacks used on the Internet. A DoS attack is an attempt to make a computer resource unavailable to its intended users. Most frequently, DoS attacks try to prevent an Internet site or service from efficient operation for some period of time by using large amounts of bandwidth or resources on the system that is being attacked. - Page 172 Default Threat Protection On the Firewall > Intrusion Prevention page, select the DoS Defense tab and set the packet/second threshold for these types of DoS flood attacks: IPSec flood attack A DoS attack where the attacker overwhelms a computer system with a large number of IPSec connections.
-
Page 173: Distributed Denial-Of-Service Prevention
Default Threat Protection Distributed denial-of-service prevention Use the Distributed DoS prevention feature to set limits for server and client traffic. Use the Server Quota setting to set a maximum number of simultaneous connections allowed incoming through the Firebox from external computers. Use the Client Quota to set a maximum number of simultaneous connections allowed out from computers protected by the Edge. -
Page 174: Configure Firewall Options
Default Threat Protection Configure firewall options You can use the Firewall Options page to configure rules that increase your network security. 1. To connect to the System Status page, type in the browser address bar, and the IP address https:// of the Firebox X Edge trusted interface. - Page 175 Default Threat Protection Firewall options are pre-configured to meet the needs of many Edge customers. Select the check box of any option you want to enable and click Submit to save your changes to the Edge. Firewall options include: Do not respond to ping requests You can configure the Firebox X Edge e-Series to deny ping requests received on the trusted, external, or optional network.
- Page 176 Default Threat Protection Firebox X Edge e-Series...
-
Page 177: About Traffic Management
Traffic Management About Traffic Management The Firebox X Edge e-Series supplies many different ways to manage the traffic on your network. You can limit the rate of traffic sent to the external or IPSec interface using QoS (Quality of Service) through Traffic Control. You can manage data transmission by giving more or less bandwidth to different traffic types. -
Page 178: Traffic Categories
Traffic Management Traffic Categories The Firebox X Edge e-Series allows you to limit data sent through policies and Traffic Control filters. A policy can allow or deny all data of a specified type. Traffic Control does not allow or deny data, but creates filters that separate important network traffic from other data. -
Page 179: Traffic Marking
Traffic Management Traffic Marking If your Firebox X Edge is part of a larger network that uses Quality of Service (QoS) and your upstream device, LAN equipment, and IPS support it, you can apply marking to each category of network traffic you define on your Edge. - Page 180 Traffic Management The following table shows the DSCP values you can select, the corresponding IP Precedence value (which is the same as the CS value), and the description in PHB keywords. DSCP Value Equivalent IP Precedence value Description: Per-hop Behavior keyword (CS values) Best-Effort (same as no marking) Scavenger* (Low)
- Page 181 Traffic Management About Traffic Control Options The Firebox X Edge e-Series has many different traffic control options, including: Traffic control is off The Edge sends network traffic in the sequence it was received. Traffic control is on, but prioritization is off This option limits all traffic to the upstream bandwidth limit.
- Page 182 Traffic Management Enable Traffic Control You must have at least one packet filter policy, proxy policy, or VPN tunnel enabled to add traffic filters. You can use any enabled policy or active VPN tunnel as a Traffic Control filter. Incoming and outgoing policies are identified by [Out] or [In] adjacent to the policy name.
- Page 183 Traffic Management 3. Select the Enable Traffic Control check box. The Interactive traffic list is enabled. 4. In the Upstream bandwidth limit text box, type the upstream bandwidth limit of your external network connection (WAN1). Enter a value from 19 Kbps to 100,000 Kbps. The default setting is 512 Kbps.
-
Page 184: Types Of Nat
Traffic Management About Network Address Translation (NAT) Network Address Translation (NAT) is a term used to describe any of several forms of IP address and port translation. At its most basic level, NAT changes the IP address of a packet from one value to a different value. The primary purposes of NAT are to increase the number of computers that can operate off a single publicly routable IP address, and to hide the private IP addresses of hosts on your LAN. -
Page 185: About Dynamic Nat
Traffic Management Secondary IP addresses You can assign eight public IP addresses to the primary external interface (WAN1). These addresses are used for 1-to-1 NAT. When you configure secondary IP addresses on the external network: The primary IP address must be a static IP address. The first IP address is the primary IP address. All secondary IP addresses must be on the same external subnet as the primary IP address. - Page 186 Traffic Management About 1-to-1 NAT When you enable 1-to-1 NAT, the Firebox changes and routes all incoming and outgoing packets sent from one range of addresses to a different range of addresses. A 1-to-1 NAT rule always has precedence over dynamic NAT.
-
Page 187: Add A Secondary External Ip Address
Traffic Management Enable 1-to-1-NAT Three steps are necessary to enable 1-to-1 NAT: 1. Add an IP address pair. For more information, see Add a secondary external IP address. A secondary external IP address is a public IP address on the external interface that also has an IP address on the trusted or optional (private) network. -
Page 188: Add Or Edit A Policy For 1-To-1 Nat
Traffic Management Add or edit a policy for 1-to-1 NAT 1. To connect to the System Status page, type in the browser address bar, and the IP address https:// of the Firebox X Edge trusted interface. The default URL is: https://192.168.111.1 2. -
Page 189: About Logging And Log Files
You can install the WatchGuard Log Server on a computer you are using as a management station. Or, you can install the Log Server software on a different computer. To do this, use the WatchGuard System Manager installation program and select to install only the Log Server component. -
Page 190: Logging And Notification In Applications And Servers
WSM applications and policies that you have defined for your Firebox to control the level of logs that you see. If you choose to send log messages from another WatchGuard server to the Log Server, you must first enable logging on that server. -
Page 191: About Logging To A Watchguard Log Server
The WatchGuard Log Server (previously known as the WatchGuard System Event Processor, or WSEP) is a component of WatchGuard System Manager. If you have a Firebox III, Firebox X Core, or Firebox X Peak, configure a primary Log Server to collect the log messages from your Firebox X Edge e-Series. You can also configure a backup Log Server. - Page 192 4. Select the Send logs in native XML format check box to have the Edge log messages sent to the WatchGuard Log Server in the XML format standard for Fireware v8.0 or higher. The WSM/Log Server installation must be WSM v8.3 or greater.
-
Page 193: Send Logs To A Syslog Host
Logging About Syslog Syslog is a log interface developed for UNIX but also used by a number of computer systems. You can configure the Firebox to send log information to a syslog server. A Firebox can send log messages to a Log Server and a syslog server at the same time, or send log messages to one or the other. - Page 194 Logging Firebox X Edge e-Series...
-
Page 195: About Certificates
Certificates About certificates When you use local authentication to connect to your Firebox over secure HTTP, the Firebox uses a certificate to secure your session. You can also use certificates for VPN authentication. Certificates are files that use a digital signature to match the identity of a person or organization with an encryption key. -
Page 196: Use Openssl To Generate A Csr
Certificates Use OpenSSL to generate a CSR OpenSSL is installed with most GNU/Linux distributions. To download the source code or a Windows binary file, go to http://www.openssl.org/ and follow the installation instructions for your operating system. You can use OpenSSL to convert certificates and certificate signing requests from one format to another. For more information, see the OpenSSL man page or online documentation. -
Page 197: Issue The Certificate
Certificates Issue the certificate 1. Connect to the server where the Certification Authority is installed, if necessary. 2. From the Start Menu, select Control Panel > Administrative Tools > Certification Authority. 3. From the Certification Authority (Local) tree in the left navigation pane, select Your Domain Name >... -
Page 198: Remove A Certificate
Certificates Remove a certificate 1. From the System Status page on the Firebox X Edge, select Administration > Certificates. 2. Select the certificate you want to delete, and then click the adjacent Remove button. VPN tunnels do not operate correctly if you remove a certificate that is currently in use. We recommend that you change the VPN tunnel authentication method before you remove a Remote VPN Gateway certificate. -
Page 199: About User Licenses
The Edge Administrator can set a global session maximum timeout. You must reboot the Edge to close all sessions. License upgrades are available from your reseller or from the WatchGuard web site: http://www.watchguard.com/products/purchaseoptions.asp. User licensing when authentication is required... -
Page 200: User Licensing When Authentication Is Not Required
WatchGuard’s user authentication feature allows a user name to be associated with a specific IP address to help you authenticate and track a user’s connections through the Firebox. With the Firebox, the fundamental question that is asked and answered with each connection is Should I allow traffic from source X to go to destination Y?"... -
Page 201: Set Authentication Options For All Users
User and Group Management Set authentication options for all users Some authentication options have an effect on all users. To set or change authentication options: 1. To connect to the System Status page, type in the browser address bar, and the IP address https:// of the Firebox X Edge trusted interface. -
Page 202: Configure An Individual User Account
User and Group Management About user accounts When you create a local user for the Firebox X Edge e-Series, you select the administrative access level for that user. You select access control for the external network and the Branch Office VPN tunnel, and time limits on this access. -
Page 203: Require Users To Authenticate To The Edge
15. If you want this user to be able to use Mobile VPN with SSL to the Edge for secure remote access, select the Allow Remote Access with Mobile VPN with SSL check box. You must also enable WatchGuard Mobile VPN with SSL on the VPN > Mobile VPN with SSL page. -
Page 204: Authenticate A Session Without Administrative Access
User and Group Management Authenticate a session without administrative access If you require authentication to the Edge for the user to access resources such as the external network, they must connect to the trusted interface IP address of the Edge using HTTPS, and type a user name and password. The default URL for the trusted interface IP address of the Edge is https://192.168.111.1. -
Page 205: Use The Built-In Administrator Account
User and Group Management Use the built-in administrator account The Firebox X Edge e-Series has a built-in administrator account that cannot be deleted. You can change some of the administrator account settings. On the Firebox Users page, click the icon in the Edit column of the administrator account. -
Page 206: Change A User Account Name Or Password
User and Group Management Change a user account name or password You can change an account name or account password. If you change the account name, you must give the account password. 1. To connect to the System Status page, type in the browser address bar, and the IP address https:// of the Firebox X Edge trusted interface. -
Page 207: About Ldap/Active Directory Authentication
User and Group Management About LDAP/Active Directory authentication If you use LDAP authentication, you do not have to keep a separate user database on the Firebox X Edge. You can configure the Edge to forward user authentication requests to a generic LDAP or Active Directory server. You can use LDAP authentication and local Firebox authentication at the same time. -
Page 208: Configure The Ldap/Active Directory Authentication Service
User and Group Management Configure the LDAP/Active Directory authentication service When you enable LDAP authentication, you define one authentication server and its properties. To enable LDAP authentication: 1. To connect to the System Status page, type in the browser address bar, and the IP address https:// of the Firebox X Edge trusted interface. -
Page 209: Use The Ldap Authentication Test Feature
For example, a DN can look like this: ou=user accounts,dc=mycompany,dc=com You can find more information about how to find your search base at: www.watchguard.com/support/faq. 11. If you select Standard LDAP as the LDAP server type, you must enter a Login Attribute Name and Group Attribute Name in the appropriate text boxes. -
Page 210: Add A Group For Ldap Authentication
User and Group Management Add a group for LDAP authentication 1. To connect to the System Status page, type in the browser address bar, and the IP address https:// of the Firebox X Edge trusted interface. The default URL is: https://192.168.111.1 2. -
Page 211: Set A Webblocker Profile For An Ldap Group
User and Group Management 9. Select the Allow access to manual and managed VPN tunnels check box to allow the members of this group to access VPN tunnels using the Firebox X Edge. 10. Select the Allow remote access with Mobile VPN with PPTP check box to allow the members of this group to establish PPTP connections with the Edge from remote locations. -
Page 212: Before You Begin
IP address, network permissions may not operate correctly. This can be a security risk. To use SSO, you must install the WatchGuard Authentication Gateway software, also known as the SSO agent software, on a domain computer in your network. When a user logs on to a computer, the SSO agent gathers all the information from the user and sends it to the Firebox. -
Page 213: Enable Single Sign-On
Install the WatchGuard Single Sign-On (SSO) agent To use Single Sign-On (SSO), you must install the WatchGuard SSO agent. The SSO agent is a service that receives requests for Firebox authentication and checks the user’s status with the Active Directory server. The service runs with the name WatchGuard Authentication Gateway on the computer on which you install the SSO agent software. - Page 214 Review your settings, then click Install to install the service on your computer. Setup - Authentication Gateway Click Finish to close the wizard. The WatchGuard Authentication Gateway service starts automatically when the wizard completes, and starts each time the computer restarts.
- Page 215 User and Group Management Enable RADIUS authentication When you enable RADIUS authentication, you define one authentication server and its properties. When you set up your RADIUS server, you must make sure that, when it sends a message to the Firebox that a user is authenticated, it also sends a FilterID string, for example "engineeringGroup"...
-
Page 216: See Active Sessions And Users
User and Group Management See active sessions and users On the Firebox Users page, you see information about the users who are online. 1. To connect to the System Status page, type in the browser address bar, with the IP address https:// of the Firebox X Edge trusted interface. -
Page 217: Local User Account
User and Group Management Stop a session The Firebox X Edge e-Series monitors and records the properties of each user session. If the Automatic Session Termination time limit for all sessions is reached, or if the Firebox X Edge restarts, all sessions are stopped at the same time. -
Page 218: Editing A User Account
User and Group Management Editing a user account To edit a user account, click the Edit icon. For descriptions of the fields you can configure, see About user accounts. Deleting a user account To remove a user account, click the X adjacent to the account name. A dialog box appears. Click Yes to remove the account. -
Page 219: About Webblocker
WebBlocker works with the HTTP and HTTPS proxies to filter web browsing. If you have not configured an HTTP or HTTPS proxy, a proxy is automatically configured and enabled for you when you enable WebBlocker. You must purchase the WebBlocker upgrade to use this feature. For more information, visit the WatchGuard LiveSecurity web site at http://www.watchguard.com/store. - Page 220 WebBlocker To configure WebBlocker: 1. To connect to the System Status page, type in the browser address bar, and the IP address https:// of the Firebox X Edge trusted interface. The default URL is: https://192.168.111.1 2. From the navigation bar, select WebBlocker > Settings. The WebBlocker Settings page appears 3.
-
Page 221: Install The Quarantine Server And Webblocker Server
If the WebBlocker subscription is renewed, the Firebox X Edge keeps the previous configuration and applies WebBlocker rules again. 8. By default, WebBlocker connects to a WebBlocker Server maintained by WatchGuard to check to see if a web site matches a WebBlocker category. If you prefer, you can install and maintain your own WebBlocker Server on your local network. -
Page 222: About Webblocker Profiles
When you are finished, click Next. Configure WatchGuard Toolbar Follow the instructions on the screen to activate your WatchGuard Toolbar. When you are finished, click Next. After the installation, you can start and stop the WebBlocker Server or the Quarantine Server with the WebBlocker Server and Quarantine Server icons on your WatchGuard Toolbar. - Page 223 WebBlocker 3. Click New. The New Profile page appears. User Guide...
-
Page 224: About Webblocker Categories
WebBlocker 4. In the Profile Name field, type a familiar name. Use this name to identify the profile during configuration. For example, give the name 90day to a group of employees that have worked at your company for less than 90 days. 5. -
Page 225: See Whether A Site Is Categorized
Submissions form on the SurfControl web site. 1. Open a web browser and go to: http://mtas.surfcontrol.com/mtas/WatchGuardTest-a-Site.asp. The WatchGuard Test-a-Site page appears. 2. Type the URL or IP address of the site to check. 3. Click Test Site. The WatchGuard Test-a-Site Results page appears. User Guide... -
Page 226: Add, Remove, Or Change A Category
WebBlocker Add, remove, or change a category If you receive a message that the URL you entered is not in the SurfControl list, you can submit it on the Test Results page. 1. Click Submit A Site. The Submit A Site page appears. 2. -
Page 227: About Allowing Sites To Bypass Webblocker
WebBlocker About allowing sites to bypass WebBlocker WebBlocker might deny a web site that is necessary for your business. You can override WebBlocker by defining a web site normally denied by WebBlocker as an exception to allow users to access it. For example, suppose employees in your company frequently use web sites that contain medical information. -
Page 228: Add A Denied Site
WebBlocker Add a denied site 1. From the navigation bar, select WebBlocker > Denied Sites. The WebBlocker Denied Sites page appears. 2. From the drop-down list, select Host IP Address or Domain Name/URL 3. Type the host IP address or domain name of the denied web site. 4. -
Page 229: Allow Internal Hosts To Bypass Webblocker
WebBlocker Allow internal hosts to bypass WebBlocker You can make a list of internal hosts that bypass WebBlocker. The internal hosts that you put on this list also bypass any user authentication settings. If a user is on this list, that user does not have to authenticate to get access to the Internet. - Page 230 WebBlocker Firebox X Edge e-Series...
-
Page 231: About Spamblocker
Before you install spamBlocker, you must have: spamBlocker feature key. To get a feature key, contact your WatchGuard reseller or to the WatchGuard LiveSecurity web site at: http://www.watchguard.com/store. POP3 or SMTP email server. spamBlocker works with the WatchGuard POP3 and Incoming SMTP proxies to scan your email. -
Page 232: About Virus Outbreak Detection (Vod)
spamBlocker About Virus Outbreak Detection (VOD) Virus Outbreak Detection (VOD) is a technology that identifies email virus outbreaks worldwide within minutes. Provided by Commtouch, an industry leader in email spam and virus protection, VOD isincorporated into the spamBlocker security service. VOD uses traffic analysis technology to provide zero hour protection against viruses. -
Page 233: Spamblocker Categories
spamBlocker spamBlocker categories The Commtouch Recurrent-Pattern Detection (RPD) solution classifies spam attacks in its Anti-Spam Detection Center database according to severity. spamBlocker queries this database and assigns a category to each email message. spamBlocker has three categories: The Confirmed category includes email messages that come from known spammers. We recommend you use the Deny action for this type of email if you use spamBlocker with the SMTP proxy, or Add a subject tag if you use spamBlocker with the POP3 proxy. -
Page 234: Configure Spamblocker
spamBlocker Enable spamBlocker 1. To connect to the System Status page, type in the browser address bar, and the IP address https:// of the Firebox X Edge trusted interface. The default URL is: https://192.168.111.1 2. From the navigation bar, select spamBlocker > Settings. The spamBlocker Settings page appears. - Page 235 spamBlocker 5. At the bottom of the page, you can set the number of bytes of an email message that spamBlocker checks with the Limit scanning to first text box. If you type a very large number in this text box, your network throughput may be slow. We recommend that you keep the scan limit under 50 kilobytes (KB).
-
Page 236: Set Pop3 Email Actions
spamBlocker Set POP3 email actions 1. From the Confirmed drop-down list, select Allow or Add a subject tag. The default action is Allow. If you choose Add a subject tag, a text box appears with the default tag * . You can change **SPAM*** this tag to some text you prefer. -
Page 237: About Spamblocker Exceptions
, the exception refers to any *@watchguard.com email address sent to the WatchGuard domain. You can also type only an asterisk in the text box if the exception applies to any sender. 4. If you select Add a subject tag as the action, type a tag in the text box below the Subject Tag column. -
Page 238: About Using Spamblocker With Multiple Proxies
spamBlocker About using spamBlocker with multiple proxies You can configure more than one SMTP or POP3 proxy service to use spamBlocker. This lets you create custom rules for different groups in an organization. For example, you can allow all email to your management and use a spam tag for the marketing team. -
Page 239: Send Spam Or Bulk Email To Special Folders In Outlook
spamBlocker Create rules for your email reader To use the Tag action in spamBlocker, it is best to configure your email reader to sort messages. Most email readers, such as Outlook, Thunderbird, and Mac Mail, allow you to set rules that automatically send email messages with tags to a subfolder. -
Page 240: Report False Positives And False Negatives
You must have access to the email message to submit the report. For information on how to submit a report for a false positive or false negative, see the spamBlocker section of the product FAQs available at: www.watchguard.com/support/faqs/fireware/. You must log in with your LiveSecurity Service user name and passphrase. -
Page 241: About The Quarantine Server
Quarantine Server About the Quarantine Server The WatchGuard Quarantine Server provides a safe, full-featured quarantine mechanism for any email messages suspected or known to be spam or to contain viruses. This repository receives email messages from the SMTP proxy and are filtered by spamBlocker. Granular control allows you to configure preferences for mail disposition, storage allocations, and other parameters. -
Page 242: Download The Server Software
3. Click the Software Downloads link. 4. Select your Firebox type and model number. 5. Download the WatchGuard Quarantine Server and WebBlocker Server for Edge software and save the file to a convenient location. Install Quarantine Server and WebBlocker Server Double-click to start the setup wizard. -
Page 243: Install Server Components
Install server components You can install Quarantine Server as part of WatchGuard System Manager, or as part of a special installer for Firebox X Edge users. When you run the installer, you are asked which client and server components you want to install. -
Page 244: Set General Server Parameters
Quarantine Server Configure the Quarantine Server When you configure the Quarantine Server, you have these options: Set general server parameters Change the expiration and user domain settings: When to delete or how long to keep messages, and add and delete user domains. Only users in the domains that are in this list can have their messages sent to the Quarantine Server. - Page 245 Quarantine Server 3. To change the default maximum database size of 10000 MB, type a new value in the Maximum database size field. The current database size and available space appear to the right of this field. When the Quarantine Server runs out of drive space, it refuses to accept new messages and drops any subsequent email messages it receives.
-
Page 246: Change Expiration Settings And User Domains
Quarantine Server Change expiration settings and user domains 1. To open the Quarantine Server Configuration dialog box: Right-click and select Configure. Type the server management passphrase. This is the server management passphrase you created in the second screen of the Quarantine Server Setup Wizard or when you configured your Management Server. -
Page 247: Change Notification Settings
Quarantine Server Add or remove user domains The Expiration Settings tab of the Quarantine Server Configuration dialog box shows the domain names for which the Quarantine Server will accept email messages. Only users in the domains that are in the list can have messages sent to the Quarantine Server for them. - Page 248 6. In the Subject field, type a name for the subject of the notification messages. The default is WatchGuard Quarantine Server Notification. 7. In the Body field, type the body of the notification message. You can use either text or HTML to specify the message body.
-
Page 249: Enable Or Disable Logging
3. From the dialog box that appears, click the Logging tab. Enable or disable logging If you want the server to send log messages to one or more WatchGuard Log Servers, select the Enable log messages to WatchGuard log server check box. - Page 250 Quarantine Server Change Quarantine Server rules You set up rules to automatically remove certain messages if they come from a specific domain or sender, or if they contain specific text strings in the subject line. 1. To open the Quarantine Server Configuration dialog box, right-click and select Configure.
- Page 251 Quarantine Server 5. Click the underlined words in the rule to add a specific domain, sender, or text string in the subject line. The Edit Auto-Remove Rule dialog box appears. 6. To add a new domain, sender, or string, type it in the top box and click Add. 7.
-
Page 252: Open The Messages Dialog Box
Quarantine Server Manage messages You can see all messages on the Quarantine Server in a dialog box. You can sort messages by user, quarantine status, sender, subject, and date/time received. You can only have one Quarantine Server dialog box open at a time. After you are done with one Quarantine Server dialog box, you must close it before you open a new one. -
Page 253: Save Messages Or Send To A User's Inbox
Quarantine Server Set viewing options You can use the Filter By drop-down list to see all messages or only those with a particular quarantine status. To see the body of a message, select the View message body check box. Select any message. A second pane appears at the bottom of the dialog box that shows the message body. -
Page 254: Open The Messages Dialog Box
Quarantine Server Open the messages dialog box You can only have one Quarantine Server dialog box open at a time. After you are done with one Quarantine Server dialog box, you must close it before you open a new one. 1. -
Page 255: About Managing Users
Quarantine Server About managing users You add, delete, and configure users from the Users tab of the Quarantine Server Message and User Management dialog box. This dialog box shows: Email addresses of users that can have email messages sent to the Quarantine Server. Whether users are notified when they have email on the Quarantine Server. -
Page 256: Add Users
Quarantine Server Add users Users are automatically added when messages are sent to the Quarantine Server for them. Use this procedure to manually add users: 1. From the Quarantine Server Message and User Management dialog box, click the Users tab. Select Edit >... -
Page 257: Get Statistics On Quarantine Server Activity
Quarantine Server statistics include those messages that have been deleted, either manually or automatically. You can only have one Quarantine Server dialog box open at a time in this release of WatchGuard System Manager. After you are done with one Quarantine Server dialog box, you must close it before you open a new one. - Page 258 Quarantine Server Firebox X Edge e-Series...
-
Page 259: About Gateway Antivirus And Intrusion Prevention
Gateway AV/IPS uses these signatures to find viruses and intrusion attacks when they are scanned by the proxy. WatchGuard cannot guarantee that Gateway AV/IPS can stop all viruses or intrusions, or prevent damage to your systems or networks from a virus or intrusion attack. -
Page 260: About Gateway Antivirus Settings
WatchGuard Gateway AntiVirus (Gateway AV) stops viruses before they get to computers on your network. Gateway AV operates with the WatchGuard SMTP, POP3, HTTP, and FTP proxies. When you enable Gateway AV, the SMTP, POP3, HTTP, and FTP proxy looks at various types of traffic and performs an action that you specify. -
Page 261: Configure Gateway Av
7. If you enable Gateway AntiVirus for SMTP, use the Virus is detected (SMTP only) drop-down list to select whether you want the Edge to remove (strip) viruses from email messages when they are found or to quarantine the email message. You must have a WatchGuard Quarantine Server installed to use the Quarantine option. -
Page 262: About Intrusion Prevention Service Settings
Gateway AntiVirus and Intrusion Prevention Service 11. When you enable Gateway AV/IPS for SMTP, you must specify the IP address of your SMTP email server in the Email Server IP Address field near the bottom of the page. The Edge creates a policy for you to allow incoming SMTP traffic to this IP address. - Page 263 Gateway AntiVirus and Intrusion Prevention Service 4. When you enable Gateway AV/IPS for SMTP, you must specify the IP address of your SMTP email server in the Email Server IP Address field near the bottom of the page. The Edge creates a policy for you to allow incoming SMTP traffic to this IP address.
- Page 264 New viruses and intrusion methods appear on the Internet frequently. The Gateway AV/IPS service uses a database of signatures to check for viruses and intrusions. WatchGuard frequently publishes updates to the signature database to our customers as new signatures become known. Usually, new Gateway AV signatures are published several times a day.
-
Page 265: About Branch Office Virtual Private Networks (Bovpns)
2. Configure the Firebox X Edge to be the endpoint of a VPN tunnel created and managed by a WatchGuard Firebox X Core or Peak Management Server. This procedure is different for different versions of WatchGuard System Manager appliance software installed on the Firebox X Core or Peak. Configure Manual VPN on the Edge, as described in Create Manual VPN tunnels on your Edge. -
Page 266: About Vpn Failover
IP Protocol 50 (Encapsulating Security Payload or ESP) If the other side of the VPN tunnel is a WatchGuard Firebox X and each Firebox is under WatchGuard System Manager management, you can use the Managed VPN option. Managed VPN is easier to configure than Manual VPN. -
Page 267: About Managed Vpns
Edge configuration pages. You must have WatchGuard System Manager and a Firebox III, Firebox X Core, or Firebox X Peak to have a Management Server. When your Firebox X Edge gets its VPN configuration from a Management Server, your Edge is a client of the Management Server in a client-server relationship. -
Page 268: Sample Vpn Address Information Table
The numbers after the slashes indicate the subnet masks. / 24 means that the subnet mask for the trusted network is 255.255.255.0. For more information on entering IP addresses in slash notation, see this FAQ: https://www.watchguard.com/support/advancedfaqs/ general_slash.asp You Example: Site A: 192.168.111.0/24 Site B: 192.168.222.0/24... - Page 269 Branch Office Virtual Private Networks Create Manual VPN tunnels on your Edge 1. To connect to the System Status page, type in the browser address bar, and the IP address https:// of the Firebox X Edge trusted interface. The default URL is: https://192.168.111.1 2.
-
Page 270: Phase 1 Settings
Branch Office Virtual Private Networks Phase 1 settings Internet Key Exchange (IKE) is a protocol used with VPN tunnels to manage keys automatically. IKE negotiates and changes keys. Phase 1 authenticates the two sides and creates a key management security association to protect tunnel data. - Page 271 Branch Office Virtual Private Networks To change Phase 1 configuration: 1. Select the negotiation mode from the Mode drop-down list. You can use Main Mode only when the two devices have static IP addresses. If one or both of the devices have external IP addresses that are dynamically assigned, you must use Aggressive Mode.
- Page 272 Branch Office Virtual Private Networks If your Edge is behind a device that does NAT The Firebox X Edge e-Series can use NAT Traversal. This means that you can make VPN tunnels if your ISP does NAT (Network Address Translation) or if the external interface of your Edge is connected to a device that does NAT.
-
Page 273: Phase 2 Settings
Branch Office Virtual Private Networks Phase 2 settings Phase 2 negotiates the data management security association for the tunnel. The tunnel uses this phase to create IPSec tunnels and put data packets together. You can use the default Phase 2 settings to make configuration easier. Make sure that the Phase 2 configuration is the same on the two devices. - Page 274 You must enter network addresses in slash notation (also known as CIDR or Classless Inter Domain Routing notation). For more information on how to enter IP addresses in slash notation, see this FAQ: http://www.watchguard.com/support/advancedfaqs/general_slash.asp. 7. Click Add. 8. Repeat step 5 if you must add additional networks.
-
Page 275: See Vpn Statistics
Branch Office Virtual Private Networks Configure VPN Keep Alive To keep the VPN tunnel open when there are no connections through it, you can use the IP address of a computer at the other end of the tunnel as an echo host. The Firebox X Edge e-Series sends a ping each minute to the specified host. -
Page 276: Why Do I Need A Static External Address
The number of VPN tunnels that you can create on your Firebox X Edge e-Series is set by the Edge model you have. You can purchase a model upgrade for your Edge to make more VPN tunnels. You can purchase a Firebox X Edge Model Upgrade from a reseller or from the WatchGuard web site: http://www.watchguard.com/products/purchaseoptions.asp. - Page 277 About Mobile VPN with PPTP You can use Point-to-Point Tunneling Protocol (PPTP) to make secure VPN tunnels. You can configure the Firebox X Edge e-Series as a PPTP VPN endpoint and allow up to 10 users to make simultaneous secure connections to the Edge and access the networks protected by the Edge.
- Page 278 About Mobile VPN with PPTP Enable PPTP access for firewall users When you enable Mobile VPN with PPTP on your Edge, you must enable PPTP access for each remote user who uses PPTP to connect to the Edge. 1. To connect to the System Status page, type and the IP address of the Firebox X Edge trusted https:// interface in the browser address bar.
-
Page 279: Enable Pptp On The Edge
About Mobile VPN with PPTP Enable PPTP on the Edge 1. To connect to the System Status page, type and the IP address of the Firebox X Edge trusted https:// interface in the browser address bar. The default URL is https://192.168.111.1 2. -
Page 280: Configure Dns And Wins Settings
About Mobile VPN with PPTP Configure DNS and WINS settings The Domain Name Service (DNS) changes host names into IP addresses. The Windows Internet Naming Service (WINS) changes NetBIOS names to IP addresses. By default, PPTP users that connect to the Edge use the WINS and DNS servers identified on the Network >... -
Page 281: Create And Connect A Pptp Vpn From A Windows Xp Client
About Mobile VPN with PPTP Create and connect a PPTP VPN from a Windows XP client To prepare a Windows XP remote host, you must configure the network connection. From the Windows Desktop of the client computer: 1. Select Start > Control Panel > Network Connections. The Network Connection wizard starts. -
Page 282: Use Pptp And Access The Internet
About Mobile VPN with PPTP Use PPTP and Access the Internet You can enable remote users to access the Internet through a PPTP tunnel. When you do this, all firewall policies are applied to the remote user. For example, if you have configured WebBlocker for outbound traffic, your WebBlocker rules will apply to traffic coming through the PPTP tunnel and sent to the Internet. -
Page 283: Client Requirements
About Mobile VPN with IPSec The WatchGuard Mobile VPN with IPSec client is a software application that is installed on a remote computer. The client makes a secure connection from the remote computer to your protected network through an unsecured network. The Mobile VPN client uses Internet Protocol Security (IPSec) to secure the connection. - Page 284 About Mobile VPN with IPSec Enable Mobile VPN for a Firebox user account 1. To connect to the Edge System Status page, type in the browser address bar, and the IP https:// address of the Firebox X Edge trusted interface. The default URL is: https://192.168.111.1 2.
-
Page 285: Enable Mobile Vpn For A Group
About Mobile VPN with IPSec 10. Select Mobile User in the VPN Client Type drop-down list. This selection is required if you use a Windows desktop, laptop, or handheld PC. 11. Select the All traffic uses tunnel (0.0.0.0/0 IP Subnet) check box if the remote client sends all its traffic (including usual web traffic) through the VPN tunnel to the Firebox X Edge. -
Page 286: About Mobile Vpn Client Configuration Files
About Mobile VPN with IPSec About Mobile VPN Client configuration files With Mobile VPN with IPSec, the Firebox X Edge administrator controls end-user profiles. You use the Edge web configuration interface to set the name of the end user and create a client configuration file, or profile, with the file extension .wgx. -
Page 287: Get The User's .Wgx File
About Mobile VPN with IPSec WINS/DNS Settings for Mobile VPN with IPSec Mobile VPN clients use shared Windows Internet Naming Service (WINS) and Domain Name System (DNS) server addresses. DNS changes host names into IP addresses, while WINS changes NetBIOS names to IP addresses. - Page 288 About Mobile VPN with IPSec Distribute the software and profiles WatchGuard recommends distributing end-user profiles by encrypted email or by another secure method. Each client computer must have: Software installation package The packages are located on the WatchGuard LiveSecurity Service web site at: http://www.watchguard.com/support.
-
Page 289: Client Requirements
About the Mobile VPN with IPSec client The WatchGuard Mobile VPN with IPSec client is installed on a user’s computer, whether the user travels or works from home. The user connects with a standard Internet connection and activates the Mobile VPN client. -
Page 290: Select A Certificate And Enter The Pin
About Mobile VPN with IPSec To import a Mobile VPN configuration .wgx file: 1. Select Configuration > Profile Import. The Profile Import Wizard starts. 2. On the Select User Profile screen, browse to the location of the .wgx configuration file supplied by your network administrator. -
Page 291: Connect And Disconnect The Mobile Vpn Client
Connect and disconnect the Mobile VPN client The WatchGuard Mobile VPN with IPSec client software makes a secure connection from a remote computer to your protected network over the Internet. To start this connection, you must connect to the Internet and use the Mobile VPN client to connect to the protected network. -
Page 292: Disconnect The Mobile Vpn Client
To set the behavior of the Mobile VPN client when the VPN tunnel goes down: 1. From the WatchGuard Mobile VPN Connection Monitor, select Configuration > Profile Settings. 2. Select the name of the profile and click Configure. -
Page 293: Mobile User Vpn Client Icon
About Mobile VPN with IPSec 4. Use the Connection Mode drop-down list to set a connection behavior for this profile. o Manual - When you select manual connection mode, the client does not try to restart the VPN tunnel automatically if the VPN tunnel goes down. To restart the VPN tunnel, you must click the Connect button in Connection Monitor or right-click the Mobile VPN icon on your Windows desktop toolbar and click Connect. -
Page 294: Enable The Link Firewall
To enable the link firewall: 1. From the WatchGuard Mobile VPN Connection Monitor, select Configuration > Profile Settings. 2. Select the profile you want to enable the link firewall for and select Configure. 3. From the left pane, select Link Firewall. -
Page 295: About The Desktop Firewall
Enable the desktop firewall To enable the full-featured desktop firewall: 1. From the WatchGuard Mobile VPN Connection Monitor, select Configuration > Firewall Settings. The firewall is disabled by default. 2. When you enable the firewall, you must choose between two firewall modes: o Basic Locked Settings - When you enable this mode, the firewall denies all connections to or from your computer unless you have created a rule to specifically allow the connection. -
Page 296: Define Friendly Networks
About Mobile VPN with IPSec Define friendly networks You can generate a firewall rule set for specific known networks that you define. For example, if you want to use the Mobile VPN client on a local network where you want your computer available to other computers, you can add the network address of that LAN as a friendly network. - Page 297 About Mobile VPN with IPSec To create a rule, click New. Use the four tabs in the Firewall Rule Entry dialog box to define the traffic you want to control: General tab Local tab Remote tab Applications tab General tab You can define the basic properties of your firewall rules on the General tab of the Firewall Rule Entry dialog box.
- Page 298 About Mobile VPN with IPSec Local tab You can define any local IP addresses and ports that are controlled by your firewall rule on the Local tab of the Firewall Rule Entry dialog box. We recommend that, in any rule, you configure the Local IP Addresses setting to enable the Any IP address radio button.
- Page 299 About Mobile VPN with IPSec Remote tab You can define any remote IP addresses and ports that are controlled by this rule on the Remote tab of the Firewall Rule Entry dialog box. For example, if your firewall is set to deny all traffic and you want to create a rule to allow outgoing POP3 connections, add the IP address of your POP3 server as an Explicit IP Address in the Remote IP Addresses section.
- Page 300 About Mobile VPN with IPSec Applications tab You can limit your firewall rule so that it applies only when a specific application is used. 1. On the Applications tab of the Firewall Rule Entry dialog box, select the Bind Rule To Application below check box.
-
Page 301: Steps Required To Set Up Your Tunnels
About Mobile VPN with SSL The WatchGuard Mobile VPN with SSL client is installed on a user’s computer, whether the user travels or works from home. The user can then connect with a standard Internet connection and activate the Mobile VPN client. -
Page 302: Enable Mobile Vpn With Ssl For A Firebox User
About Mobile VPN with SSL Client requirements The WatchGuard Mobile VPN with SSL product supplies a VPN client for all Firebox X e-Series devices. It does not provide endpoint security. You can install the Mobile VPN with SSL client software on computers with the following operating systems:... -
Page 303: Enable Mobile Vpn With Ssl For A Group
About Mobile VPN with SSL Enable Mobile VPN with SSL for a group When you enable Mobile VPN with SSL on your Edge, you must make sure to enable access for each remote user or group who uses SSL to connect to the Edge. If you use extended authentication, you must configure the group name to match exactly the name of the group on your authentication server. -
Page 304: Enable The Edge To Use Mobile Vpn With Ssl
About Mobile VPN with SSL 7. In the Session idle timeout field, set the length of time the computers in this group can stay authenticated when idle (not passing any traffic to the external network, through the Branch Office VPN, or to the Firebox X Edge itself). A setting of zero (0) minutes means there is no idle timeout. 8. - Page 305 About Mobile VPN with SSL SSL VPN General Tab Gateway The Gateway is the public IP address that Mobile VPN clients connect to. You must type an IP address assigned to the external interface of your Edge. If you have configured more than one IP address for your external interface, or you have configured WAN failover with the WAN2 port on your Edge, add this IP address in the Secondary text box.
-
Page 306: Ssl Vpn Advanced Tab
About Mobile VPN with SSL SSL VPN Advanced tab Authentication From the Authentication drop-down list, select the authentication algorithm to use. Encryption From the Encryption drop-down list, select the encryption algorithm to use. Protocol and Port By default, SSL traffic uses the TCP protocol on port 443. Most users do not change this setting. You must configure Mobile VPN with SSL to use a different port and protocol if you have a firewall policy that allows incoming HTTPS. -
Page 307: Download The Client Software
About Mobile VPN with SSL Download the client software To download the Mobile VPN client software, connect to the Firebox with a web browser. Each user must type: https://IP address of a Firebox interface:4100/ https://Host name of the Firebox:4100/ The client software is also available on the Software Downloads section of the LiveSecurity web site. You can download a version of the client software after you connect and authenticate. -
Page 308: Install The Mobile Vpn With Ssl Client Software (Mac Os X)
About the Mobile VPN with SSL client The WatchGuard Mobile VPN with SSL client is installed on a user’s computer, whether the user travels or works from home. The user can then connect with a standard Internet connection and activate the Mobile VPN client. -
Page 309: Connect To The Firebox With The Mobile Vpn With Ssl Client (Mac Os X)
After you have installed the Mobile VPN with SSL client, you can connect to your Firebox. 1. Use one of these three methods to start the client software: o Select Start > All Programs > WatchGuard > Mobile VPN with SSL client > Mobile VPN with SSL client. -
Page 310: Uninstall The Mobile Vpn With Ssl Client
Mobile VPN with SSL client controls When the Mobile VPN with SSL client is running, the WatchGuard logo icon appears in the System Tray (Win) or on the right side of the menu bar (Mac). The VPN connection status is displayed in the icon’s magnifying glass.
Need help?
Do you have a question about the Firebox X15 and is the answer not in the manual?
Questions and answers