Canon FaxPhone L170 Basic Manual
Canon faxphone l170: basic guide
Hide thumbs
Also See for FaxPhone L170:
- Software manual (104 pages) ,
- Basic manual (9 pages) ,
- Technical information (2 pages)

Related Manuals for Canon FaxPhone L170


Summary of Contents for Canon FaxPhone L170
- Page 1 FAXPHONE L170 Basic Guide Basic Guide Please read this guide before operating this equipment. After you finish reading this guide, store it in a safe place for future reference.
- Page 2 • Troubleshooting Printer Driver Issues • To view the manual in PDF format, Adobe Reader/ Acrobat Reader/Acrobat is required. If Adobe Reader/ Acrobat Reader/Acrobat is not installed on your system, please download it from the Adobe Systems Incorporated website (http://www.adobe.com).
-
Page 3: Where To Find Help
Free technical support Monday-Saturday (excluding holidays) for products still under warranty (1-800-828-4040) • Technical support for products no longer under warranty (1-757-413-2848) NOTE Within Canada, call for technical support 24 hours a day, 7 days a week (1-800-263-1121). *Support program specifics are subject to change without notice. Where to Find Help... -
Page 4: Product Type And Model
Laser Safety This product complies with 21 CFR Chapter 1 Subchapter J as a Class I laser product under the U.S. Department of Health and Human Services (DHHS) Radiation Performance Standard according to the Radiation Control for Health and Safety Act of 1968. -
Page 5: Type Conventions
Indicates notes for operation or additional explanations. Reading these is highly recommended. In addition, this Guide uses brackets to show button and switch names on the machine, such as [Start], and [Set]. Text that appears in the machine’s display is shown in capital letters, such as: <RECEPTION OK>. -
Page 6: Power Supply
If you are not sure of the type of power available, consult your local power company. • Do not allow the power cord to be near objects that emit heat. The outer cover of the power cord may melt resulting in fire or electrical shock. •... -
Page 7: Handling
IMPORTANT • If dust accumulates around the plug of the power cord when it is connected to a power outlet, unplug the machine and wipe the plug with a clean, dry cloth. • Do not plug the machine into the same circuit as appliances such as an air conditioner, television, or copier. - Page 8 CAUTION • Do not place the following objects on top of the machine. If such objects come into contact with internal electrical components, the machine may short-circuit resulting in fire or electrical shock. - Metallic objects such as jewelry and watches - Containers of water or other liquids such as glasses, vases or pot plants •...
-
Page 9: Legal Limitation On Usage Of Your Product And The Use Of Images
A non-exhaustive list of these documents is set forth below. This list is intended to be a guide only. If you are uncertain about the legality of using your product to scan, print or otherwise reproduce any particular document, and/or of the use of the images scanned, printed or otherwise reproduced, you should consult in advance with your legal advisor for guidance. -
Page 10: Users In The U.s.a
Excessive RENs on a telephone line may result in the devices not ringing in response to an incoming call. In most but not all areas, the sum of RENs should not exceed five (5.0). To be certain of the number of devices that may be connected to a line, as determined by the total RENs, contact the local telephone company. -
Page 11: In Case Of Equipment Malfunction
NOTE This equipment has been tested and found to comply with the limits for a class B digital device, pursuant to Part 15 of the FCC Rules. These limits are designed to provide reasonable protection against harmful interference in a residential installation. This equipment generates, uses and can radiate radio frequency energy and, if not installed and used in accordance with the instructions, may cause harmful interference to radio communications. -
Page 12: Users In Canada
1. Provide only a single-line to touch-tone or rotary telephone set terminated with a standard 4-pin modular phone plug. (Touch-tone is recommended if available in your area.) 2. Order an CA11A modular jack, which should be installed by the telephone company. If the CA11A jack is not present, installation cannot occur. -
Page 13: Notice
Le présent matérial est conforme aux spécifications techniques applicables d’Industrie Canada. Before installing this equipment, users should ensure that it is permissible to be connected to the facilities of the local telecommunications company. The equipment must also be installed using an acceptable method of connection. The customer should be aware that compliance with the above conditions may not prevent degradation of service in some situations. -
Page 14: Laser Safety
Laser Safety Laser Safety This machine complies with 21 CFR Chapter 1 Subchapter J as a Class 1 laser product under the U.S. Department of Health and Human Services (DHHS) Radiation Performance Standard according to the Radiation Control for Health and Safety Act of 1968. -
Page 15: Table Of Contents
Legal limitation on usage of your product and the use of images ......ix... - Page 16 Orientation of the Document and the Paper Loading ....... . .
- Page 17 Using the Machine With an Answering Machine ........7-5...
- Page 18 Checking the Status of Copy, Fax, Print and Report Jobs .......
- Page 19 5. ADD. REGISTRATION ........
- Page 20 Contents...
-
Page 21: Introducing The Faxphone L170
Introducing the FAXPHONE L170 CHAPTER This chapter introduces you to the main features of the machine. It also explains how to get the most out of the documentation that comes with the machine, and gives important safety instructions. Welcome Thank you for purchasing the new Canon FAXPHONE L170. We are sure that your machine will meet your printing and copying needs easily and conveniently, as well as your fax and phone requirements. -
Page 22: The Main Features Of The Machine
The machine’s multitasking ability enables you to perform multiple operations simultaneously. For example, you can print a document or make copies at the same time you are sending a fax. The compact size of the machine makes it ideal for desktop use, and allows you to use it in places where other machines may not fit. -
Page 23: Printer Features
The machine includes an economy printing mode which allows you to reduce toner consumption by approx. 30%. Copier Features I Up to 99 copies The machine can make up to 99 copies of a document at a time, at a rate of up to 19 copies per minute on LTR-Size paper. I Resolution ×... -
Page 24: Using The Machine As A Printer
Using the Machine as a Printer The printer driver that is included with your machine allows you to use the machine’s printing function directly from your PC. • Use the machine as the default printer for Windows applications For more information on using the printer driver with your machine, refer to the Software Guide also stored on this CD-ROM. -
Page 25: Using Your Documentation
Basic Guide (this Guide) This Guide provides detailed information on how to use and troubleshoot your machine. • Software Guide This Guide (stored in the CD-ROM) describes how to use the machine to print from your PC. Using Your Documentation... - Page 26 Using Your Documentation...
-
Page 27: Setting Up Your Machine
Place the machine near an electrical wall outlet that provides 120 V AC (60 Hz) power. • Place the machine near the PC you will be connecting it to. Make sure you can reach it easily, as you will be using the machine as a printer, fax machine, copier, and telephone. -
Page 28: Unpacking Your Machine
Do You Have Everything? As you unpack the machine, save the carton and packing material in case you want to move or ship the machine in the future. Carefully remove all items from the box. You should have someone help by holding the box while you lift the machine and its protective packaging out of the carton. -
Page 29: Removing Shipping Materials
• In addition to the items shipped with your machine, if you wish to use the machine as a printer, you will need a USB cable, which you can purchase from your Canon dealer. For best results, use a cable that is no more than 5 meters long. -
Page 30: Assembling The Machine
Assembling the Machine Use the following instructions to assemble the main unit and its components. To see how the machine will look fully assembled, see “Getting Acquainted With Your Machine,” on p. 2-9. Attaching Components NOTE Make sure the tabs are inserted into the slot completely. -
Page 31: Installing The Paper Cassette
Installing the Paper Cassette Attach the extension cover on the back of the machine. Pull out the paper cassette. Attach the cassette extension to the cassette. Insert the paper cassette into the machine. Assembling the Machine... -
Page 32: Making Connections
Connecting the Machine to Your PC Your machine has a USB port that allows you to connect it to a PC. To do this, you need to purchase a USB cable from your dealer. -
Page 33: Connecting The Telephone Line
CAUTION Follow these guidelines when connecting your machine to a power source: - The machine is intended for domestic use only and requires 120 V AC. Do not use it outside the country where it was purchased. - Use only the power cord that came with the machine. Using a longer cord or extension cord can cause the machine to malfunction. - Page 34 Plug the other end of the power cord into the outlet. NOTE The machine has no power switch, so its power is on as long as it is plugged in. Once connected, though, the machine still needs to warm up before you can use it.
-
Page 35: Getting Acquainted With Your Machine
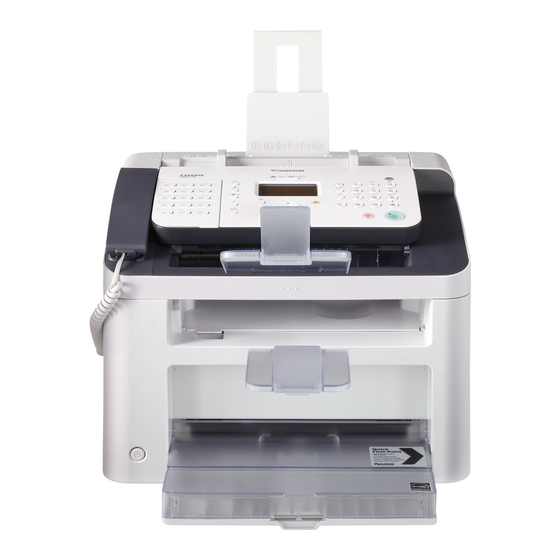
Getting Acquainted With Your Machine Before using your machine, look over the diagrams on these pages to become familiar with the machine’s components. Front View Document feeder tray Output tray Place documents to be faxed or copied. Holds printout. Received faxes. -
Page 36: Rear View
Rear View USB port Face up cover Connect the USB (Universal Serial Bus) cable. Open it when you output paper face up, or remove jammed paper. Handset jack Power socket Connect the handset. Connect the power cord. Extension phone jack Extension cover Connect an extension phone. -
Page 37: The Operation Panel
Use this button to switch standby display to Fax mode. automatically. Alarm indicator Start button This indicator flashes when an error occurs, or when the machine is out of paper Use this button to begin faxing, or copying. or toner. Hook button Status Monitor button Use this button to dial, even with the handset still in the handset cradle. -
Page 38: Special Function Buttons (One-Touch Speed Dial Panel Open)
Receive Mode button Polling button Use this button to select the receive mode for receiving faxes. Use this button to set a document for polling sending, and to poll the other fax to receive a document. Space button Clear button Use this button to enter a space between letters and numbers when you are registering information. -
Page 39: Handset
Handset Ringer Volume Switch Adjust the volume of the ringer. Use a pen or another pointed object to adjust the switch to ‘High’, ‘Low’, or ‘OFF’. Speaker Volume Switch Adjust the volume of the handset so you can hear suitable from the speaker. -
Page 40: Energy Saver Mode
NOTE • The time until the machine enters the energy saver mode can be specified in a range of 3 minutes to 30 minutes. You can also turn off the energy saver function. (See Chapter 15, “The Menu System.”) •... -
Page 41: The Toner Cartridge
Do not open the drum protective shutter on the cartridge. If the drum surface is exposed to light and damaged, print quality may deteriorate. • Do not stand the cartridge on end, and do not turn it upside down. If toner becomes caked in the cartridge, it may prove impossible to free it even by shaking the cartridge. •... -
Page 42: Installing/Replacing The Toner Cartridge
Hold the cartridge as shown so that your hand is not touching the drum’s protective shutter. • Store the cartridge in its protective bag. Do not open the bag until you are ready to install the cartridge in the machine. •... - Page 43 Always hold the cartridge as shown so that the side with the instructions are facing upward. Do not forcefully move or push the protective shutter of the drum in any way. Hold the cartridge on a flat stable surface with one hand, and break the tab and pull out the seal completely with the other hand. Open the printer cover.
- Page 44 Hold the cartridge and position the arrow mark on the cartridge towards the inside of the machine as shown below. Align the projections on both sides of the cartridge to the guides in the machine and slide the cartridge completely into the machine.
-
Page 45: Guidelines For Entering Information
You will then have to start again. The time until the machine returns to the standby mode can be specified in a range of 1 minute to 9 minutes. You can also turn off AUTO CLEAR function. - Page 46 ] to switch to the letter mode (:A) or the number mode (:1). You can see what mode you are in by the character indicated on the top right corner of the LCD display. Use the numeric buttons to enter the letter or number.
-
Page 47: Personalizing Your Machine
Transmit Terminal Identification (TTI). You must register your details in your machine so that whenever you send a fax, the other party knows who sent it, and when it was sent. Below is an example of how your sender... -
Page 48: Entering The Date And Time
To enter a plus sign (+) before the number, press [#] repeatedly until it appears. For details on how to enter or delete numbers, see “Entering Numbers, Letters, and Symbols,” on p. 3-1. Press [Menu] © [ (-)] or [ (+)] to select <2.UNIT NAME> © press [Set]. -
Page 49: Setting The Telephone Line Type
Press [ (-)] or [ (+)] to select <5.DAYLGHT SAV TIME> © press [Set]. Press [ (-)] or [ (+)] to select <ON> to enable the daylight saving time setting or <OFF> to disable it © press [Set]. If you selected <ON>, go to step 5. - Page 50 0 2 : 0 0 O C T O B E R Press [ (-)] or [ (+)] and [Set] to select the month, week, day of the week, and time when the daylight saving time ends. (e.g. OCTOBER LAST WEEK, SUNDAY and 02:00) Press [Set].
-
Page 51: Chapter 4 Paper Handling
To prevent curling, store paper flat, not upright. • If the paper is curled, uncurl it before loading it in the cassette or multi-purpose feeder. Failure to do so will cause paper creases and a paper jam. I Unacceptable Paper Do not print on the following types of paper stock. -
Page 52: Printing Areas
NOTE • The printing speed may become slower than usual depending on the paper size, the paper type, and the number of sheets you specify. This is because the machine's safety function works to prevent the failure due to heat. -
Page 53: Loading Paper
Make sure the paper is free of dust, lint, and oil stains. • To keep the paper from curling, do not open paper packs until you are ready to use the paper. Store unused paper from opened packs in a cool, dry location in the original packaging. - Page 54 Load the paper stack in the cassette with the print side down. When you load paper with a logo on, position the paper with the print side down (logo side) and load it so that the top of the paper feeds first in the cassette.
-
Page 55: Loading Envelopes In The Cassette
• Do not load extra paper when there is still paper left in the cassette. If you load extra paper while printing, remove the loaded paper first. Then put it together with the extra paper and tap the edges. After that, reload it in the cassette. - Page 56 Pinch and slide the length slide guide to fit the size of the envelopes you want to load. IMPORTANT If the slide guides are not adjusted correctly for the size of the envelopes, the quality of your printouts may be adversely affected. Do not load paper from the rear of the cassette.
- Page 57 IMPORTANT A maximum of approx. 20 envelopes can be loaded in the cassette. Be sure that the envelopes do not exceed the load limit mark of the paper guide. If the envelopes exceed the load limit mark, this may result in misfeeds.
-
Page 58: Loading Paper In The Multi-Purpose Feeder
Insert the paper straightly into the multi-purpose feeder with the print side up. NOTE When you load paper with a logo on it, position the paper with the print side up (logo side) and insert it so that the top of the paper feeds first in the multi-purpose feeder. -
Page 59: Loading An Envelope In The Multi-Purpose Feeder
Slide the slide guides to fit the size of the envelope you want to load. IMPORTANT If the slide guides are not adjusted correctly for the size of the envelope, the quality of your printouts may be adversely affected or jams may occur. -
Page 60: Testing The Machine
Insert the envelope straightly in the multi-purpose feeder with the print side up and the right edge (i.e., closer to the stamp) first. Envelopes with a flap on the short edge cannot be used. Specify the paper size. ❑ Press [Menu] © press [Set]. -
Page 61: Orientation Of The Document And The Paper Loading
Orientation of the Document and the Paper Loading When you load a document in the ADF, the orientation of the document and the orientation of the paper in the cassette or in the multi-purpose feeder are as shown below. DOCUMENT... -
Page 62: Selecting The Paper Output Area
Face down paper output delivers paper with the printed side down on the output tray. Face up paper output delivers paper with the printed side up out of the face up paper output. Select the area depending on your purpose by opening or closing the face up cover on the back of the machine. -
Page 63: Face Down Paper Output Area
Face Up Paper Output Area The paper is delivered with the printed side up out of the face up paper output on the back side of the machine. This way is convenient for printing on transparencies, envelopes, or labels which tend to curl, because the paper is delivered straight through the machine. - Page 64 4-14 Selecting the Paper Output Area...
-
Page 65: Chapter 5 Speed Dialing
Coded Speed Dialing numbers.) I Directory Dialing Dial a fax/telephone number by pressing [Directory] and entering the first letter of the other party's name. In this manner you can search for the fax/telephone number registered for One-Touch Speed Dialing. The following pages describe how to register numbers for speed dialing. You will also find instructions for changing numbers and names registered under speed dialing buttons and codes, and how to use speed dialing. -
Page 66: One-Touch Speed Dialing
One-Touch Speed Dial panel above the number of the One-Touch Speed Dial button where the number is registered. NOTE You may need to insert a pause if you are trying to access on outside line or you are making an international call. (See p.9-1) One-Touch Speed Dialing... -
Page 67: Changing Or Deleting A Number/Name Stored Under A One-Touch Speed Dial Button
For details on how to enter or delete numbers, see “Entering Numbers, Letters, and Symbols,” on p. 3-1. • If you want to delete a digit, press [ (-)] or [ (+)] to move the cursor under the digit you want to delete © press [Delete]. •... -
Page 68: Using One-Touch Speed Dialing
Problems,” on p. 13-12 for details about errors. NOTE • You can also use One-Touch Speed Dialing to send a document to more than one location at a time. For details, see “Group Dialing,” on p. 5-8, and “Sequential Broadcasting,” on p. 6-12. •... -
Page 69: Coded Speed Dialing
For details on how to enter or delete numbers, see “Entering Numbers, Letters, and Symbols,” on p. 3-1. • Open the One-Touch Speed Dial panel © press [Space] to enter spaces between numbers (spaces are optional and are ignored during dialing). -
Page 70: Changing Or Deleting A Number/Name Stored Under A Coded Speed Dialing Code
For details on how to enter or delete numbers, see “Entering Numbers, Letters, and Symbols,” on p. 3-1. • If you want to delete a digit, press [ (-)] or [ (+)] to move the cursor under the digit you want to delete © press [Delete]. •... -
Page 71: Using Coded Speed Dialing
Problems,” on p. 13-12 for details about errors. NOTE You can also use Coded Speed Dialing to send a document to more than one location at a time. For details, see “Group Dialing,” on p. 5-8, and “Sequential Broadcasting,” on p. 6-12. -
Page 72: Group Dialing
Use [ (-)] or [ (+)] to select <3.GROUP DIAL> © press [Set]. G To register a group under a One-Touch Speed Dial button: Use [ (-)], [ (+)], or the One-Touch Speed Dial button to select an unused One-Touch Speed Dial button (01 to 32) © press [Set] twice. -
Page 73: Changing Or Deleting A Number/Name Stored Under A Group Dialing
To enter in the group a number stored under a One-Touch Speed Dial button, press the desired One-Touch Speed Dial button(s). • To enter a number stored under a Coded Speed Dialing code, press [Coded Dial] © enter the two-digit code for the number using the numeric buttons. For multiple entries, press [Coded Dial] between each entry. -
Page 74: Using Group Dialing
• If you press a One-Touch Speed Dial button or Coded Speed Dialing code that has no group (or fax number) registered under it, the LCD displays <NOT REGISTERED>. Make sure that you press the correct One-Touch Speed Dial button or enter the correct Coded Speed Dialing code, and that the group you want has been registered correctly under that button or code. -
Page 75: Directory Dialing
Entries starting with the letter you entered are displayed. • If there is no entry that starts with the letter you entered, entries that start with the next letter will be displayed. Press [ (-)] or [ (+)] to display the other names. - Page 76 5-12 Directory Dialing...
-
Page 77: Sending Faxes
This chapter describes how to use your machine to send faxes. Preparing to Send a Fax Document Requirements The documents you load into the machine must meet the following requirements. When loading a multi-page document: Size: Max.: 8 1/2” × 14” (216 × 356 mm) ×... -
Page 78: Scanning Area
Make sure any glue, ink, or correction fluid on the paper is completely dry before loading the document into the Automatic Document Feeder (ADF). • If you have a document that will not feed into the machine properly, make a photocopy of the document, then load the copy instead. Scanning Area The margins shown in the illustration below are outside the machine’s scanning area. -
Page 79: Loading Documents In The Adf
Loading Documents in the ADF Fan the edges that will feed into the machine first, then tap the edges of multiple page documents on a flat surface to even the stack. Adjust the document guides to the width of the document. -
Page 80: Adjusting The Resolution And Contrast
) imaging technology enables you to send faxes with a print quality that is very close to that of the original document. The machine also lets you adjust the resolution it uses in sending faxes to best suit your particular document. -
Page 81: Adjusting The Exposure (Density)
• You can set the scanning density so that the desired scanning density such as ‘STANDARD’ is automatically returned after the <AUTO CLEAR> function activates or documents are scanned. Since <SCAN DENSITY> of <FAX DEFAULT> is set to 'OFF' in the factory default setting, the scanning density set using [Exposure] will remain unchanged. -
Page 82: Sending Methods
I Coded Speed Dialing Press [Coded Dial] © enter the two-digit code (00 to 99) under which you have registered the number you want to send to. See Chapter 5, “Speed Dialing,” for details on registering and using Coded Speed Dialing. -
Page 83: Sending Documents
NOTE You can register a new fax job while the machine is waiting to redial the other party’s number automatically. For details on how to set the machine to redial automatically, see “Automatic Redialing With Memory Sending,” on p. 6-10. -
Page 84: Manual Sending Via The Handset
Manual Sending Via the Handset Use manual sending when you want to talk to the other party before sending a document, or if the other party does not have a fax machine that can receive automatically. Follow this procedure for manual sending: Load the document in the ADF. -
Page 85: Canceling Sending
If you change your mind and want to continue sending, press [ (+)] for <NO>. • The machine prints an ERROR TX REPORT if a transmission report is set to print automatically. (See “1.TX REPORT,” on p. 15-7.) Canceling Sending... -
Page 86: Redialing
With memory sending, you can set the machine to automatically dial the fax number again if the receiving fax machine does not answer or if the line is busy. You can also control how many times the machine will redial the number and how long it will wait between dialing attempts. - Page 87 1 . R E D I A L T I M E S Press [Set] again © use [ (-)], [ (+)], or the numeric buttons to enter the number of times you want the machine to redial © press [Set] twice.
-
Page 88: Sequential Broadcasting
Sequential Broadcasting Sending a Document to More Than One Destination The machine’s sequential broadcasting feature allows you to send a fax to a sequence of up to 142 fax numbers, using any combination of dialing methods as follows: • One-Touch Speed Dialing: up to 32 destinations •... -
Page 89: Sending A Document Using Group Dialing
Be sure to press [Set] after your entry with the numeric keys. NOTE • If you make a mistake, open One-Touch Speed Dial panel © [Delete] to delete the last number, or press [Clear] to delete all numbers you entered when you use the numeric keys. •... -
Page 90: Delayed Sending
Be sure to press [Set] after your entry with the numeric buttons. NOTE If you make a mistake, open One-Touch Speed Dial panel © [Delete] to delete the last number, or press [Clear] to delete all numbers you entered when you use the numeric buttons. - Page 91 The machine can print a list of document stored in memory (DOCUMENT MEMORY LIST), along with the transaction number of each document. The document to be sent using delayed sending will be listed as <DELAYED TX> or <DEL SQ BDCST>. To print the list, see “Document Memory List,”...
- Page 92 6-16 Delayed Sending...
-
Page 93: Chapter 7 Receiving Faxes
* Factory default setting You can confirm which receive mode is set by checking the standby display. The receive mode is displayed in the lower left of the LCD. Different Ways to Receive a Fax... -
Page 94: Setting The Receive Mode
Not all fax machines are capable of sending a fax tone (the CNG tone that warns the receiving fax machine that a fax is coming). For those cases the machine may think that the call coming in is a voice call and rings to alert you of the call (the amount of time it is going to ring is determined by the <F/T RING TIME>... -
Page 95: What Happens When Faxtel Mode Is Selected
Press [ (-)] or [ (+)] to select <2.FAX/TEL OPT. SET> © press [Set] twice. Press [ (-)] or [ (+)] to set the time the machine waits before ringing when it receives a call © press [Set] twice. R I N G S T A R T T I M E F / T R I N G T I M E ©... -
Page 96: Receiving Faxes Manually: Manual Mode
Press [ (-)] or [ (+)] to set the time the machine rings while waiting for someone to pick up the handset © press [Set] twice. F / T R I N G T I M E F / T S W I T C H A C T I O N ©... -
Page 97: Receiving Faxes Automatically: Faxonly Mode
Your fax will automatically monitor incoming calls and based on the ring pattern, will let you know if the call is a fax or voice call. Set the fax ring pattern that matches the pattern assigned by your telephone company. -
Page 98: Receiving Faxes In Memory When A Problem Occurs
Once the pages are printed, they are deleted from memory. • If the memory becomes full, you will not be able to receive the remaining pages. Contact the other party and ask them to resend the remaining pages of the fax. -
Page 99: Receiving While Performing Other Tasks
If you receive a fax while you are making copies or printing, the machine stores the incoming fax in memory. Then, as soon as you finish making copies or printing, the machine automatically prints the fax. If you are entering registration information, the fax is printed as soon as it is received, and does not go into memory. - Page 100 Receiving Faxes in Memory When a Problem Occurs...
-
Page 101: Setting Up And Using Polling
NOTE Your fax can be set up to function in both roles. Your fax can poll to receive a document, or it can be polled to send a document that it is holding. -
Page 102: Polling Other Fax Machines To Receive Documents
The machine polling feature allows you to request a document to be faxed to you from another fax machine. The sender only needs to make sure the document is on his fax machine and ready to be sent: when your machine polls that machine, the document is sent automatically. -
Page 103: Setting Up Polling Sending
Setting Up Polling Sending This section shows you how to set up your fax to store and hold a document until it is polled by another fax to send it. Setting Up a Polling Box Before you can use polling sending, you must create a polling box with the <POLLING BOX> of the Menu. The polling box holds the document in the memory until the other party prompts (polls) your fax to send the document, or until you delete the document (see p. -
Page 104: Scanning A Document Into The Memory For Polling Sending
- <ON>:The document in the polling box is erased after it is sent in response to a polling request from another fax machine. - <OFF>:The document in the polling box is not erased after it is sent. Select this setting if you expect that the document will be polled by more than one fax machine. -
Page 105: Changing The Polling Box Settings
Press [ (-)] or [ (+)] to display the setting you want to change © press [Set]. To change the settings for an item, follow the same procedure you used for the initial setup of the polling box. (See “Setting Up a Polling Box,”... -
Page 106: Deleting A Polling Box
NOTE If there is any document stored in the polling box, you cannot delete the polling box and the message <CANNOT DELETE> appears on the LCD display. If you want to delete the polling box, delete the document stored in the polling box first, then perform the procedure described above. -
Page 107: Special Features
How to Enter Pauses Use this procedure to enter pauses within or at the end of numbers. During dialing registration, when you come to a step that asks you to enter a number for dialing, use the numeric buttons to enter the number. -
Page 108: Using Tone Dialing On A Pulse Line
Using Tone Dialing On a Pulse Line Even if you have a pulse line, the machine enables you to use tone dialing once you have connected to the number you are calling. This allows you to take advantage of many services that require tones, such as selecting options from telephone “touch-line”... -
Page 109: Using Memory Lock
“Memory Lock.” You may want to turn Memory Lock ‘ON’ when the machine is left unattended at night, or over long holidays, to prevent a large volume of printed documents from collecting in the paper output trays. After you return to the office, you can review the contents of the memory, and enter the memory lock password to print all of the documents stored in memory. -
Page 110: Turning Memory Lock Off And Printing Documents
Follow the steps 1 to 5 of “Turning Memory Lock ON and Setting the Password“ on p. 9-3 to turn the Memory Lock ‘OFF’. If you have not set the memory lock password (see step 6 in “Turning Memory Lock ON and Setting the Password” on p. 9-3), the LCD displays <2. -
Page 111: Chapter 10 Making Copies
This chapter describes how to make copies with your machine. Making Copies One of the machine’s convenient features is its ability to make up to 99 high-quality copies of a document. To make copies, do the following: Load the document in the ADF. -
Page 112: Specifying The Paper Size And Type (Common For Cassette And Multi-Purpose Feeder)
* The paper type should be selected in the Menu. • If you intend to make a copy and print with a thermal transfer printer using the same sheet of paper, make the copy first. Failure to do so may make copies dirty or cause a paper jam. -
Page 113: Specifying The Paper Type
Press [ (-)] or [ (+)] to select <2. PAPER TYPE> © press [Set]. Press [ (-)] or [ (+)] to select the appropriate paper type (PLAIN PAPER, PLAIN PAPER L, HEAVY PAPER, HEAVY PAPER H, or TRANSPARENCY) © press [Set]. -
Page 114: Setting Enlarging/Reducing
- 50% MIN. NOTE • If the <PAPER SIZE GROUP> setting of <COPY SETTINGS> menu in the Menu is set to ‘INCH’ or ‘AB’, the preset copy ratios will be as follows: INCH: 50%, 64%, 78%, 100%, 129% and 200%. -
Page 115: Enlarging/Reducing Using Custom Copy Ratios
You can enter the copy ratio from 50% to 200%, selectable in 1% increments. • Even after entering the copy ratio, you can use [ (-)] or [ (+)] to adjust the copy ratio. To increase the copy ratio, press [ (+)]. To decrease the copy ratio, press [ (-)]. -
Page 116: Improving Copied Image
Improving Copied Image Adjusting the Image Quality (Resolution) You can adjust image quality to the appropriate level best suited for a document with text or photos. 3 modes are available for adjusting the image quality. Press [Copy]. If you are already in the Copy standby mode, you can skip this step. -
Page 117: Adjusting Manually
L T R © - L T D K + T E X T NOTE When setting the exposure lighter, the indicator moves to the left. When setting the exposure darker, the indicator moves to the right. Improving Copied Image 10-7... -
Page 118: Special Features
Collate Copy The collate copy allows you to sort copies in page order. It is convenient when you make multiple copies of multiple page documents. To use this feature, you need to set <AUTO SORT> to ‘ON’ in the <COPY SETTINGS> menu. (See p. 15-5.) -
Page 119: Reserve Copy
• If the memory becomes full while scanning, <MEMORY FULL> appears in the LCD. When the ADF is used for scanning, the document being scanned stops in the ADF. In this case, press [Set] to make the document come out automatically. -
Page 120: Confirming The Copy Job You Reserved
B L A N K : WA I T I N G : N O PA P E R , PA P E R J A M , E T C . Press [ (-)] or [ (+)] to confirm the reservation number and number of documents. -
Page 121: System Monitor
To return to standby mode, press [Stop/Reset]. • If you perform the procedure above when the machine is not sending or receiving faxes, <NO CURRENT RX/TX JOB> appears, and the display returns to the display shown in step 1. •... -
Page 122: Confirming Transmission Results And Sending Reservation
To return to standby mode, press [Stop/Reset]. • If you perform the procedure above when there is no sending reservation and transmission jobs, <NO DOC. STORED> will appear, and the display will return to the display shown in step 2. -
Page 123: Confirming And Deleting A Copy Job
To cancel deleting the job, press [ (+)] for <NO>. Once the job is deleted, the job cannot be restored. • The LCD can display characters in ASCII cord. Using characters other than those in ASCII cord may have the LCD display garbled characters. -
Page 124: Confirming And Deleting A Report Job
If you decide to delete the job, press [ (-)] for <YES>. If there are multiple report jobs, press [ (-)] or [ (+)] to select the job you want to delete. R E P O R T S T A T U S 0 2 U S E R D A T A L I S T Press [Set]. -
Page 125: Reports And Lists
W O R L D E S TAT E , I N C . 0 0 1 ❉ ❉ ❉ ❉ ❉ ❉ ❉ ❉ ❉ ❉ ❉ ❉ ❉ ❉ ❉ ❉ ❉ ❉ ❉ ❉ ❉ ❉ ❉ ❉ ❉ ❉ ❉ ❉ ❉ ❉... -
Page 126: Transmission (Tx) Reports
10:32 8334423 WORLD ESTATE,INC. ❉ ❉ ❉ ❉ ❉ ❉ ❉ ❉ ❉ ❉ ❉ ❉ ❉ ❉ ❉ ❉ ❉ ❉ ❉ ❉ ❉ ❉ ❉ ❉ ❉ ❉ ❉ ❉ ❉ ❉ ❉ ❉ ❉ ERROR TX REPORT ❉... -
Page 127: Tx Report
FAX 8 3 3 4 4 2 3 WORLD ESTATE,INC. ❉ ❉ ❉ ❉ ❉ ❉ ❉ ❉ ❉ ❉ ❉ ❉ ❉ ❉ ❉ ❉ ❉ ❉ ❉ ❉ ❉ ❉ ❉ ❉ ❉ ❉ ❉ ❉ ❉ ❉ ❉ ❉ ❉... -
Page 128: Reception (Rx) Report
Normally the machine does not print a reception report (RX REPORT) unless you set it to do so. You can set the machine to print the RX REPORT every time you receive a document or only if an error occurs during receiving. -
Page 129: Memory Clear Report
8334423 WORLD ESTATE,INC. ❉ ❉ ❉ ❉ ❉ ❉ ❉ ❉ ❉ ❉ ❉ ❉ ❉ ❉ ❉ ❉ ❉ ❉ ❉ ❉ ❉ ❉ ❉ ❉ ❉ ❉ ❉ ❉ ❉ ❉ ❉ ❉ ❉ ❉ ❉ ❉ ❉... -
Page 130: Speed Dialing Lists
The machine prints the list and the LCD returns to standby mode. NOTE You can also print the list using [Report]. Open One-Touch Speed Dial panel © press [Report] © select <2. SPEED DIAL LIST> © a report you want to print out © press [Set]. -
Page 131: One-Touch Speed Dial List
❉ ❉ ❉ ❉ ❉ ❉ ❉ ❉ ❉ ❉ ❉ ❉ ❉ ❉ ❉ ❉ ❉ ❉ ❉ ❉ ❉ ❉ ❉ ❉ ❉ ❉ ❉ ❉ ❉ ❉ ❉ ❉ ❉ ❉ ❉ ❉ ❉ ❉ ❉ ❉... -
Page 132: Group Dial List
13:36 833 4423 WORLD ESTATE,INC. ❉ ❉ ❉ ❉ ❉ ❉ ❉ ❉ ❉ ❉ ❉ ❉ ❉ ❉ ❉ ❉ ❉ ❉ ❉ ❉ ❉ ❉ ❉ ❉ ❉ ❉ ❉ ❉ ❉ ❉ ❉ ❉ ❉ ❉ ❉... -
Page 133: User's Data List
13:36 FAX 8334423 WORLD ESTATE,INC. ❉ ❉ ❉ ❉ ❉ ❉ ❉ ❉ ❉ ❉ ❉ ❉ ❉ ❉ ❉ ❉ ❉ ❉ ❉ ❉ ❉ ❉ ❉ ❉ ❉ ❉ ❉ ❉ ❉ ❉ ❉ USER’S DATA LIST ❉ ❉ ❉... -
Page 134: Document Memory List
123 4567 WORLD ESTATE,INC. ❉ ❉ ❉ ❉ ❉ ❉ ❉ ❉ ❉ ❉ ❉ ❉ ❉ ❉ ❉ ❉ ❉ ❉ ❉ ❉ ❉ ❉ ❉ ❉ ❉ ❉ ❉ ❉ ❉ ❉ ❉ ❉ ❉ ❉ DOCUMENT MEMORY LIST ❉... -
Page 135: Chapter 13 Troubleshooting
NOTE When removing jammed paper from inside the machine, take care not to allow the toner on the jammed paper to come into contact with your hands or clothing. If they become dirty, wash them immediately with cold water. Washing with warm water will set the toner, and make it impossible to remove the toner stains. - Page 136 TRANSFER ROLLER NOTE Do not expose the cartridge to light for more than 5 minutes. If necessary, put the cartridge in its original protective bag or wrap it with a thick cloth to prevent exposure to light. Open the face up cover and push down the green paper release levers on both sides of the face up paper output.
- Page 137 Hold both sides of the jammed paper and carefully move it inward, then gently pull it out. Roll the leading end of the paper outwards so that the printed surface is on the inside of the roll, then gently pull the rolled up paper out of the machine.
- Page 138 Carefully pull the jammed paper straight out through the rollers. If the jammed paper is badly folded, similar to the folds of an accordion, ease the jammed paper loose and then pull it out of the machine Close the printer cover.
- Page 139 Push the paper release levers back to their original position and close the face up cover. IMPORTANT • Be sure to push the paper release levers back to their original position. If the levers are left pushed down, the paper jam error will not be resolved. •...
-
Page 140: Removing Jammed Paper From The Adf
Insert the cartridge back into the machine, then close the printer cover. For details, see “Installing/Replacing the Toner Cartridge,” on p. 2-16. If paper that you set into the manual feed slot is jammed, set paper into the manual feed slot and perform printing operation again in this step. -
Page 141: Lcd Messages
LCD Messages The following messages are displayed in the LCD when the machine performs a function or if it encounters an error. Message Cause Action CHANGE PAPERSIZE The paper size setting is set to a size Set the paper size setting to letter, legal, A4, B5, or A5 and load other than letter, legal, A4, B5, or A5. - Page 142 (nnnn). * xxx stands for a number. ** The identification number does not appear in the standby mode. It appears when scanning documents, operating [System Monitor], receiving faxes in Manual mode or memory, or after transmission is completed. 13-8...
-
Page 143: Paper Feeding Problems
Is the cassette inserted into the machine correctly? Push the cassette into the machine as far as it will go, and make sure the cassette is not tilted or inserted at an angle. Are the paper size and type set correctly? Specify the appropriate paper size and type in <PAPER SIZE>... - Page 144 Does the cassette or multi-purpose feeder contain an appropriate quantity of sheets? Make sure the paper stack in the cassette or the paper in the multi-purpose feeder does not exceed the capacity of the cassette or multi-purpose feeder. (See “Loading Paper,” on p. 4-3.) Do not force the paper stack into the cassette or the paper into the multi-purpose feeder.
- Page 145 Make sure the envelopes are loaded correctly. (See “Loading Envelopes in the Cassette,” on p. 4-5, or “Loading an Envelope in the Multi-Purpose Feeder,” on p. 4-9.) Do not load more than 20 envelopes in the cassette. Load an envelope one by one in the multi-purpose feeder.
-
Page 146: Faxing Problems
You cannot send a fax. Is the machine possibly overheated? Unplug the machine and let it cool for approximate 3 minutes to 5 minutes. Then plug in the machine and try sending again. Did you connect the power cord to the machine just now? Wait for a while. - Page 147 Print an ACTIVITY REPORT and check for an error. (See “Activity Report,” on p. 12-1.) Is the telephone line working properly? Make sure there is a dial tone when you pick up the handset of the telephone connected to the machine. If there is no dial tone, contact your local telephone company.
-
Page 148: Receiving Problems
Is the memory full? Wait for the machine to finish any fax or print jobs stored in the memory or delete them from the memory. (See “Deleting a Fax job,” p. 11-2.) Then ask the other party to resend the fax. - Page 149 Is the sending fax machine able to send the CNG signal that tells the machine that the incoming signal is a fax? Some fax machines cannot send the CNG signal that tells the machine the incoming call is a fax.
- Page 150 Then call the sender to resend the document. Is the sending fax machine functioning properly? The sending fax machine usually determines the fax's quality. Call the sender and have them make sure the scanning glass of their fax machine is clean.
-
Page 151: Telephone Problems
Make sure all line connections are secure. (See “Connecting the Telephone Line,” on p. 2-7.) Is the machine set for the correct telephone line type (pulse/tone)? Make sure the machine is set for the correct telephone line type. (See “Setting the Telephone Line Type,” on p. 3-5) The telephone disconnects while you are talking. -
Page 152: Copying Problems
Wait for a while. After connecting the power cord, the machine cannot scan documents immediately. Is the document loaded correctly? Remove the document, stack it if necessary, and load it in the ADF correctly. (See “Loading Documents in the ADF,” on p. 6-3.) Make sure the ADF is closed. -
Page 153: Print Quality Problems
Is the cartridge free of damage? If there is a scratch on the cartridge, replace with a new one. (See “Installing/Replacing the Toner Cartridge,” on p. 2-16.) Is the machine adjusted to room temperature? If not, condensation might build up inside the machine. - Page 154 The printouts are partly missing or shaded when you make copies on heavy paper. Is the paper type set correctly? Select <HEAVY PAPER> or <HEAVY PAPER H> in <PAPER TYPE> in <PAPER SETTINGS> of the Menu. (See “Loading Paper,” on p. 4-3.) The printouts are missing when you make copies on rough paper.
-
Page 155: Printing Problems
If the machine has no paper jam, or paper is loaded in the cassette or multi-purpose feeder, unplug the machine and wait approx. 3 minutes to 5 minutes, then plug it in again. If the problem is fixed, the Alarm indicator will turn off, and the LCD will return to the standby mode. -
Page 156: If You Cannot Solve The Problem
If You Cannot Solve the Problem If you have a problem with your machine and cannot solve it using the information in this chapter, contact the Canon Customer Care Center. CAUTION If the machine makes strange noises, emits smoke or strange smells, unplug it immediately and contact the Canon Customer Care Center. -
Page 157: Maintaining Your Machine
7-6 to print out the document. - If you disconnect the machine while it is waiting to send a document, you will have to set the machine to send your document again once you finish cleaning the machine. However, when you have set a document for delayed transmission, the machine holds the document in its memory for about 1 hour. -
Page 158: Cleaning The Adf Area
Paste, ink, correction fluid, and other foreign matter can soil the scanning glass when you send a document through the ADF while the paste, ink, or correction fluid on the original is still wet. This is what causes black lines on copies. Whenever you load a document is the ADF, always check to make sure that any paste, ink, or correction fluid that is on the document is completely dry. - Page 159 Clean the shaded areas of the operation panel and the machine. Dirt and dust particles that collect on the underside of the operation panel also affect the quality of documents you copy and send. When you finished, close the operation panel by pressing it down from the center.
-
Page 160: Transporting The Machine
If the machine is connected to a telephone or your computer, remove the telephone line or printer cable. Open the printer cover. Grip the end of the cartridge, and remove it from the machine. In order to avoid direct sunlight, place the cartridge in the protective bag that the cartridge came in when you purchased it. -
Page 161: The Menu System
The Menu System CHAPTER The Menu allows you to specify or register various settings. This chapter explains the procedure to access the menus and their contents. Accessing the Menu Press [Menu]. Press [ (-)] or [ (+)] to select the menu you want to change © press [Set]. -
Page 162: Menu Descriptions
A4, B5, A5, LTR, LGL, EXECUTIV, ENVELOPE (You can select from COM10, MONARCH, DL, or ISO-C5.) 2.PAPER TYPE Sets the paper type to be used in the paper cassette. PLAIN PAPER, TRANSPARENCY, PLAIN PAPER L, HEAVY PAPER, HEAVY PAPER H 2.MP TRAY... -
Page 163: Common Settings
2. COMMON SETTINGS Name Descriptions 1.DEFAULT SETTINGS Selects which mode is displayed in the LCD when the power cord is connected, or the AUTO CLEAR function activates. COPY The Copy mode is selected. The Fax mode is selected. 2.SW AFTER AUTO CLR Selects whether the machine switches to the mode you set in <DEFAULT SETTINGS>... - Page 164 Name Descriptions 4.RX DONE TONE Adjusts the volume of the done tone sounded when the machine has finished receiving faxes. 1 to 3 ERROR ONLY 1 to 3 The volume is turned off. 5.PRINTING END TONE Adjusts the volume of the done tone sounded when the machine has finished printing.
-
Page 165: Copy Settings
1 to 9 (5) (The factory default setting is in bold face.) *1 STANDARD EXPOSURE automatically changes to MANUAL when TEXT/PHOTO or PHOTO is selected. *2 STD. IMAGEQUALITY automatically changes to TEXT ORIGINAL when AUTO is selected. Menu Descriptions... -
Page 166: Fax Settings
20 digits, including spaces. 2.TEL LINE TYPE Selects the telephone line type. TOUCH TONE The telephone line is set for touch tone dialing. ROTARY PULSE The telephone line is set for rotary pulse dialing. 3.TX START SPEED Sets the transmission speed for all documents you send. - Page 167 Sets for light documents. 1 to 7 (3) 5.OFFHOOK ALARM Enables/disables the offhook alarm that alerts you when the handset is not in the handset cradle. After reception, the offhook alarm sounds when the handset is left off the hook.
- Page 168 All transmissions are conducted with ECM if the other party’s fax supports ECM. ECM is turned off. 2.PAUSE TIME Sets the length of the pause you insert into a dialing sequence. 01 to 15SEC (02 SEC) (The factory default setting is in bold face.)
- Page 169 01 to 10TIMES (02 TIMES) 2.REDIAL INTERVAL Sets period of time between redialings. 02 to 99MIN. (02 MIN.) After the first attempt at dialing fails, redialing is not attempted. 4.TIME OUT Enables/disables automatic scanning of documents after the fax number is entered by using speed dialing.
- Page 170 The machine does not ring when it receives a fax. (In Energy Saver mode, the fax may ring one or two times.) The machine rings when it receives a fax if a telephone is connected. RING COUNT Sets the number of incoming rings before the machine answers.
- Page 171 6.REMOTE RX Enables/disables remote receiving. The machine enables remote receiving. REMOTE RX ID You can dial code on the remote extension to start receiving a document. A combination of two characters using [0] to [9], ] and [#] is possible.
- Page 172 2.PASSWORD Changes the password. 3.ERASE AFTER TX Changes the ERASE AFTER TX setting. 3.DELETE FILE Deletes the polling box and all of its settings. 7.SYSTEM SETTINGS Sets the functions of MEMORY LOCK RX and FAX DEFAULT. 1.MEMORY LOCK RX Set the Memory Lock functions.
-
Page 173: Add. Registration
Suitable for documents that contain photographs. SUPER FINE Suitable for documents that contain fine print and images. (The resolution is four times that of STANDARD) ULTRA FINE Suitable for documents that contain fine print and images. (The resolution is eight times that of STANDARD) 2.SCAN DENSITY... -
Page 174: Printer Settings
2.AUTO ERROR SKIP Sets either printing with skipping an error automatically, or without skipping an error. The auto error skip is on. The error is skipped and shifted to the next job automatically without indicating an error code. The auto error skip is off. Skip the error and shift to the next job manually. -
Page 175: Timer Settings
The energy saver mode is turned off. 4.DATE SETUP Set the format for the DATE & TIME settings menu and how the date is displayed in the LCD. MM/DD/YYYY, DD/MMYYYY, YYYY MM/DD 5.DAYLGHT SAV TIME Sets the daylight saving time. -
Page 176: Print Lists
8. PRINT LISTS Name Descriptions 1.USER DATA Prints out a list of items set or registered in the Menu. 2.SPEED DIAL LIST Prints the list of the fax/telephone numbers registered for One-Touch Speed Dial buttons, Coded Speed Dialing codes or group dialing. -
Page 177: Appendix
Uses direct transmission when memory is full × Liquid crystal display: Display languages: ENGLISH, FRENCH, SPANISH, PORTUGUESE 120 V, 60 Hz [Power source differs depending on the country in which you Power source: purchased the product.] Maximum: Approx. 600W Power consumption: Minimum: Approx. -
Page 178: Fax
50 A4- or letter-size sheets Automatic document feeder capacity:* 20 legal-size sheets 1 sheet for sizes other than A4-, letter-, or legal-size sheets. × × × Multi-page document: Max.: 8 1/2” 14” (216 356 mm)/ Min.: 5 53/64” × 9/64” (148... -
Page 179: Copier
Copier × Scan resolution: 300 dpi Default size: 100% Zoom: 50-200% Multiple copies: Up to 99 copies of a document Telephone • Automatic FAX/TEL switchover • Answering machine connection (CNG detecting signal) • Telephone connection • Handset connection • Remote reception by telephone (Default reception ID: 25) •... -
Page 180: Printer
Printing Cartridge S35 Cartridge (Yield: Approx. 3,500 pages) * FAXPHONE L170 is equipped with a printer engine of 600 dpi resolution. By adopting Canon's own Image Refinement, an 1200 dpi enhanced × 600 dpi image can be obtained. ** S35 S-Cartridge is a starter cartridge supplied with the machine. -
Page 181: Printable Area: Papers
Printable Area: Papers The shaded area in the following figure shows the printable area for papers. I Printable area: Letter size Legal size A4 size 8.5” 8.5” 210mm Max. 0.2” Max. 0.2” max. 5.0mm Max. 0.2” Max. 0.2” max. 5.0mm 11.0”... -
Page 182: Printable Area: Envelopes
U.S. Commercial No. 10 European DL 4.1” 110mm Max. 0.2” Max. 5.0mm Max. 0.2” Max. 5.0mm 9.5” 220mm Max. 0.2” Max. 5.0mm Max. 0.2” Max. 5.0mm CAUTION For some envelope types, the edges of the envelope can not be printed on. Printer... -
Page 183: Document Sizes
Multi-page document : 14" (356 mm) One-page document : 39 3/8" (1 meter) The figure below shows how much of a letter-, A4-, or legal-size document the machine scans when faxing or scanning. MAX. 5/32" (4.0 mm) A4/LETTER/LEGAL MAX. 5/32" (4.0 mm) MAX. -
Page 184: Printer Driver
Windows® XP –Windows® 98: A 90-megahertz (MHz) Pentium processor or higher/At least 32 MB of RAM and 100 MB of available hard disk space –Windows® Me: A 150-MHz Pentium processor or higher/At least 32 MB of RAM and 100 MB of available hard disk space –Windows®... -
Page 185: Glossary
Automatic image reduction The machine can print the date, time, company name, and a fax number at the top of the faxes it receives. To prevent this information from crowding the faxed image on the page and possibly lengthening the fax, the machine automatically reduces the size of the image on the page. - Page 186 Delayed sending The ability to send a document at a preset time in the future. You do not have to be in your office to use delayed sending to one or more destinations. (You can set up only one delayed transmission at a time on the machine.) Dialing methods Ways of pressing one or more buttons to access a number to connect to an outside party or fax machine.
- Page 187 ECM capability. ECM is most effective in areas where the telephone lines are in poor condition or there is frequent interference on the line. Do not use ECM if you need to send a document quickly and you are sure the other party can read your transmission without it (turning off ECM also turns off MMR).
- Page 188 Manual receiving A method of receiving faxes in which you answer all incoming calls using the optional handset. If you hear a slow beep it indicates an incoming fax transmission from another machine. Just press [Start] to receive the incoming fax.
- Page 189 Printable area The area of a sheet of paper on which a printer can reproduce text or graphics (the printing area is smaller than the paper). On this machine, the printing area varies depending on the type of paper being used.
- Page 190 Reduction mode The machine’s automatic feature that slightly reduces the received image to allow room at the top of the page for the sender’s ID information. You can also reduce the size of large incoming documents using the <RX REDUCTION> option.
- Page 191 Sending A fax document that has been scanned by a fax machine and sent over telephone lines, in the form of electrical pulses, to another fax machine. Also called TX or Transmit. Sending speed The rate at which faxes are transmitted through the phone line. See also bps (bits per seconds).
- Page 193 Coded Speed Dialing, 5-1, 6-6 date and time, 3-4 changing or deleting numbers, 5-6 method, 3-1 storing numbers, 5-5 numbers for Coded Speed Dialing, 5-5 using, 5-7 numbers for Group Dialing, 5-8 Collate copy, 1-3, 10-8 numbers for One-Touch Speed Dialing, 5-2...
- Page 194 Error Correction Mode (ECM), 1-2 Manual Mode, 7-1, 7-4 Error TX Report, 12-2 Manual sending, 6-6, 6-8 Exposure button, 2-11 MEM IN USE nn % message, 13-7 Extension cover, 2-10 Memory Clear Report, 12-5 Extension phone jack, 2-10 MEMORY FULL message, 13-7...
- Page 195 TTI, 3-3 manually, 6-10 TX Report, 12-3 setting up, 6-10 TX/RX NO. nnnn**, 13-8 Regular Dialing, 6-6 Removing Jammed Paper from the ADF, 13-6 REPLACE CARTRIDGE message, 13-8 Report button, 2-12 REPORT STATUS, 11-1 Reserve copy, 10-9 Unpacking, 2-2 Restriction...
- Page 197 1 Thomas Holt Drive, North Ryde, Sydney, N.S.W. 2113, Australia CANON SINGAPORE PTE LTD. 1 HarbourFront Avenue #04-01 Keppel Bay Tower, Singapore 098632 CANON HONGKONG CO., LTD 120V 18/F, The Metropolis Tower, 10 Metropolis Drive, Hunhom, Kowloon, Hong Kong C CANON INC. 2004 FA7-5679 (000) PRINTED IN CHINA...
Need help?
Do you have a question about the FaxPhone L170 and is the answer not in the manual?
Questions and answers