Table of Contents
Advertisement
Quick Links
Advertisement
Chapters
Table of Contents
Troubleshooting

Related Manuals for Omron CS1W-SLK11-21 - 06-2004


Summary of Contents for Omron CS1W-SLK11-21 - 06-2004
- Page 1 Cat. No. W367-E1-02 SYSMAC CS1W-SLK11/21 SYSMAC LINK Units...
- Page 2 CS1W-SLK11/21 SYSMAC LINK Units Operation Manual Revised June 2004...
- Page 4 OMRON, 1999 All rights reserved. No part of this publication may be reproduced, stored in a retrieval system, or transmitted, in any form, or by any means, mechanical, electronic, photocopying, recording, or otherwise, without the prior written permission of OMRON.
-
Page 6: Table Of Contents
SECTION 1 Introduction ........ - Page 7 Using the C200H-SLK21 or C1000H-SLK21........
- Page 8 Index ..........179 Revision History ........181...
- Page 10 Section 4 Data Links describes the operation of data links, procedures required to establish data links, and methods of monitoring data link operations. Section 5 Network Data Exchange provides the details of the data exchange functions of the CS- series PLCs via SYSMAC LINK Networks.
-
Page 12: Precautions
Application Precautions ......... Conformance to EC Directives........ -
Page 13: Intended Audience
!WARNING It is extremely important that a PLC and all PLC Units be used for the speci- fied purpose and under the specified conditions, especially in applications that can directly or indirectly affect human life. You must consult with your OMRON representative before applying a PLC System to the above-mentioned appli- cations. -
Page 14: Operating Environment Precautions
Operating Environment Precautions • The PLC outputs may remain ON or OFF due to deposition or burning of the output relays or destruction of the output transistors. As a counter- measure for such problems, external safety measures must be provided to ensure safety in the system. - Page 15 • Connecting or disconnecting any connectors. !Caution Failure to abide by the following precautions could lead to faulty operation or the PLC or the system or could damage the PLC or PLC Units. Always heed these precautions. • Always use the power supply voltages specified in the operation manuals.
-
Page 16: Conformance To Ec Directives
• Do not place heavy objects on top of the cables. • Route cables inside conduits. • Before touching the Unit, be sure to first touch a grounded metallic object in order to discharge any static build-up. Conformance to EC Directives Applicable Directives •... -
Page 18: Introduction
CX-Programmer........ -
Page 19: Overview
The SYSMAC LINK supports data links that enable data sharing and a mes- sage service that enables sending and receiving data when required. Data link words can be freely set to create a flexible data link system and effectively use memory areas. -
Page 20: Sysmac Link Unit Features
In the event of an error or failure in the polling node, another node automati- cally takes over management of the SYSMAC LINK System without stopping the entire network. The CX-Net within the CX-Programmer can monitor and/or program PLCs anywhere in the network via the SYSMAC LINK System. -
Page 21: Standard Models
Power supply terminal block (24 V DC) Effect on CPU Unit cycle time 0.2 ms Requires an additional 1.5 ms + (No. of words transferred x 0.001 ms) when data links are used. Requires additional event processing time when servicing messages. - Page 22 Manual settings: CIO 0000 to CIO 6143 (entire CIO), entire DM Area (D00000 to D32767) When creating manually set data link tables using CX-Programmer Ver. 1.2 or earlier, the words that can be set by the user are limited to the same words as for CVM1/CV, as fol- lows:...
-
Page 23: Sysmac Link Unit Functions
Basic Settings Perform the basic settings to use the SYSMAC LINK Unit. Node Address Set the address of the local node in the network using the rotary switches on (See pages 18 and 35) the front of the SYSMAC LINK Unit. -
Page 24: Data Links
SYSMAC LINK Unit Functions Section 1-3 Set the unit number of each Unit manually from between 0 to F Hex (0 to 15) using the rotary switches on the front of the SYSMAC LINK Unit. Network Parameters The following parameters are set with the Support Software (CX-Net within (See page 36) the CX-Programmer). -
Page 25: Programming Devices And Support Software
All the nodes within a specified network can be tested using the Support Soft- ware broadcast test function. Error Log If an error occurs in the Unit, the time of the error and the error contents are (See page 137) logged in EEPROM within the Unit. The logged error information can be read using the Support Software. -
Page 26: Basic Programming
Section 1-4 Programming Devices and Support Software 1-4-1 Basic Programming One of the following Programming Devices can be connected to the CPU Unit to automatically set data links or use the message service. Programming CPU Unit Startup node Console SYSMAC LINK... -
Page 27: Data Link Procedures
C1000H-SLK21 for details. Data Link Procedures 1-5-1 Manually Setting Data Links When the data link mode is set for manual data link table creation, the data link tables can be input using the CX-Net within the CX-Programmer. Use the following procedure. 1,2,3... - Page 28 Note Be sure that the data link mode in the data link parameters in the DM Area is set to 00 when using manually set data links. 7. Register the data link tables by making the following settings for each node.
-
Page 29: Automatically Setting Data Links
Note (a) Data link Start/Stop Bit (N= unit number): CS Series: Word 0 of DM30000 + 100 × N (b) The data links will not start if there is an error in the data link ta- bles in the startup node. - Page 30 Note (a) Data link Start/Stop Bit (N= unit number): CS Series: Word 0 of DM30000 + 100 × N (b) The data links will not start if there is an error in the data link ta- bles in the startup node. Data links can be started and stopped...
-
Page 31: Message Service Procedure
Message Service Procedure Section 1-6 Message Service Procedure The following steps outline the basic procedure for using the message ser- vice. 1,2,3... 1. Install and wire the Units. Contents Remarks Page a. Mount the Units to the PLCs. b. Wire the Network. -
Page 32: Unit Components And Switch Settings
Optical Units ......... . 2-4-3 Backup Power Supply ........ -
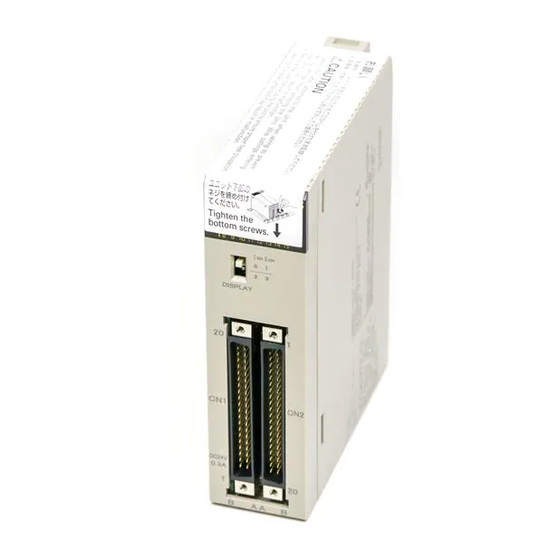
Page 33: Nomenclature
This section describes the names and components of the SYSMAC LINK Unit. 2-1-1 Component Names and Functions This section describes the names and functions of the SYSMAC LINK Unit components. CS1W-SLK11 Optical SYSMAC LINK Units Indicators LED indicators that display the Unit and network status. -
Page 34: Indicators
Data link table communications cycle time is too short. Not lit Unit is not part of active data link. Note If the Unit is participating in the network, the SD and RD indicators will light when sending and receiving the token. -
Page 35: Switch Settings
Unit or the PLC to use the new settings. Switch Positions The switches are positioned as shown in the following diagram. Set the unit number with SW1. Set the node address with SW2 and SW3. The setting ranges are given in the following table. Settings Values... -
Page 36: Cable Connections
2. F Adapters (C1000H-CE001): Coaxial cables are connected to the SYSMAC LINK Units via F Adapters. One F Adapter is included as an accessory with SYSMAC LINK Units that use coaxial cables (CV500-SLK21). 3. Terminator (C1000H-TER01): Two Terminator units (sold separately) are required, one for the F Adapter... - Page 37 3. Connect the F Adapters to the SYSMAC LINK Units by firmly pushing the adapter onto the coaxial connector on the Unit and turning the locking ring to the right until it locks. Start at one end of the network and connect the F Adapters to the other end in order.
- Page 38 2. Place an insulation cover over the F Adapter. Insulation cover 3. Any bends in the coaxial cable must be 45 mm in radius or greater (six times the outer diameter of the cable). When laying the cable, make bends of 110 mm in radius or greater (15 times the outer diameter of the cable).
- Page 39 LA mm = L mm − 12 mm Approx. 24.5 mm Approx. 24.5 mm Cable (Unit: mm) 2. Remove 15 mm of the outer covering. Be careful not to damage or to dis- tort the braiding. 15 mm 3. Insert the ferrule as shown below. Ferrule Cable 4.
- Page 40 Section 2-4 Cable Connections 6. Using your fingertips, press down on B on the trimming tool blade, forcing the blade into the polyethylene, and twist several times. Continuing to press down on B, withdraw in the direction of arrow D as shown below.
- Page 41 Cable Connections Section 2-4 10. Open the crimp tool handle, hold the tip of the body to the body stopper as shown below, and close the handle until the ratchet can no longer turn. Align the body hole with the hexagonal part of the die and crimp. A correct crimp should resemble the diagram below.
-
Page 42: Optical Units
Section 2-4 Cable Connections Provide a space between the bottom of the Unit and the cable as shown below to ensure a suitable bend radius. (Unit: mm) Note Separate the coaxial cable from other power lines and high-voltage lines to prevent noise. - Page 43 (1) Production of S3200-COCF2011 (full-lock) and S3200-COCF2511 (half- lock) Connectors has been stopped. Use the above Connectors as re- placements. (2) Either full-lock or half-lock connectors can be used in a SYSMAC LINK Network, but we recommend full-lock connectors to prevent accidental disconnections during operation.
- Page 44 All of the nodes in an Optical SYSMAC LINK Network are connected in a line (daisy-chain configuration) with H-PCF Optical Fiber Cable. The nodes can be connected in any order, but be sure to begin with the upper connector (SL1) of the highest node in the network and connect to the lower...
- Page 45 (Transmission not possible) • Do not pull on the Optical Fiber Cable too forcefully. The maximum tension that can be applied to the cord is 10 kg and the maximum tension that can be applied to the cable is 50 kg.
-
Page 46: Backup Power Supply
3. Pass the tension member through the through-holes, and tighten the ter- minal screws to affix the tension member. 4. Affix the cable to the mounting bracket so that it is clamped by the bracket. Two cables can be attached at the same time. - Page 47 (2) When wiring is complete, remove the label to avoid overheating. (3) Use a power supply that is not connected to PLC operation, as in the case of the node bypass function, for the backup power supply so that when the power to the PLC is turned OFF, the backup power supply will contin- (4) Use a dedicated power supply for the backup power supply.
- Page 48 Vinyl insulated round terminal Note (1) Always turn OFF the power to the PLC and the backup power supply be- fore connecting the backup power supply cables. (2) Separate the backup power supply wires from other power lines and high- voltage lines to prevent noise.
-
Page 50: Basic Communications
Word Applications ........ -
Page 51: Sysmac Link System Communications
To avoid having two nodes attempt to transmit simultaneously, only one node has the right to transmit at a time. The right to transmit is held by the node that holds what is called the token, which is passed in sequence from node to node, beginning with the node with the lowest node address (the polling node, see below). -
Page 52: Unit Number
(2) Turn OFF the PLC when setting the rotary switches. (3) If the unit number of any node has been changed, the I/O table on the PLC must be generated again and that node must be turned ON after all other nodes have been turned ON. -
Page 53: Network Address Setting
(1) Always turn OFF the PLC power before setting or changing node ad- dress. (2) If the node address set on the Unit is outside of the allowed range (01 to 62), a communications error will occur and the red ERC indicator will light on the Unit. - Page 54 This parameter sets a timer that fixes the length of the communications cycle to the specified time. The timer operates only when the data link is in opera- tion. Set the communications cycle time when setting the data link table’s common link parameters.
-
Page 55: Memory Areas
Memory Areas Memory Areas The CPU Bus Unit Area and part of the DM Area in the CPU Unit are used to write or read the status of the nodes and the data links of SYSMAC LINK Units. The data from the SYSMAC LINK Unit is written to the input words in these areas. -
Page 56: Word Applications
Memory Areas 3-6-2 Word Applications The applications of the words in the CPU Bus Link Area and DM Area that are allocated to SYSMAC LINK Units are described in the following tables. CPU Bus Unit Area The words allocated in the CPU Bus Unit Area to a SYSMAC LINK Unit are used to access the status of the SYSMAC LINK System as shown in the fol- lowing table. - Page 57 ON. Node addresses (1 through 62) and their corresponding bits are listed in the following table. (Bits 14 and 15 of word +5 are always 0.) Word: 1500 + (25 x Unit Number) + 2 to 5...
-
Page 58: Data Links
Automatic Settings ........ -
Page 59: Introduction
Words in the CIO and/or DM Areas are set aside as the data link words in each PLC that is in the data link. Some of the data link words are allocated to the local node and the rest are allocated to other nodes. Data can be written only to the words allocated to the local node. -
Page 60: Data Link Specifications
PLCs in the data link, with the words of the data areas listed below divided equally among 2, 4, 8, or 16 nodes. The number of words allocated to each node depend on the number of nodes linked and is given in 4-2-1 Specifications Table later in this section. -
Page 61: Data Link Indicators
Data Link Settings The following settings are required to run data links. 4-4-1 Rotary Switches Set the node address using the rotary switches on the front of the Unit. Refer to 3-3 Setting Node Address for details on setting the rotary switches. -
Page 62: Specifying Data Link Mode And Number Of Data Link Words
4-4-3 Data Link Start/Stop Bit You can start and stop the data links by turning ON and OFF the bit in the first word in the startup node in the DM Area allocated in the CPU Bus Unit. This bit is in the DM Parameter Area allocated to the SYSMAC LINK Unit. -
Page 63: Creating Data Links
SYSMAC LINK Unit as a CPU Bus Unit in the CPU Unit. Note Data link areas must be continuous in the CIO Area or the DM Area. You can- not make settings which leave unused words between the data link areas in either the CIO Area or the DM Area. -
Page 64: Automatic Data Link Tables
DM Area parameters must be set for automatic generation and the numbers of words per node in each of the CIO and DM Areas must be set. The data link mode can be set to CIO Area only, DM Area only, or CIO and DM Areas. -
Page 65: Manually Generating Data Link Tables
You can manually set the data link words by setting D30000 + 100 x unit num- ber, bit 5 and bit 4 to OFF. The data links are set in the DM parameter area allocated to the SYSMAC LINK Unit as a CPU Bus Unit. -
Page 66: Data Link Area Allocations
1063 4-6-2 Manual Settings The data link areas can be allocated as described in this section by using the refresh parameter settings for each node. Identical Allocations for When editing data link table refresh parameters, set the same refresh param- All Nodes eters for all nodes. - Page 67 DM Area DM Area Note The send area for node 8 has specified 0 for both the CIO Area and DM Area in the common link parameters. Only nodes with refresh parameters will participate in the data links. Although the node order in the manual settings can be changed as you wish, the Data Link Area must be created in continuous areas.
-
Page 68: Refreshing Data Links With Automatic Settings
Section 4-6 Data Link Area Allocations It is still necessary to set the total data link words for group 1 and group 2 to within the maximum number of link words (2,966 words). Group 1 Group 2 Node 1 Node 2... -
Page 69: Refreshing Data Links With Manual Settings
When manual settings have been made, data link areas will be refreshed for all nodes specified in the refresh parameters. In the following example, only nodes 3, 4, 6, and 7 are participating in the data links. Nodes 1, 2, 5, and 8, however, will also be refreshed and words for them cannot be used for other applications. -
Page 70: Data Link Table Example
In this example, the refresh parameters differ from node to node, so the data link tables will also differ from node to node. There are four nodes in the net- work (2, 5, 6, and 8), but some nodes will not receive data from all other nodes. - Page 71 When setting data link tables for CS-series SYSMAC LINK Units with CX-Pro- grammer Ver. 1.2 (Service Pack 1), set the PLC type to CV/CVM1. With CX- Programmer Ver. 2.0 or later, it is possible to set a CS-series PLC type.
-
Page 72: Controlling Data Links
(2) Be sure to set the data link mode (manual settings) and the data link table in the DM parameter area of the startup node when using manual set- tings. -
Page 73: Data Link Status
To start the data links, turn ON the Data Link Start/Stop Bit in DM parameter area in the CPU Unit of the node you wish to use as the startup node. To stop the data links, turn OFF Data Link Start/Stop Bit in DM parameter area in the CPU Unit of a node participating in the data links. -
Page 74: Data Link Status
+ Note (1) The Data Link Active Flag is for checking the data link system. It is not designed to check for data link errors. To check for data link errors, use the Data Link Communications Error Flag. - Page 75 Error Flag Checking for Data Link To check for an error in any node in the data links, take an OR of a NC condi- Errors in any Node tion of the Local Node Data Link Active Flag and the Communications Error Flags for all nodes.
-
Page 76: Word Structure
The following table shows the data link status in memory. The numbers within the table are in order of the nodes are set in the data link table (refresh param- eters). These will correspond to the node addresses when using automatic settings. -
Page 77: 4-10 Data Link Precautions
1. Refresh parameters must be set for each node in the data link when man- ually generating data link tables. When a data link is started in a node that does not have a data link table, a data link table error will occur and the LNK indicator on that node will flash. - Page 78 The value in the 2nd byte of the detail code for 021D registered in the error history will be the minimum possible communications cycle time setting. For example, if the communications cycle time is set to 5 ms, and the LNK indicator starts flashing quickly, an error code of “021D 0512”...
-
Page 79: 4-11 Data Link Characteristics
1039 1049 The number of send words for node 4 is set as 20 words in the common link parameters, but the number of send words is set as 10 words in the common link parameters for other nodes that are already operating. Consequently, node 4 will not participate in the data link network. - Page 80 Total number of words ..2,000 Communications cycle time (coaxial cable systems) = 62 × 0.085 ms + 10 × 0.654 ms + 4 × 0.75 ms + 32 × 0.056 ms + 2000 × 0.01 ms + 1.322 ms = 37.924 ms (38 ms after rounding)
-
Page 81: 4-11-2 Data Exchange Timing
Number of polled units: ..Changed from 4 to 5 Change of the communications cycle time (coaxial cable systems) = (62 – 16) × 0.085 ms + (10 – 13) × 0.654 ms + (4 – 5) × 0.75 ms = 1.198 ms (1 ms after rounding) Change of the communications cycle time (optical fiber cable systems) = (62 –... -
Page 82: 4-11-3 Calculation Examples For Data Link I/O Response Times
The time required for each of the above items is given below: Communications Cycle Time 62 × 0.085 + 10 × 0.654 + 4 × 0.75 + 8 × 0.056 + 192 × 0.01 + 1.322 = 18.5 ≈ 19 ms (For details, refer to page 62.) - Page 83 The following delays occur at 1, 2, and 3 in the above diagram: 1,2,3... 1. The input bit turns ON just after a scan and so the time required for one more scan elapses before the input is processed. Therefore a multiplica- tion factor of 2 is applied to the scan time, as shown in the above table.
-
Page 84: 4-12 Cx-Programmer Procedures
There is no need to create data link tables when using automatic settings. If using automatically set data links, set the DM parameter areas (DM area words allocated to the SYSMAC LINK Unit as a CPU Bus Unit) using a Pro- gramming Console or the PLC Memory Window in CX-Programmer. -
Page 85: 4-12-2 Data Link Settings
6. Connect to the network from CX-Net by selecting PLC and then Open. 7. Read the data link tables and transfer them to the PLC using the Data Link Setup Dialog Box from CX-Net. Select Data Links and then Setup. - Page 86 Section 4-12 CX-Programmer Procedures 2. Open the CX-Server file (*.CDM) in CX-Net or create a new file in CX-Net by selecting Project and then Open in CX-Net. In this example, Sam- ple.cdm is used as the file name. The following dialog box will be displayed.
- Page 87 DM Area Node 1 Node 2 Node 3 Receive Receive Send (1) Receive Receive Receive Receive Send (2) Send (3) 1,2,3... 1. Select Data Link and then Editor. A dialog box for selecting the type of data link will appear.
- Page 88 Common Link. If you select Auto, the optimum communications cycle time will be automatically calculated according to the data link tables. If you se- lect Manual, set the time manually between 5 to 255 ms (refer to 4-11 Data Link Characteristics for communications cycle time details).
- Page 89 For example, if you enter 3, 2, 1 as the refresh order, the node addresses will be allocated in the order 3, 2, 1, starting from the start address. If the local node address is 1, it will receive data from node 3, then from node 2, and finally, it will send data itself).
- Page 90 1 will first send data and then received data in order from nodes 3 and then 2. 6. Set the settings for node 2 and 3 in the same way. The following example shows the settings for node 2.
- Page 91 CX-Programmer Procedures Section 4-12 7. The following display will appear when the data link table settings have been made for all nodes. The example shows node 1 selected. Settings and Display Contents Item Contents Common Cycle Time: Data link communications cycle time:...
- Page 92 • The first word containing the data link status will be the same for all nodes participating in the data links. • The start word for data link area 1 and the start word for data link area 2 will be the same for all nodes participating in the data links.
- Page 93 Section 4-12 CX-Programmer Procedures • The send area sizes will be the same for all nodes participating in the data links. • The send node order will be in the order of node addresses • There will be no nodes that do not receive.
- Page 94 Ver. 2.0 or later, CS-series PLC types can be specified. 3. Click the OK button. As shown below, a data link table will be automatically created for all nodes in the Nodes Valid Field. All nodes will have the same start words and the same send sizes, and the refresh order set in the same order as the node addresses.
- Page 95 Save As Dialog Box will appear. 2. Enter the file name (e.g., “Sample”), specify the directory to which to save, and click the Save button. The file will be saved with an .sl3 extension (e.g., “Sample.sl3”). Connecting to the Network 1,2,3...
- Page 96 Select PLC and then Open to reconnect if disconnected. Reading and Transferring Data Link Tables Read the data link tables that have been created and then transfer them to all the nodes participating in the data links. Reading Data Link Tables 1,2,3...
- Page 97 PLCs. 2. Click the Write button. • Data link tables will start to be transferred to the nodes set in the Nodes Field, or to all the nodes on the same network. • When the transfer is finished, the bottom of the window will be dis-...
- Page 98 2. Select SYSMAC LINK and then click the OK button. • The Data Link Status Dialog Box will be displayed. • The status for each of the following will be displayed in the Data Link Status Dialog Box. The communications cycle time and the refresh cy- cle time can be updated only when this window is open or when the data link has been started or stopped.
- Page 99 4. Click the Set button. The data links will start, and the Operational Status Box will display the operational status. Stopping Data Links 1,2,3... 1. Open the Data Link Status Dialog Box and then select the Stop option but- ton under Operation. 2. Select the Set button. The data link will stop.
-
Page 100: Network Data Exchange
5-2-2 Local Network Table ........ -
Page 101: What Is Network Interconnection
CS-series, CVM1, or CV-series PLC. 5-1-2 Interconnecting Different Types of Networks A CS-series, CVM1, or CV-series PLC can be used to connect a SYSMAC LINK Network with an Ethernet, SYSMAC NET, or Controller Link Network. SYSMAC LINK Network... - Page 102 Network is limited a maximum of 552 bytes of data in any one transmission, including the header. If a transmission passes through a SYSMAC LINK Net- work, as shown in the figure on the preceding page, the amount of data is lim- ited to 552 bytes.
-
Page 103: Routing Tables
Support Software. Refer to the Support Software manuals for details. !Caution The CPU Bus Units will be reset if the routing tables are transferred to the CPU Unit from a Programming Device. The reset is required to update the routing table settings. -
Page 104: Routing Table Examples
SRM: CompoBus/S Mas- ter Unit Unit number a Unit number b Local Netw ork Table Unit number c Unit Network There is no network address for the CompoBus/S Master Unit, so no address is set in the local network table. - Page 105 Take a look at the relay network table for PLC 3. When network A is the destination network for PLC 3, B is the relay network and c is the relay node. When network C is the destination network, B is the relay network and e is the relay node.
- Page 106 CMND(490) instruction. 1,2,3... 1. PLC 1 checks its relay network table, and sends the data to node 5 (PLC 3) on network 10, to send the data to network 30, on PLC 6. 2. PLC 3 receives the data from PLC 6, checks its local network table, and sends the data to node 5 (PLC 6) via CPU Bus Unit with unit number 7, which is connected to network 30.
-
Page 108: Message Service
PLC Memory Areas ........ -
Page 109: About Data Read/Write Services
Specifying Destination Nodes The following two types of communication are possible. Messages can be sent to or received from a specific node, or it can be broadcast to all nodes. Sending and Receiving The PLC’s network instructions (SEND(90), RECV(98), and CMND(490)) can... -
Page 110: Communications Specifications
The memory areas that can be used for data transfer depend on the model of PLC, as shown in the following table. Be sure not to exceed the end of a mem- ory area when sending or receiving data. Also be sure to set the operands so that the end of the data area is not exceeded. -
Page 111: Communications Ports
AR00 to AR27 1164 to 1191 (4) It is not possible to specify the CPU Bus Link Area in a CVM1 or CV-se- ries PLC from a CS-series PLC. (5) It is not possible to specify the Work Area or Holding Area in a CS-series PLC from a CVM1, CV-series, or C-series PLC. - Page 112 Note The new data will be sent if the data in the transmission area is changed while a command is being executed. Do not change data in the area being transmit- ted unless the Port Enabled Flag is ON.
- Page 113 (in this case, no response will be recorded). Errors other than the above will be shown in the response code in the response block but will not be shown in the Port Execution Error Flag or...
-
Page 114: Network Send Instruction - Send(90)
*Indirect addressing only Control Data Set the destination node address to $FF to broadcast the data to all nodes in the designated network or to $00 to send to a destination within the node of the PLC executing the send. - Page 115 Section 6-2 PLC Network Instructions 5. Response Bit (Bit 15 of C+3) Usually set this bit to OFF (0: response required). If you do not need any response, set the bit to ON (1: not required). 6. Port Number Set the communications port number that the SEND(90) instruction will be sent from.
-
Page 116: Network Receive Instruction - Recv(98)
Set the source node address to 00 for devices at the local node. 4. Source Unit Address Set the source unit address to 00 if the destination is a PLC. If it is a user application on a computer, set the destination unit to 01 (user application 01). - Page 117 8. Response Monitor Time Designates the length of time that the PLC retries transmission when bit 15 of C+3 is OFF and no response is received. The default value is $0000, which indicates 2 seconds. Range of Control Data...
-
Page 118: Deliver Command Instruction - Cmnd(490)
*Indirect addressing only Control Data The control words, beginning with C, specify the number of bytes of control data to be sent, the number of bytes of response data to be received, the des- tination node, and other parameters. Word... - Page 119 0001 to FFFF: 0.1 to 6,553.5 s with 0.1-s increments (set by the user) Note (1) FE, or unit number + 10 (FE can be set when the destination is a SYS- MAC NET Link, SYSMAC LINK Unit, Controller Link Unit, or Ethernet...
- Page 120 Section 6-2 PLC Network Instructions (2) When broadcasting, there is no response from the nodes. even if the Re- sponse Bit has been turned OFF.
-
Page 121: Program Example
1200 The 10-word data starting from D00010 on the local PLC (021) is sent to D00020 and following words on the PLC with a @MOV #000A D00000 unit address of 0, node address of 4, and network address of 2. -
Page 122: Delay Times
Number of words transferred x 0.0045 ms + 4 ms Communications Cycle Time Coaxial: Max. node address × 0.01 ms + No. of nodes × 0.075 ms + No. of polled units × 0.75 ms + 1.322 ms Optical: Max. node address × 0.01 ms + No. of nodes × 0.133 ms + No. of... - Page 123 MAC LINK Unit stores the data in the local Unit’s memory area is described below. Note Be sure to take into account the time required for data links and program exe- cution, which are not included in the following example. RECV (98) executed...
- Page 124 Max. node address × 0.01 ms + No. of nodes × 0.075 ms + No. Coaxial: of polled units × 0.75 ms + 1.322 ms Optical: Max. node address × 0.01 ms + No. of nodes × 0.133 ms + No. of polled units × 0.75 ms + 1.322 ms Transmission Delay Commands: 0.204 ms...
-
Page 125: Fins Command/Response Format
FINS commands have the following features: 1,2,3... 1. They are defined in the application level and do not depend on lower levels (i.e., the physical and data link levels). This allows them to be used across a variety of networks and CPU buses. Specifically, they can be used with SYSMAC LINK, Controller Link, and Host Link networks, and between CPU Units and CS-series CPU Bus Units. -
Page 126: Command/Response Parameters
Section 6-3 FINS Command/Response Format 3. FINS commands support network relay operations, so they can pass through a network hierarchy to access devices on up to three network lev- els (including the local network). Network 2 Network 1 Network 3... -
Page 127: Fins Commands For Plcs
Valid Valid Valid FORCED SET/RESET CANCEL Not valid Valid Valid Valid Note When the PLC is in RUN mode, data transfers from files to the program area are not possible, but transfers from the program area to files are possible. -
Page 128: Fins Commands For Sysmac Link Units
A response code consists of two bytes. If a command is completed normally, a response code of 00 00 will be returned. The first two digits of a response code are called the main response code (MRES) and the last two digits are called the sub-response code (SRES). -
Page 129: Fins Commands For Sysmac Link Units
6-4-2 DATA LINK HALT Stops data links in the SYSMAC LINK Network. This command will be completed normally when the data link is in operation. If the data link is not in operation, an error will occur. Command Block Command... -
Page 130: Controller Data Read
Bit 7 will be ON if the SYSMAC LINK Network is using optical fiber cable; OFF if it is using coaxial cable. Bit 00 to 02 will be 011, indicating that the common RAM is 8 Kbytes. The common RAM is the buffer for the communications con- troller. - Page 131 The registered network parameters are compared to the actually network parameters upon power application the first time a Unit joins the network. If the parameters do not agree, bit 2, above, will be turned ON, but the system will not stop (the actual network parameters will automatically be registered).
-
Page 132: Network Status Read
Participation List (response): Bits in the last eight bytes of the response are turned ON to indicate when a node is participating in the SYSMAC LINK network. The bit turned ON for each node address is shown in the following illustration. Bits given as “–” are always zero. - Page 133 1: Exited because of an error.* (0: Normal exit) 1: Unit does not respond to polling. Note *Bit 1/5 is used to indicate why the node is not in the network when bit 0/4 is OFF. Communications cycle time (response): The actual communications cycle time is provided here in 4-digit hexadecimal in increments of 100 µ...
-
Page 134: Data Link Status Read
When a bit in the fol- lowing matrix is ON, a non-fatal error occurred in the corresponding node. Bit 0 of the first byte and bit 7 of the eighth byte are always OFF. −... -
Page 135: Internode Echo Test
Data link status (response): Four bits are allocated to each node address to provide information on the status of the data links, as shown below. The func- tion of each of the 4 bits is shown in the diagram following the table. Byte... -
Page 136: Broadcast Test Results Read
6-4-10 BROADCAST TEST DATA SEND Sends the test data in the command to all nodes in the specified network. No response will be returned when this command is executed, but reception of the test data can be verified by executing the BROADCAST TEST RESULTS READ command. -
Page 137: 6-4-11 Error Log Read
6-4-11 ERROR LOG READ Reads the error log. Note (1) When the error log does not have the specified number of records, all the records that have been stored will be read and an address range overflow error will result. -
Page 138: 6-4-12 Error Log Clear
FINS Commands for SYSMAC LINK Units Section 6-4 6-4-12 ERROR LOG CLEAR Clears all error log records. Command Block Command format Response Block Command Response format code... - Page 139 FINS Commands for SYSMAC LINK Units Section 6-4...
-
Page 140: Remote Monitoring And Programming
Local Networks ........ -
Page 141: Remote Programming And Monitoring
Local Networks A CX-Programmer connected to a CS-series, CVM1, CV-series, or C200HX/ HG/HE CPU Unit can program and monitor a CPU Unit on the same network. Programming and monitoring are possible, including CPU Units that are differ- ent from the one to which the Programming Device is connected. - Page 142 SYSMAC LINK Network, set the frame length to a maximum of 542 bytes using the network settings of the PLC connected to CX-Programmer. If the frame length is set to 543 bytes or over, the user program and other data cannot be transferred.
-
Page 144: Troubleshooting
Error Indications ........ -
Page 145: Troubleshooting
This section explains errors that may occur and how to solve them. 8-1-1 Error Indications You can check possible system errors using the indicators on the front panel of the SYSMAC LINK Unit. The tables below list error conditions, their proba- ble cause, and possible remedies. - Page 146 No node is set as the Set a Unit as the polling polling node. node. Note Calculate the location of the error information in the CPU Bus Unit as follows: CIO 1500 + unit number x 25 + 1 word.
- Page 147 (see note). Note In this case, the error log (error code 021D Hex) will be stored. Refer to 8-2 Error Log for details. Nodes Not Participate in Data Links For nodes to participate in the data links, first the SYSMAC LINK Units must be operating and participating in the network.
-
Page 148: Probable Causes And Remedies Of Response Code Errors
Ports for details on where the SEND(90), RECV(98), and CMND(490) instructions response codes are stored.) The 6th, 7th, and 15th bits of the response codes may be ON. When the 15th bit is ON, a network relay error has occurred. Refer to Network Relay Errors below for remedies. - Page 149 ERC indicator is lit nications controller errors and remedies table at end of this section. CPU error occurred in the PLC at the Clear the error in the CPU (refer to the destination node PLC’s operation manuals). Node address setting error...
- Page 150 The program area is protected. Execute the instruction again after issuing the PROGRAM AREA PROTECT CLEAR command. The registered table does not exist or is Set or reset the registered table. incorrect. The corresponding data does not exist. --- A non-existing program number has Check the program number and be sure been specified.
- Page 151 A memory error has occurred in inter- If the error occurred in internal memory or nal memory, in the Memory Card, or in the EM Unit, correct the data in the com- Expansion DM during the error check. mand an execute it again.
- Page 152 Network Relay Errors For network relay errors using SEND(90) or RECV(98), check the path of the command using the routing tables and the nature of the error using the response code to eliminate the cause of the error.
- Page 153 SYSMAC NET: 01 to 7E (1 to 126) Relay Errors A relay error is caused when a command fails to reach the Unit to which it has been sent. A relay error can be caused either by data failing to be passed...
-
Page 154: Error Log
Errors of significance are also recorded in the Unit’s EEPROM so that when the power to the Unit is turned OFF or reset, a record of the error will remain. (The error log table in EEPROM automatically reads the Unit’s RAM when the power is turned ON again.) -
Page 155: Error Codes
0. This can occur for PLC startup errors, unit number errors, CPU Unit errors, or PLC model errors. When error logs without times are read from the CX-Net, they will be dated 0 s, 0 min, 0 hr, 0 day, 0 month, 2000. - Page 156 Routing table 04 Hex: PLC Setup Area 0101 Transmission failed; local node Command block Refer to page 8-1-1 Error Indi- not in Network cations and place the local Bits 0 to 7: node into Network. Source node address 0103 Transmission failed; retry count...
- Page 157 Bits 8 to 14: 010A Transmission failed; communica- Conduct an echoback test Source Network address tions controller error and if the effects of noise are Bit 15: considerable, reconsider the operating environment. Restart the SYSMAC LINK Response block Unit. If the error occurs again, Bits 0 to 7: replace the Unit.
- Page 158 Check for nodes sending ille- Destination node address gal packets. Bits 8 to 14: Destination Network address Bit 15: (1st byte: bits 8 to 15; 2nd byte, bits 0 to 7) 0206 Number of participating nodes Network Number of Check network parameters,...
-
Page 159: Reading And Clearing Error Logs
0221 Hex 0001 Hex Node 16 removed from system. Error Status The status of each bit indicates that an error has occurred as given in the dia- gram below. 1: Token timeout error 1: Polling timeout error 1: Communications controller hardware error... -
Page 160: Polling Node Backup
The approximate time required for the reconstruction of the network can be computed as follows: (Address of new polling node + 1) x 20 ms + maximum node address x 1 ms Node Bypass Optical SYSMAC LINK networks can be connected to a backup power supply. - Page 161 Node Bypass Section 8-4 (2) A 24-VDC backup power supply is supplied directly to CS-series SYS- MAC LINK Units. With non-CS-series optical fiber SYSMAC LINK Units, a 100-VAC or 200-VAC backup power supply is supplied using an Auxil- iary Power Supply Unit mounted on the same Rack.
-
Page 162: Unit Replacement
Replacement Procedure........ -
Page 163: Replacing The Unit
Unit and return to you nearest OMRON outlet as listed at the back of this manual. Note (1) To prevent faulty operation be sure to turn OFF the power to all nodes be- fore replacing the Unit. (2) When replacing the Unit, do not reconnect that node to the Network be- fore carrying out the procedures listed below. -
Page 164: Replacement Procedure
7. Read the network parameters using CX-Net in CX-Programmer, and check that the network settings are correct. 8. Start the data links from the data link startup node if the data links do not start automatically. 9. Check that the data links are operating normally using the data link status... -
Page 165: Using The C200H-Slk21 Or C1000H-Slk21
Using the C200H-SLK21 or C1000H-SLK21 The CX-Programmer and CX-Net in CX-Programmer cannot perform remote monitoring/programming or create data link tables for the C200H-SLK21 or C1000H-SLK21. Replace the C200H-SLK21 or C1000H-SLK21 with the most recent SYSMAC LINK Unit, as shown in the following table. -
Page 166: Inspection And Maintenance
10-2 Handling Precautions ........ -
Page 167: 10-1 Periodic Inspections
Please observe the following precautions in the event of a problem: • Always turn OFF the power when replacing a SYSMAC LINK Unit. • If a SYSMAC LINK Unit fails, replace it with a new one and immediately verify that the new Unit is working properly. -
Page 168: Standard Models
S3200-HCCO102 500 m S3200-HCCO502 1,000 m S3200-HCCO103 Optical connector Use when connecting nodes to cables. S3200-COCF2071 (See note.) In-line adapter Use in cable relays. S3200-COIAT2000 Note Production of the S3200-COCF2011 Connector has been stopped. Use the S3200-COCF2071 as a replacement. - Page 169 Appendix A Standard Models When ordering, specify the optical fiber cable type by adding codes to the model number as shown below. ((((((( S3200-H Kind of cable Power supply line Color of fiber Length Option B: Cord L: With power supply line...
-
Page 170: Dimensions
Appendix B Dimensions CS1W-SLK11 Optical SYSMAC LINK Unit (Unit: mm) - Page 171 Appendix B Dimensions CS1W-SLK21 Coaxial SYSMAC LINK Unit (Unit: mm)
-
Page 172: Related Auxiliary Area Information
CS-series CPU Bus Unit Error Flag Bit A40207 is turned ON when a parity error occurs during the transmission of data between the CPU Unit and CS-series CPU Bus Units. The unit number of the CS-series CPU Bus Unit involved is written to word A417. - Page 173 When an error occurs in a data exchange between the CPU Unit and a CS-series CPU Bus Unit, the CS-series CPU Bus Unit Error Flag (A40207) is turned ON and the bit in A417 corresponding to the unit number of the Unit where the error occurred is turned ON.
-
Page 174: Cpu Bus Unit Area Allocations
Appendix D CPU Bus Unit Area Allocations The CPU Bus Unit Area of the SYSMAC LINK Unit is allocated in the PLC’s memory (bit area) according to the unit number as follows (25 words are allocated per Unit): Unit No. - Page 175 Polling node address Note If the local node is disconnected from the network, only the bit corresponding to the local node is turned OFF (i.e., the entire status area is not turned OFF). Also, while the local node is disconnected, the bits...
- Page 176 1: Active Note If the Local Node Data Link Active Flag (bit 15 of first word +23) is OFF, the data link status will be main- tained as it was immediately before operation stopped. This may not be the same as the actual current status.
-
Page 178: Dm Area Allocations
0: Do not initialize CPU Bus Unit Settings 1: Initialize CPU Bus Unit Settings Polling Node/Polled Node Bit 0: Polling node 1: Polled node Note Initializes the network parameters registered in the CPU Bus Unit Setting Area in the CPU Unit and clears the data link tables. -
Page 180: Glossary
A bit in the Auxiliary Area. backup A copy made of existing data to ensure that the data will not be lost even if the original data is corrupted or erased. BASIC A common programming language. BASIC Units are programmed in BASIC. - Page 181 The location in memory where a bit of data is stored. A bit address specifies the data area and word that is being addressed as well as the number of the bit within the word. Branching Link Adapter...
- Page 182 Glossary common data Data that is stored in a memory of a PLC and which is shared by other PLCs in the same system. Each PLC has specified section(s) of the area allocated to it. Each PLC writes to the section(s) allocated to it and reads the sections allocated to the other PLCs with which it shares the common data.
- Page 183 ‘distributed’ over the system. Distributed control is a concept basic to PLC Systems. DM Area A data area used to hold only word data. Words in the DM area cannot be ac- cessed bit by bit. DM word A word in the DM Area.
- Page 184 See CV-mode. flag A dedicated bit in memory that is set by the system to indicate some type of operating status. Some flags, such as the carry flag, can also be set by the op- erator or via the program.
- Page 185 CPU Racks or Expansion I/O Racks. I/O delay The delay in time from when a signal is sent to an output to when the status of the output is actually in effect or the delay in time from when the status of an input changes until the signal indicating the change in the status is received.
- Page 186 Units actually mounted to the PLC. I/O word A word in the CIO Area that is allocated to a Unit in the PLC System and is used to hold I/O status for that Unit. IBM PC/AT or compatible A computer that has similar architecture to, that is logically compatible with, and that can run software designed for an IBM PC/AT computer.
- Page 187 Acronym for light-emitting diode; a device used as for indicators or displays. leftmost (bit/word) The highest numbered bits of a group of bits, generally of an entire word, or the highest numbered words of a group of words. These bits/words are often called most-significant bits/words.
- Page 188 A communications setting that adjusts the number of ON bits so that it is al- ways odd. See parity. The status of an input or output when a signal is said not to be present. The OFF state is generally represented by a low voltage or by non-conductivity, but can be defined as the opposite of either.
- Page 189 Changing the content of a memory location so that the previous content is lost. parity Adjustment of the number of ON bits in a word or other unit of data so that the total is always an even number or always an odd number. Parity is generally used to check the accuracy of data after being transmitted by confirming that the number of ON bits is still even or still odd.
- Page 190 Programming Device A Peripheral Device used to input a program into a PLC or to alter or monitor a program already held in the PLC. There are dedicated programming devices, such as Programming Consoles, and there are non-dedicated devices, such as a host computer.
- Page 191 Glossary rack number A number assigned to a Rack according to the order that it is connected to the CPU Rack, with the CPU Rack generally being rack number 0. Rack PLC A PLC that is composed of Units mounted to one or more Racks. This config- uration is the most flexible, and most large PLCs are Rack PLCs.
- Page 192 Glossary be changed. However, the program or data can be read as many times as de- sired. routing table Tables of settings that specify what networks a device is a member of and what nodes must be passed through to reach other specific networks. See local net- work table and relay network table.
- Page 193 The process of moving data from one location to another within the PLC, or be- tween the PLC and external devices. When data is transferred, generally a copy of the data is sent to the destination, i.e., the content of the source of the transfer is not changed.
- Page 194 A switch used to write-protect the contents of a storage device, e.g., a floppy disk. If the hole on the upper left of a floppy disk is open, the information on this floppy disk cannot be altered.
-
Page 196: Index
Index A–C response codes errors automatic generation of data link tables CX-Net broadcast test CX-Programmer cables connecting transmission cables optical Optical Fiber Cables data link characteristics characteristics communications cycle time data link controlling coaxial cable creating See also cables Data Link Status Flag... - Page 197 CS-series PLCs resetting SYSMAC LINK Unit internode echo test response codes response times manual generation of data link tables maximum node address specifications maximum number of frames backup power supply message service standard models procedure...
-
Page 198: Revision History
Revision History A manual revision code appears as a suffix to the catalog number on the front cover of the manual. Cat. No. W367-E1-02 Revision code The following table outlines the changes made to the manual during each revision. Page numbers refer to the previous version. - Page 200 Regional Headquarters OMRON EUROPE B.V. Wegalaan 67-69, NL-2132 JD Hoofddorp The Netherlands Tel: (31)2356-81-300/Fax: (31)2356-81-388 OMRON ELECTRONICS LLC 1 East Commerce Drive, Schaumburg, IL 60173 U.S.A. Tel: (1)847-843-7900/Fax: (1)847-843-8568 OMRON ASIA PACIFIC PTE. LTD. 83 Clemenceau Avenue, #11-01, UE Square,...
- Page 201 Authorized Distributor: Cat. No. W367-E1-02 Note: Specifications subject to change without notice. Printed in Japan...
Need help?
Do you have a question about the CS1W-SLK11-21 - 06-2004 and is the answer not in the manual?
Questions and answers