Table of Contents
Advertisement
Quick Links
Installation/Operation Manual with Service Replacement Parts
UH330 ADA
3765 Champion Blvd.,
Winston-Salem, NC 27105
(336) 661-1556 Fax: (336) 661-1660
Toll-free: (800) 858-4477
DO NOT STORE WET DISH RACKS ON TOP OF
Storing wet dish racks on top of the machine without
a DRIPT TRAY KIT installed will void the warranty.
Order Drip Tray Kit, P/N 0714208, (see page iv).
2674 N. Service Road, Jordan Station
Ontario, Canada L0R 1S0
(905) 562-4195 Fax: (905) 562-4618
Toll-free: (800) 263-5798
Undercounter Dishwasher
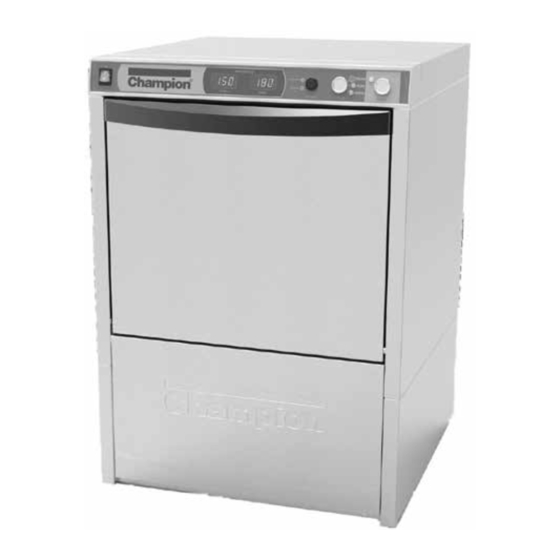
UH330 ADA
Heat Recovery
High Temperature
with built-in booster
Fresh Water Final Rinse
WARNING
MACHINE.
Issue Date: 9.27.22
Manual P/N
116141 rev. E
For machines beginning with S/N W140946406 and above
M4.2 Series
Printed in the USA
Advertisement
Chapters
Table of Contents
Troubleshooting

Related Manuals for Champion M4.2 Series


Summary of Contents for Champion M4.2 Series
- Page 1 Installation/Operation Manual with Service Replacement Parts Undercounter Dishwasher M4.2 Series UH330 ADA Heat Recovery High Temperature with built-in booster Fresh Water Final Rinse UH330 ADA WARNING DO NOT STORE WET DISH RACKS ON TOP OF MACHINE. Storing wet dish racks on top of the machine without a DRIPT TRAY KIT installed will void the warranty.
- Page 2 For future reference, record your dishwasher information in the box below. Model Number__________________________ Serial Number_______________________ Voltage________________Hertz_____________ Phase__________________ Service Agent __________________________________ Tel:______________________ Parts Distributor _________________________________ Tel:______________________ National Service Department In the USA: Toll-free: (800) 858-4477 Tel: (336) 661-1556 Fax: (336) 661-1660 email: service@championindustries.com ATTENTION: The model no., serial no., voltage, Hz...
- Page 3 Product Registration REGISTER YOUR PRODUCT to ACTIVATE YOUR WARRANTY. 4:34 PM Two ways to register: • http://www.championindustries.com/warranty-registration • Use the FAX FORM on the next page.
- Page 4 PRODUCT REGISTRATION BY FAX COMPLETE THIS FORM AND FAX TO: (336) 661-1660 in the USA 1-(800) 204-0109 in Canada PRODUCT REGISTRATION CARD Model Serial # Date of Installation: Company Name: Address: (Street) Province Postal Code Telephone #: ( Contact: Installation Company: Address: Telephone #: Contact:...
- Page 5 Revision History Revision History Specifications are subject to change based on continual product improvement. Equipment owners may request a revised manual, at no charge, by calling 1 (800) 858-4477 in the USA. Revision Revised Serial Number Revision Date Pages Effectivity Description 9.30.16 W140946406...
-
Page 6: Limited Warranty
Industries website (http://www.championindustries.com/register) in the USA or http://www.championindustries.com/canada/ register in Canada or by fax on the form provided at the front of this manual. If warranty registration is not returned to Champion within such period, the warranty will expire after one year from the date of shipment. -
Page 7: Table Of Contents
Table of Contents Table of Contents Model UH330 ADA Revision History ......................i Limited Warranty ...................... ii Model Description ..................... iv Installation ....................... 1 Receiving ......................1 Placement ......................1 Electrical Connections - UH330 ADA with Booster 1PH and 3PH Wiring Diagram ..2 Connecting Incoming Power to the Main Terminal Block 1PH and 3PH ...... -
Page 8: Model Description
Model Description UH330 ADA Heat Recovery/Condensate Removal with Dry Assist Fresh Water Pumped Final Rinse High temperature hot water sanitizing dishwasher with built-in electric booster. Two built-in chemical dispensing pumps - Detergent, Rinse-aid Field convertible from single phase to three phase operation. 208-240VAC/60/1 and 3 phase Optional Equipment (consult factory) -
Page 9: Installation
Installation Receiving NOTE: The installation of your dishwasher must be performed by qualified service personnel familiar with food service equipment and must comply with all local health codes. Problems due to improper installation are not covered by the Limited Warranty. NOTE: The installation of the dishwasher must comply with all local electrical, plumbing, health and safety codes or in the absence of local codes, installed in accordance with the applicable... -
Page 10: Electrical Connections - Uh330 Ada With Booster 1Ph And 3Ph Wiring Diagram
Installation Electrical Connections - UH330 ADA with Built-in Booster 1PH and 3PH Wiring Diagrams ! ATTENTION ! ALL DISHWASHERS ARE SHIPPED FROM THE FACTORY WIRED FOR SINGLE PHASE OPERATION UNLESS SPECIFIED AT THE TIME OF ORDER. IF YOU ARE CONVERTING A SINGLE PHASE MACHINE TO THREE PHASE BE SURE TO FOLLOW THE BOOSTER WIRING INSTRUCTIONS ON PAGES 71-72. -
Page 11: Connecting Incoming Power To The Main Terminal Block 1Ph And 3Ph
Installation Connecting Incoming Power to the Main Terminal Block for 1PH and 3PH Machines with Boosters WARNING: Electrocution or serious injury may result when working on an energized circuit. Disconnect power at the main breaker or service disconnect switch before working on the circuit. Lock-out and tag the breaker or service disconnect switch to indicate that work is being performed on the circuit. - Page 12 Installation Connecting Incoming Power to the Main Terminal Block for 1PH and 3PH Machines with Boosters Refer to the photo below: Remove the lower front dishwasher panel. Remove the retaining fasteners (A) from the swing-out brackets and swing the chemical pump bracket (B) and the chemical circuit board bracket (C) out of the way as shown.
- Page 13 Installation Connecting Incoming Power to the Main Terminal Block for 1PH and 3PH Refer to the photo below: Provide a 3 foot/1 meter service loop in the power supply cable to service the machine Route the power cable from the rear of the machine to the terminal block making sure the cable does not touch the booster heater.
-
Page 14: Booster Heater Conversion From 1Ph To 3Ph Operation
Installation Booster Heater Conversion from 1PH to 3PH Operation ! VERY IMPORTANT ! THE BOOSTER HEATER IS WIRED FOR 1PH OPERATION WHEN SHIPPED. FOLLOW THE INSTRUCTIONS BELOW TO WIRE THE BOOSTER FOR 3PH. WARNING: Electrocution or serious injury may result when working on an energized circuit. - Page 15 Installation Booster Heater Conversion from 1PH to 3PH Operation (continued) ! VERY IMPORTANT ! THE BOOSTER HEATER IS WIRED FOR 1PH OPERATION WHEN SHIPPED. FOLLOW THE INSTRUCTIONS BELOW TO WIRE THE BOOSTER FOR 3PH. Disconnect the existing booster heater wires and change the booster heater element jumpers as shown in the illustration below Connect wires 1H1, 1H2, and 1H3 as shown below.
-
Page 16: Completing The 1Ph To 3Ph Electrical Conversion
Installation Completing the 1PH to 3PH Electrical Conversion ! ATTENTION ! CHANGE THE DATA PLATE ON THE LOWER FRONT PANEL OF THE MACHINE AFTER THE MACHINE IS WIRED FOR 3PH AND THE BOOSTER HEATER IS CONNECTED FOR 3PH. The data plate on the dishwasher lower front panel must be changed after the machine is converted from single phase operation to three phase operation. -
Page 17: Water Connection
Installation Water Connection ! ATTENTION! THE MODEL UH330 ADA REQUIRES A SINGLE 1/2" INCOMING COLD WATER SUPPLY LINE Model UH330 ADA Equipped with a 6 ft. flexible cold water fill hose with a 3/4" female garden hose connector. A 1/2" or larger main incoming supply line must be installed to the dishwasher. We recommend that a 1/2"... -
Page 18: Drain Connection
Installation Drain Connection ! VERY IMPORTANT ! IMPROPER INSTALLATION OF MACHINE DRAIN HOSE. Machine drain problems are often the result of improper installation and may not be covered by the limited warranty. ! VERY IMPORTANT ! Do not connect the drain hose to a disposer. The dishwasher will not drain correctly. ! IMPORTANT ! Make sure that the flexible water supply and drain hoses are not kinked. - Page 19 Installation Drain Connection (continued) NOTE Plumbing connections must comply with national, provincial local plumbing and sanitary codes. DO NOT CONNECT THE DRAIN HOSE TO A DISPOSER. DO NOT REDUCE THE SIZE OF THE DRAIN HOSE CONNECTION. DO NOT ADD ADDITIONAL LENGTH TO THE DRAIN HOSE. DO NOT ALLOW THE DRAIN HOSE TO KINK.
-
Page 20: Chemical Connections - Chemical Injection Points
Installation Chemical Connections ! VERY IMPORTANT ! ALWAYS USE A COMMERCIAL-GRADE NON-CHLORINATED DETERGENT. PLACE THE CHEMICAL SUPPLY CONTAINERS AS CLOSE TO THE MACHINE AS POSSIBLE. DO NOT ELEVATE THE CHEMICAL CONTAINERS ABOVE THE FINISHED FLOOR. ! VERY IMPORTANT ! Contact a chemical supplier for detergent and rinse-aid chemicals. The chemical supplier must adjust the chemical dispensing pumps for water hardness and food soil types. - Page 21 Installation Chemical Connections (continued) ! VERY IMPORTANT ! ALWAYS USE A COMMERCIAL-GRADE NON-CHLORINATED DETERGENT. PLACE THE CHEMICAL SUPPLY CONTAINERS AS CLOSE TO THE MACHINE AS POSSIBLE. DO NOT ELEVATE THE CHEMICAL CONTAINERS ABOVE THE FINISHED FLOOR. Chemical Injection Points 1. The detergent enters the wash tank compartment through a fitting at the right rear of the wash compartment.
-
Page 22: Pump Priming - Detergent And Rinse-Aid Dispensing Pumps
Installation Chemical Connections Priming the Dispensing Pumps ! VERY IMPORTANT ! The chemical dispensing pumps must be primed before operating the dishwasher and whenever the chemical container is changed. TEMPERATURE DETERGENT NORMAL EXTRA OFF/DRAIN WASH RINSE RINSE AID HEAVY PRIME CYCLE START POWER... -
Page 23: Pump Adjustments - Detergent And Rinse-Aid Dispensing Pumps
Installation Detergent and Rinse-aid Dispensing Pump Adjustments Chemical Dispensing Pump Adjustments ! ATTENTION ! The amount of dispensed chemical is determined by the run time of the dispensing time. Refer to the photo below: 1. The chemical dispensing pump run adjustment screws are located on the end of the chemical circuit board swing-out bracket. - Page 24 Installation Detergent and Rinse-aid Dispensing Pump Adjustments Chemical Dispensing Pump Adjustments ( continued) ! ATTENTION ! THE FILL AND SANITIZER ADJUSTMENT SCREWS ARE NOT USED ON THE UH330 ADA MACHINE. Refer to the photo below: To adjust the amount of chemicals dispensed by the pumps: Make sure the chemical containers are full and the pick-up tubes are in their proper containers.
-
Page 25: Operation
Operation Operation Loading Dish Racks ! VERY IMPORTANT ! DO NOT OVERLOAD THE DISH RACK. LOAD ONE DISH RACK INTO THE MACHINE AT A TIME. Prescrap and rinse the wares before loading to remove large food particles. Load soiled wares into the dish rack. Place plates and glasses in a peg rack. Place cups and bowls in a flat bottom rack. - Page 26 Operation Loading Dish Racks (continued) Load pots and pans in a flat-bottom rack. Load utensils in a single layer in a flat-bottom rack. Load cups and bowls in a flat-bottom rack. NEVER stack dish racks. Wash one dish rack at a time.
-
Page 27: Control Panel And Wash Mode
Operation Operation UH330 ADA Control Panel The illustration below shows the operator controls and temperature displays for the UH330 ADA. TEMPERATURE DETERGENT NORMAL EXTRA OFF/DRAIN RINSE RINSE AID HEAVY WASH PRIME CYCLE START POWER Prime Wash Temperature Start ON-OFF/DRAIN Time Select Push button Push button Digital Display... -
Page 28: Rinse Sentry Mode
Operation Operation Wash Mode (continued) light will flash for 15 seconds. Pressing the START button before the flashing EXTRA ind- icator stops flashing starts an EXTRA wash cycle of approximately 2 minutes. The EXTRA green indicator light will come on. and the green indicator light above the start switch will illuminate indicating the machine is in the wash mode. -
Page 29: Drain Mode
Operation Operation ! VERY IMPORTANT ! Draining Problems Related To Improper Installation. Problems with machine draining are often the result of improper installation. NEVER EXTEND OR ADD LENGTH TO THE DRAIN HOSE. Drain Mode The dishwasher will enter the drain mode whenever the ON-OFF/DRAIN power switch is pushed down to the OFF/DRAIN position. -
Page 30: Cleaning
Cleaning Cleaning VERY IMPORTANT DRAIN AND CLEAN THE DISHWASHER EVERY 2 HOURS OF CONTINUOUS OPERATION, AFTER EACH MEAL PERIOD, AND AT THE END OF THE DAY. ATTENTION DO NOT USE STEEL WOOL SCRUB PADS TO CLEAN THE MACHINE. DO NOT SPRAY THE EXTERIOR OF THE MACHINE WITH WATER. To clean your machine: Open the door and remove any dish rack inside the machine. -
Page 31: Cleaning The Rinse Arms
Cleaning Cleaning Rinse Arms There are two rinse arms. They are interchangeable. Remove the spindle assembly and end plugs in each pipe and flush the rinse pipes. Inspect the rinse arm bearings for wear and replace as necessary. Clean the rinse arm Spindle nozzles with a small Assembly... -
Page 32: Cleaning The Scrap Screen And Sump Strainer
Cleaning Cleaning Scrap Screen and Sump Strainer Scrap Lift the scrap screen straight up and out of Screen the machine to prevent debris from falling into the tank sump. Flush the scrap screen in a remote sink making sure to back-flush both sides of the screen. -
Page 33: Deliming
Deliming Deliming Cautions and Warnings A deliming agent must be used in accordance with your chemical supplier's instructions. DANGER: Death or serious injury may result when deliming solution is mixed with sodium hypochlorite sanitizing agent. Mixing may cause hazardous gases to form. Deliming solution and other acids must never be mixed with chlorine, iodine, bromine, or fluorine. -
Page 34: Maintenance
Maintenance Maintenance Follow the maintenance schedules below to keep the dishwasher operating efficiently. Daily Maintenance Make sure the water supply is on and that the drain is not clogged. Check the temperature displays to ensure they are operating. Make sure the dish racks are in good condition. Check the chemical containers and refill as required. -
Page 35: Troubleshooting
Troubleshooting Troubleshooting Illustrations Page Troubleshooting ....................28 Timer Board Diagnostics ..................29 Wash Codes Temperature Display Board ..............30 Rinse Codes Temperature Display Board ..............31 Booster Codes Temperature Display Board ............... 32 Timer Board Connection Diagram ................33 Temperature Display Board Power Terminal Connections ........... 34 Temperature Display Board M3-M4 Selector Slide Switch .......... -
Page 36: Troubleshooting
Troubleshooting Troubleshooting Condition Cause Solution Dishwasher will not run. Door not closed. Close door completely. Main power OFF. Check breaker on panel. Dishwasher OFF. Turn dishwasher power switch ON. Circuit board fuse blown. Contact service agent. Open supply valve. Low or no water. Main water supply off. -
Page 37: Timer Board Diagnostics
Troubleshooting Timer Board Diagnostics Follow the instructions below to quickly check the status of many machine components. -
Page 38: Wash Codes Temperature Display Board
Digital Temperature Display Codes Digital Temperature Display Codes Display codes that appear in the display windows indicate the operating condition of the machine. Refer to the illustrations below for the meaning of the codes. Wash Display Codes CAUSE WASH DISPLAY CODE Wash temperature 1 8 8 is below 100˚F... -
Page 39: Rinse Codes Temperature Display Board
Digital Temperature Display Codes Rinse Display Codes CAUSE RINSE DISPLAY CODE Rinse temperature 1 5 9 is below 100˚F RINSE TEMP WASH TEMP 1 5 6 Rinse temperature is above 200˚F WASH TEMP RINSE TEMP Booster tank is empty 1 4 9 &... -
Page 40: Booster Codes Temperature Display Board
Digital Temperature Display Codes Booster Display Codes Error Codes for Booster and Final Rinse Thermistors Only. CAUSE DISPLAY CODES 1 5 0 Booster overtemp lockout because booster temperature is greater than 210˚F. RINSE TEMP WASH TEMP NOTE: Booster is locked out for 10 minutes before being re-energized. -
Page 41: Timer Board Connection Diagram
Timer Board Connection Diagram ... -
Page 42: Temperature Display Board Power Terminal Connections
Blank Page This Page Intentionally Left Blank... -
Page 43: Temperature Display Board M3-M4 Selector Slide Switch
Digital Temperature Display Board New Version Earlier Version Please note that in order to implement the new changes and updates, due to the lack of real-estate available on the board, it was necessary to reverse the Power and Neutral input pin locations over the earlier version *If the new pin locations are not acknowledged, and the board is wired with reverse polarity, it will default to M3 mode, and neither heat output will be enabled.* New M4 Temperature control board... -
Page 44: Digital Temperature Display Board
Digital Temperature Display Board NEW TEMPERATURE CONTROL BOARD GENERATION No more M3-M4 switch. If there is120 volts present at the Booster, and Wash heat How does the board input terminals, the board will automatically set to M4 know? programming. New M4 Temperature control board adjustments Explained Fahrenheit or Wash Temp Adjustment button Rinse Temp Adjustment button... -
Page 45: M4 Temperature Control Board Operation Explained
Digital Temperature Display Board UNIVERSAL TEMPERATURE CONTROL BOARD M3/M4 MODELS ... - Page 46 Blank Page This Page Intentionally Left Blank...
-
Page 47: Service Replacement Parts
Service Replacement Parts Service Replacement Parts Illustrations Page Wash Pump/Motor Assembly ..................40 Base Assembly .......................42 Fill Piping Assembly ......................46 Fill Solenoid Valve ......................48 Final Rinse Piping - Prior to S/N W170568116 ..............50 Final Rinse Piping - Beginning with S/N W170568116 ............52 Heat Recovery Assembly - Prior to S/N W170568116 ............54 Heat Recovery Assembly - Beginning with S/N W170568116 ...........56 Booster and Pressure Switch Assemblies ................58... -
Page 48: Wash Pump/Motor Assembly
Wash Pump/Motor Assembly... - Page 49 Wash Pump/Motor Assembly Item Part Description Qty. 0512347 CAPACITOR 40µF 0512101 PUMP/MOTOR ASSEMBLY COMPLETE 115VAC/60/1 0313394 BRACKET, WASH PUMP 0512185 BOLT, HEX FLANGE 1/4-20 X 3/8" SST 110285 GASKET 114139 SEAL 0512345 IMPELLER 0501478 WASHER, PLAIN, 17/64" 106482 WASHER, LOCK, 1/4" 114144 NUT, M6 0512340...
-
Page 50: Base Assembly
Base Assembly To upper wash hub To rinse 16 17 35 34... - Page 51 Base Assembly Item Part Description Qty. 0512136 SCREEN, SCRAP ASSY. 0513324 FLANGE, PUMP SUCTION 0513677 O-RING 0512426 HEATER, 240VAC 2000W 0512099 O-RING 0313432 BRACKET, DOOR SWITCH 0508752 SCREW, 4-40 X 5/8" RH. HD. PHILL. SST 108954 NUT, GRIP 6-32 WITH NYLON INSERT SST 113604 THERMOSTAT, HI-LIMIT BI-METAL SNAP, 212°F 0512299...
- Page 52 Base Assembly Item Part Description Qty. 0513557 VALVE, FILL 1.0 GPM 0512792 SCREW, 10-32 X 1/4" RD. HD. PHILL. SST 0501379 SWITCH, 15A...
- Page 53 Blank Page This Page Intentionally Left Blank...
-
Page 54: Fill Piping Assembly
Fill Piping Assembly Note: This is a 3/4" From Hot Water garden hose fitting Supply Fill Valve Assembly on Next Page... - Page 55 Fill Piping Assembly Item Part Description Qty. 0502653 ELBOW, 90° 3/8" MPT X 1/2" HOSE 0512185 BOLT, HEX FLANGE 1/4-20 X 3/8" SST 0300065 SUPPORT, VALVE 0300203 CLAMP, VALVE 0502618 HOSE BARB, 1/2" X 3/8" MPT 0512985 CLAMP, HOSE 0509526 HOSE, 1/2"...
-
Page 56: Fill Solenoid Valve
Fill Solenoid Valve... - Page 57 Fill Solenoid Valve Item Part Description Qty. 0513557 VALVE, FILL 1.0 GPM 0502803 SCREEN, VALVE STRAINER 0502804 GASKET, CAP 0513674 WASHER, FLOW 1.0 GPM 0502811 KIT, REBUILD 0505229 GUIDE 0501406 SCREW, SLOT SS RH 8-32 X 1/2" 0505235 COIL, 115V 60HZ 10W 0502807 GASKET, OUTLET (COPPER)
-
Page 58: Final Rinse Piping - Prior To S/N W170568116
Final Rinse Piping - Prior to S/N W170568116 From Manifold Rinse Outlet Port From Booster... - Page 59 Final Rinse Piping - Prior to S/N W170568116 Item Part Description Qty. 0512985 CLAMP, HOSE 107417 HOSE, RUBBER 1/2" ID X .84" OD 0513110 MANIFOLD, RINSE 0508817 PLUG, 1/8" HEX COUNTERSUNK 0502563 CLAMP 0513679 HOSE, 1" ID X 1-3/8" BRAIDED 0513613 HOSE, MOLDED, RINSE DISCHARGE 115231...
-
Page 60: Final Rinse Piping - Beginning With S/N W170568116
Final Rinse Piping - UH330 ADA beginning with S/N W170568116 and above... - Page 61 Final Rinse Piping - UH330 ADA beginning with S/N W170568116 and above Item Part Description Qty. 0512985 CLAMP, HOSE 107417 HOSE, RUBBER 1/2" ID X .84" OD 0514324 MANIFOLD, RINSE PUMP 104624 SCREW, 8-32 X 3/8" TRUSS HEAD 0502563 CLAMP 0514323 HOSE, MOLDED RINSE SUCTION 112612...
-
Page 62: Heat Recovery Assembly - Prior To S/N W170568116
Heat Recovery Assembly - Prior to S/N W170568116... - Page 63 Heat Recovery Assembly - Prior to S/N W170568116 Item Part Description Qty. 0513572 BLOWER 0513574 BEARING (COMES WITH RUBBER HSG.) 0514240 COIL, HEAT RECOVERY 0313599 DEFLECTOR, FAN AIR 0313594 MOUNT, FAN MOTOR 0513733 SEAL, V-RING 1/4" 0503580 NUT, 10-32 SST 0513573 MOTOR, BLOWER 115VAC 0513732...
-
Page 64: Heat Recovery Assembly - Beginning With S/N W170568116
Heat Recovery Assembly - UH330B beginning with S/N W170568116 above... - Page 65 Heat Recovery Assembly - UH330B beginning with S/N W170568116 above Item Part Description Qty. 0513572 BLOWER 0513574 BEARING (COMES WITH RUBBER HSG.) 0514293 COIL, HEAT RECOVERY M4.2 0314311 DEFLECTOR, FAN AIR M4.2 0313594 MOUNT, FAN MOTOR 0502808 WASHER 0503580 NUT, 10-32 SST 0513573 MOTOR, BLOWER 115VAC 0513732...
-
Page 66: Booster And Pressure Switch Assemblies
Booster and Pressure Switch Assemblies From heat exchanger outlet port TO RINSE PUMP... - Page 67 Booster and Pressure Switch Assemblies Item Part Description Qty. 109835 SCREW, #8 X 1/2" PAN HD. PHIL. SST 0503580 NUT 10-32 SST 0507709 WASHER, FLAT #10 SST 0313587 BRACKET, PRESSURE SWITCH H31171 SWITCH, PRESSURE H160121 HOSE, EPDM 0513731 ELBOW, 1/4 NPT X 1/2" HOSE (C/W NUT) 0713565 TANK, BOOSTER 0512985...
-
Page 68: Booster Heater - Beginning With S/N W170568116
Booster Heater - UH330 ADA beginning with S/N W170568116 and above... - Page 69 Booster Heater - UH330 ADA beginning with S/N W170568116 and above Item Part Description Qty. 107908 COVER, ELEMENT 100003 NUT, PLAIN 1/4-20 SST 106482 WASHER, LOCK 1/4" SPLIT SST 111885 PAPER, FISH 0514296 BOOSTER, ELEMENT 4.3 KW 109985 SEAL, ELEMENT BOOSTER 0513310 THERMISTOR, PROBE 100939...
-
Page 70: Booser Hoses And Level Sensor - Beginning With S/N W170568116
Booster Hoses and Level Sensor - UH330 ADA beginning with S/N W170568116 and above... - Page 71 Booster Hoses and Level Sensor - UH330 ADA beginning with S/N W170568116 and above Item Part Description Qty. 0503580 NUT, KEPS 10-32 SST 0313865 BRACKET, SENSOR 0513831 SENSOR, LEVEL 0513696 CLAMP, DOUBLE SPRING 10.7 MM PLATED H160121 HOSE, EPDM 0513736 CLAMP, EMT 1/2"...
-
Page 72: Chemical Dispensing Pumps
Chemical Dispensing Pumps Tank Detergent Fitting RINSE-AID IMPORTANT: DETERGENT Check Items #8 and #14 every 6 months and replace if stretched or worn. - Page 73 Chemical Dispensing Pumps Item Part Description Qty. 0501869 STRAINER 0306363 TUBE, 3/8" ID X 12" LG. STIFFENER 0505483 LABEL, RINSE-AID HOSE 0502666 HOSE, 1/8" ID X 1/4" OD PVC 0503695 LABEL, DETERGENT HOSE 0502667 HOSE, 1/4" ID X 3/8" OD PVC 0501519 TIE, NYLON 4"...
-
Page 74: Power Input Block
Power Input Block... - Page 75 Power Input Block Item Part Description Qty. 0313396 COVER, BOX WIRING 0501411 SCREW, 10-32 X 1/4", TRUSS HD. 0512432 CONTACTOR, 3-POLE 120VAC COIL 0509527 BLOCK, TERMINAL, 4-POLE 103310 LUG, GROUND 0313395 BOX, WIRING 107964 BUSHING, STRAIN RELIEF, SMALL 0503592 LABEL, GROUND...
-
Page 76: Timer Control Board Assembly
Timer Control Board Assembly Front View Rear View... - Page 77 Timer Control Board Assembly Item Part Description Qty. 0313397-1 BOX, CONTROL BOARD 0513575 TIMER CKT. BD. 0501464 SCREW, 10-24 X 3/8; TRUSS HD. SST 0513698 FUSE, 6A 250V 0313398-1 COVER, BOX 0501411 SCREW, 10-32 X 1/4" SST 0501373 SWITCH, BOOSTER FILL 0512973 STANDOFF 107964...
-
Page 78: Wash And Rinse Spray Arms And Drain Valve
Wash and Rinse Spray Arms and Drain Valve... - Page 79 Wash and Rinse Spray Arms and Drain Valve Item Part Description Qty. 0501478 WASHER, 17/64 id X 9/16" OD SST 107967 NUT, HEX 1/40-20 NYLON INSERT SST 0514254 HUB, UPPER SPRAY ARM 107873 WASHER, PACKING 110215 PLUG, UPPER MANIFOLD 0502571 CLAMP, HOSE GEAR 1-1/2"...
-
Page 80: Control Panel
Control Panel... - Page 81 Control Panel Item Part Description Qty. 0512221 SWITCH, ROCKER DPST 250V NEON 0512213 SWITCH, PIEZIO 0512232 LIGHT, INDICATOR, GREEN 0512226 SWITCH, ROCKER RND SPDT MOMENTARY 0501408 SCREW, TRUSS PHIL. SST 8-32 X 1/4" 0513579 LABEL, FACIA 0713583 PANEL, FACIA 0512357 STANDOFF, LED DISPLAY BOARD 0503580 NUT, 10-32...
-
Page 82: Panels
Panels... - Page 83 Panels Item Part Description Qty. 0313406 PANEL, FRONT 100779 SCREW 1/4-20 X 5/8" TRUSS SS PHIL 0513735 GASKET 0313403 PANEL, LH SIDE 0503718 FOOT, ADJUSTING 0313402 PANEL, RH SIDE 0313584 PANEL, TOP 100007 SCREW, TRUSS SLOT SST 10-32 X 3/8" 0313431 PANEL, REAR 0714208...
-
Page 84: Door Assembly
Door Assembly... - Page 85 Door Assembly Item Part Description Qty. 0714245 DOOR ASSEMBLY 0513558 GASKET, DOOR TOP 0713428 HINGE, RH ASSY 0501476 WASHER, 9/32" X 5/8" OD SS 0501422 BOLT, HEX SS 1/4-20 X 1-1/2" 0513332 SPRING, DOOR 0713429 HINGE, LH ASSY 0313430 ARM, DOOR SPRING 0512320 GASKET, STEAM...
-
Page 86: Dish Racks, Line Strainer, Prv
Dish Racks, Line Strainer, PRV... - Page 87 Dish Racks, Line Strainer, PRV Item Part Description Qty. 101273 DISH RACK, FLAT-BOTTOM 101285 DISH RACK, PEG 104421 STRAINER, LINE 1/2" BRONZE 108265 VALVE, PRESSURE REGULATING (PRV)
- Page 88 Blank Page This Page Intentionally Left Blank...
-
Page 89: Electrical Schematics And Timing Charts
Electrical Schematics Electrical Schematics and Timing Charts Illustrations Page Heat Recovery - Prior to S/N W170568116 ..............82 Chemical Alarm Schematics ....................83 Timing Chart ........................84 Heat Recovery -Beginning with S/N W170568116 ............85... - Page 90 Electrical Schematic UH330B...
- Page 91 Chemical Alarm Schematic SINGLE PHASE THREE PHASE...
- Page 92 Timing Chart UH330 ADA Timing Charts TIMING CHART FOR HEAT RECOVERY FILL CYCLE Timing Chart for Heat Recovery Fill Cycle: 1) The heat recovery fill cycle is enabled as soon as the booster tank is full and has reached the required temperature. 2) The wash tank will fill with hot water from the booster tank.
- Page 93 Heat Recovery Electrical Schematic SINGLE PHASE THREE PHASE...
- Page 94 Blank Page This Page Intentionally Left Blank...
Need help?
Do you have a question about the M4.2 Series and is the answer not in the manual?
Questions and answers