Table of Contents
Advertisement
Quick Links
Advertisement
Table of Contents
Troubleshooting

Related Manuals for Pantum CM2100 Series


Summary of Contents for Pantum CM2100 Series
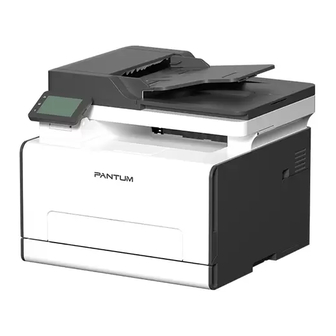
- Page 1 Pantum CM2100 Series Color laser multifunction printer (ADF model)
- Page 2 Copyright The copyright of this User Guide is owned by Zhuhai Pantum Electronics Co., Ltd. It is prohibited to copy, translate, modify and transmit this User Guide by any means or forms without the prior written consent of Zhuhai Pantum Electronics Co., Ltd.
- Page 3 Disclaimer For a better user experience, Zhuhai Pantum Electronics Co., Ltd. reserves the right to make changes to the User Guide. The information contained herein is subject to change without notice. Users are responsible for any damages arising from failing to follow this User Guide. Meanwhile, except the express warranty made in the product maintenance manual or service commitment, Zhuhai Pantum Electronics Co., Ltd.
- Page 4 Safety Precautions Disconnect the power supply The product should be placed close to or easily accessible to power sockets, so as to allow easy disconnection of power supply! Laser Safety The laser radiation is harmful to the human body. Since laser components are completely sealed in the printer, laser radiation will not leak.
- Page 5 Safety Warning Please note the following safety warnings before using the printer: Warning There is a high-voltage electrode inside the printer. Before cleaning the printer, make sure the power is turned off! Plugging and unplugging the power cord plug with a wet hand may result in an electric shock.
- Page 6 Safety Information Conventions CAUTION: A caution indicates a potentially hazardous situation that could injure you. Note:A note indicates the information that could help you or something that could damage the product hardware or software. Different types of caution statements include: CAUTION - POTENTIAL INJURY: Indicates a risk of injury.
- Page 7 CAUTION - POTENTIAL INJURY: Do not cut, twist, bind, crush, or place heavy objects on the power cord. Do not subject the power cord to abrasion or stress. Do not pinch the power cord between objects such as furniture and walls. If any of these things happen, it could result in a risk of fire or electrical shock.
- Page 8 CAUTION - ROTATING FAN BLADES: To avoid the risk of laceration from moving fan blades, turn off the printer and unplug the power cord from the electrical outlet before accessing areas marked with this symbol. CAUTION - POTENTIAL INJURY: This product uses lasers. Use of controls or adjustments or performance of procedures other than those specified in the User’s Guide may result in hazardous radiation exposure.
- Page 9 Precautions Precautions before Using the Printer: 1. Read and understand all instructions; 2. Familiarize yourself with the basic principles associated with operating electrical appliances; 3. Comply with all warnings and instructions marked on the equipment or specified in the manual supplied with the equipment;...
- Page 10 23. This product is sold as a complete machine. The consumers can go to Pantum Aftersales Service Centre to purchase parts they need. If the product sold is inconsistent with the package list, please go to the specified Aftersales Service Centre to solve the problem;...
- Page 11 Radio Equipment directive 2014/53/EU only for models ending with suffix “W”. The manufacturer of this product is: Zhuhai Pantum Electronics Co., Ltd., Building 02,06 and 08,No.888 Shengping Avenue, Pingsha Town, Zhuhai City,...
-
Page 12: Table Of Contents
Table of Contents 01 Before Using the Printer ......................... 1 Product View ..........................1 Control Panel ..........................3 Home screen ......................... 4 Touch screen button ......................5 Function of power indicator ....................5 02 Paper and Print Media ........................6 Selecting paper .......................... - Page 13 Red Auto Enhancement function ..................23 Set transfer print parameters ..................... 25 08 Copying ............................27 Copying function ........................27 Common copying setting ......................28 Multipage ..........................28 Collated copy ........................29 manual duplex copying ...................... 29 ID copy settings .......................... 31 Receipt setting ..........................
- Page 14 The paper is jammed in the manual feed tray ..............54 The paper is jammed in the multi-purpose feed tray ............56 Paper jam in the rear cover ....................57 Paper jam in the automatic document feeder (ADF) ............60 Software Failure..........................
-
Page 15: Before Using The Printer
Before Using the Printer Product View Side view Cover of automatic document This is used to remove the paper jammed in scanning for feeder the ADF. Feed tray of automatic This is used to place originals scanned from the ADF. document feeder Front USB interface Scan into the USB flash disk... - Page 16 For placing the media for printing from the standard feed Standard feed tray tray. Waste toner bottle Store the waste toner produced in printing. Glass Platen To put the original of tablet PC for scan. Width guide plate of standard Slide paper deflector to adapt to paper width.
-
Page 17: Control Panel
Control Panel Overview of control panel Name Functions Turn the power on or off and press this button under Ready state to Power switch enter energy-saving mode. Press and hold this button for more than 2s to turn the printer power off. •... -
Page 18: Home Screen
Home screen The layout of the main screen is shown below: Name Functions Copy Access to “Copy” menu and make a copy. Scan Access to “Scan” menu and scan document. ID copy Access to “ID copy” menu and make an ID card copy. Bill copy Access to “Bill copy”... -
Page 19: Touch Screen Button
Touch screen button Layout of touch screen buttons of printer control panel is shown as below: Name Functions Radio button Select or delete an item. Scroll up and down. Slide the button Save setting. Save” button Function of power indicator Status displayed by Status... -
Page 20: Paper And Print Media
Paper and Print Media Selecting paper Plain paper1(70 89g/m²), Plain paper2(90 105g/m²),thin Media Type paper(60 69g/m²) A4 A5 A6 Legal Letter JIS-B5 ISO B5 Executive Media size Folio Oficio Statement 16K 32K Big 16K Big 32K Standard feed tray B6,Customize paper Media weight 60 105 g/m²... -
Page 21: Loading Paper
This may be due to incorrect operation, inappropriate temperature and humidity, or other factors beyond the control of Pantum. Before purchasing large quantities of print media, make sure that the print media meets the specifications specified in this User Guide. - Page 22 To avoid paper jams, do not remove the tray while the printer is busy. Note:• 2. Load the paper with the printable side facing up. For single-sided printing, load the paper with the printing side facing up and the header facing Note: •...
-
Page 23: Install The Multipurpose Feed Tray
3. Adjust the guide to match the size of the loaded paper. 4. Insert the tray. Install the multipurpose feed tray 1. Adjust the guide to match the size of the loaded paper. -
Page 24: Paper And Manuscript Use Process
2. Load a sheet of paper with the printable side facing up. For single-sided printing, load the paper with the printable side facing up and the top edge going Note: • into the printer first. • For better printing effect, it is recommended to use new, undamaged paper. 3. -
Page 25: Scanning With Tablet
Scanning With Tablet Note: • Printer appearance may differ because of various models and functions, so the schematic diagram is only for your reference. Operation steps: 1. Lift up the scanner cover. 2. Load the manuscript face down. - Page 26 3. Align the manuscript to match the appropriate paper size. Note: • If the manuscript does not match with any size marker, please align the upper-left corner of the manuscript with the arrow. • Make sure there is no document in the ADF. If a document is detected in the ADF, it will be more preferential than that on glass platen.
-
Page 27: Scan With The Automatic Document Feeder (Adf)
Scan with the automatic document feeder (ADF) 1. Put the original into the ADF with its front upward and top fed first. 2. Adjust the document guide till it gets close to the paper stack. Note: • The ADF supports feeding 50 pieces of paper at most that should be fed one by one. -
Page 28: Driver Installation And Uninstallation
2. Connect the printer to computer via USB cable, then power the printer on. 3. Insert the accompanying installation disk into the computer CD drive, or log in to Pantum official website (www.pantum.com) to download the drive. -
Page 29: Uninstall Driver
The information on your computer screen may differ because of multiple operating systems. 1. Click "Go" - "Applications" - "Pantum" - "Utilities" - "Pantum Un-install Tool". 2. Delete the driver as instructed in the pop-up Uninstall window. -
Page 30: Wired Network Setup (Applicable To Wired Network Models)
Wired network setup (applicable to wired network models) In case printers support wired network printing, they can be connected to network to control printer to print in wired network mode. Set IP Address The IP address of the printer may be automatically obtained through DHCP function or set manually. -
Page 31: Wireless Network Setup (Applicable To Wi-Fi Models)
Wireless network setup (applicable to Wi-Fi models) Based on the model, the printer model with Wi-Fi print function supports two types of wireless network connection: Wi-Fi Station and Wi-Fi Direct. Usually, only one connection is enabled between the computer and the printer at a time. Wi-Fi Station:connecting to a wireless device via router 1. -
Page 32: Setup Methods Of Wireless Network Setup Tools
Setup methods of wireless network setup tools Take the wireless network setup tool in computer. 1) Windows system: Click the “Start menu” – “All programs” - “Pantum”- Product name – “Wireless network setup tool”. 2) macOS system: click "Go" - "Applications" - "Pantum" - "Utilities" - "Wireless Network Configuration Tool"... -
Page 33: Web Server
Web server You can manage printer setup via the embedded Web server. Visit the embedded Web server 1. Turn on the power of printer and computer. 2. Connect the printer to network to ensure that the printer is connected to the network where the computer is connected to. -
Page 34: Print
Print Print Function You can set the print function through "Start"-"Devices and Printers"- select corresponding printerright click – set print function in "Printing preferences". Some functions are as follows: Functions Diagram Color Printing Monocolor printing Collate Print Reverse Print N-in-1 Poster Print(for Windows Operation System only) Zoom Print... -
Page 35: Duplex
Custom Size Note: • You can select the 2 x 2 Poster Print in N-in-1 to enable the poster printing function. • You can open the Printing Preferences and click Help button to view the specific function explanation. Duplex The printer supports duplex printing of plain paper. Paper size supported by the duplex printing: A4, Letter, Legal, Folio, Oficio. -
Page 36: Print Without Margins
Print without margins Print without margins is supported. You can adjust the margins and offset values of the printed portrait in the following steps. 1. Press the menu key on the printer control panel to enter the ready interface. 2. Select "Settings"-"Print Settings"-"Margin Settings" to adjust the offset values of the left margin and the top margin. -
Page 37: Red Auto Enhancement Function
Red Auto Enhancement function When the red content on the printed portrait does not meet the expectation, you can try to adjust the color of the portrait via the "Red Auto Enhancement" function. The operation steps are as follows: The Windows 7 system is taken as an example in the following steps. The information indicated on your computer screen may vary from operating system to operating system. - Page 38 5. In the interface of "Red Enhancement Option Setting", click the "Print A Color Atlas" button to print the color atlas. 6. Drag " " onto the portrait to be adjusted, and adjust the value of "Print A Color Atlas" as required by referring to the printed color atlas.
-
Page 39: Set Transfer Print Parameters
Set transfer print parameters If the printed image is mottled or blotchy-looking, you can try to adjust the transfer print parameters through Printer Setup. The steps are as follows: (Suitable for printers installed via USB connection) Windows 7 is taken as the example in the following operation. The information on your computer screen may differ because of multiple operating systems. - Page 40 Note:• You can also set transfer print parameters through buttons on control panel.
-
Page 41: Copying
Copying Copying function Instructions Copying function Set the paper size of the originals. Copy source Copy To Set the paper size and type of the specified tray. Resizing Reduce or enlarge the size of image copied. Intensity Adjust deep-light copying effect by setting intensity. Duplex copying It supports manual duplex copying for originals. -
Page 42: Common Copying Setting
Common copying setting Change related setting through setting menu for better copy result. 1. Select “Copy” button in printer control panel; 2. Determine copy setting, click “Copy” button to copy. Note: • Once the settings options for image quality, brightness and contrast, zoom, and paper size are selected, the settings will remain in effect. -
Page 43: Collated Copy
Collated copy The "Collated Copies" feature supports only copying with the automatic document feeder (ADF). The collated copy includes 2 modes: Startup: Closed: manual duplex copying In case of manual duplex copying of original, choose ADF mode. Steps to use Manual Duplex Original Copying 1. - Page 44 2. Operate in accordance with the procedure of ordinary copy; choose the “manual duplex copy” mode and press “OK” to save the settings. 3. Click “Copy” button to copy. 4. Paper exited should be with the direction as shown in the figure: 5.
-
Page 45: Id Copy Settings
ID copy settings For better copying effects, you can change the corresponding settings via the “ID Copy Settings” menu. 1. Select “ID Copy” button in printer control panel; 2. Determine copy setting, click “Copy” button to copy. Receipt setting For better copying effect of bills, you can enter the "Bill Copy Setting" menu to change relevant settings. -
Page 46: Scan
You can scan from the PC scan application via USB, wired, or wireless connection. Make sure the the printer is properly connected before scanning. Windows system scan Pantum Scan Application Operation Steps: 1. Double click on "Pantum Scan Application" on the computer. 2. The prompt window is shown as below:... -
Page 47: Macos System Scan
3. Set Scan in the right list. Click "Scan" on the bottom right corner and start scan. Note: • Images in the format of BMP, JPG, TIF, PDF, PNG, and OFD can be scanned by the Pantum scanning application software. The image text recognition is available for documents in the format of DOCX, XLS, XLSX, PPTX, TXT and searchable PDF.(If you need to use the image text recognition function,... -
Page 48: Scan To Pc
Scan to PC You may operate the printer's control panel to scan a file to PC. (Only support connection method of USB connection line.) 1. Be sure the printer and the computer are both switched on and connected with each other properly. -
Page 49: Scan Usb Drive
Scan USB drive This printer supports scanning files to USB without a computer. Before operation, please make sure the USB has enough storage space. The specific operation steps are as follow: Insert the USB into the printer’s front USB interface. Put an original on the glass platen or into the ADF Click “Scan-Scan USB”... -
Page 50: Routine Maintenance
Routine Maintenance • Note: Printer appearance may differ because of different models and functions, so the schematic diagram is only for your reference. Cleaning the Printer Some parts of the printer are still in high temperature within a short time after use. To prevent burns, please don’t directly touch places labeled with high temperature warning in contact with internal components after opening the printer’s front or rear cover. - Page 51 1. Turn off the printer, and then unplug the power cord from the electrical outlet. 2. Remove the paper from the standard exit and feed tray. 3. Remove any dust, lint, and pieces of paper around the printer using a soft brush or vacuum. 4.
- Page 52 Do not use household cleaners or detergents, as they may damage the surface of the printer. Note: • • Make sure that all areas of the printer are dry after cleaning. 5. Connect the power cord to the electrical outlet, and then turn on the printer. To avoid the risk of fire or electrical shock, connect the power cord to an appropriately rated and properly grounded electrical outlet that is near the product and easily accessible.
-
Page 53: Adf Cleaning
ADF cleaning the machine with the ADF should be regularly cleaned, removing dirt on the top cover of the Note: • ADF. Please wipe the place as shown in figure with a soft cloth. - Page 54 1. Use a soft cloth to wipe the outside of the printer clean. 2. Open the scanner cover and then wipe the glass platen gently with a soft cloth.
-
Page 55: Replacing Parts And Consumables
Replacing parts and consumables 1. Use and maintenance of toner cartridge. Please use the original toner cartridge for better printing quality. Please pay attention to the following items while using the toner cartridge: • Please keep the toner cartridge in a dry and dark place. •... -
Page 56: Replacing The Toner Cartridge
Replacing the toner cartridge If the tray is unfolded, remove it before replacing the toner cartridge. Note: • 1. Open the front cover, and then push it down hard. - Page 57 2. Pull out the toner cartridge tray. 3. Remove the used toner cartridge.
- Page 58 4. Unpack the new toner cartridge. • Do not expose the bottom of the toner cartridge to direct light. Prolonged exposure to light may Note: cause print quality problems. • Do not touch the bottom of the toner cartridge. Otherwise it will affect the quality of future print jobs.
- Page 59 6. Insert the toner cartridge tray, and then close the cover.
-
Page 60: Replacing The Waste Toner Bottle
Replacing the waste toner bottle 1. Remove the used waste toner bottle. To avoid toner leakage, keep the waste toner bottle upright. Note: • 2. Unpack the new waste toner bottle. 3. Insert a new waste toner bottle. -
Page 61: Replace The Tray
Replace the tray 1. Remove the used tray. 2. Unpack the new tray. 3. Insert a new tray. -
Page 62: Move The Printer
Move the printer Move the printer to another location :To avoid the risk of electrical shock, do not place or use this product near water or wet locations. :If the printer weighs more than 18 kg, then it requires two or more trained personnel to lift it safely. -
Page 63: Troubleshooting
Troubleshooting Please read this section carefully. It may help you to solve common problems encountered during the printing process. If the problems persist, please contact Pantum Aftersales Service Centre. Prior to handling common problems, first check that: • The power cord is connected correctly and the printer is powered on. -
Page 64: Use Recommended Paper
• Do not load or remove a tray while the printer is printing. • Do not load too much paper. Make sure that the stack height is below the maximum paper fill indicator. • Do not slide paper into the tray. Load paper as shown in the figure. •... -
Page 65: Locate Jammed Paper
Locate jammed paper Paper jam locations Standard exit Multipurpose feed tray Standard feed tray Automatic document feeder (ADF) Rear cover... -
Page 66: Cleaning Jammed Paper
Cleaning Jammed Paper The paper is jammed in the standard feed tray 1. Remove the tray. 2. Remove the jammed paper. Make sure that all paper fragments are removed. Note: •... - Page 67 3. Insert the tray. 4. Open the rear cover. :The inside of the printer might be hot. To reduce the risk of injury by a hot component, allow the surface to cool before touching it. 5. Remove the jammed paper. Make sure that all paper fragments are removed.
-
Page 68: The Paper Is Jammed In The Manual Feed Tray
The paper is jammed in the manual feed tray 1. Remove the standard feed tray and press the blue unlock button on the left. 2. Pull out the jammed paper. - Page 69 3. Press and push up the metal plate to return it to its original position. 4. Push the standard feed tray in.
-
Page 70: The Paper Is Jammed In The Multi-Purpose Feed Tray
The paper is jammed in the multi-purpose feed tray 1. Open the front cover, and then push it down hard. 2. Remove the jammed paper. Make sure that all paper fragments are removed. Note: • 3. Close the front cover. -
Page 71: Paper Jam In The Rear Cover
Paper jam in the rear cover 1. Open the rear cover. : The inside of the printer might be hot. To reduce the risk of injury by a hot component, allow the surface to cool before touching it. 2. Remove the jammed paper. Make sure that all paper fragments are removed. - Page 72 • Fuser area...
- Page 73 • Below the fuser area • Duplex unit 3. Close the cover.
-
Page 74: Paper Jam In The Automatic Document Feeder (Adf)
Paper jam in the automatic document feeder (ADF) 1. Open the ADF's top cover. 2. Remove the paper jammed from the ADF. - Page 75 3. After removing the paper jamed, close the top cover and then the printer will be back to the ready state. 4. If it is difficult to remove the paper jammed, please try to open the scanner cover and remove it from the pressing block.
-
Page 76: Software Failure
Software Failure Problem Solution Reinstall the printer driver. The printer icon does not appear in the Ensure that the USB interface cable and the power cord "Devices and Printers" folder. are properly connected. If the failure still exists after restarting the printer, please The printer is in Ready mode but it will not reinstall the printer driver. - Page 77 Please cancel the current scan job or wait for the completion of other scan jobs. Scan failed Scanner internal failure. Please contact Pantum Customer Service. No paper in ADF If you have selected ADF as Please put in the original properly.
-
Page 78: Common Troubleshooting
Common Troubleshooting Common Problems Type of Problem Cause Solution fault Printing Poor print See details in Image Defects. See details in Image Defects. problems quality Please contact the customer service Failed to copy • The scanner is damaged. center. Problems •... - Page 79 • The print media has been • Please install the printing medium loaded incorrectly. correctly. If a special printing • The print media is out of the medium is used, enable the supported media range. multipurpose feed tray mode. Paper feed The feed roller is dirty.
-
Page 80: Image Defects
Image Defects Problem Cause Solution • Pull out the toner cartridge tray, remove • Toner cartridge is not installed the toner cartridge, then insert the toner properly. cartridge, and insert the toner cartridge tray. Blank or white pages • A higher density is set when •... - Page 81 • The tray fails to load the media • Please load the paper correctly. See properly. Paper Feeding for how to feed the paper • The print margin is set incorrectly. correctly. • Please set the correct print margin. • Make "Position Calibration" or "Full Calibration"...
- Page 82 • The toner cartridge is dirty or leaks • Please contact the customer service toner. center. • The print media does not meet the • Please properly use the print media within usage specification. For example, the the specification range. print media is textured, damp, or too •...
- Page 83 • The tray fails to load the media • Please load the paper correctly. See properly. Paper Feeding for how to feed the paper • Toner cartridge is not installed correctly. properly. • Pull out the toner cartridge tray, remove •...
- Page 84 • The paper used has been stored in • Keep the paper in its original wrapper the air for a prolonged time. before use. • Toner cartridge is not installed • Pull out the toner cartridge tray, remove properly. the toner cartridge, then insert the toner •...
-
Page 85: Product Specifications
Note: • Specification values are slightly different for different models of printers with different functions. These values are based on the initial data. For more information about the latest specification, please visit: www.pantum.com. Overview of the Specifications Product Size(W*D*H) 400mm*400mm*342mm... -
Page 86: Print Specifications
Microsoft Windows XP/ Windows 7/ Windows 8.1/ Windows 10/ Windows 11/Windows Server 2012/2016/2019/2022 32/64 Bit macOS 10.10/10.11/10.12/10.13/10.14/10.15/11.5/11.6/12.0.1/12.3/12.4/12.5/12 .6/13.1 Linux Ubuntu 16.04 32/64 Bit / Ubuntu 18.04/Ubuntu 20.04/Ubuntu 22.04 Operating system Astra Linux Special Edition V1.6/Redhat 8.0/Debian 64 Bit)/ 10.0/Centos 7/Centos 8.2 32/64 Bit iOS 11.0-16.5 Android 6.0-13.0... -
Page 87: Copy Specifications
Copy Specifications Copy Speed 20cpm Flatbed <17 s FCOT ADF<18 s Maximum number of continuous 99 pages copies/pages Zoom ratio 25%~400% Other Copy ID Printing, Document Printing, N-in-1 Printing, Clone Printing, Collated Functions Printing Scan Specifications Scan Type Flatbed +ADF ADF scanning speed 20ppm Scanning time for Flatbed <10 s...
Need help?
Do you have a question about the CM2100 Series and is the answer not in the manual?
Questions and answers