
Related Manuals for PROLiNK Professional II+ Series


Summary of Contents for PROLiNK Professional II+ Series
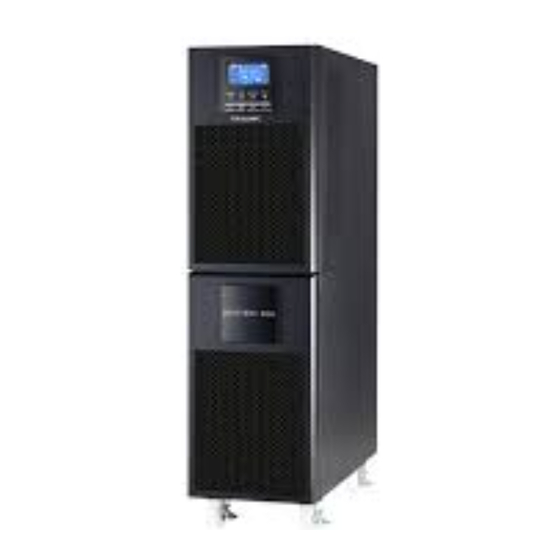
- Page 1 User Guide Professional II+ Series (1P/1P) Tower Type INSPIRE 906-ES, INSPIRE 910-ES Version 1.00 (English)
-
Page 2: Table Of Contents
Table of Contents 1. SAFETY AND EMC INSTRUCTIONS ..................... 1 1-1. Transportation and Storage ....................1 1-2. Preparation ........................... 1 1-3. Installation ..........................1 1-4. Connection Warning ......................2 1-5. Operation ..........................2 1-6. Standards ..........................3 2. INSTALLATION AND OPERATION ...................... 3 2-1. -
Page 3: Safety And Emc Instructions
1. SAFETY AND EMC INSTRUCTIONS Please carefully read the following user instructions and safety instructions before installing the unit or using the unit! 1-1. Transportation and Storage Please transport UPS systems use only the original pakaging to protect against shocks and impacts. -
Page 4: Connection Warning
1-4. Connection Warning • There is no standard feedback protection inside, please make sure the UPS has been isolated with safe before installation. The UPS isolation device must be able to carry current to the UPS input. • UPS must be connected to the TN grounding system. •... -
Page 5: Standards
1-6. Standards *Security IEC/EN 62040-1 *EMI Conducted Emission..........:IEC/EN 62040-2 Category C3 Radiated Emission............:IEC/EN 62040-2 Category C3 *EMS ESD................:IEC/EN 61000-4-2 Level 4 RS................:IEC/EN 61000-4-3 Level 3 EFT................:IEC/EN 61000-4-4 Level 4 SURGE..............:IEC/EN 61000-4-5 Level 4 CS................:IEC/EN 61000-4-6 Level 3 Power-frequency Magnetic field....:IEC/EN 61000-4-8 Level 4 Low Frequency Signals.......:IEC/EN 61000-2-2 Warning: This is a product for commercial and industrial applications within the constraints of a... -
Page 6: Back Panel Display
2-2. Back Panel Display INSPIRE 906-ES / INSPIRE 910-ES Diagram 1: 6K/10K Back Panel Diagram 2: Terminal Input/Output Tower Additional battery connectors 2. RS-232 communication port 3. Intelligent slots 4. USB communication port 5. Connector intended as Emergency power off function (EPO connector) 6. -
Page 7: One Ups Installation
2-3. One UPS Installation Installation and wiring must be done in accordance with local electrical laws/regulations and carried out the following instructions by professional personnel. Make sure the electrical wiring and breakers in the building are sufficient for UPS capacity to avoid the danger of electric shock or fire. -
Page 8: Software Installation
Warning : • Make sure the DC breaker or other protection device between the UPS and the external battery is plugged in. If not, please install carefully. Turn off the Battery breaker before installation. NOTE: Set the breaker on the external battery in the "OFF" position and then plug it in External battery. •... -
Page 9: Led Indicator And Lcd Panel
3-2. LED Indicator and LCD Panel Panel LCD LED Indicator LED Indicators: There are 4 LEDs on the front panel to indicate the working status of the UPS: Mode Bypass Line Battery error ● ● ● ● Active UPS ● ○... - Page 10 Sail Function Backup time information Battery discharge time in numbers H: Hours, M: minutes, S: seconds Error information Indicates a warning that an error has occurred. Indicating the error code, it is listed in detail in sections 3-9. Operation of turning off the alarm Indicates that the UPS alarm is disabled.
-
Page 11: Alarm Sound
3-3. Alarm Sound Information Status buzzer Mute Status UPS Mode Bypass Sound once every 2 minutes Battery mode Sound once every 4 seconds Error mode Continuous sound COMMEMORATION Overloaded Sound twice every second Low battery Battery not connected Overcharging Sound once every second Active EPO Fan malfunction / Overtemperature Charger failure... - Page 12 2. Turn on the UPS without utility power supply (in Battery mode) 1) Make sure that the battery breaker is in the "ON" position (only for Long Run models). 2) Press the "ON" button to set up the power supply for the UPS, the UPS will enter power on mode. After initialization, the UPS will enter No Output mode, then press and hold the "ON"...
- Page 13 7. Turn off the UPS without electrical power utility in Battery mode 1) Turn off the UPS by pressing the "OFF" button for at least 0.5 seconds, and then the buzzer will sound once. 2) Then the UPS will cut off power to the output and there is no display on the display screen panel. 8.
-
Page 14: Lcd Display Index
3-5. LCD display index Abbreviation Show content Meaning Enable Disable Auto .BAT Battery Normal mode mode (not CVCF mode) Mode CVCF Subtract Not allowed Allowed In the message 3-6. LCD Settings There are three parameters for setting up a UPS. Refer to the diagram. Parameter 1 Parameter 1: This is for alternative programs. - Page 15 Reserved Calibrate battery voltage Reserved Inverter voltage calibration Floating charger voltage regulation Constant charger voltage adjustment Charger maximum current setting Battery group and capacity settings Calibrate backup time *Y means that this program can be set in this mode. 01: Output voltage regulation Interface Settings Parameter 3: Output Voltage...
- Page 16 04: Frequency range for bypass Interface Settings Parameter 2: Set the low acceptable frequency for the bypass. 50 Hz system: The setting range is from 46.0Hz to 49.0Hz. 60 Hz system: The setting range is from 56.0Hz to 59.0Hz. The default value is 46.0Hz/56.0Hz. Parameter 3: Set an acceptable high frequency for the bypass.
- Page 17 09: Setting maximum battery discharge time Interface Settings Parameter 3 : 000 ~ 999 : Maximum discharge time from 0 min. to 999 min. The UPS will be turned off to protect the battery after discharge time arrives. The default value is 990 min. DIS: Disable battery discharge time and backup time will depend on battery capacity.
- Page 18 16: Floating charger Charging voltage adjustment Interface Settings Parameter 2 : You will select Add or Sub to set the Voltage adjustment of the floating charger. Parameter 3 : Voltage range from 0V to 6.4V, Default value 0V. 17: Constant charger voltage adjustment Interface Settings Parameter 2 : you will select Add or Sub to adjust the constant...
-
Page 19: Operation Mode/Status Description
3-7. Operation Mode/Status Description Operation Mode/status When the input voltage is within an acceptable range, the UPS will provide pure and stable AC power to the output. The UPS will also charge the Information battery in AC mode. Mode AC LCD Display When the input frequency is in the range of 46 to 64Hz, the UPS can be set Information... -
Page 20: Error Codes
3-8. Error Codes Error Problems Error Codes Icon Problems Icon Codes Bus start failure None Low Inverter Voltage None Bus over Short circuited None output inverter Bus under None SCR battery short circuited None Bus unbalance None Over temperature None Inverter soft start failure Overload None... -
Page 21: Problems
4. PROBLEMS If the UPS system is not operating correctly, please troubleshoot using the table below. Possible Causes Repair Symptom There is no indication (indicator) and Check that the input cable is The AC input cable is not alarm even though the main electricity properly connected to the connected properly. -
Page 22: Storage And Care
STORAGE AND CARE 5-1. Storage Before storing, charge the UPS for at least 7 hours. Store the UPS closed and upright in a cool, dry place. During storage, recharge the battery according to the following table: Storage temperature Recharge Frequency Charging Duration -25°C - 40°C Every 3 months... -
Page 23: Specifications
6. SPECIFICATIONS TYPE INSPIRE 906-ES INSPIRE 910-ES CAPACITY* 6000 VA / 5400 W 10000 VA / 9000 W INPUT 110 VAC ± 3% at 50% Load; Low Line Loss 176 VAC ± 3% at 100% Load Voltage Low Line Comeback Low Line Loss Voltage + 10V Range High Line Loss... - Page 24 Note: Closed on Saturdays, Sundays and local/regional Public Holidays. Register online for your Product Warranty at www.prolink2u.com Prolink is a registered trademark of Fida International (S) Pte Ltd. Other brands and product names are trademarks or registered trademarks of their respective holders. Product images are purely for illustrative purposes and may defer from the actual product.
Need help?
Do you have a question about the Professional II+ Series and is the answer not in the manual?
Questions and answers