
Subscribe to Our Youtube Channel
Related Manuals for PROLiNK PRO800-QS


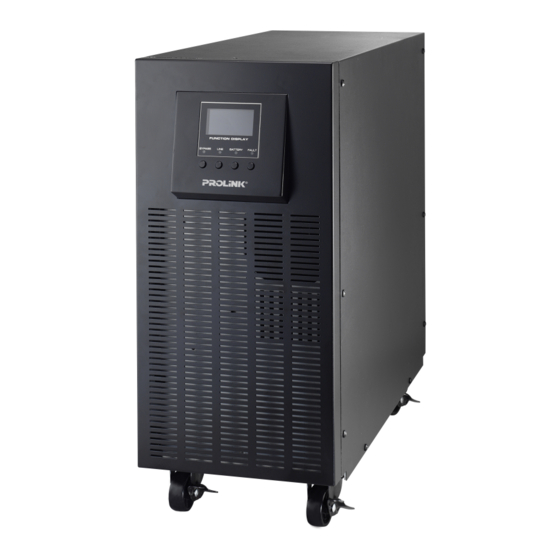
Summary of Contents for PROLiNK PRO800-QS
- Page 1 ONLINE UPS User Manual MASTER II SERIES (1P/1P) - TOWER PRO800-QS/QL 6KVA/10KVA Version 1.00 (English)
-
Page 2: Table Of Contents
Table of Contents 1. SAFETY AND EMC INSTRUCTIONS ....................1 1-1. T ....................... 1 RANSPORTATION AND TORAGE 1-2. P ............................1 REPARATION 1-3. I ............................1 NSTALLATION 1-4........................ 2 ONNECTION ARNINGS 1-5. O ............................3 PERATION 1-6. S ............................3 TANDARDS 2. -
Page 3: Safety And Emc Instructions
1. Safety and EMC instructions Please read carefully the following user manual and the safety instructions before installing the unit or using the unit! 1-1. Transportation and Storage Please transport the UPS system only in the original package to protect against shock and impact. -
Page 4: Connection Warnings
1-4. Connection Warnings • In accordance with safety standard EN-IEC 62040-1, installation has to be provided with a《Backfeed Protection》 system, as for example a contactor, which will prevent the appearance of voltage or dangerous energy in the input mains during a mains fault. There is no standard backfeed protection inside of the UPS. -
Page 5: Operation
• Use of this equipment in life support applications where failure of this equipment can reasonably be expected to cause the failure of the life support equipment or to significantly affect its safety or effectiveness is not recommended. Do not use this equipment in the presence of a flammable anesthetic mixture with air, oxygen or nitrous oxide. -
Page 6: Installation And Operation
2. Installation and Operation There are two different types of online UPS: standard and long-run models. Please refer to the following model table. Model Type Model Type standard model Long-run model 10KL We also offer optional parallel function for these two types by request. The UPS with parallel function is called as “Parallel model”. -
Page 7: Single Ups Installation
2-3. Single UPS Installation Installation and wiring must be performed in accordance with the local electric laws/regulations and execute the following instructions by professional personnel. Make sure the mains wire and breakers in the building are enough for the rated capacity of UPS to avoid the hazards of electric shock or fire. -
Page 8: Ups Installation For Parallel System
● Make sure the UPS is not turned on before installation. The UPS should not be turned on during wiring connection. ● Do not try to modify the standard model to the long-run model. Particularly, do not try to connect the standard internal battery to the external battery. -
Page 9: Software Installation
Parallel communication port connection Share current cable connection Diagram 2: Communication cable connection Diagram 1: Power cable connection Wiring diagram of parallel system 2-5. Software Installation For optimal computer system protection, install UPS monitoring software to fully configure UPS shutdown. -
Page 10: Operations
3. Operations 3-1. Button Operation Button Function Turn on the UPS: Press and hold the button more than 0.5s to turn on the UPS. ON/Enter Button Enter Key: Press this button to confirm the selection in setting menu. ... - Page 11 LCD Panel: Display Function Backup time information Indicates battery discharge time in numbers. H: hours, M: minutes, S: seconds Fault information Indicates that the warning and fault occurs. Indicates the fault codes, and the codes are listed in details in section 3-9. Mute operation Indicates that the UPS alarm is disabled.
-
Page 12: Audible Alarm
Battery information Indicates the Battery capacity by 0-25%, 26-50%, 51-75%, and 76-100%. Indicates the battery is not connected. Indicates low battery level and low battery voltage. Input & Battery voltage information Indicates the input voltage or frequency or battery voltage. Vac: Input voltage, Vdc: battery voltage, Hz: input frequency 3-3. - Page 13 3) A few seconds later, the UPS will be turned on and enter to Battery mode. 3-4-3. Connect devices to UPS After the UPS is turned on, you can connect devices to the UPS. 1) Turn on the UPS first and then switch on the devices one by one, the LCD panel will display total load level.
- Page 14 3) Users also can set battery self-test through monitoring software. 4) If the UPS is at battery self-test, the LCD display and buzzer indication will be the same as at Battery mode except that the battery LED is flashing. 3-4-7. Turn off the UPS with utility power supply in AC mode 1) Turn off the inverter of the UPS by pressing “OFF”...
-
Page 15: Parallel Operation
“Mute/Down” button. Please confirm the setting by pressing “ON/Enter” button. 4) In the parameter 3, it is to adjust the charging current according to the deviation between the actual charging current and the setting value of the current. 5) For example, you want to have charging current in 4A, but in fact, the charging current is measured only 3.7A. -
Page 16: Abbreviation Meaning In Lcd Display
seconds later, the UPS will enter to battery mode and add to the parallel system. If you have the third UPS, follow the same procedure of 3). Then, the parallel system is complete. 3-5-4. Add one new unit into the parallel system 1) You can not add one new unit into the parallel system when whole system is running. -
Page 17: Lcd Setting
Subtract Not allowed Allow Reserved OP.V Output voltage Parallel 3-7. LCD Setting There are three parameters to set up the UPS. Refer to following diagram. Parameter 1 Parameter 1: It’s for program alternatives. Refer to below table for the detailed programs. Parameter 2 and parameter 3 are the setting options or values for each program. - Page 18 Output voltage calibration Charging current setting *Y means that this program can be set in this mode. Note: All parameter settings will be saved only when UPS shuts down normally with internal or external battery connection. (Normal UPS shutdown means turning off input breaker in bypass mode). 01: Output voltage ...
- Page 19 03: Voltage range for bypass Interface Setting Parameter 2: Set the acceptable low voltage for bypass. Setting range is from 110V to 209V and the default value is 110V. Parameter 3: Set the acceptable high voltage for bypass. Setting range is from 231V to 276V and the default value is 264V.
- Page 20 08: Bypass mode setting Interface Setting Parameter 2: OPN: Bypass allowed. When selected, UPS will run at Bypass mode depending on bypass enabled/disabled setting. FBD: Bypass not allowed. When selected, it’s not allowed for running in Bypass mode under any situations. Parameter 3: ENA: Bypass enabled.
- Page 21 13: Battery voltage adjustment Interface Setting Parameter 2: Select “Add” or “Sub” function to adjust battery voltage to real figure. Parameter 3: the voltage range is from 0V to 5.7V, the default value is 0V. 14: Charger voltage adjustment ...
-
Page 22: Operating Mode/Status Description
17: Charging current setting Interface Setting Parameter 2: Set the charging current of the charger at 1A, 2A, 3A or 4A (001 ~ 004). Parameter 3: Calibrate the charging current. If there is deviation between setting current and real measured current, please use this parameter to calibrate the charging current. - Page 23 CVCF mode Description When input frequency is within 46 to 64Hz, the UPS can be set at a constant output frequency, 50 Hz or 60 Hz. The UPS will still charge battery under this mode. LCD display Battery mode Description When the input voltage is beyond the acceptable range or power failure, UPS will backup power from battery and alarm will beep every 4 seconds.
-
Page 24: Fault Code
3-9. Fault Code Fault event Fault code Icon Fault event Fault code Icon Bus start failure None Battery SCR short circuited None Bus over None Inverter relay short circuited None Bus under None Charger short circuited None Bus unbalance None Can communication fault None Inverter soft start failure... -
Page 25: Trouble Shooting
4. Trouble Shooting If the UPS system does not operate correctly, please solve the problem by using the table below. Symptom Possible cause Remedy No indication and alarm in the front The AC input power is not Check if input cable firmly display panel even though the mains is connected well. -
Page 26: Storage And Maintenance
5. Storage and Maintenance 5-1. Storage Before storing, charge the UPS at least 7 hours. Store the UPS covered and upright in a cool, dry location. During storage, recharge the battery in accordance with the following table: Storage Temperature Recharge Frequency Charging Duration -25°C - 40°C Every 3 months... -
Page 27: Specifications
6. Specifications MODEL 10KL CAPACITY* 6000 VA / 6000 W 10000 VA / 10000 W INPUT 110 VAC(L-N) ± 3 % at 0-60% Load Low Line Loss 176 VAC(L-N) ± 3 % at 60%-100% Load Voltage Range Low Line Comeback Low Line Loss Voltage + 10V High Line Loss 300 VAC(L-N) ±... - Page 28 Register Online For Your Product Warranty @ www.prolink2u.com/register PROLiNK® is a trademark of FIDA INTERNATIONAL (S) PTE LTD and is manufactured under its authority. All other brands, products, services, logos and company names mentioned herein are trademarks of their respective owners.
Need help?
Do you have a question about the PRO800-QS and is the answer not in the manual?
Questions and answers