
Related Manuals for Strong SRT 7815


Summary of Contents for Strong SRT 7815
- Page 1 DIGITAL SATELLITE HD+ RECEIVER SRT 7815 User Manual Bedienungsanleitung Kullanım Kılavuzu www.strong-eu.com...
- Page 2 Supplied by STRONG Austria Represented by STRONG Ges.m.b.H. Teinfaltstraße 8/4. Stock 1010 Vienna, Austria Email: support_at@strong-eu.com www.strong-eu.com...
- Page 3 SIMPLIFIED EU DECLARATION OF CONFORMITY Hereby, STRONG declares that the device SRT7815 is in compliance with Directive 2014/53/EU. The full text of the EU declaration of conformity is available at the following internet address: https://www.strong-eu.com/en/doc Subject to alterations. In consequence of continuous research and development technical speci cations, design and appearance of products may change. ASTRA is a registered trademark of SES ASTRA.
-
Page 4: Table Of Contents
TABLE OF CONTENTS 1. INTRODUCTION 1.1 Safety Instructions 1.2 Storage 1.3 Equipment Set-up 1.4 Accessories 1.5 Usage of external USB devices 2. YOUR RECEIVER 2.1 DEFAULT PIN-CODE: 0000 2.2 Front Panel 2.3 Side Panel 2.4 Rear Panel 2.5. Remote Control 2.5 Installing the batteries 2.6 Using the remote control 3. - Page 5 6.7 Quick changing of Screen settings 6.7.1 Changing HDMI Resolution 6.7.2 Changing the Aspect Ratio 6.8 Electronic Programme Guide (EPG) 6.9 Favourite channels 7. MAIN MENU 7.1 Channel 7.1.1 Channel manager 7.1.2 Favorite manager 7.1.3 Timer 7.1.4 Electronic Program Guide (EPG) 7.2 Multimedia 7.2.1 Pictures 7.2.2 Music...
-
Page 6: Introduction
1. INTRODUCTION 1.1 Safety Instructions Read all of the instructions before operating the device. Keep these instructions well for later use. „ Only use attachments/accessories speci ed or provided by the manufacturer (such as the exclusive supply adapter, battery etc.). „... -
Page 7: Storage
„ Keep away from direct sunlight. „ Do not use the set near dust place. „ Do not place candles near the opening area, to avoid ammable foreign material from entering the device. WEEE Directive WEEE Correct Disposal of this product. This marking indicates that this product should not be disposed with other household wastes throughout the EU. -
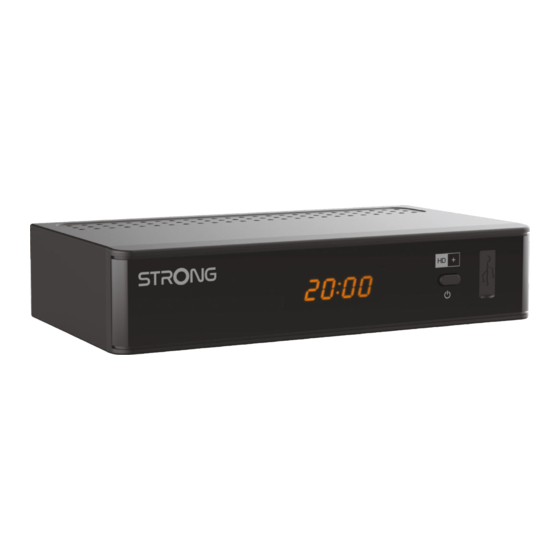
Page 8: Your Receiver
„ We as supplier cannot guarantee compatibility with all types of USB storage devices. „ It is advised not to store important information on USB storage devices used with the receiver. Always make backups of data on your USB storage device before using it with this receiver. We as supplier will not take responsibility for any loss of information or circumstances caused by loss of information. -
Page 9: Remote Control
4. TV SCART To connect to TV using a SCART cable 5. DC POWER To connect to the original included main power adapter (Input ~230 V 50~60 Hz/ Output 12 V, 1.5 A DC ) 2.5. Remote Control Fig. 4 1. -
Page 10: Installing The Batteries
Cancellation of current process/exit from main menu to viewing mode 16. VOL+/ Increases/decreases the volume level in TV mode 17. P+/P Jumps 10 places up or down in channel list or any other list. 18. LIST Displays the channel list. 19. -
Page 11: Using The Remote Control
2.6 Using the remote control Fig. 6 To use the remote control, point it towards the front of the digital receiver. The remote control has a range of up to 7 metres from the receiver, if properly aligned towards the IR eye on the front panel. The remote control will not operate if its path is blocked. -
Page 12: Connections
3. CONNECTIONS This section explains the most important functions to ensure that you can directly watch television with your new receiver. Please note additional adjustments may be required. NOTE: Do not connect the receiver to the main power yet. 3.1 Connecting the Antenna and LNB (Low Noise Block) to the receiver Connect the LNB of your satellite antenna to the SAT IN connector of your receiver using a good quality coaxial cable and suitable ‘F-connector’... -
Page 13: Connecting To Digital Audio Ampli Er
A Connect the LNBs of your xed antenna to the inputs of a DiSEqC 1.0 switch using a good quality coaxial cable and suitable ‘F-connectors’ . B Connect the output or “to receiver” of the DiSEqC 1.0 switch to the SAT IN connector on your receiver. Use good quality coaxial cable and suitable “F-connectors”. -
Page 14: Basic Connection Using A Scart Cable
3.4 Basic connection using a SCART cable Fig. 8 b IN LIZENZ VON DOLBY LABORATORIES GEFERTIGT. DOLBY, DOLBY AUDIO UND DAS DOPPEL-D-SYMBOL SIND EINGETRAGENE MARKEN DER DOLBY LABORATORIES LICENSING CORPORATION. a. Connect the LNB of your satellite antenna to the SAT IN connector of your receiver using a good quality coax cable and suitable ‘F-connector’... -
Page 15: Starting Up For The First Time
4 STARTING UP FOR THE FIRST TIME Once you properly installed and connected all cables of the receiver, setup your receiver step by step by First Time Installation procedure. It will guide you through the basic installation and channel searching process. Please, switch on your TV and select the correct input source and switch aswel on the receiver. -
Page 16: Channel Search
We at STRONG understand that you can’t wait to enjoy your new HD+ receiver. However, we advise you to read this manual to get the best performance from your STRONG HD+ receiver. To turn your receiver On or to go to Standby mode, press q on the remote control. Choose channels with CH+/ or p q. -
Page 17: Direct Access
6.1.1 Direct access To gain direct access to a certain channel simply enter its number with the 0~9 keys on the remote control. Channel numbers can be up to 4 digits long. Entering numbers and values with less than 4 digits is possible. Just wait a few seconds and your receiver will switch to the selected channel. -
Page 18: Selecting Subtitle Language
With t u you can additionally select audio mode of Stereo (for stereo sound), Mono (both speakers will produce same mixed from both channels sound) and Left or Right (both speakers will produce sound respectively from left or right sound channel). 6.5 Selecting subtitle language Press SUB in viewing mode to display subtitle languages banner. -
Page 19: Main Menu
7. MAIN MENU To enter the main menu, press MENU on your remote control. In the main menu you can manage channels, timers, speci c receiver settings, get access to multimedia and receive useful information about the receiver, programmes, operator messages, etc. The main menu contains the following chapters: Channel, Multimedia, Installation, Settings and CAS. -
Page 20: Favorite Manager
7.1.2 Favorite manager In the Favorite manager menu you can create channel list with your favorite channels into a list. There are 8 Favorite list groups availeble. 1. By using p q select channel you like to add into Favorite 1 group list. 2. -
Page 21: Pictures
press OK to open or start the playback. Use u 2 3 5 6 to control the playback of multimedia les. Use the button to return to the previous step. Press to exit the menu and to go back to the viewing mode. NOTE: Before you use the multimedia functions of your receiver, please make sure that your USB storage device is properly connected to the receiver and that it is formatted in the required le... -
Page 22: Hd+ Channel Restore
NOTE: Channels can be change, move to other frequency or gone in future and can lead to non reception. 7.3.3 HD+ Channel Restore If you like only to restore the channel list from operator. Select this menu item and start with OK. The receiver will restore channel list including the channel order automatically now. -
Page 23: Ts Information
„ SatCR can only work in combination with an optional multi-output (max. 8) satellite splitter and a SatCR LNB, an example is STRONG type SRT L780 (max. 4 users). „ SatCR cannot be combined with any other DiSEqC function. SatCR systems are mainly installed by professional experts. -
Page 24: Interface Setting
HDCP: Available options: On or O , please see the note below. NOTE: HDCP (High De nition Content Protection) is set to On to default as nowadays all TV sets with an HDMI connector support HDCP. If you face problems with the HDMI connection, you can deactivate HDCP, which allows watching via HDMI without problems. -
Page 25: Ota Upgrade (Manual)
WARNING: „ Do not take any action during the update procedure if the receiver has not restarted yet or if an error message appears. „ Do not disconnect the receiver from the mains nor switch o until the software update has been completed. -
Page 26: Information
7.4.11 Information This submenu shows all receiver related information hardware and software version. It also displays technical information from CASN ID. Please refer to the information given on screen when you call a hotline support. The support center employee might ask for the information given on screen. 7.5 CAS INFO Smartcard Information This menu section is only accessible when an HD+ smartcard is inserted into the receiver. -
Page 27: A1 Troubleshooting
A1 TROUBLESHOOTING There may be various reasons for faulty operation of the receiver. Please check the receiver according to the procedures shown below. If the receiver does not work properly after checking it, please contact your local service line or dealer. Alternatively, you can send a support e-mail via our website. NEVER open or disassemble your receiver. - Page 28 Aspect ratio: 4:3 and 16:9, Pan & Scan Automatic adjustment for 16:9 TV sets, Letterbox supported Video resolution: PAL: 576i/p, 720p, 1080i, 1080p over HDMI surface Audio Audio mode: Mono L/R, Stereo Audio support: Dolby® Digital, Dolby® Digital Plus*, PCM Transcoding to S/PDIF: Dolby Digital Plus to Dolby Digital or PCM *Dolby Digital Plus and the double-D symbol are registered trademarks of Dolby Laboratories...
Need help?
Do you have a question about the SRT 7815 and is the answer not in the manual?
Questions and answers