
Related Manuals for Strong SRT 8221


Summary of Contents for Strong SRT 8221
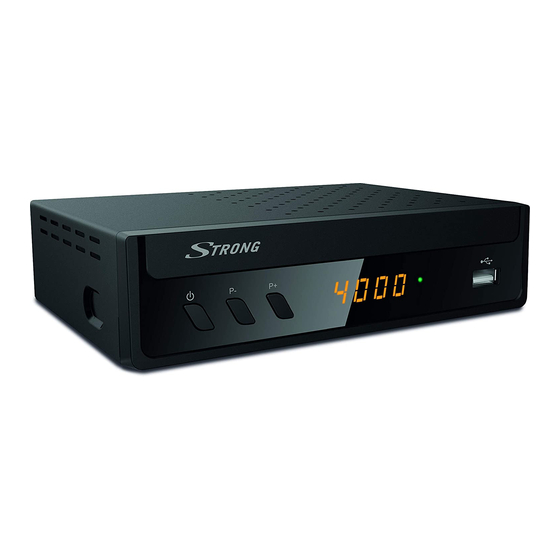
- Page 1 Digital HD Combo Receiver SRT 8221 User Manual Manuel d’utilisation Manuale utente Korisnički priručnik Felhasználói kézikönyv Uživatelská příručka Používateľská príručka Ръководство за потребителя...
- Page 2 INFO SLEEP AUDIO TEXT MENU EXIT INFO SLEEP GOTO AUDIO TEXT MENU EXIT TV/R GOTO RECALL TV/R RECALL TIMESHIFT ZOOM ASPECT V.F. TIMER TIMESHIFT ZOOM ASPECT V.F. TIMER...
- Page 4 0180 501 49 91 support_nl@strong.tv support_de@strong.tv € 0,14/Min. deutsches Festnetz 801 702 017 € 0,42/Min. max. Mobilfunknetze support_pl@strong.tv +380(44)228 24 73 support_dk@strong.tv support_ua@strong.tv Supplied by STRONG Austria Represented by STRONG Ges.m.b.H. Franz-Josefs-Kai 1 1010 Vienna Austria Email: support_at@strong.tv 26 Jul 2019 14:01...
- Page 5 Licenses THIS PRODUCT IS LICENSED UNDER THE AVC PATENT PORTFOLIO LICENSE FOR THE PERSONAL AND NONCOMMERCIAL USE OF A CONSUMER TO (i) ENCODE VIDEO IN COMPLIANCE WITH THE AVC STANDARD (“AVC VIDEO”) AND/OR (ii) DECODE AVC VIDEO THAT WAS ENCODED BY A CONSUMER ENGAGED IN A PERSONAL AND NON-COMMERCIAL ACTIVITY AND/OR WAS OBTAINED FROM A VIDEO PROVIDER LICENSED TO PROVIDE AVC VIDEO.
-
Page 6: Table Of Contents
5.0 QUICK GUIDE TO USING YOUR RECEIVER SIMPLIFIED EU DECLARATION OF CONFORMITY Hereby, STRONG declares that the radio equipment type SRT 8221 is in compliance with Directive 2014/53/EU. The full text of the EU declaration of conformity is available at the following internet address: https://www.strong.tv/en/doc Subject to alterations. -
Page 7: Introduction
1.0 INTRODUCTION 1.1 Safety Instructions Read all of the instructions before operating the device. Keep these instructions well for later use. Only use attachments/accessories specified or provided by the manufacturer (such as the „ „ exclusive supply adapter, battery etc.). Please refer to the information on the product enclosure for electrical and safety information „... -
Page 8: Storage
It is a necessity that you only use an approved extension and compatible wiring that is suitable „ „ for the electrical power consumption of the installed equipment. Please ensure that the electrical power supply corresponds with the voltage on the electrical identification plate at the back of the device. -
Page 9: Usage Of External Usb Devices
„ Always make backups of data on your USB storage device before using it with this receiver. STRONG will not take responsibility for any loss of information or circumstances caused by loss of information. Please ensure that either the USB device is already formatted to NTFS or FAT32 or format the USB „... -
Page 10: Remote Control
2. SAT IN To connect to the LNB of your satellite dish for reception of satellite broadcast signal 3. ETHERNET To connect your receiver to Ethernet LAN 4. S/PDIF Coaxial To connect your receiver to a digital audio amplifier. 5. HDMI To connect your receiver with your TV set using a HDMI cable. -
Page 11: Installing The Batteries
30. TIMER See an overview and/or edit the timer schedule 2.5 Installing the batteries Fig. 4 Open the cover on the remote control and insert 2x AAA type batteries into the compartment. Observe correct polarity of the batteries when inserting. A terminal diagram is shown inside the compartment. -
Page 12: Connections To A Satellite Antenna
3.2 Connections to a satellite antenna 3.2.1 Basic connection using an HDMI cable Fig. 7 Connect the LNB of your satellite antenna to the SAT IN connector of your receiver using a good quality coax cable and suitable ‘F-connector' plugs. Connect one end of a good quality HDMI cable to the HDMI output on your receiver and the other end to the HDMI input of your TV. -
Page 13: Starting Up For The First Time
For proper functioning of Timeshift and recording functions, a fast USB device (such as a hard disk drive) is needed. Interrupted playback or a distorted picture during playback or Timeshift are indications for a low device speed. STRONG cannot guarantee proper functioning of recording and or Timeshift functions with all USB devices. -
Page 14: Dvb-S2 Installation
Antenna Power: Set to On if you use an active antenna. When set to On, a 5 Volt power will be present on the RF IN connector of the receiver. Select Off for passive antennas. Once all settings are made, move the highlight to Auto Search and press OK to start scanning. The receiver will now search for all available channels. -
Page 15: Quick Guide To Using Your Receiver
5.0 QUICK GUIDE TO USING YOUR RECEIVER We at STRONG understand that you can't wait to enjoy your new high definition digital terrestrial receiver. The following quick guide will make you familiar with the basic operation of this device. We do, however, advice you to read the full manual to get the best performance from your receiver. -
Page 16: Info Banner
TIP: Use t u to toggle between the TV List and Radio List, press FAV for a list of available favourite lists, toggle between them, also with t u. 6.1.3 Using the or PG+/PG- keys p switches to the next channel. q switches to the previous channel. -
Page 17: Epg (Electronic Programme Guide)
NOTE: Timeshift needs a connected USB storage device with sufficient free space and sufficient speed in order to work properly. 6.7 EPG (Electronic Programme Guide) The Electronic Programme Guide is a very useful function that allows you to view event schedules and information and to mark programmes for recording. - Page 18 NOTE: If both tuners have been scanned (DVB-T and DVB-S), the receiver will display a list containing all the channels from both tuners. To modify the order of one of the two lists, press INFO button and use pq to select one of the lists.
-
Page 19: Picture
highlight is on the channel of your choice, press FAV. A Favourite Type can be selected from the pop- up list. Use pq to select the favourite list you wish to add the channel to and press OK, press EXIT to finalize the process. -
Page 20: Channel Search
4:3 Pan&Scan A centre cut-out of the 16:9 programme will be displayed full-screen on your 4:3 TV, missing content to the left and right. 4:3 Full A 16:9 programme will be compressed sideways on a 4:3 TV, to show a full picture without any black bars 16:9 widescreen A 4:3 programme will be show full screen, with sideways stretched content. - Page 21 Use pq to select the LNB power and t u to modify the setting. 13/18V is LNB Power the setting for a Universal LNB. Use t u to switch the 22KHz oscillator signal on or off. Auto is the setting for 22 KHz a Universal LNB.
- Page 22 Latitude Direction: Choose North or South. Latitude Angle: Use the 0 ~ 9 buttons to enter the coordinate. When all settings have been made, press OK to save the data and leave the window. NOTE: The location setting only needs to be entered once, and is valid for all satellites.
-
Page 23: Time
Other options At the bottom of the screen there are some commands (color buttons) to make changes to satellites or transponders (use INFO button to choose between Satellite and Transponder Press RED button to add a new Satellite/Transponder. Press GREEN button to modify the value of the Satellite/Transponder. Edit Press YELLOW button to delete one Satellite/Transponder. -
Page 24: System
Power Off Time Enter the switch Off time with the numeric buttons on the remote control. 7.5 Option Set up the options for languages. Use t u to select the language for the On-Screen Display. OSD Language Subtitle Language Set your preference for the subtitle language priority, if available in broadcast. Audio Language Set your preference for the audio language priority, if available in broadcast. -
Page 25: Usb
is found. Then go to the System menu and select the Software Update option. Select the correct file in the list. Press OK to start update. When ready, the unit will reboot automatically. Network Setting Setup your Network connection to use the Network Apps. Link Type is LAN, for use with a wired network to a router/modem on the RJ45 Ethernet port. -
Page 26: Troubleshooting
If the receiver does not work properly after checking it, please contact your dealer or the local Service Hotline or send email to our Support via www.strong.tv. Do NOT try to open or disassemble the receiver. It may cause a dangerous situation and warranty will be void. - Page 27 Problem Possible cause What to do No signal. The receiver is not connected to Check the lead of the antenna the antenna (terrestrial or satellite or cable. antenna). Check that the coaxial cable is correctly fitted to the antenna input on the receiver. Damaged or defective connectors Check connectors for visible (F-connectors (DVB-S2) or IEC-...
- Page 28 Problem Possible cause What to do No sound on TV or The volume of the TV is set too low. Increase the volume of the TV amplifier. The volume of the receiver is set with its remote control. too low. Increase the volume of the receiver with its remote control.
- Page 29 Forgotten PIN code/ Contact your local Service password. Hotline or send an email to our Support via www.strong.tv Forgotten channel Contact your local Service lock code. Hotline or send an email to our Support via www.strong.tv...
-
Page 30: Technical Specifications
9.0 TECHNICAL SPECIFICATIONS Demodulator DVB-T2 Demodulator DVB-T/T2: QPSK, 16QAM, 64QAM, 128QAM, 256QAM DVB-T (EN 300 744), DVB-T2 (EN 302 755) Transmission mode: 2K, 8K, 32K Guard intervals: DVB-T = 1/32, 1/16, 1/8, 1/4; DVB-T2 = 1/128, 1/32, 1/16, 19/256, 1/8, 19/128, 1/4 Demodulator DVB-S2 Demodulator DVB-S/S2: QPSK, 8PSK... - Page 31 HDMI TV SCART (RGB, CVBS, Audio L&R) S/PDIF (coaxial output) Ethernet RJ45 USB 2.0 port: 5 V/500 mA (max.) supported Power cord: AC 110 ~ 240 V, 50/60 Hz General Data: Supply voltage: 110 - 240 V AC (SMPS), 50/60 Hz Power consumption: 6 W (typ.), 20 W (max) Power consumption in standby:...
Need help?
Do you have a question about the SRT 8221 and is the answer not in the manual?
Questions and answers