Table of Contents
Advertisement
Quick Links
Advertisement
Table of Contents

Related Manuals for Strong SRT 8010


Summary of Contents for Strong SRT 8010
- Page 1 Digital Terrestrial Receiver SRT 8010 User Manual...
-
Page 2: Table Of Contents
PART 1 • English TABLE OF CONTENTS 1.0 INTRODUCTION 1.1 Safety Instructions 1.2 Storage 1.3 Equipment Set-up 1.4 Features & Accessories 2.0 YOUR RECEIVER 2.1 Front panel 2.2 Rear panel 2.3 Remote control 3.0 CONNECTION 3.1 Connecting to terrestrial antenna. 3.2 Connecting to TV set. -
Page 3: Introduction
PART 1 • English 1.0 INTRODUCTION 1.1 Safety Instructions DO NOT INSTALL YOUR RECEIVER: In a closed or poorly ventilated cabinet; directly on top of or under any another equipment; on a surface which might obstruct the ventilation slots DO NOT EXPOSE THE RECEIVER OR ITS ACCESSORIES: To direct sunlight or near any other equipment that generates heat;... -
Page 4: Equipment Set-Up
PART 1 • English 1.3 Equipment Set-up We recommend you consult a professional installer to set up your equipment. Otherwise, please follow the instructions below: Refer to the user manual of your TV and your antenna Make sure that the SCART cable and outdoor components are in a good condition and the SCART connections are well shielded This manual provides complete instructions for installing and using this receiver. -
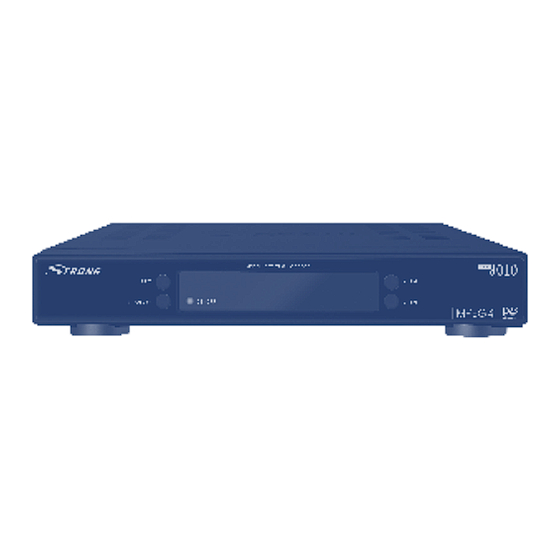
Page 5: Your Receiver
PART 1 • English Package content: 1x Receiver 1x User manual 1x Remote control 2x batteries (AAA type) Tips: The batteries should not be recharged, disassembled, electrically short-circuited or be mixed or used with other types of batteries. 2.0 YOUR RECEIVER 2.1 Front panel 1. -
Page 6: Rear Panel
PART 1 • English 2.2 Rear panel 1. ANT IN To connect a terrestrial antenna for receiving broadcasting signal. 2. TO TV To connect a TV set to receive analogue channels or to connect an extra receiver. 3. USB To connect an external USB memory device. 4. -
Page 7: Remote Control
PART 1 • English 2.3 Remote control 1. MUTE Mutes audio outputs of the receiver. 2. POWER Turns receiver On/Stand-by. 3. V+/V- Increase/decrease volume level. 4. AV toggles SCART output between TV and AV modes. 5. AUDIO Shows list of available audio languages for the channel you are watching. -
Page 8: Connection
PART 1 • English 17. FAV Displays list of Favourite groups. 18. TV/R Toggles between TV and Radio modes. 19. EPG Displays Electronic Program Guide. 20. 0..9 To select channel by number in live view mode, to enter values of parameters in Menu mode. 21. -
Page 9: Connecting To Digital Audio Amplifier
Extrernal USB memory device should correspond to USB 2.0 standard and it’s power consumption should be not more than 500 mA. External USB memory device can be used for software update (see part 5.4.4 of this manual for details). New software versions are published on the web site www.strong.tv (support > download). -
Page 10: Preferences
PART 1 • English Channel numbering: select “Appearing order” if broadcast in your country does not support logical channel numbering or select “Operator defined” if broadcast in your country supports logical channel numbering. If you are not sure which option to select –... -
Page 11: Main Menu
PART 1 • English 5.0 MAIN MENU All settings of the receiver can be done in Main Menu. Main menu consist of: “Channel organiser”, “Installation", “Preferences” and “Setup”. To access to the Main Menu press button MENU on the remote control. 5.1 Channel organiser Using buttons tu, select item Channel organiser. - Page 12 PART 1 • English Channels are sorted only in selected list. Sorting of the channels in one list would not Tips: cause change of order in other lists. To Lock access to all channels in selected group press OK and save changes by pressing GREEN (Save). Viewing of locked channels will require entering of the PIN code (if option “Service Lock”...
-
Page 13: Installation
PART 1 • English Remove channel from favourite group. Use button FAV to select favourite group where you wish to remove channel. Use button u to move menu focus to the right part of screen (favourite group content). Use buttons pqto select channel that you would like to remove and press OK to confirm. - Page 14 PART 1 • English 5.2.3 Advanced Scan This function can be used if necessary to find new channels on already installed frequencies or on one of the new frequencies of broadcast. Select this item and press OK. In Advanced Scan displayed information about broadcast channel (MUX), frequency in KHz and other technical parameters (TX –...
-
Page 15: Preferences
PART 1 • English 5.3 Preferences In this menu you can setup preferred menu language, audio and subtitles languages, setup video output, time settings and tune some options of OSD display. 5.3.1 Language Select OSD language, audio and subtitles languages. To select language use buttons tu or press OK to display list of available options and select language by pq buttons. -
Page 16: Setup
PART 1 • English 5.4 Setup In this menu you can setup Timer for switching receiver ON/OFF according to schedule, block access to the receiver settings and channels, get information about software and hardware version of your receiver, update software and return receiver to factory settings. 5.4.1 Timer Setting up Timer make possible to switch receiver to channels automatically, according to schedule. -
Page 17: Daily Operations
PART 1 • English 5.4.3 System Info Select this item and press OK to get information about installed software version and hardware version in your receiver. 5.4.4 Software update Before enter to this menu you need to insert USB memory module to USB port at the back of your receiver. -
Page 18: Channel Information
PART 1 • English 6.2 Channel information Information banner displayed on screen every time when you zap channel in live view mode. It displays information about channel type (TV or Radio), date and time information, channel number and name, start time and name of the present and following program on the channel. -
Page 19: Trouble Shooting
PART 1 • English 6.3.6 Zoom part of video In live view mode press button ZOOM. On screen will be displayed rectangle which represents area of screen to be enlarged. Use buttons pq and tu to move Zoom area. To change Zoom ratio press ZOOM button again. -
Page 20: Specification
PART 1 • English Symptom Cause Remedy Remote control Batteries are discharged or not Check correct installation of the batteries. doesn’t work correct installed. Change batteries Message “Antenna Short cut in cable between Disconnect receiver from main power. Check circuit overload” on antenna and receiver or the cable between receiver and antenna. - Page 21 1.2 kg Subject to alterations. In consequence of continuous research and development technical specifications, design and appearance of products may change. All product names are trademarks or registered trademarks of their respective owners. © STRONG 2008. All rights reserved. 11/2008...
-
Page 22: Environmental Issues
Environmental Issues ENVIRONMENTAL ISSUES STRONG is committed to reducing the impact of its products on the environment. To maximise the benefits of our design enhancements, your co-operation is required. Electronic product recycling Packaging Do not dispose of this product with your When disposing of this domestic rubbish. - Page 23 Environmental Issues...
Need help?
Do you have a question about the SRT 8010 and is the answer not in the manual?
Questions and answers