Table of Contents
Advertisement
Quick Links
Digital Terrestrial HD Receiver
SRT 8210
User Manual
Bedienungsanleitung
Manuel d'utilisation
Manuale utente
Manual del usuario
Bruksanvisning
700
USB
channels
multimedia
EPG
TEXT
Teletext
Programme
guide
function
Instrukcja obsługi
Návod k obsluze
Používateľská príručka
Korisnički priručnik
Felhasználói kézikönyv
4
Parental
Favorite
control
lists
Advertisement
Table of Contents

Subscribe to Our Youtube Channel
Related Manuals for Strong SRT 810


Summary of Contents for Strong SRT 810
- Page 1 Digital Terrestrial HD Receiver SRT 8210 User Manual Instrukcja obsługi Bedienungsanleitung Návod k obsluze Manuel d'utilisation Používateľská príručka Manuale utente Korisnički priručnik Manual del usuario Felhasználói kézikönyv Bruksanvisning TEXT Parental Teletext Favorite Programme control channels multimedia guide function lists...
- Page 4 Supplied by STRONG & Co, Japan Represented by STRONG Ges.m.b.H. Franz-Josefs-Kai 1 1010 Vienna, Austria Email: support_at@strong.tv 09 Nov 2016 16:11...
- Page 5 Licenses ANY USE OF THIS PRODUCT IN ANY MANNER OTHER THAN PERSONAL USE THAT COMPLIES WITH THE MPEG-2 STANDARD FOR ENCODING VIDEO INFORMATION FOR PACKAGED MEDIA IS EXPRESSLY PROHIBITED WITHOUT A LICENSE UNDER APPLICABLE PATENTS IN THE MPEG-2 PATENT PORTFOLIO, WHICH LICENSE IS AVAILABLE FROM MPEG LA, LLC, 6312 S.
-
Page 6: Table Of Contents
TAbLE of ConTEnT 1.0 InTroDuCTIon 1.1 Safety Instructions 1.2 Storage 1.3 Equipment Set-up 1.4 Accessories 1.5 Usage of external USB devices 2.0 Your rECEIvEr 2.1 DEFAULT PIN: 0000 2.2 Front Panel 2.3 Rear Panel 2.4 Remote control 2.5 Installing the batteries 2.6 Using the remote control 3.0 ConnECTIon 3.1 Connecting to a terrestrial antenna... -
Page 7: Introduction
1.0 InTroDuCTIon 1.1 Safety Instructions Do noT InSTALL Your rECEIvEr: In a closed or poorly ventilated cabinet; directly on top of or under any other equipment; on a „ „ surface which might obstruct the ventilation slots. Do noT EXPoSE ThE rECEIvEr or ITS ACCESSorIES: To direct sunlight or any other equipment that generates heat;... -
Page 8: Equipment Set-Up
„ Always make backups of data on your USB storage device before using it with this receiver. „ „ STRONG will not take responsibility for any loss of information or circumstances caused by loss „ „ of information. * This user manual describes the full functionality including the recording function and may not be applicable if the... -
Page 9: Your Receiver
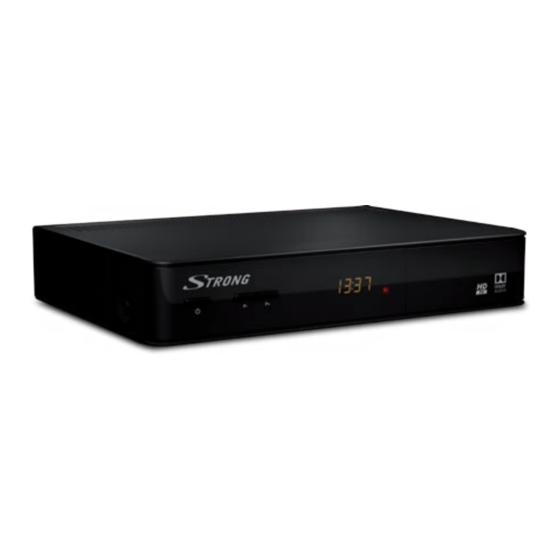
2.0 Your rECEIvEr 2.1 DEfAuLT PIn: 0000 2.2 front Panel Fig. 1 1. Standby/on button Switches the receiver ON or into Standby 2. P- /P+ buttons Switches to the previous/next programme 3. Ir Sensor Receives commands from the remote control 4. -
Page 10: Installing The Batteries
13. ok Opens the current channel list in menu: for confirmation 14. MEnu Opens the main menu, in a menu you will get one step back. Exits from the menu or sub-menu. 16. voL+/voL- Increases/decreases the volume level. 17. P+/P- Page up/down in all list modes. -
Page 11: Connection
3.0 ConnECTIon 3.1 Connecting to a terrestrial antenna Fig. 6 To receive broadcast signals, your terrestrial indoor or outdoor antenna must be connected to the ANT IN connector on the back of the receiver. Use a proper shielded antenna cable and suitable connectors. -
Page 12: Extended Connections For Your Home Entertainment
3.7 Extended connections for your home entertainment Fig. 8. Connecting to a Digital Audio Amplifier with S/PDIf By connecting your receiver to a digital amplifier or home cinema set, you can enjoy the best possible sound quality and multi-channel audio (depending on broadcast). Connect your Digital Audio Amplifier or home cinema set with a suitable cinch cable to the S/PDIF connector on the back of the receiver. -
Page 13: Quick Guide To Using Your Receiver
5.0 QuICk GuIDE To uSInG Your rECEIvEr We at STRONG understand that you can’t wait to enjoy your new high definition digital terrestrial receiver. The following quick guide will make you familiar with the basic operation of this device. We do, however, advice you to read the full manual to get the best performance from your receiver. -
Page 14: Changing Channels
6.1 Changing channels Following ways are possible for changing channels with your new receiver: Via direct access using the 0~9 buttons. „ „ Via the channel list through ok and the PG+/PG- buttons. „ „ Via the pq buttons. „ „... -
Page 15: Subtitles
* This part of the user manual describes the full functionality including the recording function and may not be applicable if the software for recording via USB has not yet been installed and activated. Please, visit our website www.strong.tv to get more information. -
Page 16: Main Menu
noTE: To switch off the Timeshift function completely you need to change the Timeshift status to disable in the Record setup menu. 6.7.3 Timer recording There are 2 ways to set a timer: Programming a record timer via the EPG The easiest way to record an event is via the EPG. -
Page 17: Channels Edit And Information
7.1.1 Manual Search This menu allows you to search for channels at a specific Frequency or Channel number. Use pq to select Scan mode, and select between Free which will only install Free-to-Air channels or All. This means that channels that are Free-to-Air or scrambled will be searched and stored. Use pq to select Channel No and select the channel number of the frequency you’d like to search. -
Page 18: Lock Channels
7.2.1 Tv Manager This menu allows you to create favourite lists, move channels in order, lock channels with PIN protection and delete channels from the TV list. 7.2.1.1 Adding channels to favourite lists Channels from the TV list can be added to up to4 different favourite groups. Select Favourite and press ok, select the wanted favourite group and press ok. -
Page 19: Settings
7.2.2 radio Manager Create favourite lists, move channels in order, lock channels with PIN protection and delete channels from the radio list. The functions of handling are the same as in the TV Manager as described above. The only difference is that in the Radio manager there is no video information, so it will always display the radio background on the preview screen. -
Page 20: General Settings
OSD Transparency: To set the OSD transparency from Off ~ 50% with 10% steps. OSD Timeout: Sets the time after which on screen banners and messages disappear. The range is 3~10 seconds. HDMI Audio Output: Toggles between PCM and Bitstream output. When PCM is selected, all digital audio will be converted to stereo audio. -
Page 21: Time Settings
Old PIN Code: Enter your current PIN code (4 digits). New PIN Code: Enter your new PIN code (4 digits) you’d like to use. (Make a note of it.) Re-enter your new PIN code to confirm. Press ok to end and save the change. Confirm: 7.3.5 Time Settings Here you can set up your time zone for clock/time in your menu and system. -
Page 22: Multimedia
7.4 Multimedia The Multimedia menu consists of the following submenus: Records, Movies, Music, Pictures, Record Setup and Storage Device Setup. Please, insert first a USB device and use pq to highlight the menu of choice and press ok to enter. Press to quit or 9 to return to the previous menu. 7.4.1 Multimedia Player This function allows playback of different kind of files from the connected USB storage device. - Page 23 you select a time, press ok and show starts to play. Press the button to stop. 7.4.2 record Setup This menu is only accessible if you connect a USB storage device. Here you can setup Timeshift and recording. The following settings are available: Timeshift Status: Choose between Enable to activate the Timeshift function or Disable to switch it off.
-
Page 24: Network
It is possible to use USB storage devices already formatted in NTFS. * STRONG cannot guarantee the playback of files although extensions are listed, as it depends on codec, data bit rate and resolution used (all MPEG codec formats are supported). -
Page 25: Software Update
If the receiver does not work properly after checking it, please contact your dealer or the local Service Hotline or send email to our Support via www.strong.tv. Do NOT try to open or disassemble the receiver. It may cause a dangerous situation and warranty will be void. - Page 26 Forgotten PIN code Forgotten channel Contact your local Service Hotline lock code or send an email to our Support via www.strong.tv Press Info on the remote After moving the The antenna signals are too weak receiver to another The signal strength/quality might...
-
Page 27: A.2 Technical Specifications
MP3, FLAC, OGG* Picture view: BMP, JPG* * STRONG cannot guarantee the playback of all files although extensions are listed, as it depends on codec, data bit rate and resolution used (all MPEG codec formats are supported). Connectors ANT IN - IEC Female RJ-45 Ethernet 3.5 mm Audio L/R... - Page 28 220 x 164 x 43 Weight: 0.63 kg STronG declares that this item complies with the basic requirements and other relevant regulations of directives 2004/108/EC and 73/23/EC, rohS 2002/95/EC Subject to alterations. In consequence of continuous research and development technical specifications, design and appearance of products may change.
Need help?
Do you have a question about the SRT 810 and is the answer not in the manual?
Questions and answers