
Related Manuals for ETC S4WRDCII


Summary of Contents for ETC S4WRDCII
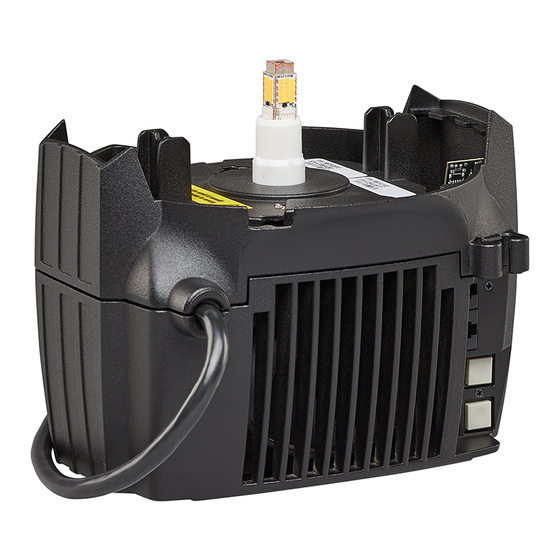
- Page 1 Source 4WRD Color II Retrofit Installation and User Manual Version 3.0 Part Number: 7068M1220-3.0 Rev A Released: 2023-01...
- Page 2 To view a list of ETC trademarks and patents, go to etcconnect.com/ip. All other trademarks, both marked and not marked, are the property of their respective owners. ETC intends this document, whether printed or electronic, to be provided in its entirety.
-
Page 3: Table Of Contents
Table of Contents Introduction Help from ETC Technical Services Safety Retrofit the Fixture Wire the Power Connector (If Needed) Remove Incandescent Lamp Housing Install the Reflector Insert Install the Source 4WRD Color II Retrofit Install the Fixture Attach C-clamp and Safety Cable... - Page 4 Adjust the Yoke Position Shape the Beam Troubleshoot the Fixture Restore Factory Defaults Update the Fixture Software RDM Values Clean and Maintain the Fixture Clean the Fixture Store the Retrofit Clean the Lenses Clean the Reflector Insert Clean 5° and 10° Polymer Lenses Specifications Electrical Environment...
-
Page 5: Introduction
Introduction The Source 4WRD Color II is a replacement for a standard Source Four burner assembly. It converts the HPL source to an RGBA (red, green, blue, and amber) LED and provides a significant reduction in power consumption. The Source 4WRD Color II uses DMX dimming and requires power from a non-dimmable source. - Page 6 ETC support website at support.etcconnect.com or the main ETC website at etcconnect.com. If none of these resources are sufficient, contact ETC Technical Services directly at one of the offices identified below. Emergency service is available from all ETC offices outside of normal business hours.
-
Page 7: Safety
1 hour before applying power. Applying power to a cold fixture will cause damage to the fixture and void the ETC warranty. • Do not use this fixture if a glass lens is deeply scratched or cracked. Damaged lenses must be replaced. - Page 8 • En plus de l'accroche principale, fixer une élingue de sécurité (modèle ETC 400SC ou autre câble/dispositif de sécurité certifié) au corps du projecteur. Un point d’accroche (trou) approprié est prévu dans la patte qui ressort du boîtier du projecteur.
-
Page 9: Retrofit The Fixture
Retrofit the Fixture WARNING: RISK OF FIRE OR ELECTRIC SHOCK! Installing the Source 4WRD Color II retrofit kit requires knowledge of luminaire electrical systems. If you are not qualified, do not attempt installation. Contact a qualified electrician. AVERTISSEMENT : RISQUE D'INCENDIE OU DE DÉCHARGE ÉLECTRIQUE! Installer le nécessaire de conversion Source 4WRD Color II nécessite une connaissance des systèmes électriques de projecteurs. - Page 10 3. Remove the lamp housing from the fixture body. Note: The burner assembly is no longer needed. If you would like ETC to recycle the burner assembly, contact ETC Technical Services for more information. See Help from ETC Technical Services on page 2.
- Page 11 Retaining bolt Reflector housing Barrel rotation knob 2. Place the reflector housing on a flat surface with the reflector facing 3. Position the reflector insert in the reflector housing over the top of the reflector, taking care to align the centers of the reflector insert and reflector.
- Page 12 4. Gently rotate the reflector insert clockwise until the teeth on the reflector insert tabs are secured against the bracket wings on the reflector housing. Do not use excessive force when rotating the reflector insert, as the reflector insert may flex under pressure. Rotate clockwise until teeth lock under bracket...
- Page 13 CAUTION: Do not touch or clean LED emitters with anything other than oil-free canned air. Tools required: • Adjustable wrench • #2 Phillips screwdriver 1. Use oil-free canned air to clean the LED emitters before you install the retrofit. Do not touch the LED emitters. 2.
-
Page 14: Install The Fixture
Attach C-clamp and Safety Cable The C-clamp attaches the fixture to the mounting pipe and allows you to adjust the position of the mounted fixture. ETC recommends using 1.5 in schedule 40 pipe. 1. Tightly fasten the C-clamp to the yoke with the provided yoke bolt and lock washer. -
Page 15: Connect Cables
Leave a loop of data cable between the connector and the strain relief to ensure that the connection point is not stressed. • To order an RJ45-to-socket XLR adapter, use ETC part number W6538. • To order an RJ45-to-plug XLR adapter, use ETC part number W6539. -
Page 16: Configure The Fixture
DMX channels Channel Description Value Intensity Green Blue Amber 0 = No strobe Strobe 1–254 = Linear increase from 1 per second (DMX = 1) to 33 per second (DMX = 254) 255 = No strobe DMX pinout Description Description DMX + Not connected DMX - DMX2 - (Pass Thru) - Page 17 Play Presets and Sequences The fixture has twelve factory-configured presets and five factory- configured sequences. When you play a preset or sequence on a fixture: • The same preset number or sequence number plays on any connected fixtures that are not receiving DMX. •...
-
Page 18: Data Loss Behavior
Pre-configured Sequences Sequence Name Rainbow Fast Rainbow Slow Warm Colors Fast Cool Colors Fast Random Re-record Presets 1. Using DMX, set the desired levels for the new preset. 2. Press the Up button and Down button simultaneously to activate the Presets/Sequences menu. 3. -
Page 19: Focus The Fixture
Focus the Fixture Set the Z-adjustment Use the Z-adjustment knob located on the rear of the fixture to adjust the field of the LED light for specific applications. 1. Turn on the fixture and aim it at a flat surface. 2. -
Page 20: Shape The Beam
The pattern holder slot is on the top side of the barrel and in front of the shutters. It accommodates A-size, B-size, and glass pattern holders. Because the Source 4WRD Color II fixture aperture is 3 inches wide, ETC recommends A-size patterns for maximum effectiveness. Set the Set the Z- Z-adjustment to FLAT for the sharpest pattern focus (see... -
Page 21: Troubleshoot The Fixture
• : Screen toggles between to indicate a problem with the color calibration. The fixture will need to be returned to the ETC factory; contact your local dealer to set up a repair. No App • : Screen toggles between to indicate that the upgraded fixtures have a software issue. -
Page 22: Restore Factory Defaults
: See Update the Fixture Software on the facing page. • : Force the fixture into bootloader mode to troubleshoot the failure of software updates. Contact ETC Technical Services for assistance (see Help from ETC Technical Services page 2). • : Used internally by ETC. -
Page 23: Update The Fixture Software
Update the Fixture Software ETC recommends using UpdaterAtor software to manage software updates. For information on UpdaterAtor, see the UpdaterAtor Software Quick Guide and the UpdaterAtor Software Release Note , which you can download from etcconnect.com. You can push newer software versions from a connected fixture to selected Source 4WRD Color II fixtures (see table that follows). -
Page 24: Rdm Values
RDM Values Parameter RDM PID Value Manufacturer ID 0x6574 Electronic Theatre Controls ETC Source 4WRD Color II Model ID 0x0803 Range = 1–507 DMX Start Address 0x00F0 0 = Standard (1.2 kHz) Output Frequency 0x8123 1 = High (20 kHz) Clean and Maintain the Fixture... -
Page 25: Clean The Lenses
Clean the Lenses WARNING: Do not use ammonia-based cleaners or other harsh commercial cleaners. Clean lens and reflector only as directed. Commercially available glass cleaning agents should be avoided as they may contain ammonia, other harsh chemical detergents or abrasive agents. These cleaners may damage the glass surface and the Anti-Reflective coatings. -
Page 26: Clean The Reflector Insert
Clean the Reflector Insert WARNING: Unplug the fixture and allow it to cool before you clean the reflector. AVERTISSEMENT : Débrancher le projecteur et le laisser refroidir avant de nettoyer le réflecteur. 1. To protect the lamp housing during cleaning, remove the LED lamp housing by loosening the attachment screw and pulling the housing page 9 straight out. -
Page 27: Clean 5° And 10° Polymer Lenses
Clean 5° and 10° Polymer Lenses To quickly clean the lenses, remove dust with a blast of oil-free air. If this is not sufficient, follow these steps. CAUTION: Handle polymer lenses by their edges only. Never rub anything dry on a polymer lens. 1. -
Page 28: Specifications
• Source 4WRD Color II retrofit kit only: 1.63 kg (3.6 lb) • Source 4WRD Color II installed on 26° fixture with yoke and C-clamp: 8.98 kg (19.8 lb) Optical Compatible with all ETC Source Four lens tubes. Source 4WRD Color II Installation and User Manual... -
Page 29: Fcc Compliance
FCC Compliance Source 4WRD Color II (For any FCC matters): Electronic Theatre Controls, Inc. 3031 Pleasant View Road Middleton, WI 53562 +1 (608) 831-4116 etcconnect.com This device complies with Part 15 of the FCC Rules. Operation is subject to the following two conditions: (1) this device may not cause harmful interference, and (2) this device must accept any interference received;... - Page 30 Source 4WRD Color II Installation and User Manual...
- Page 31 Source 4WRD Color II Installation and User Manual...
- Page 32 | Support support.etcconnect.com Contact etcconnect.com/contactETC | © 2023 Electronic Theatre Controls, Inc. Trademark and patent info: etcconnect.com/ip | Product information and specifications subject to change. ETC intends this document to be provided in its entirety. 7068M1220-3.0 Rev A Released 2023-01...
Need help?
Do you have a question about the S4WRDCII and is the answer not in the manual?
Questions and answers