ETC Source 4WRD Installation And User Manual
Par and parnel fixture bodies
Hide thumbs
Also See for Source 4WRD:
- Installation and user manual (32 pages) ,
- Quick manual (9 pages) ,
- Installation and user manual (24 pages)

Related Manuals for ETC Source 4WRD


Summary of Contents for ETC Source 4WRD
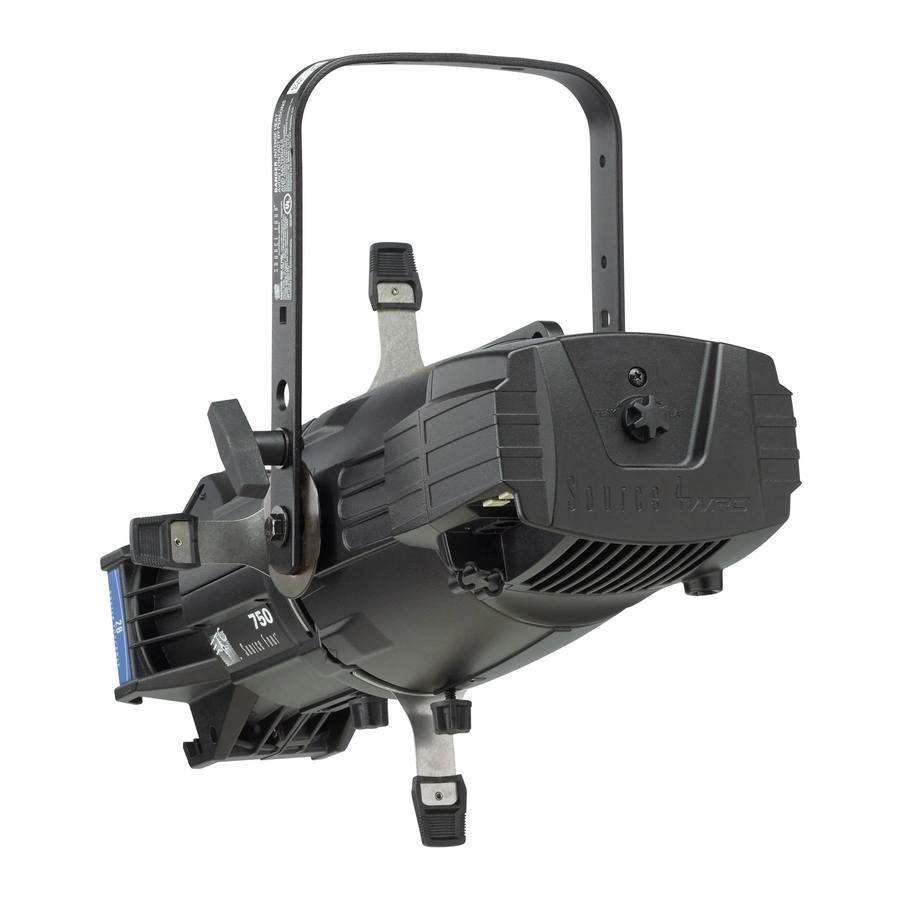
- Page 1 Source 4WRD PAR and PARNel Fixture Bodies Installation and User Manual Part Number: 7067M1220 Rev C Released: 2020-02...
- Page 2 To view a list of ETC trademarks and patents, go to etcconnect.com/ip. All other trademarks, both marked and not marked, are the property of their respective owners. ETC intends this document, whether printed or electronic, to be provided in its entirety.
-
Page 3: Table Of Contents
Install the Source 4WRD LED Attach C-clamp and Safety Cable Connect Cables Configure the Fixture RDM Values Set Up the Fixture Set the Angle within the Yoke Use the Accessory Holder Loosen the Z-adjustment Knob Adjust the Focus Knob (PARNel Fixtures Only) Source 4WRD Installation and User Manual... - Page 4 Troubleshoot the Source 4WRD About PAR Lenses Clean and Maintain the Fixture Clean the Fixture Store the Retrofit Clean the Lenses Change a PAR Lens Change a Front PARNel Lens Clean the Reflector Source 4WRD Installation and User Manual...
-
Page 5: Introduction
Introduction Use the Source 4WRD LED or Source 4WRD II LED (supplied separately) with the Source 4WRD PAR or PARNel Fixture Body to create the Source 4WRD PAR or PARNel fixture. The fixture produces about 20% more flux than a 750W long-life Source Four PAR while consuming less power, and it can be line-dimmed, DMX-dimmed, or dimmed locally on the fixture. -
Page 6: Help From Etc Technical Services
ETC support website at support.etcconnect.com or the main ETC website at etcconnect.com. If none of these resources are sufficient, contact ETC Technical Services directly at one of the offices identified below. Emergency service is available from all ETC offices outside of normal business hours. -
Page 7: Safety
Safety The Source 4WRD fixture is intended for professional use only. Read the entire manual before using this equipment. WARNING: This fixture must be installed by a qualified electrician in accordance with all national and local electrical and construction codes and regulations. - Page 8 WARNING: RISK OF FIRE OR ELECTRIC SHOCK! Installing the Source 4WRD LED retrofit kit requires knowledge of luminaire electrical systems. If you are not qualified, do not attempt installation. Contact a qualified electrician. AVERTISSEMENT : RISQUE D'INCENDIE OU DE DÉCHARGE...
- Page 9 WARNING: Note the following safety warnings before use: The Source 4WRD LED is not user serviceable. Field • modification of the Source 4WRD LED will void your ETC warranty. Do not use the Source 4WRD fixture below 5°C (41°F). •...
- Page 10 Specifications For full product specifications, see the Source 4WRD PAR or PARNel datasheet at etcconnect.com. Electrical (120V) 114–125 VAC 60 Hz power input • 150 W draw at full • Recommended 2 fixtures per dimmed circuit (D20 module) • Maximum of 14 fixtures per non-dimmed circuit (R20 module) •...
- Page 11 (145°F) at Ta=50°C (122°F) External Temperature (steady state achieved) at 25°C (77°F) • ambient: 38°C (100°F) Weight Source 4WRD PAR fixture body only: 2.83 kg (6.25 lb) • Assembled Source 4WRD PAR fixture: 4.53 kg (9.98 lb) • Source 4WRD PARNel fixture body only: 3.49 kg (7.70 lb) •...
-
Page 12: Install The Fixture
Install the Fixture Wire the power connector (if needed) If you ordered a Source 4WRD retrofit without a power connector, wire the connector in accordance with all national and local electrical codes: Brown = Live • Blue = Neutral • Green/Yellow = Protective earth •... - Page 13 Source 4WRD PAR or PARNel fixture. Note: When used as part of a Source 4WRD retrofit on a Source Four ellipsoidal fixture, the Z-adjustment knob adjusts the field of the LED light for specific applications. On the Source 4WRD PAR or PARNel fixture, however, no additional adjustments are needed after you loosen the Z-adjustment knob as described above.
-
Page 14: Attach C-Clamp And Safety Cable
The C-clamp attaches the fixture to the mounting pipe and allows you to adjust the position of the mounted fixture. ETC recommends using 1.5 in schedule 40 pipe. Tightly fasten the C-clamp to the yoke with the provided yoke bolt and lock washer. -
Page 15: Connect Cables
See Configure the Fixture on page 14 WARNING: Do not use or store the Source 4WRD fixture below 5°C (41°F). When the fixture has been stored or transported in cold temperatures, allow it to warm to room temperature for a minimum of 1 hour before applying power. - Page 16 (You may need to adjust dimmer settings for optimal fixture control). In addition to the recommended settings in the following tables, you may need to increase the SCR Off Time from the default setting. Contact ETC for assistance in changing the SCR Off Time, or any other CEM classic, Help from ETC Technical Services on page 2...
- Page 17 Note: When line-dimming the fixture, performance may vary based on the control settings of the dimmer. For this reason, ETC recommends using line-dimming for level-setting or for architectural dimming. ETC recommends testing the Source 4WRD fixture on all existing dimmers that you want to use.
-
Page 18: Configure The Fixture
. The display will read (Level = Full). Use the down L.99 arrow to decrease the level to a percentage of full ( = 99%, L.98 = 98%, etc.). You can set levels from 0%–100% (full). Up and down navigation User interface RDM Values Parameter RDM PID... -
Page 19: Set Up The Fixture
Loosen the Z-adjustment Knob Z-adjustment knob The Source 4WRD PAR and PARNel optics are optimized for PEAK focus. Turn the Z-adjustment knob toward PEAK until the knob becomes loose, and then tighten the Z-adjustment knob an additional quarter turn. This sets the LED light source into the appropriate position within the Source 4WRD PAR or PARNel fixture. -
Page 20: Adjust The Focus Knob (Parnel Fixtures Only)
To adjust focus knob tension on a PARNel lens, loosen or tighten the focus knob screw, which is located on the bottom of the lens. Focus knob in flood position 45° field angle Focus knob screw Focus knob in spot position 25° field angle Focus knob Source 4WRD Installation and User Manual... -
Page 21: Troubleshoot The Source 4Wrd
Troubleshoot the Source 4WRD The following error codes may be seen on the Source 4WRD user Help from ETC interface. For more troubleshooting assistance, see Technical Services on page 2 (OTP) indicates that the fixture has gone into over-temperature • protection. Allow the fixture to cool, and then reset the fixture to clear the code. -
Page 22: About Par Lenses
About PAR Lenses The Source 4WRD PAR Fixture Body includes a flat lens, but the fixture can use the same lenses as the Source Four PAR. Identify the lens type, or beam spread, by the lens texture. VNSP Very narrow spot... -
Page 23: Store The Retrofit
Store fixture before applying power. facing up Note: After shipping or storing the Source 4WRD LED below 5°C (41°F), visually inspect the unit to ensure the low temperatures have not caused cracking of the LED array. Clean the Lenses WARNING: Do not use ammonia-based or other harsh commercial cleaners. - Page 24 Spring clip behind the tabs on the bottom of the lens rotator ring. Gently push the top of the lens inward until it snaps behind the clip. Source 4WRD Installation and User Manual...
-
Page 25: Change A Front Parnel Lens
Allow the lens to drop forward from under the clip. When the lens drops, remove your finger, allowing the lens to slide forward until it rests on the lens catchers. See figure at right. Lens Carefully remove the lens. catcher Source 4WRD Installation and User Manual... - Page 26 Bottom two The bottom of the lens has a center notches cluster of four notches. Place the two center notches behind the tabs at the bottom of the lens rotator ring. Source 4WRD Installation and User Manual...
-
Page 27: Clean The Reflector
Remove the lens. See Remove a PAR Lens on page 20 Remove a PARNel Front Lens on page 21 To protect the Source 4WRD LED during cleaning, remove the LED housing by loosening the attachment screw and pulling the LED page 1 housing straight out. See image on Remove any dust with a blast of oil-free air or wipe with a clean, lint-free cloth. - Page 28 Conta c t etcconnect.com/contactETC © 2020 Electronic Theatre Controls, Inc. Product information and specifications subject to change. ETC intends this document to be provided in its entirety. Trademark and patent info: etcconnect.com/ip 7 0 6 7 M 1 2 2 0 Rev C Released 2020-02...
Need help?
Do you have a question about the Source 4WRD and is the answer not in the manual?
Questions and answers