ETC Source 4WRD Color II Installation And User Manual
Retrofit
Hide thumbs
Also See for Source 4WRD Color II:
- Installation and user manual (28 pages) ,
- Quick manual (9 pages) ,
- Installation and user manual (24 pages)

Related Manuals for ETC Source 4WRD Color II


Summary of Contents for ETC Source 4WRD Color II
- Page 1 Source 4WRD Color II Retrofit (CE) Installation and User Manual Version 3.0 Part Number: 7068M1230-3.0 Rev A Released: 2023-01...
- Page 2 To view a list of ETC trademarks and patents, go to etcconnect.com/ip. All other trademarks, both marked and not marked, are the property of their respective owners. ETC intends this document, whether printed or electronic, to be provided in its entirety.
-
Page 3: Table Of Contents
Install the Source 4WRD Color II Retrofit Install the Fixture Attach Hanging Clamp and Safety Cable Connect Cables Configure the Fixture Set the DMX Address Play Presets and Sequences Data Loss Behavior Focus the Fixture Set the Z-adjustment Source 4WRD Color II Installation and User Manual... - Page 4 RDM Values Clean and Maintain the Fixture Clean the Fixture Store the Retrofit Clean the Lenses Clean the Reflector Insert Clean 5° and 10° Polymer Lenses Specifications Electrical Environment Weight Optical FCC Compliance Source 4WRD Color II Installation and User Manual...
-
Page 5: Introduction
When not using DMX, you can use any of the 12 presets or 5 sequences on the Source 4WRD Color II. The Source 4WRD Color II can also be used with the Source 4WRD PAR or PARNel Fixture Body to create a Source 4WRD Color II PAR or PARNel fixture. - Page 6 ETC support website at support.etcconnect.com or the main ETC website at etcconnect.com. If none of these resources are sufficient, contact ETC Technical Services directly at one of the offices identified below. Emergency service is available from all ETC offices outside of normal business hours.
-
Page 7: Safety
Safety The Source 4WRD Color II fixture is intended for professional use only. Read the entire manual before using this equipment. WARNING: Note the following warnings before use: • The Source 4WRD Color II is not user serviceable. Field modification of the Source 4WRD Color II will void your ETC warranty. - Page 8 à la norme according to IEC 60536. IEC 60536. L’entrée et la sortie de ce produit The product input or output is convient uniquement au courant suitable for direct current only. continu. Source 4WRD Color II Installation and User Manual...
-
Page 9: Retrofit The Fixture
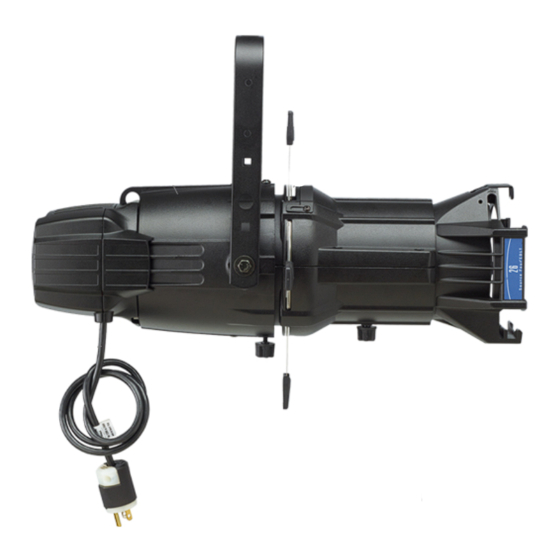
Retrofit kit User interface and navigation buttons Wire the Power Connector If you ordered a Source 4WRD Color II retrofit without a power connector, wire the connector in accordance with all national and local electrical codes: • Brown = Live •... - Page 10 4. Remove the lamp housing from the fixture body. Note: The burner assembly is no longer needed. If you would like ETC to recycle the burner assembly, contact ETC Technical Services for more information. See Help from ETC Technical Services on page 2.
- Page 11 Install the Reflector Insert When you use the Source 4WRD Color II with a Source Four fixture body, you must install the reflector insert provided with the Source 4WRD Color II in the Source Four fixture body. CAUTION: Use the reflector insert only with the Source 4WRD Color II retrofit.
- Page 12 Note: No additional diffusion is used with the reflector insert. The reflector insert replaces the older Source 4WRD Color diffusion insert. 5. Replace and secure the shutter barrel and lens tube. Source 4WRD Color II Installation and User Manual...
- Page 13 3. Secure the earth bond wire to the fixture body using the provided screw and washer. 4. Gently slide the Source 4WRD Color II onto the fixture body and threaded post while guiding the LED tower into the lamp housing hole, as shown in the following image.
-
Page 14: Install The Fixture
5. Use a #2 Phillips screwdriver to tighten the screw located on the back end of the Source 4WRD Color II, directly above the Z-adjustment knob. 6. Pull gently to verify secure attachment. 7. Set the Z-adjustment using the Z-adjustment knob. See Set the Z- adjustment on page 16... -
Page 15: Connect Cables
Connect Cables WARNING: Do not use or store the Source 4WRD Color II fixture below 5°C (41°F). When the fixture has been stored or transported in cold temperatures, allow it to warm to room temperature for a minimum of 1 hour before applying power. - Page 16 33 per second (DMX = 254) 255 = No strobe DMX pinout Description Description DMX + Not connected DMX - DMX2 - (Pass Thru) DMX2 + (Pass Thru) Common (shield) Not connected Common (shield) Source 4WRD Color II Installation and User Manual...
-
Page 17: Configure The Fixture
2. Press the Up button or Down button as needed to scroll through the available presets and sequences. 3. To stop the selected preset or sequence, press the Up button and Down button simultaneously. The display will revert to show the DMX start address. Source 4WRD Color II Installation and User Manual... - Page 18 4. Press and hold either the Up button or Down button to re-record the preset. The display shows a three-second countdown, and then records the current look to the preset. Source 4WRD Color II Installation and User Manual...
-
Page 19: Data Loss Behavior
• If you selected a preset or sequence, that preset or sequence automatically plays. • If no preset or sequence is active in the background, the fixture goes dark and the DMX start address flashes on the user interface. Source 4WRD Color II Installation and User Manual... -
Page 20: Focus The Fixture
LED light for specific applications. 1. Turn on the fixture and aim it at a flat surface. 2. Slide the fixture barrel toward or away from the Source 4WRD Color II to create a hard-edged beam of light. -
Page 21: Shape The Beam
The pattern holder slot is on the top side of the barrel and in front of the shutters. It accommodates A-size, B-size, and glass pattern holders. Because the Source 4WRD Color II fixture aperture is 3 inches wide, ETC recommends A-size patterns for maximum effectiveness. Set the Set the Z- Z-adjustment to FLAT for the sharpest pattern focus (see... -
Page 22: Troubleshoot The Fixture
Troubleshoot the Fixture The following error codes may be seen on the Source 4WRD Color II user interface. For more troubleshooting assistance, see Help from ETC Technical Services on page 2 • : Screen toggles between to indicate that the fixture has gone into over-temperature protection mode to avoid damaging the fixture. -
Page 23: Restore Factory Defaults
: Force the fixture into bootloader mode to troubleshoot the failure of software updates. Contact ETC Technical Services for assistance (see Help from ETC Technical Services page 2). • : Used internally by ETC. • : Return to the standard display. Source 4WRD Color II Installation and User Manual... -
Page 24: Update The Fixture Software
Update the Fixture Software ETC recommends using UpdaterAtor software to manage software updates. For information on UpdaterAtor, see the UpdaterAtor Software Quick Guide and the UpdaterAtor Software Release Note , which you can download from etcconnect.com. You can push newer software versions from a connected fixture to selected Source 4WRD Color II fixtures (see table that follows). -
Page 25: Rdm Values
• Store the Source 4WRD Color II at temperatures of 5°C (41°F) or higher. • If you must store the Source 4WRD Color II below 5°C (41°F), make sure it is in an upright position as shown. Allow it to warm to room... -
Page 26: Clean The Lenses
50%-50% mixture of each to clean the glass surface. 3. Slide the lens tube back into the barrel with the color frame retaining clip on top. Reinstall the beam focus knob and retaining bolt. Source 4WRD Color II Installation and User Manual... -
Page 27: Clean The Reflector Insert
7. Reinstall the barrel rotation knob and tighten the retaining bolt. 8. Reinstall the LED lamp housing and tighten the attachment screw. See Install the Source 4WRD Color II Retrofit on page 9 Source 4WRD Color II Installation and User Manual... -
Page 28: Clean 5° And 10° Polymer Lenses
9. Set the lens back in the lens tube with the ridged side facing the front of the tube. Reinstall the lens brackets. 10. Slide the lens tube back into the barrel with the retaining clip for the color frame on top. Reinstall the beam focus knob. Source 4WRD Color II Installation and User Manual... -
Page 29: Specifications
• External Temperature (steady state achieved) at 25°C (77°F) ambient: 45°C (113°F) Weight • Source 4WRD Color II retrofit kit only: 1.63 kg (3.6 lb) • Source 4WRD Color II installed on 26° fixture with yoke and C-clamp: 8.98 kg (19.8 lb) Optical Compatible with all ETC Source Four lens tubes. -
Page 30: Fcc Compliance
Operation of this equipment in a residential area is likely to cause harmful interference, in which case the user will be required to correct the interference at their own expense. Source 4WRD Color II Installation and User Manual... - Page 31 Source 4WRD Color II Installation and User Manual...
- Page 32 | Support support.etcconnect.com Contact etcconnect.com/contactETC | © 2023 Electronic Theatre Controls, Inc. Trademark and patent info: etcconnect.com/ip | Product information and specifications subject to change. ETC intends this document to be provided in its entirety. 7068M1230-3.0 Rev A Released 2023-01...
Need help?
Do you have a question about the Source 4WRD Color II and is the answer not in the manual?
Questions and answers