Table of Contents
Advertisement
Quick Links
Advertisement
Table of Contents

Related Manuals for Cardinal 210FE


Summary of Contents for Cardinal 210FE
- Page 1 210FE WEIGHT INDICATOR Installation and Technical Manual 8200-0727-2M Rev A 203 E. Daugherty, Webb City, MO 64870 USA Printed in USA Ph: 417-673-4631 Fax: 417-673-2153 02/15 www.cardinalscale.com Technical Support: Ph: 866-254-8261 tech@cardet.com...
- Page 2 8200-0727-2M Rev A 210FE Installation & Technical...
- Page 3 Configuration and upgrades can easily be performed in the field, while still maintaining the rigid control the most demanding installations require. This flexibility insures the Model 210FE will be able to meet your weight indicating needs for years to come.
- Page 4 CAUTION: RISK OF EXPLOSION IF BATTERY IS REPLACED BY AN INCORRECT TYPE. DISPOSE OF USED BATTERIES ACCORDING TO THE INSTRUCTIONS. ATTENTION: RISQUE D'EXPLOSION SI LA BATTERIES EST REMPLACE'E PAR UN TYPE INCORRECT. REJETEZ LES BATTERIES UTILISE'ES SELON LES INSTRUCTIONS. 8200-0727-2M Rev A 210FE Installation & Technical...
-
Page 5: Table Of Contents
CALIBRATION "C" NUMBERS - - - - - - - - - - - - - - - - - - - - - - - - - - - - - - - - - - - - - - - Page 69 8200-0727-2M Rev A 210FE Installation & Technical... - Page 6 PART IDENTIFICATION - - - - - - - - - - - - - - - - - - - - - - - - - - - - - - - - - - - - - - - - - - - Page 107 8200-0727-2M Rev A 210FE Installation & Technical...
-
Page 7: Specifications
1 ea bi-directional 20mA port (uses one of the four RS-232 ports) 1 ea USB port (uses one of the four RS-232 ports) 8 ea Remote Isolated Inputs 8 ea Remote Isolated Outputs 8200-0727-2M Rev A 210FE Installation & Technical... -
Page 8: Standard Features
Any application affected by vibration or movement on ® the scale platform can benefit using StableSENSE 8200-0727-2M Rev A 210FE Installation & Technical... -
Page 9: Precautions
ALWAYS store and transport electronic printed circuit cards and components in anti-static protective bags or packaging. 8200-0727-2M Rev A 210FE Installation & Technical... - Page 10 8200-0727-2M Rev A 210FE Installation & Technical...
-
Page 11: Site Preparation Requirements
SITE PREPARATION REQUIREMENTS The Cardinal 210FE indicator is a precision weight-measuring instrument. As with any precision instrument, they require an acceptable environment to operate at peak performance and reliability. This section is provided to assist you in obtaining such an environment. - Page 12 RFI (Radio Frequency Interference) in a digital weight indicator is weight indication instability during a radio transmission. Cardinal digital weight indicators are designed with special grounding and RFI shielding to achieve a high degree of immunity to common RFI. To maximize the digital weight indicator’s immunity to radio transmissions, follow these guidelines: 1.
-
Page 13: Installation
Mounting The Model 210FE indicator is housed in a Stainless Steel wall or desk-mount enclosure. The gimbal may be mounted on a desktop or other smooth, flat, horizontal surface or may be mounted on a wall. -
Page 14: Load Cell Cable Connection For Rfi Suppression
If sense leads ARE used (as in motor truck scales), these plug-in jumpers should be positioned on one plug-in pin only or removed and stored for later use (see Figure No. 15). 8200-0727-2M Rev A 210FE Installation & Technical... - Page 15 12. The shield wire is secured when tightening the gland connector nut. See Figure No. 7. 13. Do not over-tighten the connector but make certain it is snug. Figure No.7 Figure No.6 8200-0727-2M Rev A 210FE Installation & Technical...
-
Page 16: Load Cell Cable Connection (Standard Gland Connector)
The sense wires must be connected between the +SENS, -SENS terminals on the indicator and the +EXCITATION, -EXCITATION wires of the load cells or the +SENS, -SENS terminals of the load cell trim board or the section seal trim board. 8200-0727-2M Rev A 210FE Installation & Technical... -
Page 17: Serial I/O Cable Installation
INSTALLATION, CONT. Serial I/O Cable Installation The 210FE indicator may be connected to a printer to record weight and associated data or it may be connected to a remote display or even to a computer for transmission of weight data. - Page 18 Interconnect Wiring for 20mA Current Loop Operation Peripheral Device has PASSIVE END of Current Loop. 210FE Figure No. 10 PORT RS-232 20mA TXD0 RXD0 TXD1 RXD1 TXD2 RXD2 TXD3 RXD3 * Mutually exclusive ** Mutually exclusive 8200-0727-2M Rev A 210FE Installation & Technical...
-
Page 19: Usb Interface And Usb Cable Installation
INSTALLATION, CONT. USB Interface The 210FE indicator USB Interface is a standard full speed (12Mbps) USB 2.0 device port. It can be connected to a USB 2.0 host, with the Cardinal Scale 8200-B163-0A USB CABLE or an industry standard USB 2.0 cable, to be used as the COM3 serial I/O port set to 8 bit data, 1 stop bit, no parity, 9600 to 115.2k baud. -
Page 20: Main Pc Board I/O Functions Table
The relay box cable wire numbers correspond to the indicator main PC board remote input (P3) and output (P2) terminal connection pins. CABLE WIRE RELAY NUMBER CABLE WIRE RELAY NUMBER NUMBER (Set Proper Jumpers) NUMBER (Set Proper Jumpers) +SRC (For AC Input Relays) 8200-0727-2M Rev A 210FE Installation & Technical... -
Page 21: Optically Isolated Remote Inputs
NOTE: The input must be momentarily connected to GND to initiate the function. AC Input Relay Board(s) The AC Input Relay Board(s) are mounted in an external junction box for use with the 210FE Indicator. The RB4-ACIN (115 VAC) or RB4-ACINV (230 VAC) contain one board and supports 4 inputs (jumper selectable). - Page 22 Relay Box Assembly RB4-ACIN or RB8-ACIN Relay Box Assembly RB4-ACINV or RB8-ACINV Relay Box Assembly RB4-ACIN or RB8-ACIN IMPORTANT! AC INPUT RELAYS ARE VOLTAGE DEPENDENT. A DIFFERENT RELAY IS REQUIRED FOR 115 VAC AND 230 VAC! 8200-0727-2M Rev A 210FE Installation & Technical...
-
Page 23: Pwc/Checkweigher Logic Level Output
INSTALLATION, CONT. Preset Weight Comparator/Checkweigher Logic Level Output If you so choose, you may use the logic level outputs from your Model 210FE indicator’s preset weight comparators or checkweigher to control peripheral devices used to manage the flow of material or signal when the weight is within preset limits. Note that these outputs are at logic level and cannot drive external devices directly, with the exception of the Cardinal 2XX-OU Checkweigher Light Bar. -
Page 24: Ac Output Relay Board(S)
INSTALLATION, CONT. AC Output Relay Board(s) The AC Output Relay Boards are mounted in an external junction box for use with the 210FE Indicator and can be purchased from Cardinal. The RB4-ACOUT contains one board and supports four outputs (jumper selectable). The RB8-ACOUT contains two boards and supports eight outputs. -
Page 25: Rb4C Relay J-Box
J4 (see Figure No. 14), one for each relay. Figure No. 14 (Relay Control Source Type Jumpers) RB4C Output Relay Wiring Example Figure No. 15 RB4C Control Circuit Wiring Example 210FE 210FE Figure No. 16 8200-0727-2M Rev A 210FE Installation & Technical... -
Page 26: Main Pcb (Figure No. 17)
INSTALLATION, CONT. Main PCB Figure No. 17 8200-0727-2M Rev A 210FE Installation & Technical... -
Page 27: Main Pcb Jumpers
Main PCB Jumpers J2 – REMOTE INPUT SRC (SOURCE) The Remote Input SRC jumper J2, when connected, allows the 210FE indicator to supply (source) 12-24VDC to a solid-state relay or other load of 200 ohms or greater. The positive connection from the relays must be connected to the remote input connector pins and the negative wire from the relays to the GND/SHLD pin. -
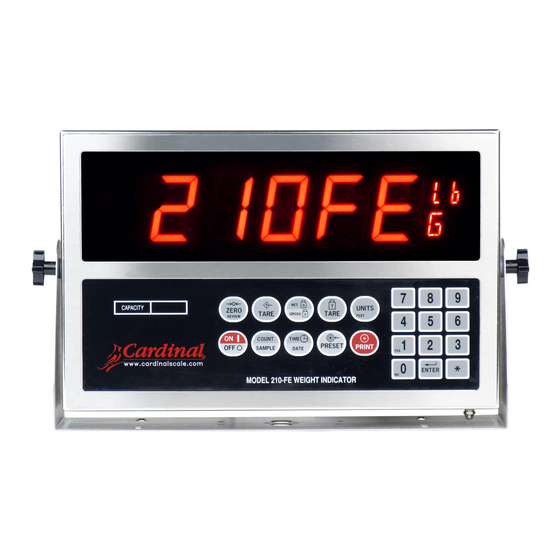
Page 28: Keypad Functions
KEYPAD FUNCTIONS The Model 210FE is equipped with a 22-key keypad. The keypad is used to enter commands and data into the instrument. This section describes each key along with its normal function. It is helpful to refer to the actual instrument while reading this section. - Page 29 Once prompted, press the ENTER key to display the current head count. Use the numeric keys to select the new head count (1-255) and then press the ENTER key to accept it. The value you entered will appear on the next ticket that is printed. 8200-0727-2M Rev A 210FE Installation & Technical...
- Page 30 TIME/DATE KEY This key is used to enter the clock mode to program the time, date and consecutive number. Pressing the TIME/DATE key will enter the clock mode with the 210FE displaying HoUr=. 12-Hour Format Selected In Setup (td=12) 1. With the display showing HoUr=, press the ENTER key.
- Page 31 If Stor is enabled (Stor=YES), you can store/modify a permanently stored preset ID by pressing the key followed by the PRESET key, then enter the desired stored preset ID (Stor=?) then press the ENTER key. 8200-0727-2M Rev A 210FE Installation & Technical...
- Page 32 If displaying gross weight, the only weight printed is gross weight. If displaying net weight, the gross, tare, and net weights are printed. The 210FE includes support for visual tickets. Visual tickets are designed by the PC based programs...
- Page 33 This combination will print the Net accumulator. AND NET/GROSS KEY, ZERO KEY This combination will zero (clear) the Net accumulator. AND NET/GROSS KEY, NET/GROSS KEY This combination will display the Gross accumulator. 8200-0727-2M Rev A 210FE Installation & Technical...
-
Page 34: Display Brightness
DISPLAY BRIGHTNESS The 210FE indicator has an extra-bright 2 1/2” LED weight display. Ten levels of brightness can be set from the 210FE keypad by using a combination of the key and the 1 or 0 key. To Increase Brightness: 1. - Page 35 This is used to indicate that the displayed unit of weight measurement is grams. It is displayed in the two upper characters of the annunciator display. 8200-0727-2M Rev A 210FE Installation & Technical...
- Page 36 It is displayed in the lower character of the annunciator display. This is turned on to show that the displayed weight is the Tare weight. It is displayed in the lower character of the annunciator display. 8200-0727-2M Rev A 210FE Installation & Technical...
-
Page 37: Setup And Calibration
SETUP AND CALIBRATION Your Model 210FE indicator has been thoroughly tested and calibrated before being shipped to you. If you received the indicator attached to a scale, calibration is not necessary. If the indicator is being connected to a scale for the first time or recalibration is necessary for other reasons, proceed as indicated. -
Page 38: Setup
0/NO or 1/YES, enter the new setting, then press the ENTER key to save it. PASS (No) PASS (Yes) Password protection is not needed. Password protection is desired. The Setup advances to the LFt= prompt next prompt will be PASS= 8200-0727-2M Rev A 210FE Installation & Technical... - Page 39 ENTER key to save it. Allowable values are: 0 = none 4 = oz (ounces) 1= tn (tons) 5 = kg (kilograms) 2= g (grams) 6 = tonnes (metric tons) 3 = lb (pounds) 7 = lb/oz (pounds/ounces) 8200-0727-2M Rev A 210FE Installation & Technical...
- Page 40 ENTER key again to save it. Otherwise, using the numeric keys, 0/NO or 1/YES, enter the new setting, then press the ENTER key to save it. trL=1 (Yes) trL=0 (No) 4% of scale capacity Full capacity (no limit) 8200-0727-2M Rev A 210FE Installation & Technical...
- Page 41 ENTER key again to save it. Otherwise, use the numeric keys to select the format (12 or 24 hour) of the Model 210FE clock operation, then press the ENTER key to save it. Note that in the 24 hour format, 12 is added to all times after noon, i.e. 3 PM would be 1500.
- Page 42 ENTER key to save it. Otherwise, use the numeric keys to enter the new Scale ID and then press the ENTER key to save the new setting. Allowable values are: 0 through 99. 8200-0727-2M Rev A 210FE Installation & Technical...
-
Page 43: Analog To Digital Filtering
To accept the value displayed, press the ENTER key, otherwise, use the numeric keys to enter a new value then press the ENTER key to save it. Note that entry of a 0 disables this feature. 8200-0727-2M Rev A 210FE Installation & Technical... - Page 44 If the displayed value is acceptable, press the ENTER key to save it. Otherwise, use the numeric keys to enter a new value and press the ENTER key to save the new setting. Allowable values for the stable count are: 3 through 255. 8200-0727-2M Rev A 210FE Installation & Technical...
- Page 45 3. F= FILTER SETTING (1 to 99) determination: Set to desired results. 4. If stability is unacceptable with any setting of F=, reduce the sample rate and/or increase the break range, b= setting for increased filtering. 8200-0727-2M Rev A 210FE Installation & Technical...
- Page 46 8200-0727-2M Rev A 210FE Installation & Technical...
-
Page 47: Calibration
CAL1= setting, otherwise press the ENTER key to advance to the Sio menu. CALIBRATION MODES The 210FE indicator has five modes that can be used to perform calibration. Three of the modes require a test load or test weights, one requires the scale to be empty (and at zero) and the last uses the calibration “C”... - Page 48 • Starting at the left and advancing right, a series of dashes will appear on the display. The dashes will stay on the display momentarily, then disappear, after which the display will show: Sio?. 8200-0727-2M Rev A 210FE Installation & Technical...
- Page 49 The display will show CAL2=0. This is the second of two calibration steps. • Remove the weights on the scale platform, and then press the ZERO key. • The display will advance to Sio?. 8200-0727-2M Rev A 210FE Installation & Technical...
- Page 50 NOTE: If any components have been changed that affect calibration and/or your scale is used in a commercial application and must be "Legal for Trade" you cannot use the “C” numbers to re-calibrate. 8200-0727-2M Rev A 210FE Installation & Technical...
-
Page 51: Setup Guardian Scale
If you selected id=1 (Yes, ID Prompt), an additional prompt, "a clr=" will be displayed. If you selected id=0 (No ID Prompt) proceed to A-d (A-d?) Analog to Digital Filtering. 8200-0727-2M Rev A 210FE Installation & Technical... -
Page 52: Digital Fill Control
No trim weight adjustment will be made at the completion of a filling operation. APrnt= (Automatic Print) YES The time, date, and weight will be automatically printed at the conclusion of the fill. No automatic print at the conclusion of the fill. 8200-0727-2M Rev A 210FE Installation & Technical... - Page 53 Filling parameters may be stored and recalled by entering an ID No Fill control storage. h oUt= (High State Before Cutoff) If the comparator outputs are to be High before cutoff, answer YES to this prompt. 8200-0727-2M Rev A 210FE Installation & Technical...
-
Page 54: Preset Weight Comparator
0/NO or 1/YES, enter the new setting, then press the ENTER key to save it. A clr=1 (Yes) a clr=0 (No) Automatically clears the ID after the ID is not cleared when ticket prints ticket has printed. and can be used for next transaction. 8200-0727-2M Rev A 210FE Installation & Technical... - Page 55 0/NO or 1/YES, enter the new setting, then press the ENTER key to save it. A clr=1 (Yes) a clr=0 (No) Automatically clears the ID after the ID is not cleared when ticket prints ticket has printed. and can be used for next transaction. 8200-0727-2M Rev A 210FE Installation & Technical...
-
Page 56: Axle Weigher
So the first weight will be a gross weight, all remaining axles will be in net weight. If using axle pads all weights will be gross weight. 8200-0727-2M Rev A 210FE Installation & Technical... - Page 57 The Total Delay is the (duration in seconds for a total print to occur after the stop delay timer has expired). Allowable values for the total delay are 1 to 99 seconds. NOTE: The Total Delay timer will start after the Stoplight Delay timer expires. 8200-0727-2M Rev A 210FE Installation & Technical...
-
Page 58: Livestock Weigher
Prints the average animal weight if there’s a stored head count • CrLF= Select YES to append a LF to each printed line • EoP= Number of new lines to append at the end of a ticket 8200-0727-2M Rev A 210FE Installation & Technical... -
Page 59: Serial Input/Output
No Continuous Output If Cont0= YES (Continuous Output) is selected, an additional prompt, tYPE0= will be displayed. If Cont0= no (No Continuous Output) is selected, proceed to the Weight On Demand section. 8200-0727-2M Rev A 210FE Installation & Technical... - Page 60 CZ = Center of Zero MO = MOtion ee = weight not currently being displayed cr = Carriage Return (hex 0D) The SB-80, SB-300 (multiple displays not supported) and WinVRS use the SB-400 format. 8200-0727-2M Rev A 210FE Installation & Technical...
- Page 61 Where: stx = Start of TeXt (hex 02) swa =, swb=, swc= Status Bytes xxxxxx= Displayed Weight, Gross or Net Weight (Six Digits) cr = Carriage Return (hex 0D) sum= Checksum Character 8200-0727-2M Rev A 210FE Installation & Technical...
- Page 62 If there is no decimal point, then the first character is a space. Leading zero blanking applies. Status = Provides information on the weight reading. The characters G/N/U/O/M/E represent Gross/Net/Underload/Overload/Motion/Error respectively. 8200-0727-2M Rev A 210FE Installation & Technical...
- Page 63 SETUP AND CALIBRATION, CONT. Weight On Demand If continuous output has not been selected for Serial Port 0 (Cont0=NO), the 210FE indicator will respond to a weight request (ENQ). The host device (computer) sends: ENQ - (hex 05) The 210FE will respond: <s><xxxxxx><d><uu><m><cc><cr>...
- Page 64 14 = 14.4k Baud 19 = 19.2k Baud 28 = 28.8k Baud 38 = 38.4k Baud 57 = 57.6k Baud 76 = 76.8k Baud 11 = 115.2k Baud 23 = 230.4k Baud 8200-0727-2M Rev A 210FE Installation & Technical...
- Page 65 ENTER key again to save it. Otherwise, using the numeric keys, 0/NO or 1/YES, enter the new setting, then press the ENTER key to save it. tShort= YES tShort= no Toledo Short Output Format Toledo Long Output Format 8200-0727-2M Rev A 210FE Installation & Technical...
- Page 66 No Continuous Output If Cont3= YES (Continuous Output) is selected, an additional prompt, tYPE3= will be displayed. If Cont3= no (No Continuous Output) is selected, proceed to the Weight On Demand section. 8200-0727-2M Rev A 210FE Installation & Technical...
- Page 67 RED light will turn on. • NOTE: If you enter a zero (0) for the threshold weight (THRS=0), the traffic light feature will be disabled (turned off). 8200-0727-2M Rev A 210FE Installation & Technical...
- Page 68 8200-0727-2M Rev A 210FE Installation & Technical...
-
Page 69: Print Tab Settings
Press the ENTER key to show the current setting for the location of Tare weight printing. If the setting displayed is acceptable, press the ENTER key again to save it. Otherwise, use the numeric keys to enter a new location and then press ENTER to save it. 8200-0727-2M Rev A 210FE Installation & Technical... - Page 70 ENTER key to save it. Otherwise, use the numeric keys to enter the new the number of End-Of-Print linefeeds, then press the ENTER key to save the new setting. Allowable values are: 0 through 99. 8200-0727-2M Rev A 210FE Installation & Technical...
-
Page 71: Fine Span Adjustment
– Option Card Configuration This prompt will ONLY be displayed when a 2XX Option Card is installed in the indicator. Refer to the manual for the 2XX option card installed for setup instructions. 8200-0727-2M Rev A 210FE Installation & Technical... - Page 72 8200-0727-2M Rev A 210FE Installation & Technical...
-
Page 73: Setup Review
SETUP REVIEW The 210FE indicator allows several operational parameters to be reviewed and changed without breaking the calibration seal. These operational parameters are: Power Up Zero Reset Enable/Disable Time Format Digital Output Control Enable/Disable Sleep Mode Feature Enable/Disable Auto Shutoff Feature Enable/Disable... - Page 74 8200-0727-2M Rev A 210FE Installation & Technical...
-
Page 75: Calibration "C" Numbers
NOTE: If any components have been changed that affect calibration and/or your scale is used in a commercial application and must be "Legal for Trade" you cannot use "C" numbers to re-calibrate. 8200-0727-2M Rev A 210FE Installation & Technical... - Page 76 8200-0727-2M Rev A 210FE Installation & Technical...
-
Page 77: Accumulators
2. The indicator will return to normal operation when printing has been completed. To clear (zero) the Count accumulator: 1. Press the key, the COUNT/SAMPLE key, then the ZERO key 2. Press the key to return to normal operation. 8200-0727-2M Rev A 210FE Installation & Technical... - Page 78 8200-0727-2M Rev A 210FE Installation & Technical...
-
Page 79: Troubleshooting
TROUBLESHOOTING Error Codes The 210FE indicator is equipped with software that indicates when an error in the operation takes place. The following lists the error codes displayed by the 210FE along with their meaning. Should you encounter an error code, please refer to this list for the cause. - Page 80 UNITS key pressed in an attempt to perform a unit conversion where the interval would have been greater than 50. CORRECTIVE ACTION: Determine the reason for the error display and take the appropriate corrective action. 8200-0727-2M Rev A 210FE Installation & Technical...
- Page 81 Error Codes, Cont. UnStb (Unstable) Motion is present when trying to perform a print function. CORRECTIVE ACTION: Wait for a stable weight display (STABLE annunciator on) before performing any of this operation. 8200-0727-2M Rev A 210FE Installation & Technical...
-
Page 82: Before You Call Service
TROUBLESHOOTING, CONT. Before You Call Service The 210FE indicator has been designed to provide you with years of trouble-free operation. However, should you experience a problem, please refer to the troubleshooting guide below before you call for service. The following describes several types of symptoms along with suggested remedies. -
Page 83: Diagnostic Test Mode
IMPORTANT! Once Diagnostic Test Mode has been enabled, the indicator will power on with TEST on the display. Operator must press ENTER key to stay in Diagnostic Test Mode or press key to disable Diagnostic Test Mode. 8200-0727-2M Rev A 210FE Installation & Technical... -
Page 84: Calibration Seal Installation
CALIBRATION SEAL INSTALLATION If your 210FE Weight Indicator is used in a commercial application it must be tested and sealed by your local weights and measurements official. The 210FE has been designed to accept a lead and wire security seal to prevent unauthorized access to the calibration adjustments. -
Page 85: Id Storage Operation
ENTER key. The alarm time may be from 0 to 99 seconds. NOTE: If the alarm time setting is zero, then the alarm is disabled. 8200-0727-2M Rev A 210FE Installation & Technical... - Page 86 7. If the number of loads is correct, press the ENTER key to save it. Otherwise, using the numeric keys enter the new number of loads and then press the ENTER key to save it. 8. The indicator will return to normal operation. 8200-0727-2M Rev A 210FE Installation & Technical...
- Page 87 3. The PrtALL prompt will be displayed, to print all of the IDs press the 1/YES key. The IDs and their associated tare, accumulator, and loads will be printed. NOTE: To abort the print operation, press the 0/NO key. 4. The indicator will return to normal operation. 8200-0727-2M Rev A 210FE Installation & Technical...
- Page 88 ACCUMULATOR= 0 lb NO OF LOADS=1 ID= 7 STORED WGHT= 100 lb K ACCUMULATOR= 0 lb NO OF LOADS=0 ID= 8 STORED WGHT= 100 lb K ACCUMULATOR= 0 lb NO OF LOADS=0 8200-0727-2M Rev A 210FE Installation & Technical...
- Page 89 IN-PROCESS (Temporary ID) REPORT ID= 11 WEIGHT= 9242 lb ID= A WEIGHT= 9242 lb ID= D WEIGHT= 9242 lb ID= G WEIGHT= 9242 lb ID= J WEIGHT= 9242 lb ID= M WEIGHT= 9242 lb 8200-0727-2M Rev A 210FE Installation & Technical...
- Page 90 5. The Net weight will be added to the accumulator and the number of loads will be incremented for the entered ID and the ticket printed will show the TIME, DATE, ID, and TIME/DATE of Stored Tare weight, the Gross, Tare, and Net weights. 8200-0727-2M Rev A 210FE Installation & Technical...
- Page 91 2. Press the ENTER key. The display will change to show no. 3. Press the 1/YES key.. The display will change to show YES. 4. Press the ENTER key. 5. ALL temporary ID’s are deleted. 8200-0727-2M Rev A 210FE Installation & Technical...
- Page 92 8200-0727-2M Rev A 210FE Installation & Technical...
-
Page 93: Digital Fill Control Mode Operation
If AdiSC=No, the indicator will halt after filling and will wait for the DUMP key to be pressed (or a remote manual dump command) before the material is discharged and the next fill started. 8200-0727-2M Rev A 210FE Installation & Technical... - Page 94 If this value is acceptable press the ENTER key, otherwise, use the numeric keys to enter a new zero tolerance weight and press the ENTER key. The current Gross/Net weight will be displayed. 8200-0727-2M Rev A 210FE Installation & Technical...
- Page 95 (PWC3 annunciator and output control are turned on). The weight display will change from net to gross. The discharge will continue until the scale weight returns to zero within the 0 TOL=XX value 8200-0727-2M Rev A 210FE Installation & Technical...
- Page 96 6. To continue the fill, press the 1/YES key or the optional START pushbutton. 7. The 210FE will return to normal operation, displaying the Gross weight on the scale. NOTE: If dGAtE=YES, the fill operation cannot be restarted after a STOP if the material weight is above the zero tolerance.
- Page 97 ENTER key, otherwise, use the numeric keys to enter a new time and press the ENTER key. The valid range is 0.00 to 99.9 seconds. The current Gross/Net weight will be displayed. 8200-0727-2M Rev A 210FE Installation & Technical...
- Page 98 (PWC3 annunciator and output control are turned on). The weight display will change from net to gross. The discharge will continue until the scale weight returns to zero within the 0 TOL=XX value 8200-0727-2M Rev A 210FE Installation & Technical...
- Page 99 6. To continue the fill, press the 1/YES key or the optional START pushbutton. 7. The 210FE will return to normal operation, displaying the Gross weight on the scale. NOTE: If dGAtE=YES, the fill operation cannot be restarted after a STOP if the material weight is above the zero tolerance.
- Page 100 8200-0727-2M Rev A 210FE Installation & Technical...
-
Page 101: Digital Fill Control Id Storage
9. If a zero value is correct, press the ENTER key to save it. Otherwise, using the numeric keys enter the number of batches and then press the ENTER key to save it. 10. The indicator will return to normal operation. 8200-0727-2M Rev A 210FE Installation & Technical... - Page 102 9. If the count is correct, press the ENTER key to save it. Otherwise, using the numeric keys to enter a new count value and then press the ENTER key to save it. 10. The indicator will return to normal operation. 8200-0727-2M Rev A 210FE Installation & Technical...
- Page 103 3. The PrtALL prompt will be displayed, to print all of the IDs press the 1/YES key. The IDs and their associated settings will be printed. NOTE: To abort the print operation, press the 0/NO key. 4. The indicator will return to normal operation. 8200-0727-2M Rev A 210FE Installation & Technical...
- Page 104 8200-0727-2M Rev A 210FE Installation & Technical...
-
Page 105: Axle Weigher Operation Mode
The example below illustrates a typical print ticket for a five-axle truck. Time 13:47 09-26-14 Date 15440 lb 16320 lb 15980 lb Axle Weights 15880 lb 15700 lb Total 79320 lb Total Vehicle Weight Axle Numbers 8200-0727-2M Rev A 210FE Installation & Technical... - Page 106 Note, however, that as soon as the first axle of the next vehicle is printed, the weights from the previously weighed vehicle are cleared. 8200-0727-2M Rev A 210FE Installation & Technical...
- Page 107 These outputs can be used, or the serial output of the indicator can contain the light state tyPE#=8, where # is the serial port number). information if continuous data type = 8 ( 8200-0727-2M Rev A 210FE Installation & Technical...
- Page 108 8200-0727-2M Rev A 210FE Installation & Technical...
-
Page 109: Livestock Weigher Mode Operation
3. Press the PRINT key. 4. Total ticket will be printed containing total weight, total head count, and average weight. 5. These values will be reset after the total ticket is printed. 8200-0727-2M Rev A 210FE Installation & Technical... -
Page 110: Local/Remote Setup
In addition, the Continuous Output must be set to NO (Cont=no). Local/Remote 210FE RS-232 Wiring REMOTE 210FE LOCAL 210FE Figure No. 23 8200-0727-2M Rev A 210FE Installation & Technical... - Page 111 LOCAL/REMOTE SETUP, CONT. Local/Remote 210FE 20mA Current Loop Wiring Figure No. 24 8200-0727-2M Rev A 210FE Installation & Technical...
- Page 112 8200-0727-2M Rev A 210FE Installation & Technical...
-
Page 113: Part Identification
QTY. PART NUMBER DESCRIPTION 8200-D296-0A SUB ASSEMBLY: FRONT ENCLOSURE 8200-D295-0A SUB ASSEMBLY: REAR ENCLOSURE 6013-0433 NUT #10-32 HEX ACORN LOCK SS 8200-B026-08 NUT #10-32 HEX ACORN, DRILLED, S.S. 593GR986 SERIAL TAG ASSY 8200-0727-2M Rev A 210FE Installation & Technical... - Page 114 8200-C299-08 BOARD MOUNT BRACKET 8200-D124-1A PCB ASSEMBLY - 210 CONTROLLER 8200-D244-08 OVERLAY: 210FEAU 8200-D245-08 KEYPAD: 210FEAU 8200-D278-0A PCB ASSY: DISPLAY BOARD, 210FE 8200-D286-08 OVERLAY: 210FE 8200-D287-08 KEYPAD: 210FE 8200-D293-0A WELDMENT: ENCLOSURE, FRONT 8200-0727-2M Rev A 210FE Installation & Technical...
- Page 115 PART IDENTIFICATION, CONT. (Front Enclosure Sub Assembly) 8200-0727-2M Rev A 210FE Installation & Technical...
- Page 116 CABLE: GROUND 205/210 8200-B237-0A CABLE: AC POWER W/FILTER 205/210 DWI 8200-B240-0A CABLE 210FE POWER SUPPLY OUTPUT 8200-C291-0A REAR PANEL WELDMENT 8200-C363-08 POWER SUPPLY COVER 8510-C346-OI LABEL CAUTION HIGH VOLTAGE 8539-B254-0A CABLE ASSEMBLY: CAL SWITCH 8200-0727-2M Rev A 210FE Installation & Technical...
- Page 117 PART IDENTIFICATION, CONT. (Rear Enclosure Sub Assembly) 8200-0727-2M Rev A 210FE Installation & Technical...
- Page 118 STATEMENT OF LIMITED WARRANTY WARRANTY TERMS Cardinal Scale Manufacturing Company warrants the equipment we manufacture against defects in material and workmanship. The length and terms and conditions of these warranties vary with the type of product and are summarized below:...
- Page 119 This warranty sets forth the extent of our liability for breach of any warranty or deficiency in connection with the sale or use of our product. Cardinal will not be liable for consequential damages of any nature, including but not limited to loss of profit, delays or expenses, whether based on tort or contract.
- Page 120 8200-0727-2M Rev A 210FE Installation & Technical...
Need help?
Do you have a question about the 210FE and is the answer not in the manual?
Questions and answers